|
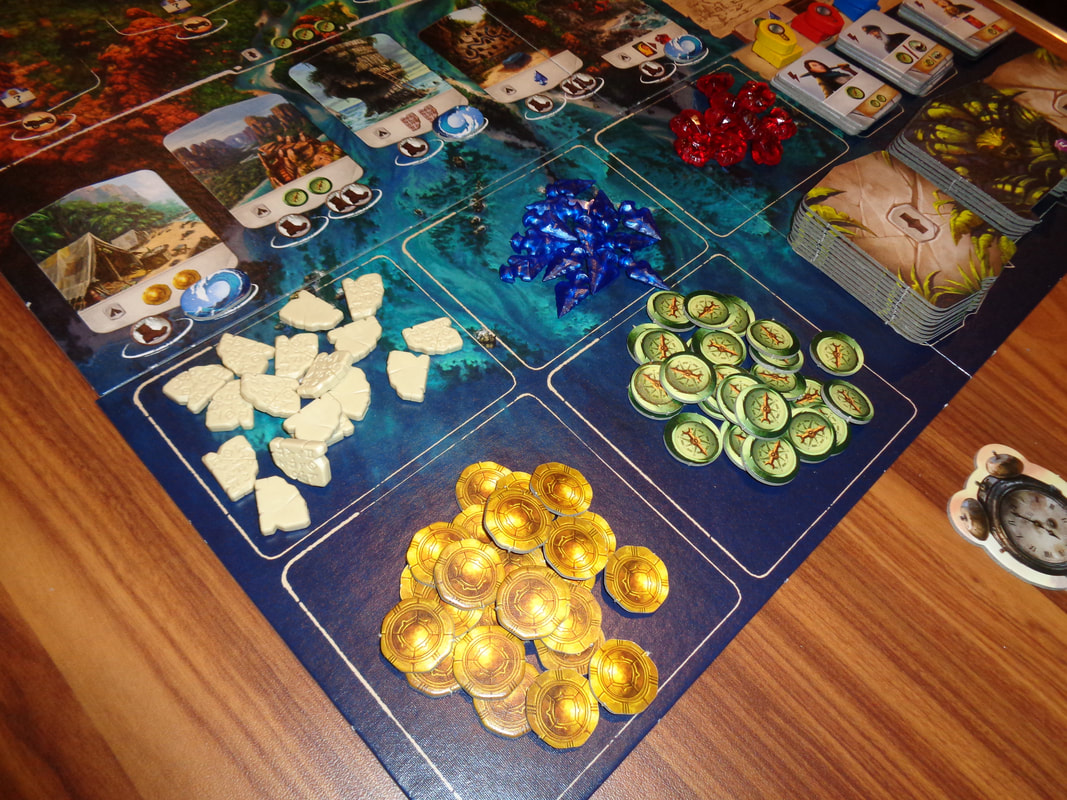
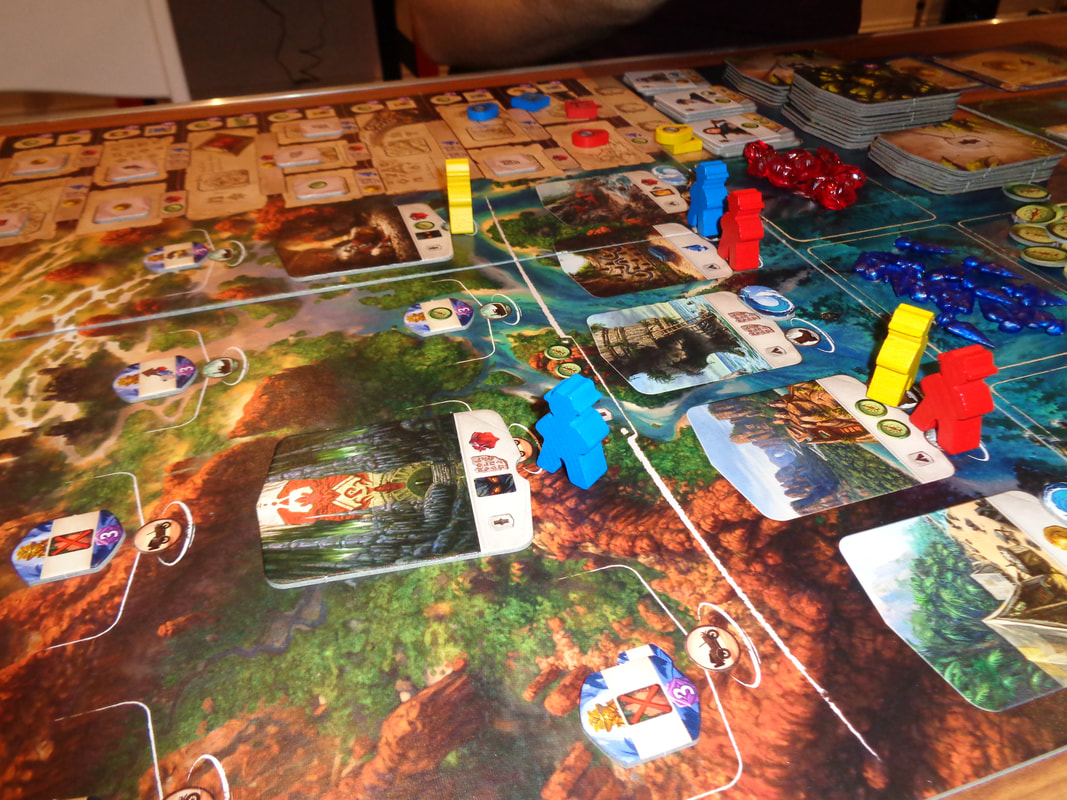
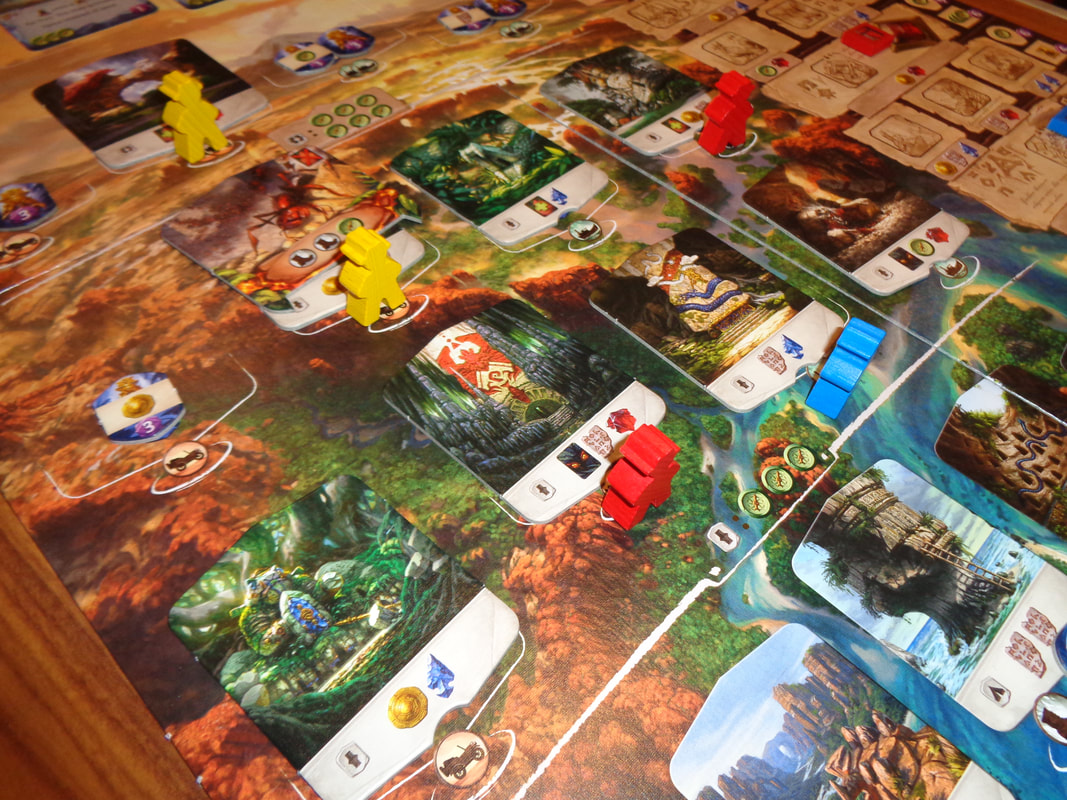
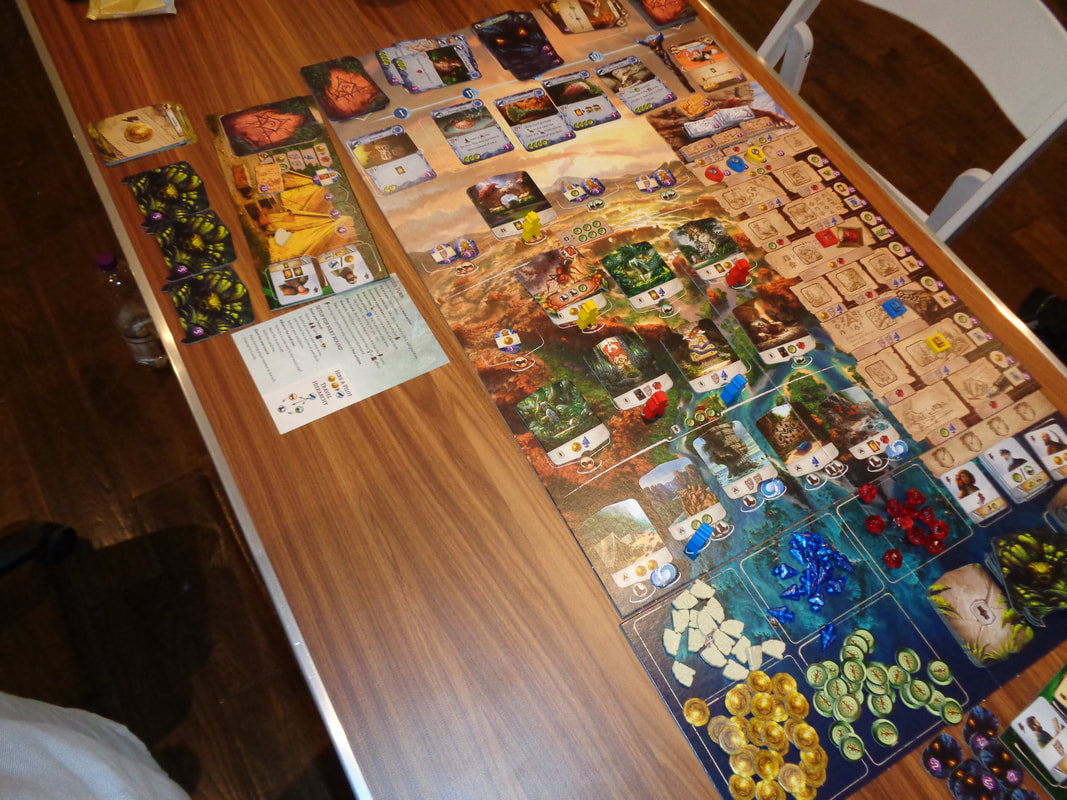
15th January 2022 It's a Saturday and we're at the Bisley Scout Hall with the Woking Gaming Club for Wogglecon, for a day of gaming and hanging with with friends. There are a lot of national parks in the USA and you're about to hike a bunch of them in the first game of the day; Parks. What's in a game?
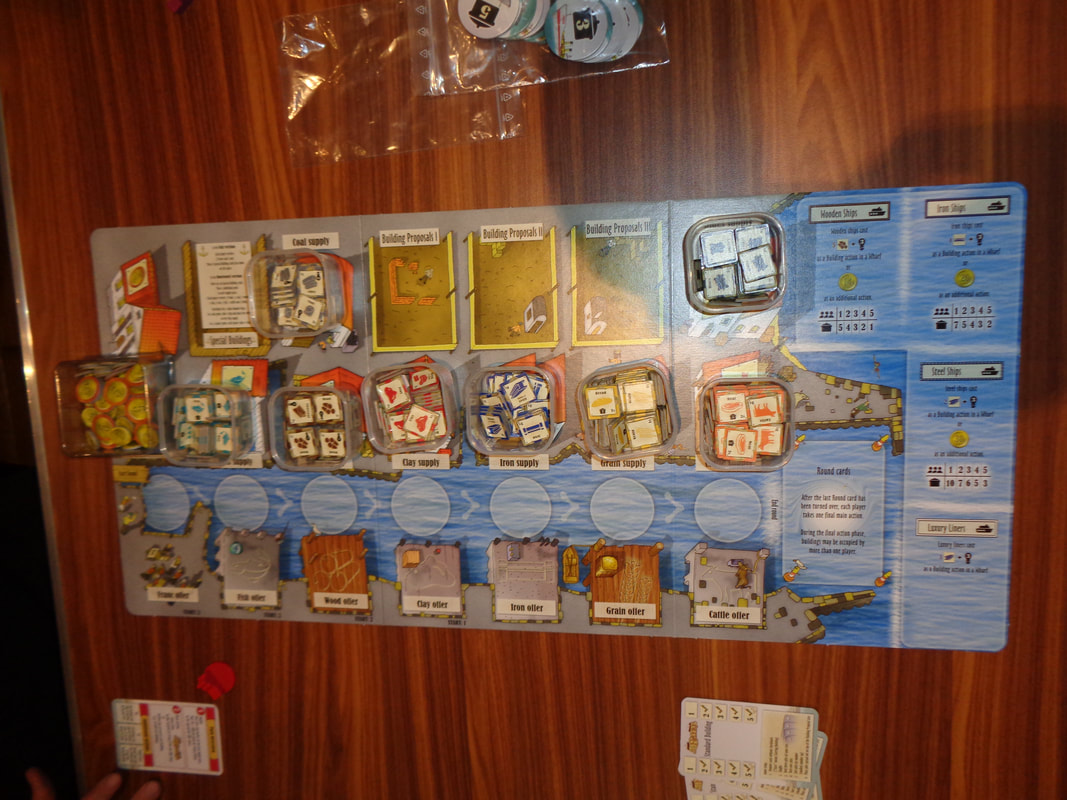
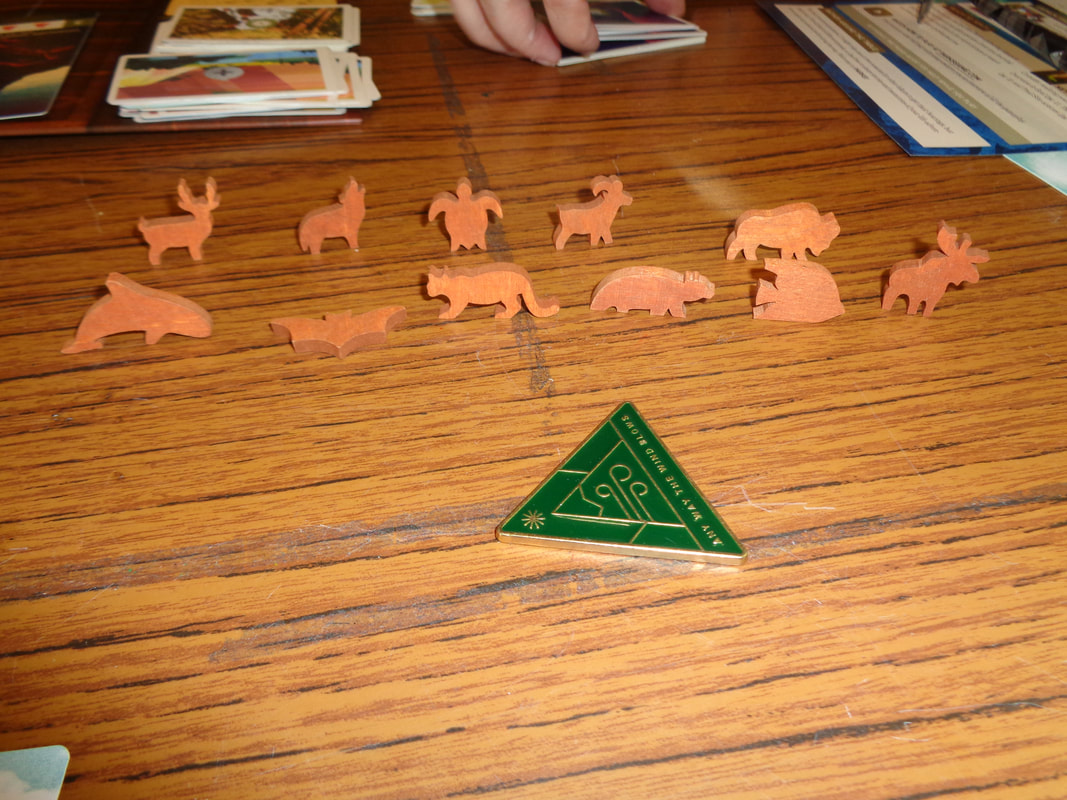
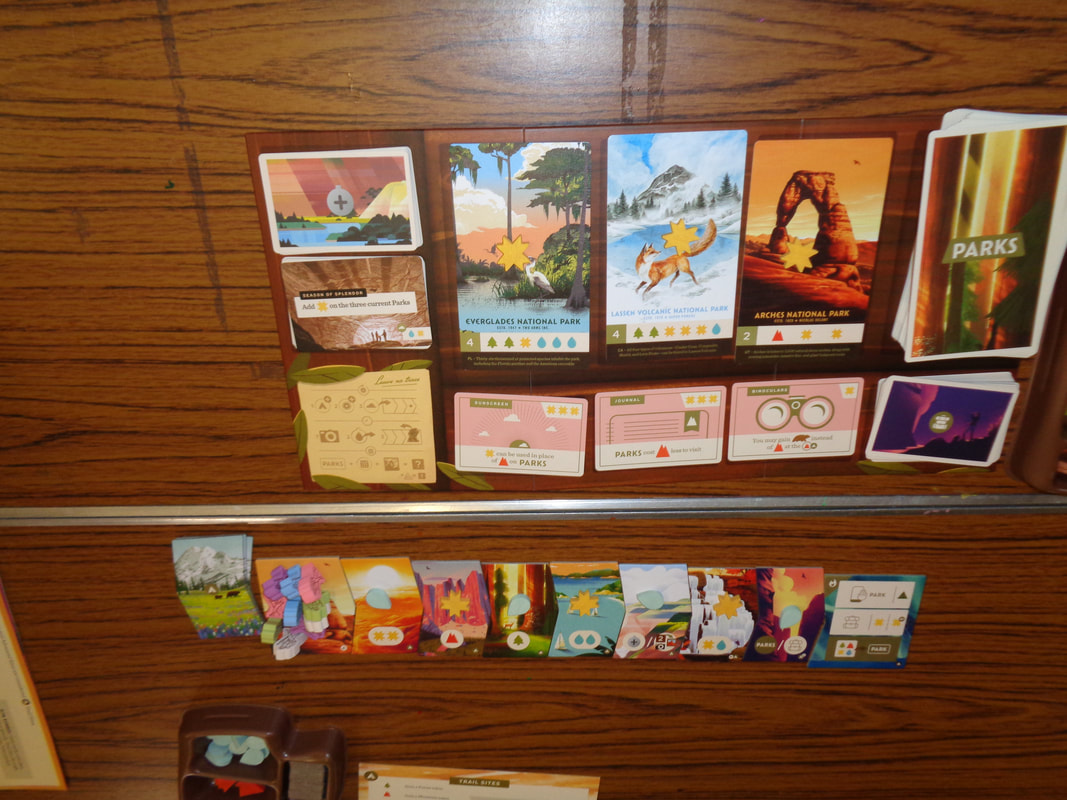
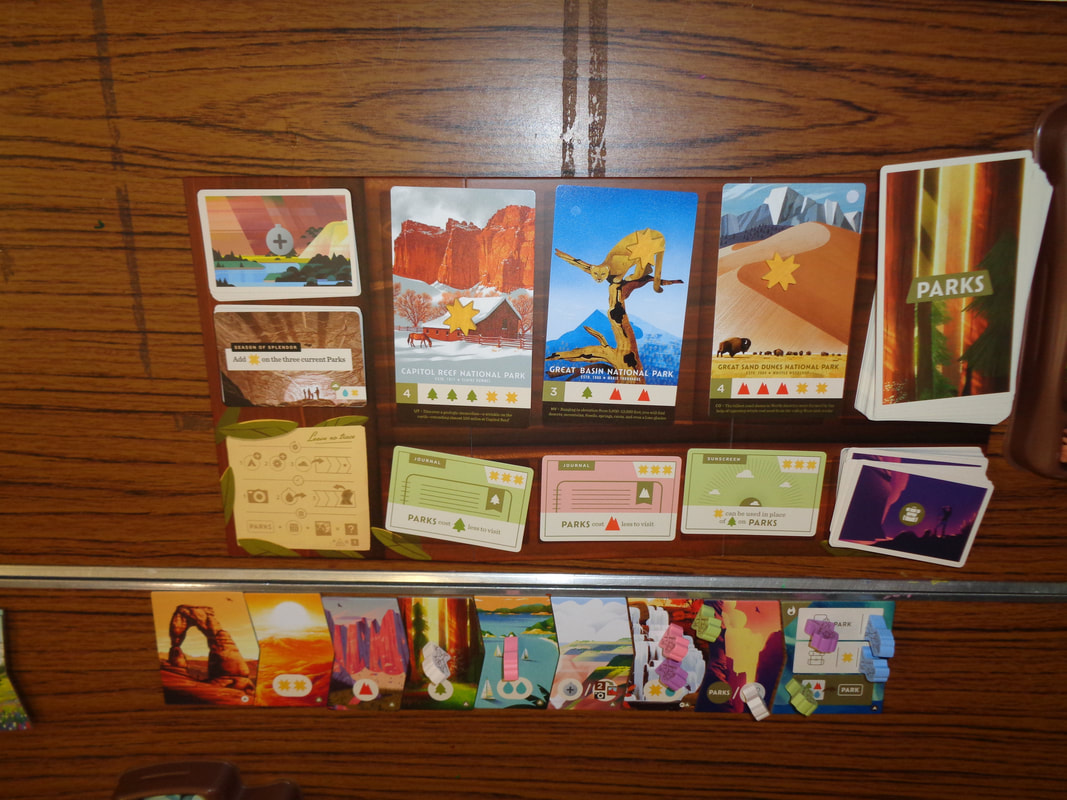
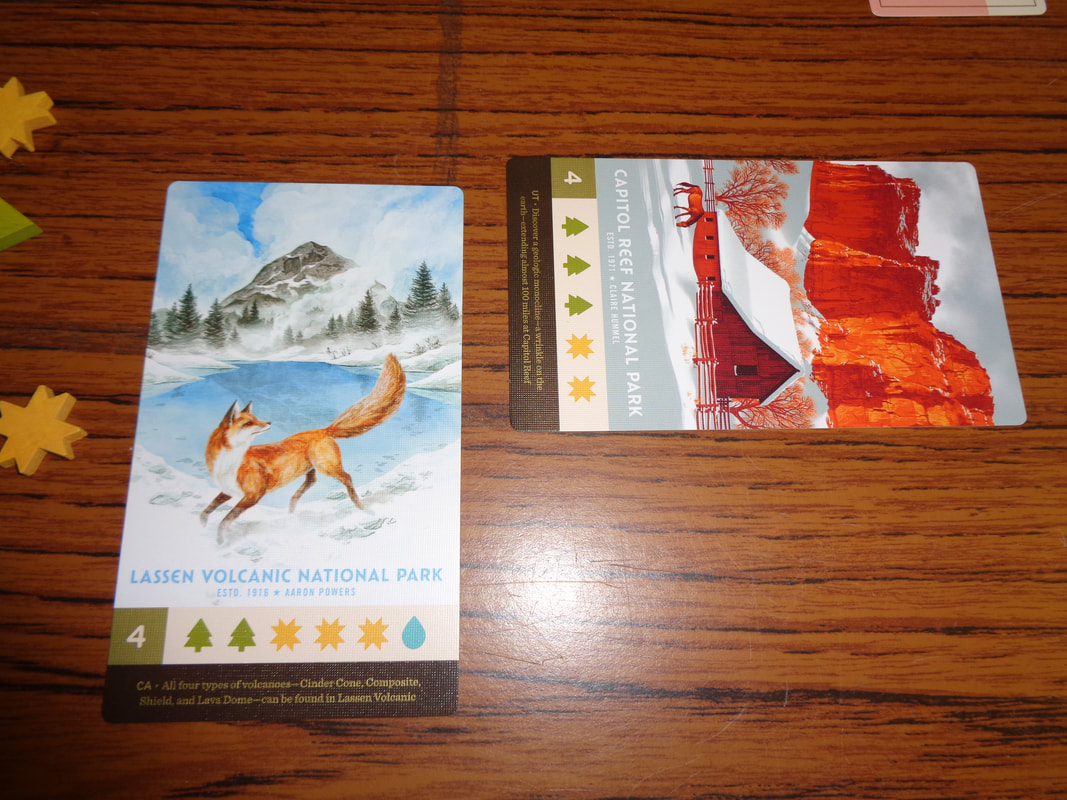
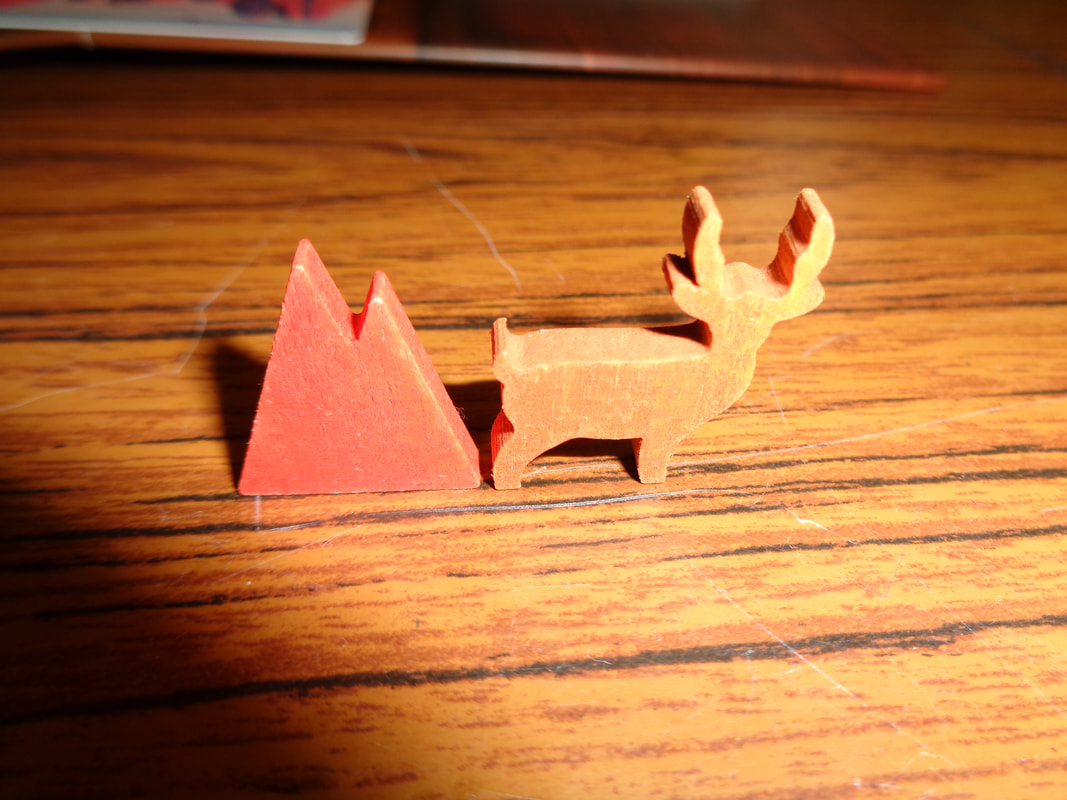
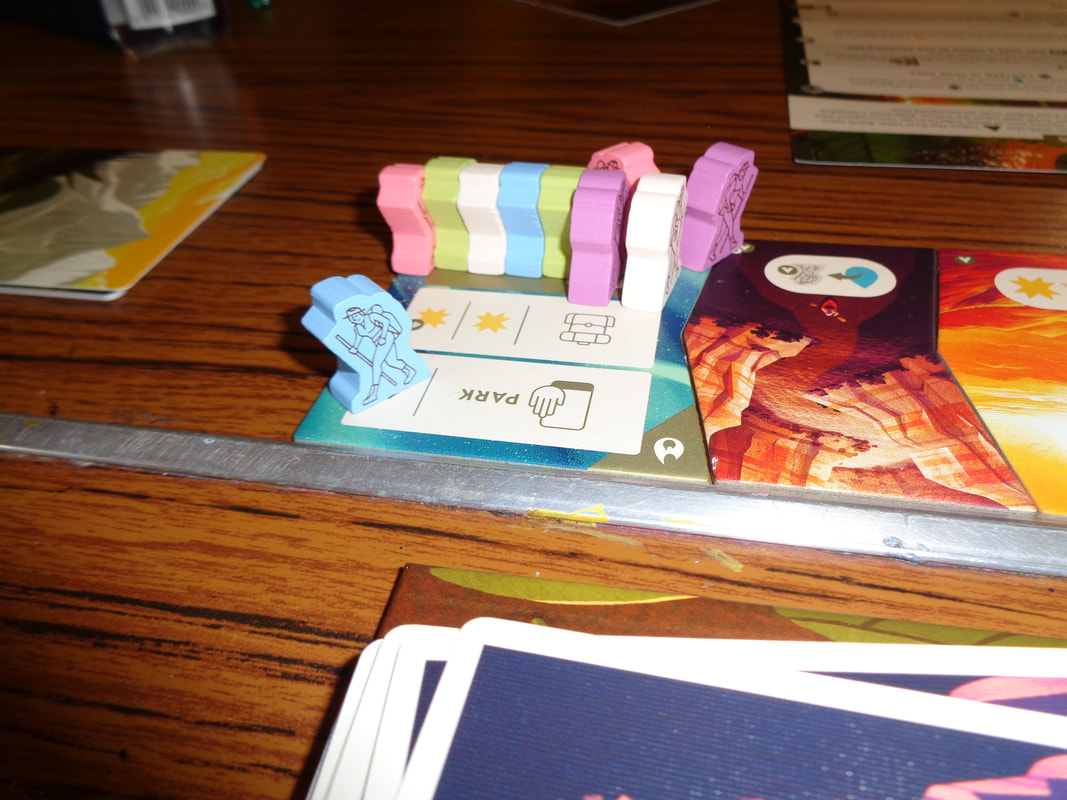
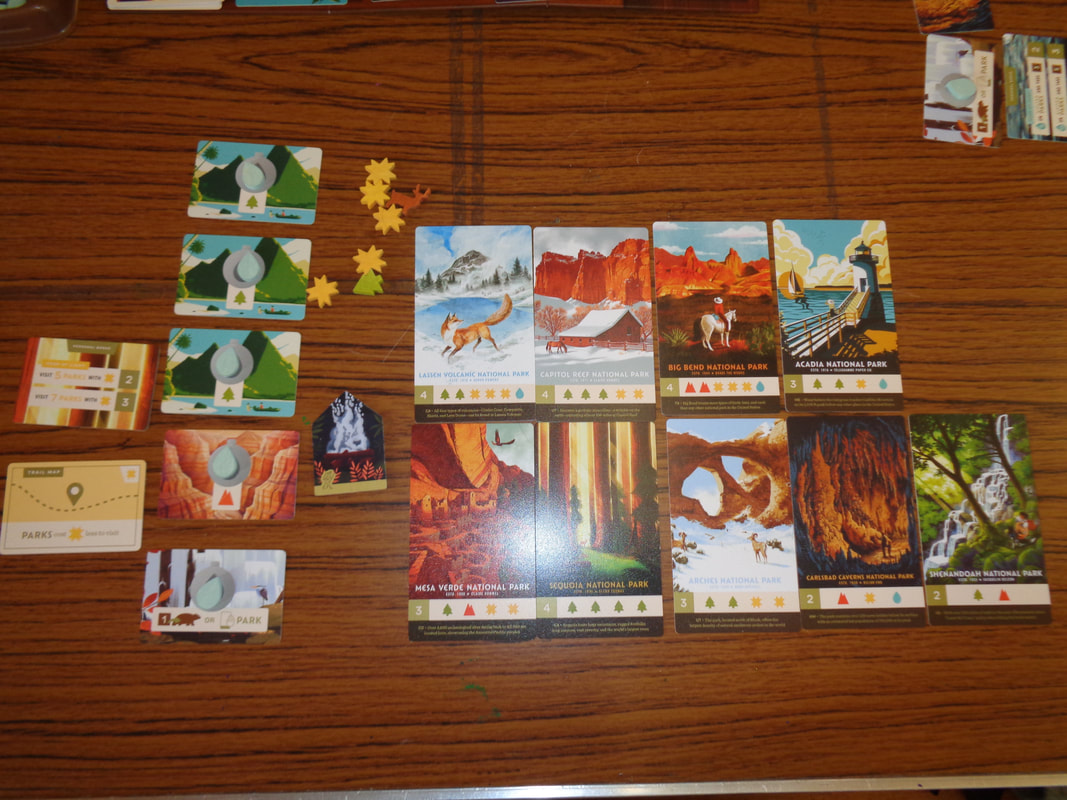
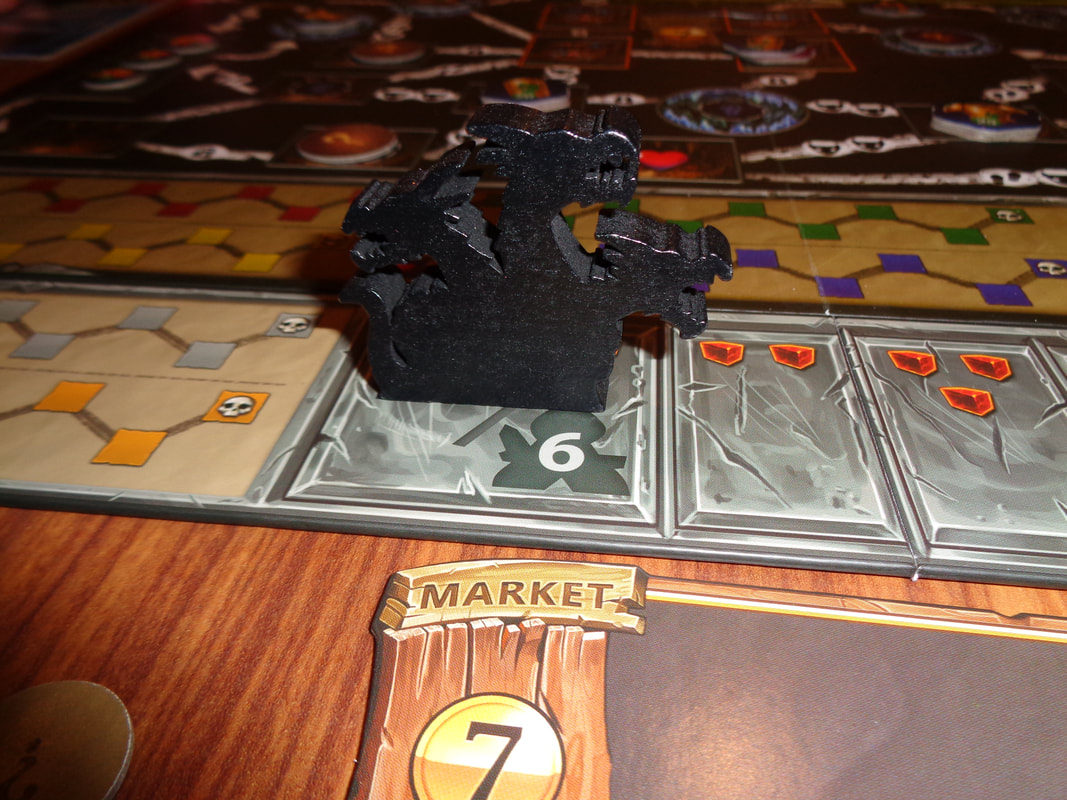
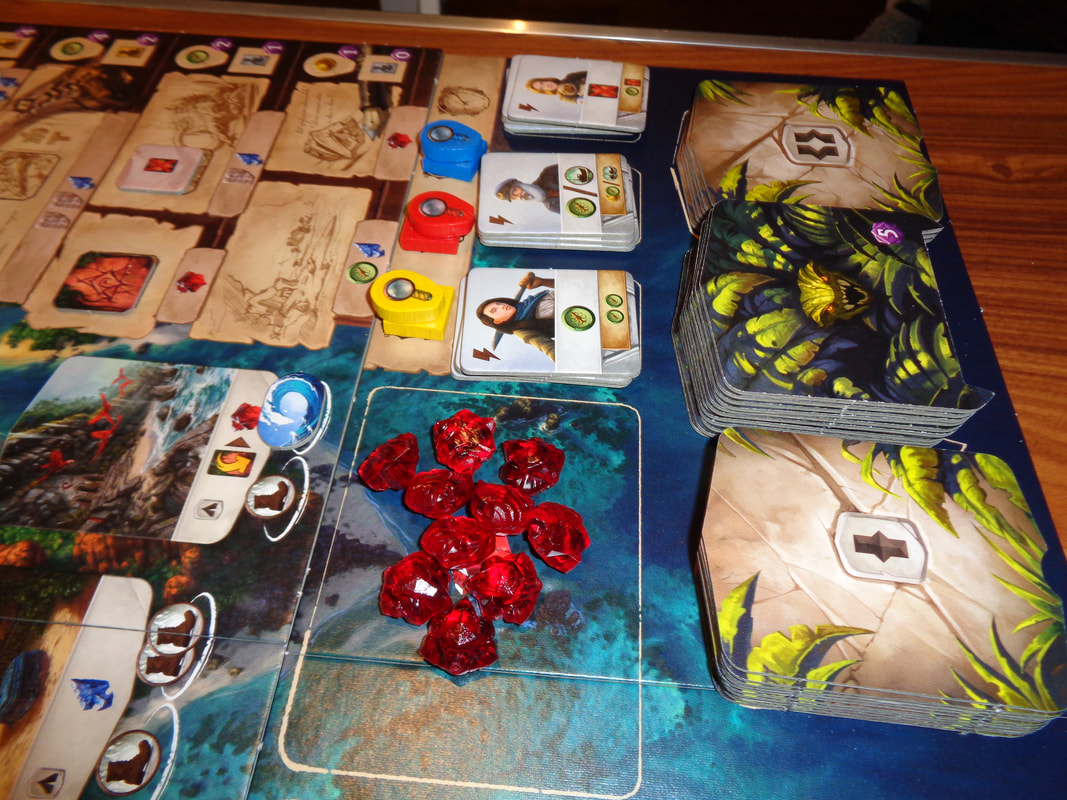
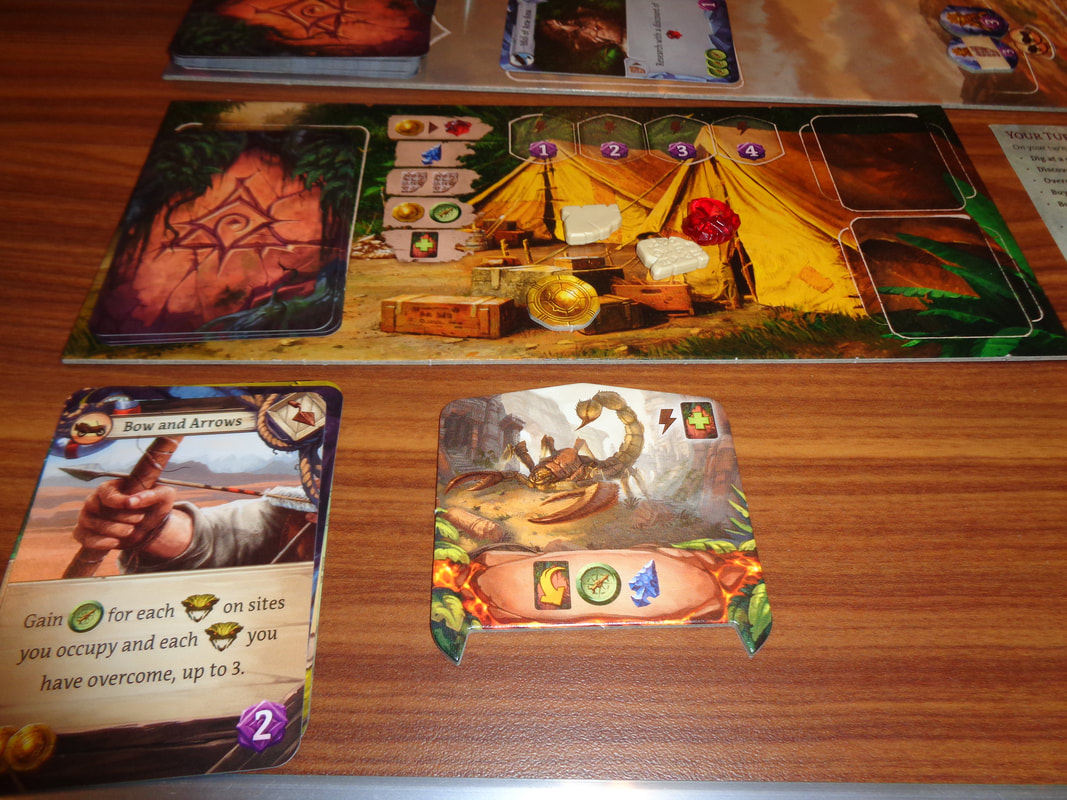
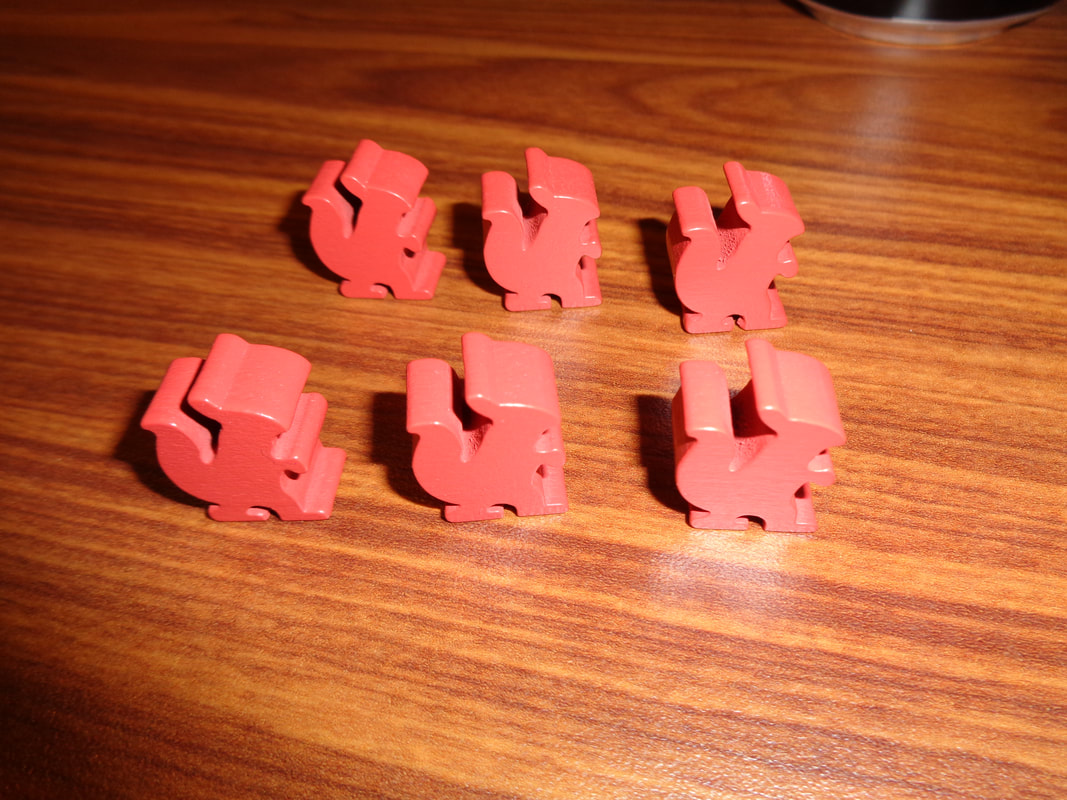
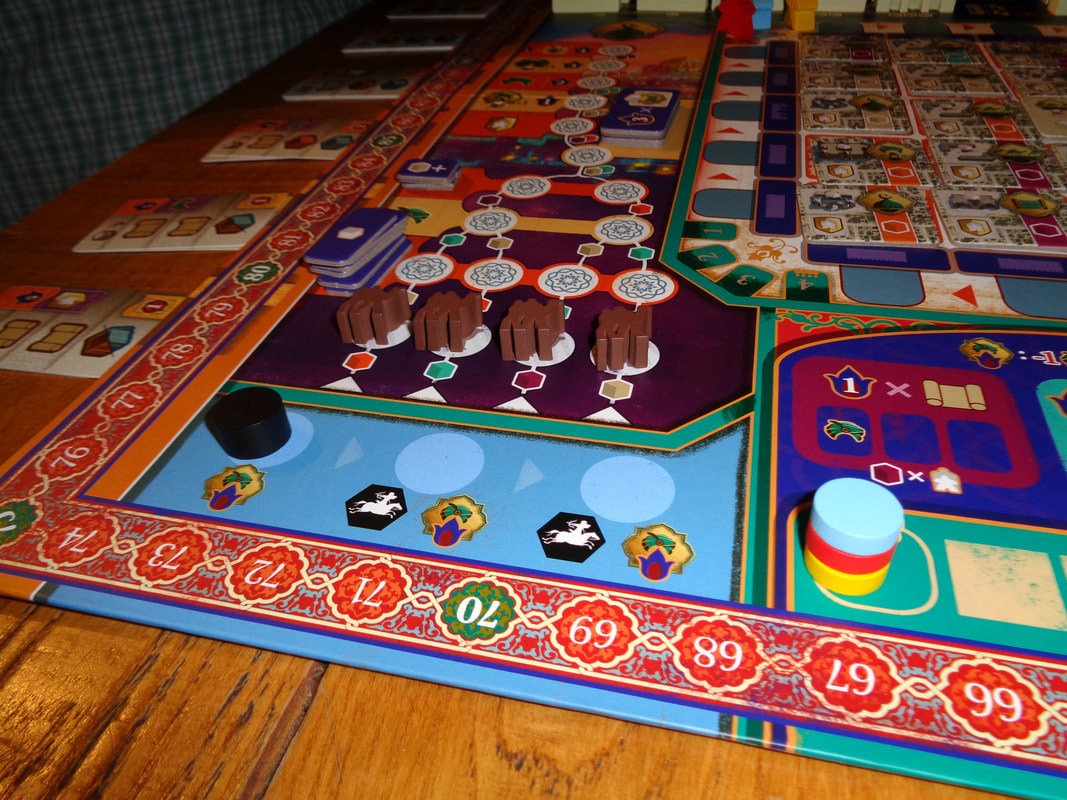
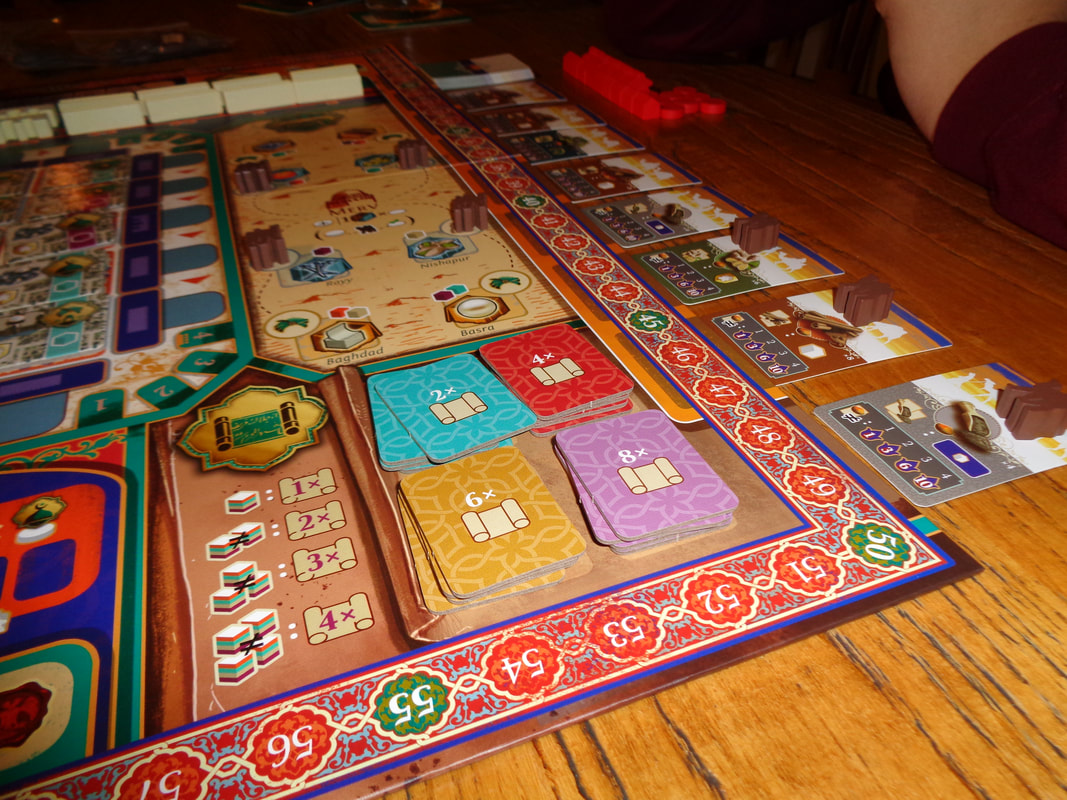
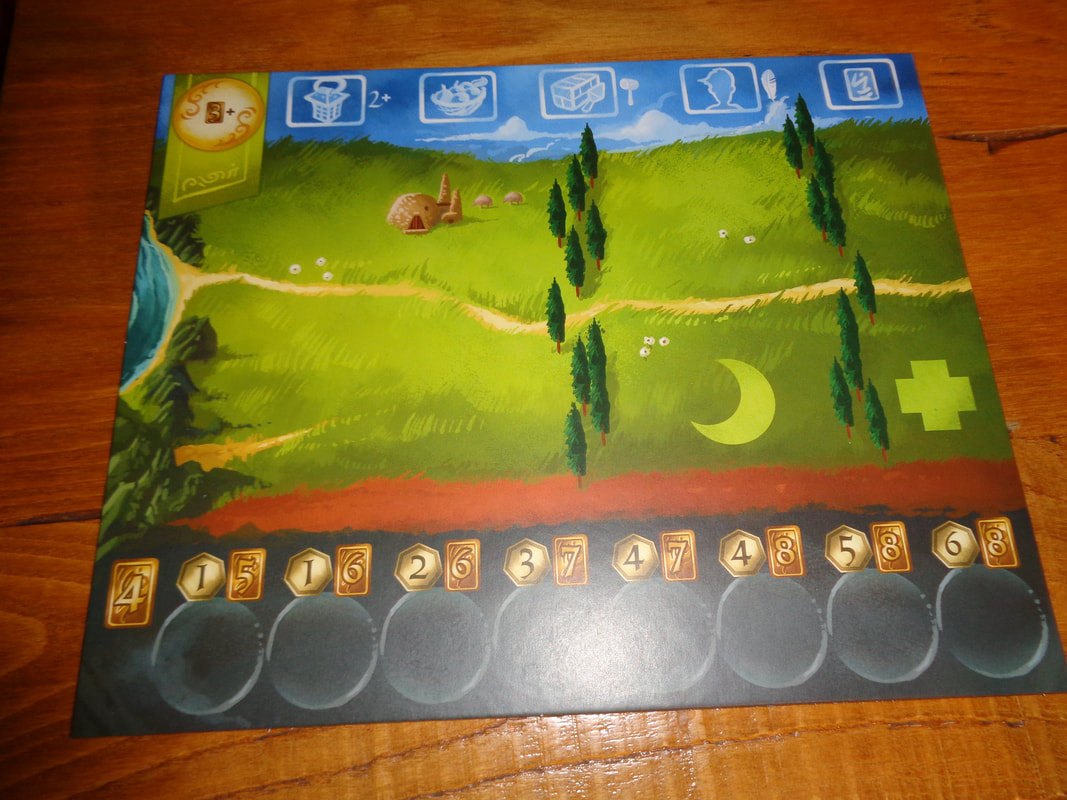
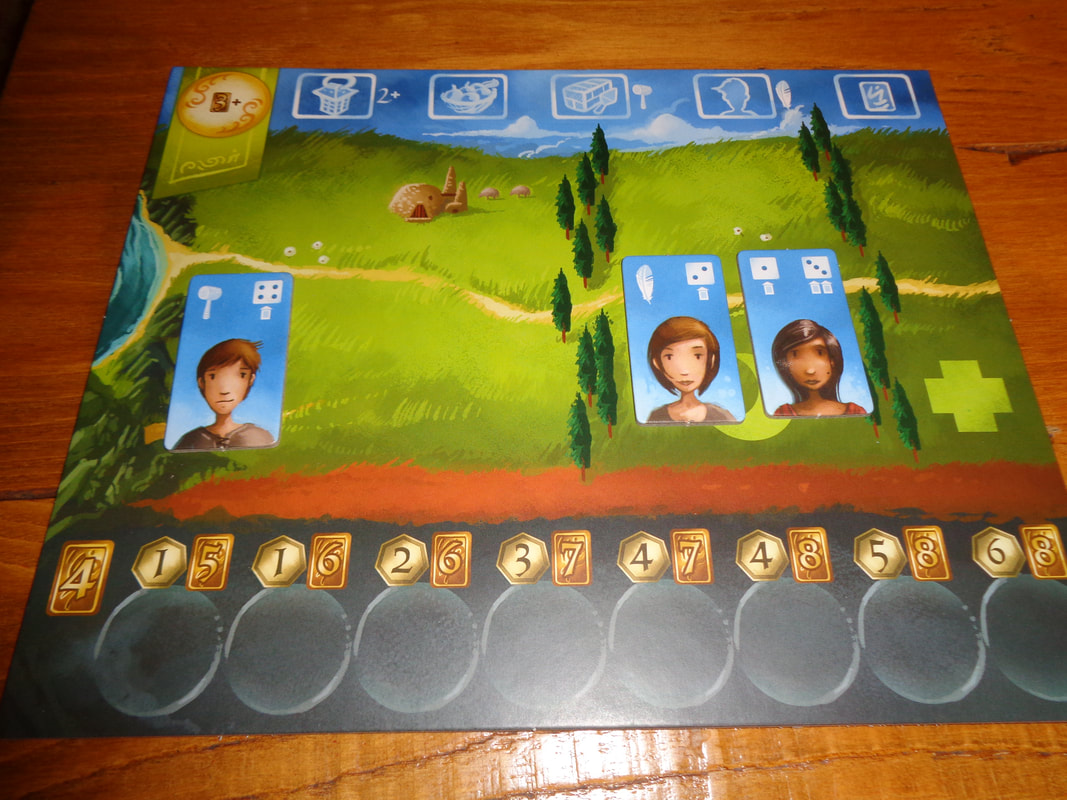
The quality of Park's components is universally high and it's obvious that a lot of care and attention has been put into the game, this extends even to the packaging and token trays. The cards are fine and the tiles are appropriately thick. The tokens are all wooden, well made and colourful, the individually shaped wildlife tokens are the standout here. Finally, the inclusion of a metal first player marker is pretty unusual but it has a satisfyingly weighty feel to it and is a cool addition. For nearly all of it's artwork, the game sources The Fifty Nine Parks Print Series which as the name suggests, is a project which consists of a picture of each American national park created by a different artist. Perhaps it could be argued that doing this saves on the art budget but honestly, it feels like a great collaboration. As a result the game features excellent and varied artwork throughout, all the park cards and photography tokens are uniquely illustrated, the art also features on all the card backs and even the inside of the box lid! Fantastic! Parks makes use of a fairly wide variety of iconography but for the most part it was easy to comprehend and presented no obstacle to the game. How's it play? Setup
On to play Parks is played over 4 seasons during in which each the players' hikers travels along that season's trail from left to right.
Endgame Once the 4th season has been completed, the game ends. Players score points from the parks they've visited (Bought.), they also score a point for each photo they took and whoever has the first player token at the game end scores 1 point for it. Finally; players reveal their year cards, completing the objective on these usually scores 2-3 points. Points are tallied, highest score wins. Overall
Parks is essentially a light worker placement game added where your 2 workers only ever head right combined with resource management. It's a game all about planning trips that means that it's about acquiring resources to buy park cards which generally provide the majority of VPs required to win the game. However, it is impossible to fully plan things out. Going from season to season, players will have a good idea what resources and tiles will be available but not where they will appear. It requires adaption and some creative thinking when faced with a different tile layout. Limiting the resources a player can own to 12 is an solid rule, it prevents players hording too much and splurging out big at once. It also makes players think about optimising their strategies. The initial urge in Parks is to travel as slowly as possible to collect as many resources as possible and in the early-game that's not a bad idea but sooner or later, players will need to use them up and that means visiting parks. Remember, players have only 2 hikers and that means they can only use the visit park action on the trail end twice per season (Provided they don't use any other actions on the tile.), this means that players have 8 opportunities to visit parks, yes; there's an advanced trail tile that allows extra buy actions but there's no guarantee where and when it'll appear. This brings me to the worker placement element of Parks. Each player can use their campfire a maximum of 2 times in a season, it means thinking carefully before moving on to a occupied tile, it also means trying to anticipate how other players will move and if necessary, getting there first! Or perhaps moving the other hiker so that whoever is occupying the tile you need may have moved by the following turn. Ultimately it means that players should look to optimise their moves, balance resource acquisition with card acquisition, players might well be competing for the same park card and watching a card you want being taken by another player because you tarried to collect an extra resource can be galling. Players will have the double-obstacle of reacting to both seasonal changes and the choices made by the other players. The game's rules are not over-complex but also provide a fair amount of depth. There's enough interaction between players to force you to pay attention to their choices . Decisions that players face are always meaningful and getting wrong could lose you out. Add to this the game's top notch thematically appropriate production values and you have a small package that delivers a big game. Having said that, it's not without a couple of drawbacks. Most significantly; the game experience can change notably with player count. A 3-player game will feel quite different to 5-player. The hiker count goes from 6 to 10, the tiles become a lot more crowded and it becomes more challenging to do what you want. While in games with 4 or more players an extra basic tile is added into the mix, it doesn't quite alleviate the increased clutter on the trail. Secondly, a 5-player game seems to last around 2 hours and that perhaps feels a little overlong. Parks doesn't outstay its welcome and it's not a game-breaker but it can feel a little long for what it is. Other than that, Parks is well presented, accessible and satisfying to play (At least when you get the park card you want!). It's definitely one that's worth trying.
0 Comments
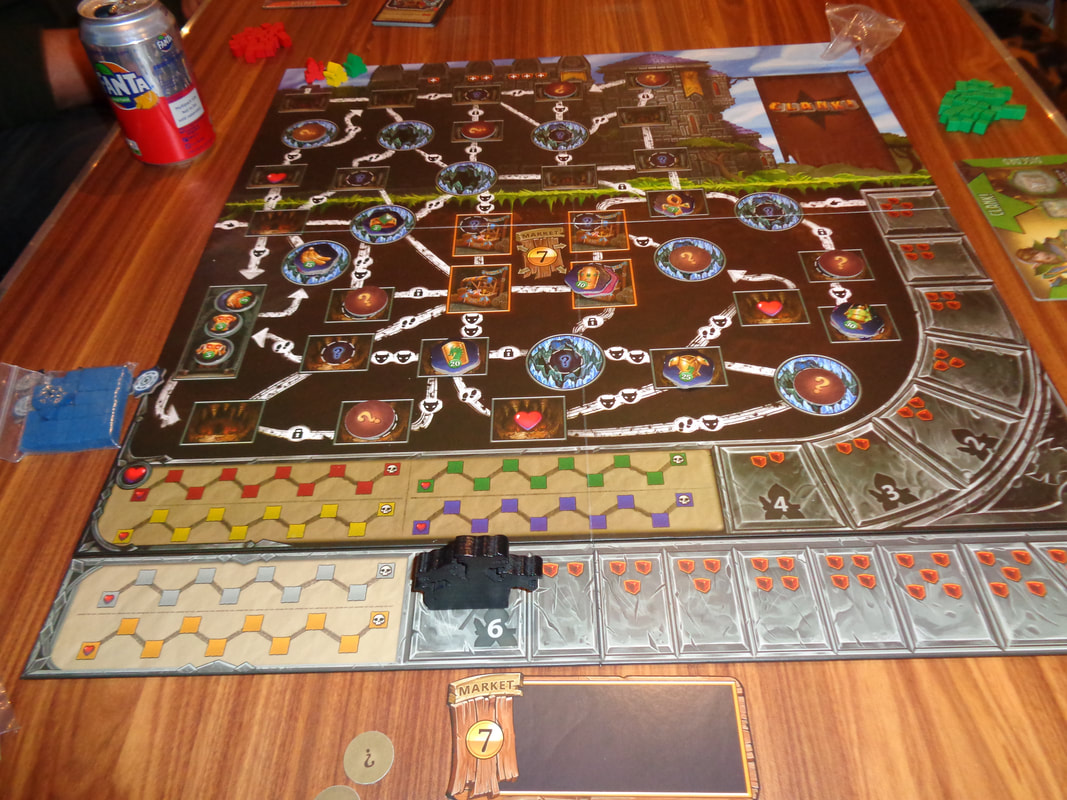
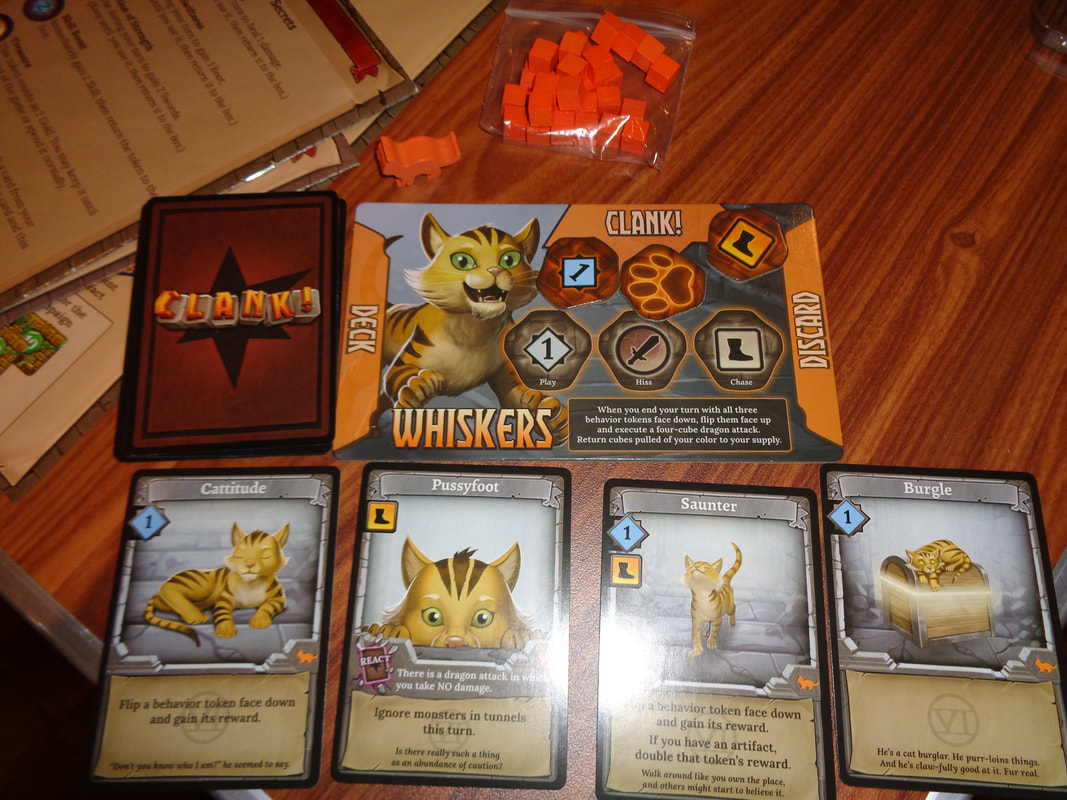
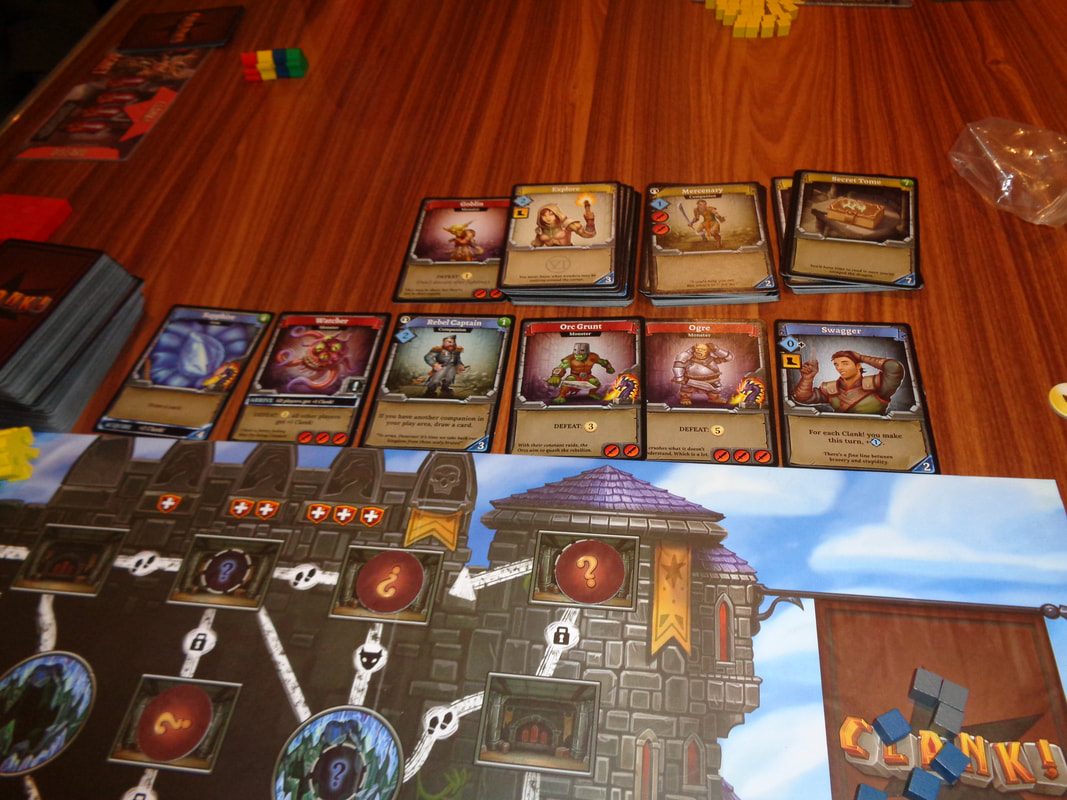
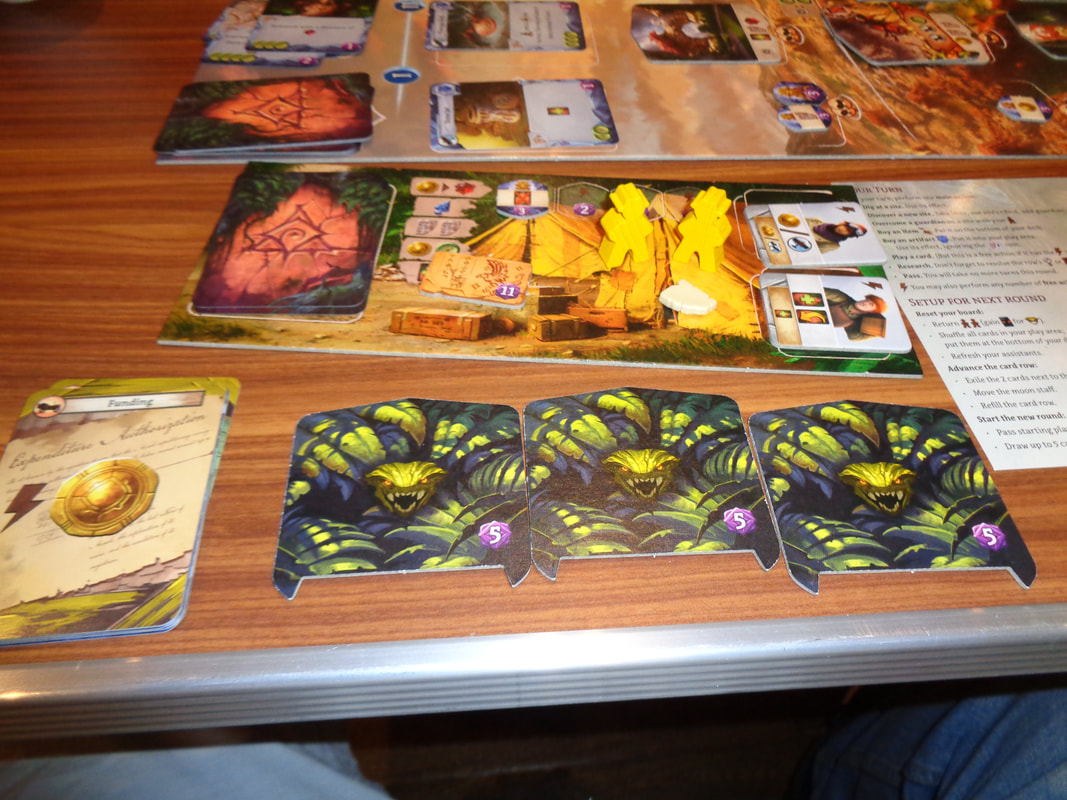
4th January 2022 It's a Tuesday and we're round Simon's for the first in-person game of the year! 'Here be dragons', is something you don't want to shout in Clank! Instead you'll want to silently tippy-toe around without waking the damn thing up, then steal its stuff and run! NOTE: When we played Clank!, it was with an expansion that took the player count up 6 (Which was useful, as there were 6 of us!) and added characters with individual starting decks. What's in a game?
Clank features good, colourful artwork throughout, the board has a fairly unique look to it and is clearly illustrated, the cards and tokens also feature good artwork with well illustrated characters and monsters. The game uses a fairly small assortment of iconography and it's all easily understood. How's it play? Setup
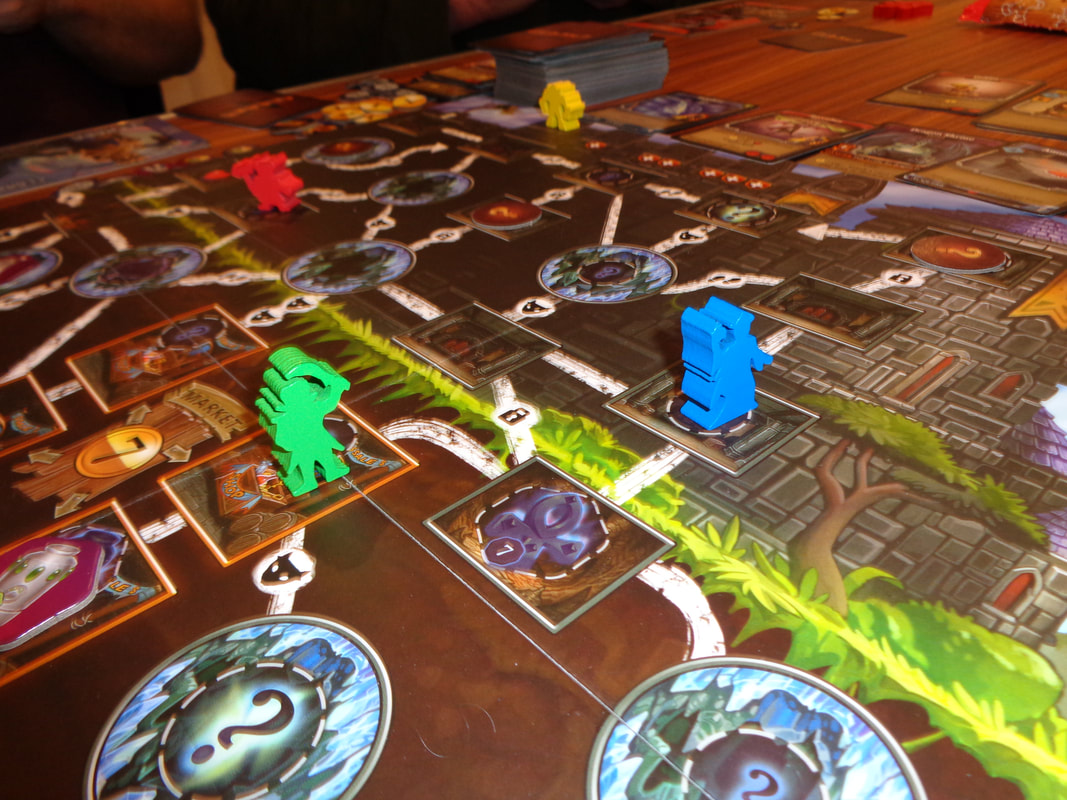
On to play The objective in Clank! is to grab an artefact from the depths and escape the out of the dungeon alive! A player cannot leave the dungeon without an artefact neither score points. Play progress in traditional clockwise order during Clank! and the active player plays cards from their hand to generate resource pools which they can then utilise to perform associated actions.
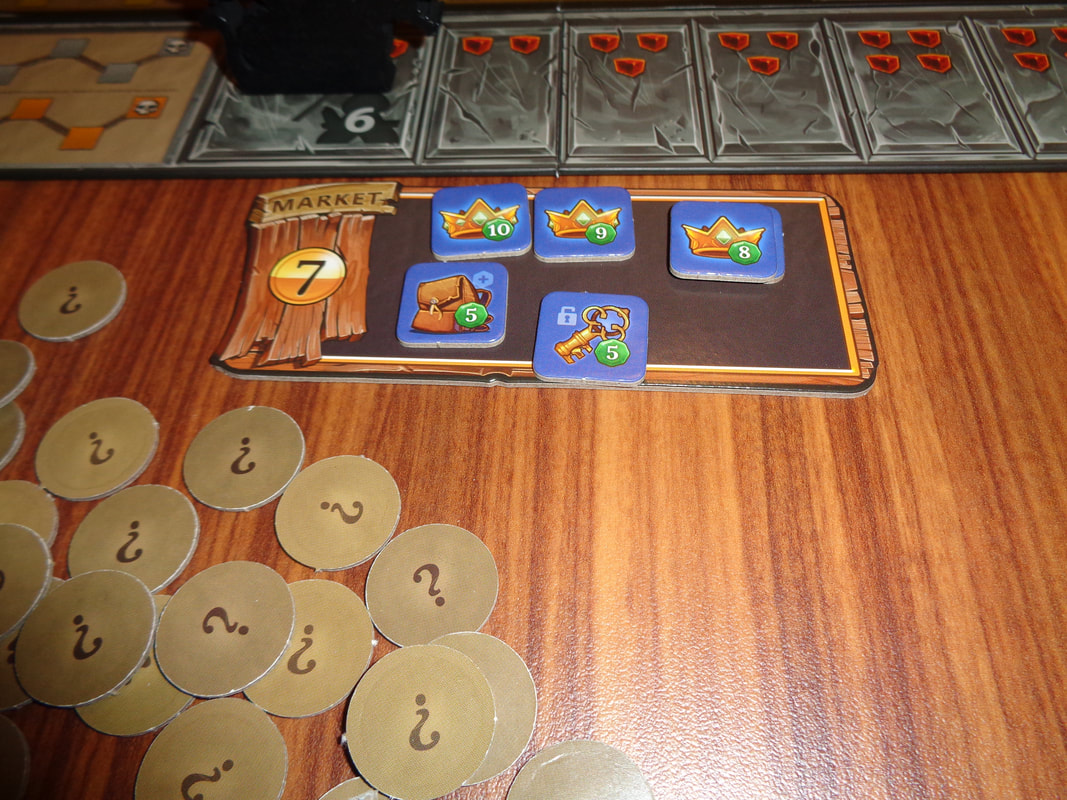
Endgame There are 2 ways to trigger the endgame. It can be triggered by the 1st player to acquire an artefact and leave the dungeon or the 1st player to be knocked out. In either circumstance, the player who triggered the endgame places their meeple on the countdown track. Then when they become the active player, all they do move their meeple along the track. This will trigger a worsening dragon attack every round for the next 3 rounds, then on the final round the dragon will knock out all players who are still in the dungeon, regardless of whether they are in the depths or the upper levels. After this, the game goes to scoring, players who did not acquire an artefact or who were for any reason knocked out while in the depths do not score any points! Points may be accumulated from the following sources: Artefacts score 5-30 VPS. Tokens acquired. Card with VP values that players bought. Gold; each gold scores 2 VPs. Points are tallied, highest score wins. Overall
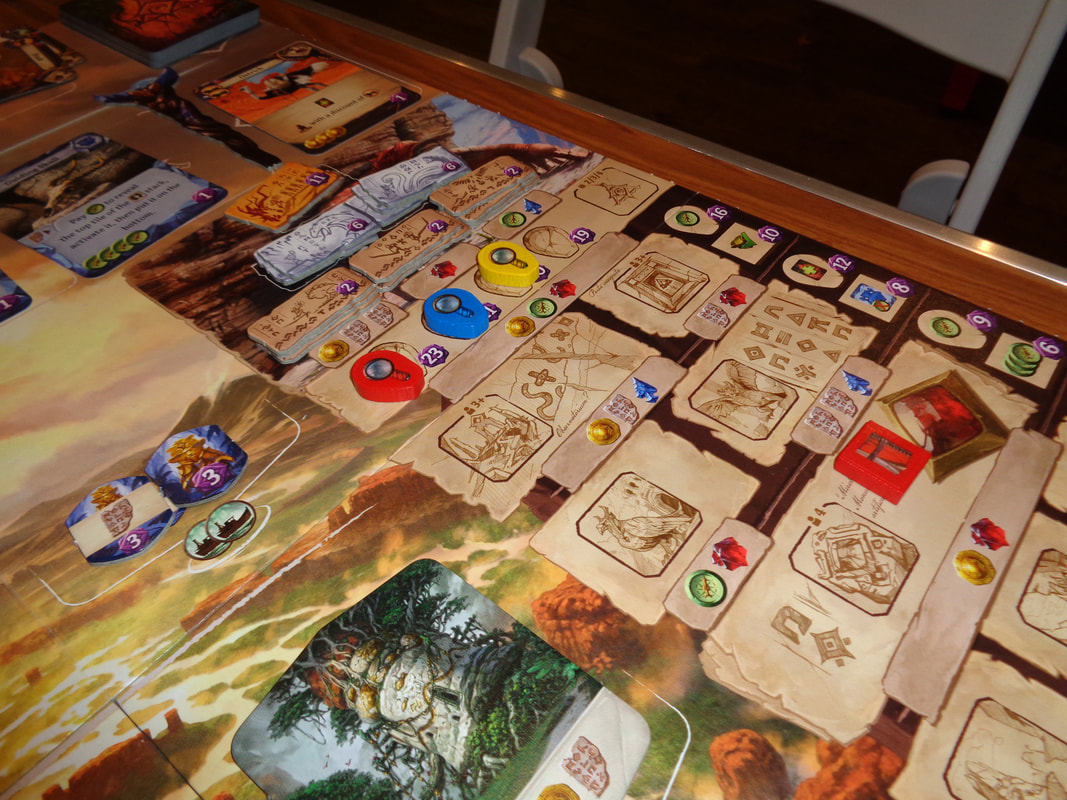
Clank! has an unusual mix of deck-building and push-your-luck mechanics and it's the push-your-luck element that interests me the most. Clank! makes use of this mechanic in several aspects of the game. Firstly, there's a definite push-your-luck element to generating clank. Players will obviously want to minimise how much clank they add to the banner and lessen the chances of their cubes being pulled when the dragon attacks. Having said that, lessening the impact of clank may slow a player's progress, sometimes generating clank will give a bonus, the question is; is it worth it? how much do you want to push it. There's also a contextual angle here, if you see other players are generating a lot of clank, that means it should be safer to generate a little bit of clank yourself. If the opposite is true, they you'll need to be even more careful. The most obvious use of push-your-luck is when collecting an artefact. Every player needs to collect 1 but there's quite a spread of VPs. The higher scoring artefacts are found lower down in the depths. Getting one and getting out will be more risky, but more rewarding. Compounding this is the rule that you can't drop an artefact once it's been picked up. There's no hedging you bet here, if you want a higher value artefact, you have to go for it. It's basically stick-or-twist. This also ties in with the game's other aspect of push-your-luck. The countdown mechanic adds an interesting wrinkle to all this, dramatically altering player priorities and objectives. If the countdown is triggered by another player, you'll find yourself wondering whether you can get one last scoring token before heading to the top or not - probably better to run? The penalty for getting caught in the depths is catastrophic and that 20 VP mastery token is pretty good. Conversely, if you're the player who has an opportunity to escape the dungeon and trigger the countdown, should you do it? Or should you try and get more points? It might seem like a no-brainer, but is it? Chances are the first player to get out didn't go too deep and got a lower value artefact. The combined value of a mastery token and a 5 point artefact is still less than the highest value artefact and I'm sure this is no coincidence, I put it down to well balanced scoring. Rushing to get out and put pressure on other players may work or it may not. The deck-building aspect in Clank! is light-ish and fairly straightforward, which I think is a good thing because it can have quite the influence on a player's turn. There's little in the way of card combos and mostly all the cards stand on their own. The only trash cards (And they're not really trash.) are the secret tomes, which score 7VP at the game end but otherwise clutter up a deck. This brings me to perhaps the only niggle I have about the deck-building and Clank! In most deck-builders, it's all about buying more cards, either to improve your deck or score you points and Clank! is unlike those deck-builders. In Clank! your needs may change from round to round; in a particular round you may want to move a lot, in the next you may want fight points and sometimes, the cards may just not give you what you need. Sure, in most deck-builders, the cards will screw you over but somehow it can feel worse in Clank! It can be frustrating when you don't enough quite have the movement you to reach an artefact for example and feels like nothing is going on. It's not a dealbreaker though and I guess learning to adapt as much as possible is key. Otherwise, Clank! is hard to fault. Colourful with an interesting theme and mechanics, not too tricky to learn, reasonably fast to play and with a dramatic endgame. What's not to like. If you like deck-builders or push-your-luck games or both, Clank! is worth a try. 29th December 2021 We're at Simon's for some Wednesday evening gaming goodness during the mid Christmas break. The game of the night was Lost Ruins of Arnak. "That belongs in a museum!" What does? Cliched old one liners! Lost Ruins of Arnak is a game about raiding temples of a long forgotten ancient civilisation on an uncharted island. What's in a game?
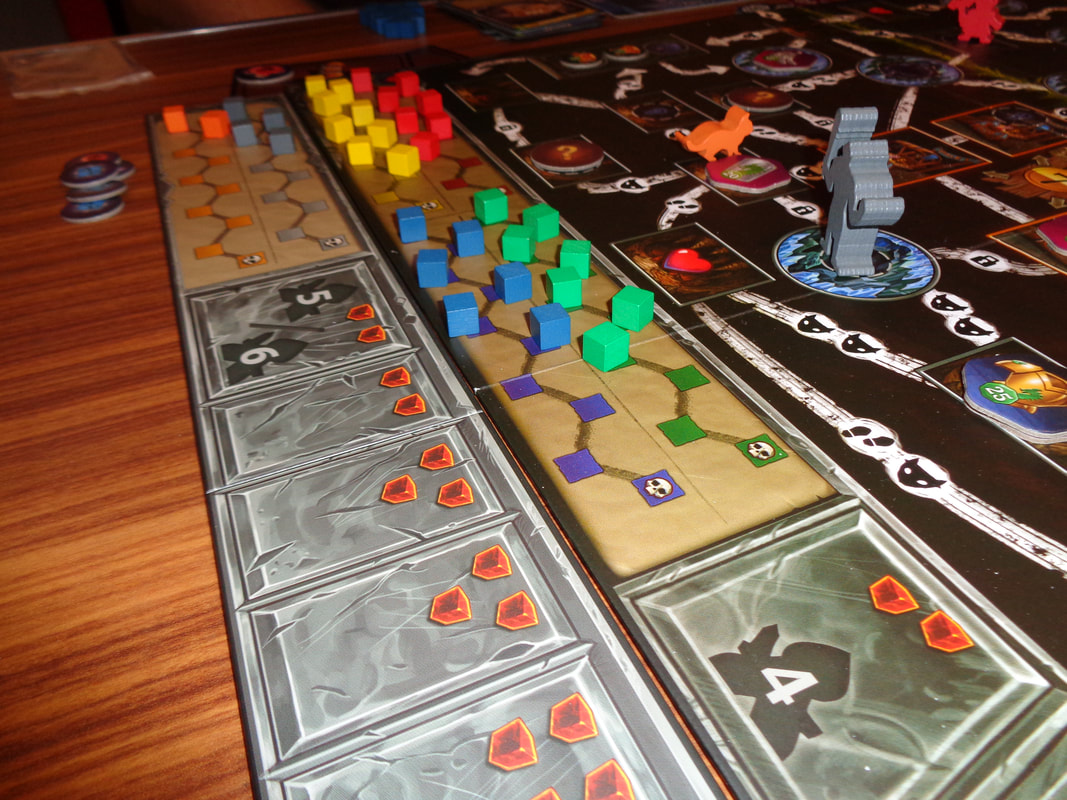
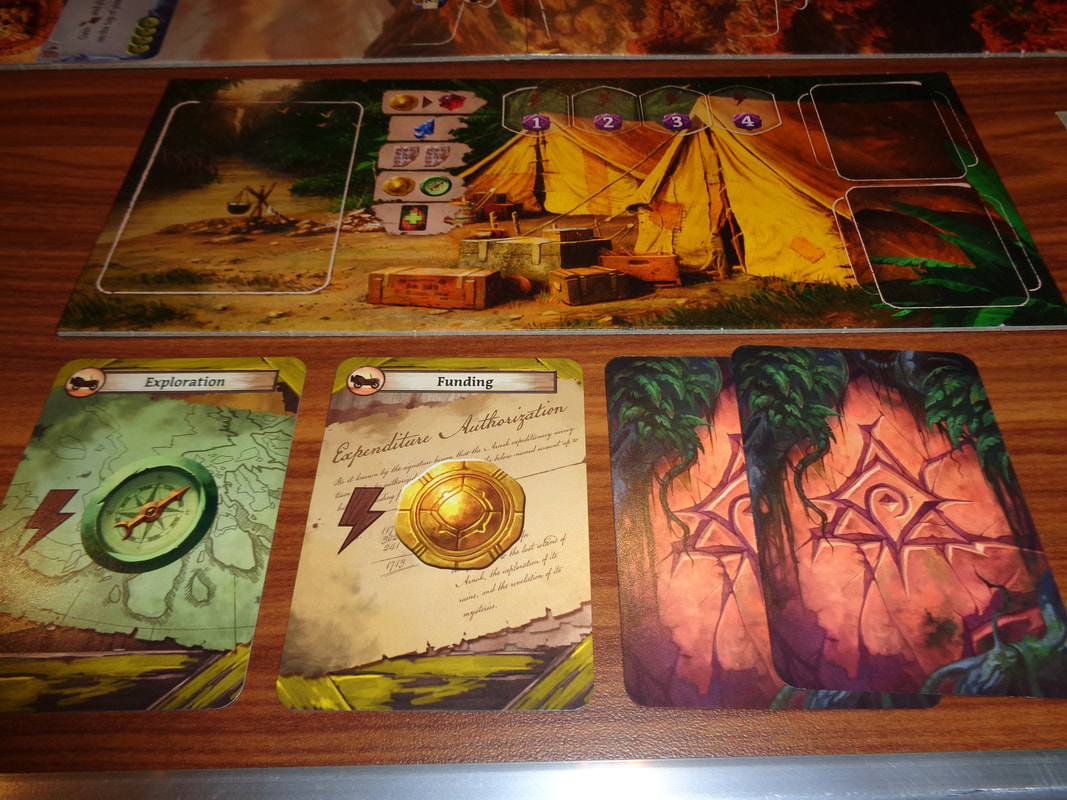
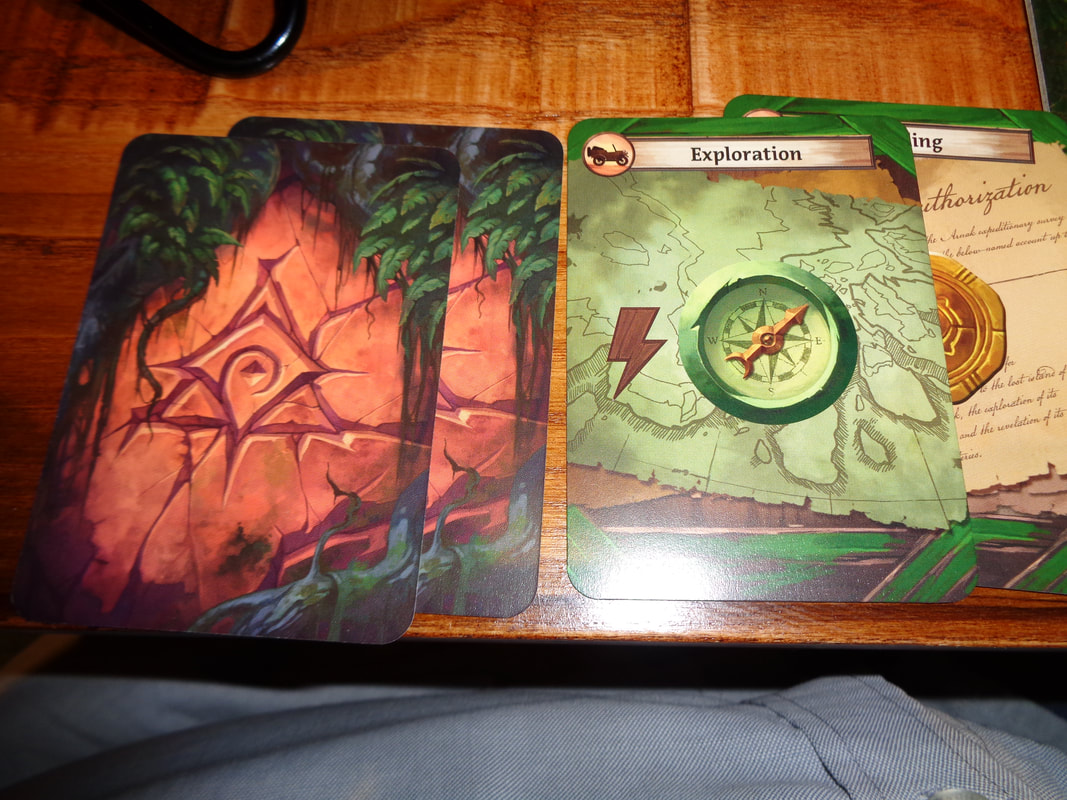
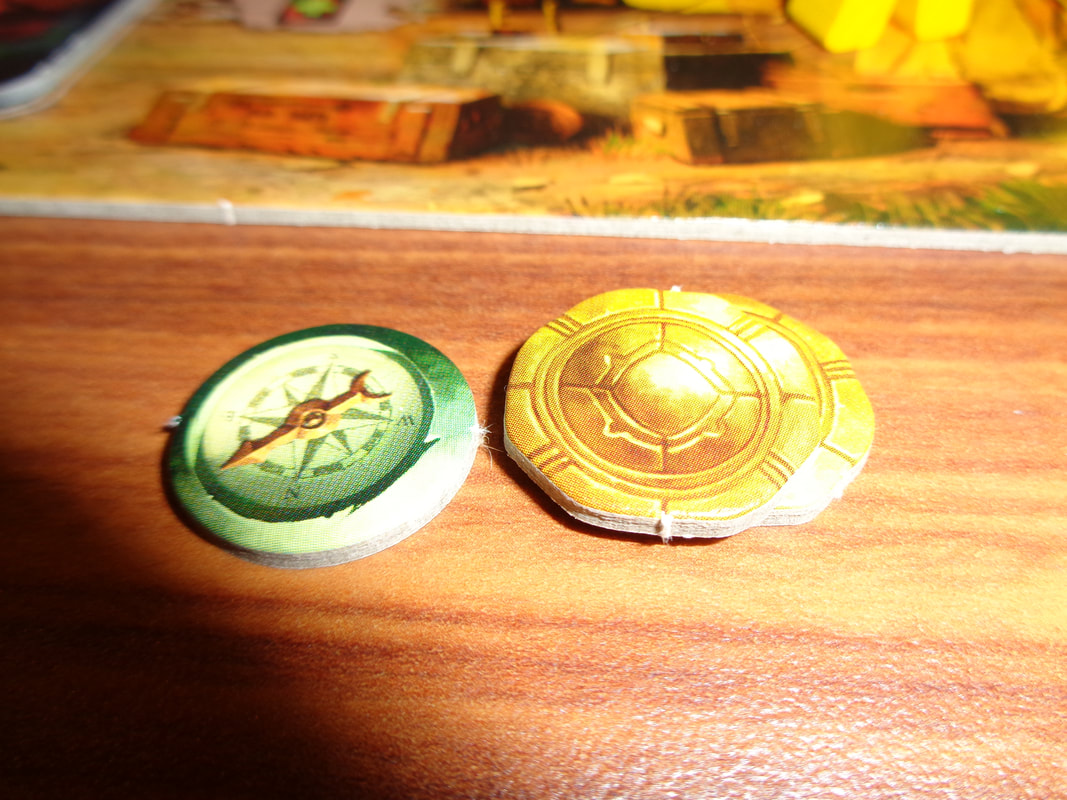
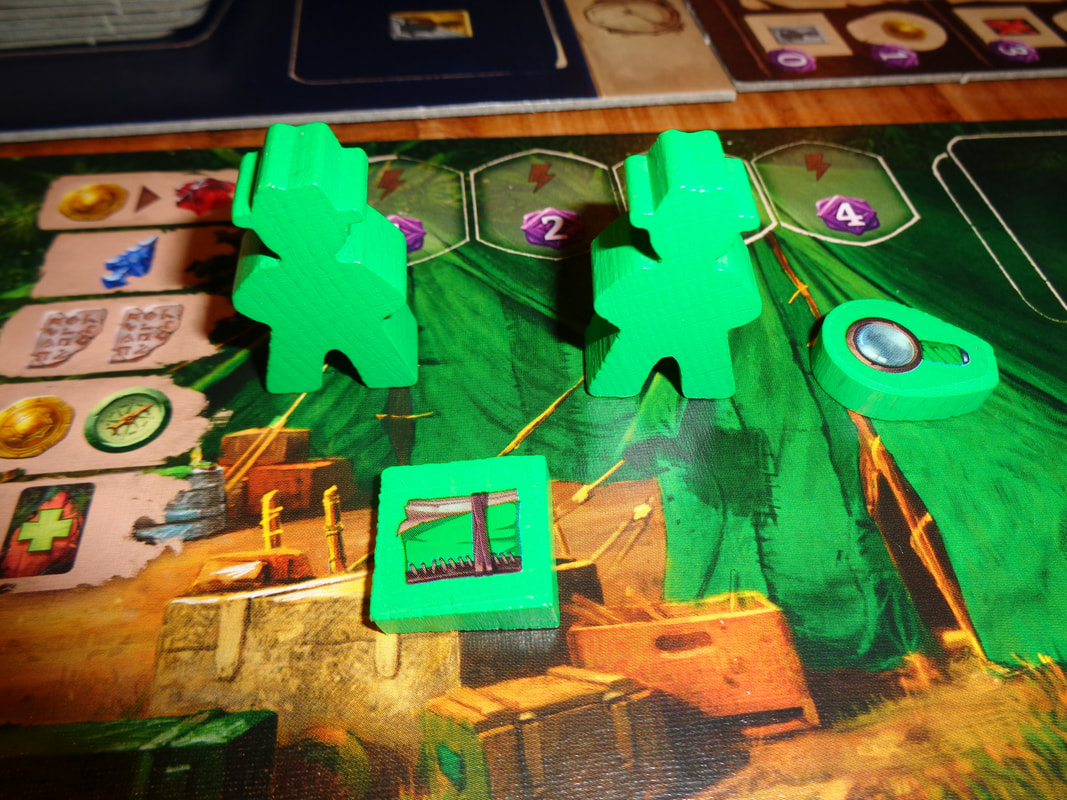
The game has really nice plastic pieces for arrowheads, tablets and jewels, along with wooden meeples, magnifying glasses and notebooks, you can never go wrong with wooden components and yet, makes use of unremarkable card tokens for coins and compasses. Yes it's a minor quibble but it's definitely noticeable. The game's cards and tiles are standard quality. From an art perspective, it's all pretty good, cards and tokens all have nice, clear and colourful thematic art. The standout however, is the board, with a pair of lovely landscape images, it's almost a shame that they'll mostly be covered with components during play. The game contains a fair amount of iconography, none of it was particularly unclear though. How's it play? Setup
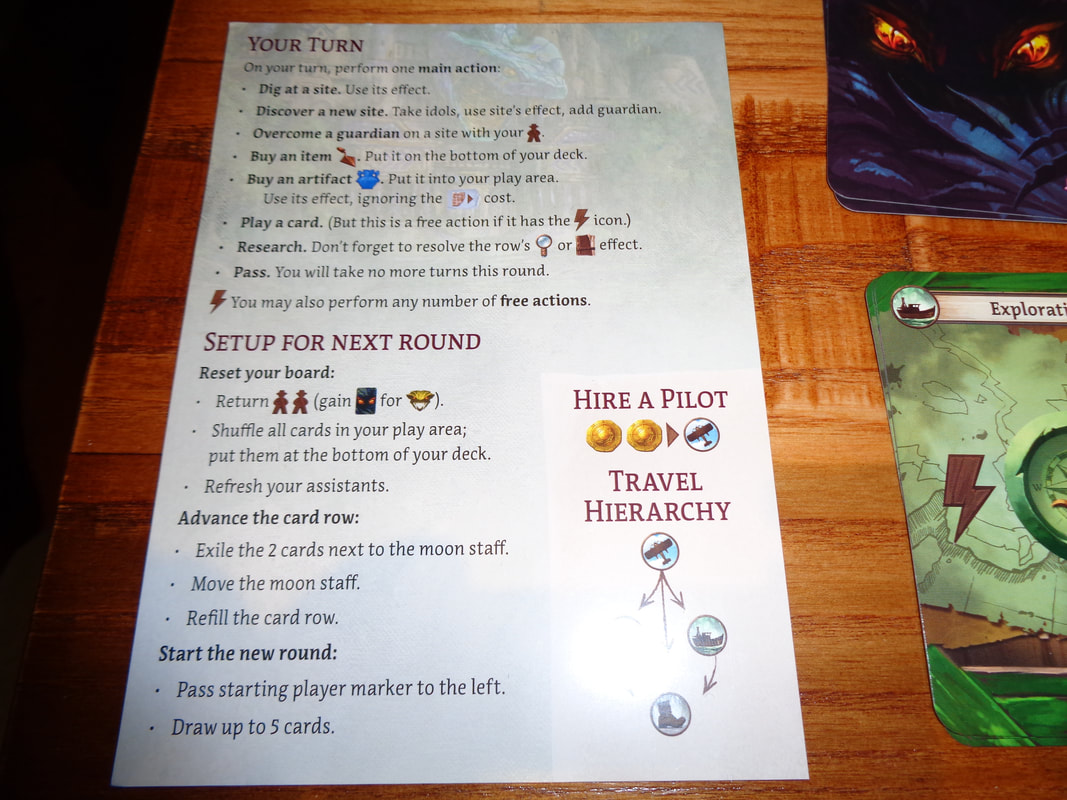
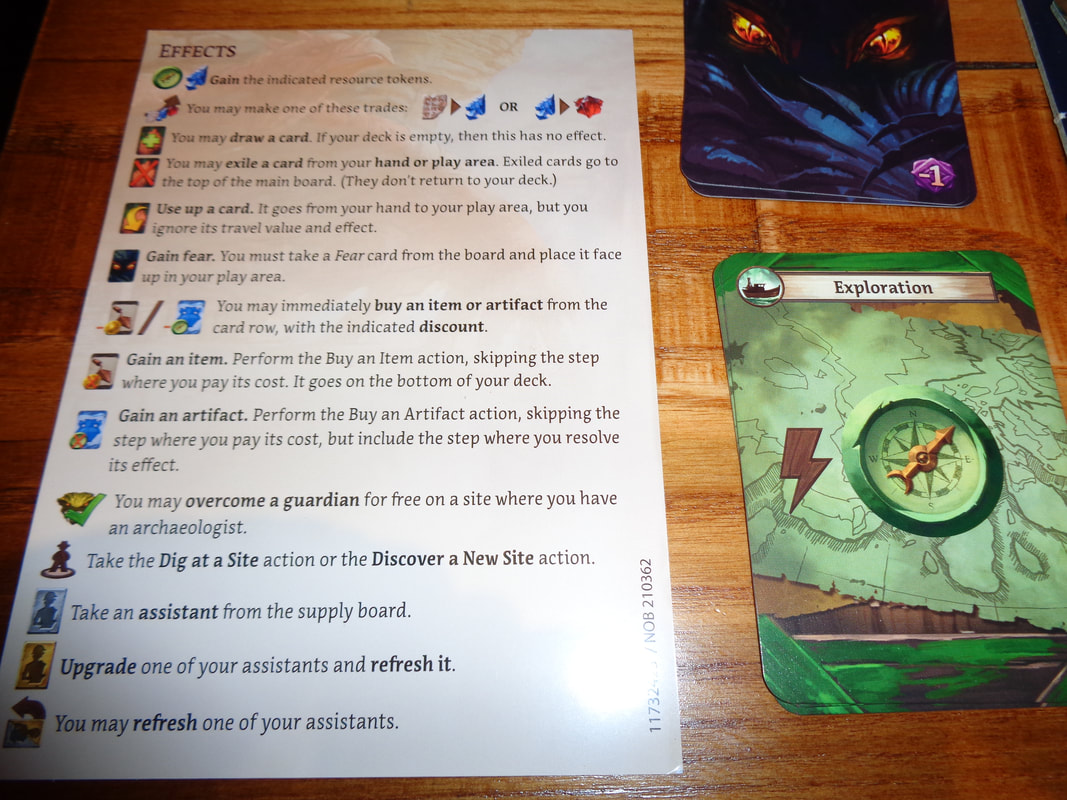
On to play A round in Lost Ruins of Arnak continues until all players can no longer perform actions (Free actions don't count.) or have passed. The game features a pretty standard turn order that goes clockwise and in their turn, players will get 1 main action and any amount of free actions. A round proceeds as follows:
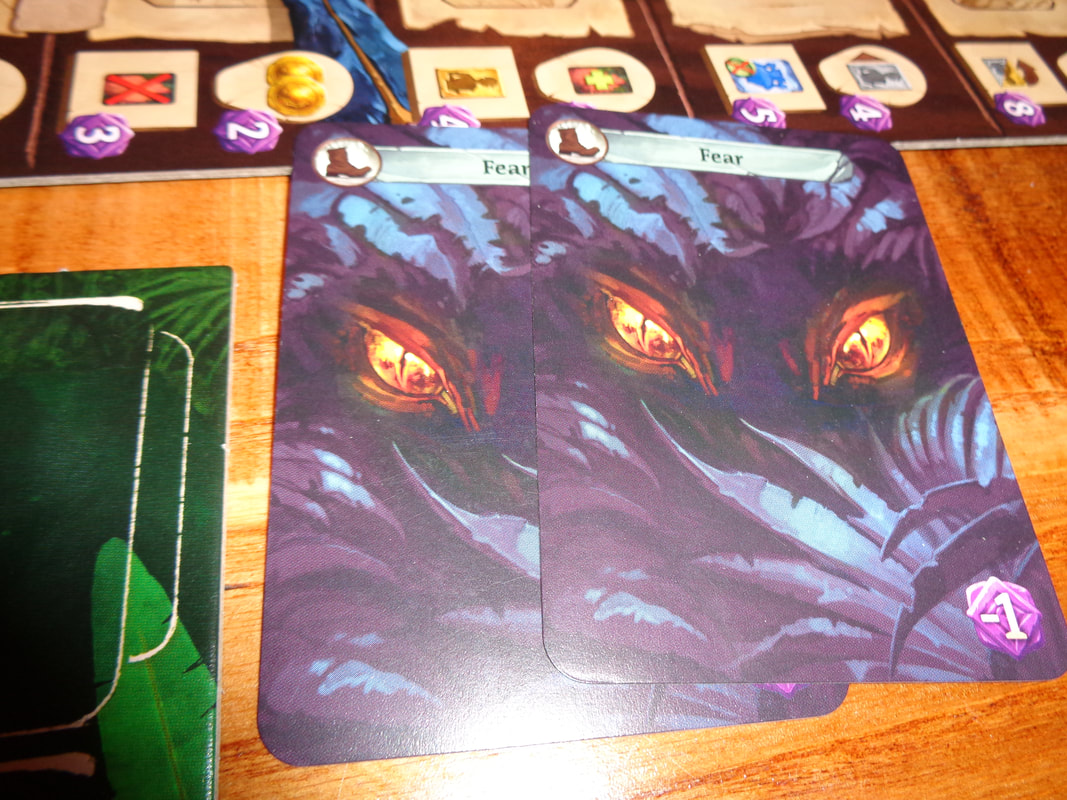
Endgame When the 5th round is completed, then so it the game and we go to scoring. There are a variety of opportunities to score. Research: Research tokens earn VPs depending where they finished on the research track. Temple tile: Players who reached the temple can score the VPs on these tiles: Idol tokens: each idol token acquired earns 3 VPs. Player board idol slots: Each empty slot on a player's player board earns the VPs it displayed. This means when an idol is slotted for a benefit, the VPs it covers are not scored. Guardian tiles: Each guardian defeated earns the player 5 VPs. Cards: Aretfact and item cards can also earn the owning player VPs. Fear cards: Finally; fear cards. Each fear card a player has deducts 1 VP from their total. Points are tallied, highest score wins! Overall
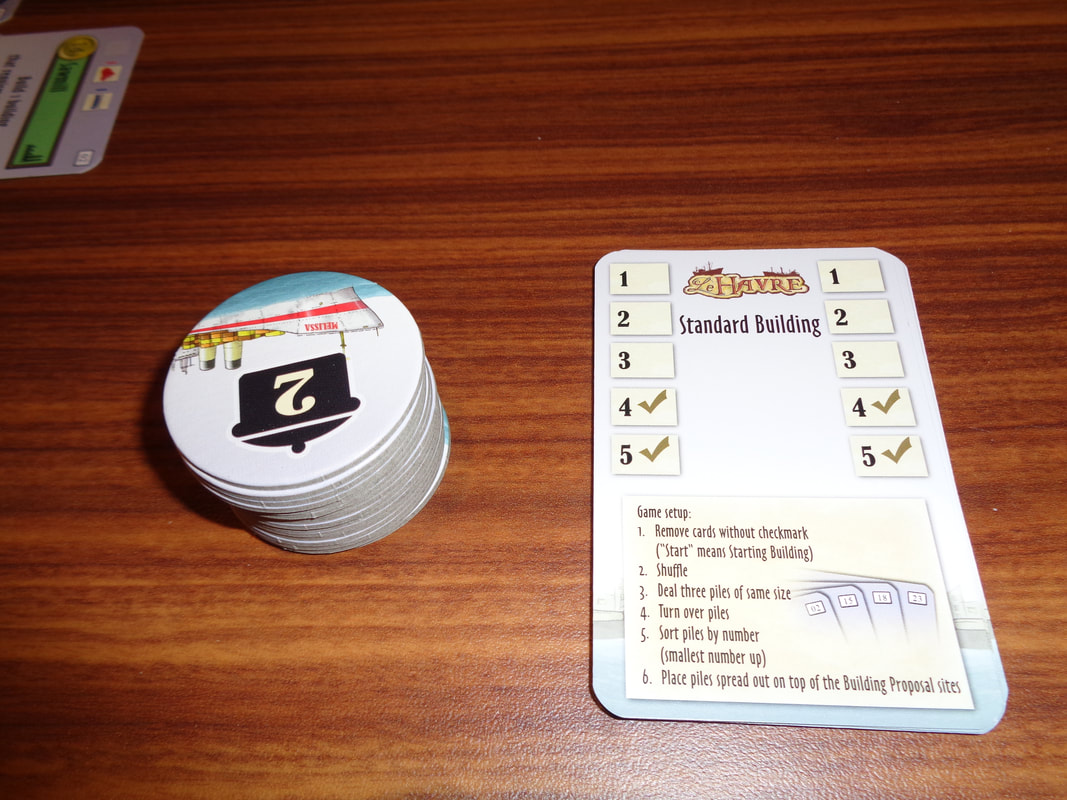
Hmmm, what to say about Lost Ruins of Arnak. It would only be a slight exaggeration to say that this game is sort of a jack of all trades and master of none. A little bit of deck building, a little bit of worker placement and a little bit of resource management, this game has it all! Joking aside, this, on a basic level represents 3 different approaches to accumulating VPs. That is; buying cards and using cards, visiting sites and moving up the research track. Card will get players useful special abilities and travel points, visiting sites will acquire players resources and going up the research track gets other benefits, including assistants. Players will not want to neglect any of these elements and there's fairly good synergy between different parts of the game, but generally players end up focusing on 1 of them during play. While the game isn't overly complex, there's quite a lot to consider. Personally, it felt like going up the research track was a good way to score big but it's hard to be sure. Another very important factor to think about is turn-economy, there's no set number of turns per round in Lost Ruins and finding ways to get extra main actions is vital. A player who gets 10 actions per round instead of 5 is going to just do better and I have to say, finding way to combo actions into more actions is pretty satisfying. For example, a player might use a card to get resources to move a worker to get different resources to spend on the research which would provide another benefit. Having said that, taking a single main action at a time can feel frustrating, yes it's a combo system, but it's a slow one - unless you're the only player still with actions. I found Lost Ruins of Arnak a fun game, but not a particularly compelling one; it's hard to put a finger on. The game's theme fits it's mechanics well and it has great presentation. I think maybe that all the game's systems, the worker placement and the deck building and so on are all on an individual level, a little uninspiring and bland. The deck building mechanic would never stand on its own for example, neither would the worker placement, on the other hand, they don't need to. So is the sum greater than the parts? The jury's out. When I encounter a game I like, I get the urge to buy a copy and I don't get that with Lost Ruins of Arnak. The game was entertaining but it wouldn't be first choice of mine to play but I happily play it if someone else wanted to. 16th December 2021 It's a Thursday and we're round Simon's for some gaming. The game of the night was Le Harve; have you ever had the urge to run a business on the French coast, construct buildings and ships, manage goods, feed your ever expanding workforce and avoid going into debt? If the answer is yes, then maybe, just maybe, Le Havre is the game you're lookng for. What's in a game? Le Havre uses a lot of components, I mean it, A LOT!
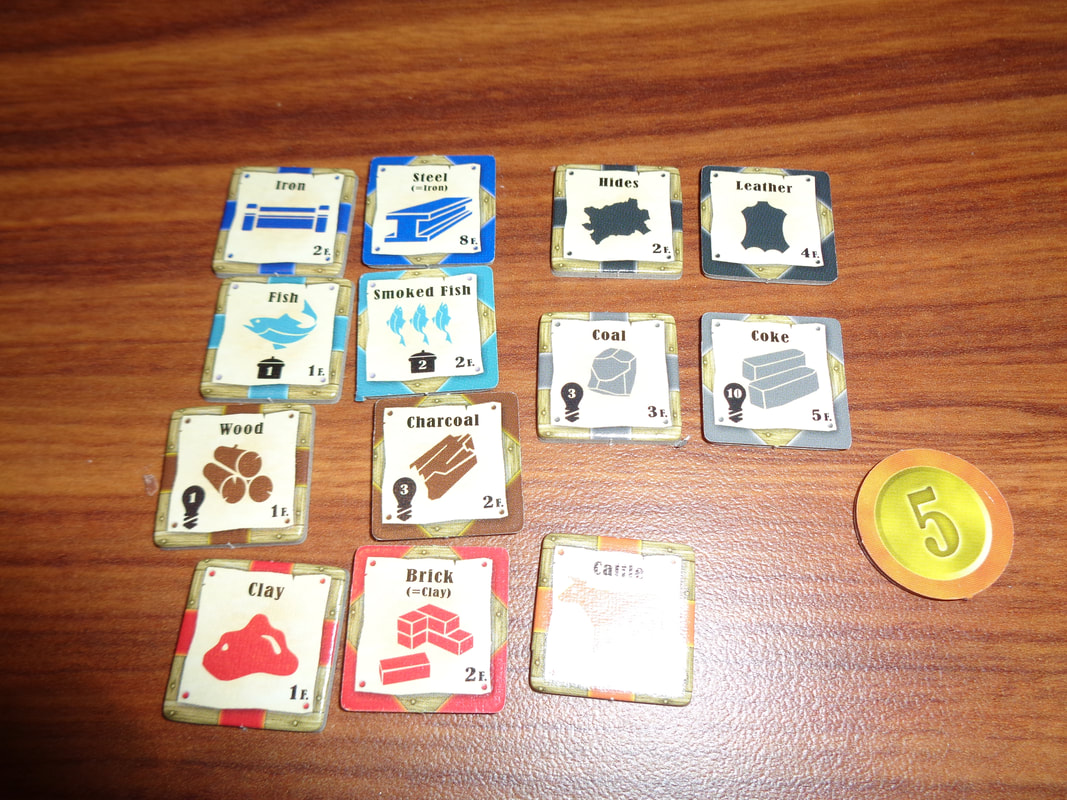
 The game board... so many resources!
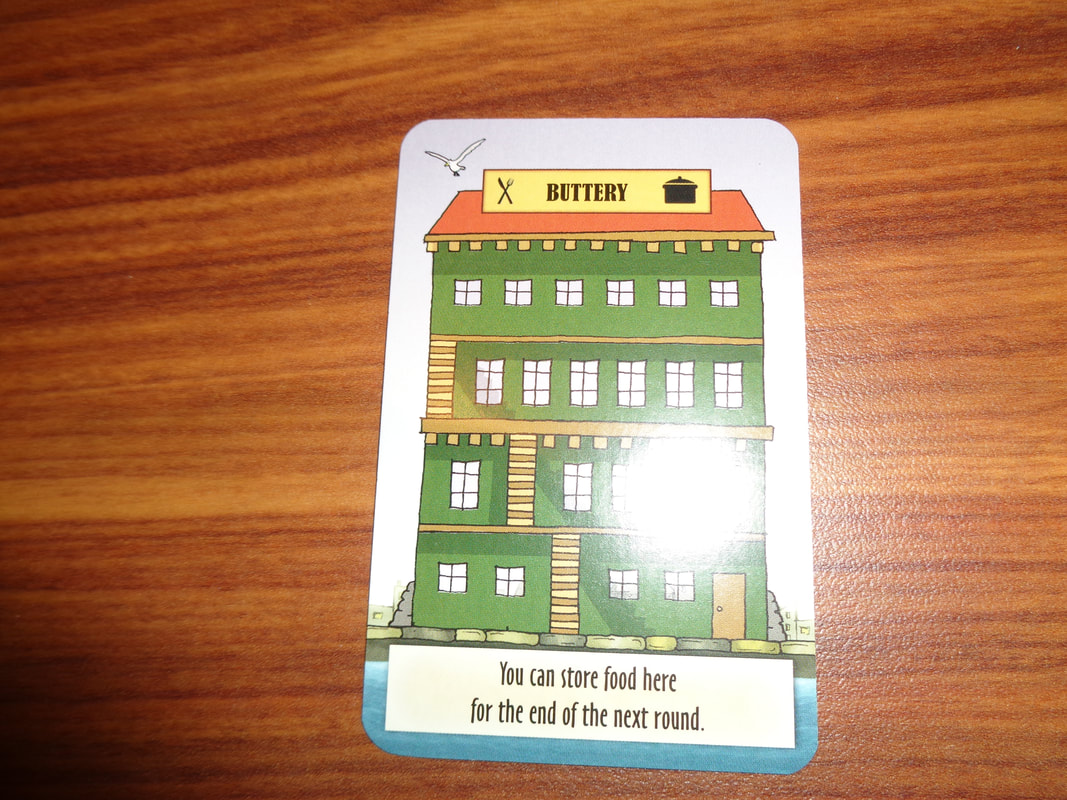
The art in Le Havre is a bit of a mixed bag. The game board uses fairly simplistic and colourful illustrations that I personally found clear, distinct and looked quite evocative, the same is true of illustrations on the cards. However, the tokens used monochromic artwork which is a little old school. Having said that, it was always clear what they represented. Which brings me to iconography. Between all the different actions on all the building cards in particular, Le Havre uses a fair amount of iconography. Much of it is straightforward and apparent but some of it will require looking up in the rules. none of it game-breaking though. How's it play? Setup
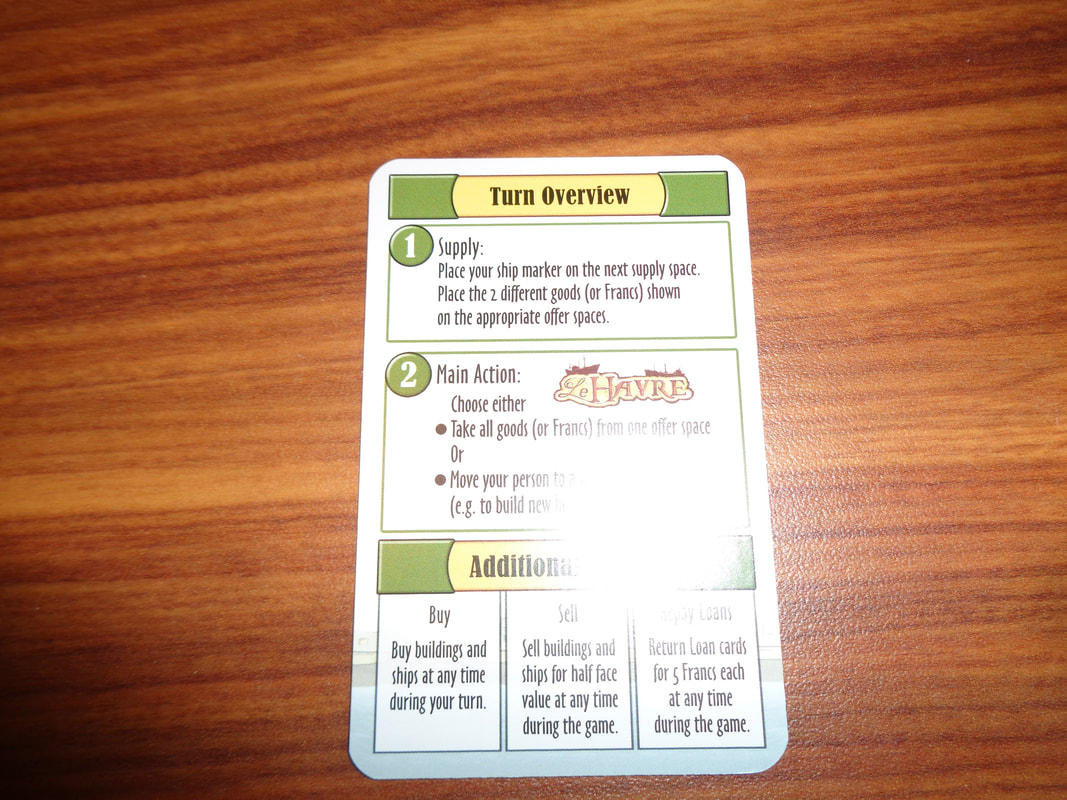
On to play Acquisition of wealth is goal in Le Havre and money becomes victory points at the game end. The game is played over a number rounds dependant on the number of players. In each round there are 7 turns, you will note that this means that players will not have an equal number of turns and this is by design. In their turn each player must perform the supply action and has a single main action they can also perform, in addition the active player can also perform buy/sell actions. When all 7 turns have been completed, there are some end of round actions to resolve before moving on to the next round. Free actions: These can be performed by the active player at any time.
Endgame When the final round is completed, all players have 1 final main action they can perform, after this, the game goes to scoring. Now each player calculates their wealth which are victory points. This is done by totting up the following: Value of all building and ships a player owns. Cash they possess. Every loan card a player still possess at the game end deducts from the total. Scores are tallied, highest score wins. Overall
When playing Le Havre players will need to pay attention to several areas of the game. Buildings are very important and players will probably spent a significant number of actions on them, not only do they have to think about to what they've built, what the town owns and what it available to build but what other players have built. Being able to make use of other player's building adds an interesting spin on the game. Players will need to adapt their strategy to the buildings that become available and while there is a ordering number for buildings, it's still no guarantee of the actual order they become available. That doesn't mean you can risk ignoring ships or acquiring resources of course, food is vital, probably the single most important thing in the game, you'll constantly need food otherwise you'll eventually be plunged into spiralling debt. Managing all the resources is also key and the game deliberately forces players to make the hard choice between using a building or taking a resource from an offer space. Resources tend to be relatively scarce at the start of the game and player's will want to optimise their strategies. Generally money can be used in place of some resources but it's essentially sucking up victory points and getting players closer to having to take a loan, something to avoid if you can. Players will need to also pay attention to the supply track and their position on it and when their turns will come up, as well as when resources will be moved into the offer spaces. Even though there were some more rules which I skipped over describing, I wouldn't call La Havre a very heavy game. I did find it a little fiddly with the occasional little rule popping up here or there and at the start I did find the game a little obtuse. Once you get over that hump Le Havre becomes a mostly straightforward game and proves a challenging game with meaningful decisions to make. I do have a criticism of Le Havre though - and that's the playtime, it's just too long! This is a known issue too as the rules contain a 'shortened' variant of the game! A 5-player game is expected to take 210 minutes over 20 rounds, that's 3 ½ hours and quite frankly, that's an underestimation. Think about it; 210 minutes over 20 rounds is 10 minutes 30 seconds per round and each round has 7 turns, that works out at 90 seconds per turn. Do you think that the kind of players that like this type of game spend just 90 seconds per turn? If every player spends 2 minutes taking their turn instead of 90 seconds, it would add 70 minutes to the playtime. 😭 It meant that the down time between turns felt like it lasted forever and at times was just more frustrating than fun or compelling, which was what I ultimately took away from it. If you like resource-management games that are slightly on the heavy side, then Le Havre might be worth a look, provided you can commit the time. To be honest, it's a game that rainy, chilled Sunday afternoons are perfect for. 21st November 2021 Sunday evening gaming Board Game Arena continued. The next game of the night was Chocolate Factory. Have you ever wanted to own your own chocolate factory? Since pretty much everyone's a fan of chocolate, why not? Unfortunately, there's no eating chocolate in Chocolate Factory, only a resource-management and light programming game instead. Caveat: we've only ever played Chocolate Factory digitally. What's in a game?
Since we've only played Chocolate Factory digitally, I can really comment on the qualty of the components. However, I can say what are there is, is quite nice and colourful, it has an early 20th century vibe to both the art style and subject of the art. The game uses a fair amount of iconography, luckily for the most part, it was pretty straightforward to comprehend. How's it play? Setup
On to play Chocolate Factory is played over 6 rounds - Monday to Saturday and each round has 2 phases, a drafting phase which goes twice in turn order and a factory phase which can be played out simultaneously. Drafting phase
Factory phase Each player will now have a factory part and a employee card. Factory parts are added to the player's board in one of the spaces above or below the conveyor belt spaces, a factory part can be used to replace an already existing factory part. Employee cards serve 2 purposes, firstly they grant the player some sort of bonus and secondly, they allow the controlling player to sell chocolate to the department store they work for. Unlike factory parts, employees only stay in play for 1 round. So how does the factory phase work? The factory phase has 3 shifts and in each shift players first take a bean and place it on the conveyor belt tile that's about to enter into the factory. Then each player must push their conveyor belt tiles along 1 space from the left to right so that the tile they placed a bean on goes into the factory, it's also possible that a tile will be slid out of the exit on the other side. Anything on that tile is placed into the respective player's storeroom. Once this is done, the factory parts can be used, each part costs mostly 1 but sometimes 2 coal to activate. A factory part can only be used on resources adjacent to it. For example the basic roaster factory party will turn a bean into coca, a upgrader factory part will change any resource into the next level of resource (E.g., coca into chocolate fingers.). Converters will turn chocolate into wrapped chocolate or boxed chocolate and so on. There are some limitation here, each factory part can only be activated once per shift. Once the 1st shift is finished, the 2nd begins, another tile is placed at the entrance to the factory with a bean on it and then the conveyor belt is pushed along another space and factory parts can be activated (Or reactivated.). Thus the conveyor belt will move 3 times a day. Selling When all 3 shifts have been run, players must sell chocolate, they can only keep 2 pieces in their storeroom between rounds, any excess is lost and players think ahead to avoid losses! Chocolate can be sold to corner shops and each one has their own demands. Like the factory phase, selling can be completed simultaneously. When selling to corner shops, they have 1-3 tiers of demand that must be met depending on their size and lower tiers must be completed before the higher ones. When a tier is completed it is immediately scored, when all tiers are scored the card is discarded and the player must draw a new corner shop card or any size they want. Selling to department stores is a little different. Firstly a player can only sell to a department store that matches the employee they drafted. Secondly, when fulfilling the demands of a department store, points are not immediately scored, instead a marker in the player's colour is moved along the 9 spaces. Once selling is concluded, a new round is set up, coal is distributed to players and new factory part and employee cards drawn, then the new round commences. Endgame Play continues until the 6th and round is completed, then the 5 department store scores are calculated. Whoever has completed the most corner shop cards earns a bonus Whoever has their marker the furthest along scores for 1st place, if the next player is at least half as far along as 1st place they score for 2nd place and if a 3rd player is half as far along as 2nd place, they score for 3rd place. Furthermore, players can earn a bonus for selling chocolate to 3, 4 or all 5 department stores. Finally, remaining chocolate and coal can earn points. Points are tallied, highest score wins. Overall
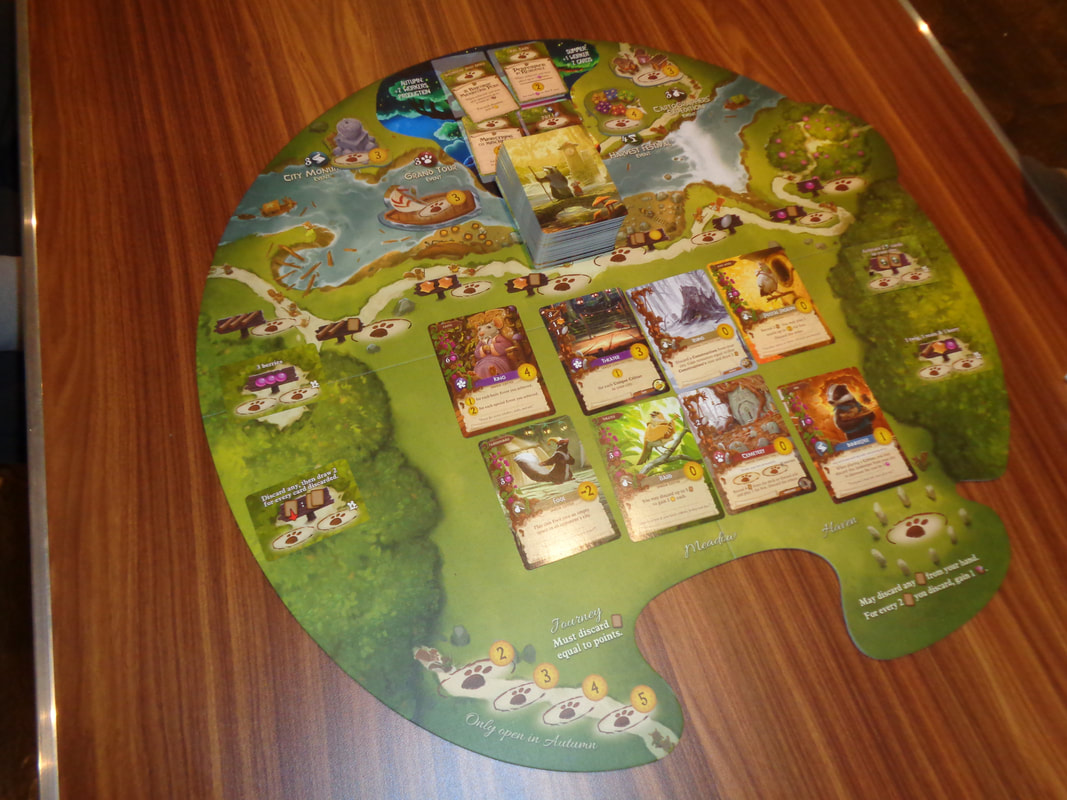
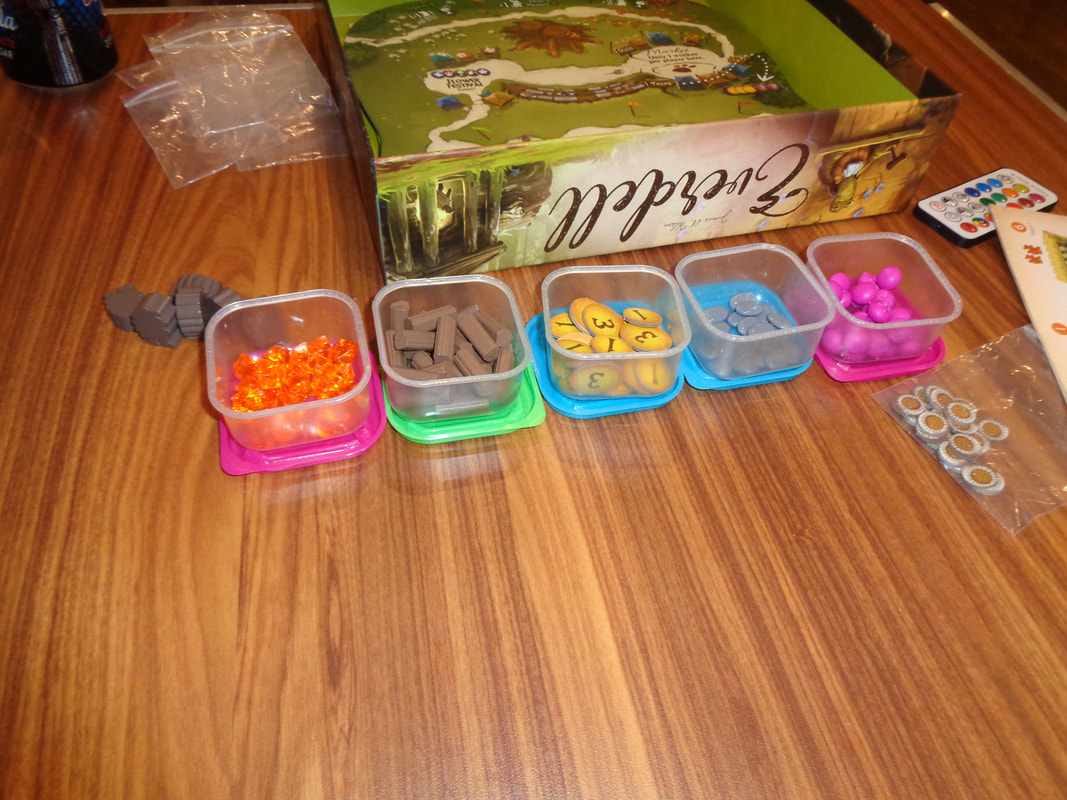
Chocolate Factory gives players several important factors to think about. Firstly, during the drafting phase, players must prioritise what they think is important to them, do they want a factory part more than an employee, they'll get both, but not necessarily in the ones they want if they wait to the 2nd drafting phase. Cards that players draft can dramatically change the situation for players. Most obviously are employee cards which determine which department store a player can sell chocolate to. If a player is geared to sell the kind of chocolate a particular department is demanding, then getting the employee that gives you access can be paramount. This is even before considering which benefit the employee card also confers on the controlling player. Factory parts will form the core of the player's ability to produce and sell chocolate, getting a part that wasn't wanted or needed will force player to reconsider their strategies for at least one round. Unlike employee cards, factory parts can stick around for the entire game, although they can be replaced and since players will acquire 6 factory parts and only have 5 spaces in their factory, it means something will have to go. Where these parts are placed can have a significant impact. Place them too far to the right and it'll take a while for resources on the conveyor belt to reach them. Put them too far to the left and players risk screwing up their engine. Putting factory parts in factory is an exercise in optimisation. Speaking of optimisation, the game has a fairly unforgiving action economy. It's obviously a deliberate design decision, but there's never enough coal. Players start with 5 coal in round 1, they'll have 3 factory parts to activate - and that's over 3 shifts! Even in round 6, when each player can have a full factory, they only get 10 coal each, they'll on average only be able to activate 3 or 4 of their parts per shift. If forces player to make meaningful decisions which is always good and also makes them think across 3 shifts instead of 1, but it also feels a little frustrating and uneventful when half of the engine you've been building isn't used in a shift and maybe isn't used in the entire round. Scoring also presents players with choices. Each round, every player will have the opportunity to score their 3 corner shops and work towards scoring 1 of the 5 department stores. Corner shops are pretty straightforward to manage, the only wrinkle being that their demands must be met in tier order. It means that players will sometimes need to adapt to changing demands that a corner shop might present. Department stores are a proposition that's a little more interesting though. Because scores are based on relative positions between players, it can lead to some interesting outcomes. E.g., if a player sells just 1 item to a department store and no one else does then they'll get the full reward for 1st place but conversely, if they sell 5 items to a department score and another player sells more, then they'll get less. This adds an extra option or strategy to the game and unlike some tableau-engine building games, it becomes beneficial to watch what other players are doing and what they're producing and who they're selling it to. And while I feel that the majority of player's victory points will come from corner shops, department stores can't be neglected. They exist in a sweet (sic) spot where they can tip the balance in a player's favour. I'm kind of conflicted about Chocolate Factory, it has some solid mechanics that present players with choices, I particularly like how players can chose where to sell their chocolate to maximise their profit. But parts of it are also a little unexciting, where the effort creating an engine feels greater than the rewards it provides. I would have no problem playing Chocolate Factory again, but not too often. I think occasionally, it would be a good change of pace 12th November 2021 It's a Friday night and we're round Simon's for some impromptu evening gaming. “I beg your pardon,” said the Mole, pulling himself together with an effort. “You must think me very rude; but all this is so new to me." Well, Everdell is new to me, mixing various game mechanics and lush anthropomorphic artwork. What's in a game? Everdell is a game that has a big footprint and a lot components.
The components are well made and the attention to detail for the most part is excellent. In particular, the resources look great as do the individualised meeples. We didn't use the tree but it's a nice touch Even if the anthropomorphised artwork is not to your taste, it's hard to fault the quality of the artwork and rich, warm colour palettes used throughout on the board and all the cards. Iconography is where the game could be improved though. Sometimes, the text used on the critter and construction cards is perhaps a little too small as are the symbols and sometimes, to maintain the game's aesthetic, you'll encounter a small around of tiny writing surrounded by a lot of unused space. Having said that, it's a quibble, not a gamebreaker and doesn't really detract from the game's quality How's it play? Setup
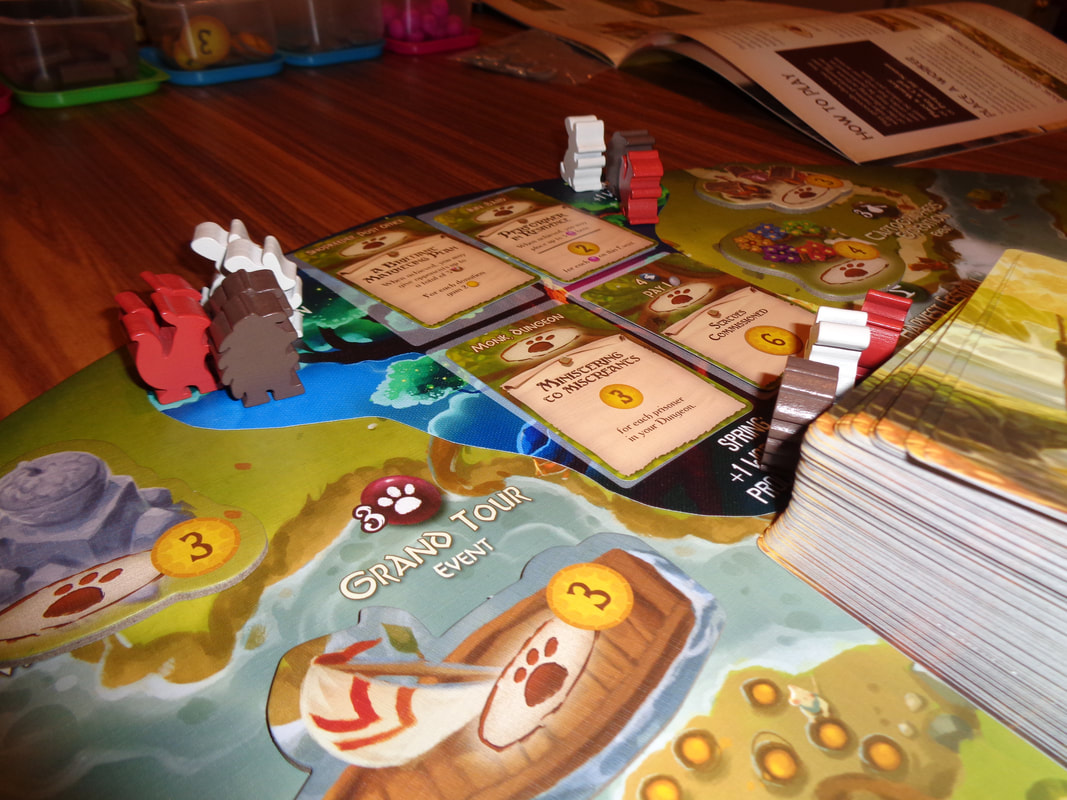
On to play The objective in Everdell is to construct the best city, that is the city that scores the most victory points. Players achieve this by playing critters and constructions into their tableau. When somebody becomes the active player, they can perform 1 action from a choice of 3 and then player progresses to the player to the left. Players continue performing actions until they have to or choose to stop; in which case the season has ended for them. Everdell is played over 4 seasons.
Endgame When the 4th season is completed, then the game is over. Victory points can be scored from a variety or sources, including cards, tokens and events. Points are tallied, highest score wins. Overall
It's obvious that a lot of thought and care has gone into the game's presentation and charm. It's one of the best looking games I've seen in a while and I always appreciate the extra effort committed to a game. Hmmm, what else to say about Everdell; for the most part, it's initially a pretty solid, straightforward game, although it feels a like a bit of a slow burner. While the game's cards provide players with a variety of approaches choices and plays to make. Having said that, the game's action-economy is actually quite tight, almost too harsh. E.g, in the 1st season, players will only have 2 workers to gain resources in order to play cards, it means players will have to pay close attention to optimising their plays and actions. card synergy can make a big difference. It gave me the feeling that players will need to know what they're doing from their first action in order to play Everdell competitively. Additionally, in comparison to other tableau building games, it feels like the tableau in Everdell provides much more limited benefits that lacks the satisfaction putting together a good tableau. At best, production cards are reactivated once every other season - or round - but because players have multiple actions in a single season, it means a lengthy gap before those reactivations. This is something players will need to consider when playing cards. All of this makes the choices in Everdell important - which is the sign of a good game. Ultimately though, I just found it a little unexciting and unengaging and while it wouldn't be my first choice, I'd have no qualms about playing Everdell again. 21st September 2021 It's a Tuesday and I'm at The Sovereigns in Woking with the Woking Gaming Club. In honour of Talk Like A Pirate Day, the first game of the evening was Jamaica, a game of pirate racing. However, before we move on: "My wife's gone to the West Indies." "Jamaica?" "No, she went of her own accord!" With that out of the way, let's continue. What's in a game?
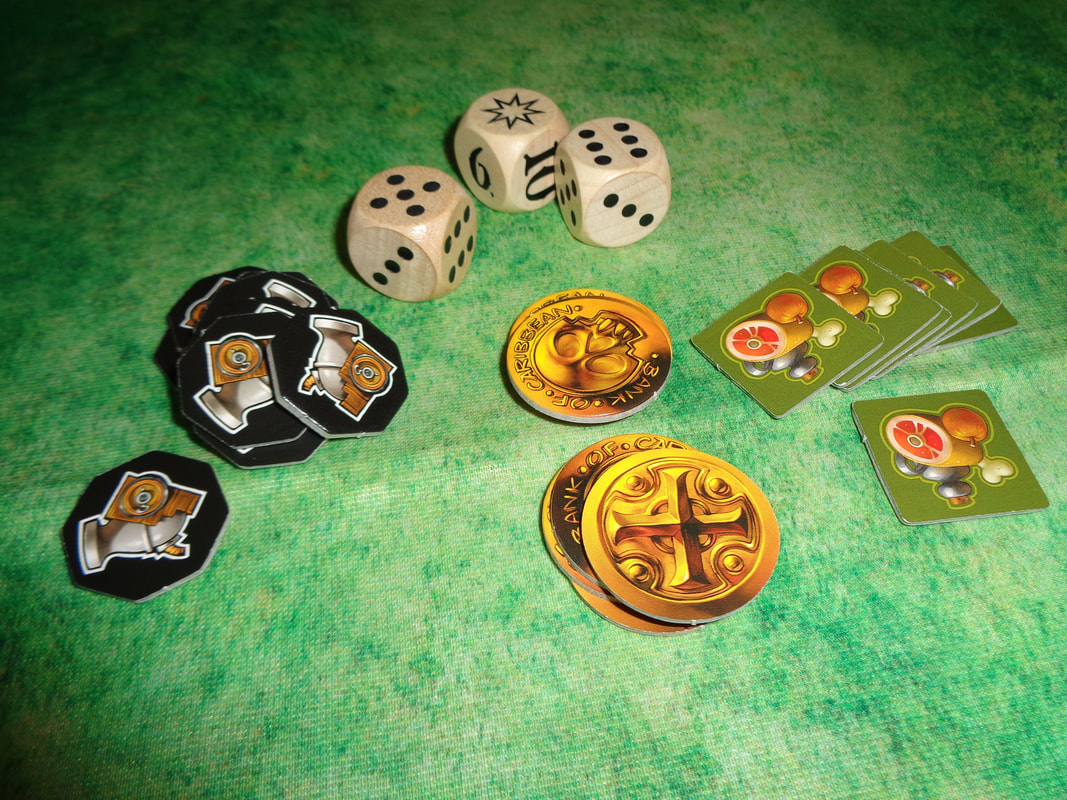
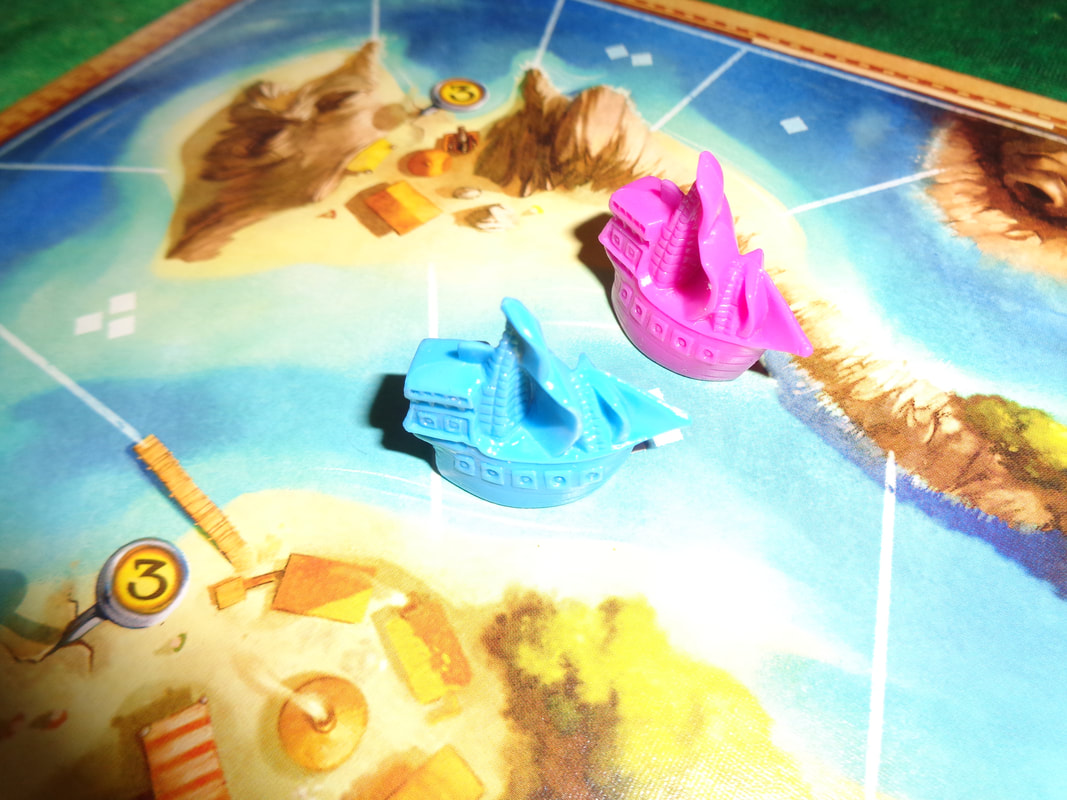
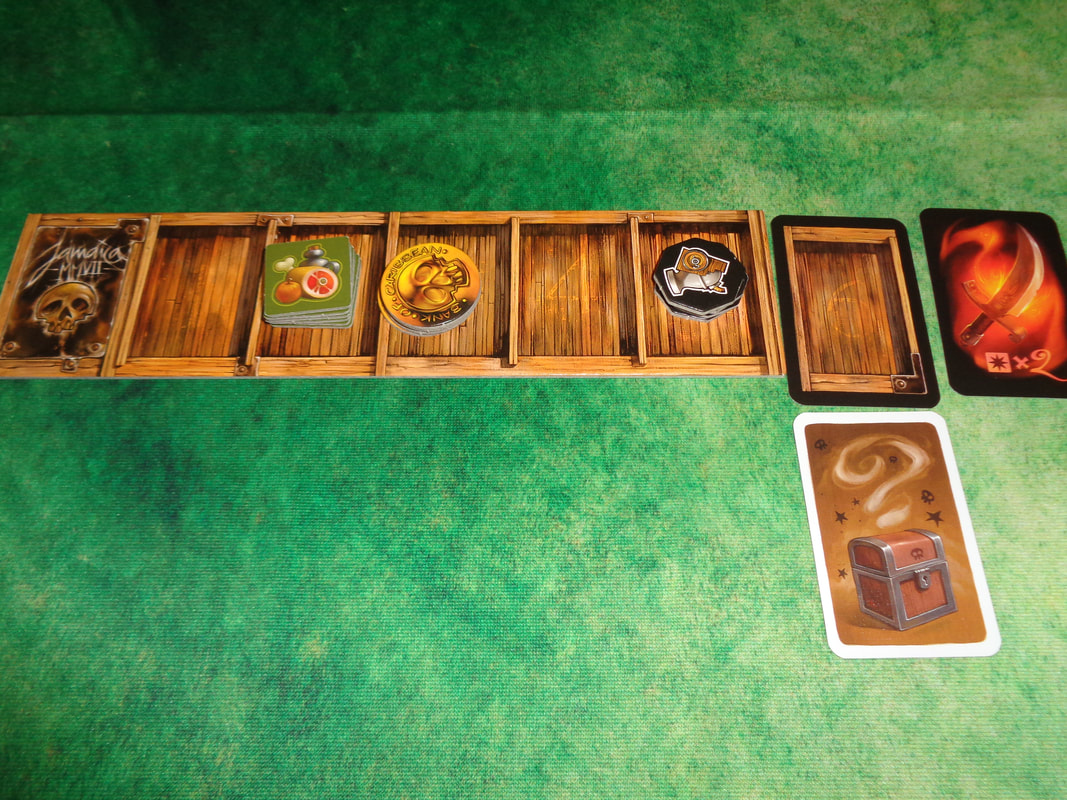
The overall art direction for Jamaica is colourful and makes use of a cartoonish style that suits the game's comical theme. The gameboard is brash with brightly coloured art but the standout are the player decks; not only do they share the board's style, they can be placed side-by-side to create a single long picture. The game doesn't use much iconography, what there is of it is easy to understand. How's it play? Setup
On to play In Jamaica, the Captain rolls the dice and assigns them to the game's 2 different phases per turn. Each player then chooses 1 of their 3 available cards to play and then performs the day and night actions on those cards. how effective those actions will be are determined by dice rolled and allocated to day and night.
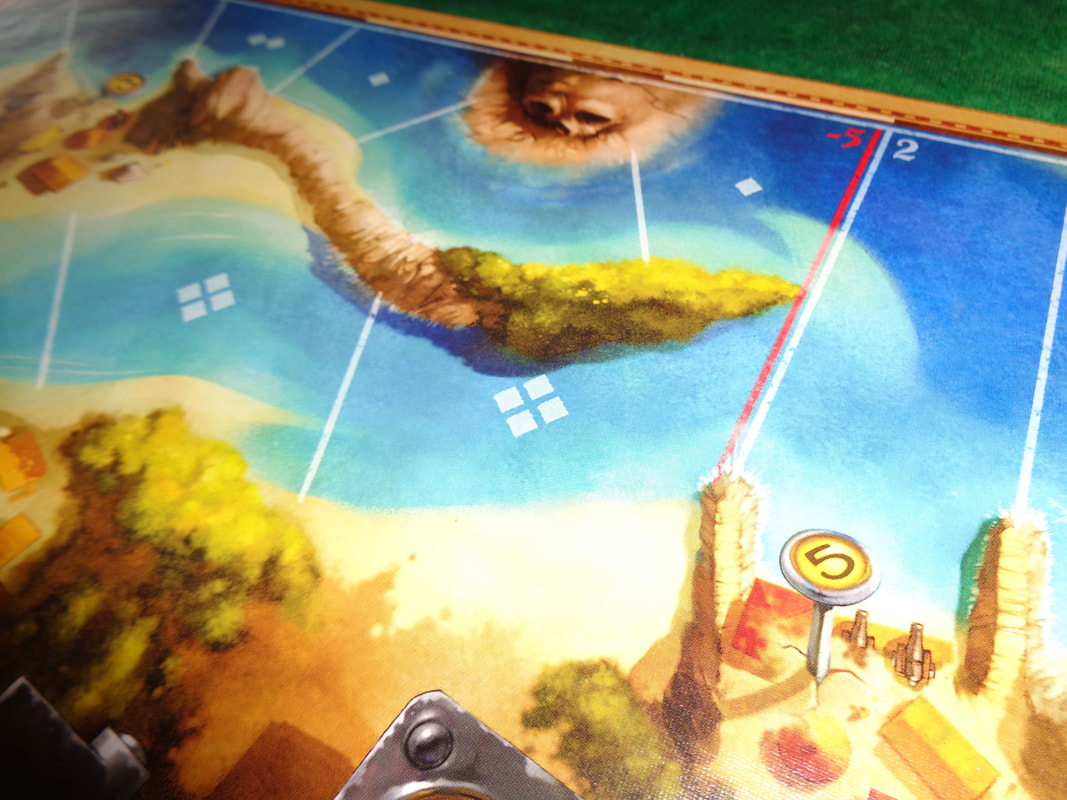
Endgame Play continues until a ship reaches the start/finish, upon which the current turn is completed and the game goes to scoring. There are 4 sources of scoring. Players score points according to where their ship finished, the start/finish scores 15 and points go downwards from there. If a ship failed to pass the -5 space, then they lose 5 points. Every gold token a player has on their player board scores a points. Treasure cards score their points and cursed treasure cards deducts from the player's score. Points are tallied, highest score wins. Overall
In Jamaica, players must balance the need to load resources with the need to move along the game track, doing too much of one or the other will probably be detrimental. They'll need to judge when it's the right time to move with the right amount of resources. The rules limiting how players fill their holds forces players to make decisions about what they carry on their ships. Players will also need to mitigate bad rolls and unfavourable cards, e.g., playing a red arrow backwards move when the die shows a 1. At the same time it's also a good idea to keep an eye out for other players. If another player is 3 spaces away and one of the dice rolled a 3, there's always the risk that opponent will end moving on to your space, provoking a fight, which could prove costly. Perhaps it might be a good time to load some gunpowder... Obviously, all of this is to some extent is influenced by the dice rolls, having all the gold in the world wont help if a player can't reach a port! It means players will need to adapt to this randomiser and change strategies when the dice - and sometimes the captain don't give player the results they need. Jamaica is a cheerfully colourful game with fairly light programming game where players 'only' have to think 2 moves ahead, with a theme that fits well with the mechanics. Jamaica also has elements of resource management and a touch of player interaction and conflict. It's an easy to learn programming game that is fun to play, particularly if you like a little bit of jostling between players and generally presents them with meaningful choices to make. 7th September 2021 Tuesday evening is here and we're at The Sovereigns with the Woking Gaming Club. The first game of the night was Merv. What's in a game?
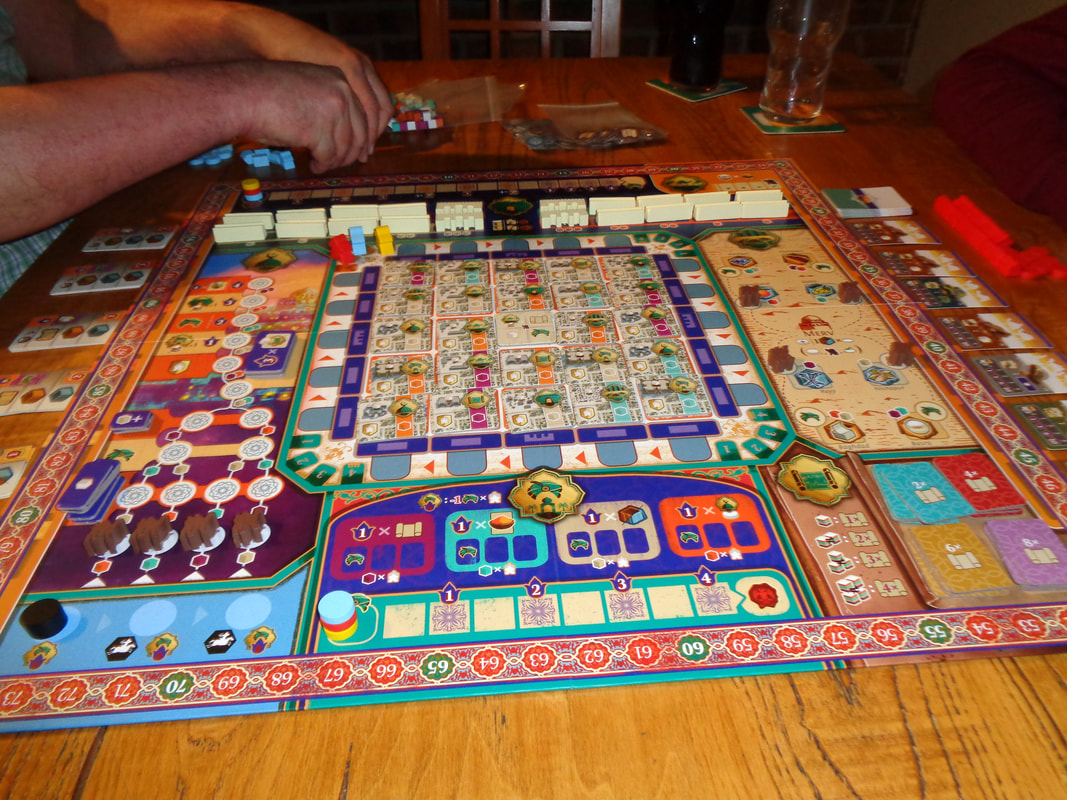
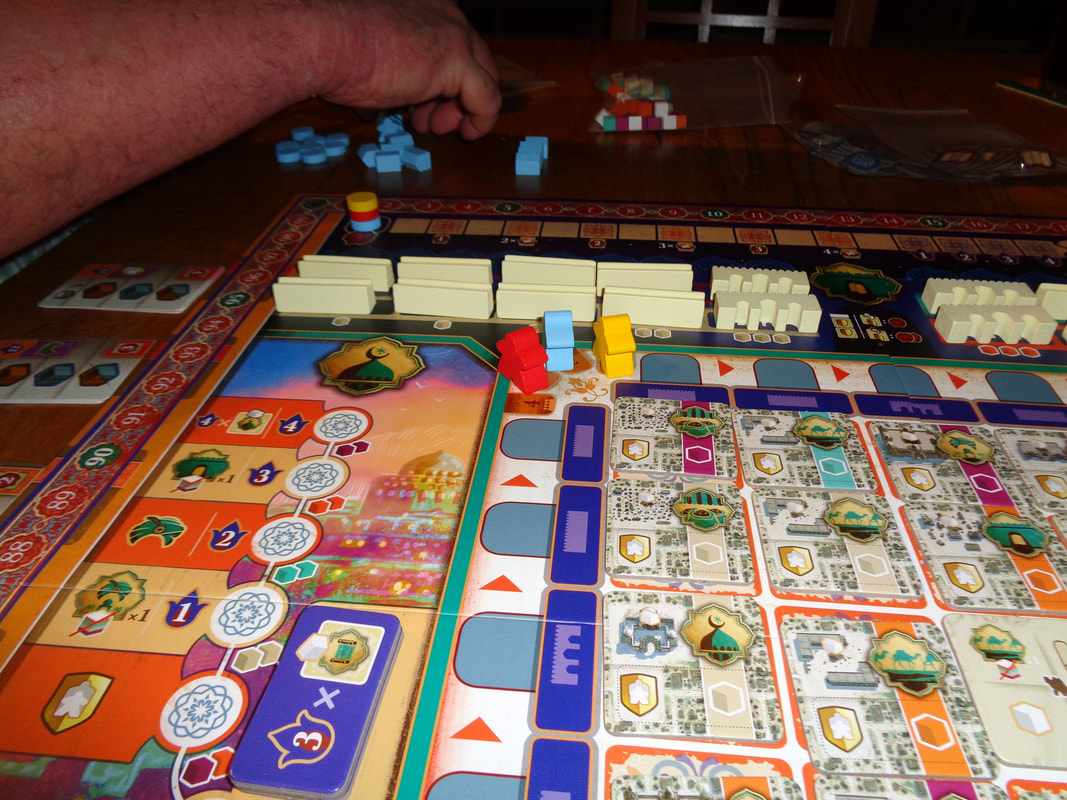
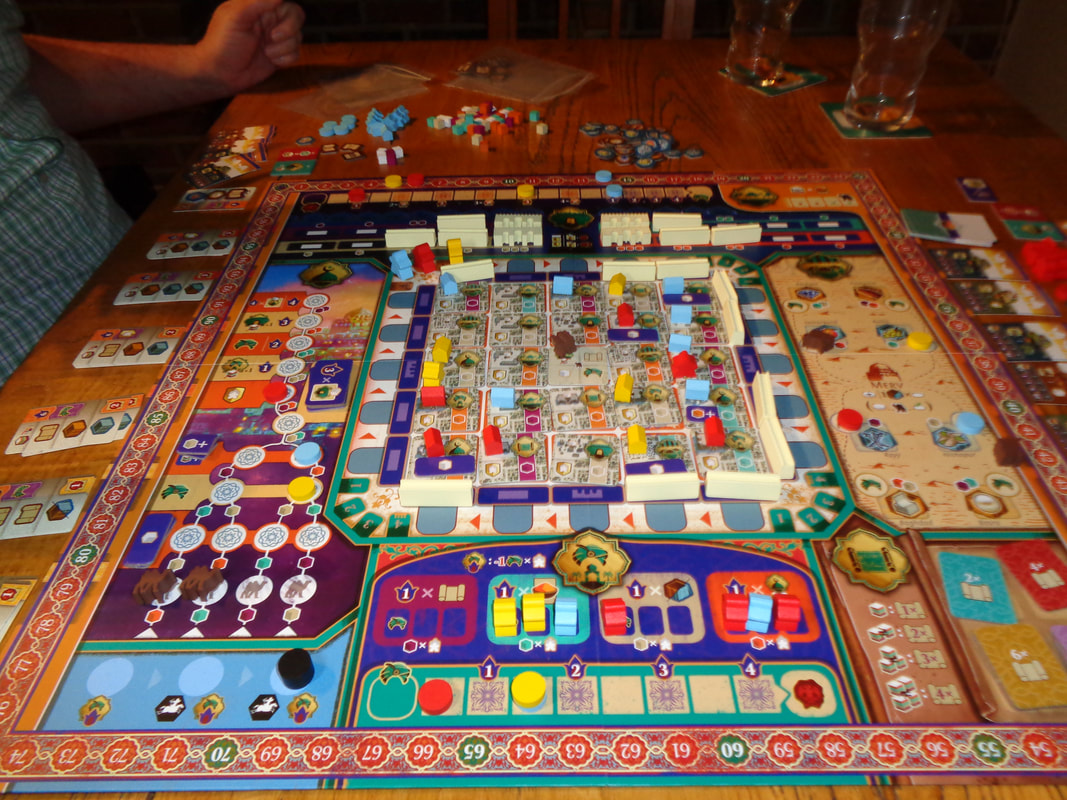
Despite its busyness, the game board is well illustrated and colourful, artwork on cards is also clear and colourful. For the most part the iconography is clear and easy to understand. Unfortunately, this does not extend to the symbols used to represent the game's 6 actions, these were a constant source of confusion and error. For example; the mosque action uses a minaret symbol but actually involves moving camel meeples along a track, but the symbols with camels on it is used to represent the caravansary! Why? Because the caravansary used camels to move spices! However, in game, the caravansary action only is used to get spices and has nothing to do with camels This means that camels are used to represent spices and minarets are used to represent camels! It verges on the ridiculous. It didn't help that all 6 symbols were the same colour so that it matched the colour theme of the board. How's it play? Setup
On to play Merv is played over 3 years and in each year there are 4 rounds, players have 1 action per round, thus 12 actions in total. Taking actions in Merv are quite unusual, play takes place around the 5x5 grid and each round takes place across 1 side of the grid (Starting on the north side.), then in the subsequent round, play moves clockwise to the next side of the grid and so on, so by the 4th round, a complete circuit will have been completed.
Endgame Once the 3rd year is over and has been scored, there is there final scoring to calculate. Sets of caravan cards score points. Points are tallied, highest score wins. Overall
Merv has several approaches to acquiring victory points but resource cubes is key to nearly all of them and the resource cube economy is very important. Acquiring cubes may conflict with choosing actions if the building site a player wants to activate produces cubes of a different colour, players will have to make choices and adapt. Having said that, it pays to diversify but it also pays to pursue one one strategy such as the caravansary or mosque track. Completing contracts feels like more of a bonus for sharp-eyed players than a long-term approach. Players also need to consider palace actions, placing workers into the right spaces in halls and moving along the favour track can be a good source of points. Players will need to also look towards defending Merv from attackers, losing buildings also loses the ability to gain resource cubes in later turns and of course loses victory points for the affected player(s). Merv is definitely on the heavier side of board games, but to be honest it didn't feel deep, just fiddly. I never got the feeling that I was making clever plays, instead I got the feeling that Merv was a heavy game made for the sake of being a heavy game. When I took an action, it often felt like I was doing 2 half actions instead of 1 whole one and it took multiple different actions to achieve something. E.g., I would undertake the marketplace action and acquire a good, Was I able to sell that good? No! What about spices, what if I'd acquired spices? Can't sell them either. To sell something, that is to complete a contract, I needed influence, which earned by building walls and also scrolls, which are acquired by visiting the library. Of course I also needed resources cubes. I know that some people will love this idea but I found it unengaging and a little dull and verging on tedious. Merv feels a little dry, unexciting and detached. 5th September 2021 Sunday night gaming on Board Game Arena continued with New Frontiers. Galaxies: The New Frontier, these are the games of the website of 3 Spellcaster and a Dwarf. Dodgy puns aside, New Frontiers is a sibling-game to Race for the Galaxy and Roll for the Galaxy and shares the same universe. Players will find many similarities between the 3. Caveat: We have only ever played the digital version of New Frontiers What's in a game? Unlike the previously mentioned games, while New Frontiers is a board game, players of the other games will recognise many elements here.
Like its siblings, New Frontiers uses an abundance of symbols and icons which can be daunting for new or inexperienced players. How's it play? Setup
In New Frontiers, turns are carried out according to the turn order as shown on the priority board. Actions are not simultaneous. On their turn, the active player chooses a single action tile and performs the action on it, all other players may follow, in other words also perform that action. However, there is a bonus that only the active player gets for triggering a tile. Each tile can only be used once per round, thus only 1 player benefits from the bonus a tile may confer. Furthermore, actions are actually performed in the order they are selected, there are no numbered phases in New Frontiers. There are 7 actions that can be chosen, most of these will be familiar to players of Race for the Galaxy or Roll for the Galaxy.
Now a new round begins, possibly with a new player order and all the action tiles are now selectable again. Rounds continue until the endgame conditions are met. Endgame Once the endgame is triggered, the current round ends and points are scored. There are 4 ways to trigger the game end. Settlements: A player adds a 7th settled worlds to the game board. Developments: When the 11th or 12th development space on a player's board has been filled with a development. Victory points: When the supply of victory points is depleted. Colonists: When the supply of colonist meeples drops lower than 5. Points come from settled planets and developments bought, some developments offer additional routes to earn point and finally, victory points are counted. Points are tallied, highest score wins! Overall
Players of the previous 2 games will find a lot here instantly familiar. New Frontiers contains the same mix of intricate and mechanical interdependencies between planets and developments that feature in the other two games which allow players to create varied combinations of engine building and combinations. There are a couple of mechanics New Frontiers does differently, particularly the action mechanic, firstly there's no set action order for actions to occur and more importantly, only 1 player can benefit from an action's bonus per round. If a player really needs a bonus action, it can make turn order very important. The existence of a turn order is new as well. When playing New Frontiers, there are a couple of approaches always available to players, building their tableau or acquiring victory point tokens, or maybe getting one of the 9-point developments and working towards exploiting for points in the endgame. However, players will need to adapt to which planets become available to the, as unlike developments which use a drafting mechanic, planet acquisition will be to some degree, random. But here's the thing; the additions New Frontiers brings to the table don't add anything to the game other than extra complexity, there's no extra depth or strategy, just extra resources to manage in place of the hand-as-money mechanic that makes Race for the Galaxy such a good game. Yet somehow, it even seems to have a shorter, less engaging play time? You see, in Race for the Galaxy and Roll for the Galaxy, there are 2 ways to end a game; a player can complete their tableau or deplete the supply of victory tokens, both of which require players to play well or at least fast/better than other players. But in New Frontiers, it's possible to end the game by simply triggering the Settle action multiple times. It felt hugely unsatisfying way for the game to end. Ultimately, New Frontiers is a good game, it has the pedigree of its predecessors, but it's also too familiar and too similar to Race for the Galaxy, which is in my opinion, hands down the better game. I would choose it over New Frontiers every time. 3rd August 2021 Tuesday is here and I'm in Woking with the Woking Gaming Club at The Sovereigns pub for gaming night. The game of the night was Above and Below. Published by the same company who also produce a game called Near and Far. Left and right, up and down, in and out: wiggle it all about, here and there, out and about, Far and Away and Home and Away! Some great suggestions for naming more games! As the name suggest, the players will concerning themselves with the above ground settlement and exploring the caves below the village. What's in a game?
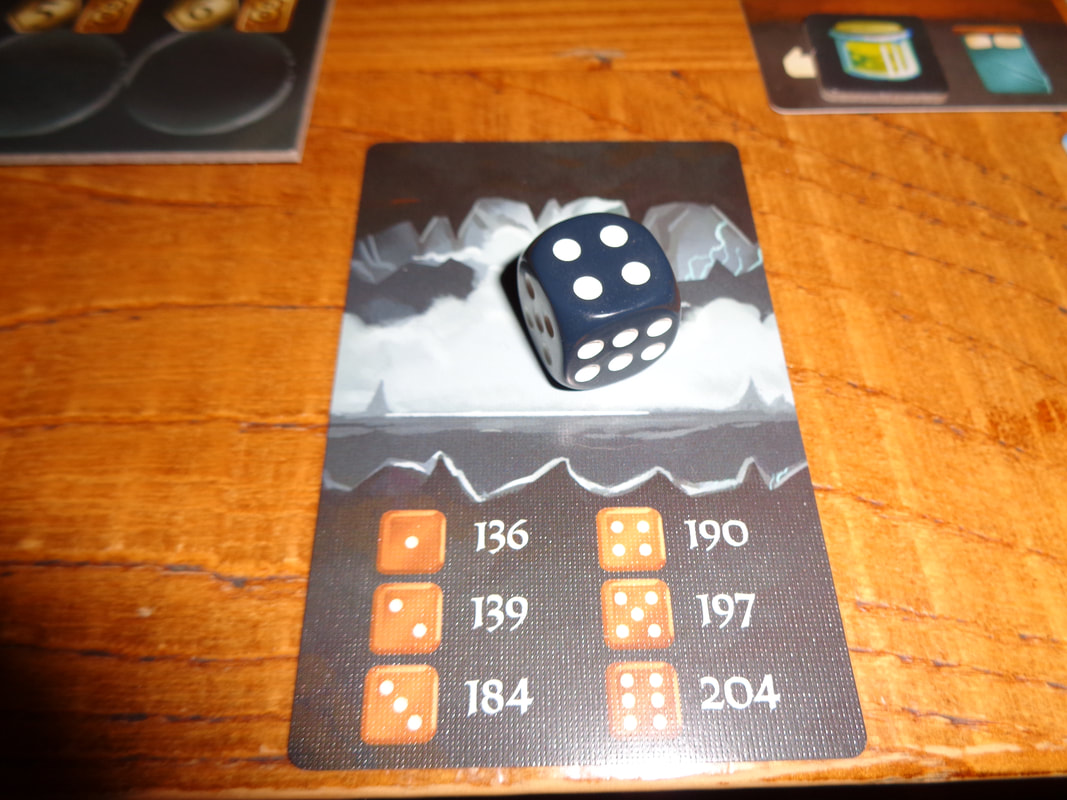
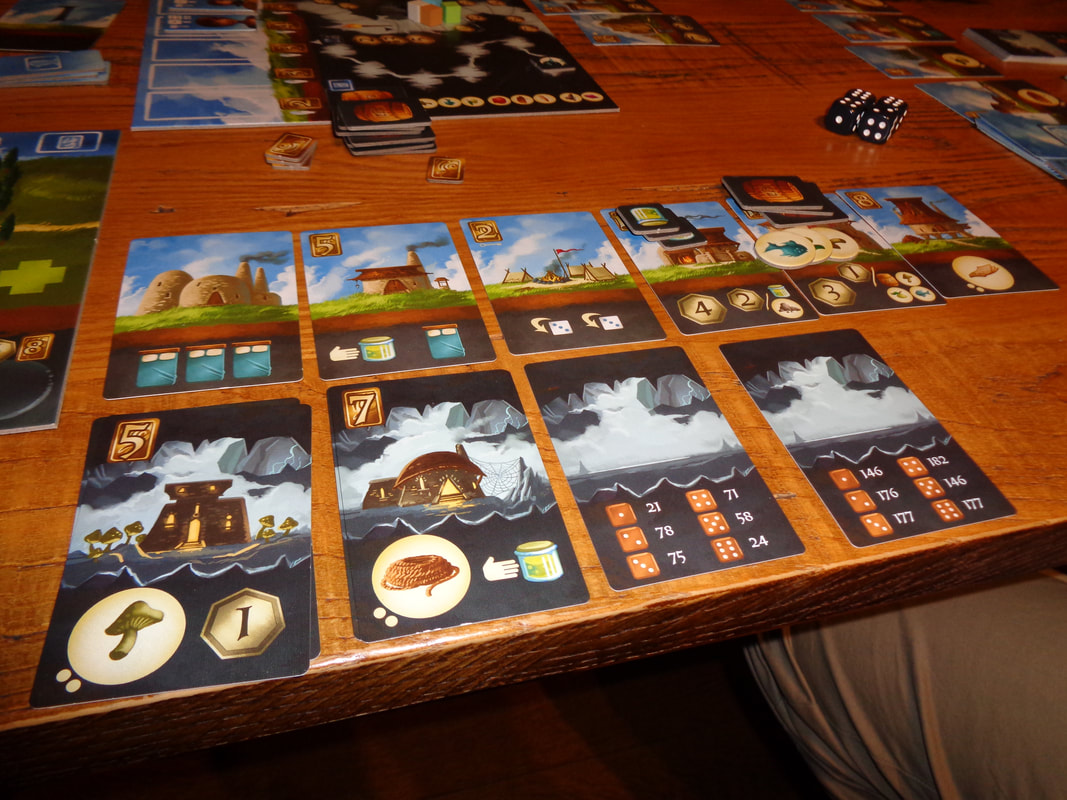
The game makes good use of its cartoony artwork, particularly with the green, grassy landscapes and cloudy blue skies that appear on many of the cards. Buildings and villagers are also well illustrated. Finally, the underground cards have evocative, mildly forbidding artwork. There is little iconography used throughout Above and Below and what there is of it, is easy to comprehend. How's it play? Setup
Beginning with the starting player and going clockwise, each player performs a single action using 1 or more of their villagers, play continues clockwise until all players have used all their available villagers or have passed. After this, the next round begins.
Endgame Once seven rounds are completed, the game goes to scoring, victory points can come from a variety of places. Reputation: Whoever has the highest reputation gets 5 victory points and 2nd place gets 3. Each house and outpost: Regardless of what it is, earns a victory point. House/outpost bonuses: Some houses and outposts will confer additional bonus points, these may be straight up points or situational points, e.g., 1 point per barrel. Advancement tracker: Players earn points for each good on their advancement tracker, depending on where the good is positioned. 2 goods on the 1st space would earn 2 victory points in total, 2 goods on the 8th and final space would earn 12 victory points! The type of good makes no difference here. The advancement tracker can earn a lot of points. Points are tallied, highest score wins. Overall
For the most part, mechanically speaking, Above and Below is a fairly straightforward, unremarkable game. Players use their workers to increase their resources to acquire more workers and buildings create a strategy to earn victory. Pretty standard stuff, not that there's anything wrong with that, no need to reinvent the wheel. Even so, there's some depth here and quite a bit of balancing to perform. There's little good acquiring workers without the ability to rest them which means acquiring buildings with beds instead of other benefits, particularly to ability to acquire goods and so on. This brings us neatly to the merchant track, which is one of the game's two interesting mechanics. Firstly, it more-or-less forces players to diversify in goods in order to reach the higher scoring spots. Secondly, it does something unusual with the game's 8 goods; which is that the rarity of a good has no bearing of it's worth for victory points, position on the track determines a good's worth and this is likely to be different for each player, meaning they may have different priorities for different goods, regardless of rarity. Finally, it gives players a conundrum to navigate: Logically, players will want to put the most common goods on the later, higher scoring spots because, well, there's more of the common goods available to stack up for more points. This means using rarer goods earlier in the track, but rarer goods are harder to come by. So should a player start filling out the merchant track as quickly as possible with whatever they get to reach the later spots? Or should they hold off, hoping to get the scarcer goods and use them to fill the earlier spots. It's an interesting decision to consider. The second interesting mechanic is exploring, Above and Below really stands out from the crowd when exploring the below. The inclusion of a 'lite storytelling' choose-your-own-adventure element with flavour text and all, is both fun and meaningful, presenting players with sometimes story-based choices and risks to take which directly affect what they earn from their exploration. It's cool and a great addition beyond the usual board game fare. It makes Above and Below worth trying. |
AuthorI play, I paint. Archives
March 2024
Categories
All
|


 RSS Feed
