|
7th September 2021 Tuesday evening is here and we're at The Sovereigns with the Woking Gaming Club. The first game of the night was Merv. What's in a game?
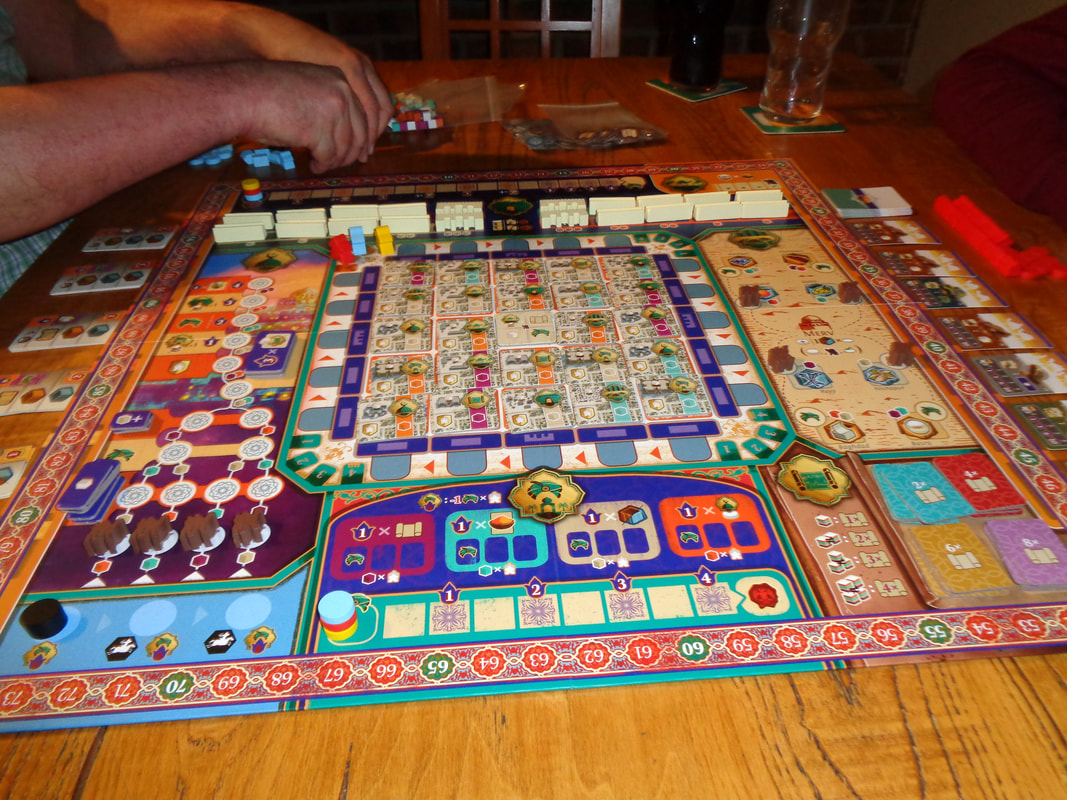
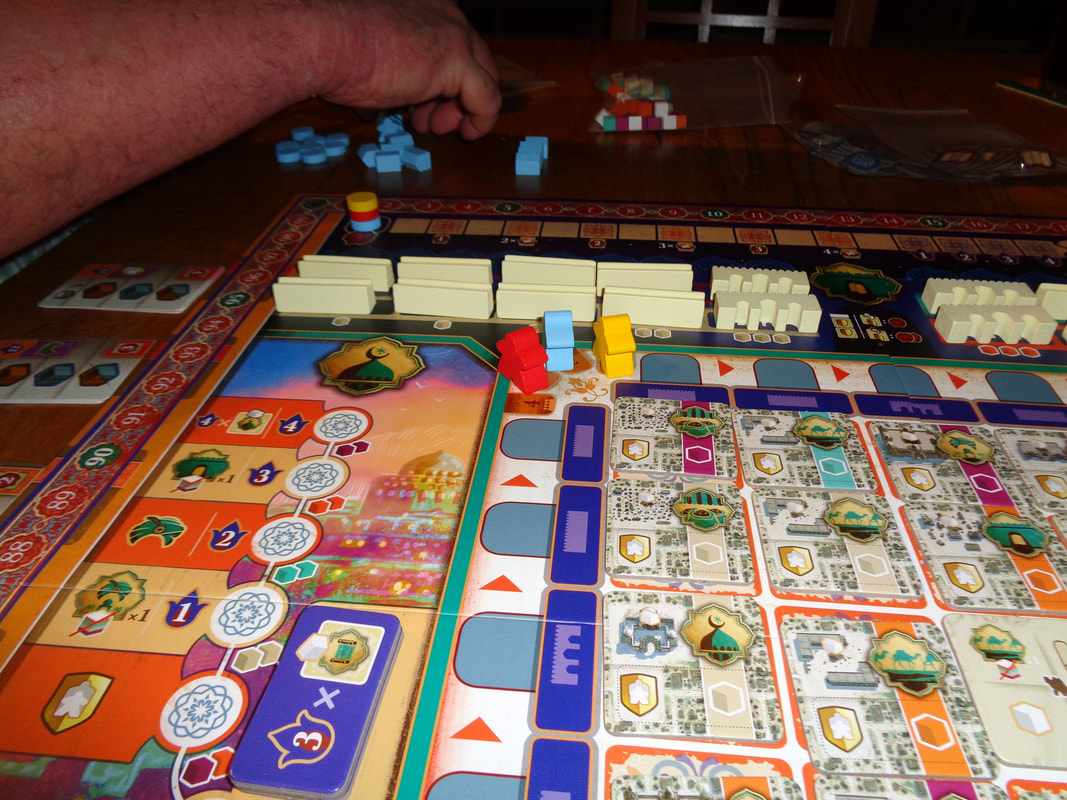
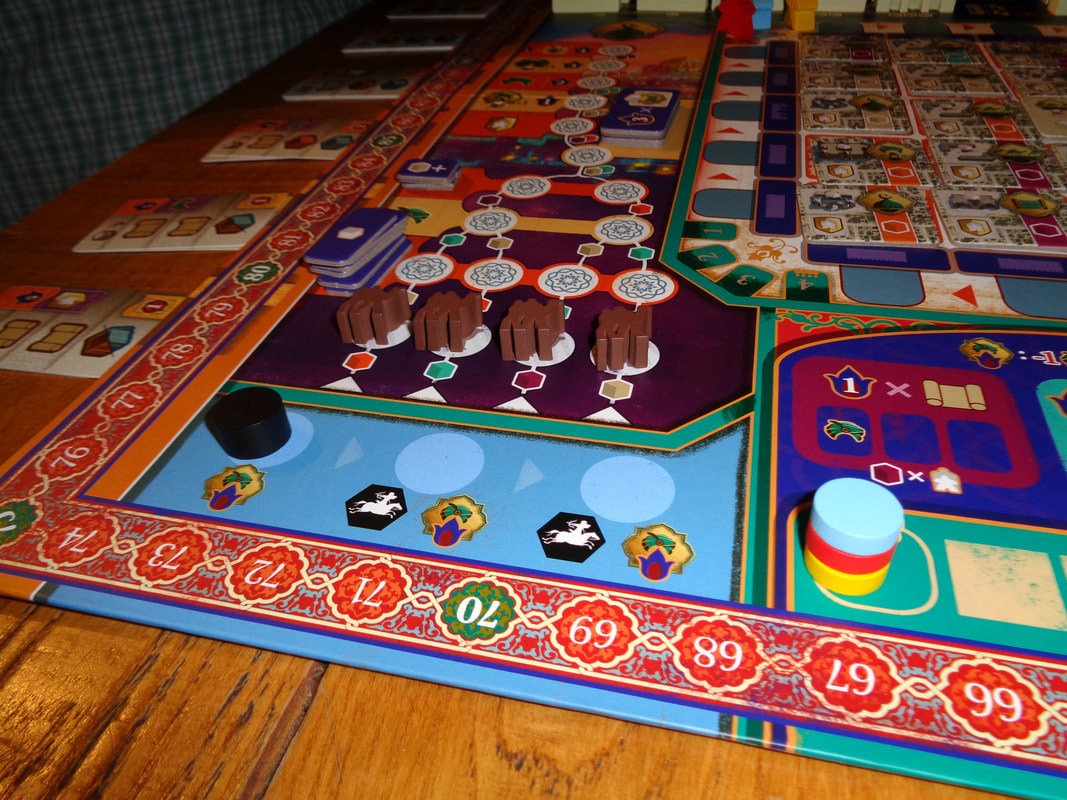
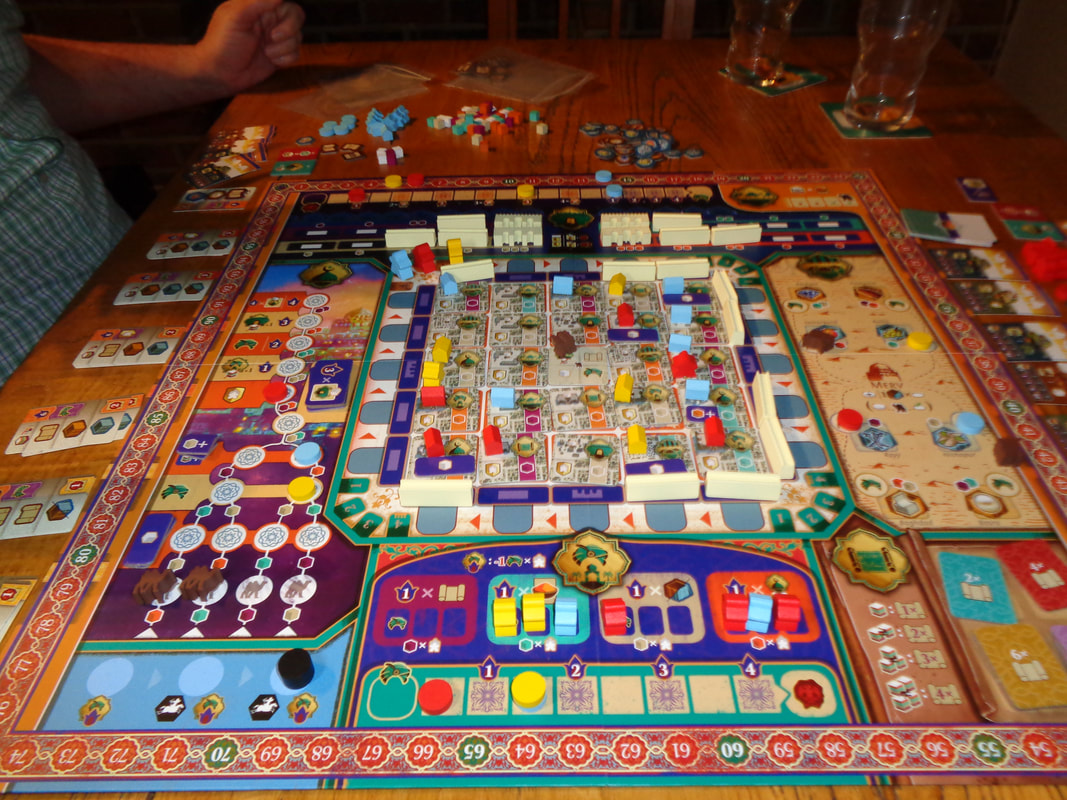
Despite its busyness, the game board is well illustrated and colourful, artwork on cards is also clear and colourful. For the most part the iconography is clear and easy to understand. Unfortunately, this does not extend to the symbols used to represent the game's 6 actions, these were a constant source of confusion and error. For example; the mosque action uses a minaret symbol but actually involves moving camel meeples along a track, but the symbols with camels on it is used to represent the caravansary! Why? Because the caravansary used camels to move spices! However, in game, the caravansary action only is used to get spices and has nothing to do with camels This means that camels are used to represent spices and minarets are used to represent camels! It verges on the ridiculous. It didn't help that all 6 symbols were the same colour so that it matched the colour theme of the board. How's it play? Setup
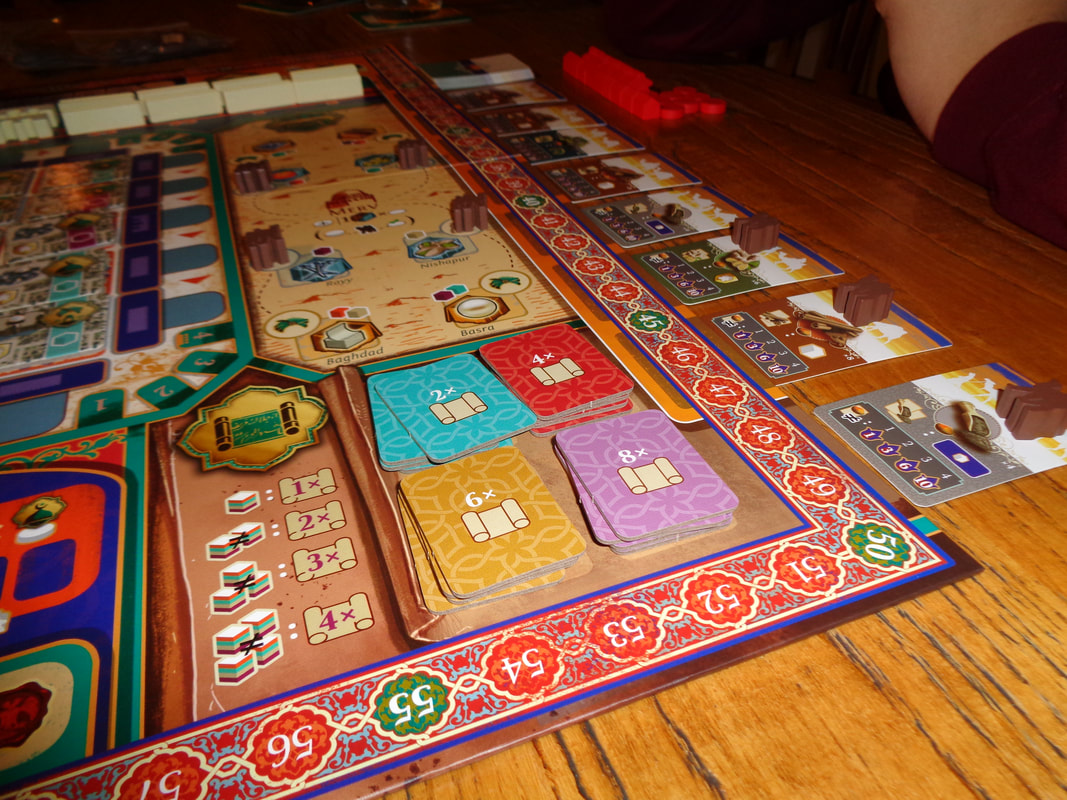
On to play Merv is played over 3 years and in each year there are 4 rounds, players have 1 action per round, thus 12 actions in total. Taking actions in Merv are quite unusual, play takes place around the 5x5 grid and each round takes place across 1 side of the grid (Starting on the north side.), then in the subsequent round, play moves clockwise to the next side of the grid and so on, so by the 4th round, a complete circuit will have been completed.
Endgame Once the 3rd year is over and has been scored, there is there final scoring to calculate. Sets of caravan cards score points. Points are tallied, highest score wins. Overall
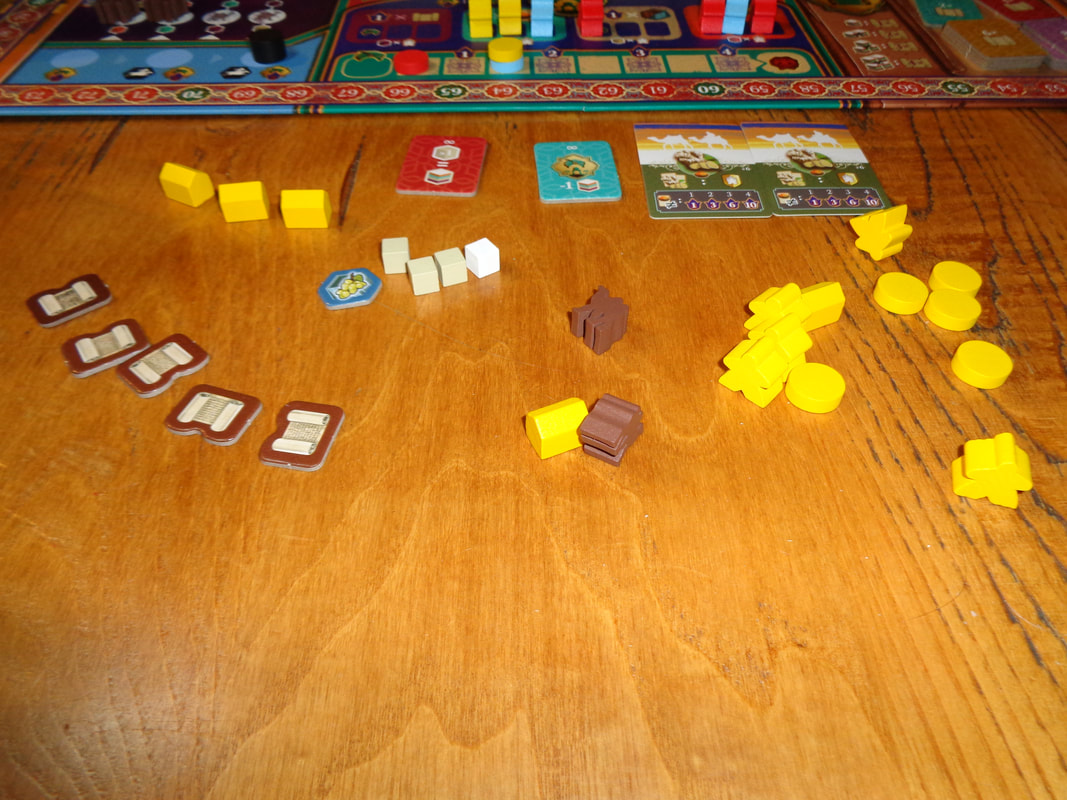
Merv has several approaches to acquiring victory points but resource cubes is key to nearly all of them and the resource cube economy is very important. Acquiring cubes may conflict with choosing actions if the building site a player wants to activate produces cubes of a different colour, players will have to make choices and adapt. Having said that, it pays to diversify but it also pays to pursue one one strategy such as the caravansary or mosque track. Completing contracts feels like more of a bonus for sharp-eyed players than a long-term approach. Players also need to consider palace actions, placing workers into the right spaces in halls and moving along the favour track can be a good source of points. Players will need to also look towards defending Merv from attackers, losing buildings also loses the ability to gain resource cubes in later turns and of course loses victory points for the affected player(s). Merv is definitely on the heavier side of board games, but to be honest it didn't feel deep, just fiddly. I never got the feeling that I was making clever plays, instead I got the feeling that Merv was a heavy game made for the sake of being a heavy game. When I took an action, it often felt like I was doing 2 half actions instead of 1 whole one and it took multiple different actions to achieve something. E.g., I would undertake the marketplace action and acquire a good, Was I able to sell that good? No! What about spices, what if I'd acquired spices? Can't sell them either. To sell something, that is to complete a contract, I needed influence, which earned by building walls and also scrolls, which are acquired by visiting the library. Of course I also needed resources cubes. I know that some people will love this idea but I found it unengaging and a little dull and verging on tedious. Merv feels a little dry, unexciting and detached.
0 Comments
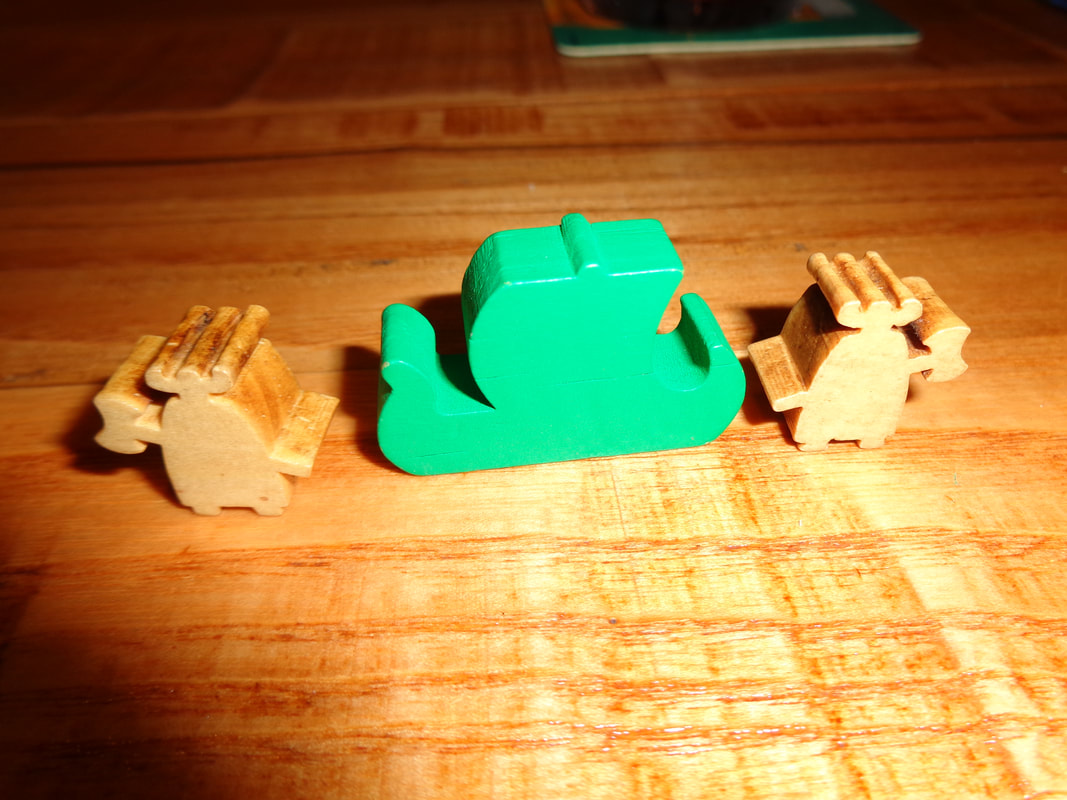
31st August 2021 We're at The Sovereigns in Woking with the Woking Gaming Club for some Tuesday evening gaming. The first game of the night was Raids. Raids is a game about Vikings going around doing what they do, which is raiding and pillaging. What? You say, that's a cliché and Vikings were also explorers, traders, craftsmen and so on, well this game is called Raids, so raiding and pillaging it is; and all for glory! What's in a game?
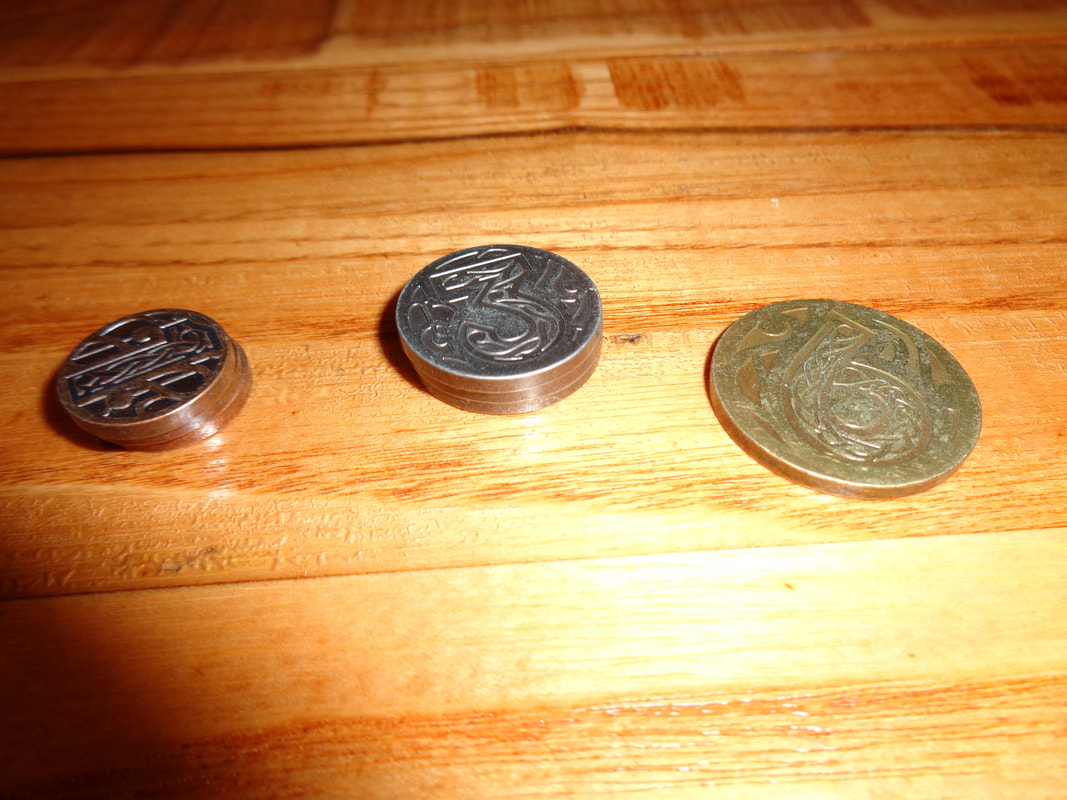
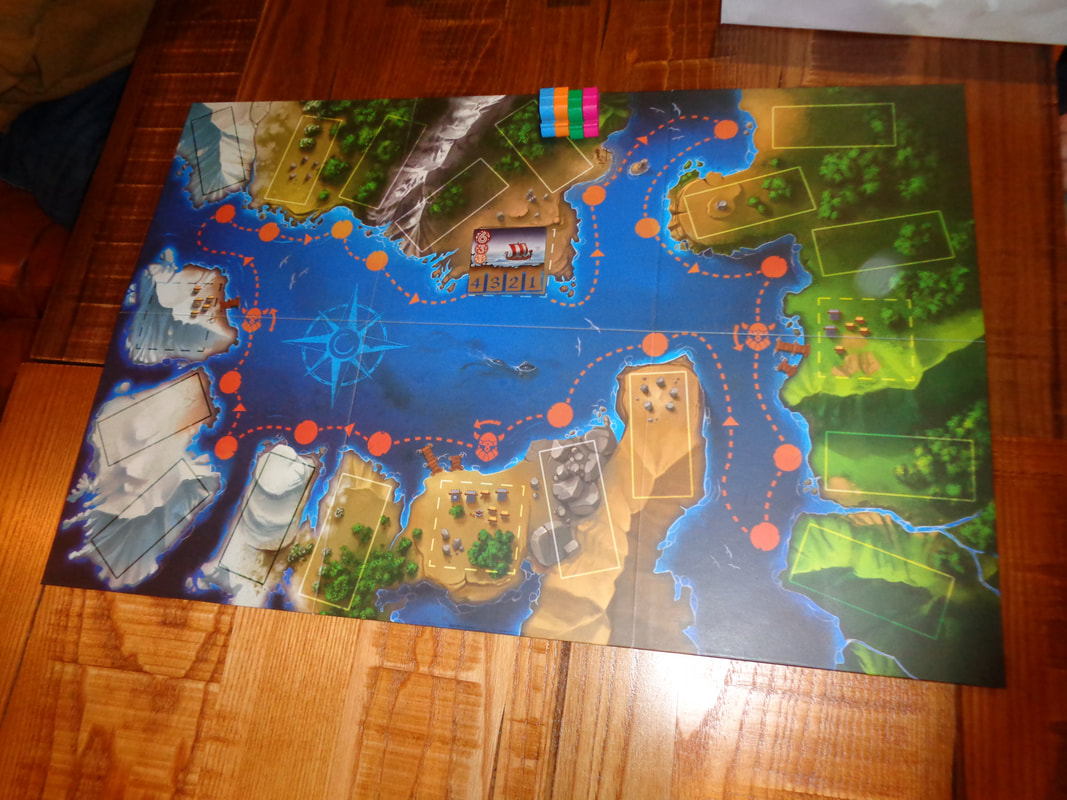
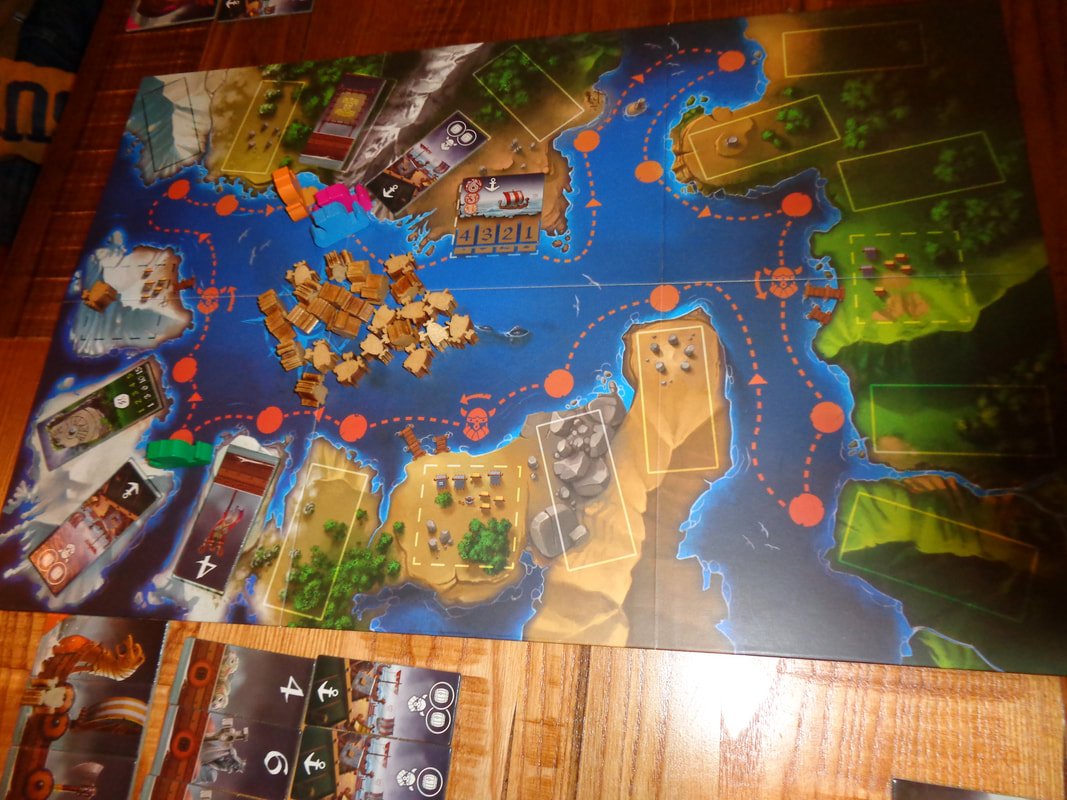
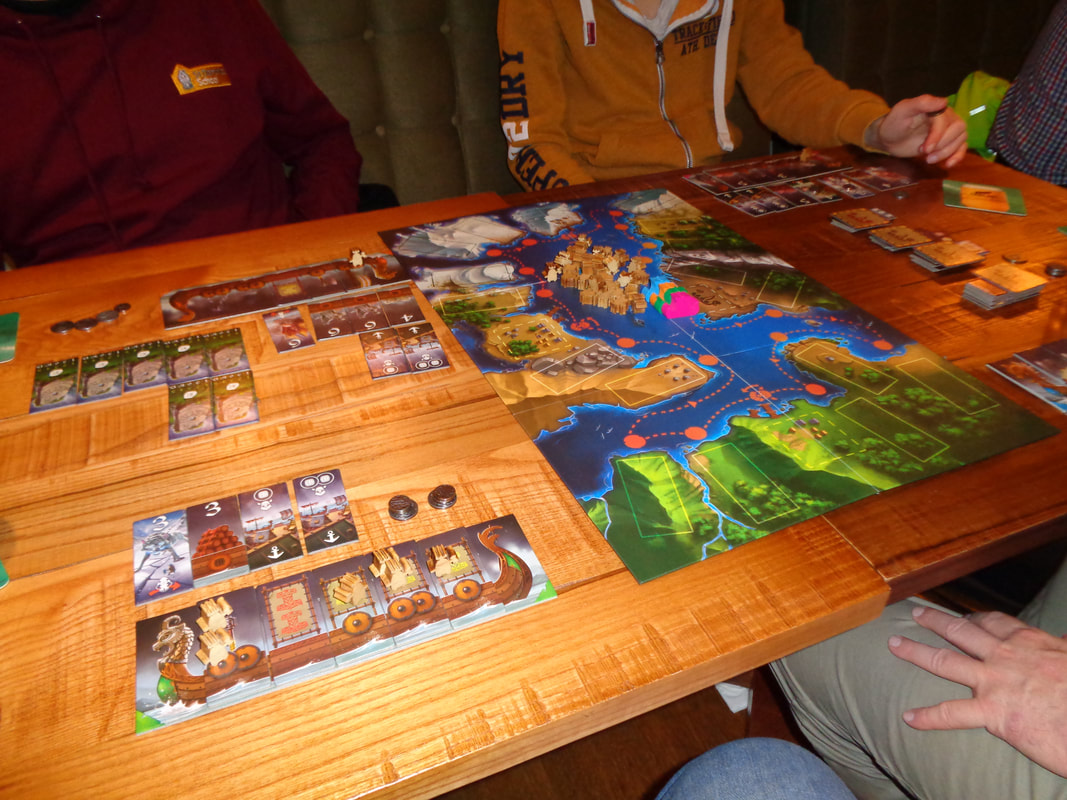
Artwork on the game board is nice and colourful and the longship board are also good, the art on the voyage tiles is a little drab, a little more colour would make them pop but it's only a very minor quibble. There isn't too much iconography in the game and mostly it's very clear what it means. All-in-all, excellent, top notch production values for Raids. How's it play? Setup
Raids is played over 4 voyages which each involve journeying around the game board. During these voyages, the players will stop at the randomly placed voyage tiles and deal with those encounters.
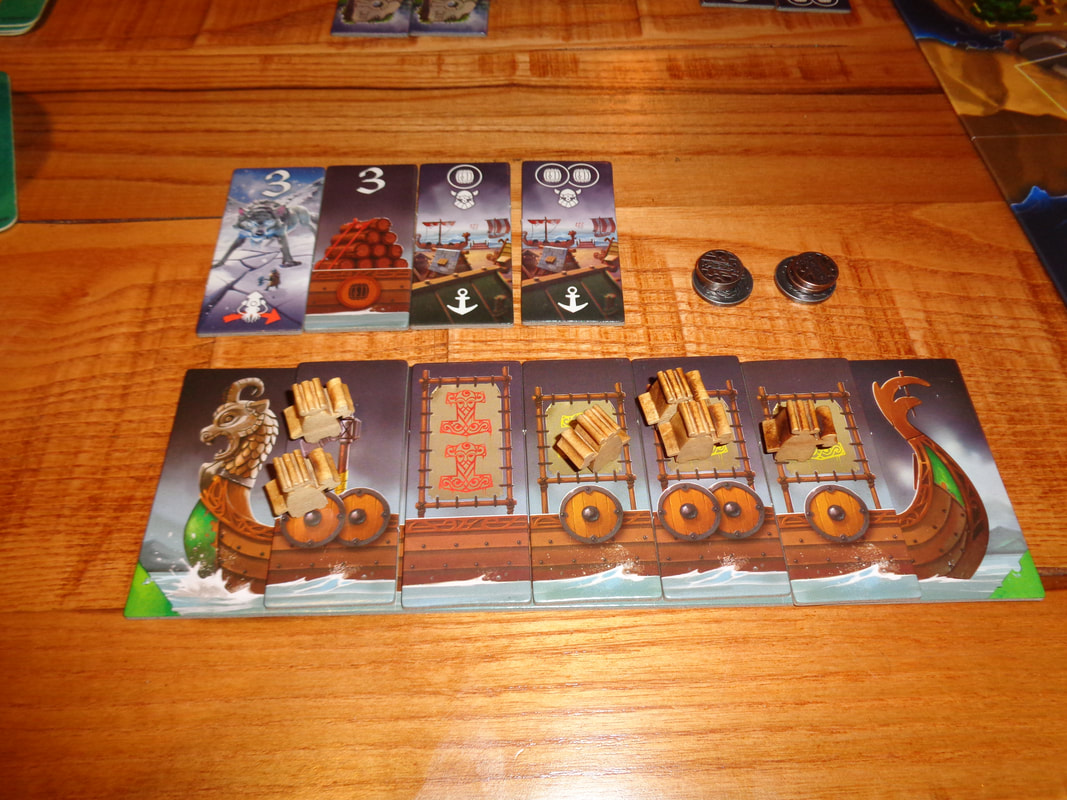
Endgame Play continues until all players have completed the 4th voyage, then scores are calculated. Players can earn Glory points from a number of sources. Pennant tiles on a player's Longship earns straight up Glory points. Hammer tiles on a Longship earn points per Viking also on the Longship. Goods tiles that have been traded earn Glory Points. Sets of Rune tiles collected earn points accordingly. Monsters defeated earn points. Finally, cash accumulated during the game earn Glory points on a 1-to-1 basis. All points are tallied, Highest score wins. Overall
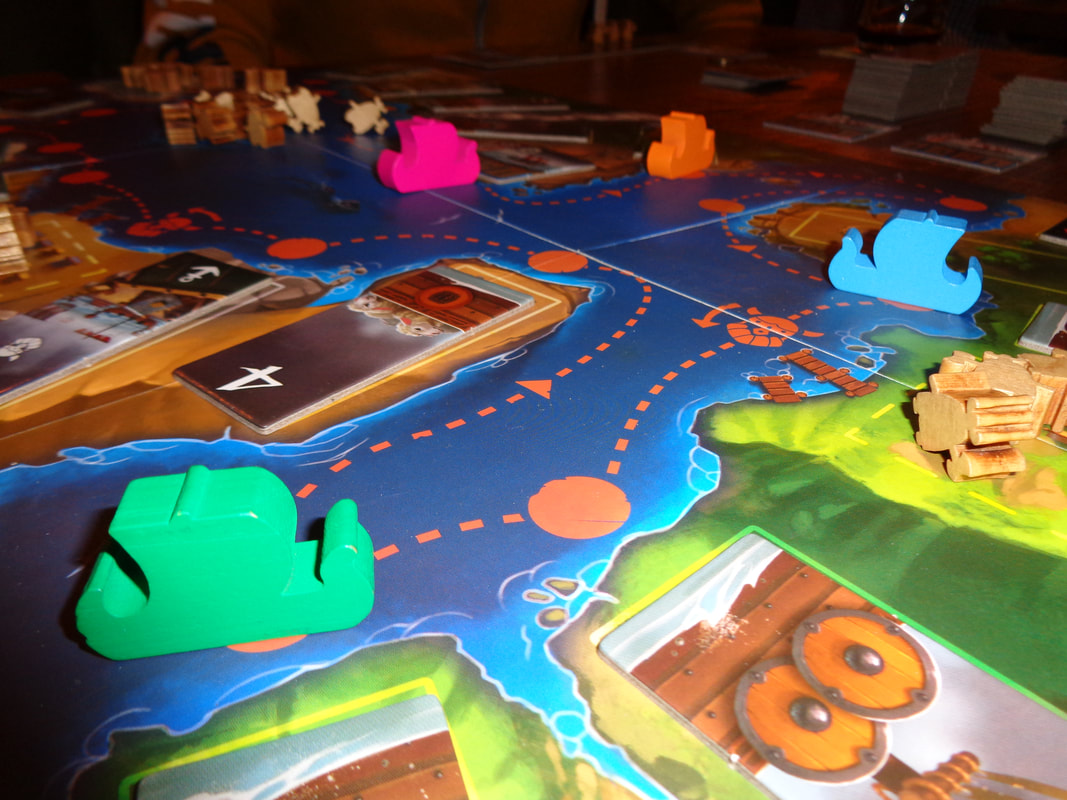
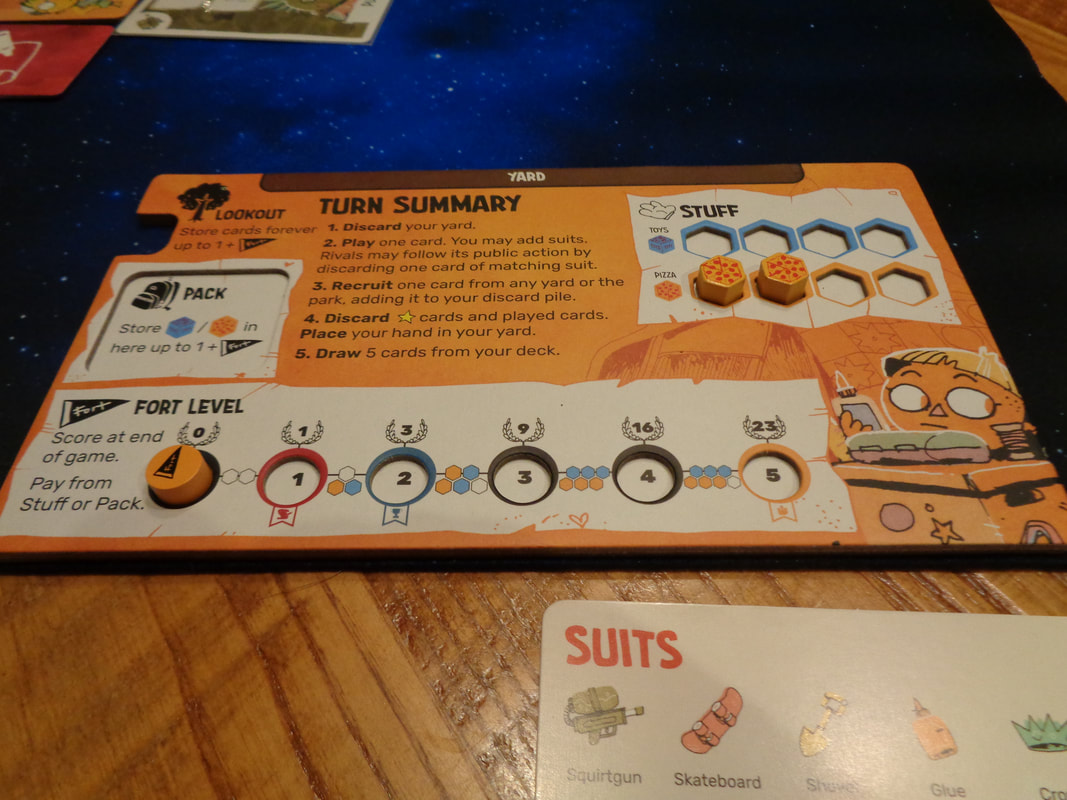
Travelling around the map, players will faced with a central choice on deciding how far to move their Longship? Should a player move slowly to encounter more tiles or rush ahead to a tile they really want? This is of course contextual and players will have to identify what they need and prioritise accordingly. They'll also have to keep an eye out for the behaviour of other players and want to gauge their motivations. The rule where players can only collect tiles at the start of their turn slots into this nicely, possibly allowing other players to fight for the tile and keeping the situation tense. A worker placement game that allows workers to drive off other workers! I also like how the Longship board works, merging aesthetics and mechanics. It's a great visual representation of what players are carrying and crew limitations. The game is in essence a mid-to-light worker placement game with a touch of auctioning and resource management mechanics. Raids fits its Viking theme reasonably well as players sail around, trading and plundering while battling mythic beasts and each other. Having said that, I found the game a little unengaging, maybe a little too abstract. I could sail pretty much anywhere I wanted with generally minimal risk, it never felt like epic adventuring. Combat was fairly rare, mostly players didn't complete too much for the same resources but it felt bland, a quick glance at other player's Viking meeples will tell you if you can be beat them or not and at what cost. I'm also a little uncertain of how much replayability Raids has. Even though it has random placement for the encounter tiles, because they're not really interdependent on each other, it felt like it didn't matter the order in which you might encounter them, especially since I could sail as far as I wanted. I don't think Raids is a bad game, if someone wanted to play it, I'd have no problem joining in (But not too often!), but it's not a game I'd pick. 10th August 2021 We're with the Woking Gaming Club for board gaming night at The Sovereigns in Woking for the second and final game of the evening. So apparently, if you're a kid, the most important things to you, other than building a fort, is pizza and toys. Welcome to Fort, a game about very fickle personal relationships! What's in a game?
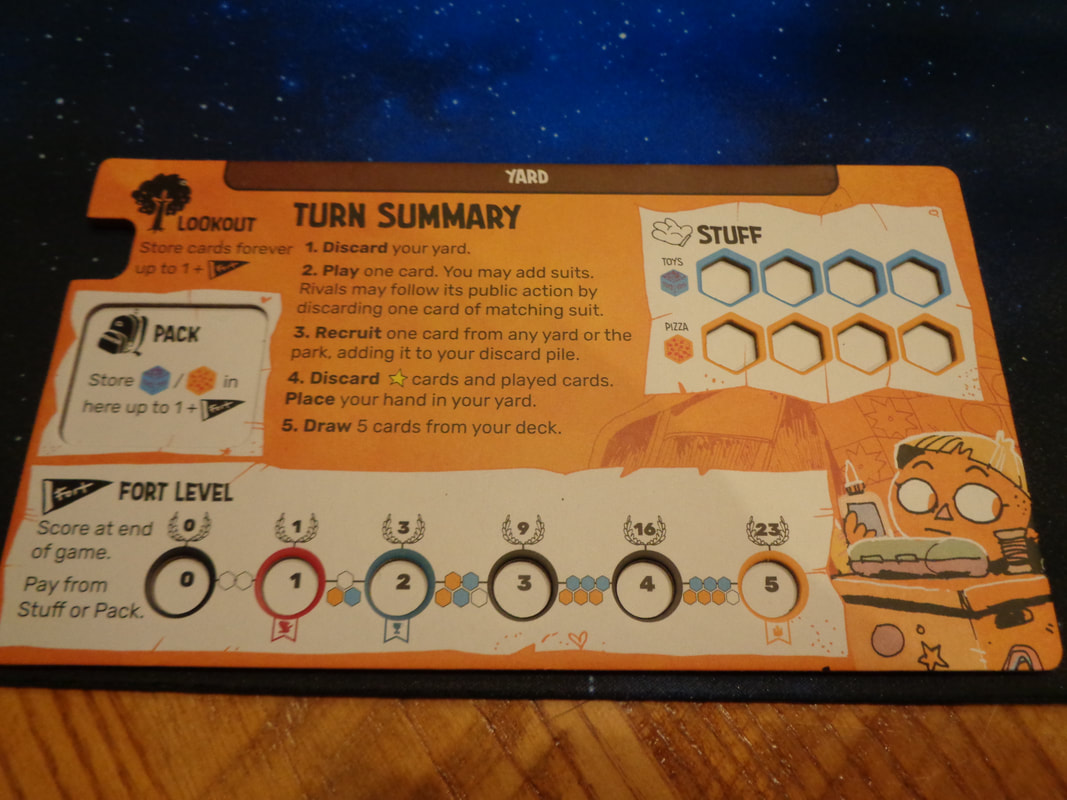
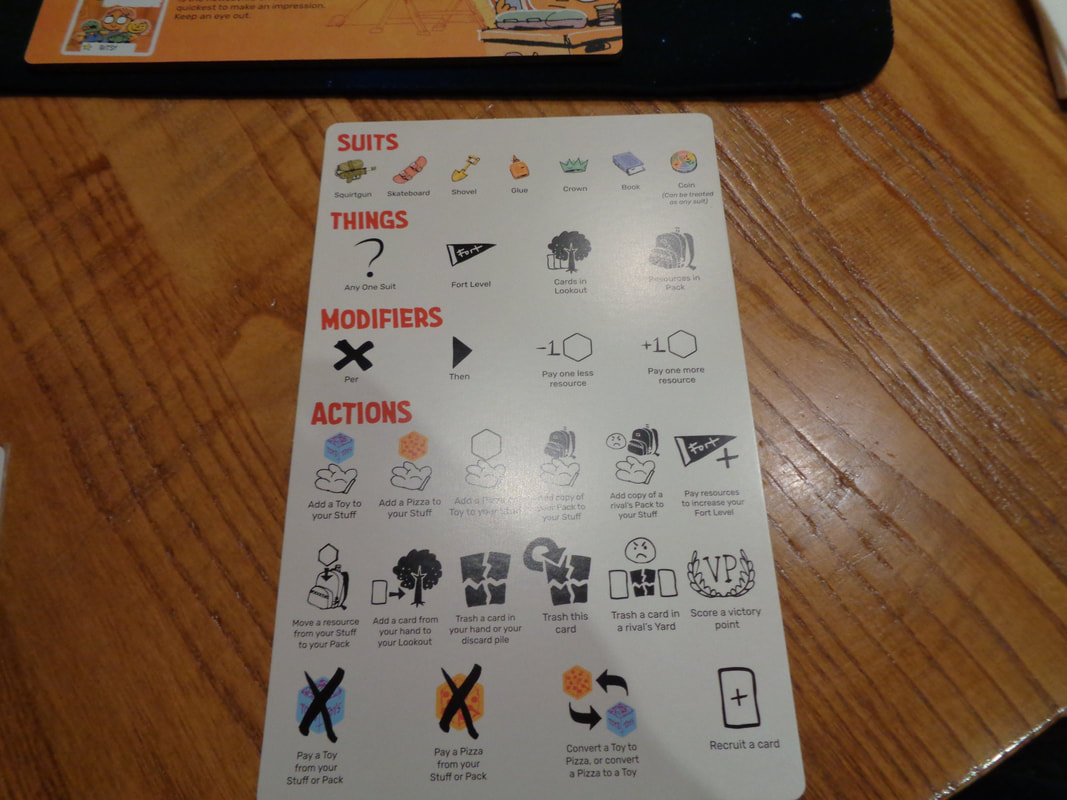
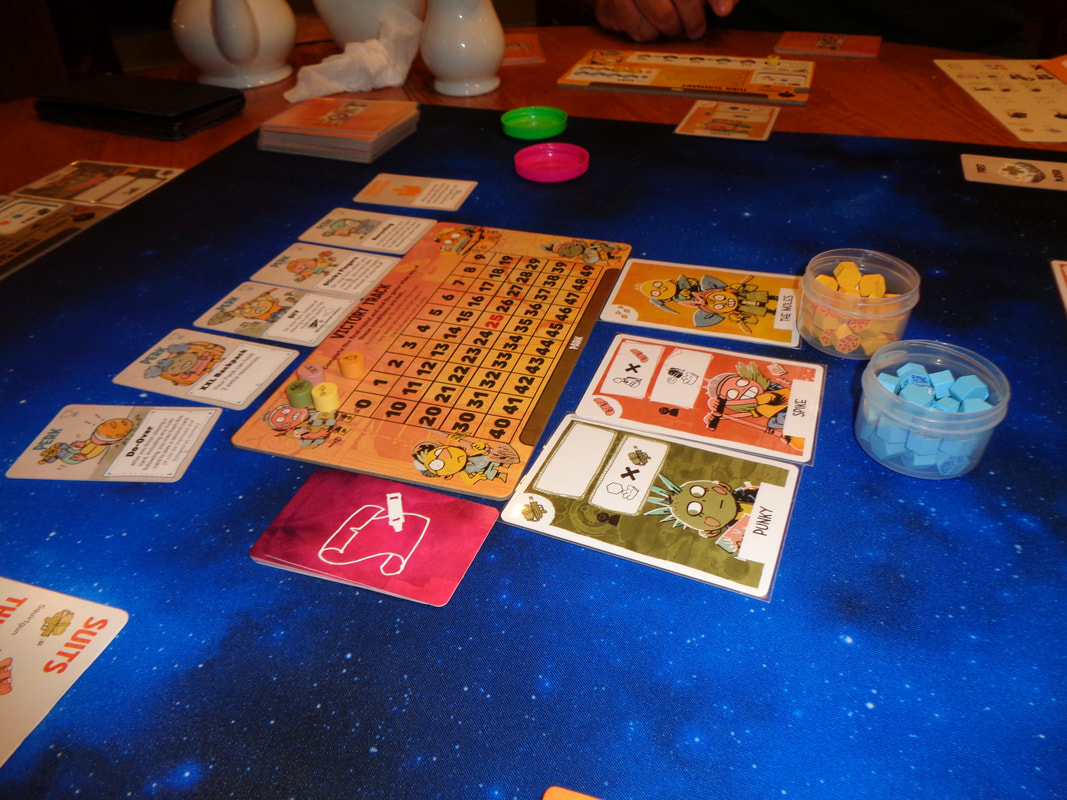
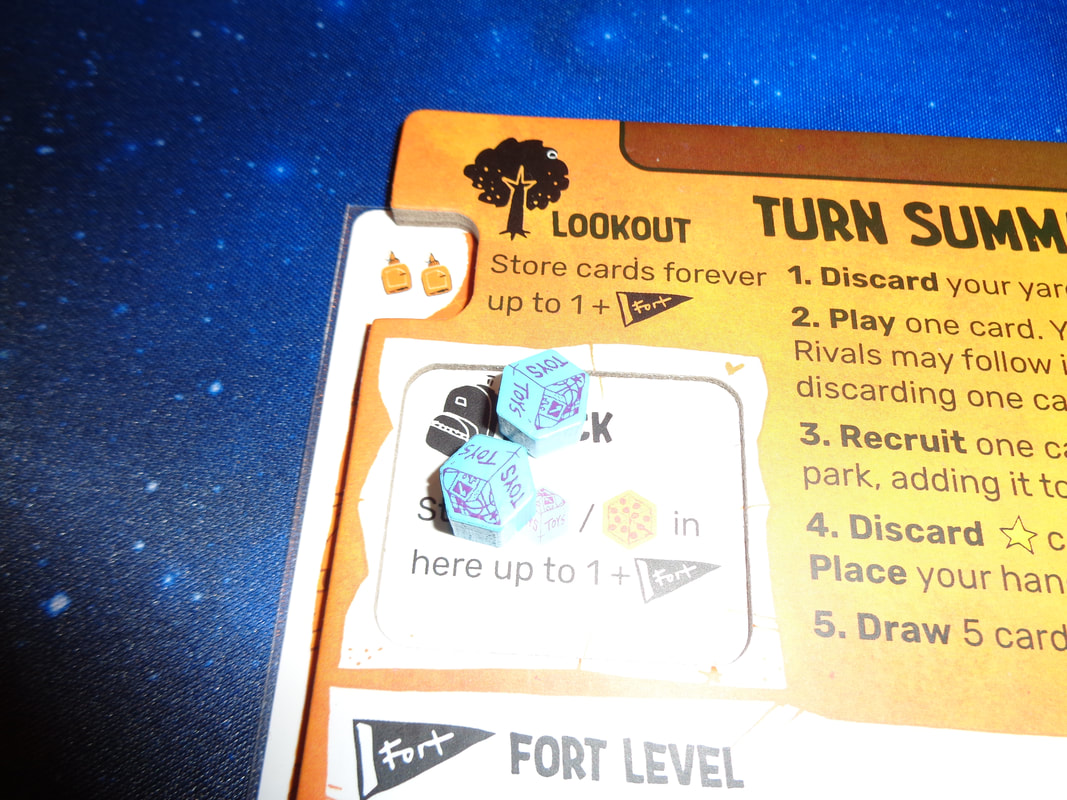
The cards and boards are pretty standard, normal quality components, what you'd expect from a modern game. The tokens are anything but average, big, chunky and colourful, they're a great addition to the game. Stylised child-like art is used throughout Fort to decorate its cards and components, normally against a plain but colourful background, fairly effective art in my opinion. Fort uses a lot of iconography; between the 7 suits on the cards and a plethora of symbols for card actions, there quite a lot to remember and the stylised art used for icons isn't always instantly clear. It's not a gamebreaker by any means but it does add to the learning curve. How's it play? Setup
On to play A round is pretty standard in Fort, the active player plays a card and the other players react. Then the player to the left becomes the active player.
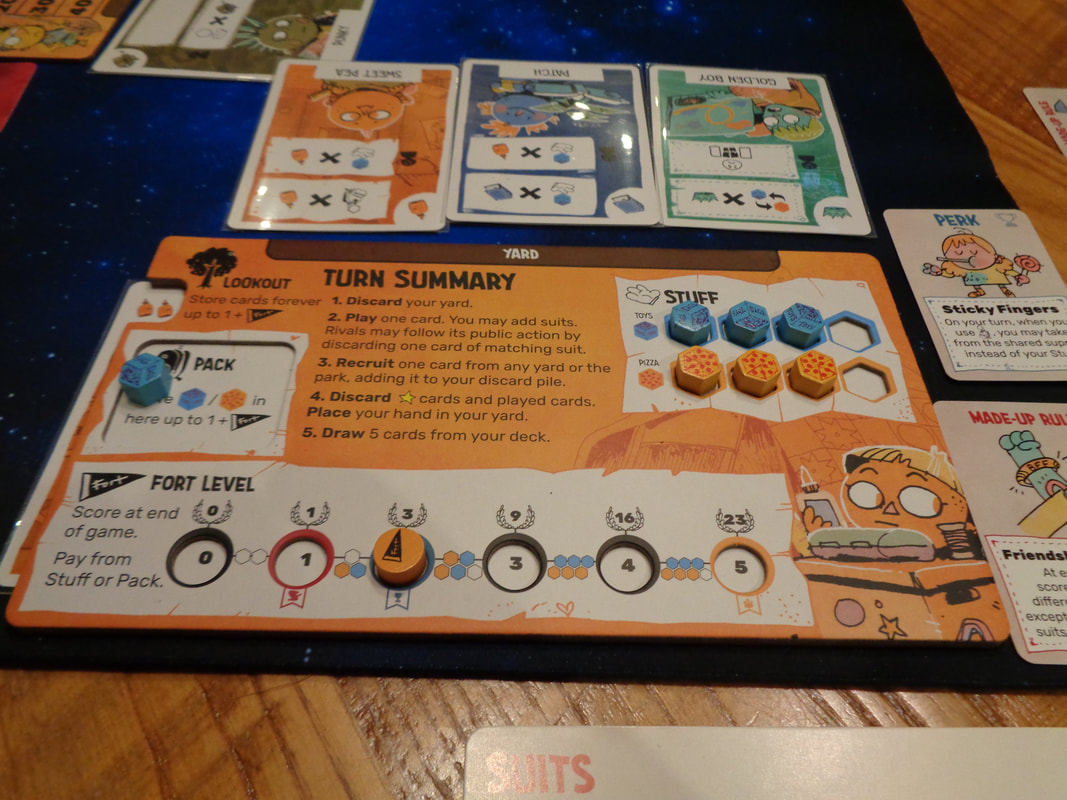
Endgame There are 3 ways the endgame can be triggered. If the park deck is depleted. If any player reaches 25 or higher on the victory track. If any player reaches fort level 5, they acquire the Macaroni Sculpture Card. Once one of these criteria have been met, the current round is completed. Points can come the victory track, fort level, made up rule cards and the Macaroni Sculpture Card. Points are tallied, highest score wins. Overall
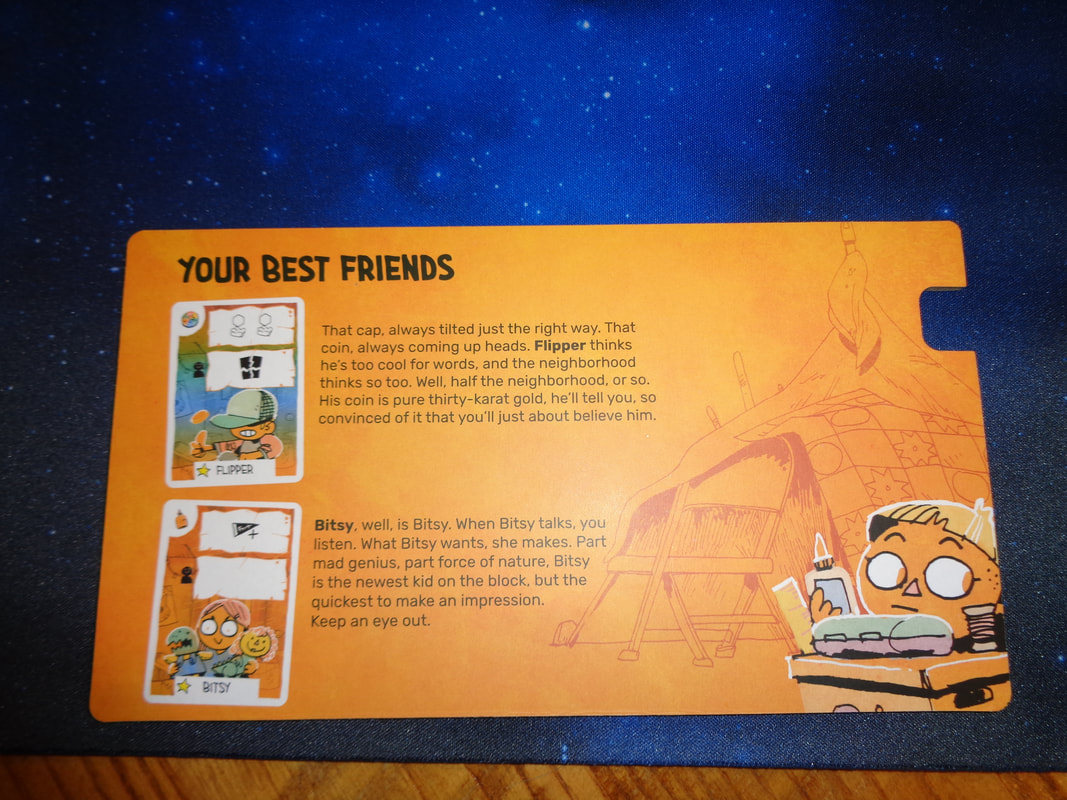
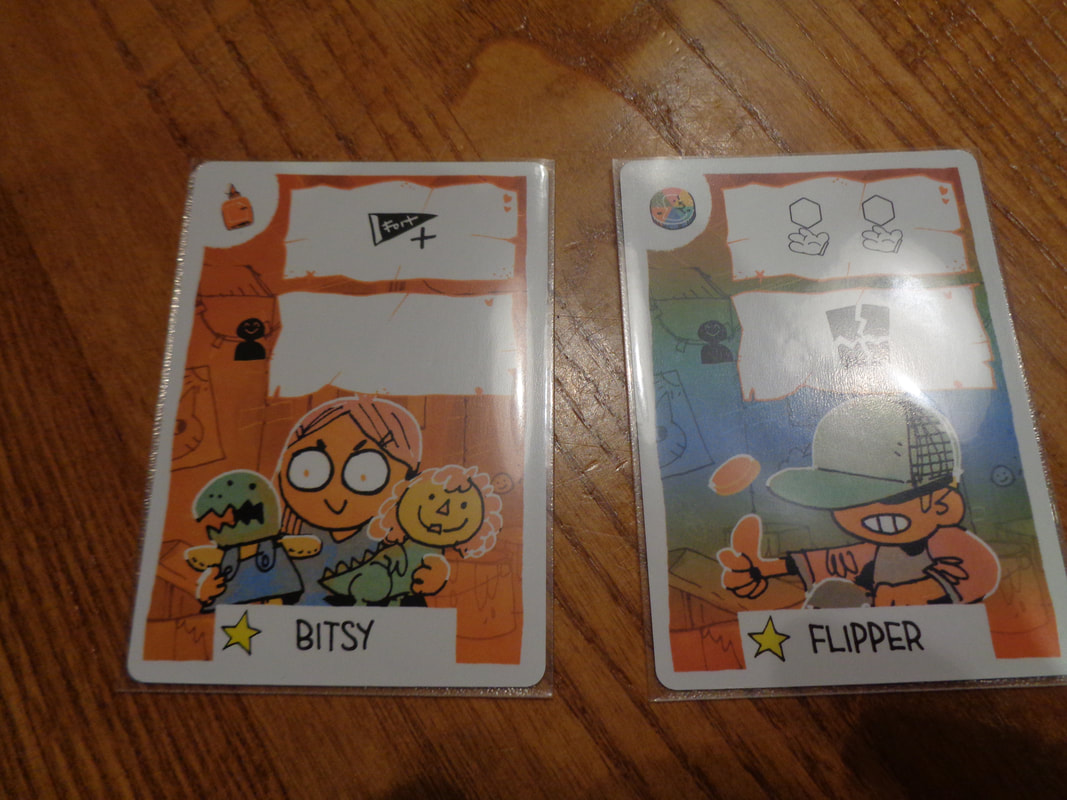
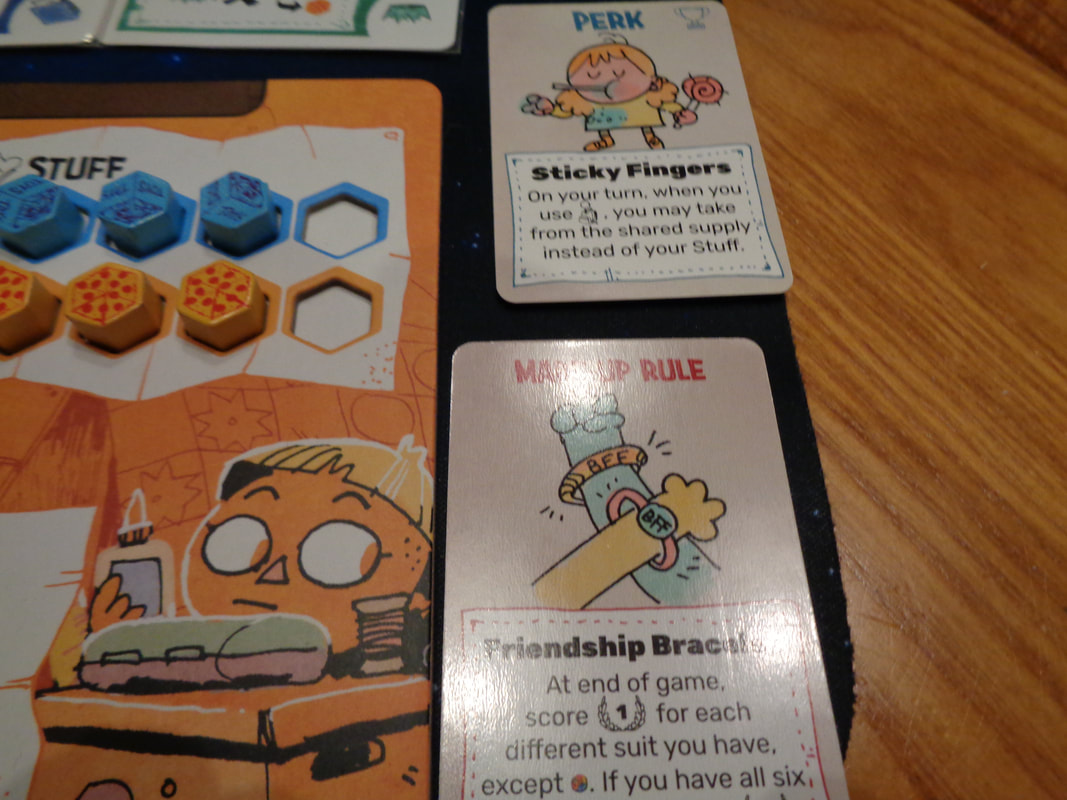
The central theme and premise behind Fort is quite clever and charming. That is that friend cards are literally friends: Don't play a friend card, then that friend may go hang out with another player, although best friends are always loyal and more potential friends may be found at the park. Building a fort is of paramount importance as are pizzas and toys. Halcyon days! Fort blends together a bit of deck-building and a bit of drafting. Broadly speaking it provides players with the choice of performing actions to increase their victory points, or build up their fort. One provides points towards winning and the other confers benefits which hopefully helps later on. Another very important strategy here is to watch what other players put into their yards, some vulture-like scavenging may net the sharp-eyed player's a useful card, simultaneously denying another player of it. Thus players will also want to play as many of their 5 cards as possible, minimising the risk of losing friends. The better combos a player can generate, the more cards they can play. But despite this, I found Fort a finicky game to play, there's lots of suits to remember, somewhat indecipherable iconography to navigate and occasionally overly-complex actions to comprehend. The rule about having to fully complete an action in order to perform it all was a sticking point for me. I'm sure it's there's for balancing or a legitimate reason, but it felt so unnecessary and counter-intuitive. It's frustrating being unable to use a card because it's too powerful and having to discard it into the yard, only to watch another player snatch it up. It turns Fort from what could have been light, breezy and quick, into slow, pedestrian grind instead. Fort is a mechanically sound game with a strong theme and great presentation but somehow becomes a forgettable experience. 1st August 2021 Sunday night gaming on Board Game Arena has come to a conclusion. The last game of the evening was Via Magica. Via Magica - the magic way, what is the magic way? Turns out it's a game of errr.... bingo? Not just bingo, but bingo very loosely inspired by Harry Potter. Players take the role of a student of magic looking to earn their Certificate of Sorcery, this is done by collecting macguffins to open magical portals; the titular Via Magica. Caveat: We have only ever played Via Magica online. What's in a game?
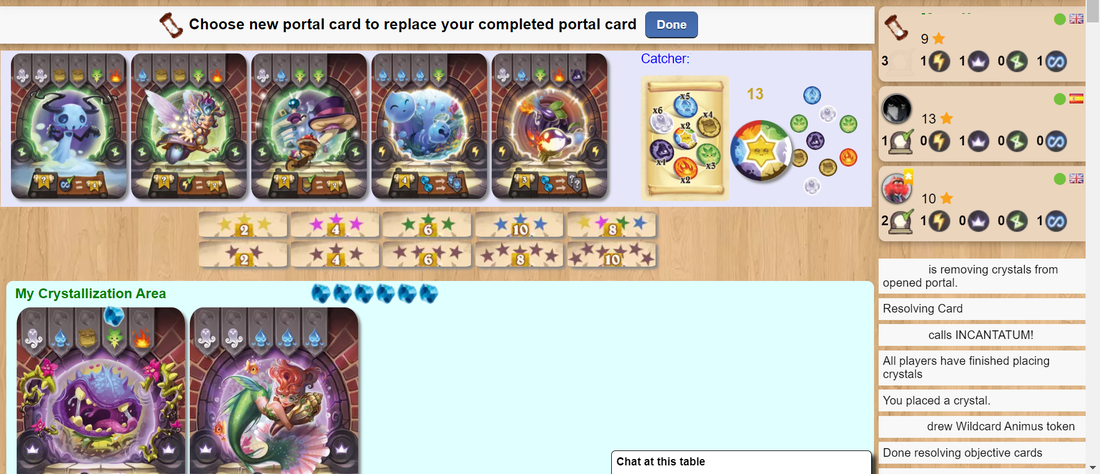
The artwork on cards in Via Magica is universally good; cheerfully brash and colourfully cartoonish characters dominate the cards. The animus tokens are also bright and colourful. The game's iconography is easy to read. How's it play? Setup
On to play In Via Magica, all players act simultaneously after the active player who assumes the role of Catcher, which is a fancy name for a bingo caller, draws a token.
Play proceeds until a player has activated a 7th portal card. Players now calculate at all the victory points their portal cards confer, end of game bonuses they earn and points acquired from bonus tiles. All scores are tallied, highest score wins. Overall
There's no denying it, Via Magica is bingo, the manual says as much. The portal cards are bingo cards and the animus tokens are bingo balls, the twist though, is that whilst there are only 7 'numbers', the odds of them coming up are heavily skewed and is what adds a scintilla of much needed depth to the game. Portal cards with more than 1 or 2 rare openings will generally be much harder to complete, it also means that players should complete the 'rarer' spaces first if they get wildcards. Additionally, there is a little bit of strategy when using some of the lower cost cards; once a player starts a card, they'll generally want to finish it, as a consequence, quite often there's no decision to be made and players will concentrate on the card they started if they can. However, since players initially have 7 crystals, they'll always have at least 1 surplus crystal (Provided they are only 'going' for 1 card a a time that is.), 'loading' a lower cost card with surplus crystals can prove when a draw goes against the player, allowing them to switch a crystal round to a secondary card which may prove beneficial. Initial and later card drafts will prove important, the basic dichotomy is choosing between point scoring cards and special ability cards, as well as quick-to-complete lower cost cards and higher value more costly ones. During play, we found that picking the highest cost cards seemed to be the most successful approach. Ultimately though, this is a game of luck and luck will be the biggest factor. Obviously Via Magica has little to engage players of heavier games and personally I found it an unabsorbing experience. It's unlikely that I'm the target audience though, the simplicity and bingo theme of Via Magica clearly makes it a crossover game that is accessible enough to appeal to non-gamers and which they will find easy to learn. 25th July 2021 Sunday gaming on Board Game Arena continued with our next game. If Esther Rantzen ever made board games, it probably wouldn't be this one, for starters, there's no dog that says 'sausages'! Caveat: We have only ever played That's Life! digitally online. What's in a game? That's Life! is all about travelling along a route consisting of a series of randomly placed hexagonal tiles, where the bad ones outweigh the good ones, generally trying to manage those bad situations with a bit of luck and occasionally encountering generosity or greed. Maybe that really is what life is all about?
How's it play? Setup
On to play The goal in That's Life! is to journey to the game's end, acquiring those scoring tiles as you go while trying to avoiding those minus tiles. How's this done?
Endgame Play continues until all players' meeples have crossed the finish line. Each lucky tile acquired by a player can now used to convert the score from a minus tile into a plus, then all points are tallied, highest score wins. Overall
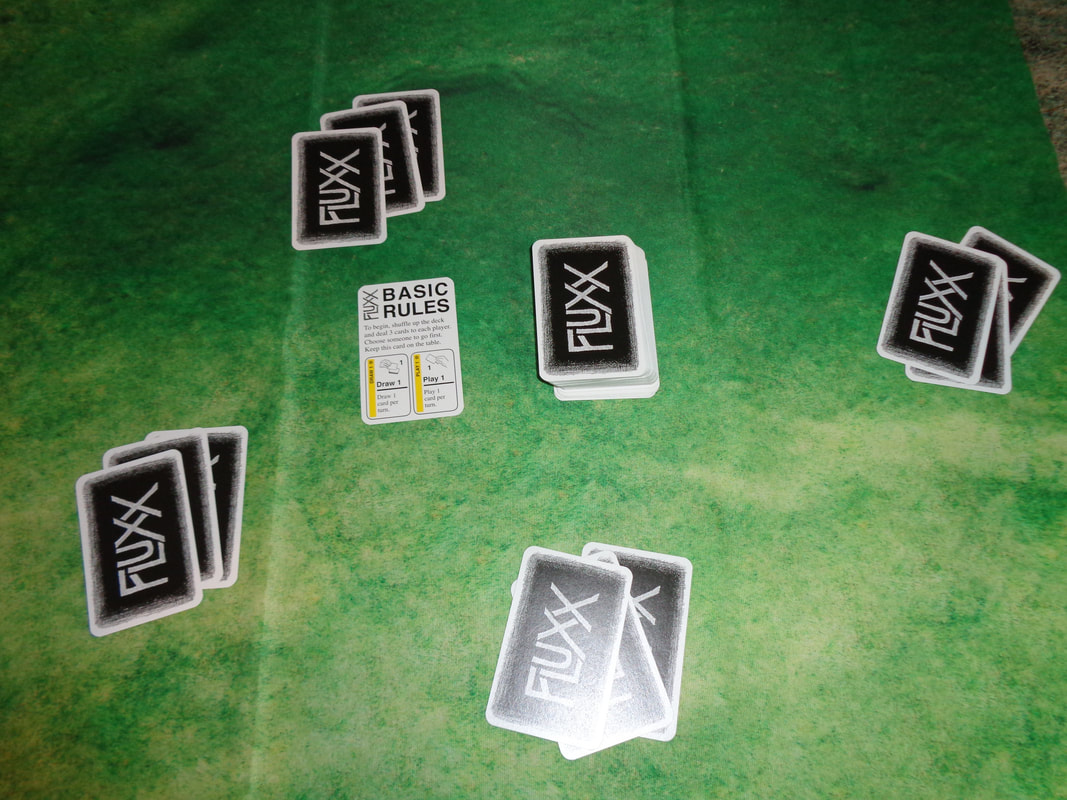
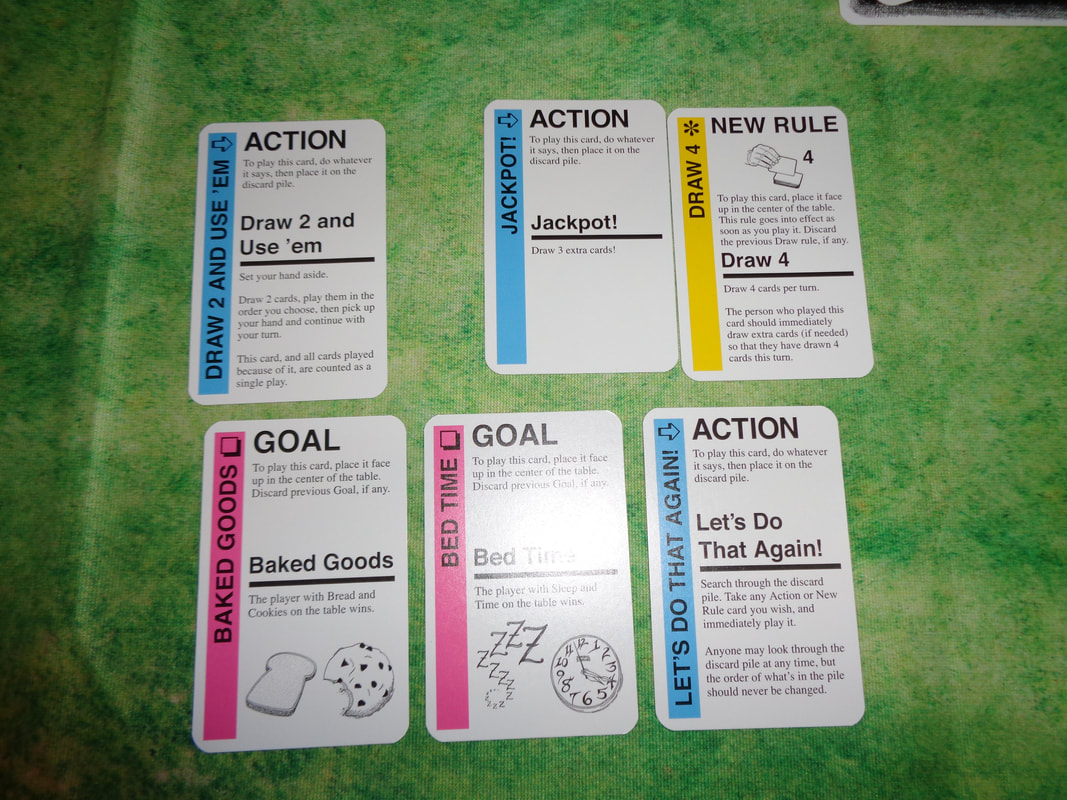
There's no getting away from that fact that this is a roll and move game, it may give you 2 or 3 choices from that roll, but it still is what it is. That's not to say it's all bad, usually at least 1 of the 2 or 3 choices a player is given is meaningful. Finding a way to linger on a plus tile until other players have to leave (Or getting off the tile before other players even arrive!) will earn victory points and players will obviously also want to avoid the minus tiles. However, minus tiles sort of reverses this, players will look to linger on a bad tile in the hope that another player will land it, allowing them to potentially escape. Furthermore, minus tiles outnumber plus ones 18-to-8; that's more than double, landing on them is inevitable, so is picking them up. This is what makes the lucky tiles such gamechangers with their ability to mitigate negative penalties, if a player has a lucky tile in their stack, suddenly that big minus tile becomes an asset, provided of course someone doesn't steal the lucky tile in the meantime. All of this is also largely dependant on what other players do, because they'll also be trying to linger on good tiles and escaping bad ones. That's Life! is a very easy game to learn and comprehend. I feel that it will have crossover appeal to non-gamers but for us, it felt a little too light and a little too luck-based; because players invariably end up collecting more negative tiles than positive, it ends up lending the game a negative feel - even though generally it will affect all player equally (Maybe life is like that?). It meant we didn't find That's Life a satisfying experience or a compelling game. 11th July 2021 Sunday night is here again and I'm logged into Board Game Arena. "The only constant is change." - Heraclitus' review of Fluxx from about 500 BC! He knew what he was talking about when it comes to the first game of the evening. What's in a game? Fluxx comes with a deck of just over 80 cards. which is about 50% bigger than a pack of regular playing cards, there 4 types of card in Fluxx along with the basic rules card:
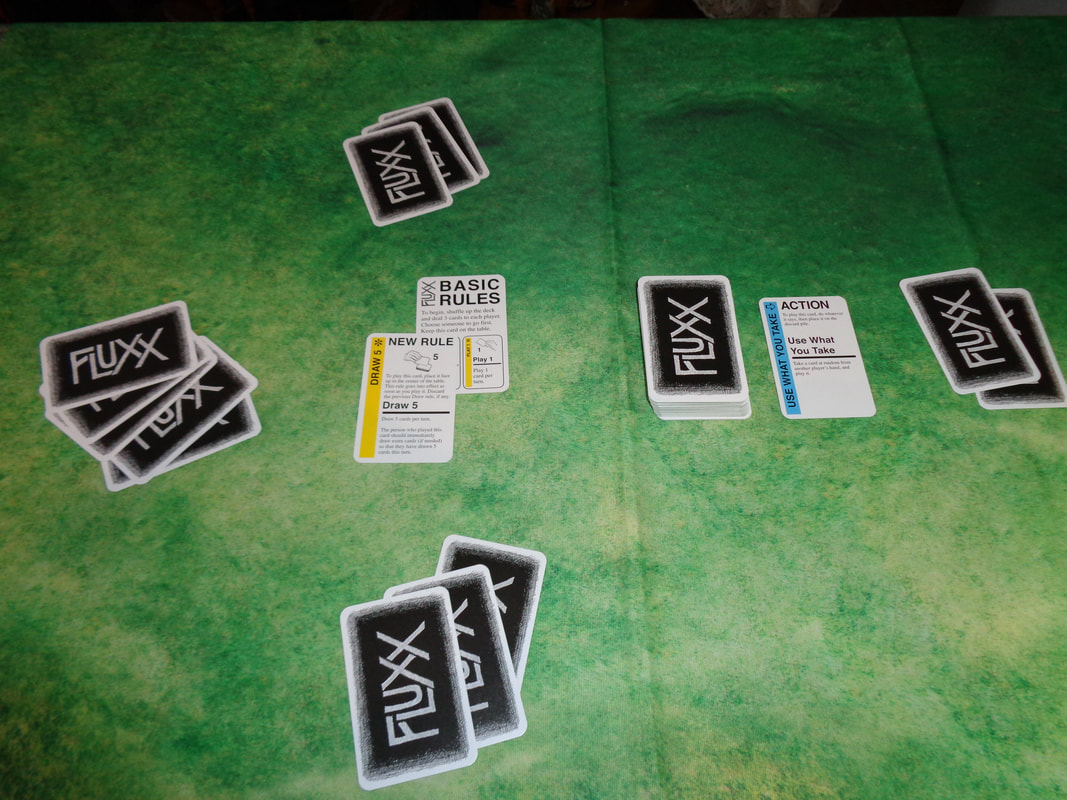
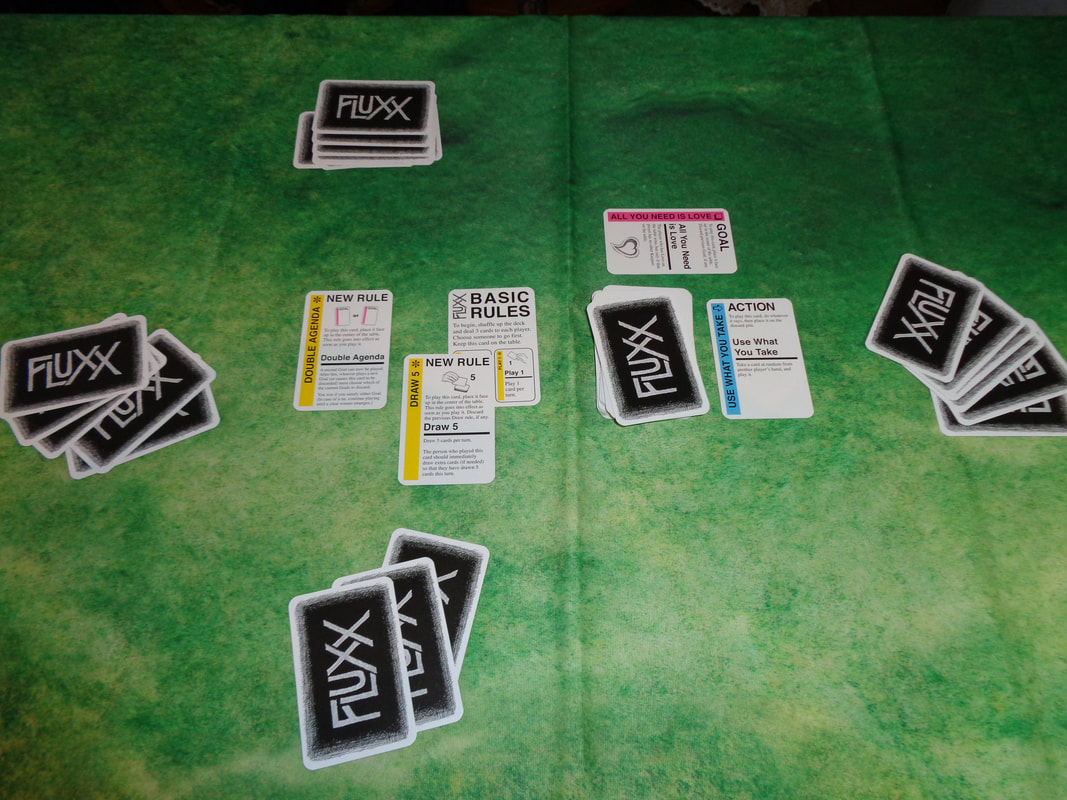
Large easy-to-read text is used throughout Fluxx, which is a boon considering the kind of game it is. Cards in Fluxx, other than the action cards it seems, contain some sort of mostly monochrome line illustrations. The artwork is a bit plain, but doesn't detract from the cards or interfere with the clarity of the text. All cards also have a splash of colour which indicates which of the 4 kinds of card they are. Its functional more than pretty, but I don't have a problem with that. 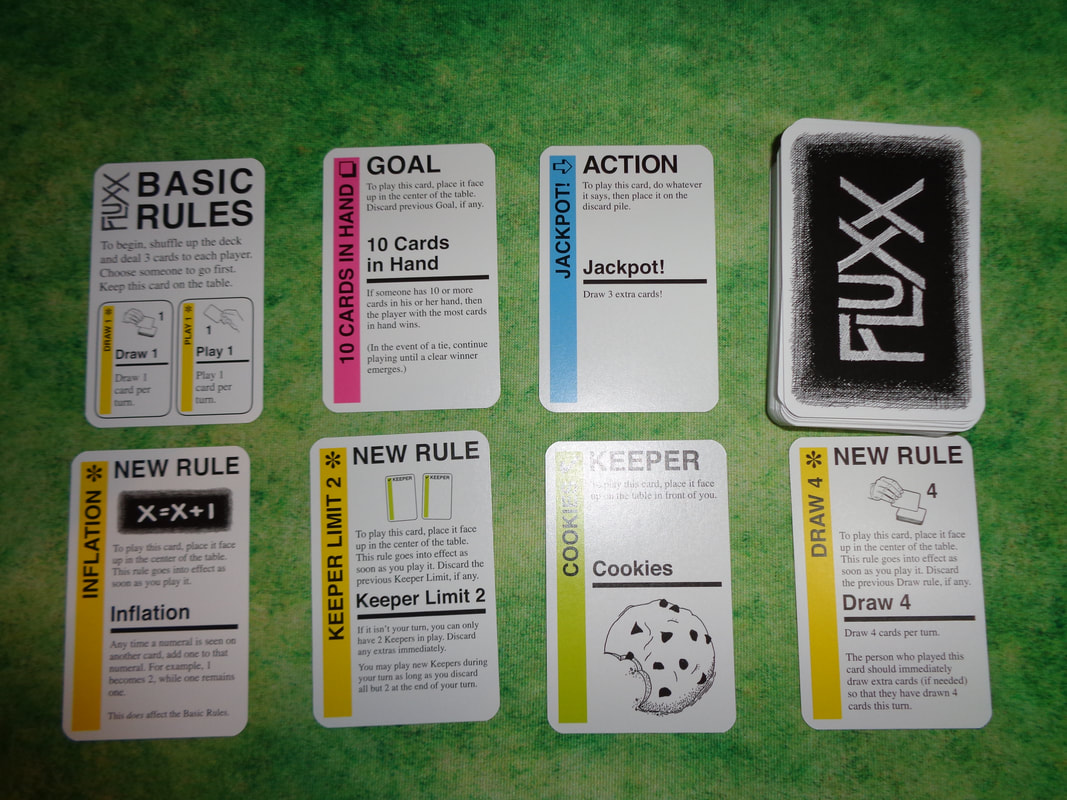 Example of cards from Fluxx How's it play? Setup
Endgame Fluxx boasts that there's 23 ways to win! (Mine also says it's version 3.1.) When any player meets the win conditions, they immediately win, they don't need to be the active player or have a turn to win! 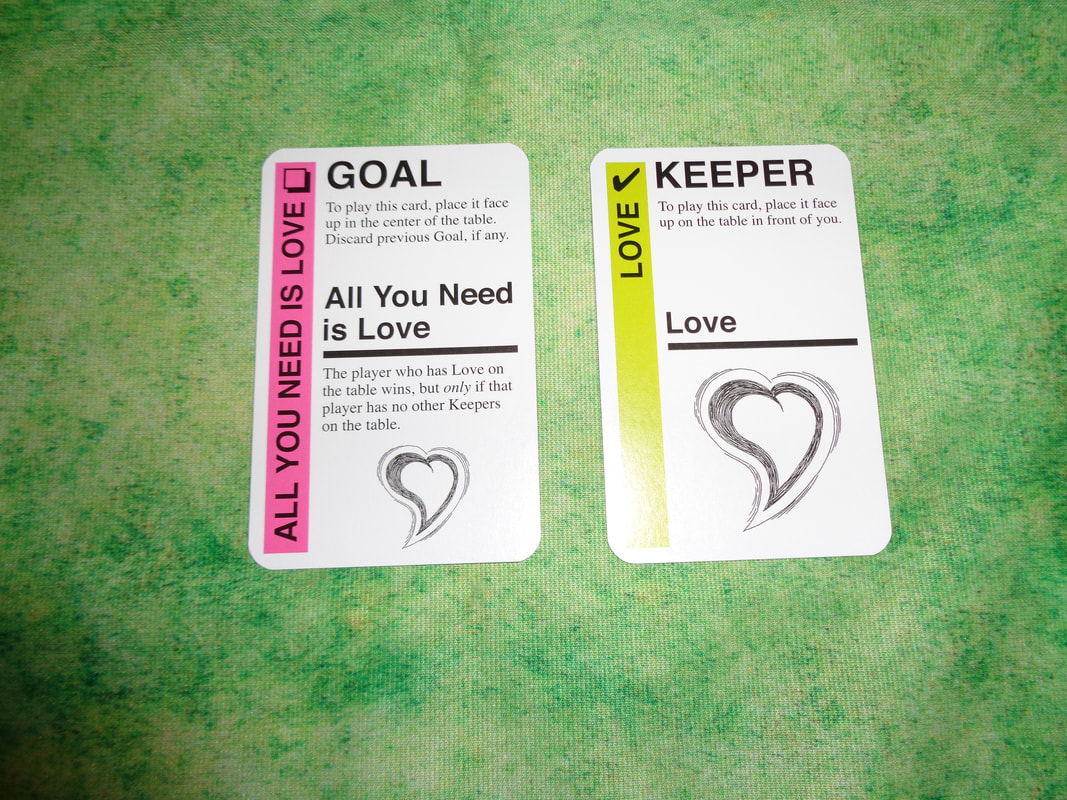 The goal is met. Overall
There's not much I can say about Fluxx, it's clearly a light, fun and unpredictable experience which favours opportunistic play. Players will want to keep a sharp eye out for the changes that occur when the situation inevitably shifts from one rule to another, this is especially true since any player can win at any time. An easy game to pick up that plays quickly (Probably!), This makes it an excellent filler, the version 5.0 rules state that players can just drop in and out, making it a good opener for a longer session of gaming or a finisher. If you want a quick diversion, it's hard to go wrong with Fluxx 27th June 2021 Sunday is here and I'm logged into Board Game Arena. Playing board games is a great way to escape your troubles and ignore what's been happening outside your window and across the globe for the past 2 years and to do that, we chose to play a game about not 1 pandemic, but 4 of them! The first game of the evening was Pandemic. What's in a game?
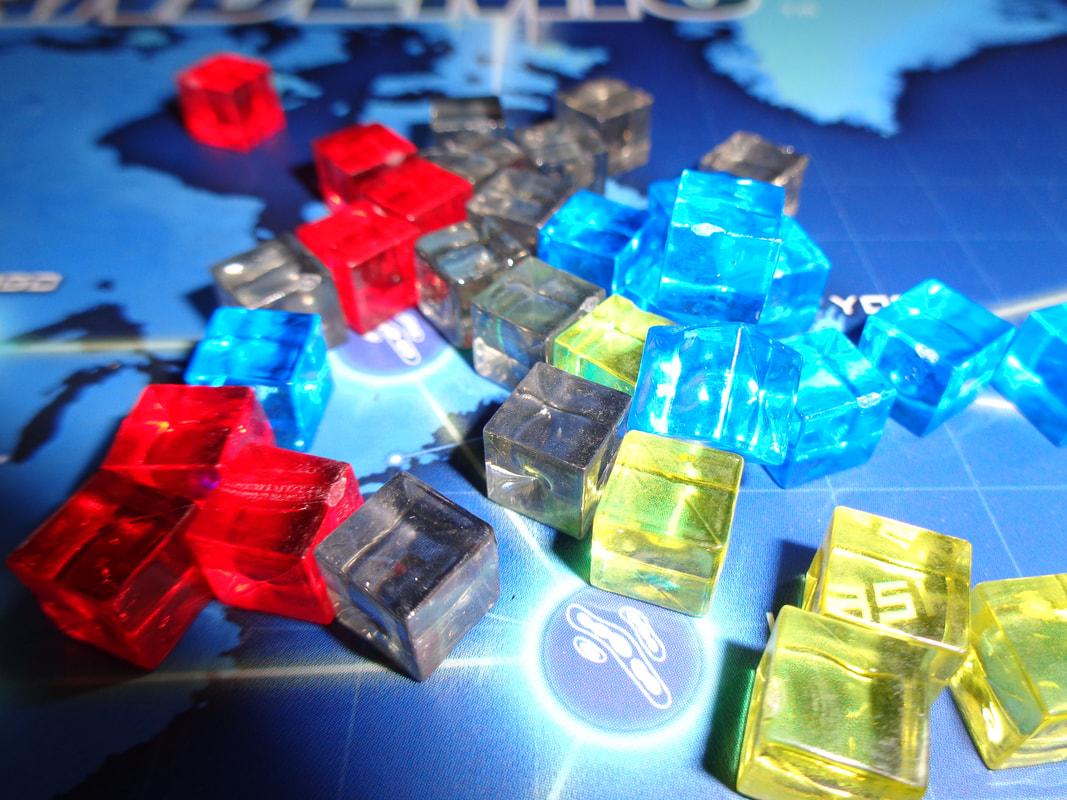
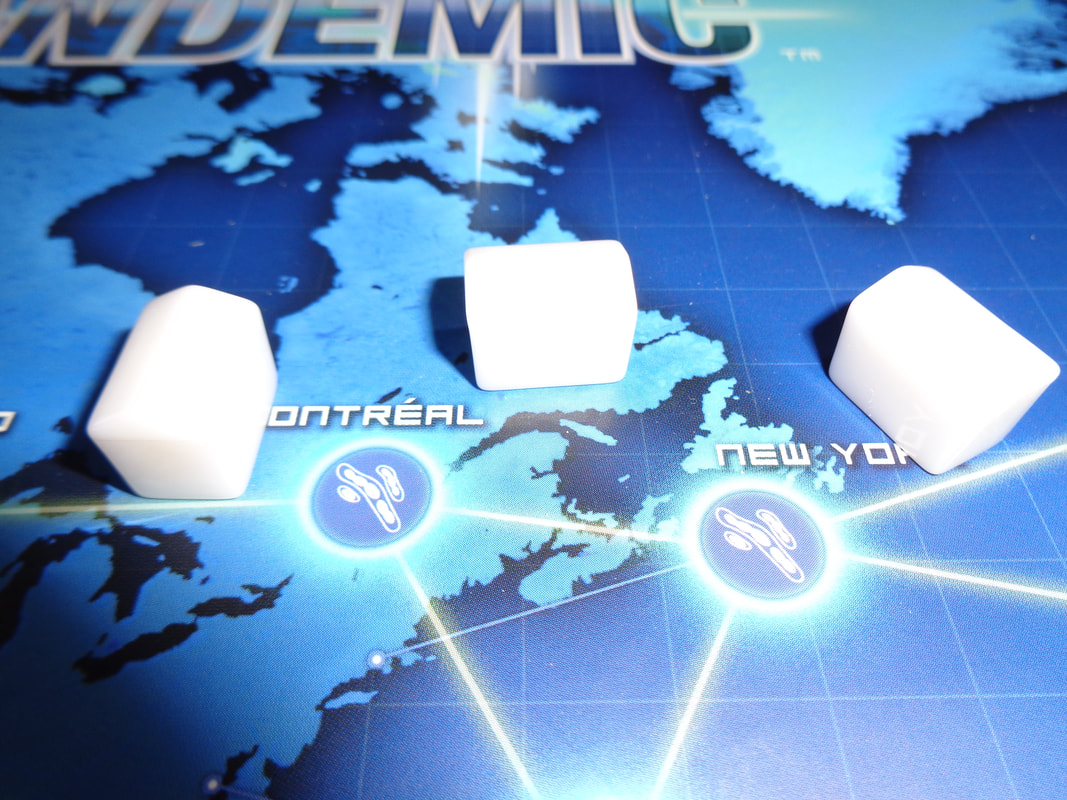
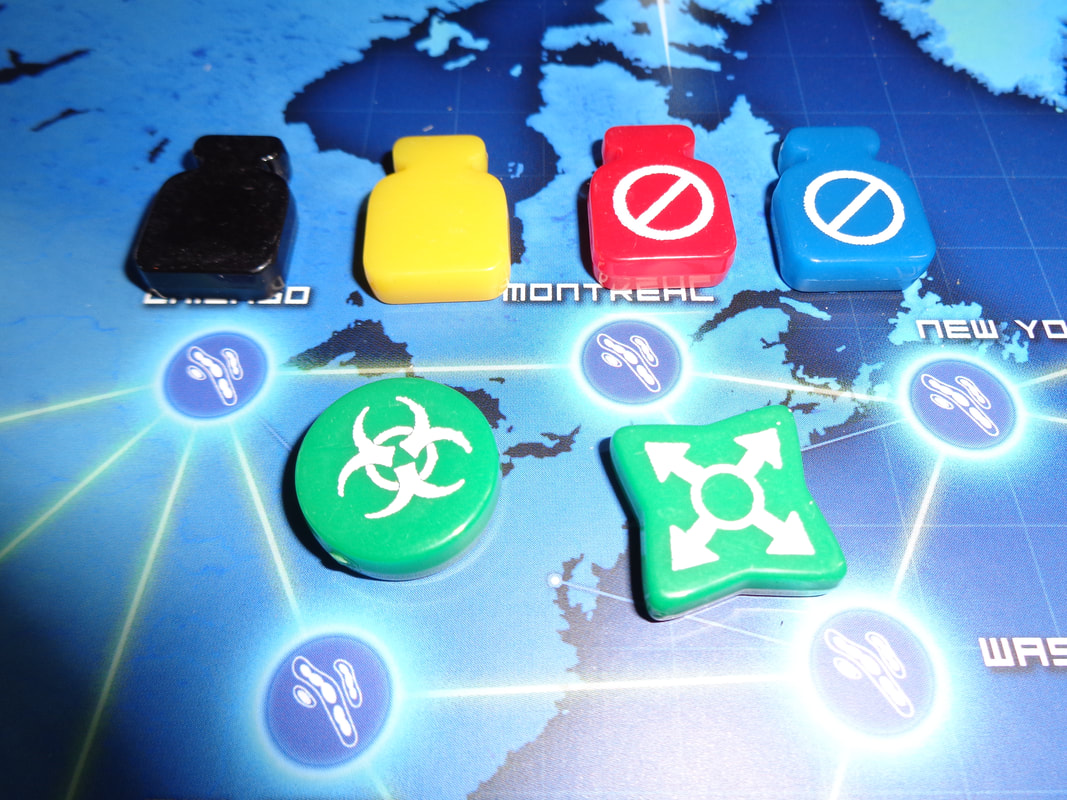
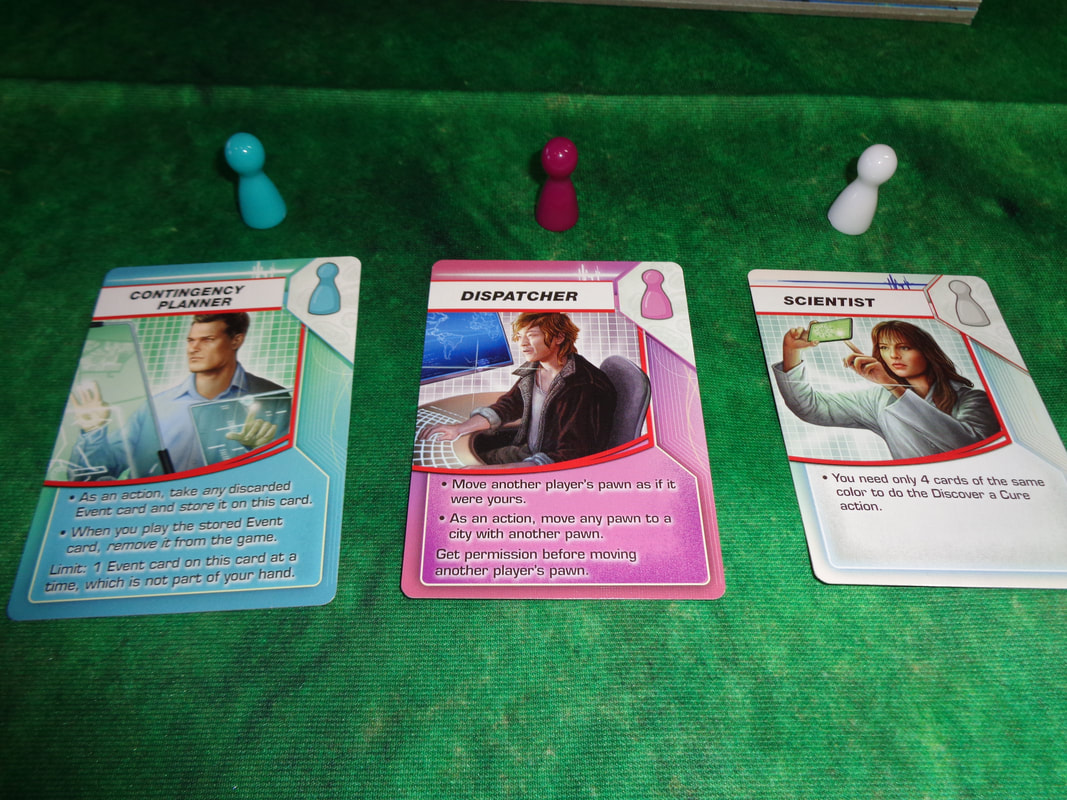
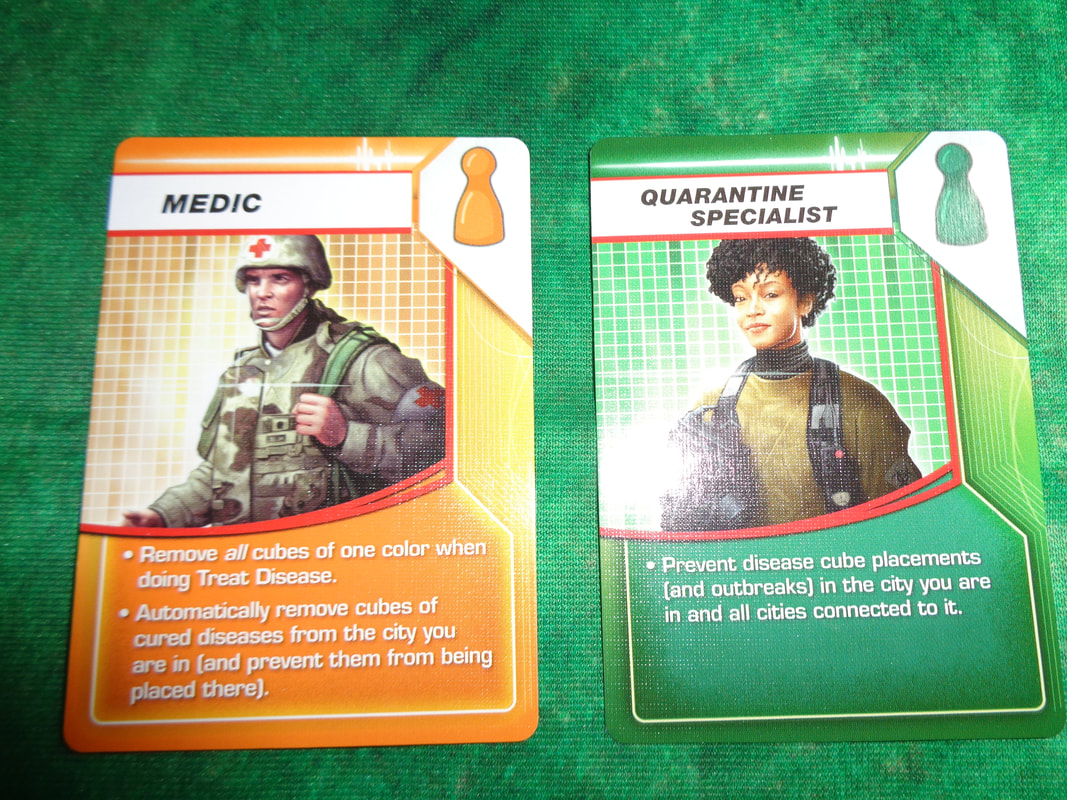
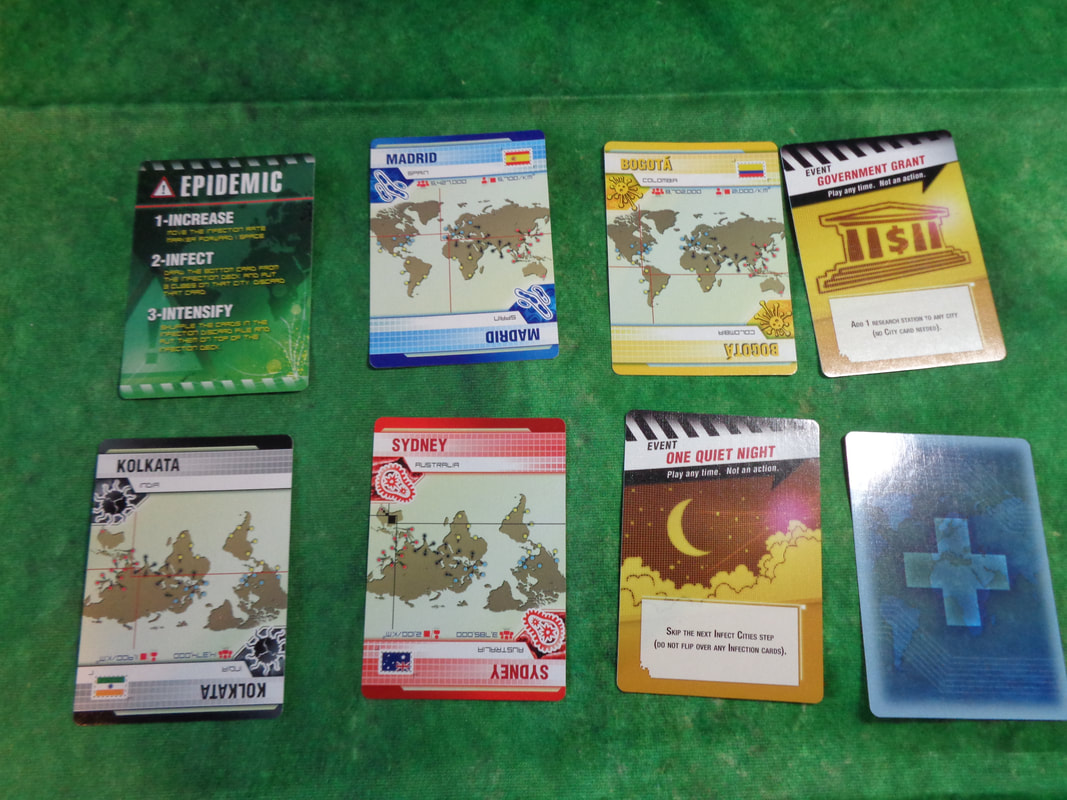
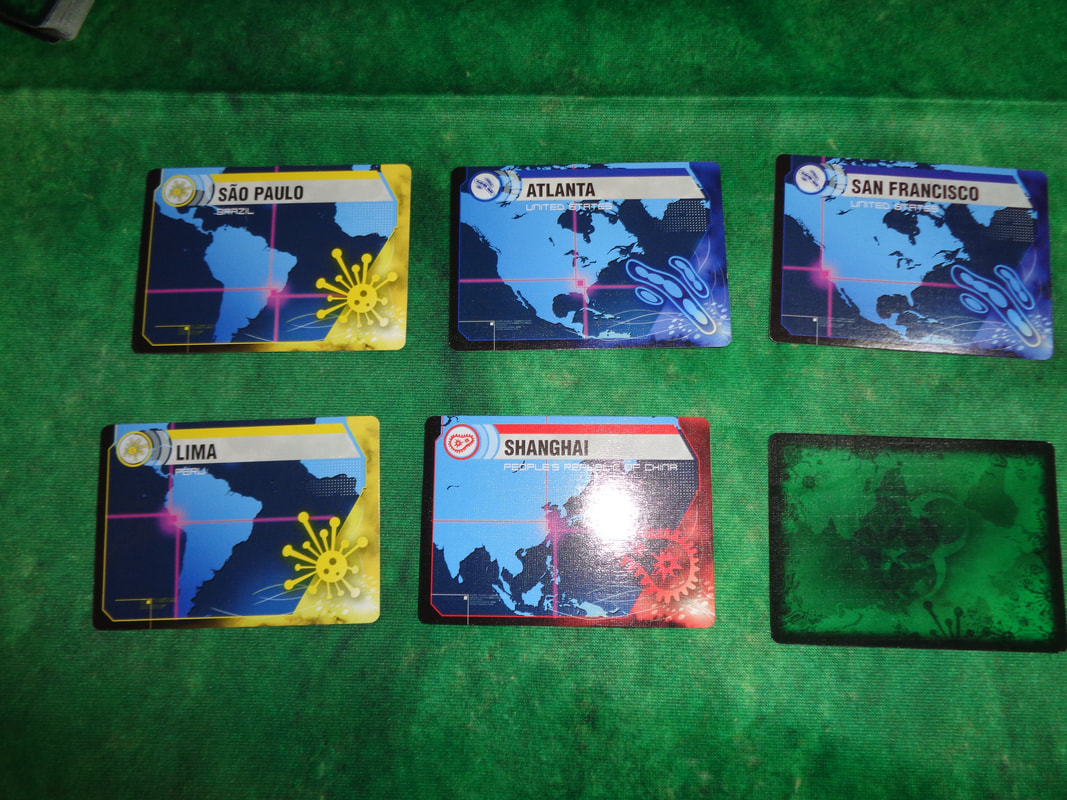
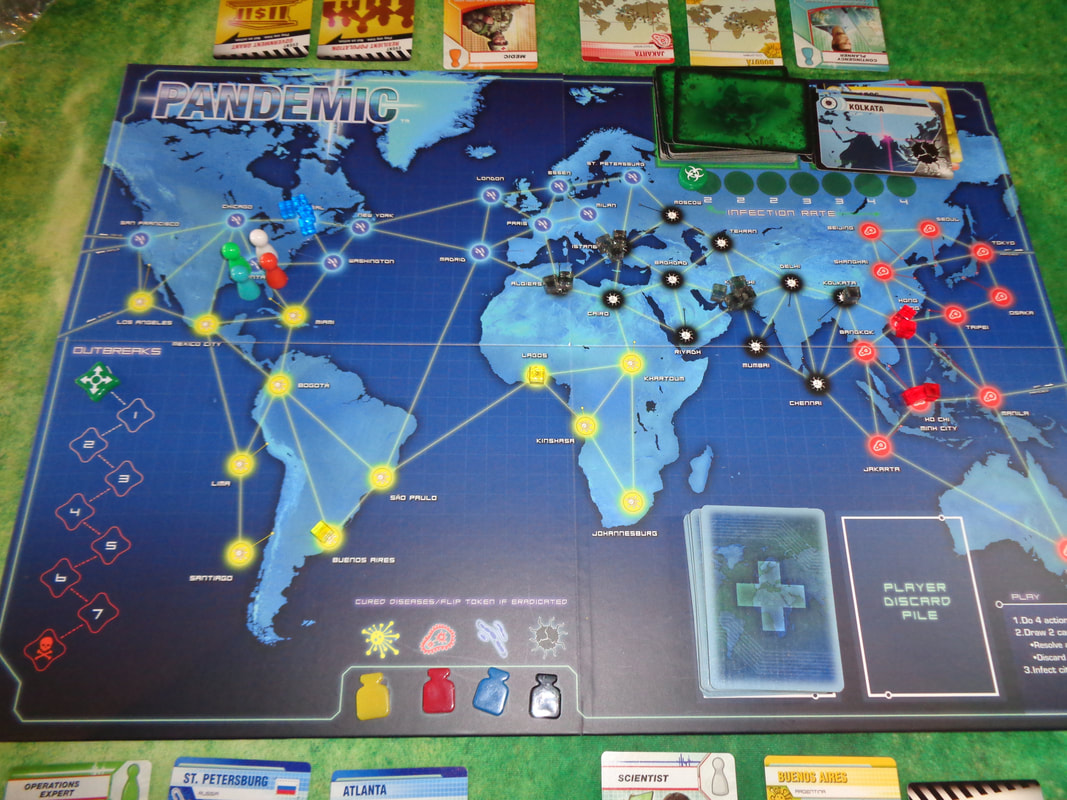
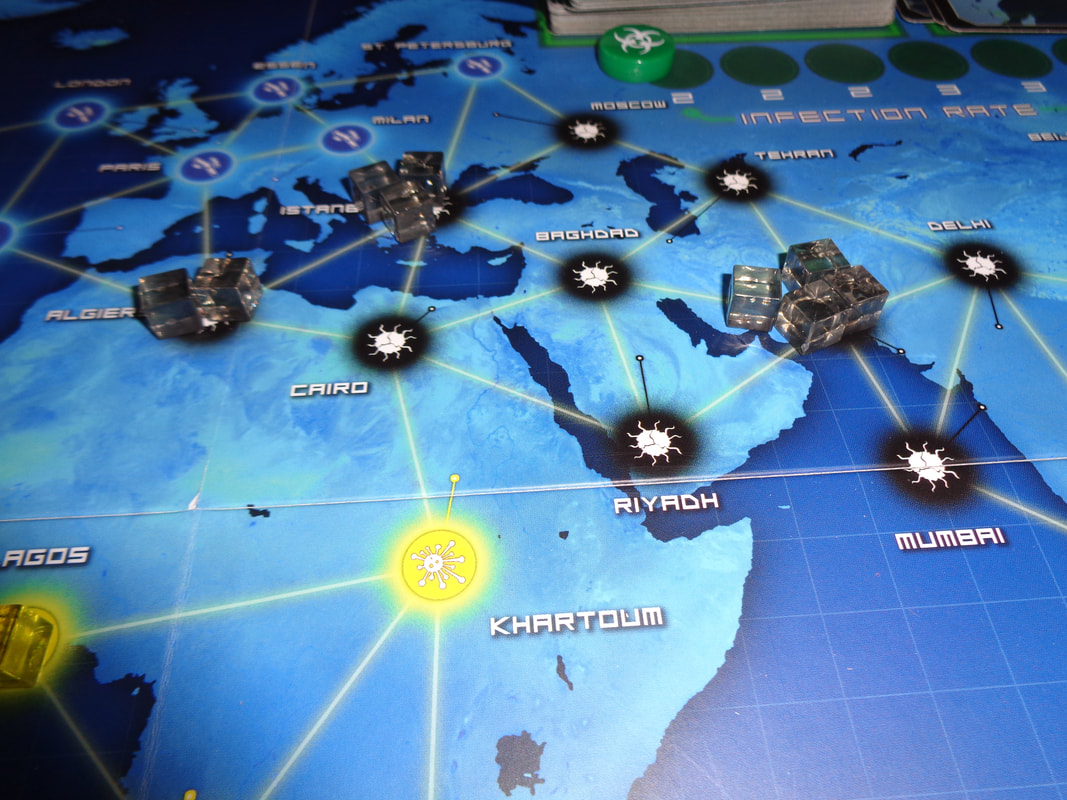
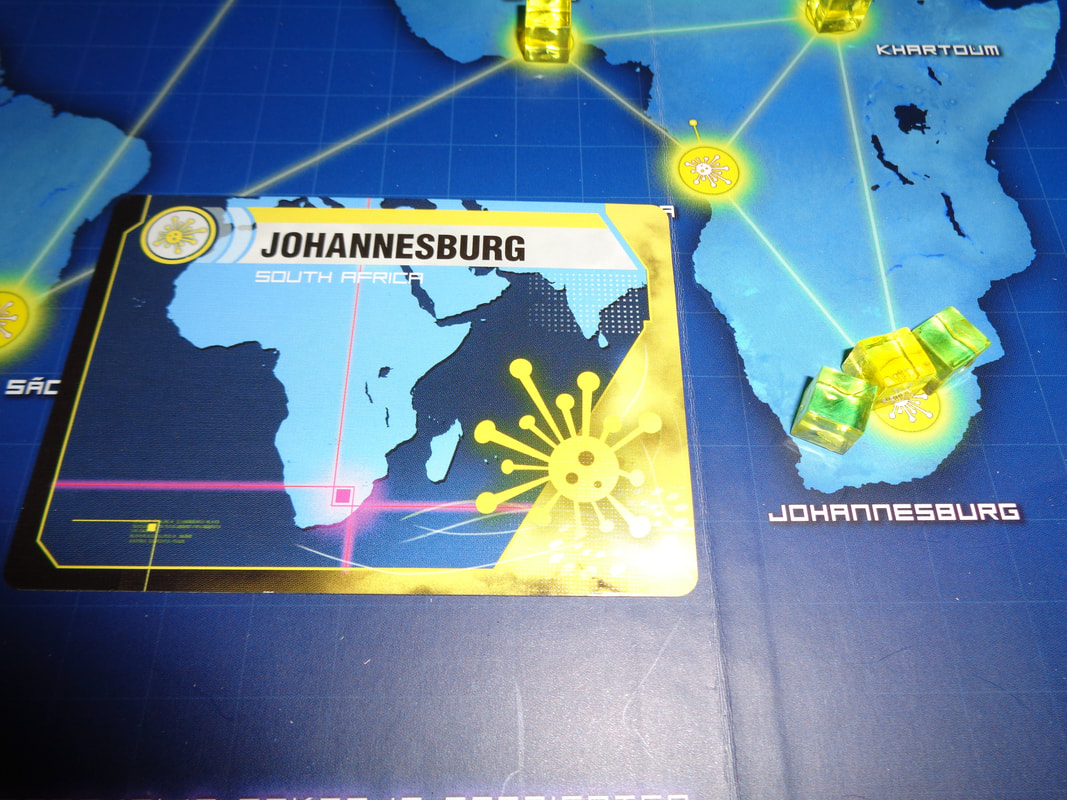
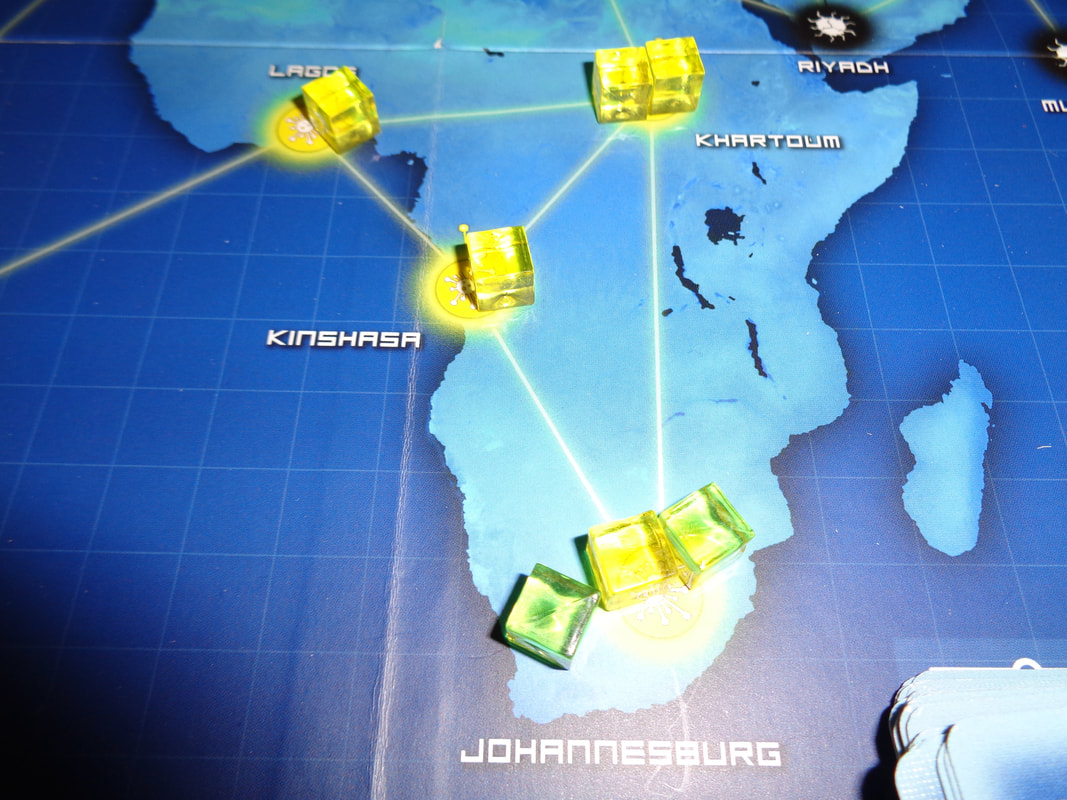
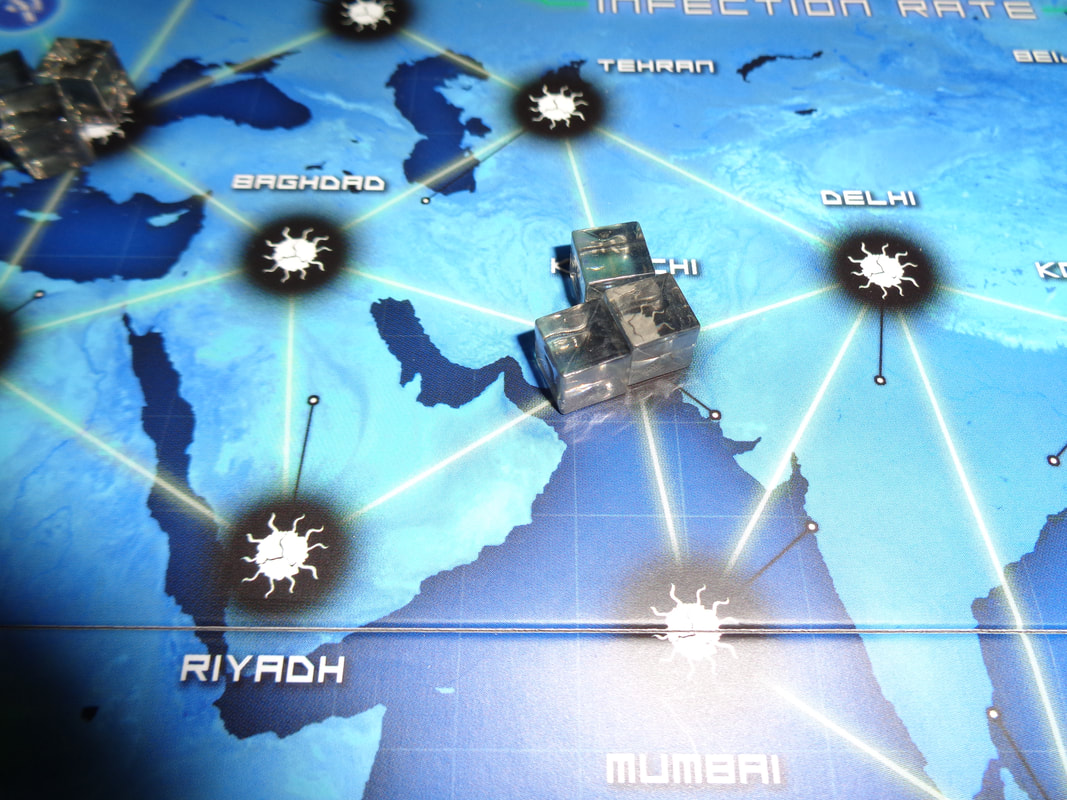
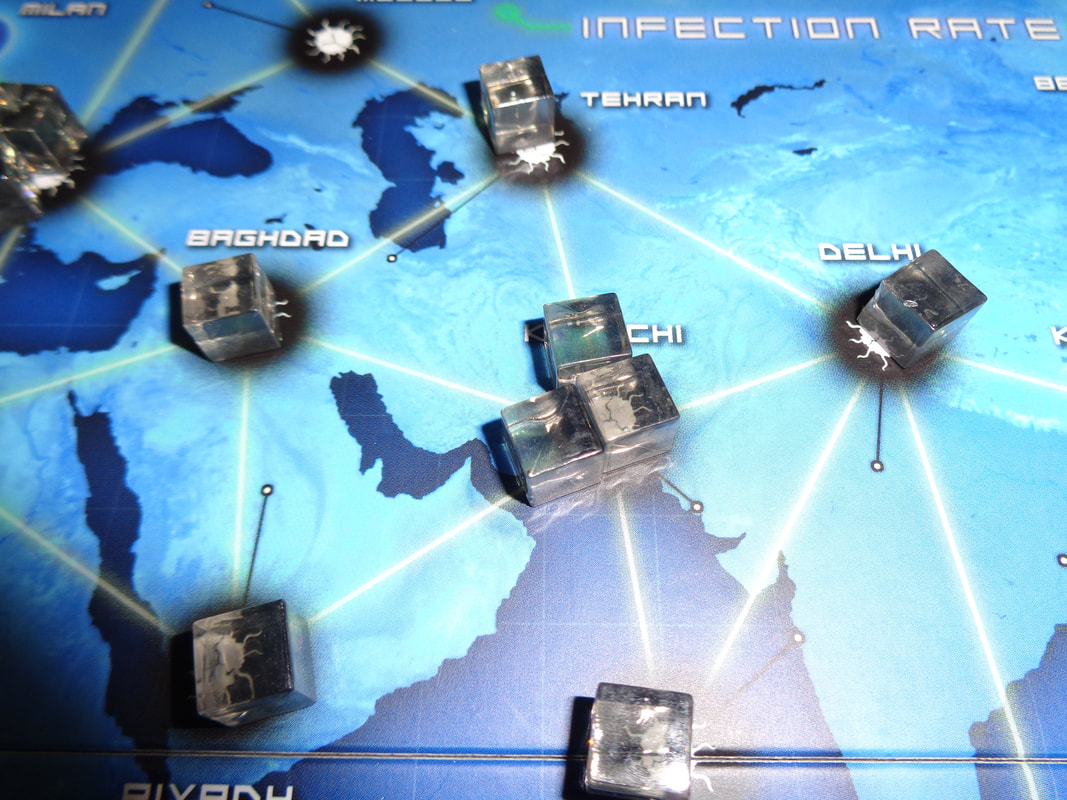
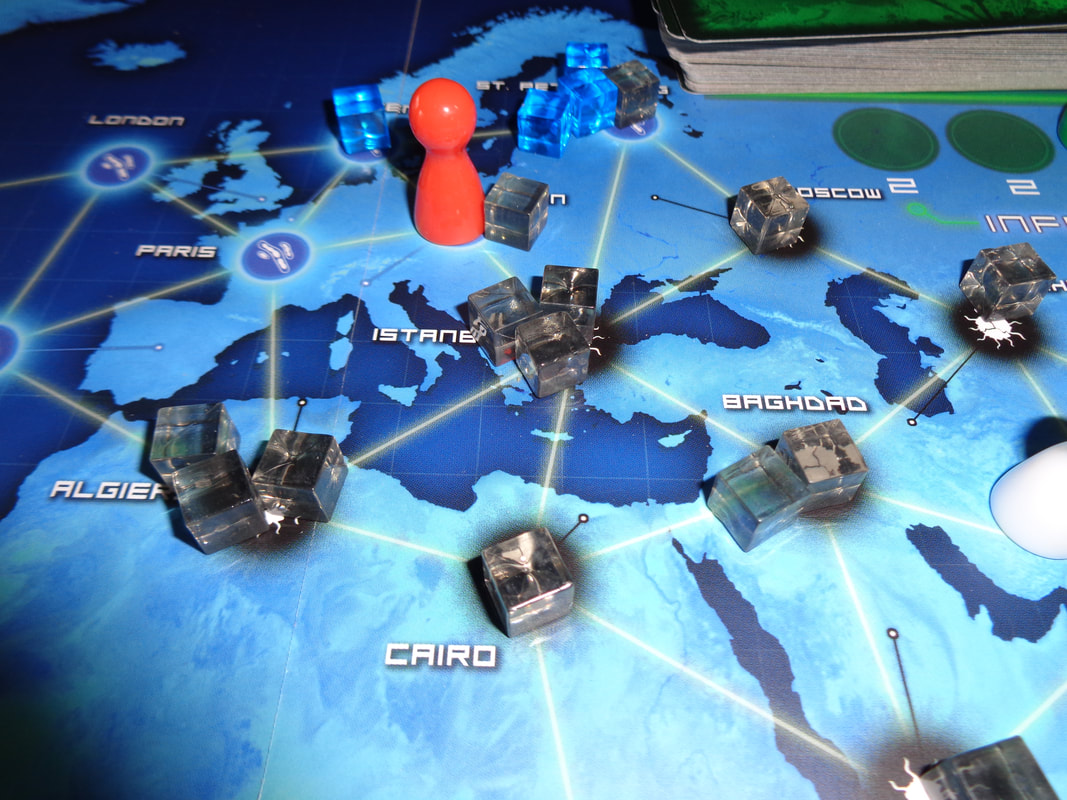
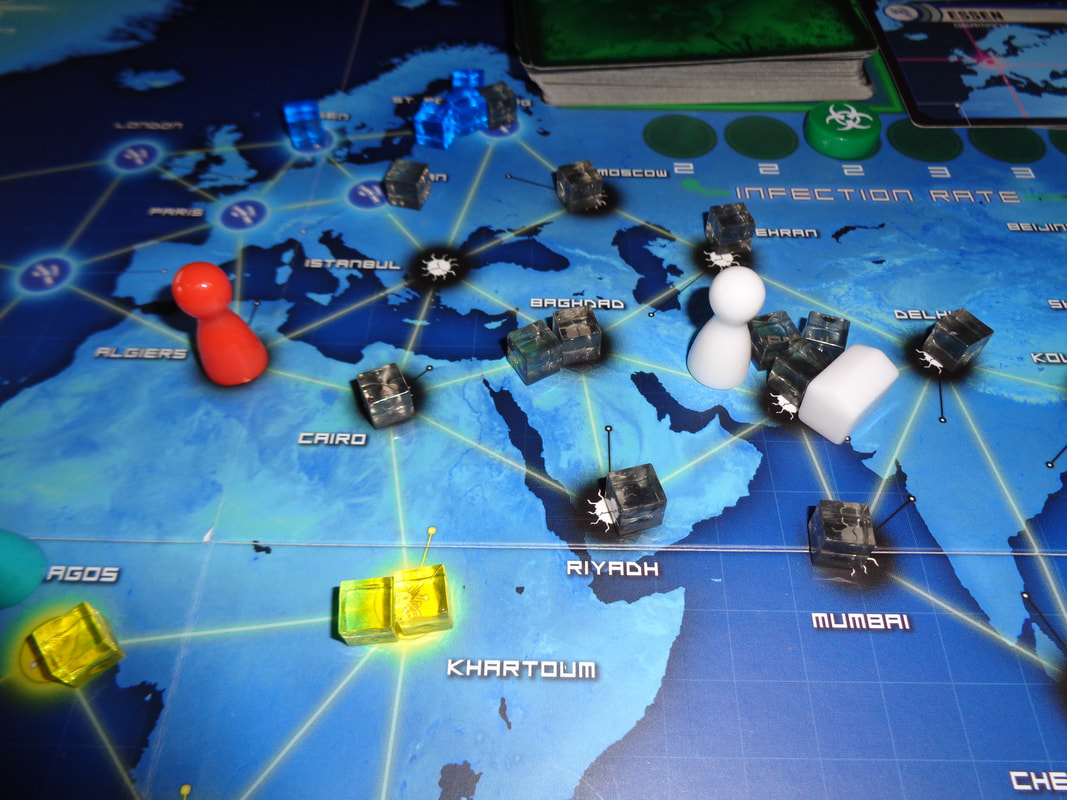
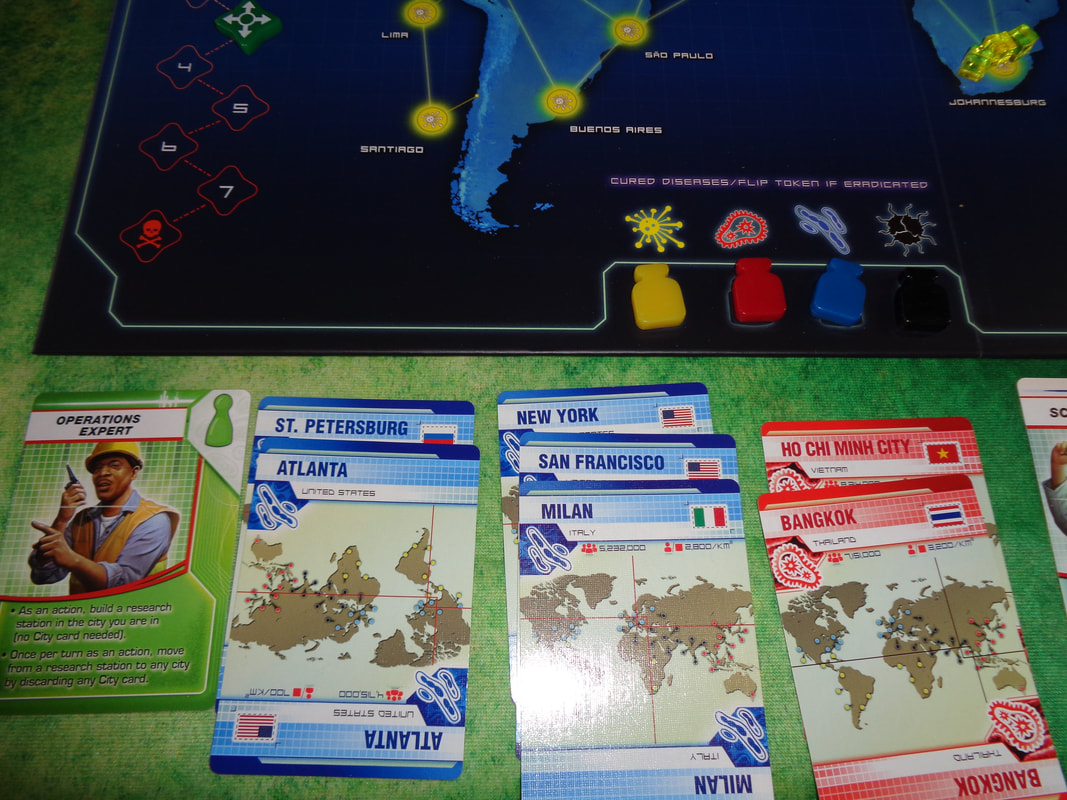
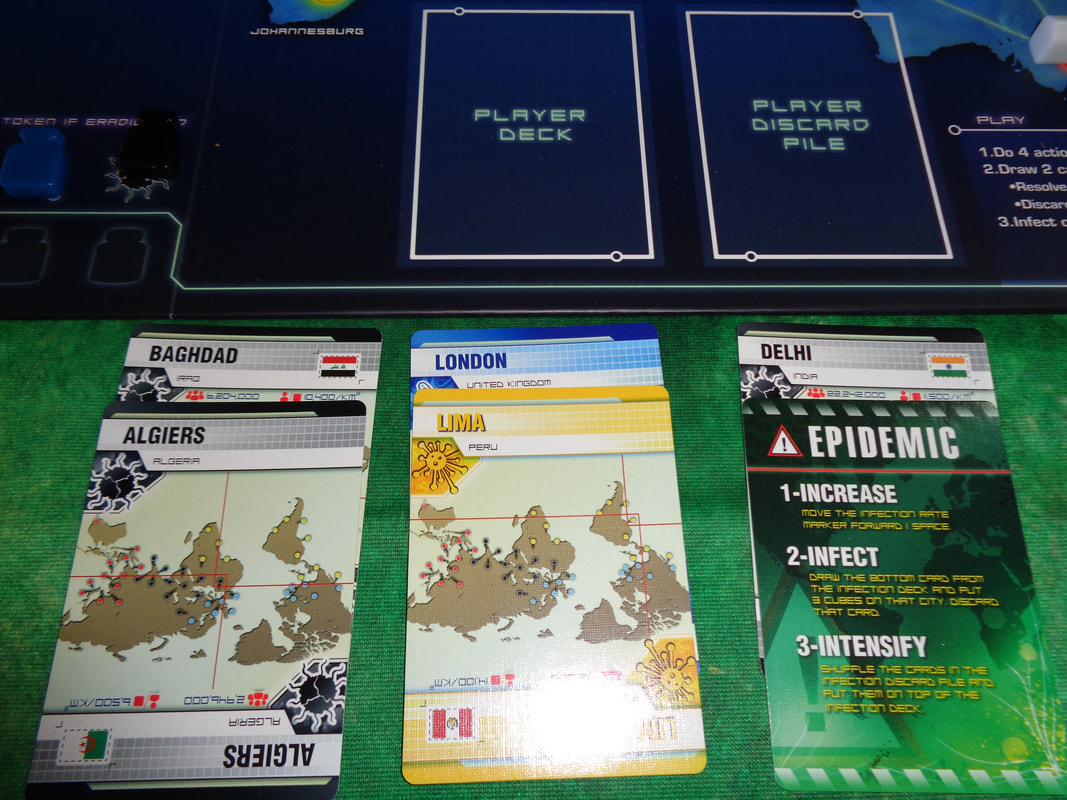
The components in Pandemic are all of a reasonable quality as you would expect, nothing feels particularly cheap. The pawns are made of plastic and not wood, but that's a trivial quibble. The other markers are constructed of satisfyingly thick plastic. The plastic 3D research stations are a nice touch as are the colourful, translucent, acrylic disease cubes, it also makes them easier to pick up and move - which for the cubes will occur frequently. Artwork on the board is functional more than pretty, which is fine and everything's easy to understand, the same is true of city and infection cards which show locations on the board as opposed to containing illustrations. The small amount of artwork in the game mostly appears on role cards, which each have a good quality unique illustration that depicts their role, event cards also contain some unique artwork. How's it play? Setup
On to play The turn structure for Pandemic is as follows: The active player has their turn, which consists of 4 actions, then they draw 2 cards from the player deck, finally the 'board' has its go. Once all of this has been completed, the player to the left becomes the active player.
Endgame Play continues until one of the following conditions is met. If the marker on the outbreak track reaches its 8th and final space; the players collectively lose. If, at any time a disease cube needs to be added to the board and none are available in that colour; the players lose. If a player needs to draw 2 cards from the player deck and cannot do so because none or only one is available.... you guessed it; the players lose. If all 4 diseases are cured, then the players immediately win. Diseases do not need to be eradicated in order to win. Overall
Well, Pandemic.... what's there to say about this game? Pandemic is a pillar of modern cooperative games that has been followed up not only by a slew of expansions and spinoffs, but also a number of differently themed games such as Horrified that employ similar mechanics. Some of Pandemic's elements and mechanics may seem a bit trite nowadays, but that's simply because they're part of a game that popularised those mechanics in the first place and is a testament to Pandemic's longevity and influence. Pandemic utilises the tried-and-tested game flow of alternating between player turns and card-driven board actions in a game that is a globe-trotting race against time. In a turn, players are faced with the difficult choice of trying to stem the spread of the 4 diseases or instead trying to interact with the other players and swap the cards necessary to cure those diseases. Ultimately, players will need to find a balance between the two approaches. As with other cooperative games, bad luck may play a major role in Pandemic and mitigating that bad luck is vital to winning. Decisive actions, recognising priorities and acting on them are also vital to success, as are knowing when to use role special abilities. Pandemic is also hard, I think this comes down to Pandemic's rules for swapping city cards between players which requires them to be in that card's city in order to do so. It's unlikely players will be able to collect 5 cards of single colour on their own so coordination between players is vital. We've played a few of the iterations that followed Pandemic and it always felt like this rule has been softened a little. Is that as bad thing, I suspect YMMV? Pandemic does a good job at evoking the feel of a spreading global crisis and the desperate worldwide fight to contain it. I have to admit, considering the events of the past 2 years, we haven't had much compulsion to play Pandemic. Even so and despite the difficulty, I feel that if you like cooperative games, it's still worth playing, it challenges players with making difficult decisions at nearly every avenue and is satisfying to win. 30th May 2021 Sunday night gaming on Board Game Arena continues with Dragonwood. Those woods there, there be dragons in those woods, that must be why it's named Dragonwood! There are many monsters to capture, so to assemble brave adventurers, take your cards and take your dice and head off into the forests, there're adversaries to be struck, stomped or screamed at! Caveat: We've only ever played Dragonwood digitally online. What's in a game?
Well, there's not much that can be said since we've only played it digitally. The art on the carts is bright, cartoonish and pleasant, text is clearly written and easy to read. How's it play? Setup
The objective in Dragonwood is to capture creatures cards which are worth 1-7 points each. Each turn, the active player will have a choice of 2 actions.
Then it goes to the endgame. Endgame Players score the victory points for each creature they captured. The player who has captured the most creatures earns an additional 3 points. Once points are tallied, highest score wins! Overall
Decisions are based around how much you want or need to push your luck and when to or when not to try and capture cards, managing this is key to Dragonwood. If a creature has a value of 10 for one of it's target numbers, then it's not hard to figure out that 4 dice will give the active player a 50% chance of capturing it and they'll need to play 4 cards to do this. 9 or lower and the odds swing in the player's favour, 11+ and well, it's not a push your luck game for nothing! Sure, someone can play it safe and draw cards to get better odds, but this consumes turns while instead, competitors could be capturing those creatures. A handful of adventurer cards scores nothing at the game's end. Conversely, rashly trying to capture cards and failing will cost players their adventurer cards, it's a clever little balancing mechanic. Even though the decision to capture a card or not is a simple, almost no brainer decision, the need to outdo other players generally means it never quite a meaningless one. We found that acquiring enhancements early on (If they appear early on that is.) could be a big advantage. There are enhancements that add 1 or 2 to capture rolls, it might not seem like much, but in a game about averaged dice rolls, it can swing the odds quite a lot. It's obvious that Dragonwood is a light game that skews towards younger players and with that in mind, I don't think it's appropriate to be overly harsh on it. With it's fairly simplistic choices and reliance on randomness, fans of 'heavy' games probably won't find much to engage with here, unless they're looking looking for a undemanding filler for around 30 minutes to allow their brains to cool down between other, heavier games. However, I do think that younger players will find the game enjoyable and dice rolling exciting, casual gamers may also find it entertaining. 23rd May 2021 It's Sunday evening and I'm logged into Skype and Board Game Arena on my PC and it's time for the final game of the day. Drafting. Rawr! Dinosaurs. Rawr! T-rexes. Rawr! Draftosaurus has it all, drafting and well... you get the idea. This is a game where scientists have discovered how to clone dinosaurs and now parks of them are opening everywhere, all in a completely non-copyright infringing manner of course! Caveat: We've only played Draftosaurus digitally online. What's in a game?
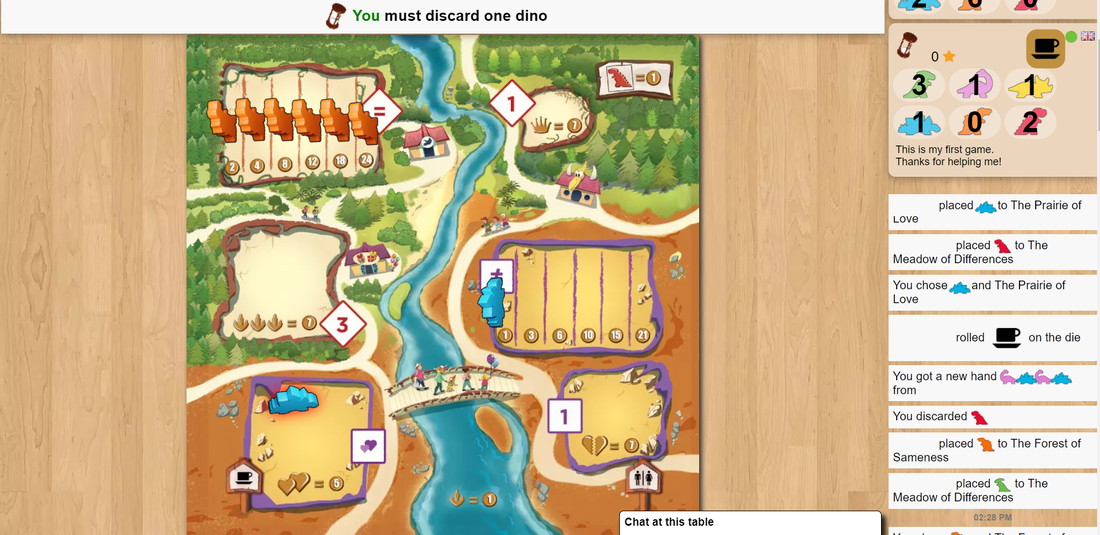
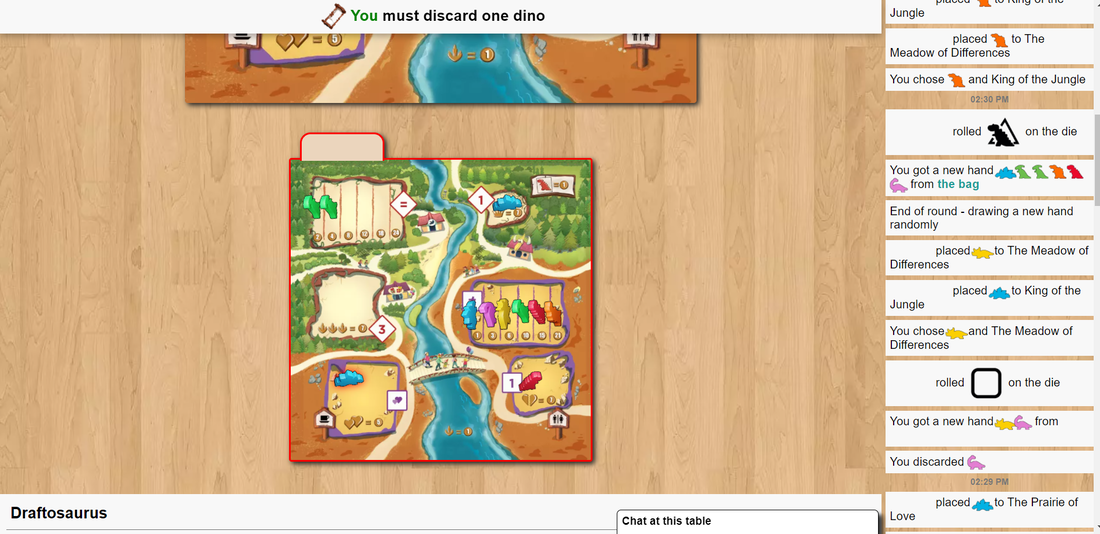
There's not much more I can say, I can't talk about the physical components which also include a draw bag. How's it play? Draftosaurus is about placing dinosaur meeples into the pens, different pens have different requirements, which is explained below. Setup
Endgame Once the 12th and final dinosaur meeple has been placed by all players, the endgame is triggered. Players score all of the sets they've created on their board, plus any bonuses or penalties. Highest score wins.
Overall
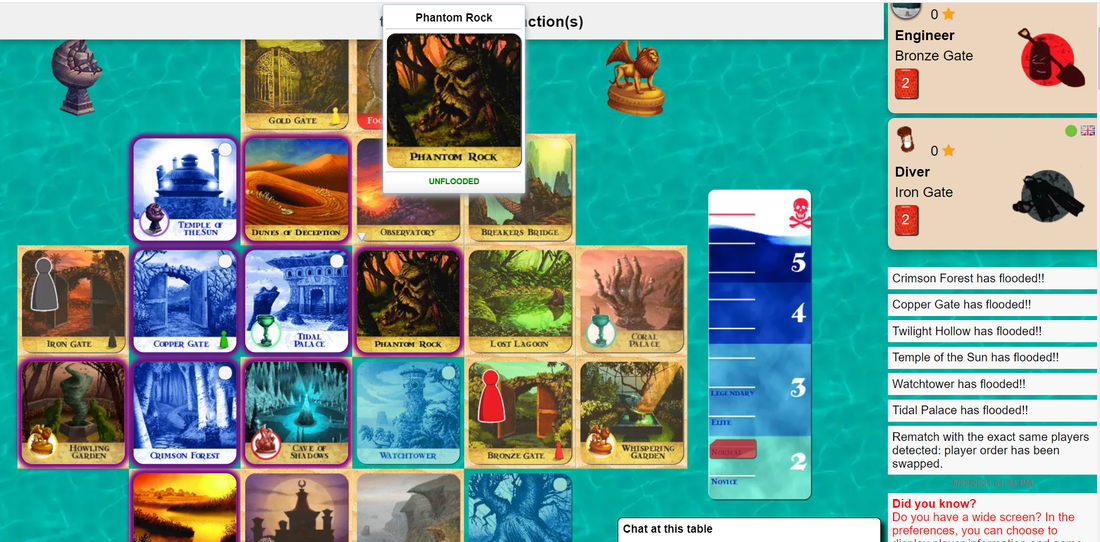
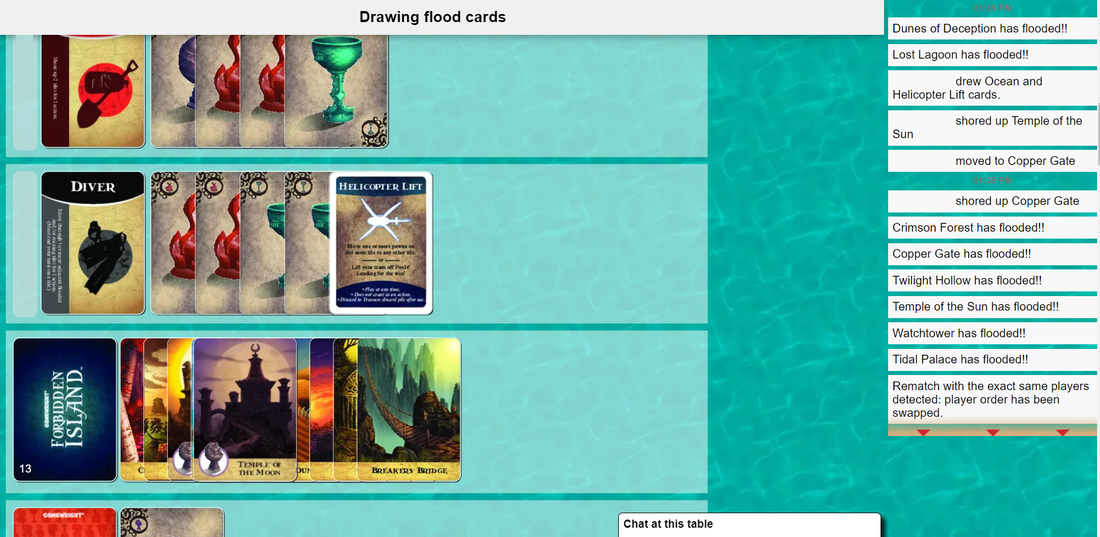
When playing Draftosaurus, more often than not, players will find themselves having to place meeples into unexpected pens thanks to the placement die. Without this element, the game would be too predictable. How players deal with, manage and anticipate these these situations is key to victory. Often there will be a conflict between which set to increase or start on and keeping a pen open for another type of dinosaur. It also pays to try and remember which dinosaur meeples will be coming round. The winter side of the board makes it harder to collect different sets and provides more challenge but somehow a little less fun? It's hard to find a lot more to say about Draftosaurus, it's quick, fairly light game to learn and play that's also quite luck based. If you don't like this sort of game, Draftosaurus will probably infuriate you. I think that maybe it's a bit too luck based for me to play extensively. Not taken too seriously and played as a filler game and Draftosaurus is a reasonable diversion. 23rd May 2021 Sunday night game rolls on and I'm logged into Skype and Board Game Arena. The final game of the night was Forbidden Island: A cooperative race against time to escape a mysterious island about to be swallowed by the ocean. Forbidden Island is the older sibling of Forbidden Desert, you can read my blog about it here. Caveat: We played the game digitally but in the past have played the physical game. What's in a game?
Eye-catching, good quality artwork is used on the flood cards & island tiles, they also come with suitably evocative names such as Temple Of The Moon, Cave Of Embers, Breaker's Bridge and so on. Art on the treasure cards is also good and matches the nicely sculpted figurines. All-in-all, the components are good.
How's it play? Forbidden Island is a race against time to recover 4 treasures (In the form of the 4 figurines.) and escape the ancient island as it collapses into the ocean waves. Collecting treasures is done by heading to certain locations with a set of cards and acquiring them, Setup
During their turn, the active player will have 3 action points to spend on various actions. Once all players have had a turn, then the game gets to have its turn.
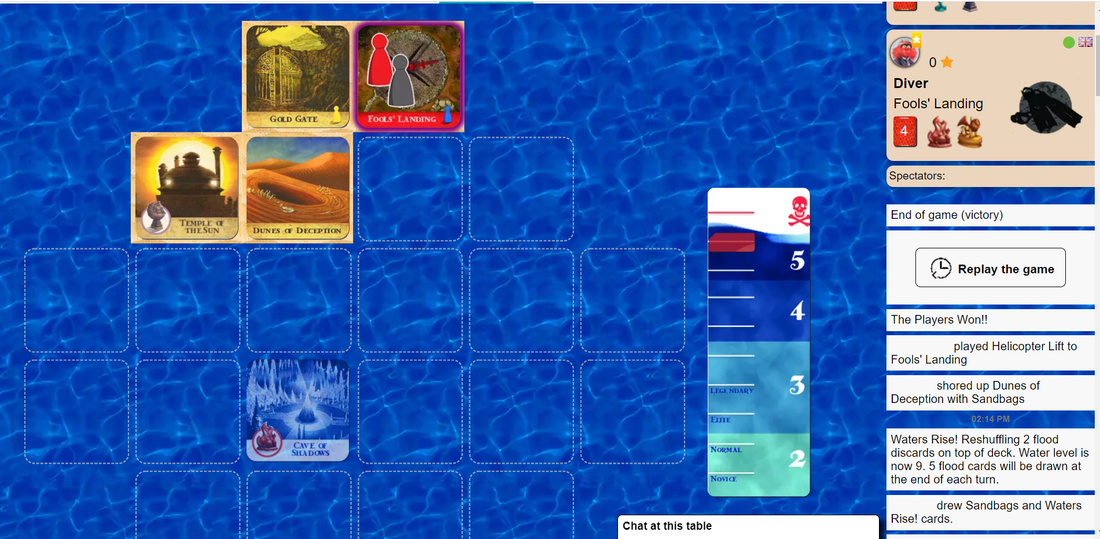
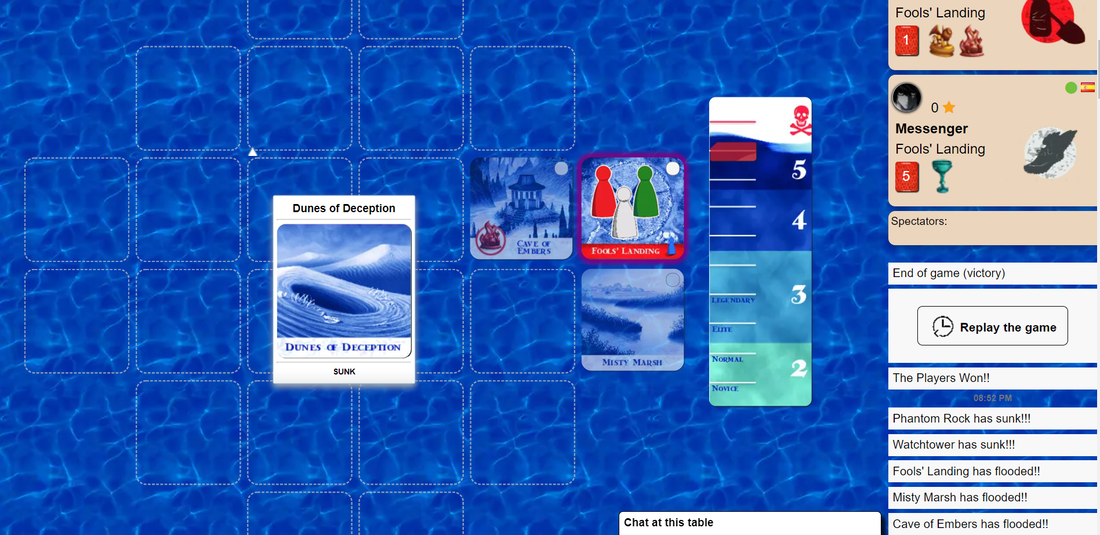
If, during play either of the decks is depleted, simply shuffle the discard pile back into a deck. Endgame As a cooperative game, the players collectively win or lose. Forbidden Island has several ways to lose and 1 way to win! There are 9 'critical' island tiles on the board. Each figurine has 2 tiles which are used to acquire the it, if both tiles for a figurine sink before it is acquired, then it's game over as there's now no way to get that figurine. Similarly, if the Fool's Landing island tile (Which contains the helipad sinks.), then there's no way to escape and it's also game over. If a tile with a character on it sinks, the character must swim to an adjacent tile, if there are no adjacent tiles, then unless that character is the diver, they will meet their water end! If any character is lost then it's game over for all players! Finally, if the marker on the water level reaches the skull & crossbones, then well.... you get the idea. Glub! Winning; easier said than done! Any single player must collect 4 identical treasure cards, then must reach one of the 2 island tiles associated with that treasure and spend an action to acquire that treasure's figurine. This must be done for all 4 figurines. That's not the end though, now all the characters must reach the helipad and a Helicopter Lift card must be played by any player to escape to victory.
Overall
Like other cooperative games I've played, Forbidden Island injects a dose of luck into the gameplay in order to consistently challenge players and how players manage that luck is key to victory. Broadly speaking the gameplay is; player shores up island - game tries to sink island - player shores up island and so on. Players have to keep the island a safe as possible long enough to survive and get the cards they need to win the game. It's not as straightforward as it sounds though, the 3 actions points each player is given to do stuff never seems enough. Players have to choose between working towards objectives or saving the island and the clock is always, always ticking. The way the flood deck works means that tiles which have already suffered a flood will be more prone to suffering further floods because when a Waters Rise! card appears and refreshes the flood deck, cards that were already revealed are put back on the top of the flood deck, meaning they will be the first to be revealed again. Obviously protecting the critical island tiles is.... well critical but choosing to protect other tiles is a harder choice. Sure you can allow a unimportant tile at the edge of the board to sink and it won't immediately affect the game, however, when a tile sinks, its flood card is removed from the deck, slimming it down and meaning that flood cards for tiles you are trying to protect will appear more often. Keeping cards in the flood deck can act as a buffer against other parts of the islands sinking, provided you're willing to spend the action points of course.... A hand limit of 5 is also another area of the game which forces players to make decisions, just like action points, the hand limit never seems enough. It takes 4 cards to gain a figurine, giving player's space for only 1 other card in their hand! Through gritted death, players will frequently have to discard useful cards because they're not useful right now. To win Forbidden Island, the players will need to cooperate, coordinate and optimise the use of action points, they'll need to make every decisions count and use special cards appropriately and decisively. Choosing when to let a tile sink or save it, or when and what card to give to another player are all vital decisions and most of the time player's will be forced to make compromises, rarely will their decisions be no-brainers. I find Forbidden Island to be an enjoyable cooperative game and I'm happy to play it. Sometimes the luck of the draw can go with and give you a slightly easier time or it screw you over (Nothing like drawing Fool's Landing in the starting 6 flooded tiles, drawing Waters Rise straightaway and watching Fool's Landing immediately sink....). But if it was always easy or fair, what would be the fun it that? |
AuthorI play, I paint. Archives
March 2024
Categories
All
|


 RSS Feed
