3 Spellcasters and a Dwarf
  • Home
  • Special Effect
    • Special Effect
    • Return of The Indiana Jones Charity Globe Trot
    • Bard's Tale Challenge
    • Fighting Fantasy Challenge
    • The Indiana Jones Charity Globe Trot
    • Mirkwood Charity Walk
    • Middle-earth Charity Walk
    • Dungeon Daze
  • Games
    • Beach Patrol
    • The Surrendered Lands
  • Game Blogs
    • RPG Blog
    • Gaming Blog
  • Painting Blog
  • Contact

Gaming Blog

Wingspan - 06

30/11/2019

0 Comments

 
5th November 2019
0 Comments

Orleans - 02

30/11/2019

0 Comments

 
3rd November 2019

Sunday gaming at 'The Sovereigns' in Woking continues.

We concluded our afternoon with 'Orleans'.
Read my blog here.
0 Comments

Heckmeck/Pickomino - 02

30/11/2019

0 Comments

 
3rd November 2019

Sunday lunch time at 'The Sovereigns' in Woking. 50 Fathoms is on a hiatus, so we're playing board games instead.

We began the day with Heckmeck.
Read my blog about it here.
0 Comments

Wingspan - 05

30/11/2019

0 Comments

 
2nd November 2019

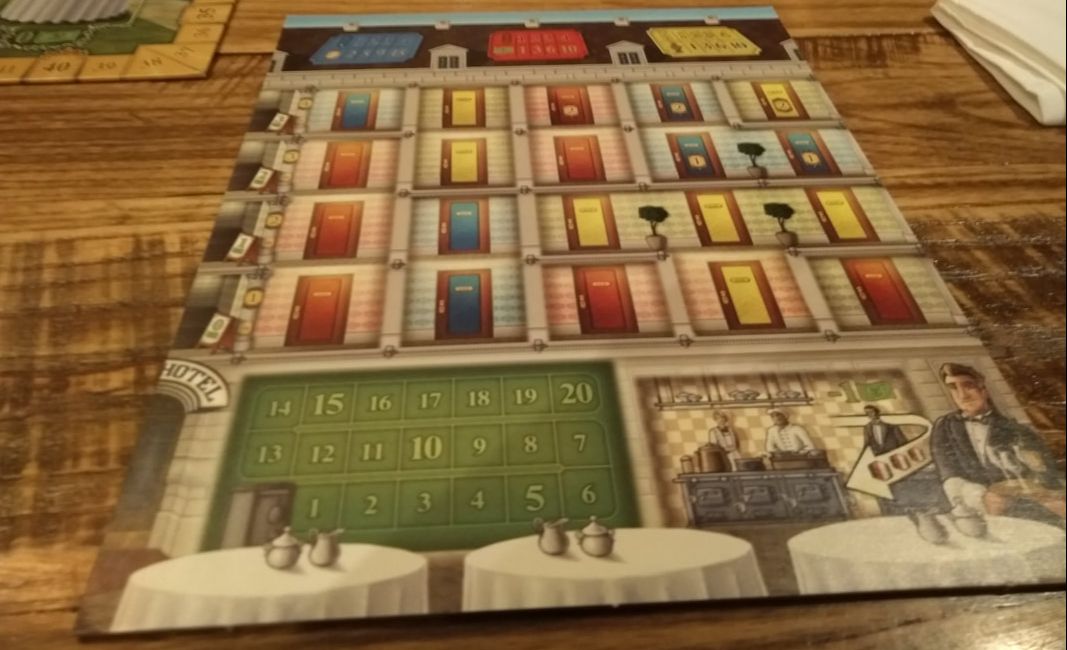
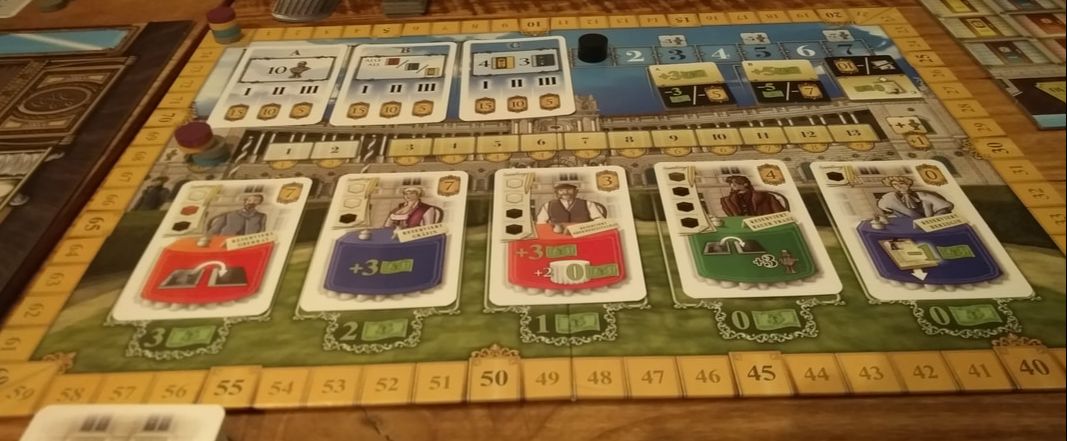
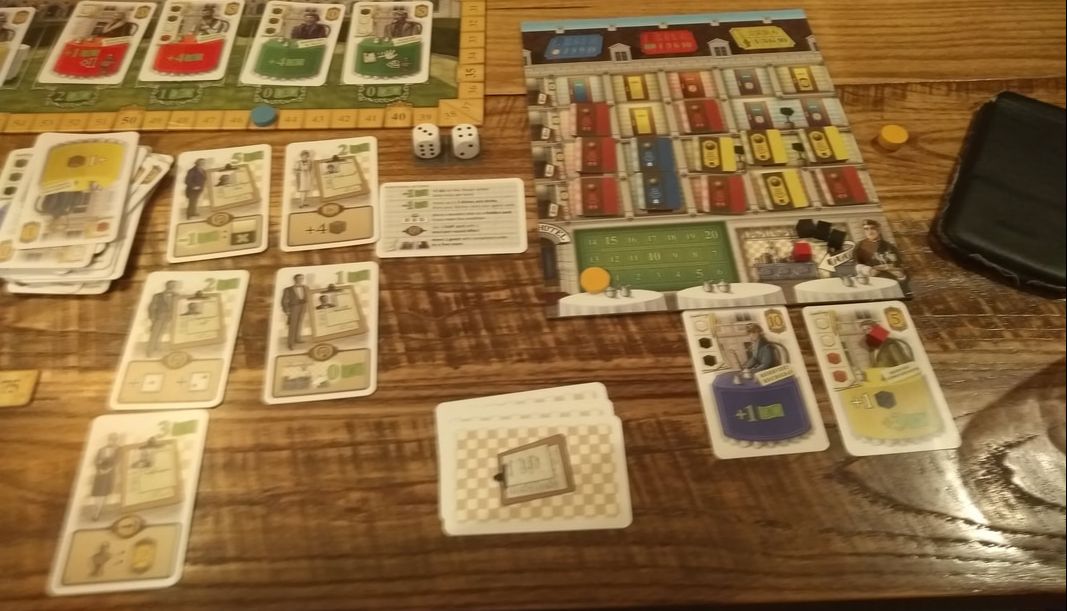
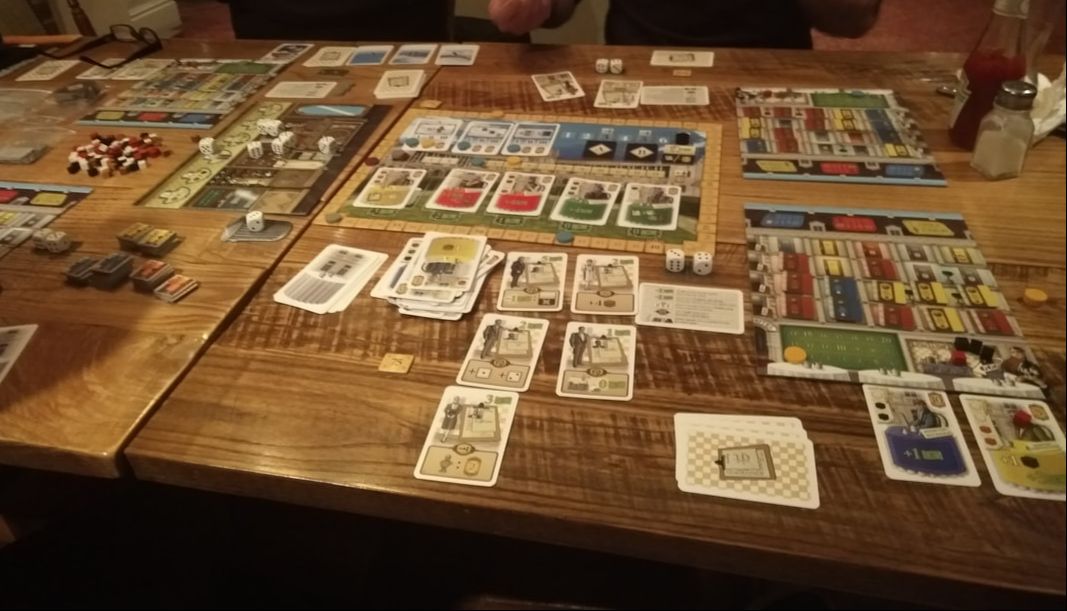
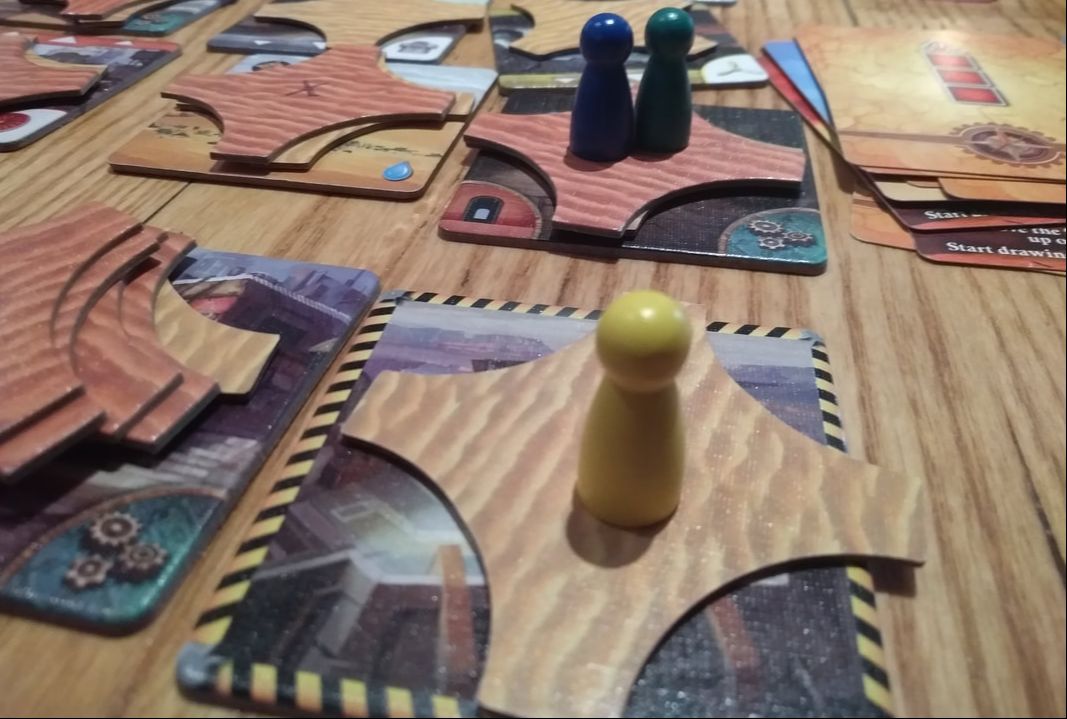
Saturday is here again and we're at Matakishi's for games tonight.

We played Wingspan.
Read my blog about it here.
0 Comments

Grand Austria Hotel

22/11/2019

0 Comments

 
29th October 2019

Tuesday night gaming at 'The Sovereigns' in Woking with the board game club continues.

The final game of the night was 'Grand Austria Hotel'.

It doesn't take much imagination to realise that this is a game about running a hotel. That's right, keep those restaurant customers happy. Manage all those hotel rooms. Maintain the prestige of your establishment. All the fun!
Joking aside, Grand Austria is pretty good game. The rules are fairly straightforward to learn, but there's a lot of things to think about and take into consideration. A lot of things! 

What's in a game?
Grand Austria Hotel has a lot of components. They are all quite colourful and well made.
  • Game board: The main game board has a few things going on. A scoring track, a prestige scoring track and a turn track. Space for 3 objective cards, space for 3 prestige reward/penalty tokens and finally 5 spaces for guest cards.
  • Action board: The action board determines how many of the 6 the game's actions will be available in any particular given turn.
  • Dice: These are normal six-sided dice to go with the action board.
  • Personal hotel board: A hotel board is given to each player. The board displays a money track, 3 spots to place guest cards in your restaurant and a place for food and drink. There are also 20 hotel rooms that come in 3 different colours, blue, red and yellow. These hotel rooms are also grouped into sets of 1 to 4 rooms. These boards are double sided, one side is identical for all players, the other is different for all players.
  • Room tiles: Used to indicate if rooms in a hotel are; not ready, prepared or occupied. There are the same 3 different colours as the hotel rooms
  • Staff cards: Staff cards that can be bought by players. They give a benefit or advantage, staff cards can be a one-off, once per turn or always active. Some staff cards provide bonus points during the endgame instead.
  • Guest cards: Guest cards are acquired by players. They have a need. If the player fulfils that need, then the player is given a reward. Then the guest will go into a prepared room that matches the guest card's colour. Guest cards come in 4 colours, blue, red, yellow and green (Green is a wild colour.).
  • Turn order tokens: Actually very important in this game.
  • Little wooden cubes. Yep, it's a quality game if it has little wooden cubes! They come in 4 colours to represent the food and drink needs of guests in restaurants. Brown is for strudel, white is for cake. Red is wine and black is coffee.

Picture
Hotel board at the game start. Note how hotel rooms are grouped by colour.
Picture
The action board before any dice have been rolled.
Picture
The main game board before anything has been added.
Picture
Main game board with objective cards, prestige tokens and guest cards.

How's it play?
We begin with setup.
  • Give out the hotel boards. ​Players decide on whether they want identical of unique hotels and use the relevant side.
  • Shuffle and place 3 objective tokens on their relevant spaces on the board.
  • Shuffle and place 3 prestige reward/penalty tokens on their relevant spaces.
  • Shuffle the guest cards and place 5 on to their relevant spaces on the board. The remaining cards will form a draw deck.
  • Shuffle the staff cards and deal 6 to each player. 
  • Give one of each of the 4 coloured cubes to each player to put on to their hotel board.
Turn order
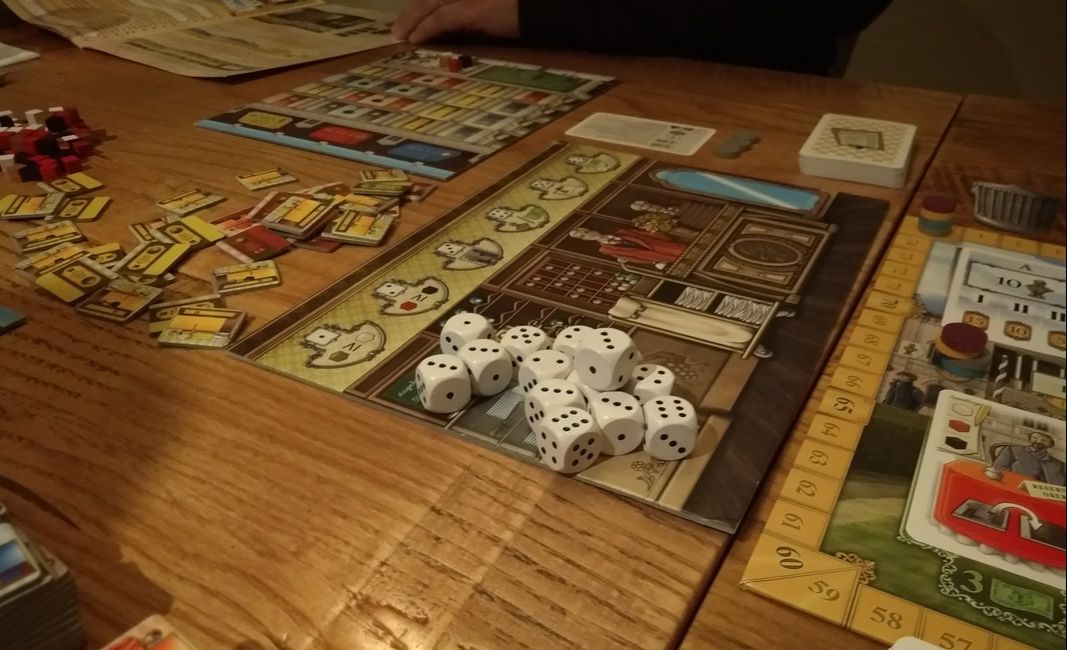
The turn order is a little unusual in Grand Austria Hotel. Every player gets 2 turns in a round. All players are given a token with 2 numbers on it - which is when their turns will occur.
Turns proceed clockwise until all players have had their first turn, then goes back anticlockwise so that the last player was also the first player.
In a 4 player game, the first player will have a token that shows '1/8' and the fourth player will have a token showing '4/5'.
Actions
The first thing the active player can choose to do is to take a guest card from the main game board. Depending on which card is taken, the active player may have to pay for it. 
The further the card is to the left, the more it costs. Gaps in the row are replaced by sliding cards from the left to the right and adding new cards on the furthest left. This is a 'conveyor belt' mechanic.

Action board
Actions in Grand Austria Hotel are determined by dice. The number of dice used depends on the number of players. In a 4 player game, 14 dice are used. The first player rolls all the dice and and places them as required on the action board.

There are 6 columns on the action board. After the dice have been rolled, they are placed in their relevant space. If 3 1's have been rolled, they are placed into the '1' column, this is done for all 6 columns.
​
This determines both the effectiveness and number of each action that can be performed. The more dice there are in a column the more effective that action is and the more often it can be performed. Every time an action is performed, a die from that column is removed. If a column has no dice, that action cannot be performed (Unless performing the 'copy action' action!).
The 6 actions are:
  1. Take food: For each die in this column a food (Cake or strudel.) cube can be taken by the active player and placed on to their customers in their restaurant or into their kitchen area. However there's a twist here. The active player can never take more cake than strudel. Thus if there were 4 dice in the column, the active player 2 of each, but not 3 cake and 1 strudel.
  2. Take drinks: This is identical to taking food, except it applies to wine and coffee cubes. For drinks, the active player cannot take more coffee than wine.
  3. Prepare rooms: For each die in this column, the active player may prepare a room on their hotel board. This means they can place the relevant number of room tiles with the 'prepared' side up on their hotel board. Depending on which rooms are prepared, they may be other requirements such as cost.
  4. Gain prestige/money: Gain prestige or money equal to the number of dice in this column. 
  5. Recruit staff: The active player may pay to recruit a staff card from their hand. The number of  dice in this column deducts from this cost.
  6. Copy action: Finally, copy action - as the name suggests, allows the active player to copy any of the 5 other actions. The dice used to determine how effective this action is comes from this column.
One other choice the active player can make is to 'pass'. When a player passes, after all other players have taken both their actions, the remaining dice (Minus 1 die.) are re-rolled and put back on the action board according to their new numbers. Then the players who passed can now act.
Additional actions
As well as the actions listed above, players can perform some extra actions.
  • Increase action dice score: The active player can pay to increase the action dice in a column on the action board by +1 for their next action only. This can only be done once per turn.
  • Serve customers: The active player can pay to move up to 3 food and drink cubes from their kitchen to customers in their restaurant.
  • Use staff card: If a staff card that has a 'once per turn' ability, the active player can use it.
  • Move guest: A guest in your restaurant can be moved to their room, provided that their needs have been met and there is a prepared room for them. When they are moved into a room, the room tile is flipped to occupied. As mentioned above, the rooms on a hotel board are grouped into sets, when all the rooms in a set are occupied by the active player, they receive a reward of money, prestige or points.
That's pretty much it for actions.

Endgame
Grand Austria Hotel is played over 7 rounds, thus each player has 14 turns to use.

Prestige is scored at the end of rounds 3, 5 & 7. During prestige scoring, before prestige is scored each player's prestige score is lowered by 3, 5 or 7 in each related round. Prestige points translate in victory points, but if a player's prestige points are too low, that player will lose victory points instead.
Additionally, if a player is above the prestige threshold, they get a bonus, if they are below, the receive a penalty. This depends on the 3 prestige reward/penalty tokens that were placed on to the main board.
 
At the end of the 7th round, points are scored from various sources, such as staff cards, occupied rooms, remaining food, drink & money, objectives and prestige tokens.
Any guests left in your restaurant loses points.
All points are tallied, highest score wins.

Picture
Hotel board at game end. With 2 restaurant guests not served
Picture
The game end.

Overall
So Grand Austria Hotel is a game about acquiring customers, fulfilling their needs and  preparing rooms for them in your hotel.
The game is quite a balancing act as it forces players to juggle preparing rooms and fulfilling the needs of their customers.
Players also need to pay attention to the prestige track, as failing to acquire enough prestige can be seriously detrimental.
The bonus objective can earn quite a lot of points.
Money too can be a problem, it's quite hard to accumulate money and is also something you need to think about.

Whilst there's a lot going on in this game, the rules aren't too complicated.
Optimising strategies is really important here. But the available actions and their effectiveness is unpredictable.
So Grand Austria Hotel forces players to both think ahead and be adaptable, whilst providing players with lots of meaningful decisions.

These are things that make Grand Austria Hotel a good game.
0 Comments

Heckmeck/Pickomino

22/11/2019

0 Comments

 
29th October 2019

Tuesday night at 'The Sovereigns' in Woking and it's game night at the Woking board game club.

We started the evening with 'Heckmeck' AKA 'Pickomino'.

Have you ever wondered what is a chicken's favourite food? It turns out that a chicken's favourite food is worms. But not just any worms, but roast worms! And not just any roast worms either, but BBQ roast worms! How many BBQ roast worms does a chicken like eating? As many as it can get. How does it get as many BBQ roast worms as it can? By pushing it's luck of course!

That's what Heckmeck is about. Pushing your luck to accumulate as many BBQ roast worms as possible.

What's in a game?
There are 2 versions of Heckmeck, standard and deluxe.
We played the standard version of the game. They use the following components:
  • 8 six sided dice, each numbered from 1 to 5, the 6th side depicts a worm. A worm has a value of 5. 
  • 16 dominoes, the top half of the dominoes are numbered from 21 to 36, the bottom half show 1-4 worms. The higher the value of the domino, the more worms on it.
The deluxe version includes some extra components and rules.
  • 2 extra dominoes.
  • 7 'bratworm' tokens.
  • 6 different meeples, each meeple grants a special ability to whoever 'owns' it.
All of the components are of a good quality. The dominoes are solid and heavy. The dice are all wooden with rounded corners. The deluxe components are of a similar quality.

How's it play?
First there's setup.
  • Place the dominoes in a line in ascending order to form a supply.
Yep, that's it for setup. Now on with the game.

The goal in Heckmeck is to roll and accumulate dice to get a score high enough to claim a domino. But here's a twist, at least one of those dice must have a worm result.
How's this done? Keep reading.
  • At the start of their turn, the active player rolls all 8 dice.
  • The player must then keep a 'set' of dice. A 'set' consists of 1 or more dice showing the same face. For example, after rolling the dice the player gets; 1, 2, 2, 3, 3, 4, 4 & 5. They could choose to keep the 1, the two 2s (Combined value of 4.), the two 3s (Worth 6.), the two 4s (Worth 8.) or the 5. Let's say the player took the two 4s.
  • Once the player has chosen a 'set', they put those dice to one side. Then they must choose to stop rolling or continue rolling.
  • If the player chooses to continue rolling, they must re-roll the remaining dice and keep another 'set', but this set cannot be the same as a set the player already took. So now the player rolls the remaining 6 dice and gets; 4, 4, 5, W, W, W (W=worm.). The player cannot take the 4s because they have already taken 4s. So they must take 5 or the 3 worms. The player takes the 3 worms.
  • The player now has a score of 23, 8 from the first roll and 15 from the second roll  (Remember worms are worth 5.). The player also has at least 1 worm result. So this is enough to get a domino, the player chooses to stop rolling. There are dominoes with the scores of 21, 22 & 23. The player must take the highest domino they can, which in this case is the 23.
Going bust or failing
  • If after rolling the dice, the player cannot collect a set because all of the dice are showing numbers they have already collected. Then they have gone bust!
  • Additionally, if a player chooses to stop rolling or cannot roll anymore dice and they have no accumulated a high enough score to get a domino, then they have failed!
  • Going bust or failing have the same result; the player must return a domino to the supply row and turn the highest valued domino in the supply row face-down. If the player has no domino to return, there is no further action.
Stacking
Stacking is one of the things that makes Heckmeck stand out.
  • When a player takes a second domino (And any subsequent dominoes.) they place it on top of the previous domino to form a stack. Thus all dominoes are kept in a stack (Even if it's a stack of 1.) and each player will have a single stack.
  • When a player goes bust or fails and must return a domino to the supply, they must return the domino from the top of the stack.
Stealing
Like stacking, stealing is something I've not seen in a push your luck game before.
  • If the active player accumulates a score that is exactly the same value as the domino on the top of another player's stack, then the active player can steal that domino and add to their own stack!
  • That's bang out of order!

Endgame
Play continues until there are no more face-up dominoes in the supply to collect.
Players tally the worms they've collected, highest number of worms wins.

Picture
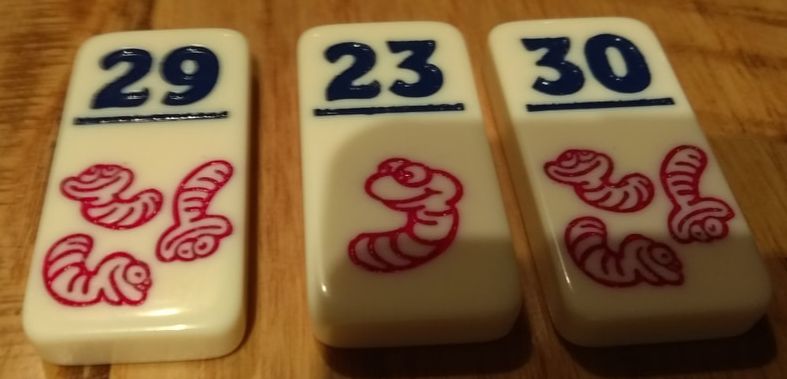
3 dominoes and a winning score!

Overall

​Heckmeck is easy to learn and fairly quick to play. It has several excellent mechanics that give players tricky decisions to make.
Choosing which sets to keep is crucial because of it 'locks out' numbers. Do you really want to take that single 5, because that means you can no longer get any more 5s. Decisions, decisions.
The worm mechanic is also cool. Needing to have a worm result is an extra thing that can go wrong. Making a worm worth a 5 is genius, it puts players in the same quandary as rolling a 5. If a worm was only worth 1, taking it when it's only 1 worm would be a no-brainer.
Finally, the stacking and stealing together is another great idea. If players just laid their tiles out in a line, then stealing them would be a bit too easy as the choice would be wider. However, since the dominoes are stacked, stealing is uncommon. When it does occur, it's something that should be taken advantage of!

All of this adds up to make a good push your luck game.
Heckmeck has very quickly become a favourite with nearly everybody I play it with. And deservedly so. 
0 Comments

Forbidden Desert

19/11/2019

0 Comments

 
27th October 2019

Sunday at 'The Sovereigns' in Woking and our gaming continues.

The final game of the day was 'Forbidden Desert', the second game in the 'Forbidden series' of co-operative games.

'Forbidden Desert' is a co-operative game of exploration.

The players are a band of adventurers and explorers, scouring the desert (Which I guess is a forbidden?) for the remains of a legendary flying machine. But during your trip, a ferocious sand storm forces your helicopter to crash in the remains of a lost city. The only way to escape the desert is to fly back out of the desert. Your helicopter is a wreck, so your only hope of survival is to find and reconstruct the flying machine before the storm and desert spell your doom!

What's in a game?
'Forbidden Desert' comes in a natty tin box, the game's components are good quality with some nice artwork.
  • City tiles: There are 24 of these tiles, except for the starting tile, they are all turned face-down at the start of the game.
  • Sand tokens: There's a whole stack of these, they are used to represent the moving sands throughout the city.
  • Storm track: As the game progresses, the storm will get more and more violent. This is tracked on the storm track.
  • Storm cards: This deck of cards are used to dictate the sandstorm's behaviour.
  • Gadget cards: Useful cards that the players acquire during the game.
  • Flying machine: The flying machine is a plastic model. The 4 missing parts of it are made of plastic, metal and acrylic. They are weighty and high quality.
  • Adventurer classes: There are 6 of these, each class has it's own card and meeple. Each character has their own water track and also has it's own unique ability.

How's it play?
Setup.
  • Randomly deal or choose a class for each player. Each class has it's unique ability and water track shown on the pertinent card. Each class also has its meeple.
  • Shuffle the location tiles and place them face-down in a 5x5 grid. Hang on, a 5x5 grid has 25 spaces, but there are only 24 tiles? When placing the tiles into a grid, the centre space is left empty. The empty space is the 'eye of the storm'. The starting tile and 3 oasis tiles can be identified even when face-down.
  • Place sand tokens on to 8 of the city tiles in a 'diamond' shape. The remaining sand tokens should be placed in a stack close to the playing area.
  • Shuffle the gadget cards into a face-down deck.
  • Shuffle the storm cards into a face-down deck.
  • Set up the storm track, there are different tracks depending on how many players there are. Additionally, the game has several difficulty levels that determine the starting point on the track.
  • One of the city tiles is double sided and represents the crashed helicopter. This is the adventurer's starting tile. Place all the meeples on to this tile.
Now, we're good to go.

Picture
The starting setup for Forbidden Desert.
Picture
One of the six professions.

Player actions
During the active player's turn, they have 4 actions that they can perform (in any order and repeatedly.). These are:
  • Move: A player can move their character's meeple left, right, up or down to an adjacent tile, provided there is no more than 1 sand token on that tile. If there is more than 1 sand tile, then the area is blocked by a sand drift and is currently inaccessible. Furthermore if the tile the meeple is currently standing on has more than 1 sand token on it, then the meeple is trapped!
  • Excavate: If a meeple is standing on a face-down tile with no sand tokens on it, then the player can excavate and turn it face-up. There are several different types of tile in the game and different actions will occur when they are revealed. Some tiles are blank, so nothing happens. There are the 3 'oasis' tiles, one is a mirage, the other 2 will provide water when excavated. There are 3 tunnel tiles, this allows characters to move between them with 1 action regardless of their locations in the game area, tunnels also provide shelter from the sun. There are 8 'clue tiles', each part of the flying machine has 2 clues associated with it. One clue shows the vertical position of the part and the other for the horizontal position. When both clues are revealed, they are cross-referenced to show the actual location of the part. Launch pad tile, nothing happens when this tile is revealed, but when the players have acquired all 4 machine parts, they must all meet on the launch pad to escape and win the game. Finally any card that displays a 'cog' in the corner allows the active player to draw a gear card.
  • Remove sand: As sand tokens build up in the playing area, they will need to be removed for various reasons. For 1 action a character may remove a sand token from their tile or an adjacent tile. The sand token is returned to the sand token supply.
  • Retrieve part: When a machine part has been revealed, if a character is on the same tile as the part, they can spend an action to retrieve it.
The storm
Once the active player has completed their 4 actions, the storm gets to act.
Cards are drawn from the storm deck, the number drawn depends upon how severe the storm is, this ranges from 2-6 cards. There are 3 types of storm card.
  • Storm moves: This is by far the most common card in the storm deck. The empty space in the game area represents the 'storm'. When the storm moves, it shuffles a tile into the empty space and creates a new empty where the tile was previously located. Depending upon circumstances, up to 4 tiles can be moved this way. Every tile that is moved this way accumulates a sand token. Sand tokens can build up very quickly.
  • ​High temperature: When this storm card is drawn, the adventurers encounter savage heat. If a character is on a tunnel tile, they are safe from the heat. Every character not in a tunnel must lose 1 water from their water track.
  • Storm intensifies: When this card is drawn, move the marker 1 space further along the storm track. After moving the marker 3 or 4 spaces, the storm will reach 'the next level' and from the next turn onward an additional storm card will be drawn at the end of a player's turn.
Gear Cards
Gear cards are all beneficial for the players and can be played at any time by the owning player.

Endgame
Losing conditions:
  • If at any time, a characters water track reaches the end, then the character dies and the players lose the game.
  • If at any time, the storm reaches it's maximum level, the players lose the game.
  • If at any time, sand tokens need to be put on a tile and there are none remaining, the players lose the game.
Winning condition:
If the players manage to retrieve all 4 missing parts of the machine, all manage to reach the launch pad at the same time and the launch pad is unblocked. Then the players win the game. As the adventurers escape in their new flying machine.

Picture
Buried! As the sand tokens ran out.
Picture
So close to victory, we had all 4 parts.

Overall
Forbidden Desert has essentially 2 timers running, the sand tokens pouring on to the tiles and the strength of the storm (Which also increases the rate in that sand tokens appear.).
Water is a resource that must be managed.

Players are faced with the choice of being prudent to preserve their water levels, acting to manage the sand token levels or having to work towards their objectives. Especially since the storm can move the game area about which can cause big problems or be an opportunity to exploit.
I think the key to doing well in Forbidden Desert are the characters. Each character has their own special ability. Remembering to utilise these abilities and working them into any strategy used vital in my opinion.

​Forbidden Desert is a cooperative game in which the players play against 'the game'.
Games of this type must balance strategy and randomness in order to be good games.
Too much strategy and once the players learn the game's systems, they'll learn to rinse it every time.
Too much randomness and player decisions become meaningless as their fates will be left to the whim of luck.

Forbidden Desert manages to straddle this line pretty well and is one of the better examples of this type of game.
0 Comments

Tiny Towns - 04

19/11/2019

0 Comments

 
27th October 2019

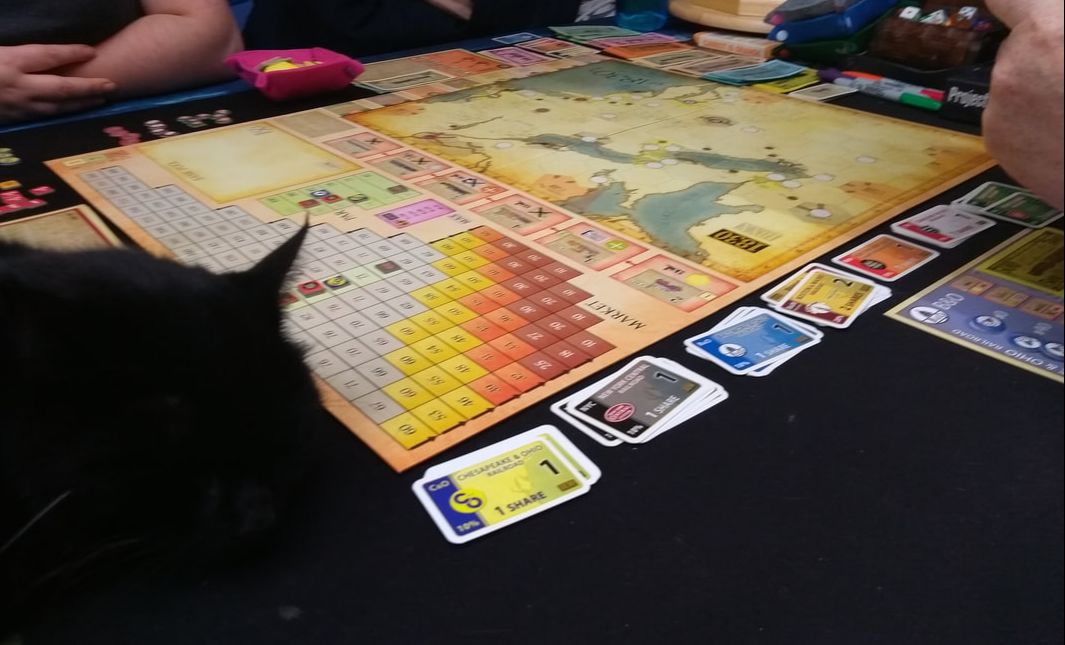
Sunday lunchtime at 'The Sovereigns' in Woking and it's time for board games as there's no 50 Fathoms this week.

We begun the day with 'Tiny Towns'.
Read my blog post about it here.
0 Comments

1830

13/11/2019

0 Comments

 
26th October 2019

Saturday evening has rolled round again and we're at Matakishi's for some gaming goodness.

​Tonight we played '1830', or to give it its full name; '1830: The Game of Railroads and Robber Barons'. As you will have surmised, this is a game about railroad building. Actually, it's probably fair to say it's the game about railroad building.

What's in a game?
1830's components are very 'old-school' and clearly favour function over form.
  • Game board: The 1830 game board is split into 2 halves. The top half contains a grid filled with numbers, this is used to manage the stock market in the game. The bottom half of the board depicts a hex map of north-eastern United States from Chicago to New York.
  • Hex tokens: These tokens show the railway lines that will connect towns and cities. The tokens come in several different colours to represent improvements in technology. As the game progresses, players will gain access to more and more complicated rail layouts and junctions that can be used to 'upgrade' previously played hex tiles.
  • Share certificates: There are several 'public' companies in the game and there are shares for each of them. Each certificate is for 10%, except for the first certificate which is the 'President's certificate' and is worth 20%. That's 9 certificates for each company that equal 100%.
  • Private company certificates: As well as public companies, there are a number of smaller privately held companies in the 1830.
  • Company boards: Each company has its own board. The board has room for the company trains and funds, each board also comes with come some 'station' tokens.
  • Train cards: These double sided cards represent train technology and are numbered from 2-6. The higher the number the better the trains that can travel further and make more stops.
  • Money: 1830's currency is obviously U.S. dollars, this depicted with paper money. That's right, actual paper money! Haven't seen that in a board game for a long time, as I said 'old-school'.

Picture
Felix (On the left.) provides sound financial advice, despite his drooling,
Picture
3 shares in the 'New York, New Haven' company and the 'priority' card.

How's it play?
Setup
1830 was originally published in 1986. The version we played was published in 2011 by Mayfair Games. There was some head-scratching during set up as it turns out in this edition there are several variants of the game. We had been trying to set up the 'basic' version of the game, which apparently is different to the 'classic' version (Which is what we wanted to play.).

The basic version of the game should be the classic version, do you hear Mayfair Games!

​Anyway, on with setup.
  • The game board is set out, as are the train cards,  private companies and company boards.
  • The share certificates are put out into stacks for each public company. The president's certificate goes on top.
  • $2400 is divided amongst the players.
That's pretty straightforward.

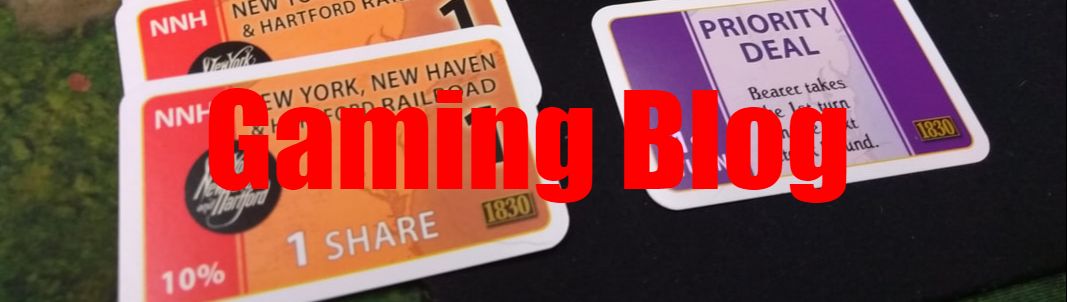
Bidding
Bidding only occurs once in the game (Right at the start.).

Players have to bid for the right to buy one of the private companies.
Auctioning is actually very straightforward. One player makes a starting bid (Whoever is nominated as 'The Banker' should start.), then proceeding clockwise, each player has to make a higher bid or pass. If a player passes, then they are out of the auction permanently.
When everybody has passed, then the player who was the highest bidder, gets the 'privilege' of choosing which private company to buy first (Yes, even though you may have bid loads of money, you still have to pay to buy a private company!), also the highest bidder gets to take the 'Priority' card for the first stock market round. Second highest bidder gets second choice of buying a private company and so on until all the players have a private company.

Stock market and operating rounds
This is where the majority of the game takes place.

At the beginning of the game there will be a stock market round followed by an operating round.
Later on, there will be a stock market round followed by two operating rounds.
Even further into the game, the stock market round will be followed by three​ operating rounds.

Stock market round
  • The stock market rounds begins with the player who has the priority card and proceeds clockwise.
  • Players can choose to buy and sell shares or pass. Obviously, this early in the game, there will be little if any selling of shares. The stock market round continues until all players has consecutively passed. Finally, the priority card is given to the player to the left​ of the last player to buy or sell a share.
  • At the start of the game there are no public companies operating, so the starting player can only buy shares.
  • When buying a share in a company for the first time, two things happen. Firstly the player who is buying the share sets the price of the stock, this is called the 'Par' and ranges from $67 to $100 for each 10% certificate. Secondly, the president's certificate must be bought before any other certificate (At twice the par cost too! Since it represents 20% of the company). After this, certificates in that company are bought at the normal 10% per certificate.
  • Any shares that are sold by a player are put into 'the bank' and are not returned to the stack it was bought from. Selling shares will lower the value of the shares on the stock market, but it does not affect the 'par' price. Player may choose to buy shares from the bank (At the stock market price.) or from the stack (At the par price.). No player may own more than 5 stock certificates in any one company. This includes the president's certificate, so a single player can earn up to 60% of a company.
  • When 60% of the shares in a company have been bought (From the stack at the par price) by players, the company has been 'floated', see more below about this.
  • At the end of a stock market round, if all the shares in any company have been bought by players, then the stock value of that company increases.
Company flotation
When a company is floated, the following occurs:
  • Whoever has the most shares becomes president of the company. If this is not the player with the president's share, then it is swapped for two shares with the player who has the most shares. 
  • The president receives the company board, this will include station tokens and 'operating capital' equal to ten times the par value.
Operating rounds
So now we're on to the operating round(s). The following occurs:
  • The private companies pay out to the players that own them. They're a useful source of income early in the game, but eventually they disappear from the game as the publicly held companies come to dominate.
  • Next the publicly held companies operate. They do this in order of the stock value, the most valuable company goes first. They can carry out the following actions.
  • Lay track: The president can put down a hex token on a part of their rail network to expand it. If the he goes over 'rough terrain', it incurs a cost that must be paid out of the companies operating capital, sometimes going into another city also costs. If this is the first operating round for a newly floated company, then it will have it's own unique starting hex, players must start their expansion from this hex. As the game progresses, more and more advanced hex tokens become available that allow more complicated junctions to appear on a hex token, these can be used to upgrade previously placed hexes.
  • Run a service: Starting from the company's home hex (Or a station token that has been paid for and placed by the company.), the president must run a rail service. The number of stations that the service can stop at is dependant on the train cards that the company owns. If a company owns a 3 point train card, then the service will stop at a maximum of 3 stations. A company may run multiple services if they own multiple train cards, but they cannot use the same rail lines again in the same round.
  • Income: Once the service has been run, the president calculates how much income the service makes. Then the president decides whether to add the money to the company's operating capital or pay it out as a dividend. If it's paid out as a dividend, then all players who own shares in the company will receive a percentage of the profit according to the stocks they own. If a company pays out a dividend, the stock market value of the company rises, if the income is given to the company, the stock market value drops.
  • Purchase trains: You will have noticed that trains are bought after running a service; this means during a company's first operating round, it cannot run a service! There's a nasty twist in the rules here, because as improved trains come into player, older trains become obsolete. So when the first 4 point trains is bought by a player, all 2 point trains are removed from play. If a player isn't careful, the train(s) of a company that they control will removed in someone else's turn. Then the player cannot buy a train until after running a service! Nasty!
  • After the operating rounds have completed. Play returns to the stock market round, beginning with the player who currently holds the priority card.
There are more situational rules in the game, but there's no need to go into too much detail here.

Endgame​
Play continues until all the money from the bank has been paid out to the players.

Winning is determined by who has acquired the most personal wealth.
Players add up all the personal money they have accumulated and the combined stock market value of all the shares they own. The operating capital of any companies that the player may control is not added to the final tally.

Highest score wins.​

Overall
It's a testament to 1830's design that 30 years on, it's mechanics and rules are still totally solid and watertight.
The stock market round is well balanced so it has enough depth to be engaging and interesting, but is not head scratching in complexity.
I really like it that player's money is entirely separated from the money needed to run a company. I also like how in order to maximise your personal profitability, you'll also need to invest in companies run by other players. Because no player can own more than 60% in a company, this will happen.
The operating rounds give players plenty of choice and options when expanding their companies. Eventually there will be sets of intricate and convoluted rail networks interacting and criss-crossing with each other.
​Players also need to pay close attention to the money that their companies maintain as having a company go bankrupt will have serious consequences for the stock value.

On the box of 1830, it says that it takes 3-6 hours to play and that's no exaggeration. It is the only drawback to 1830 is that I can think of.

1830 is a classic and there's no doubt about it. There are plenty of other rail building games and many of them are good. But if you've got the hours to spare, none are as good as 1830.

It only remains for me to say that it seems that the game was last in print a few years ago. It's criminal that it's still out of print now, considering just how good a game 1830 is.
0 Comments

Loot - 09

13/11/2019

0 Comments

 
22nd October 2019

It's Tuesday night at 'The Sovereigns' in Woking for gaming.

The third and final game of the evening was 'Loot'.
Read my blog about it here​.
0 Comments
<<Previous

    Author

    I play, I paint.
    ​This is where I talk about what I play.

    Archives

    February 2023
    February 2022
    December 2021
    November 2021
    October 2021
    September 2021
    August 2021
    July 2021
    June 2021
    May 2021
    April 2021
    March 2021
    February 2021
    January 2021
    December 2020
    November 2020
    October 2020
    September 2020
    August 2020
    July 2020
    June 2020
    May 2020
    April 2020
    March 2020
    February 2020
    January 2020
    December 2019
    November 2019
    October 2019
    September 2019
    August 2019
    July 2019
    June 2019
    May 2019
    April 2019
    March 2019
    February 2019
    January 2019

    Categories

    All
    2 Player Only
    50 Fathoms
    Abstract
    Annual Quiz
    Area Control
    Asymmetrical Play
    Auctioning
    Black Hack
    Bluffing
    Board Game
    Campaign Play
    Card Game
    Clockwork & Chivalry
    Cooperative
    Cthulhu Hack
    Deck Builder
    Deduction
    Dice Game
    Drafting
    Engine Builder
    Hand Management
    Hidden Role
    In Darkest Warrens
    Legacy
    Merry Outlaws
    One Vs Many
    Oubliette
    Programming
    Push Your Luck
    Real Time
    Renaissance
    Resource Management
    Roll And Move
    Roll & Write
    Route Builder
    RPG
    Savage Worlds
    Set Collecting
    Storytelling
    Team Based
    The Year In Gaming
    Tile Placement
    Trading
    Traitor
    Trick Taking
    Wargame
    Wasted Hack
    WFRP
    Word Game
    Worker Placement

    RSS Feed

Powered by Create your own unique website with customizable templates.
  • Home
  • Special Effect
    • Special Effect
    • Return of The Indiana Jones Charity Globe Trot
    • Bard's Tale Challenge
    • Fighting Fantasy Challenge
    • The Indiana Jones Charity Globe Trot
    • Mirkwood Charity Walk
    • Middle-earth Charity Walk
    • Dungeon Daze
  • Games
    • Beach Patrol
    • The Surrendered Lands
  • Game Blogs
    • RPG Blog
    • Gaming Blog
  • Painting Blog
  • Contact