|
Here are the totals for May. Quite similar to April, but quite a few more first plays. Total games: 44 Different games: 27 First plays: 11 Sunday 1st on Board Game Arena
Lucky Numbers - 19 Stella - Dixit Universe - 6 Dragonwood - 10 Codex Naturalis - 21 Azul - First Play! Monday 2nd Round Simon's Lords of Waterdeep - First Play! Tuesday 3rd at The Sovereigns with the Woking Gaming Club My Little Scythe - 2 Horrified - 4 Sunday 8th Board Game Arena Lucky Numbers - 20 Railroad Ink - 26 Martian Dice - 13 Azul - 2 Tuesday 10th at The Sovereigns with the Woking Gaming Club Horrified - 5 Friday 13th Farnborough Codenames - 5 Joking Hazard - First Play! The Resistance - First Play! Saturday 14th Aldershot Flip City - First Play! Sunday 15th Board Game Arena Lucky Numbers - 21 Stella - Dixit Universe - 7 Cloud City - 12 Diced Tomatoes - First Play! Hanabi - 3 Tuesday 17th at The Sovereigns with the Woking Gaming Club Space Base - 11 Horrified - 6 Wednesday 18th Simon's Parks - 8 Machi Koro 2 - 2 Thursday 19th Aldershot Deep Sea Adventure - 6 Switch & Signal - First Play! Friday 20th Simon's Valor & Villainly - 2 Sunday 22nd Board Game Arena Lucky Numbers - 22 Azul - 3 Parks - 9 King of Tokyo - 8 Diced Tomatoes - 2 Tuesday 24th at The Sovereigns with the Woking Gaming Club Libertalia: Winds of Galecrest - First Play! Thursday 26th Aldershot Tiny Epic Dungeons - First Play! Tiny Towns - 7 Pan Am - 4 Sunday 29th Board Game Arena Lucky Numbers - 23 Railroad Ink - 27 Can't Stop - 16 Copenhagen - First Play! Fruit Picking - First Play! Tuesday 31st at The Sovereigns with the Woking Gaming Club Tiny Epic Dungeons - 2
0 Comments
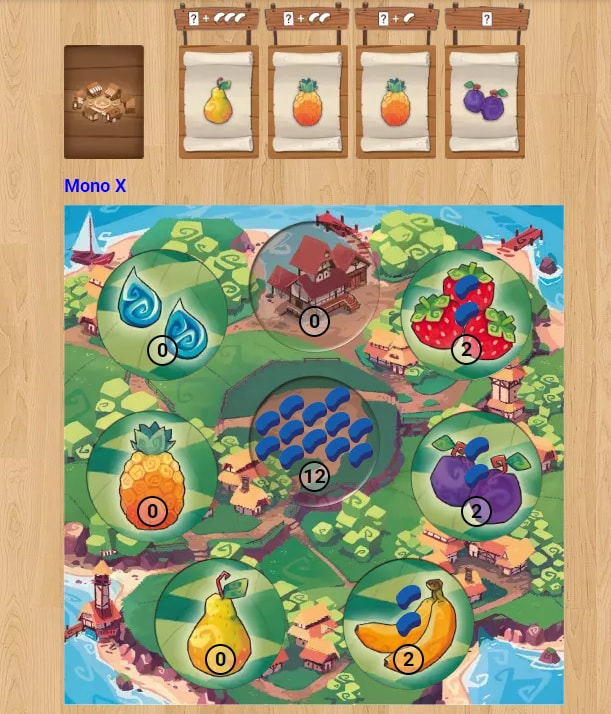
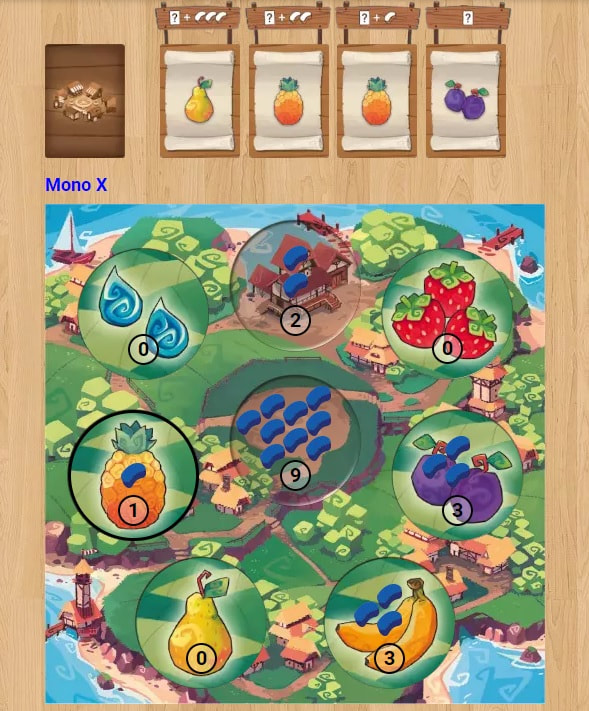
29th May 2022 Sunday gaming on Board Game Arena continued with mancala styled game Fruit Picking. I'm not the fruit picker, I'm the fruit picker's son, I'm only picking fruits 'til the fruit picker comes. Hmm, it doesn't work... Caveat: We've only ever played Fruit Picking digitally. What's in a game?
The boards in Fruit Picking feature a couple rural landscapes depicted with a appealingly stylised illustrations showing idyllic countryside. The fruits are also well illustrated and Fruit Picking has solid art style. Other than the fruit and waterdrop symbols, there's no iconography in the game and it should not prove any problem to players. How's it play? Setup
On to play In Fruit Picking, players take turns moving their resources clockwise around the spaces on their board which allows them to active one space to gain more seeds or buy a card. Play begins with the first player and once their turn is over, proceeds to the left.
Endgame Play continues with players acquiring fruit cards until one player has the cards to meet one of the criteria which triggers the game end. Fruit Picking provides players with 4 ways to do this. A pair and 3 of a kind, 4 of a kind, 3 pairs and 1 of each fruit. When this occurs, the current round is completed and if the player who triggered the game is the only one to have met any of the criteria, then they win. In the likelihood that more than one player has met any of the criteria by the end of the last round, then ties are broken by quantities of fruit and seeds on cards. Overall
Fruit Picking is a lightweight games that has a good mix of logic and luck. Logically, it's not hard to think several moves ahead if you want. Once farm cards have been distributed on to the player boards, moving seeds and activating farm cards is entirely predictable and only driven by player decisions. Manipulating the Harvest House action to game more actions is a key tactic, especially as it can be used to quickly fill the Harvest House and used to purchase cards. Fruit Picking is essentially a race to acquire cards before other players. When cards are drafted, everything can change, which neatly brings me to the next facet of the game The game's unpredictability comes into play on the market track. As play progresses, cards will come into play randomly, not only that, their costs will also vary, especially as they move along the track. It means that some times, the cards appearing will play into certain players' strategies and other times, potentially scupper those strategies. Players will have to be prepared to change direction for long term plans when this occurs and adapt their approach according to what is available. It's something I've encountered in other games and found to be irritating, Fruit Picking is no different. I know that this can be an important element of a game because without some randomizer, it can sometimes very quickly become obvious who's going to win. Even so, it irritates me. Fruit Picking also sits in a strange place of feeling a bit overlong for a filler game but definitely a bit too light for a main game. Having said that, it's accessible game that's easy to learn. For people who want something which engages some tactical thinking but is not along time brain burner, Fruit Picking may hit that sweet spot. 29th May 2022 It's a Sunday Evening and we're on Board Game Arena for some gaming entertainment. Copenhagen; largest city in and capital of Denmark. Few know though, of the cities secret history of builders having ties with errr.... tetromino shapes? At least that's what the game Copenhagen would have you believe... sort of! Caveat: we've only ever played Copenhagen digitally. What's in a game?
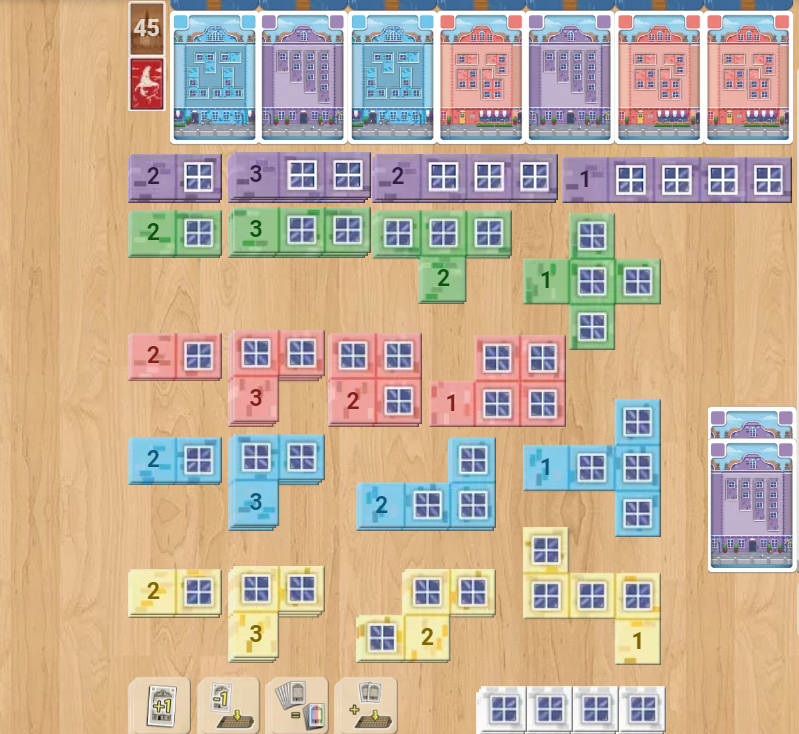
The components for Copenhagen are pretty colourful and bright, although there's barely any art to speak of. There's also barely any iconography to speak of. The symbols on the ability tiles aren't immediately obvious and will probably require looking up in the rules a couple of times. Other than that though, everything else is easily understood.
How's it play? Setup
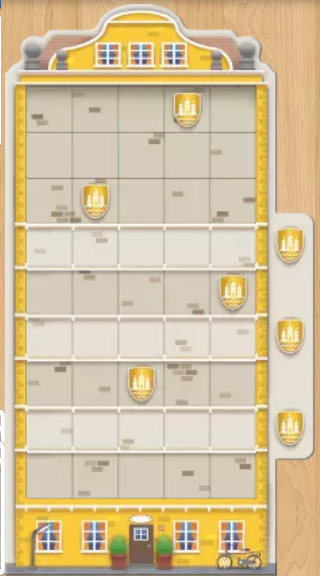
On to play In Copenhagen, players take turns either gathering cards or playing them to gain tiles which they put on to their player board to score points. During their turn, the active player may perform exactly 1 of 2 possible actions.
Endgame Either one of two ways can trigger the game end. If the End Game card is drawn (Can only occur after shuffling the discard pile back into a draw deck.) then the game immediately ends. If a player scores a 12th point then the game immediately ends. In either case, points are tallied, highest score wins. Overall
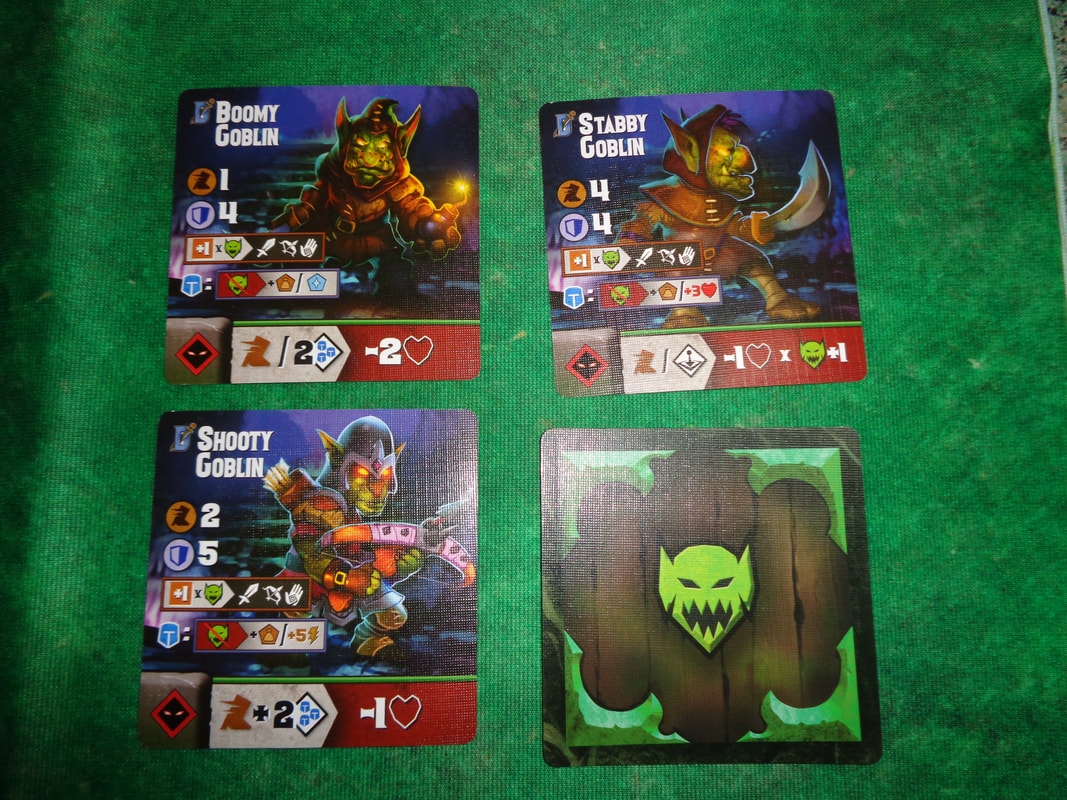
Mechanically, Copenhagen is a fairly light, accessible game; players are either drafting cards or drafting tiles. It's the relationship between those 2 actions that's interesting. Firstly, there's not many tiles that go into the game, e.g., only 1 5-space tile is available in each colour and only 3 each of the other sizes in each colour, which is all quite deliberate. It takes more cards and thus more actions (And longer.) to get the bigger tiles which are the better tiles but there's the risk a player won't get the one they want. The bigger tiles are better because of the windows (Or lack of.) on them. Getting a lot of 2-space tiles will mean 50% of filled spaces on a player's board will be windowless, while getting a lot of 5-space tiles means only 20% of spaces are windowless. Completing a row or column with all windows essentially doubles the points that line is worth and the more windows a player can get on their board, the more likely they are to do this. This brings me to the next point, other than the 1-space tiles, every tile has a windowless space. This means it's very hard to create lines that all score windows. Players will want to position windowless spaces to minimise their effect and provides players with meaningful decisions to make. These two factors means that players are faced with a dilemma. Go for the quicker easier to get tiles and probably get a smaller score, or take the risk of losing our by going for bigger, better scoring tiles. There's definitely a higher level of play that involves watching what cards other players are drafting and trying to anticipate what colours they're going for. This kind of knowledge allows players to adapt to what they think their opponent is doing. I think Copenhagen is a fairly easy to learn game that has a streak of depth to it. Most people will pick it up fairly quickly. Having said that I personally found the game a little dull. There's nothing here that I haven't seen elsewhere, it's just packaged differently here. Copenhagen also played just a little too quickly for my liking (Normally something I'd never criticise a game for!); playing with just 3 people meant that frequently 6 cards were being drawn from the 70 card deck every round, this means the game would reach the end of the deck twice after 20-something cards drafts for each player. It felt like the game is mostly likely to deplete it's deck before a player gets to 12 points. To put that into perspective; if a player has 20-something card drafting actions, that in turn gives them the ability to draft around 50 spaces worth of tiles. The quickest way to reach 12 points is to have 6 filled rows, all with windows. That would require filling in 30 spaces at a minimum, this is provided they got the cards and tiles they wanted. I'm sure there are players out there that would find the challenge of getting to 12 points compelling but for me. It meant that I found the game unsatisfying and combined with it's blandness made it average and unremarkable. I can't really fault the game, it's just a little dull. 26th May 2022 It's a Thursday evening and I'm in Aldershot with friends for some gaming goodness that's been a long time coming! Is it tiny? Yeah pretty much. Is it in a dungeon? Definitely. Is it epic?... Well, you'll just have to see! Tiny Epic dungeons is a cooperative tile laying (Or card laying really.) dungeon crawler with players taking on the roles of various heroes who will spend much of their time managing a goblin epidemic before being chased around by the big bad before hopefully defeating it. What's in a game?
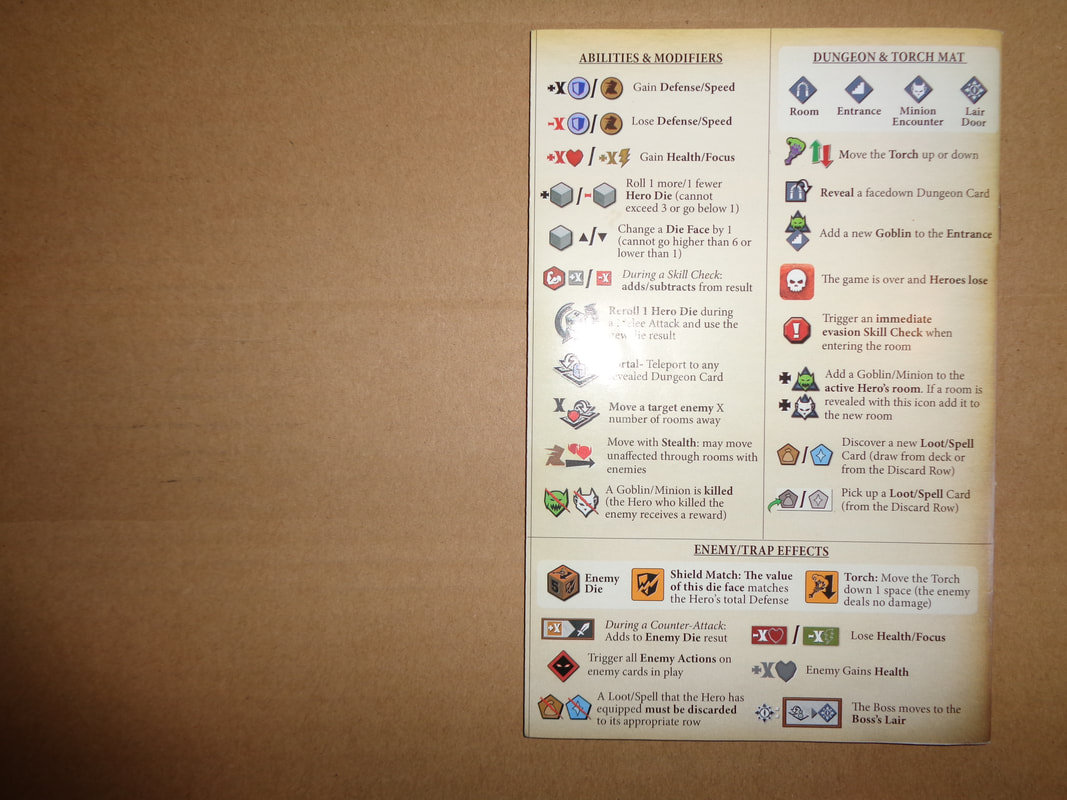
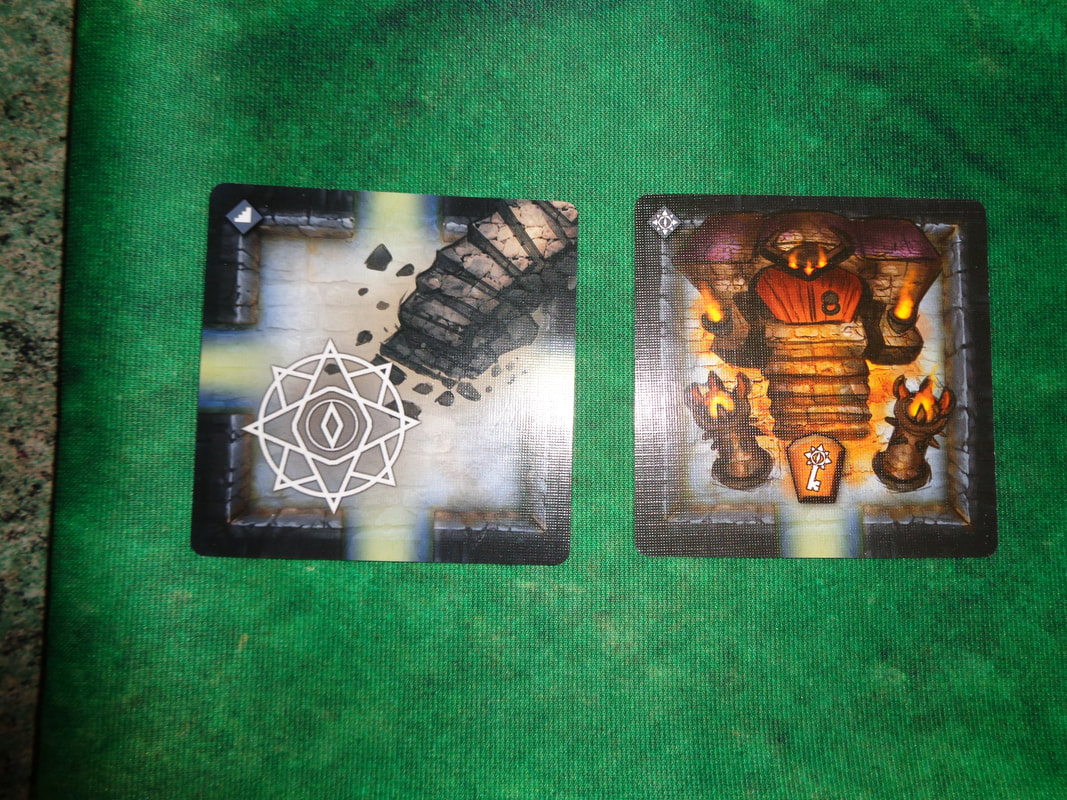
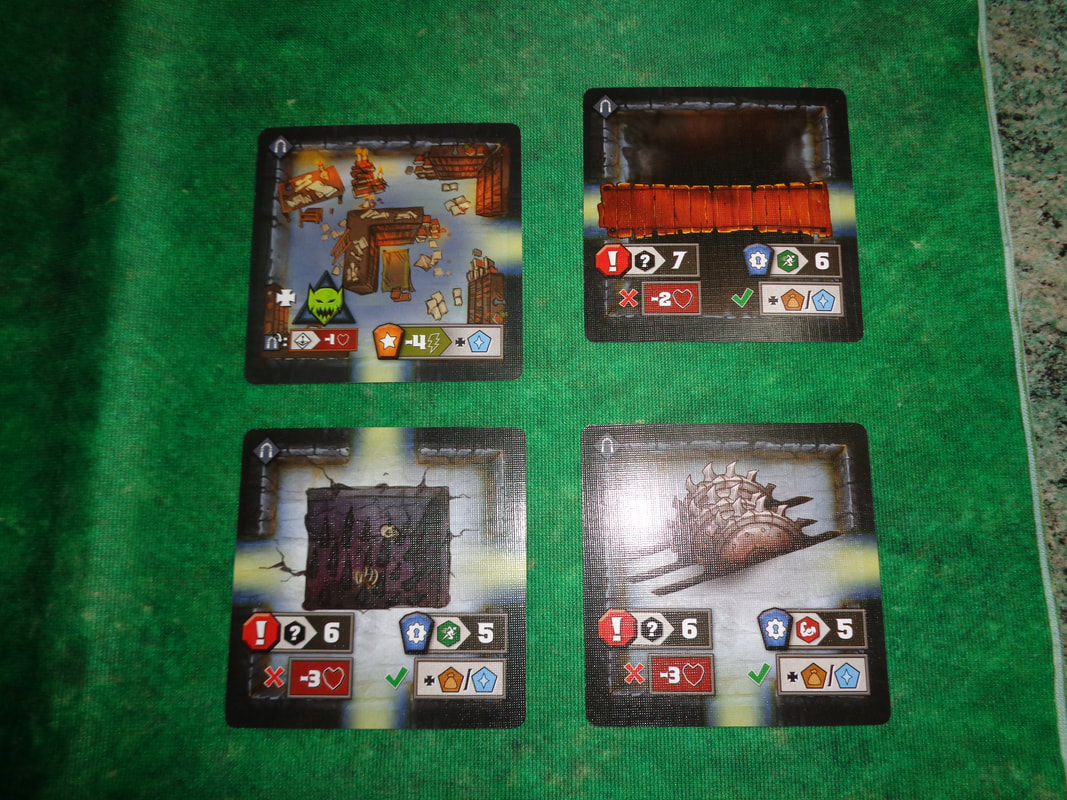
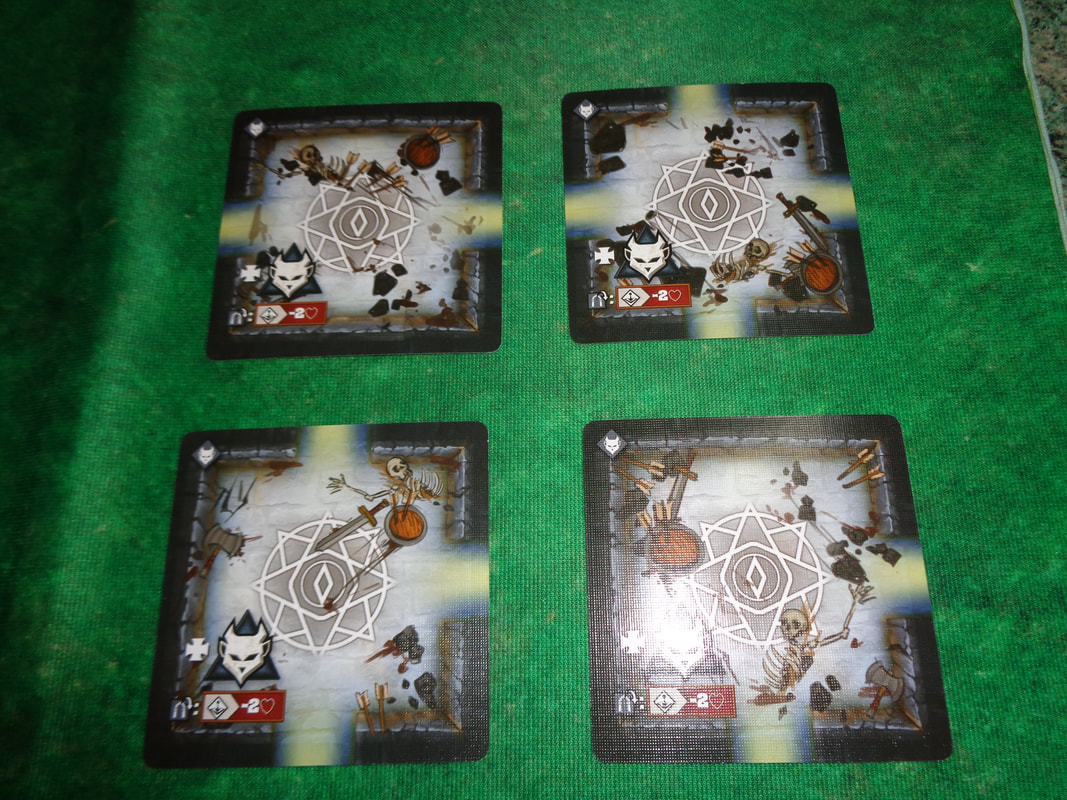
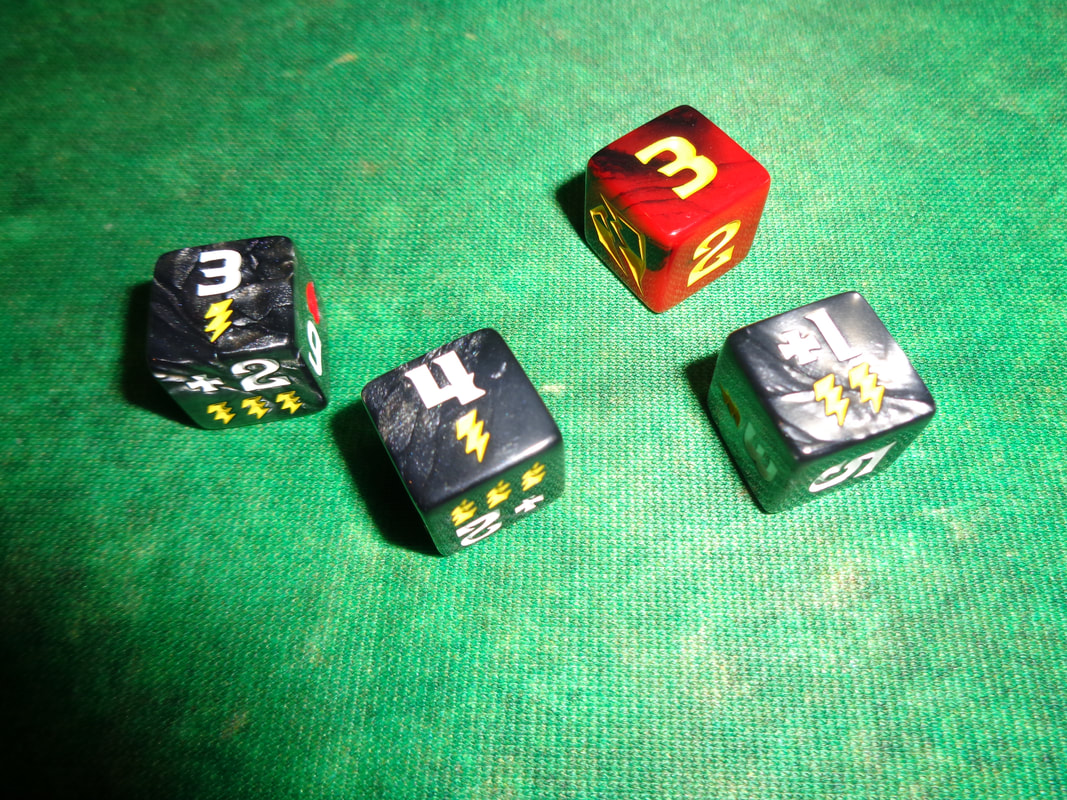
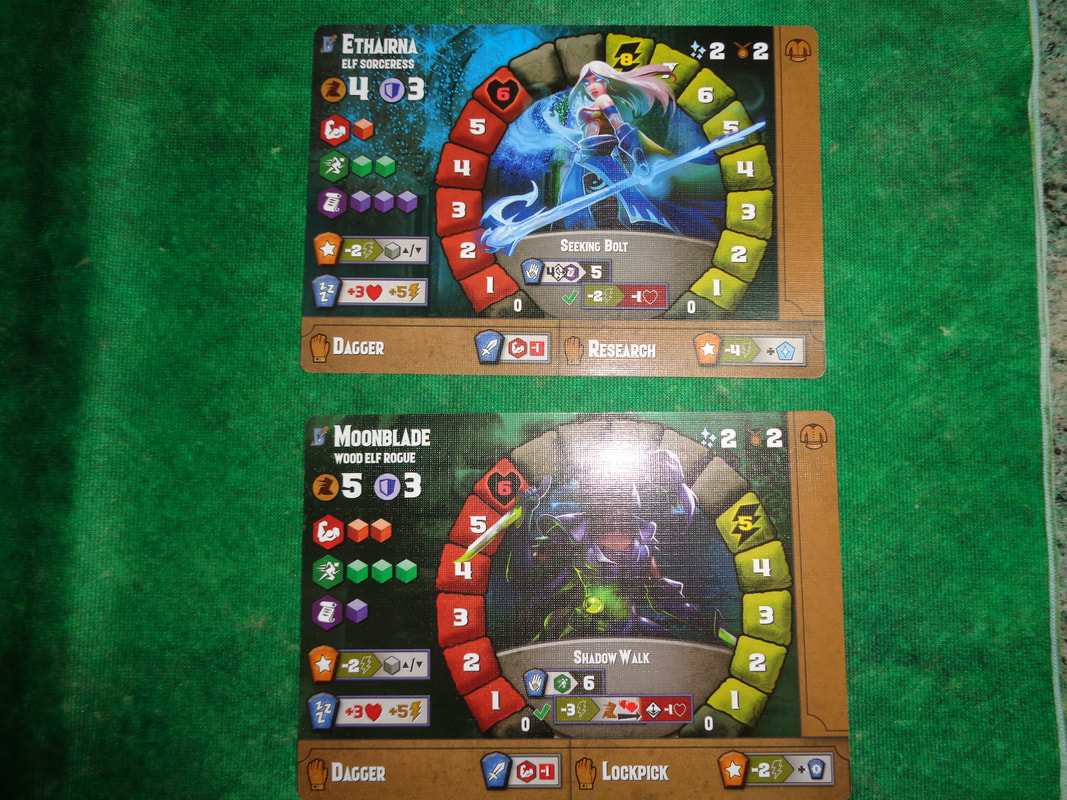
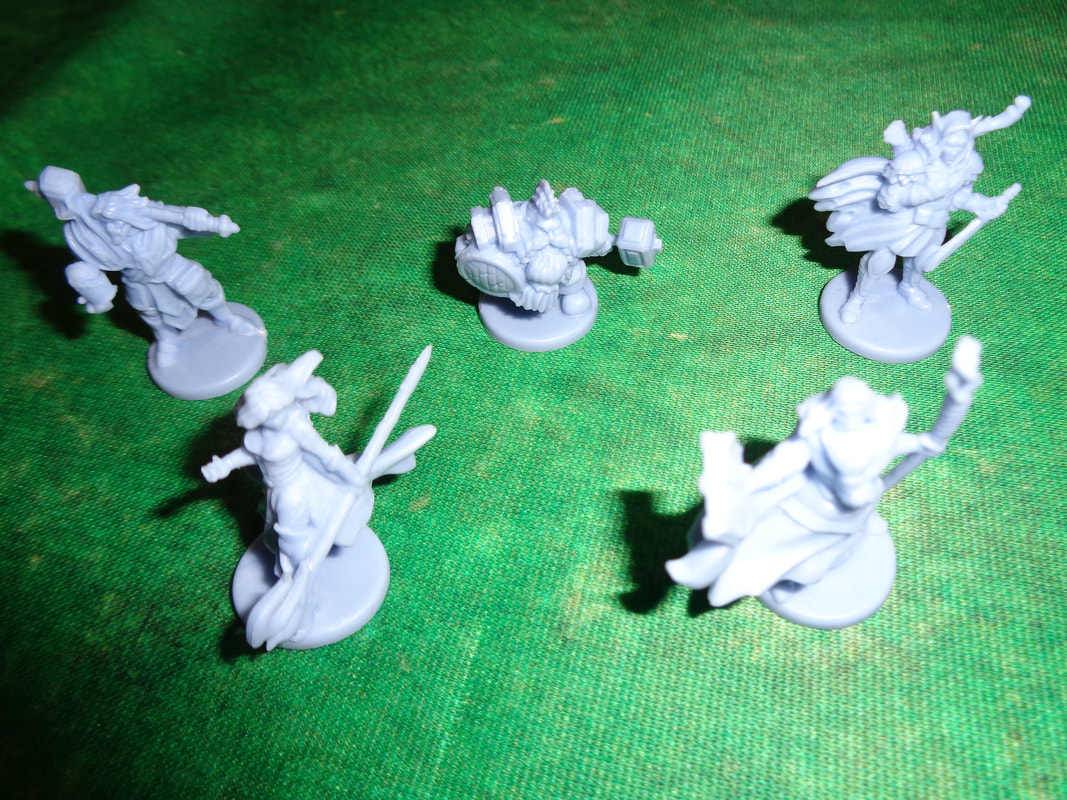
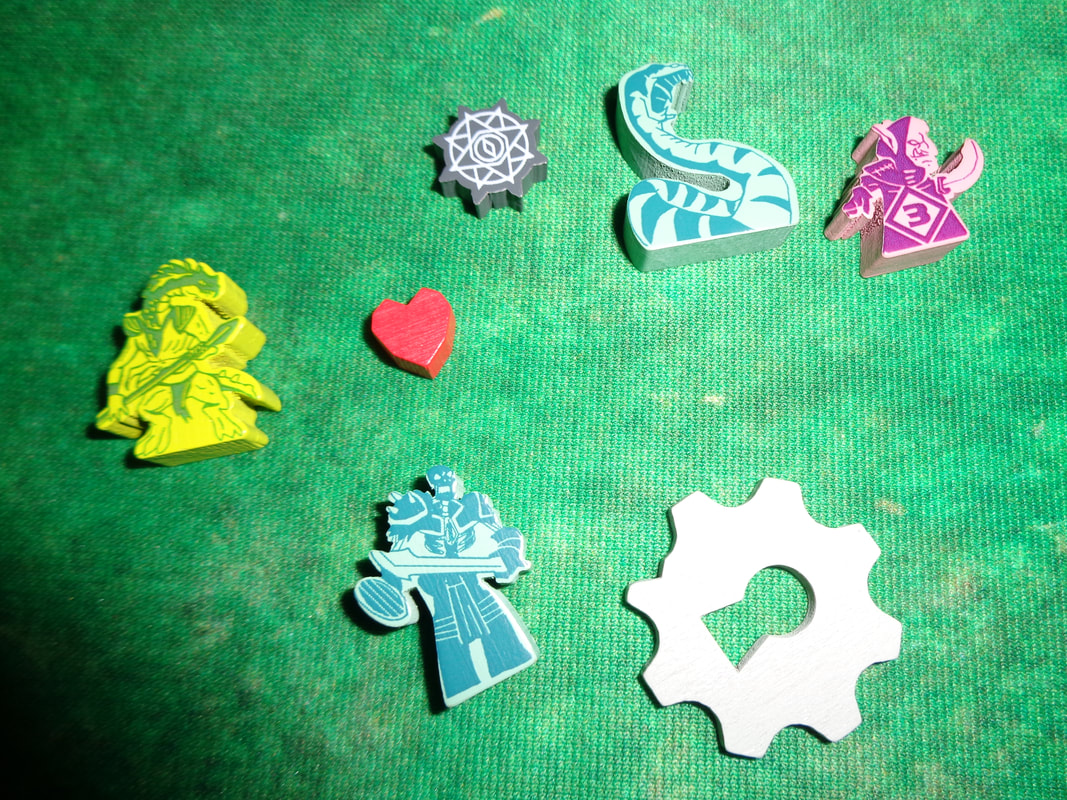
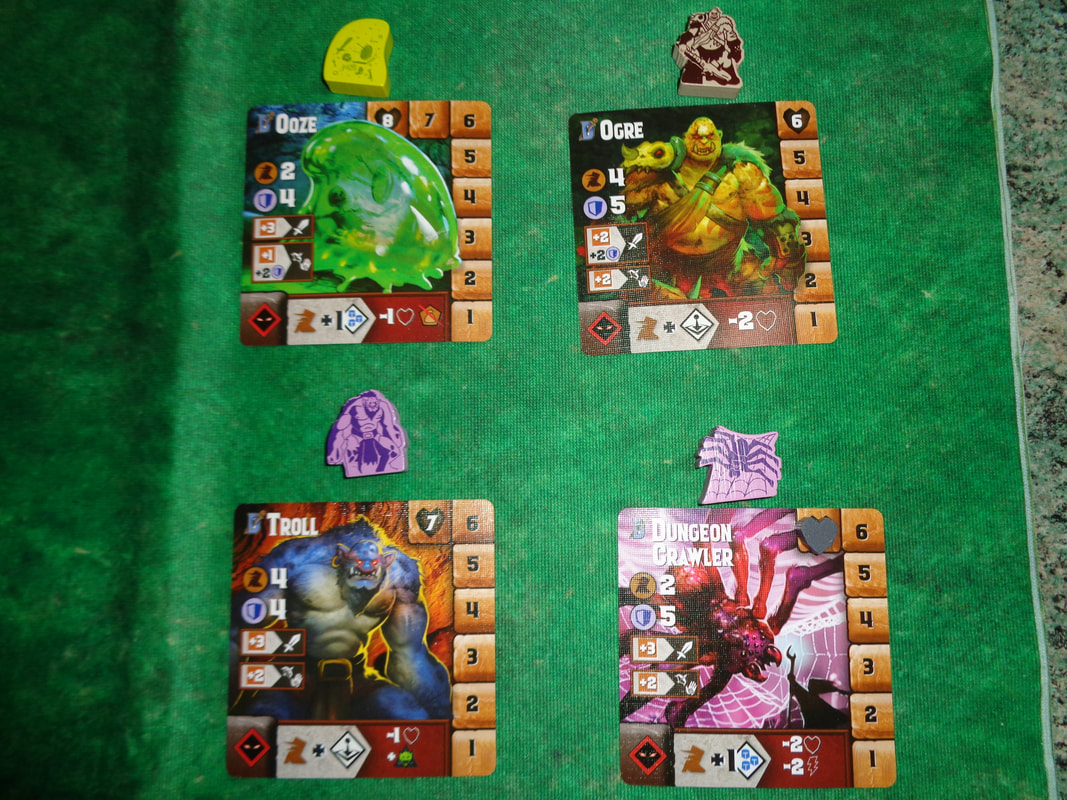
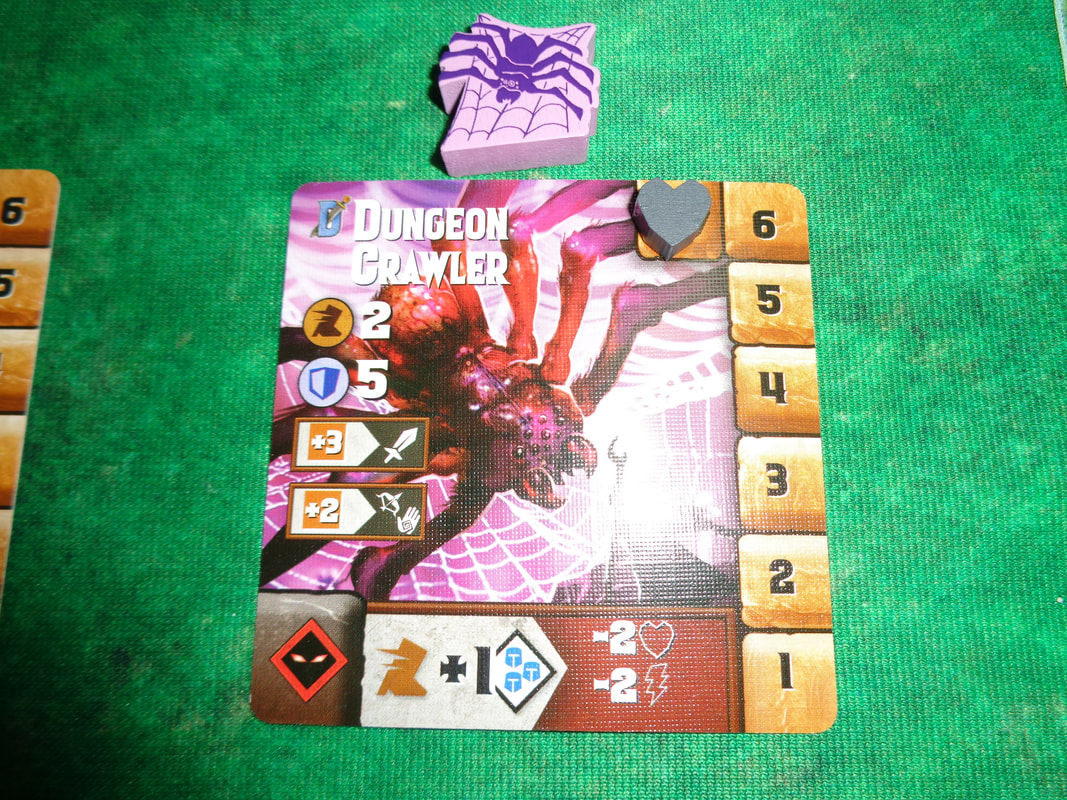
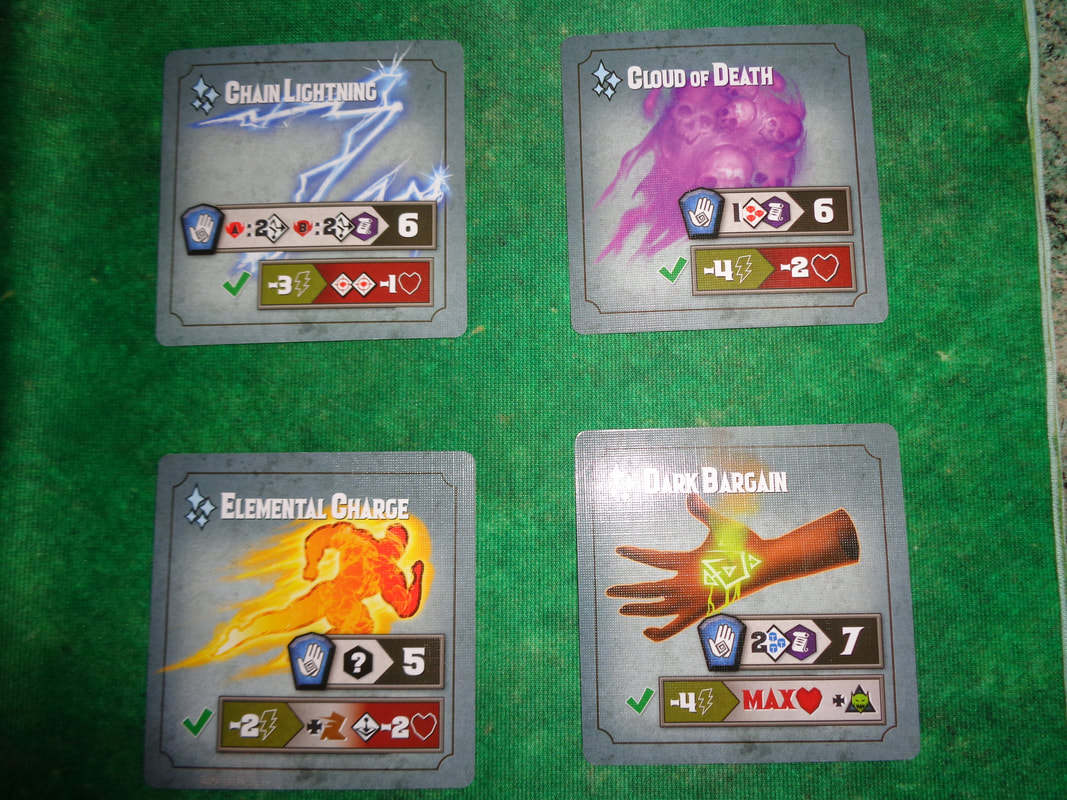
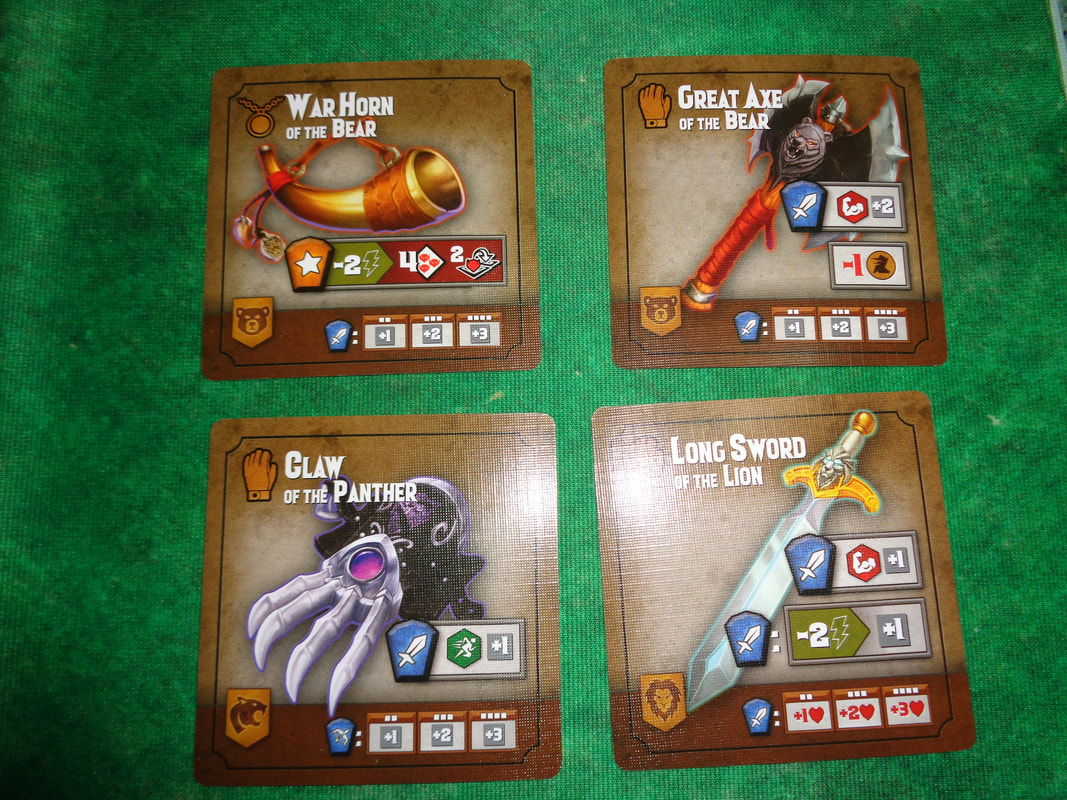
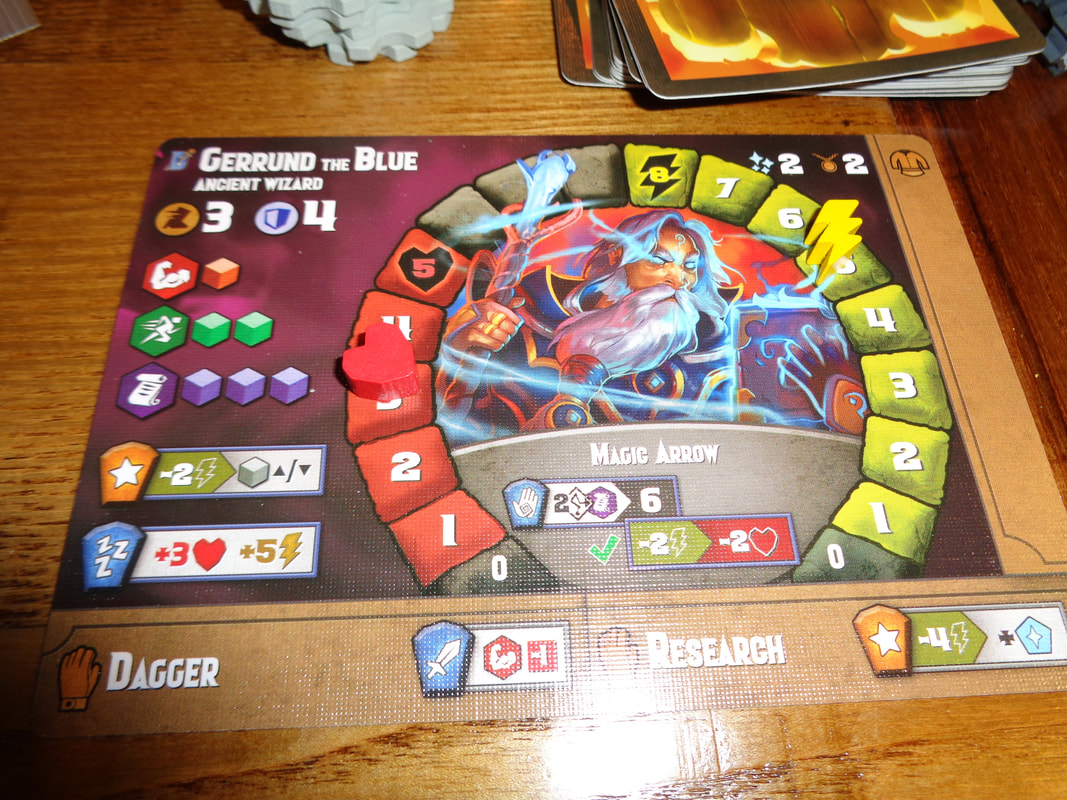
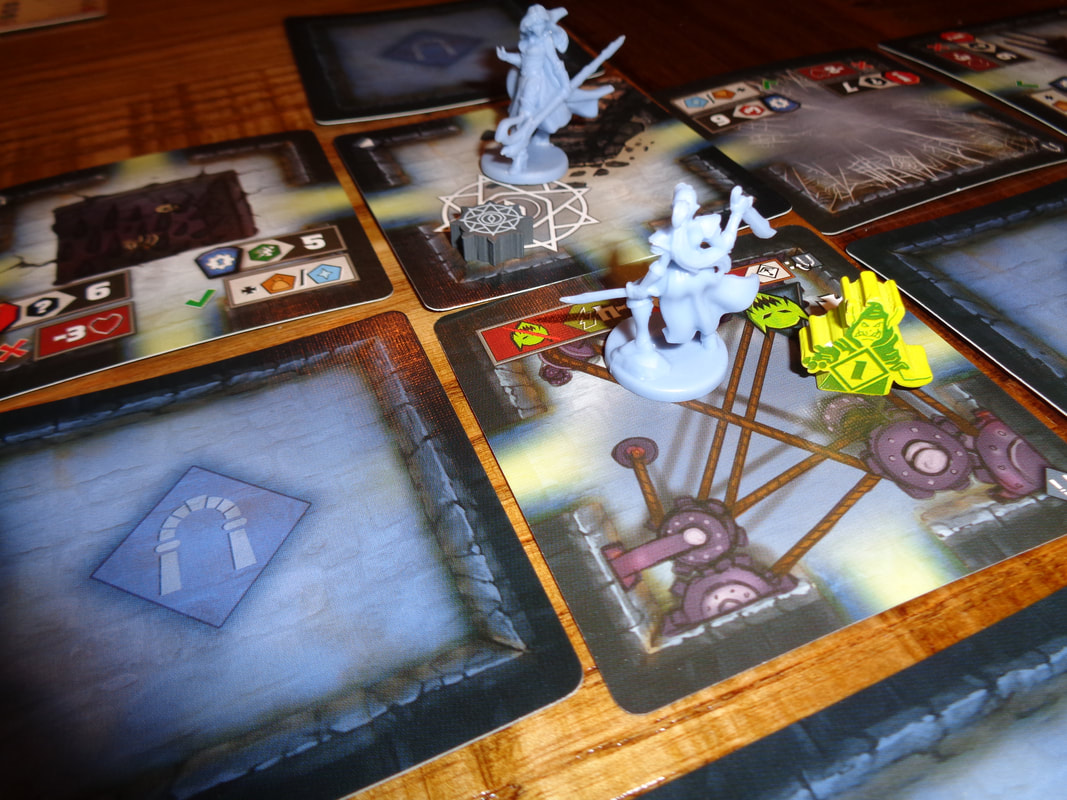
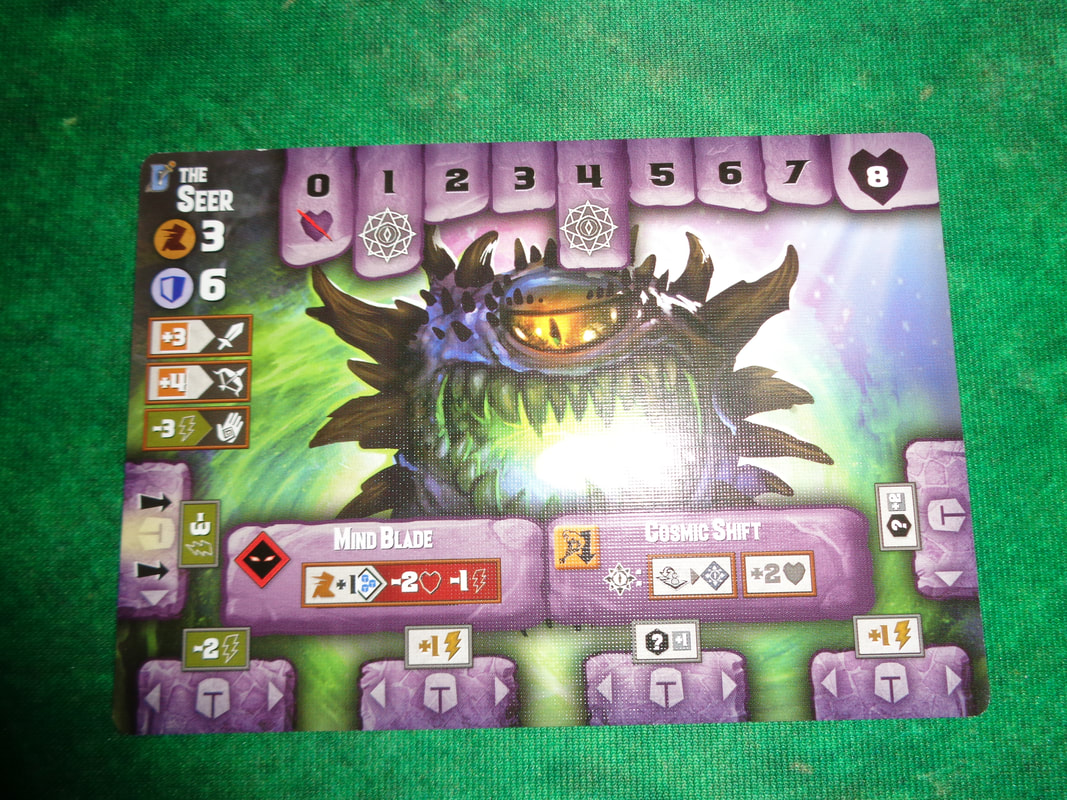
Tiny Epic Dungeons packs a lot into a small box. The cards feel a little flimsy and the dice are plastic and feel a bit average but other than that, the components are all good quality. The character figures are sizable and a pretty cool touch for a game of this proportion, while for the most part the tokens are small (Other than the disarm tokens.), they're still solid and well made. But for me, the standout components are the meeples, not only are they nicely shaped wooden tokens, they also illustrated. It shows some thought and care has gone into the production. The use of art is also good throughout the game, portraits of heroes, minions and bosses are all chunky and colourful, utilising a cartoony style that's used in a lot of modern fantasy games, it's a style I like Artwork used on the dungeons cards is also pretty good, there's a nice contrast between somewhat grey looking rooms and the colourful dressing and scenery that inhabit them and even the box lid features some evocative art. This brings me to iconography. It's rare that I'm critical of a game's iconography and this is one of those occasions. It's just that there's so much of it. A good proportion of it is instantly comprehensible, but a smaller proportion of it is not and a smaller proportion of a lot is still quite a lot!
I know that this is the result of game that is trying to emulate a D&D RPG style dungeon-crawl experience without a dungeon but even so: we played the game several times and I still did not recognised some icons. Between the fairly extensive rules and the extensive iconography, it gives the game a bit of steep learning curve. Additionally; not only are so many icons, some of them are quite small, icons in the corner of the dungeons cards and the first time we tried to play I didn't notice them! How's it play? Setup
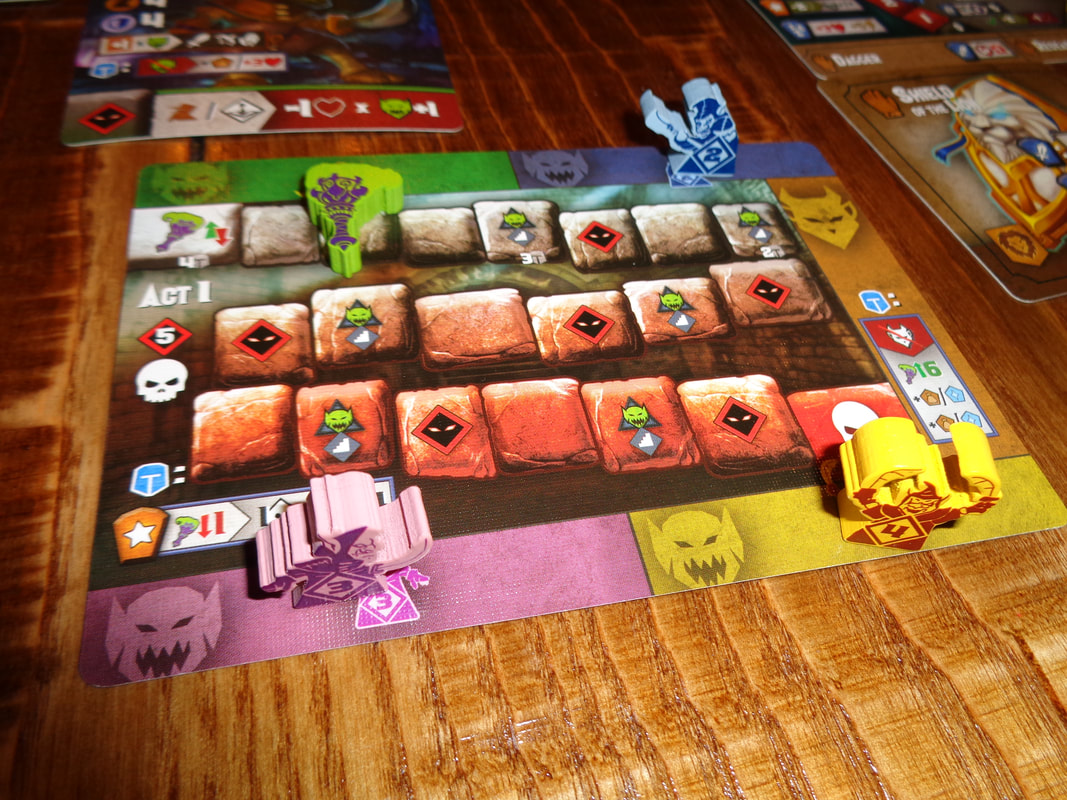
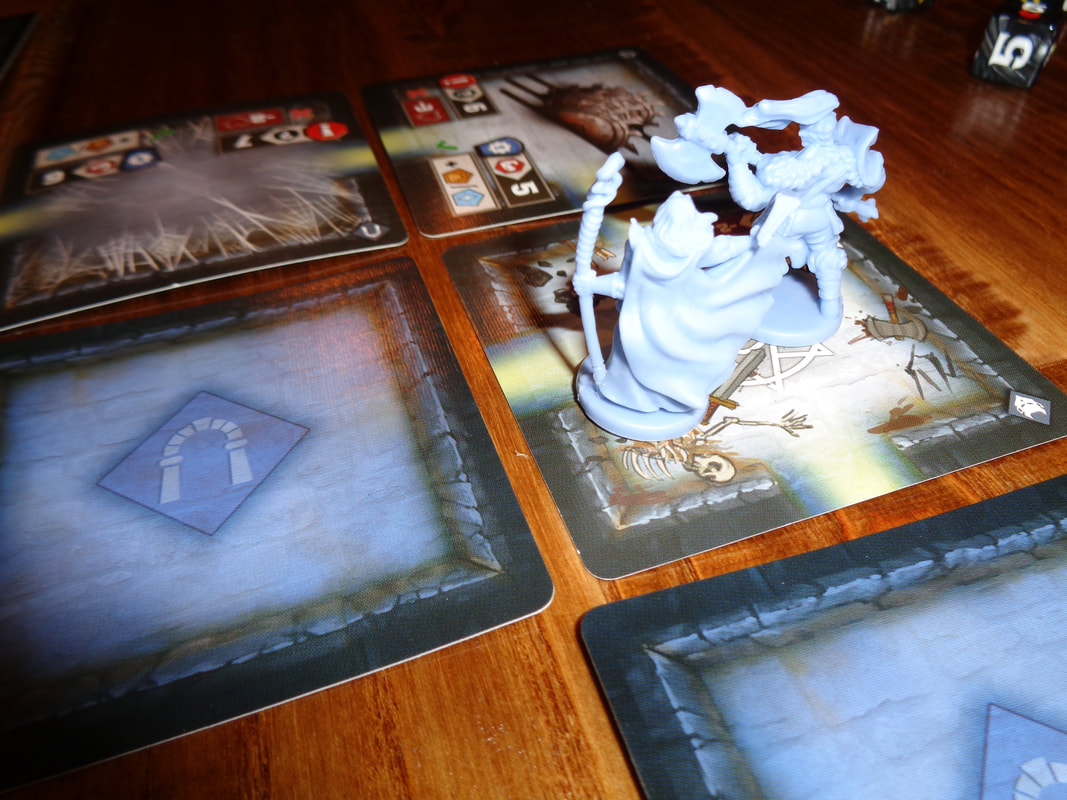
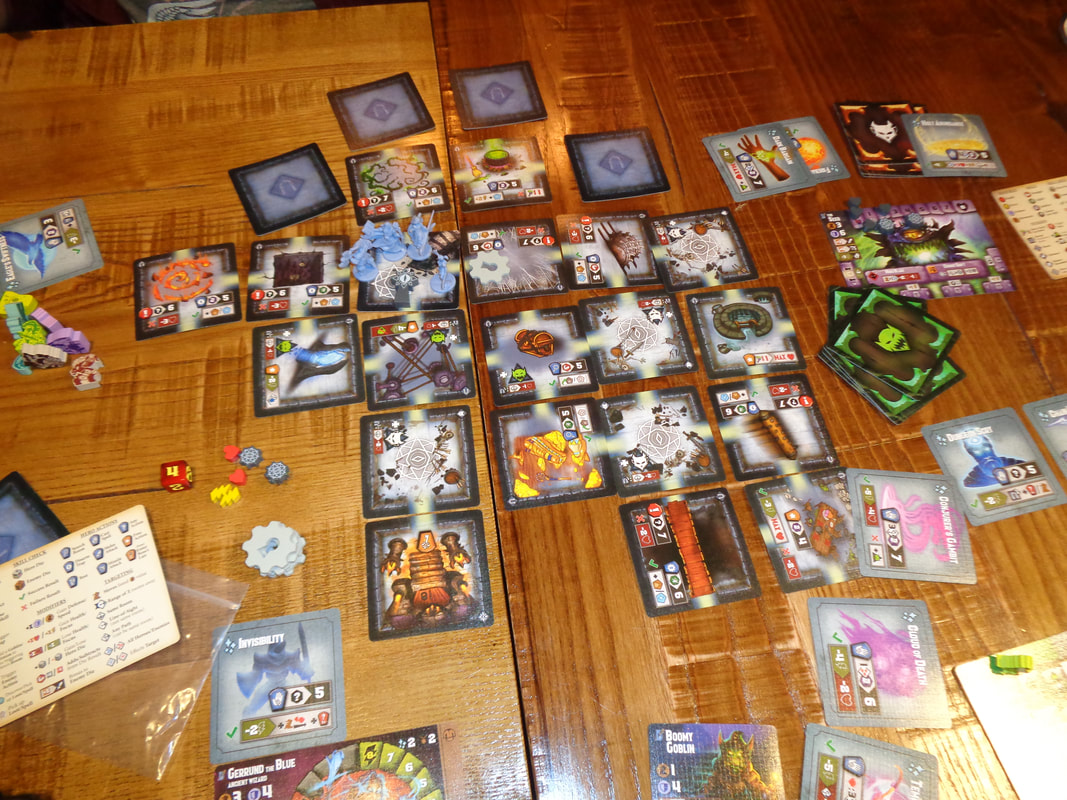
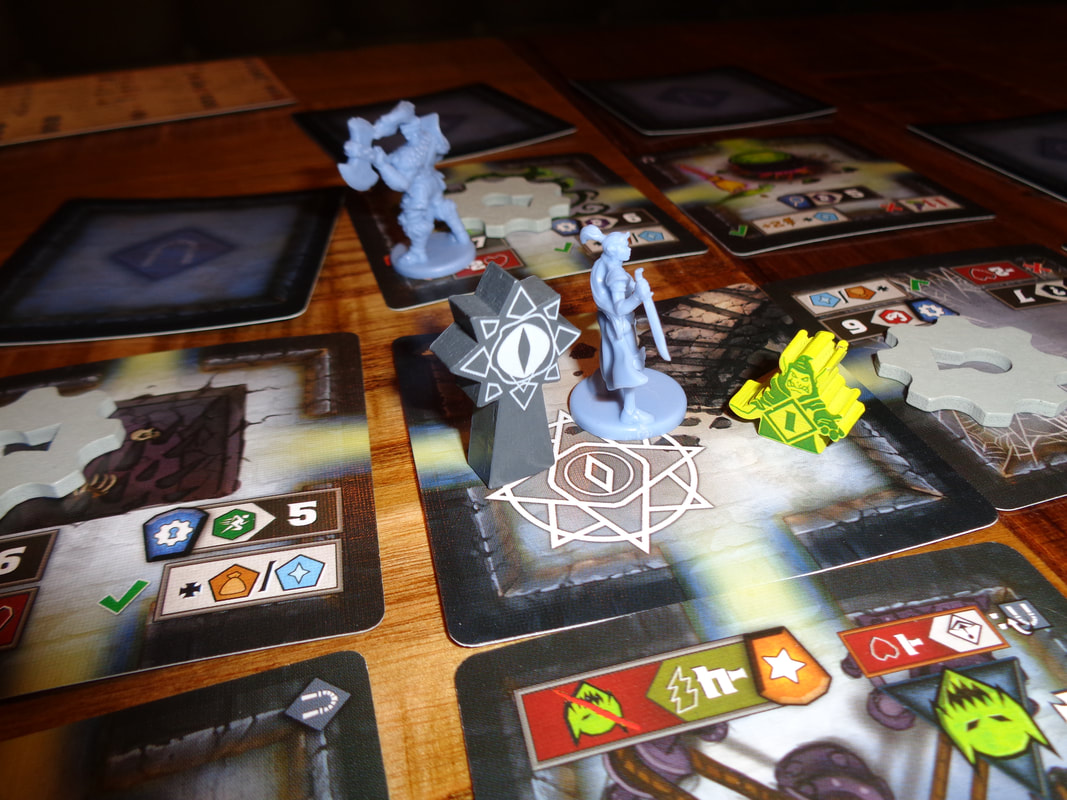
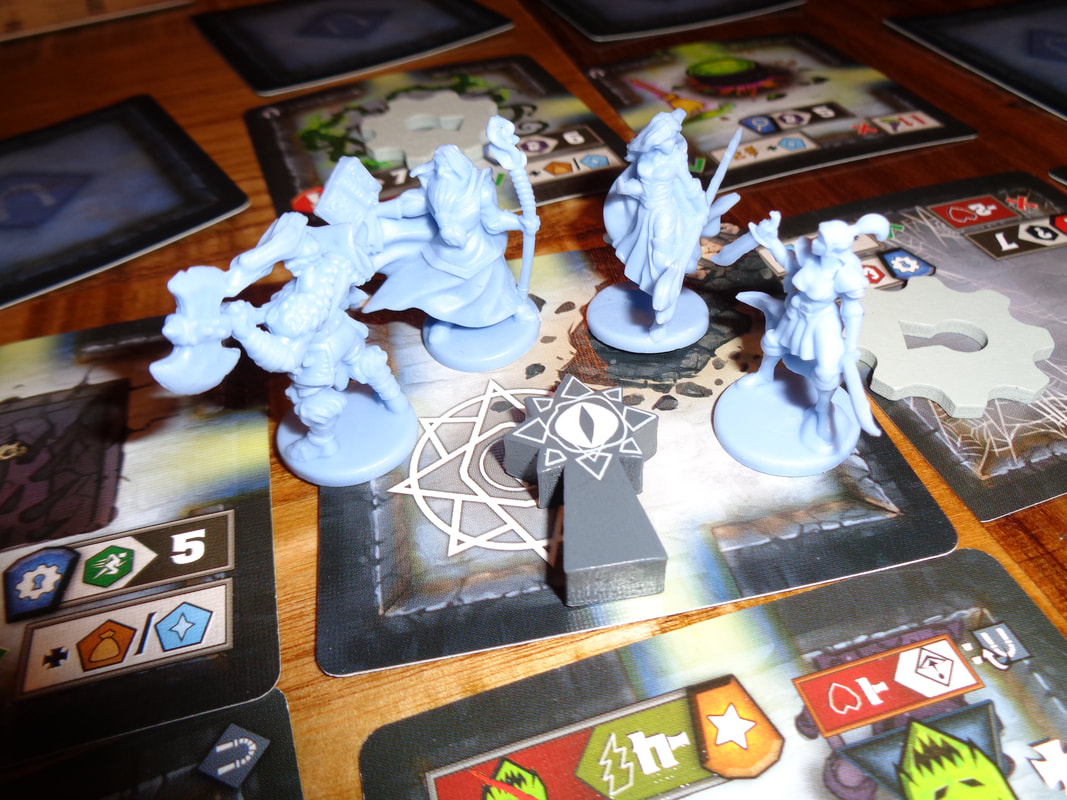
On to play In Tiny Epic Dungeons, the players must explore and reveal the dungeon, fighting goblins and acquiring loot and magic until they defeat enough minions in order get into the boss' lair and defeat them. The dungeon in Tiny Epic Dungeons is always a 7x7 grid in size, with the entrance always being the exact centre of the dungeon. When it comes to the active player's turn, they can broadly speaking: move, perform exactly 1 'heroic' action and any number of free actions.
There are also some other rules that need covering.
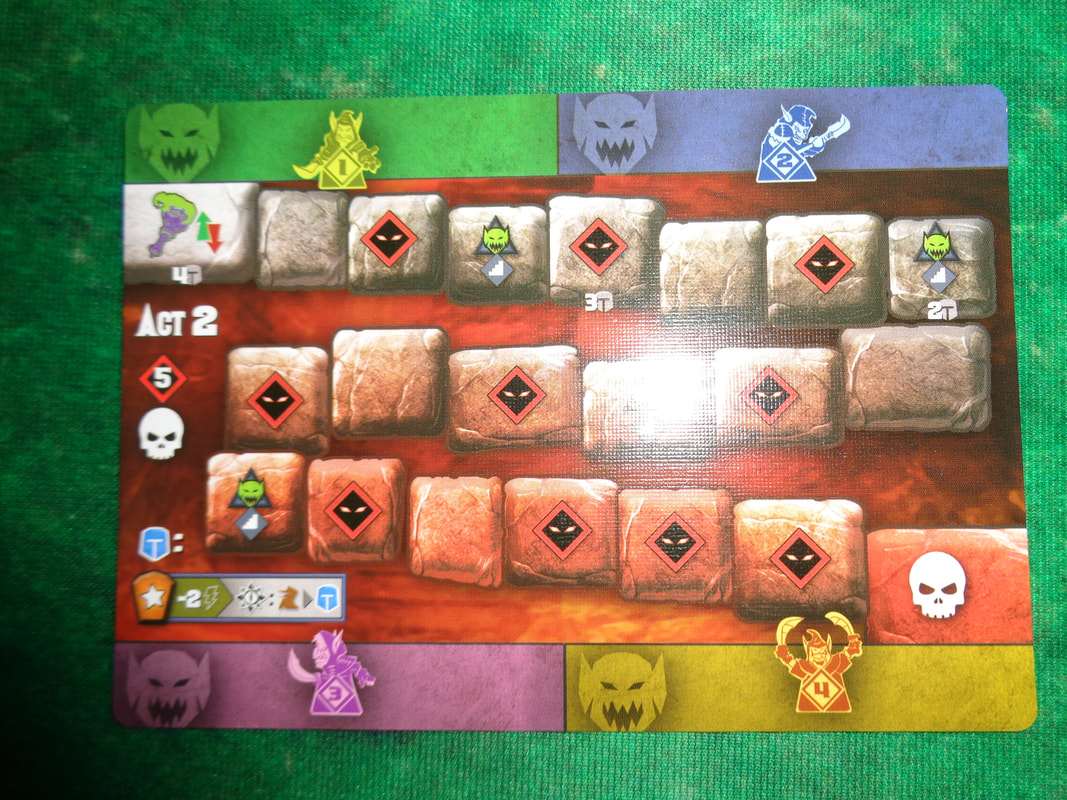
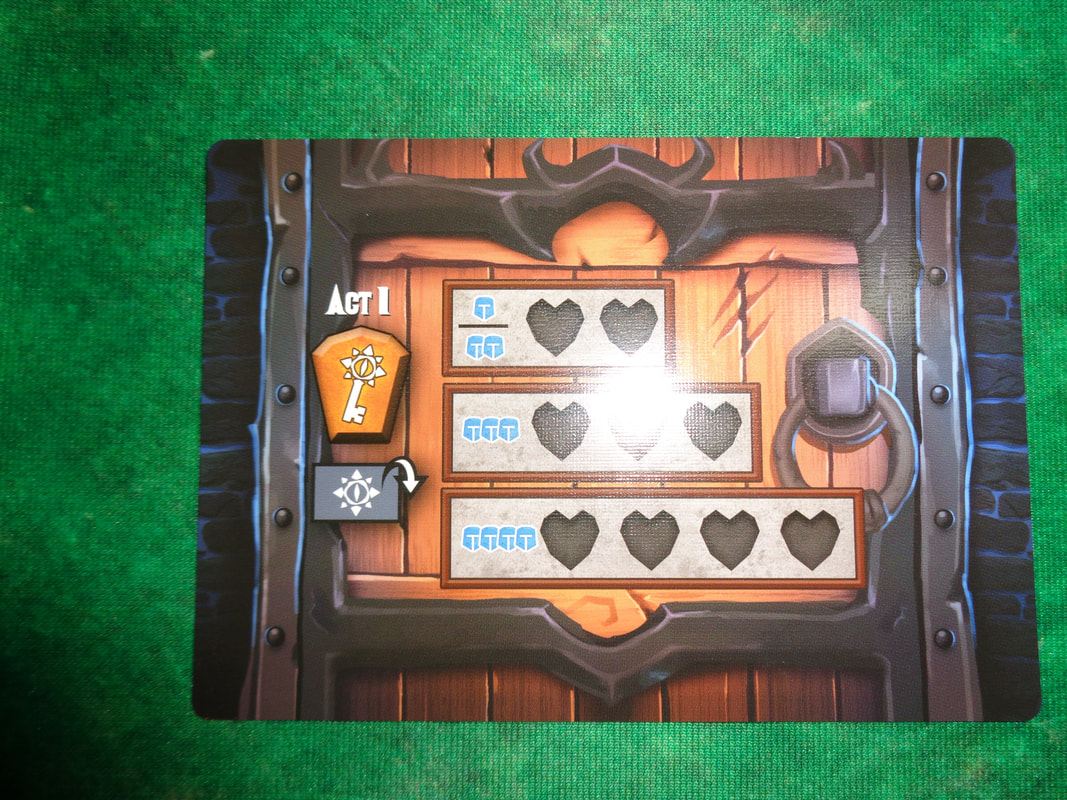
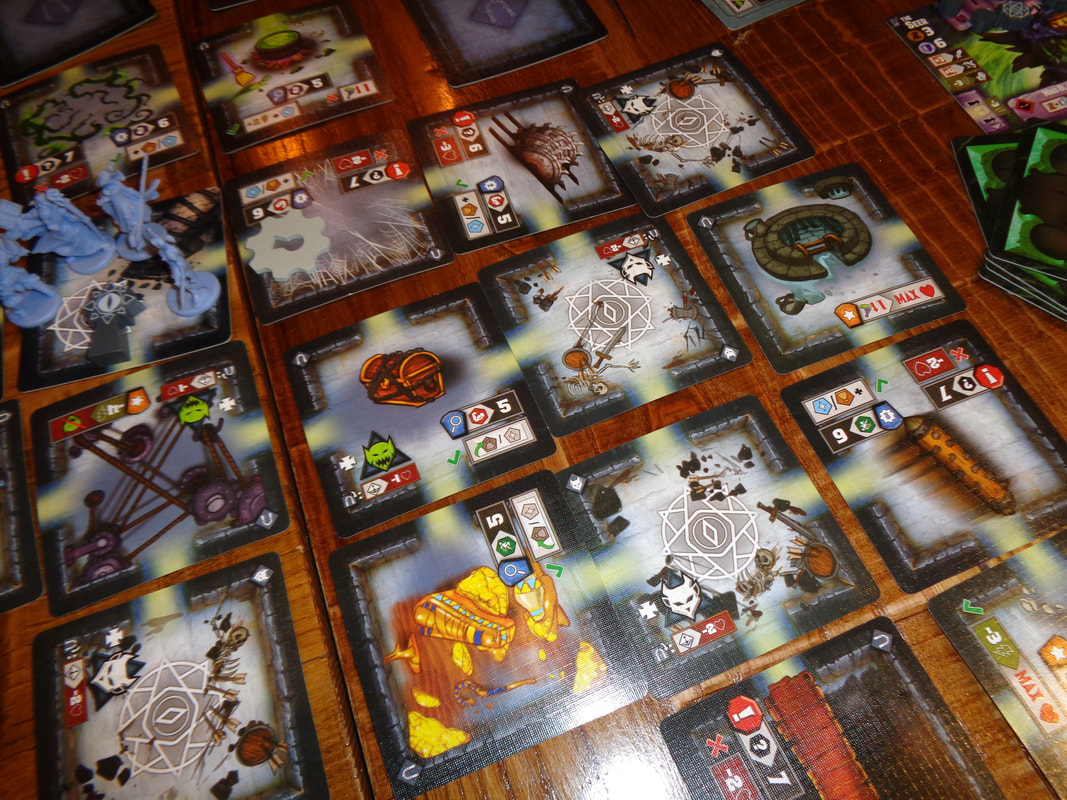
Endgame In the first act, if a 5th goblin comes into play before any of the 4 adjacent to the torch mat are defeated, then the players collectively lose. If at any time the torch token reaches the end of the track on either side of the torch mat, then the players lose. If the players get to act 2 and reduce all the boss's health tracks to 0, they collectively win! Overall
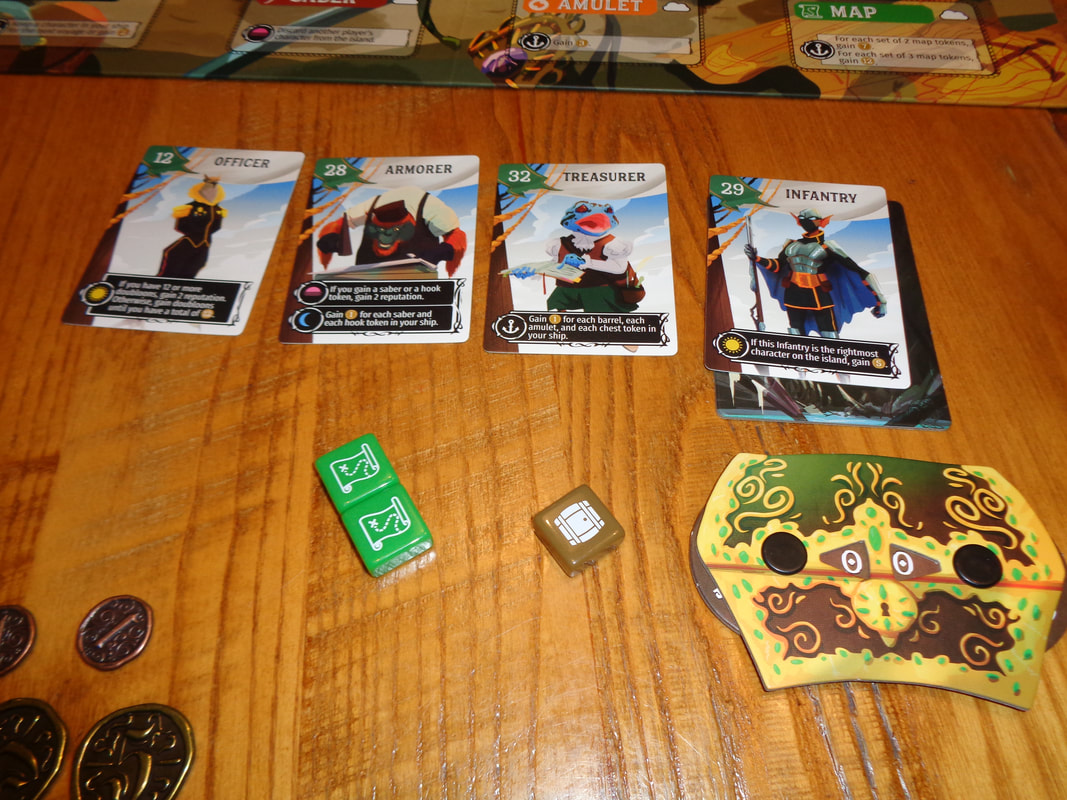
So, Tiny Epic Dungeons has quite a lot rules, I feel it's not particularly complicated but there's certainly a lot going on and that means that there's a lot to remember in this fairly ambitious attempt to recreate the D&D style dungeon-crawling experience. The question is, does it succeed? Well... sort of. The thing is, Tiny Epic Dungeons can't hide it's cooperative board game DNA. it utilises a commonplace cooperative mechanic of making the players choose between working towards their objectives (In this case exploring the dungeon, finding and defeating minions and finding the boss lair.) with managing an ongoing, constantly expanding threat (In this case preventing 5 goblins spawning in the game.). Players will be faced with choosing between the two. Furthermore, the constant ticking countdown of the torch track will encourage players not to dawdle and cooperate as much as possible. Another challenge facing players is placement of dungeon tiles all current passageways must be honoured and the game has a strict 7x7 size. If player don't think a step ahead, there's a risk that a pathway may lead to a dead-end too early, leaving a portion of the 7x7 grid inaccessible. Mechanically, these are all good, they put players in the position of having to make meaningful decisions. However, they do feel a little un-RPG-ish. During this early stage of the game we did encounter a noteworthy quirk; one character could not leave the entrance for about a quarter of the game! At the start of their turn, there was always a goblin on the entrance card thanks to spawning from the torch track. Once they defeated the goblin, they could no longer move and by the time of their next turn, there was another goblin on the entrance! One thing I like is how the game clearly differentiates between the early and late game. When the boss is revealed, everything changes and priorities shift somewhat. Exploration and goblin management become less important and dealing with the boss more so which thanks to the altar tokens requires more than just dealing damage to the big bad. All of this should serve to make Tiny Epic Dungeons a good game but truth be told - it's all a little unremarkable. Combat feels unexciting, particularly when dealing with goblins again and again, it felt repetitive and frustrating. They're not a threat because they're tough (They're not tough!), they're a threat because the rules say that you lose if you don't defeat them quick enough. The dice mechanic used is pretty cool though. I like that the unused dice can give a benefit, e.g., not using a 6 as the result of a skill check because as it provides a point of health gives players a meaningful decision to make when choosing which die to use for a skill check. The dungeon exploration experience it provides is pretty standard and OK but the lengthy rules and having to interpret fiddly icons mires the game in slowness and interfere with the pacing. Even after several play throughs, I look at the icons and think, 'Wait, what does that do?'. After more play throughs I'm sure that the rules will provide no obstacle but I feel little compulsion to play it again, which is a bit of shame as it looks really nice. While there's nothing wrong with Tiny Epic Dungeons and I can't find any fault with it, I also can't find a reason to like it. 24th May 2022 It's a Tuesday and we're with the Woking Gaming Club in The Sovereigns. Fly as free as a err flying pirate? Libertalia: Winds of Galecrest is set in a world of fantastical aerial ships, anthropomorphic heroes and adventurous voyages to find loot and lost treasure. What's in a game?
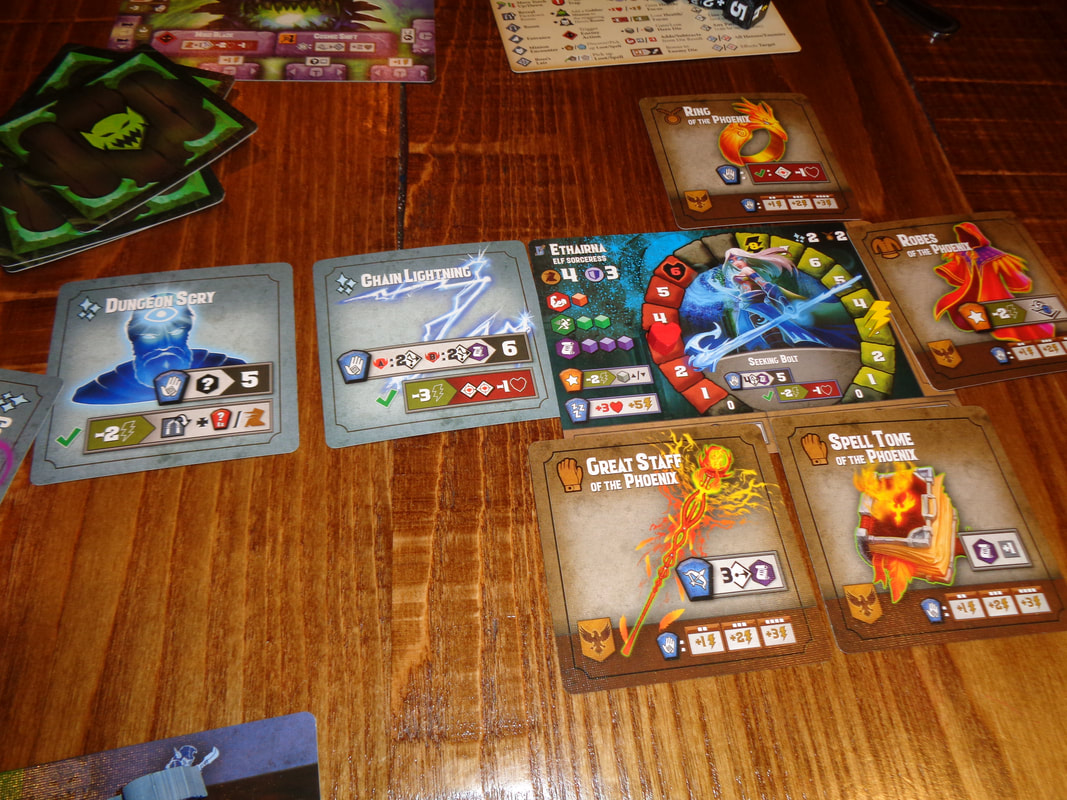
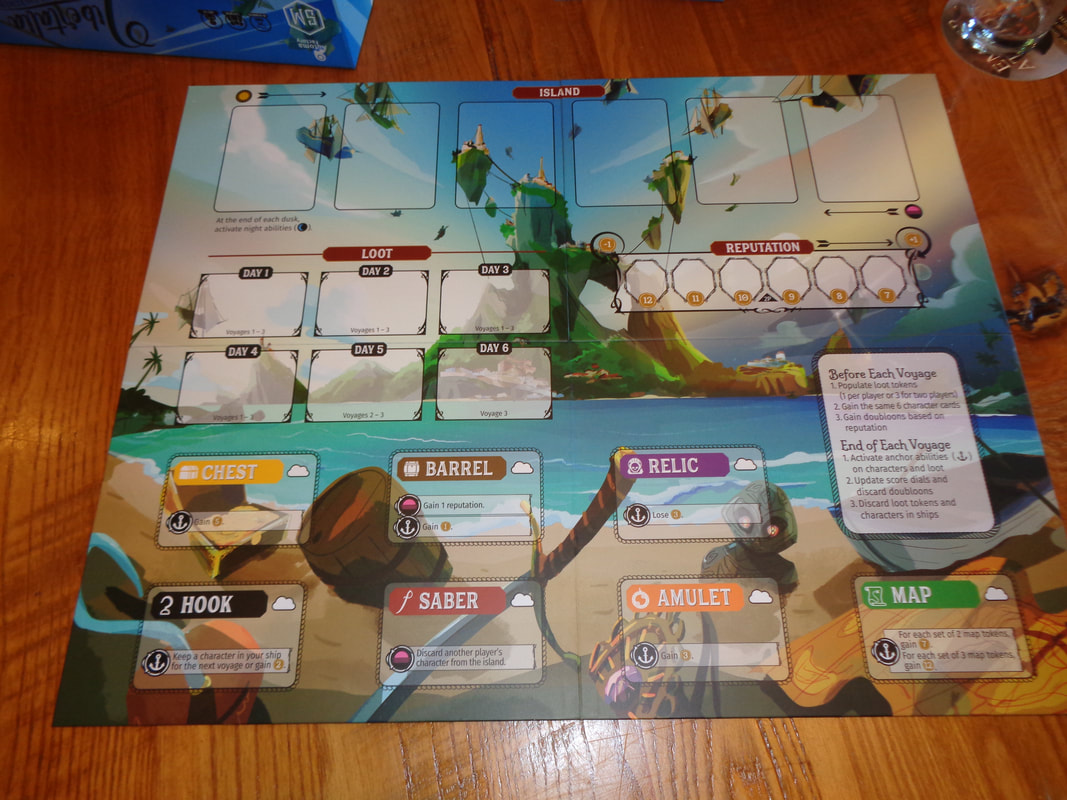
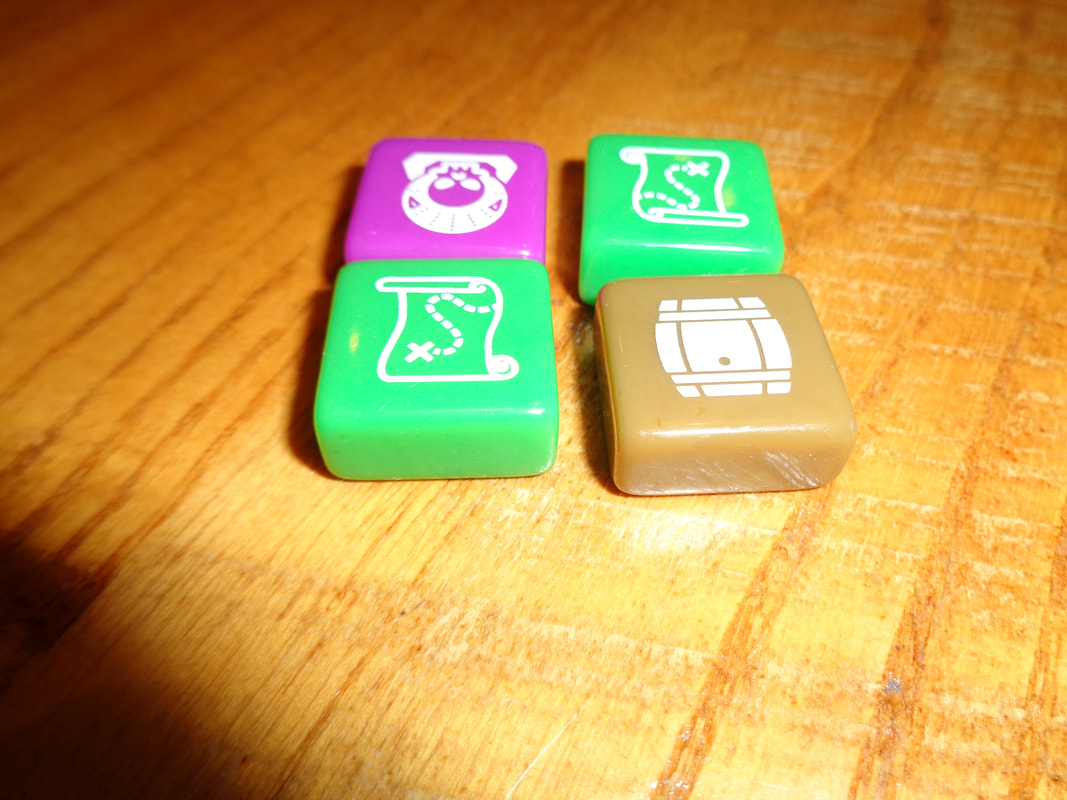
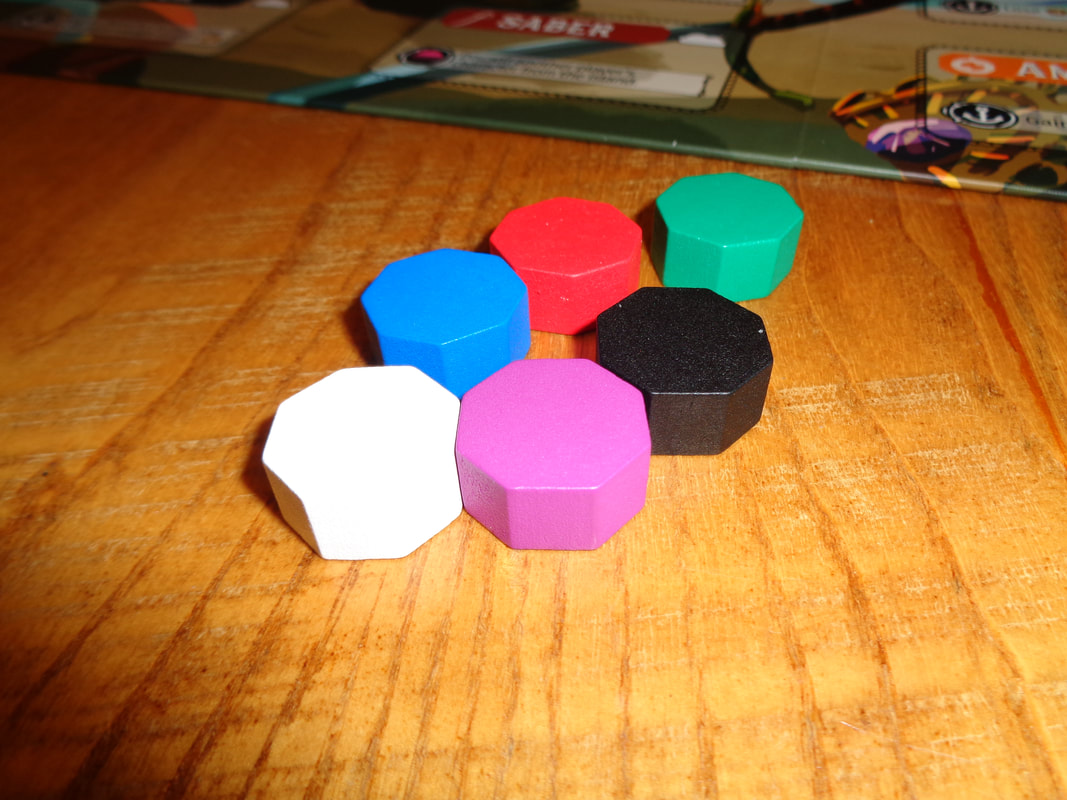
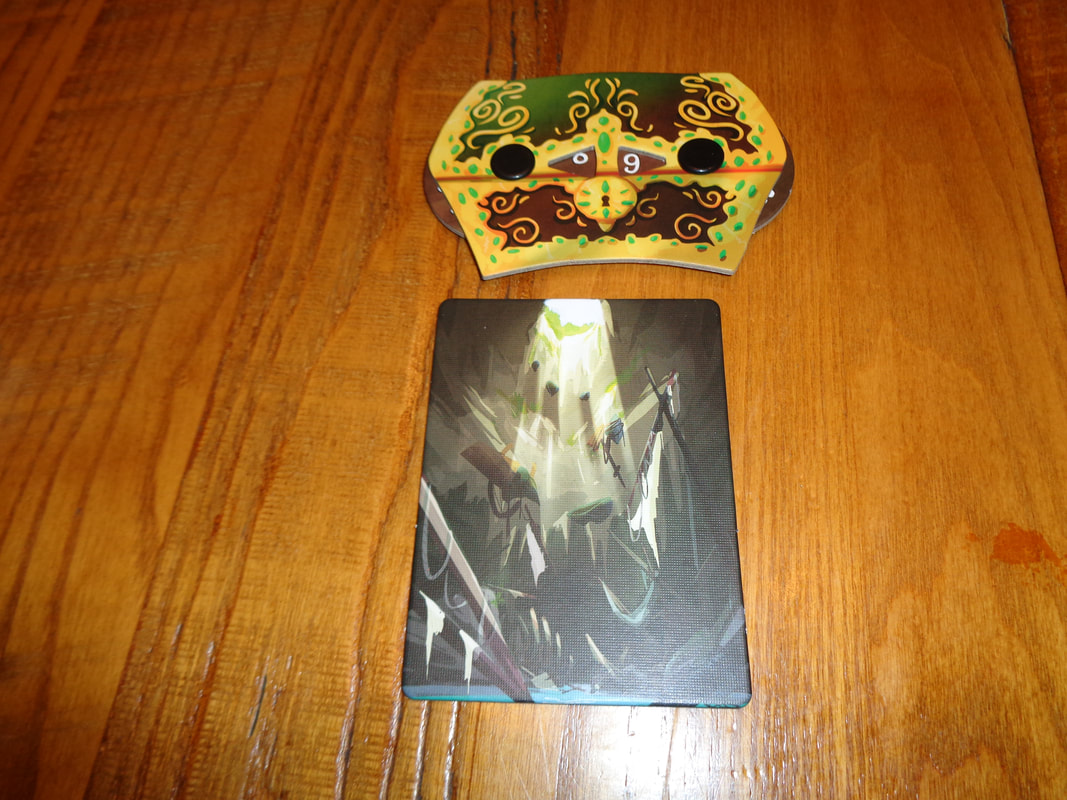
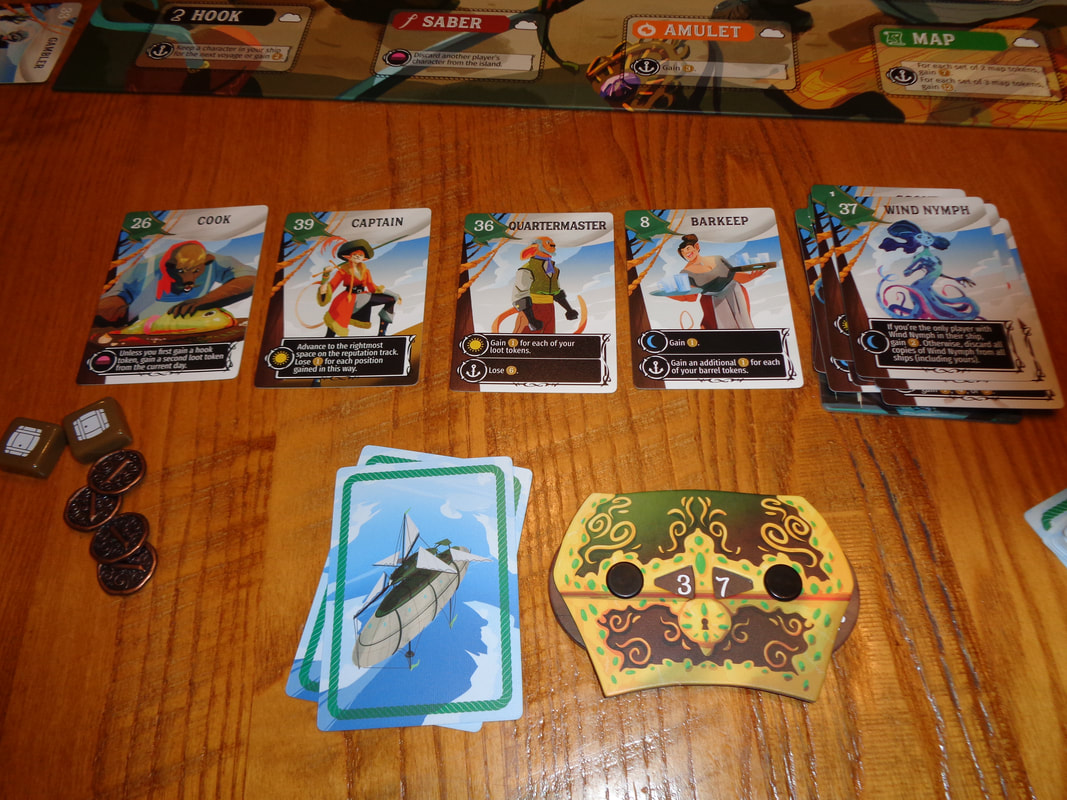
Component quality is solid throughout, cards, tokens and tiles are well constructed but the chunky loot tokens really stand out, even if I have to resist the urge to try and unwrap and eat them. Libertalia: Winds of Galecrest makes use of excellent use of bright, eye-catching, cartoony art presenting a larger than life setting and characters. About a dozen icons are used throughout the game, they are all fairly clear and easily understood. How's it play? Setup
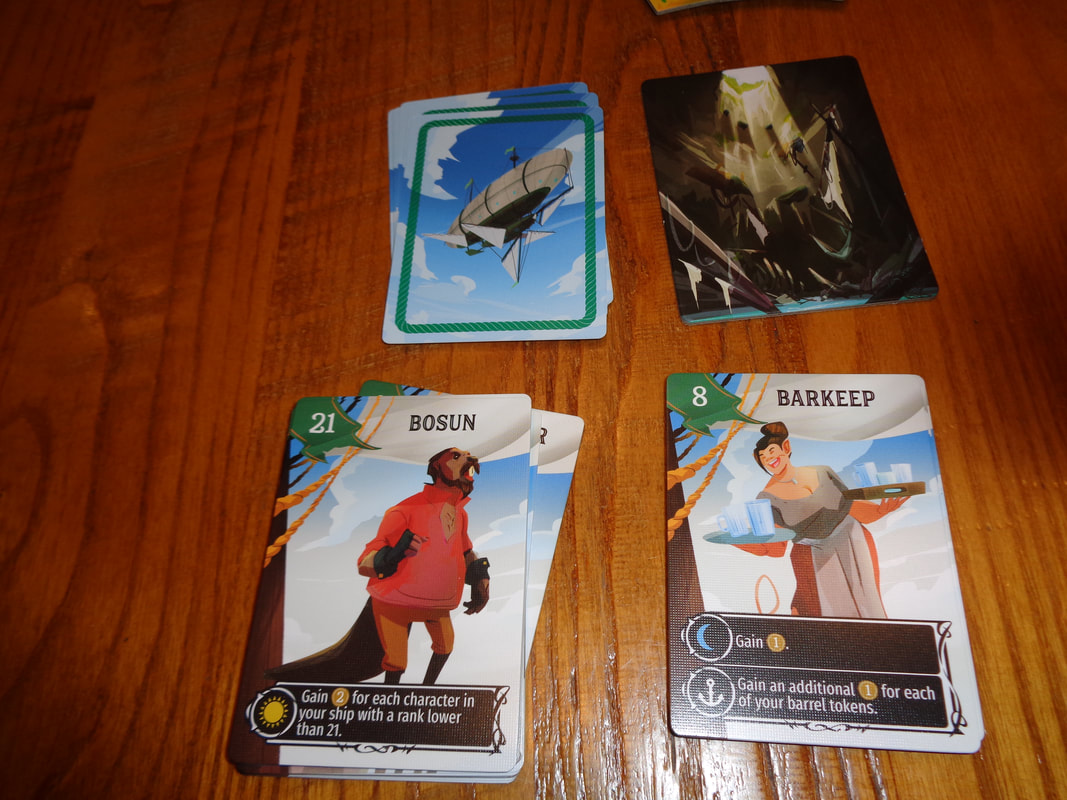
That's pretty much setup done. On to play Libertalia: Winds of Galecrest is played over 3 'voyages' which have a length of 4, 5 and 6 days. For each day, a player will put a character card into play and this is done secretly. Thus over all 3 voyages each player will use 15 character.
Endgame Play progress until the night actions for the 3rd and final voyage are resolved. Players compare their scoring dials. Points are tallied, highest score wins. Overall
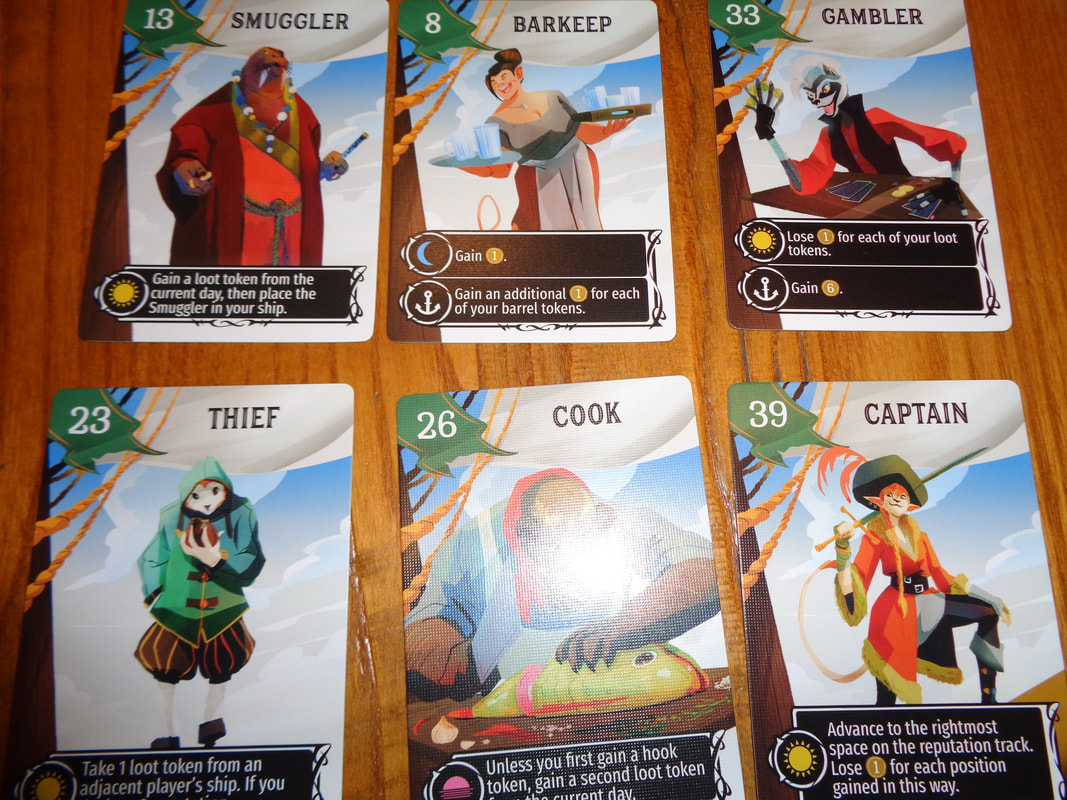
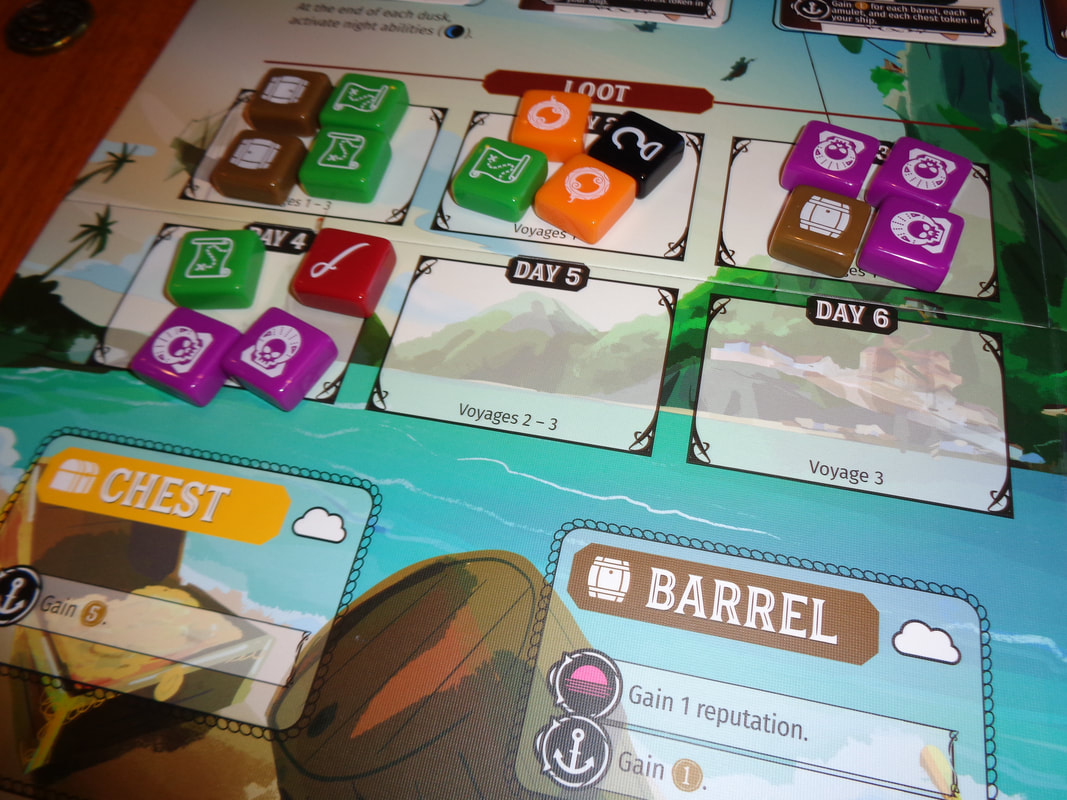
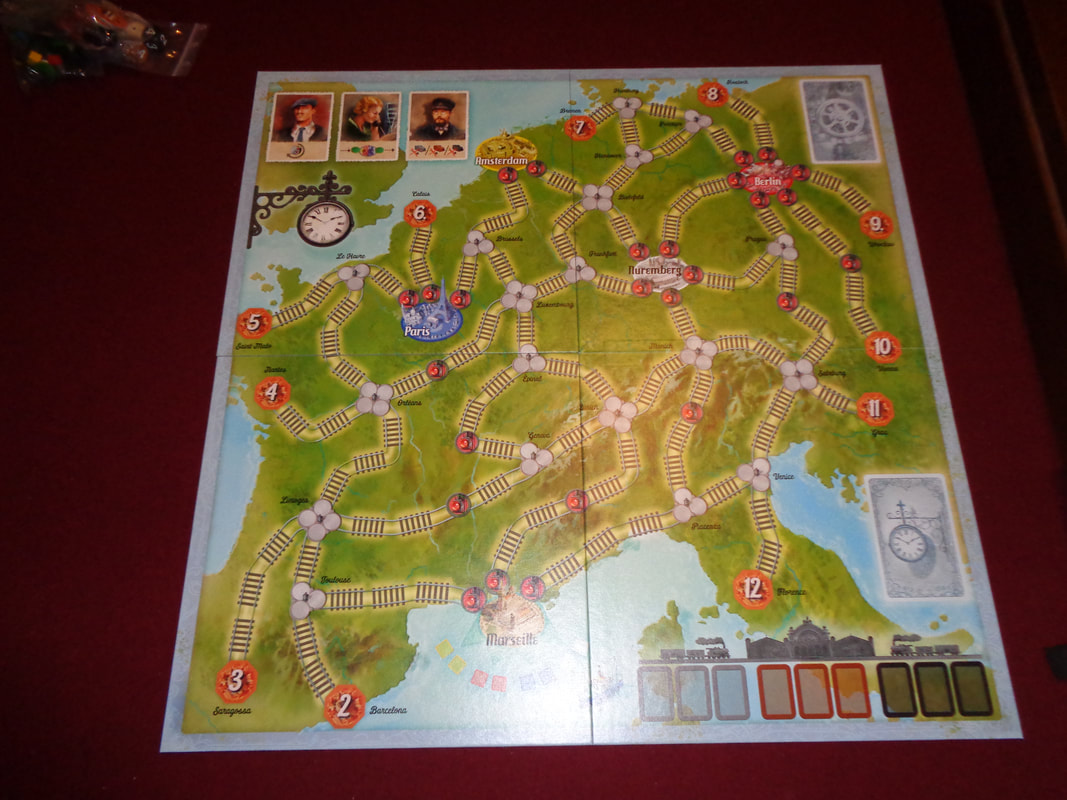
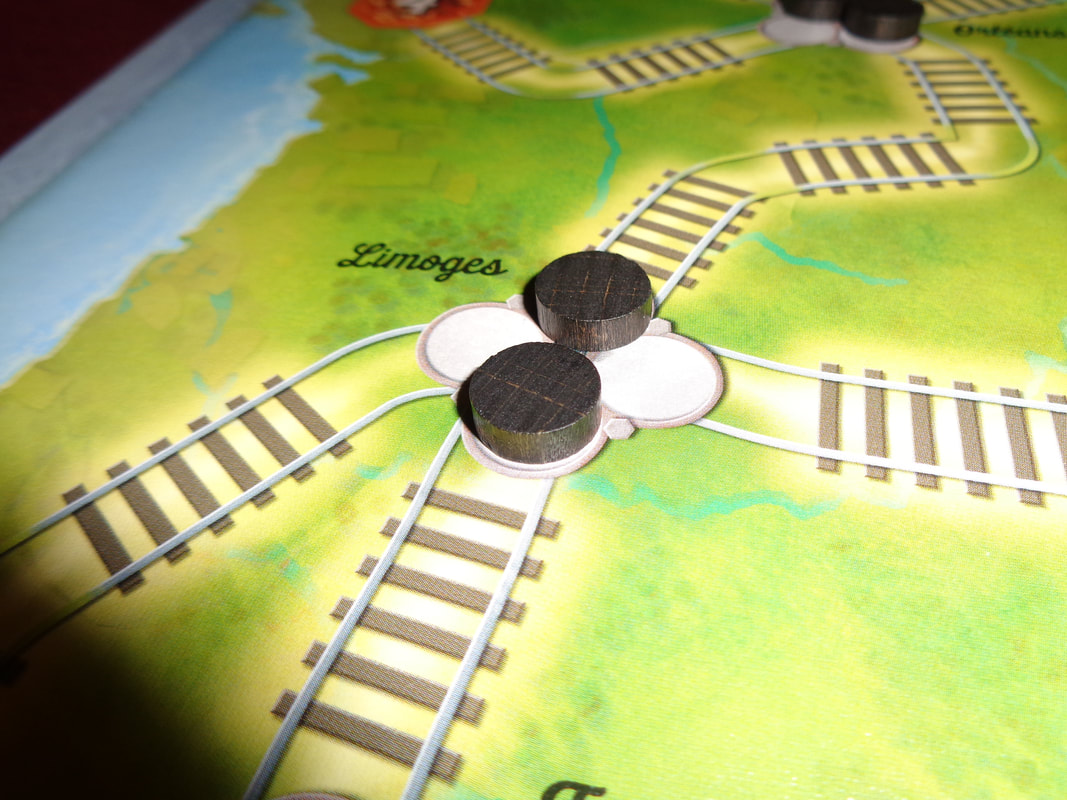
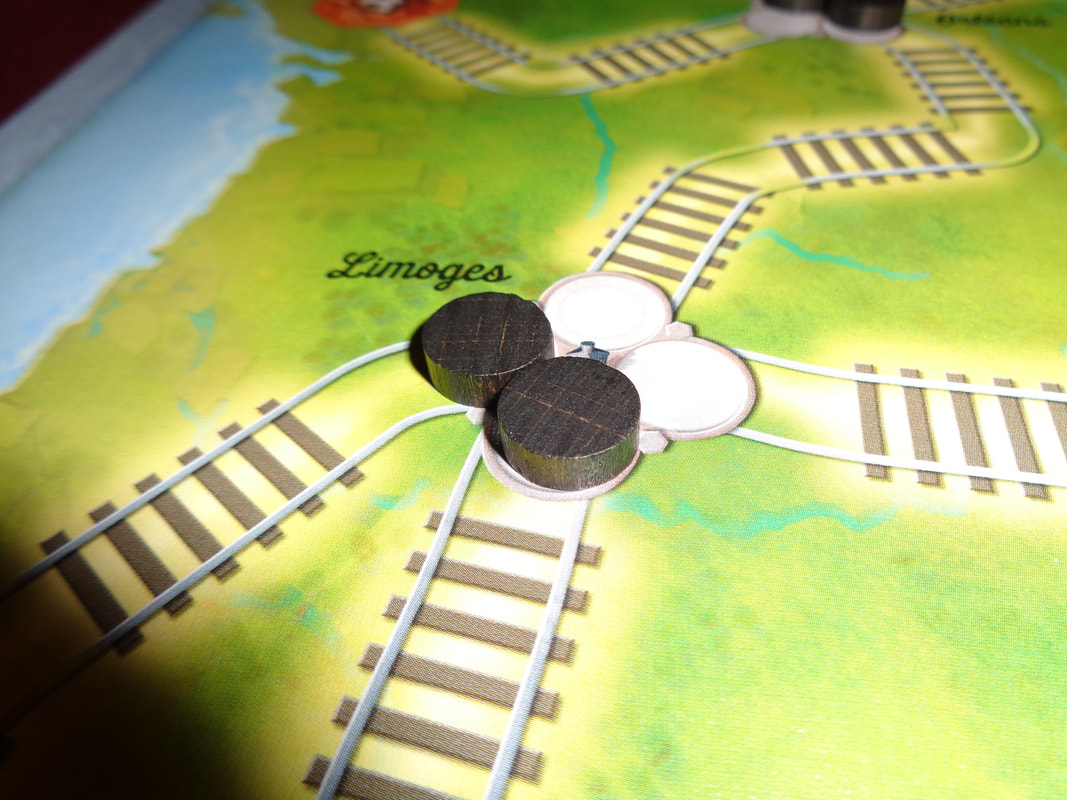
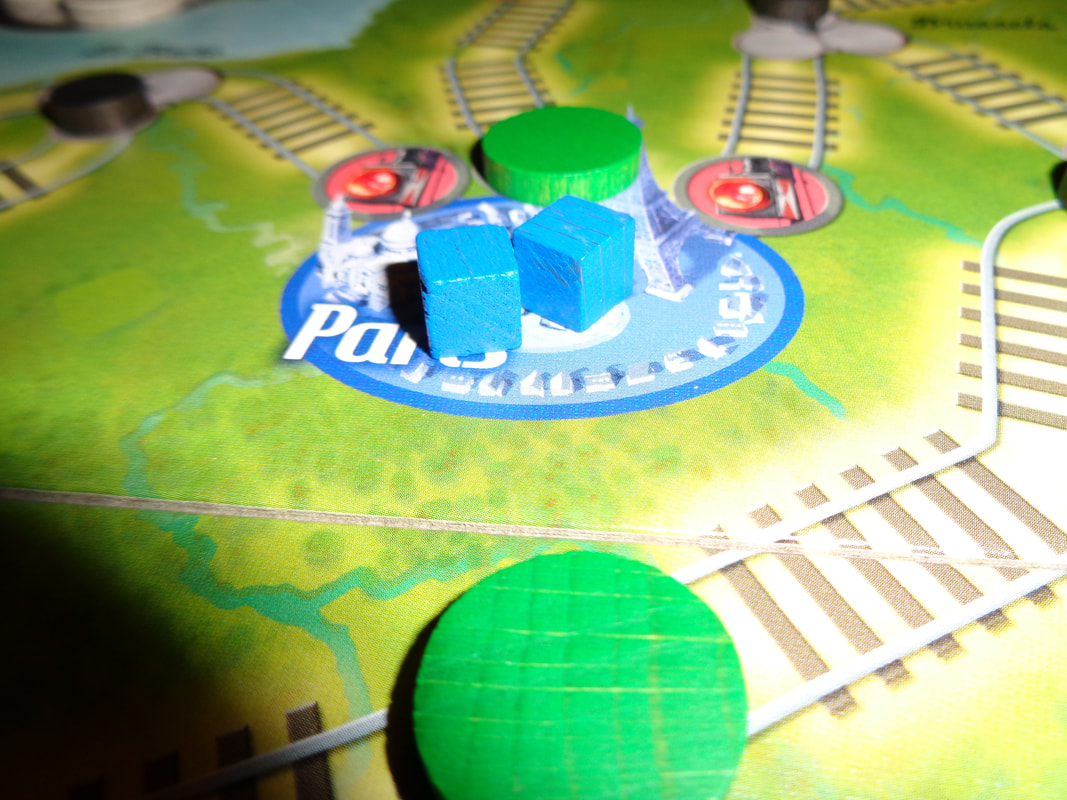
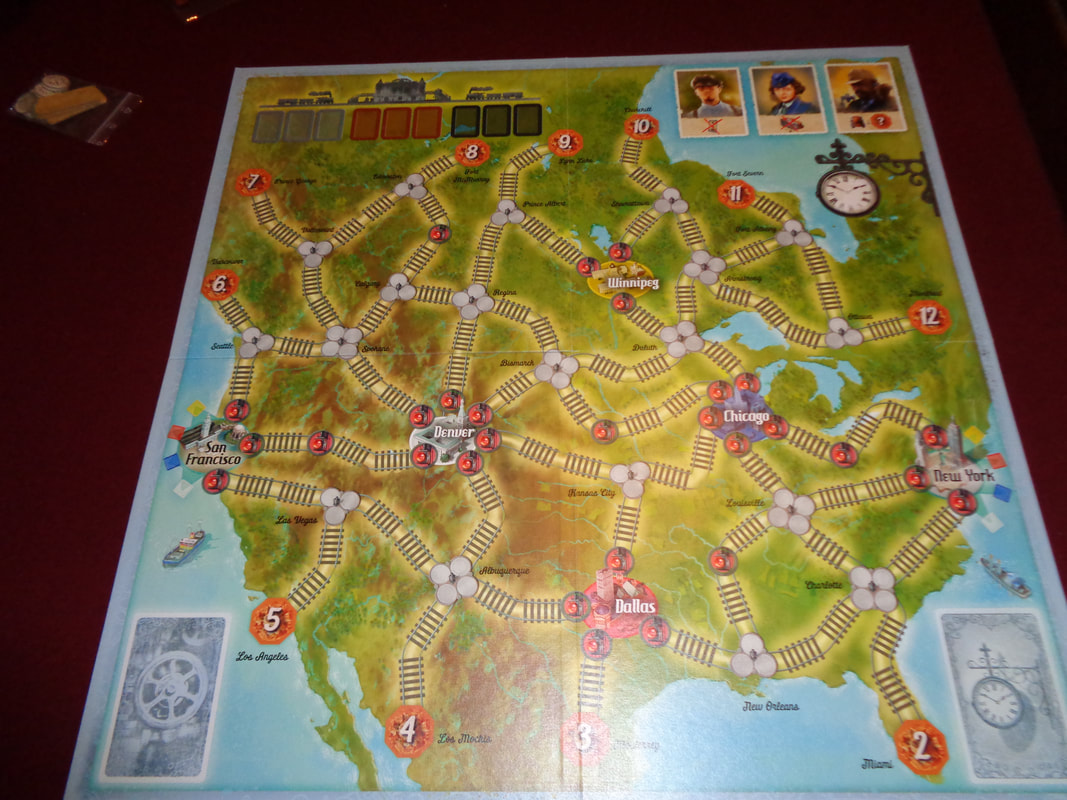
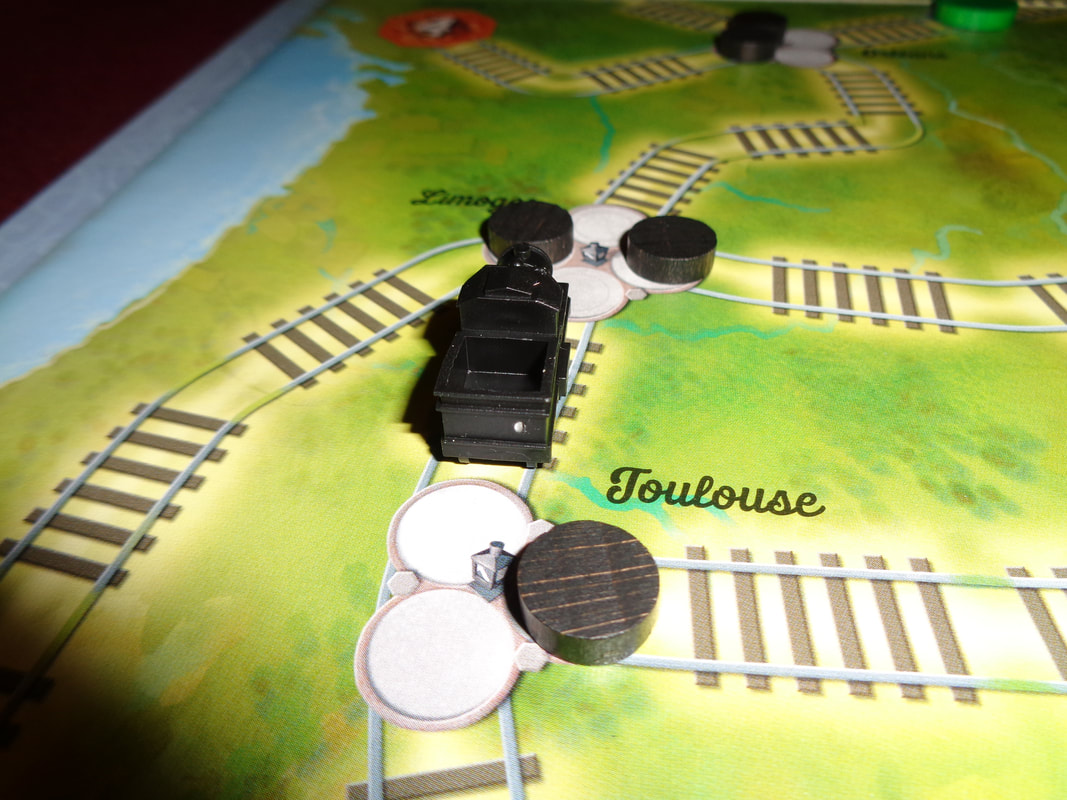
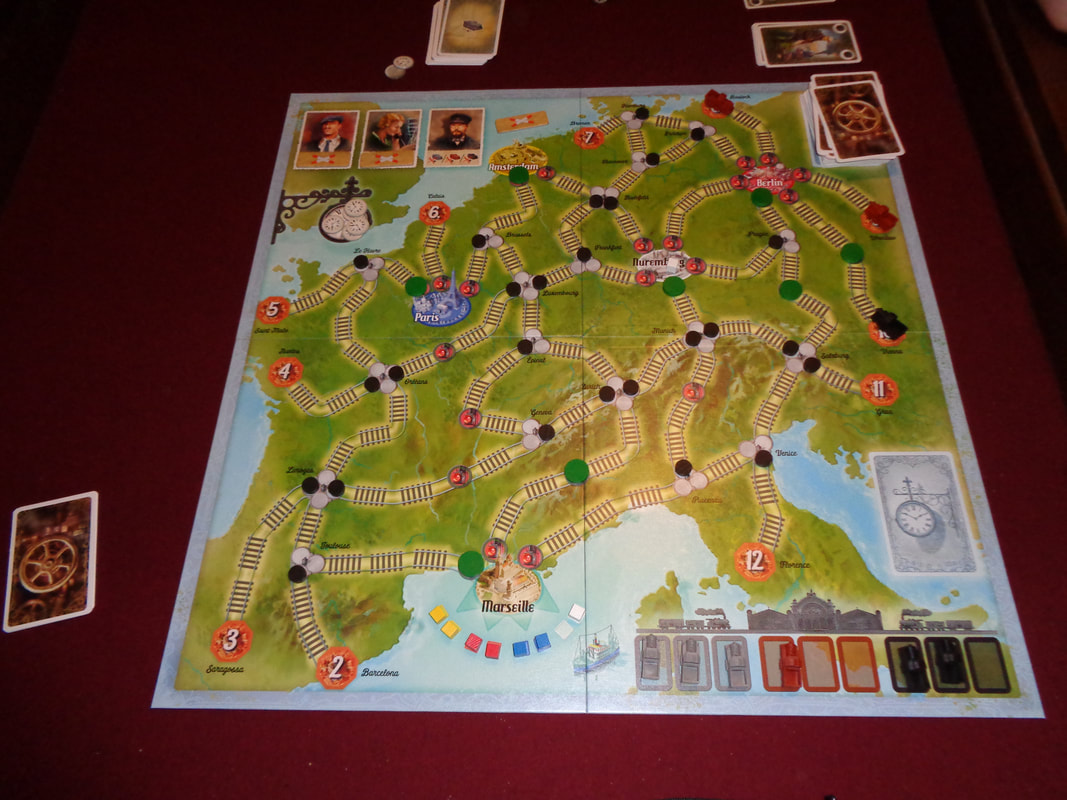
Libertalia: Winds of Galecrest feels like a complex game but in practice is quite straightforward. In essence, a character card is played and the resolved up to 3 times. Where the game's complexity comes from is how a character card played interacts with character cards played by other players. Everyone starts with the same hand of cards and will acquire a further identical 12 cards during the course of the game. It means that all players will be using the same 18 cards played over in total 15 actions. But since it's unlikely that all players will make use of the same cards at the same, it means the game encourages players to watch their opponents. Knowing when someone has or hasn't played a certain card can prove very useful. This contextual information can allow players to adapt their tactics and can change the flow of the game. Additionally; Libertalia: Winds of Galecrest injects a dose of 'take that' into the game, the 40 cards have a varied set of abilities that can be brought to play, including being able to eliminate other characters, pulling cards out of the graveyard, etc. It's also worth noting that while the 'calm' side of the game board has the potential for some friction between players the 'stormy' side increases this. The game also provides short and long term goals which require short, mid and long term strategies. Day abilities on cards give players immediate benefits, but dusk and night abilities can also provide desirable benefits. A player may choose to put a high value character card on to the initiative track so they go earlier in the dusk phase to secure a certain type of loot. Which brings me to long term strategy, loot is vital here. Loot typically provides benefits during the end of voyage phase and the loot for all days is openly shown on the board which players must take this into consideration during the whole journey. All of this means that Libertalia: Winds of Galecrest hits a sweet spot of accessible but tactical game play. Players are always given meaningful decisions to make using a degree of imperfect information. I found it an engaging game. Definitely one to try. 19th May 2022 It's a Thursday and I'm enjoying an evening of gaming in Aldershot for the first time in actual years! Take that Covid-19! Cho chooo! Switch & Signal is a cooperative board game about managing train schedules, that's right - you're playing the generously proportion controller and how do you control these schedules. With switches and signals of course! What's in a game?
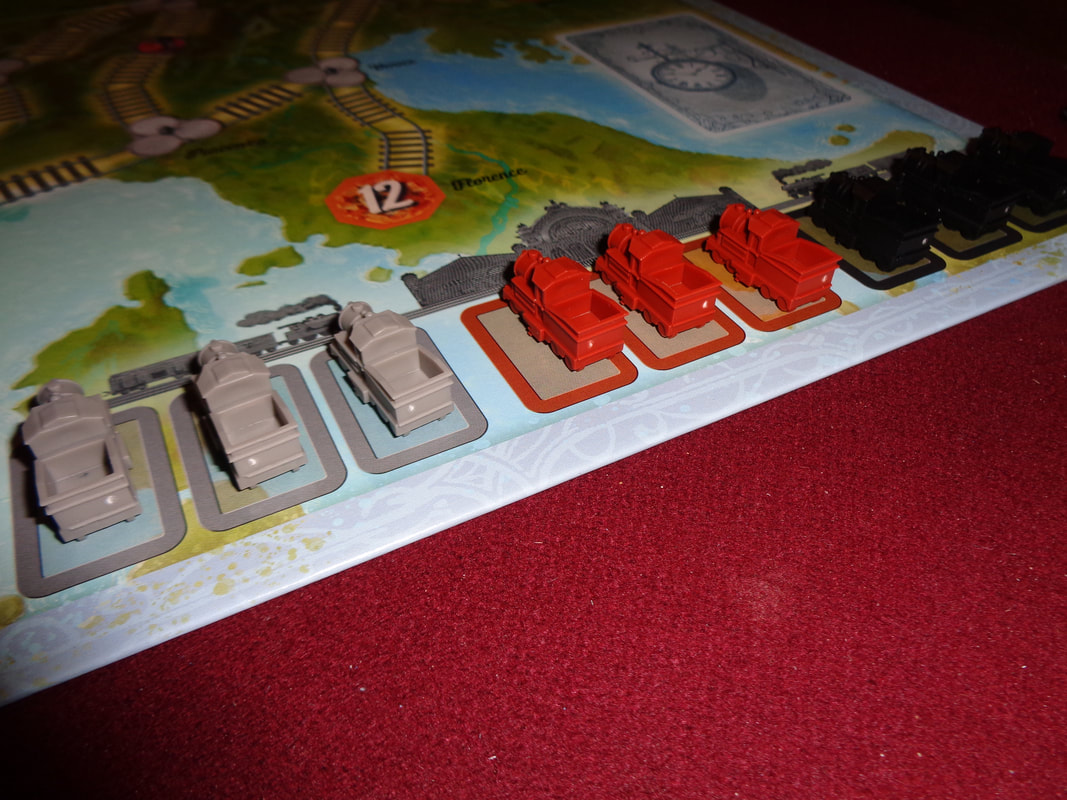
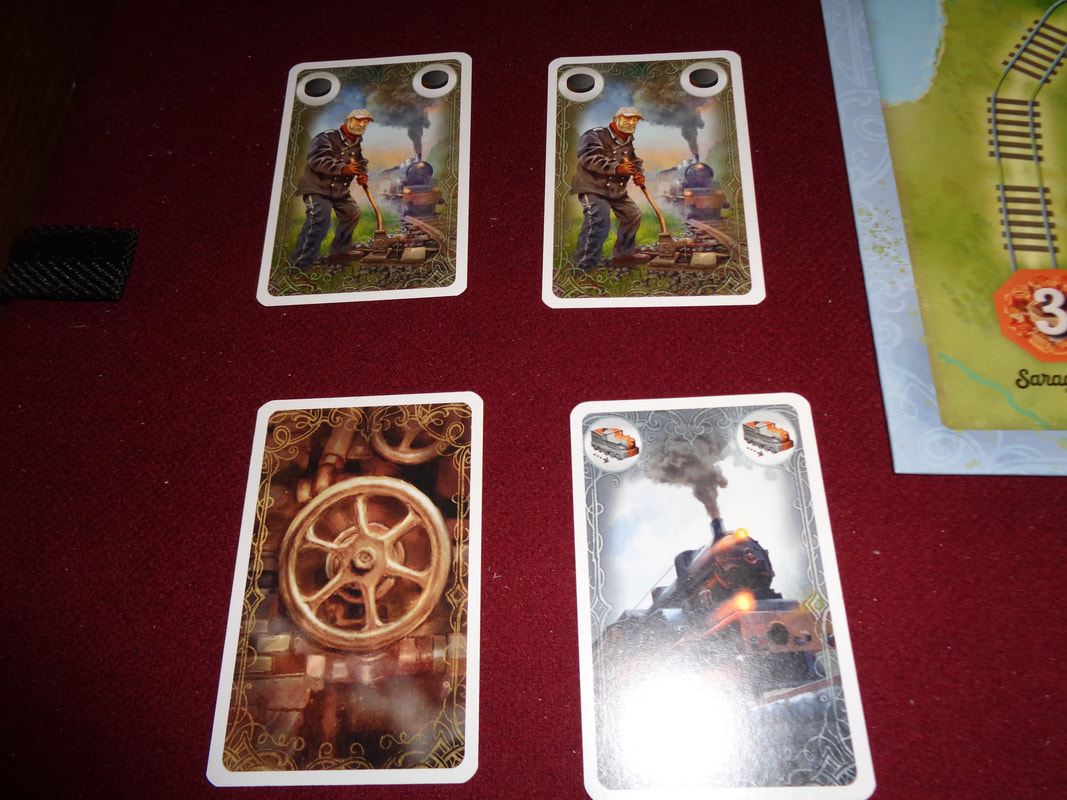
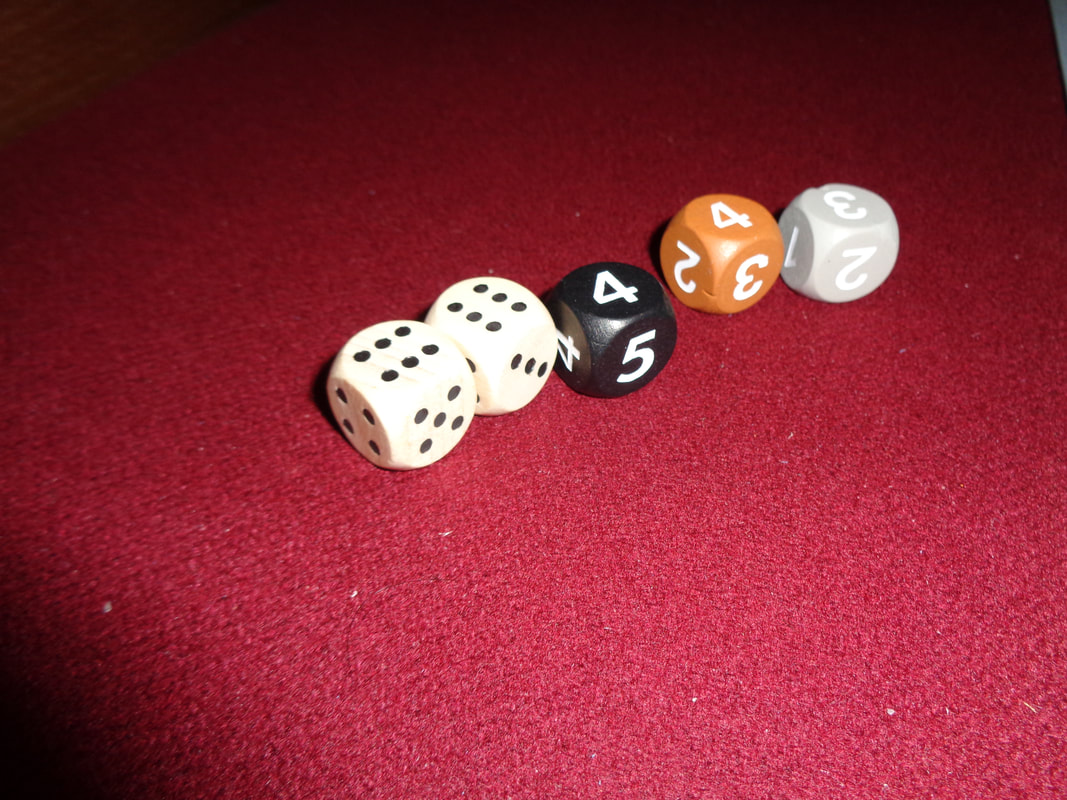
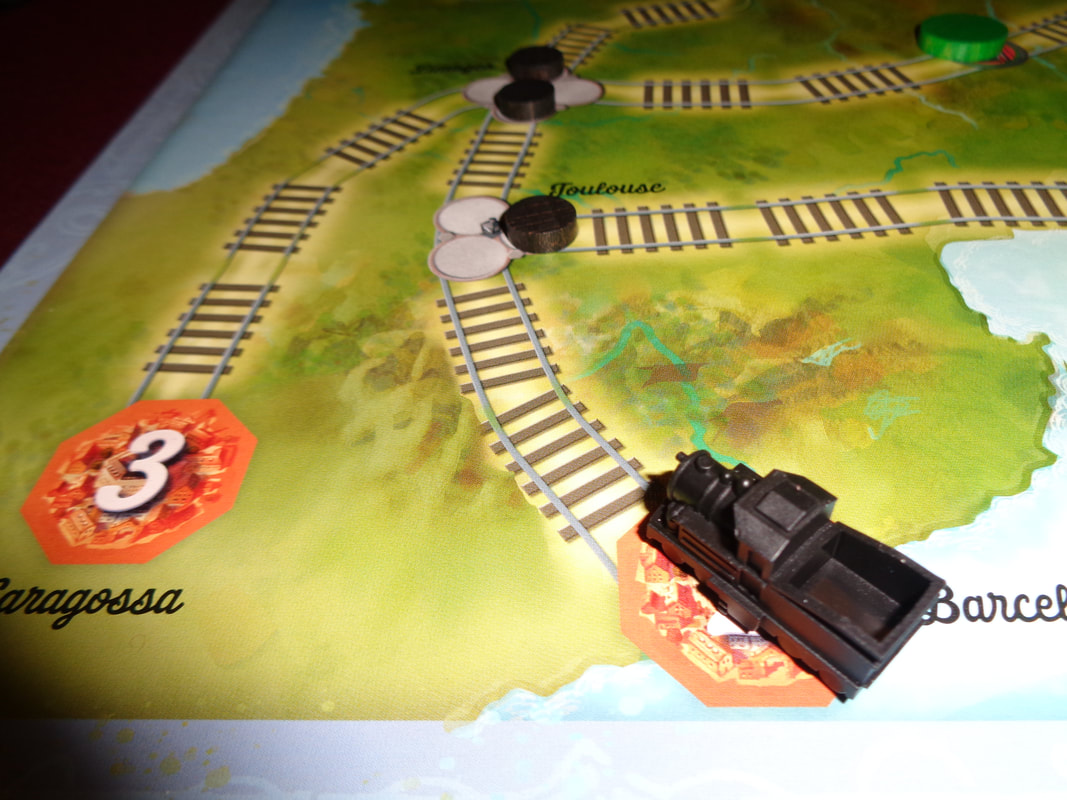
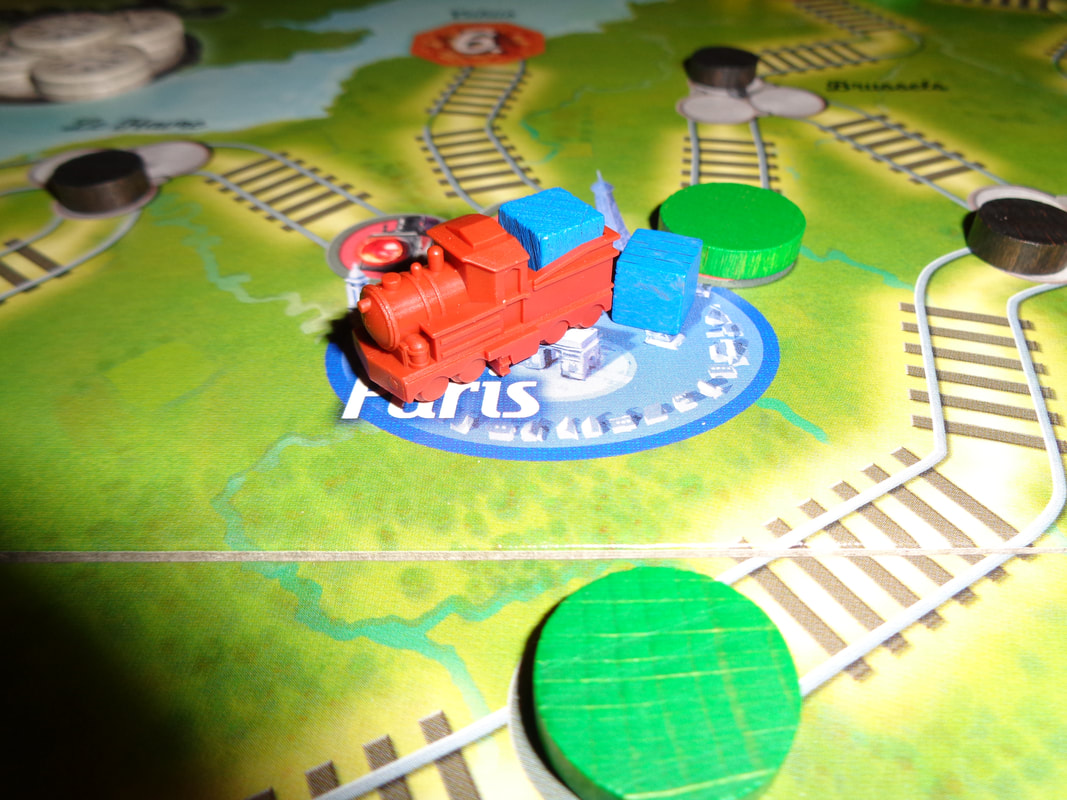
Quality-wise, all of Switch & Signal's components are made to the usual high standard we've come to expect from modern game and nothing feels particularly flimsy. The game makes good use of a wooden components, especially the dice that are nicely rounded and is something I always like. The notable components are the little plastic trains which each contain a space to put a wooden goods cube. The art is good, the boards are colourful and uncluttered with some nice illustrations for various cities. The art on the cards is equally good. The game's use of iconography is straightforward, easily understood and doesn't prove an obstacle. On to Play Setup This set up is for the European beginning default game, the rules provide options to alter the game's challenge and the U.S. side has some different rules.
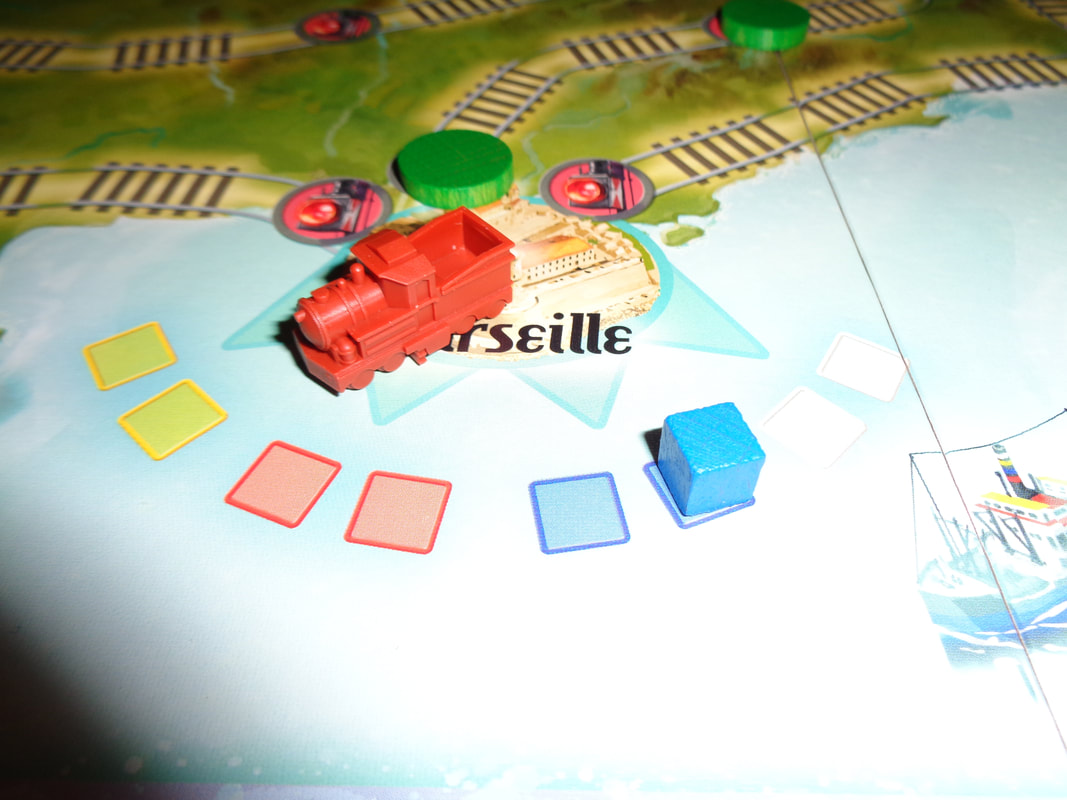
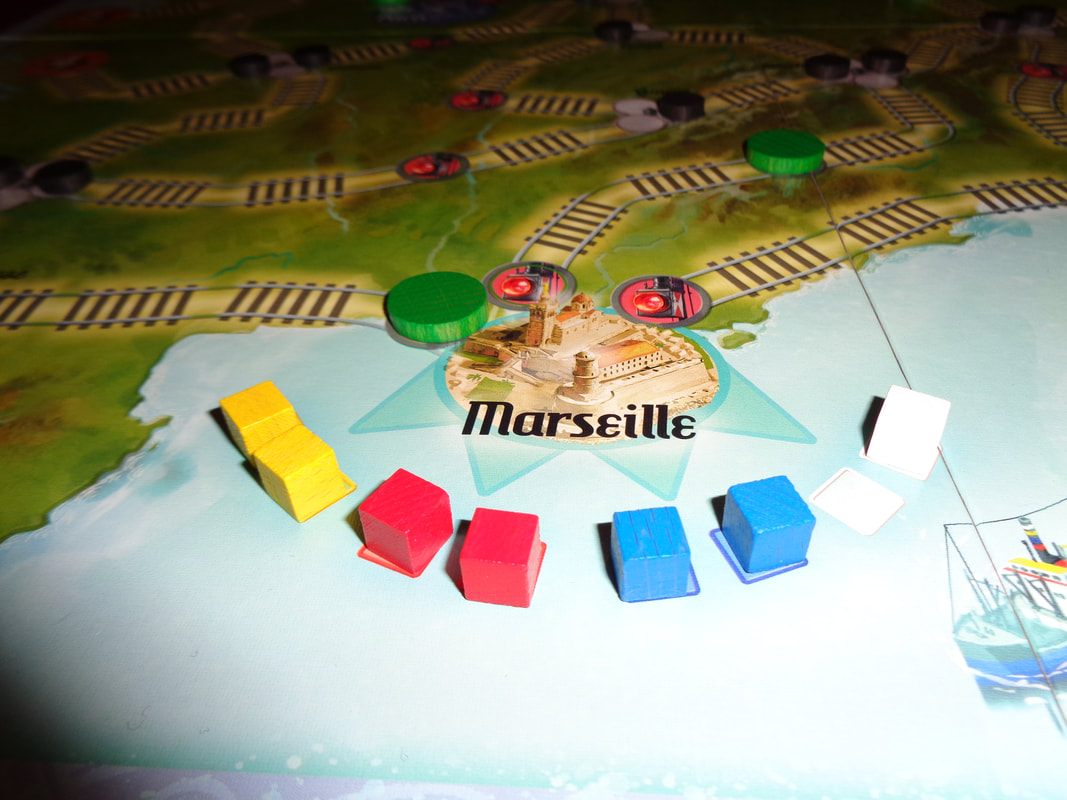
On to play The objective in Switch & Signal is to collect all 8 cubes from the 4 cities using the trains and deliver them all to Marseille. Switch & Signal functions much like a lot of cooperative games; that is the active player flips a card and resolves it's actions on the board. Then the active players takes their action(s).
Endgame Play continues until one of the following conditions is met. If the players run out of departure cards and they have to draw one, then they collectively lose. If all 8 cubes are delivered, then the players immediately win. Overall
If you play a lot of cooperative games, the basic mechanics will be familiar here: Turn over a card and resolve it's action which will create obstacles for the players, then have them perform some actions and choose between progressing the objective or mitigating the problems caused by the drawing of cards. Rinse and repeat. Something about Switch & Signal feels a little different though. Maybe its because the departure cards are so contextual. The trains being moved by the departure cards are both the cause of problems for players and also the means to victory. On more than one occasion, we wanted to move a train but didn't want to spend a card to do so, instead we left it to the 'game' and departure cards to do the job for us. It's pretty rare for players to want the 'bad things happen' card to actually do something in a cooperative game. How trains are moved is vital. Not only do players have to move them into cities to pick up goods, they'll need to manage the different speeds they move at. Getting a fast train behind a slower one is a disaster, no two ways about it. This is exacerbated by the random nature in which trains are deployed on to the board by the dice. Players will also to manage the titular switches and signals. They'll look to create clear routes with full green lights to the port and funnel trains down that route in the correct order. It's a real balancing act though, it's hard to get the junction points where you want them and there's are never enough green lights. I have to say, that when it works, it feels extremely satisfying. I've never been a train controller but Switch & Signal genuinely makes me feel a little like one as I think about how to prioritise trains and set up routes with minimum card expenditure. This brings me to a final point about the game. I said earlier that being forced to discard a departure card is not good and I meant it! Switch & Signal is a well balanced game and it seemed every victory, every loss came down to the wire, came down to the last departure card or two and losing one felt very risky. I found it a lot of fun. If you like train-themed games, Switch & Signal is worth a look, how many cooperative trains games are there? If you like cooperative games, you really should give this a try. It's blend of familiar and unique mechanics makes it easy to get into yet different to other cooperative games. 15th May 2022 It's a Sunday and we're logged into Board Game Arena for some online board gaming fun. Diced Tomatoes, a game about tomatoes that uses dice - what it says on the tin er... box! Caveat: we've only played this game digitally. What's in a game?
There's not much art to speak of in Diced Tomatoes, understandably, the minimalist art is red-themed. How's it play? Setup
On to play Points are scored in Diced Tomatoes by creating vertical lines of 4 dice (Vines if you will.) in either straights or sets of-a-kind. In a turn, the active player takes their actions which will involve rolling and placing dice, which may result in them or other players scoring points.
Endgame There are 2 criteria that can trigger the game end. If there are no dice left in the central pool at the end of the active player's turn, then the game immediately ends. Alternatively, once any player has filled all 6 spots on their scoring board, they score 2 bonus VPs, current round is played out and the game ends. Players now calculate their finishing scores from the following sources.
Points are tallied, highest score wins. Overall
Despite Diced Tomatoes being a fairly light game with an unusual implementation of trick-taking mechanics (In that you don't really take other players' tricks - well you can ruin them instead!), it does give players lots to think about. Firstly players will want to create their own vines. The order in which seeding dice are scored can be very important because getting it right will earn bonus points. This is particularly true for the early scoring spaces. A value 1 seeding die earns 6 VPs when placed on the 1 slot but a value 6 seeding die placed on the 6 slot only earns 1 bonus VP. Secondly, because players can put dice on to the vine tokens and vines of other players, it means that they can try to complete them to gain karma. Alternatively, they can try and mess with other player vines to disrupt their scoring. E.g., if another player has a vine with 3 '1s' which they are intending to put into scoring slot 1, adding a 1 value black dice would complete the vine, but the black die would lower the seeding die's value to 0 - wiping that vine out. Or adding a gold die would add 1 point making the seeding die worth 2 when completed, this means the other player would not gain the star fruit bonus when putting it on scoring slot 1. So while they've gained a VP from the gold die, they've lost the bonus from not matching the scoring slot, collectively losing 5 VPs! So it seems sometimes, players will want to wipe out their own vines to keep a scoring opportunity open! As you can see, Dice Tomatoes provides quite a lot of interaction between players and a quite lot of opportunities for 'take that' moves and depending on how you feel about this style of play, may or may not be your kind of thing. Personally I'm a bit ambivalent about it - especially in a game that's a quick and light filler. One thing I'm not a fan of is having your vines wiped when your score goes above 6. I know why the rules are that way but it feels a bit mean spirited and counter-intuitive to lose points by gaining points. Diced Tomatoes is a not difficult to learn, fairly quick to play filler game. Mechanically it's fairly solid and has a unique spin on trick-taking. I'm struggling to find any genuine criticism but then, I'm also struggling to find any reason to play it again. I feel that the ease in which players can interfere in each other's plans is a bit of a frustration and it left me unengaged. It also feel like it prolongs what could be a short and sweet game. It's not a bad game but there's just other game's I'd rather play. Of course YMMV and maybe you'd get more out of it but Diced Tomatoes isn't one for me. 14th May 2022 It's a Saturday and I'm in Aldershot after a impromptu get together with some friends. Flip City AKA Design Town is a light and uncomplicated push-your-luck deck building game about developing a city. What's in a game?
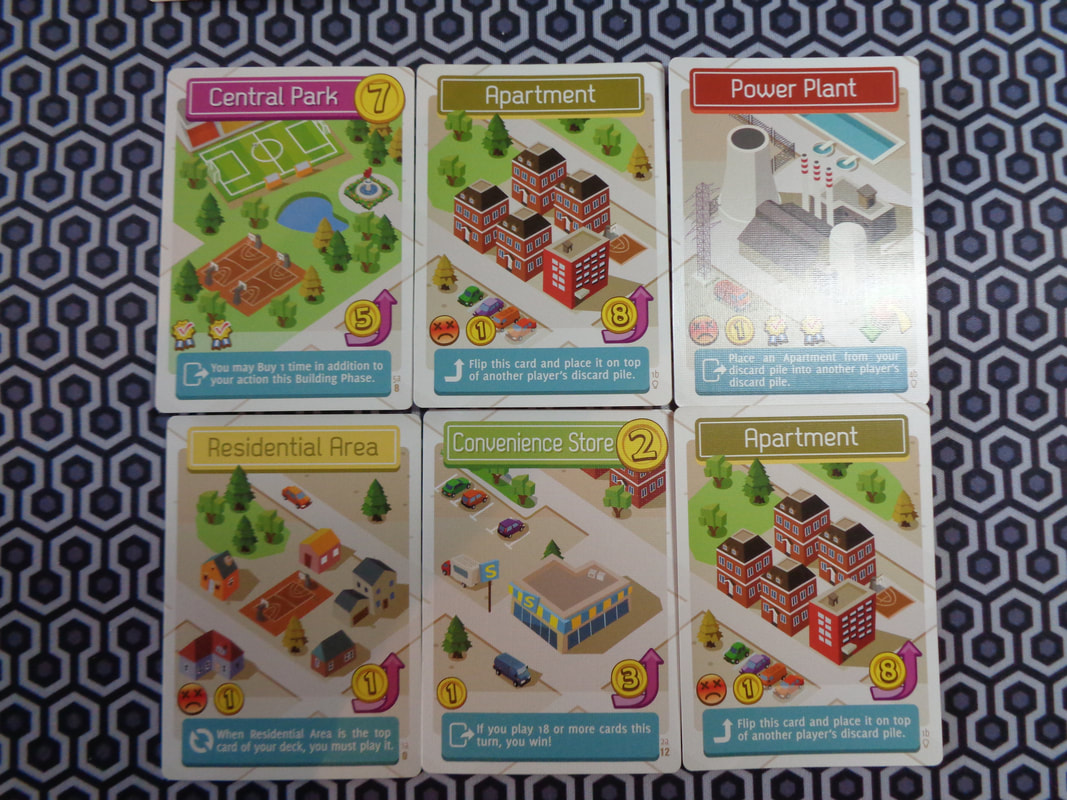
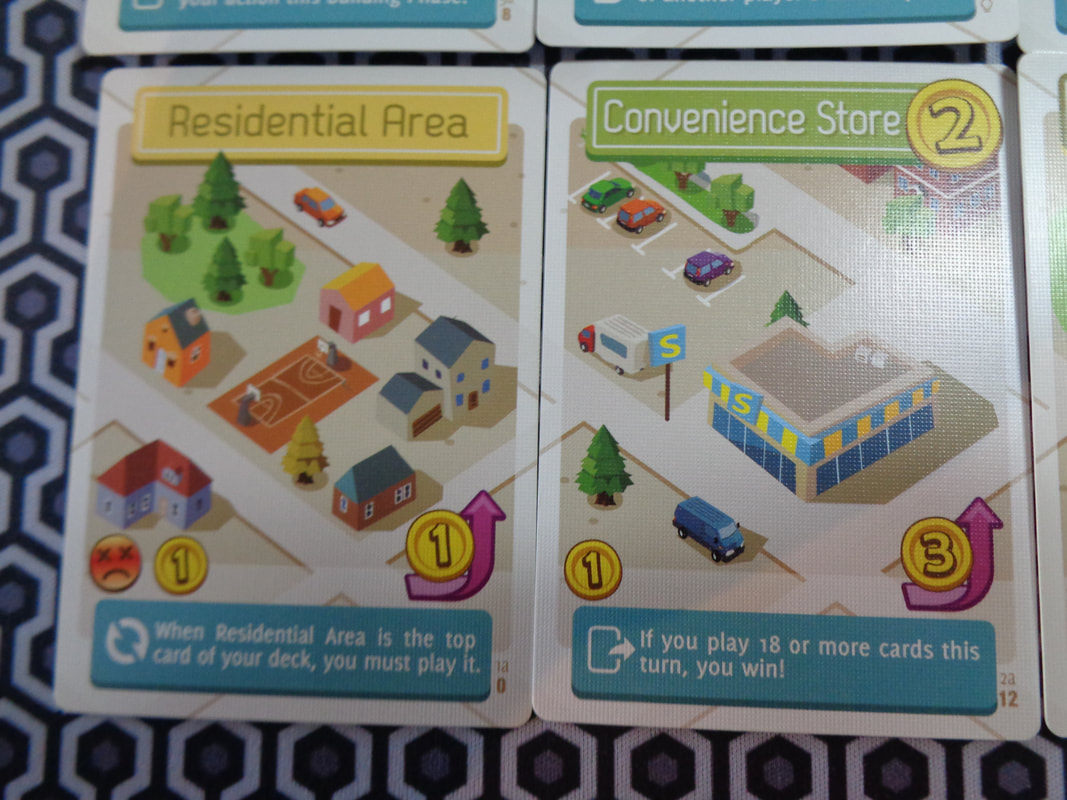
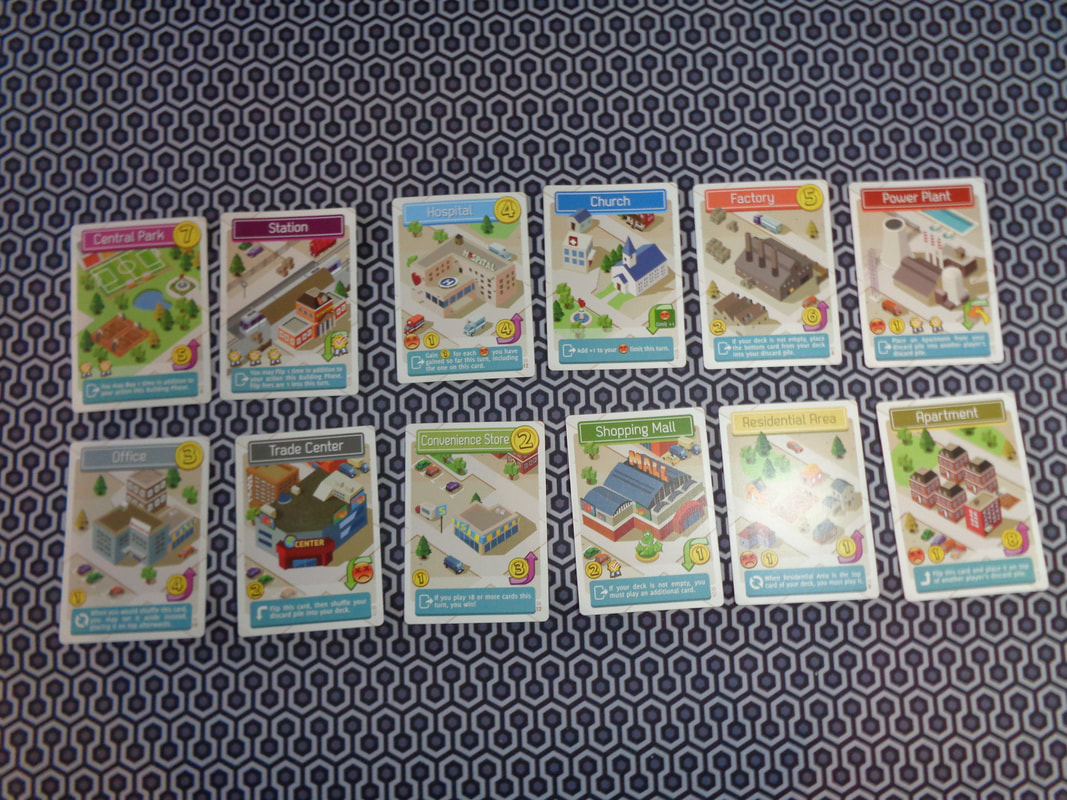
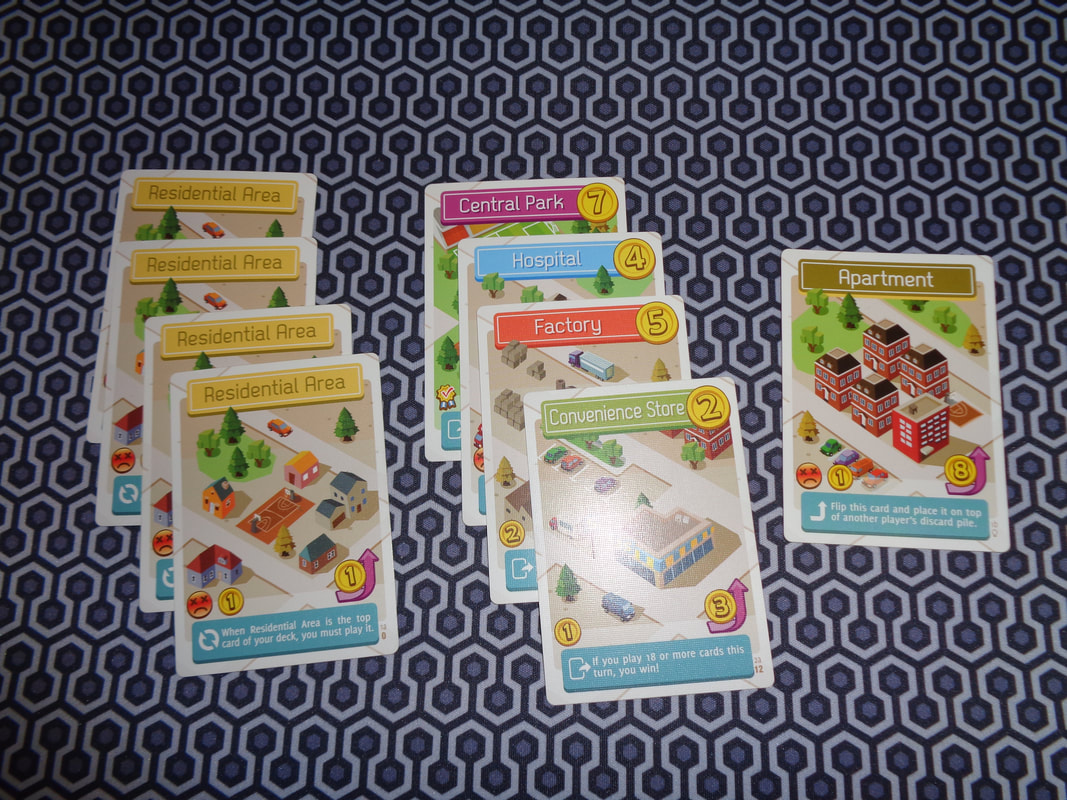
The cards are all the standard quality you'd expect from a card game. The game uses brightly coloured stylised art throughout and I always like this kind of artwork and I think it looks good here. additionally, the cards can be placed next to each to make a city landscape. Yes, it's unnecessary but it's a nice touch and shows some extra thought has gone into the presentation. Flip City uses some iconography, but all of it is clear and easily learned or understood. How's it play? Setup
On to play Each's active player's turn will consist of up to 2 phases, a play cards phase in which they play as many cards as they want or go bust and a buying phase.
Endgame Play continues until 1 of 2 winning criteria is met.
Overall
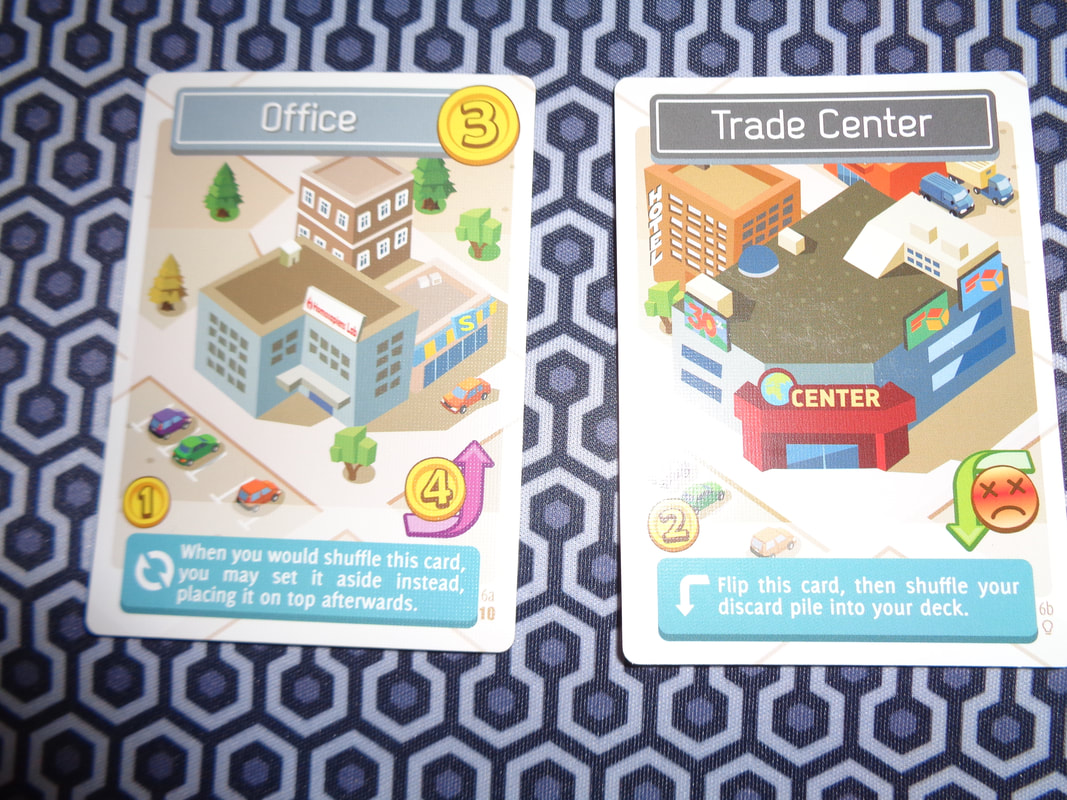
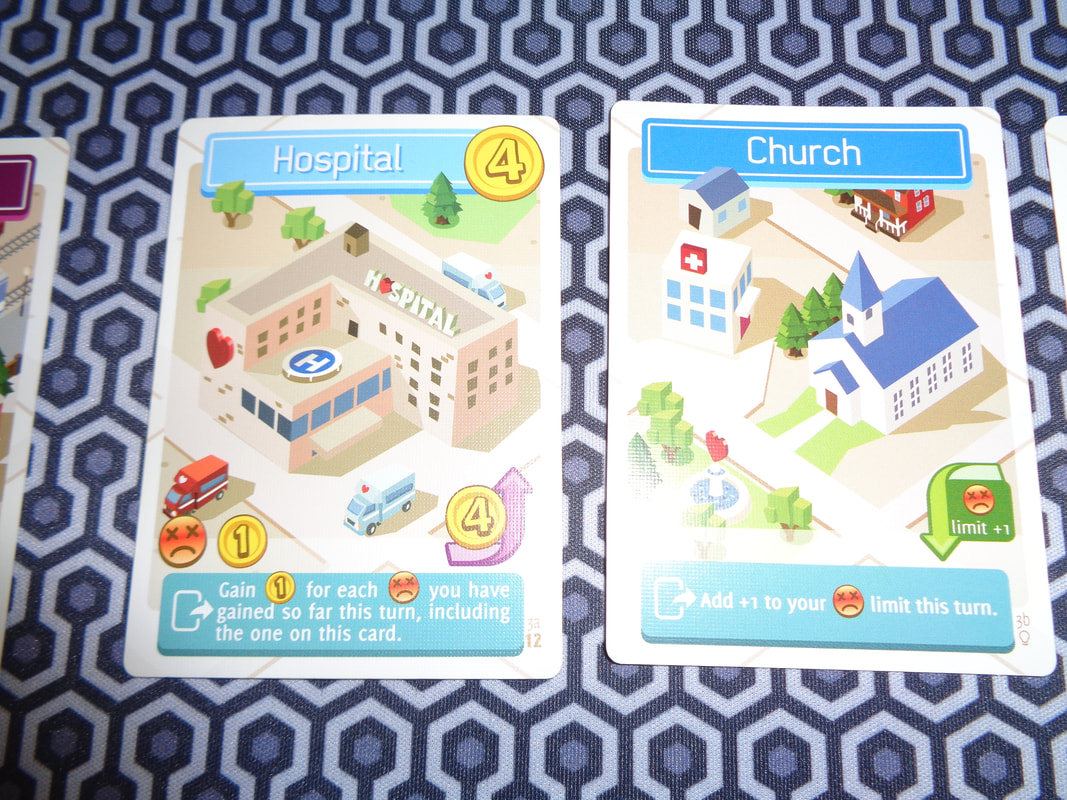
Flip City describes itself as a microdeckbuilder and it's not really wrong. Most deck-builders come with a supply-market of 10 card types or so but Flip City makes do with 4 types (5 if you include the micro-expansion), although they are double-sided, so there are actually 10 types of card. Even so, it's a very compact feeling game. For me however, where Flip City differentiates itself from other games of its kind is the implementation of a push-your-luck mechanic. It works well here, especially in conjunction with meeting the winning conditions, essentially forcing players to continue drawing cards and pushing their luck until they either have 8 VPs or 18 cards in play. As a result, Flip City is a little different to many deck-builders, which at their core are more-or-less about creating cash-generating engines to purchase cards that will earn them more cash during the early-game or VPs during late-game play. In Flip City, generating cash is still important because it allows players to acquire more cards but some of those cards will have to work towards being able to draw 8 VPs or 18 cards. Flip City is a quirky, charming, fairly light and quick to play pocket-sized deck-builder that presents players with some meaningful paths to winning and choices as well as some unusual game play and a nice little risk-and-reward mechanic. Given it's light nature, I'm not sure how the game will hold up to repeated play but that's sort of missing the point. This is a fun filler game that is good to ply every once in a while. It's worth a try and if deck-builders are you thing, then this will probably appeal to you. 13th May 2022 Friday the 13th continues and we in Farnborough for some more after work gaming goodness. Many games have small components that could be considered choking hazards, that however is not the case with... Joking Hazard, a game inspired by the Cyanide & Happiness comic strip. What's in a game?
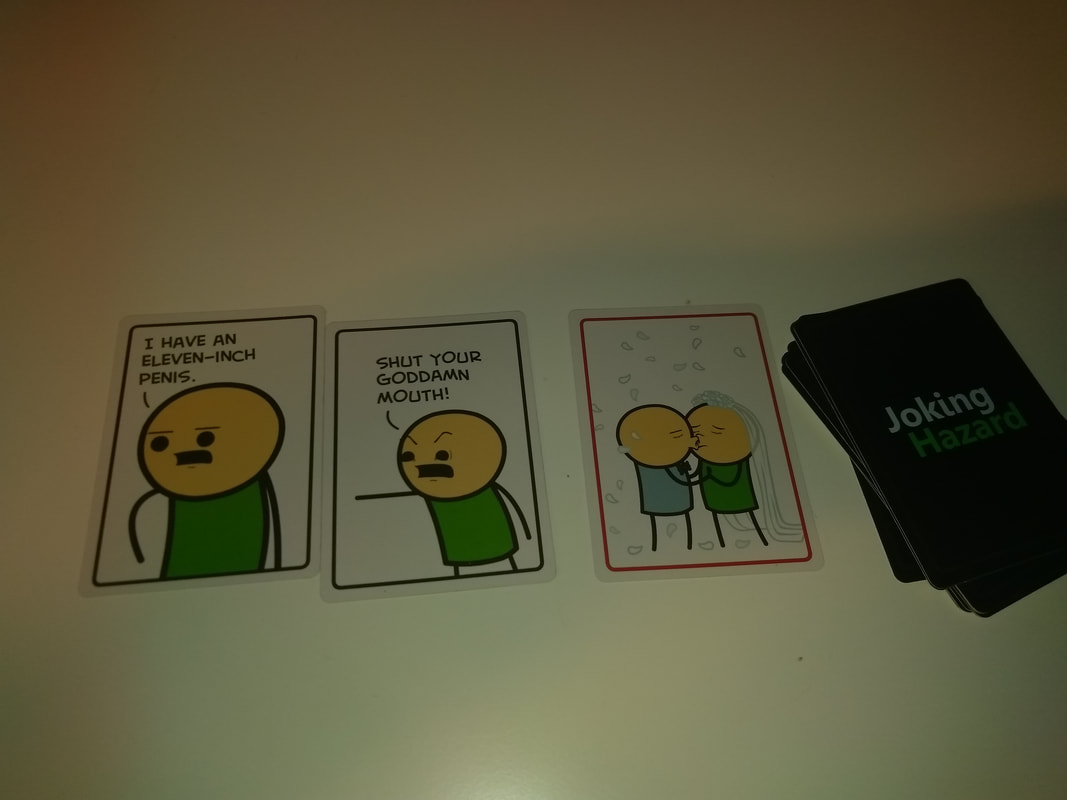
There's not much more to say about the cards, they're quality is pretty good, considering the game's origin, the artwork is exactly what is expected and the game uses no iconography. How's it play? Setup
On to play Individual cards in Joking hazard essentially have no context and this is a game about putting them into context by constructing jokes out of 3 comic panels, only the comic panels will be to some degree randomly created.
Endgame The first player to win 3 points, wins! Overall
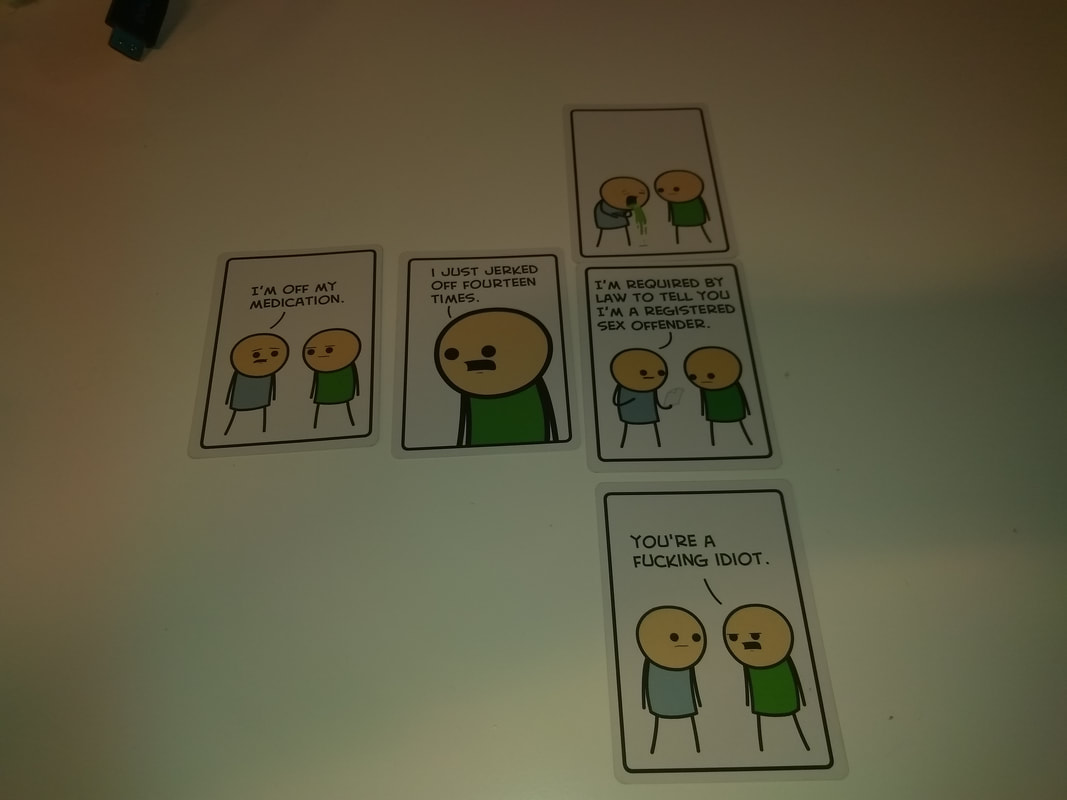
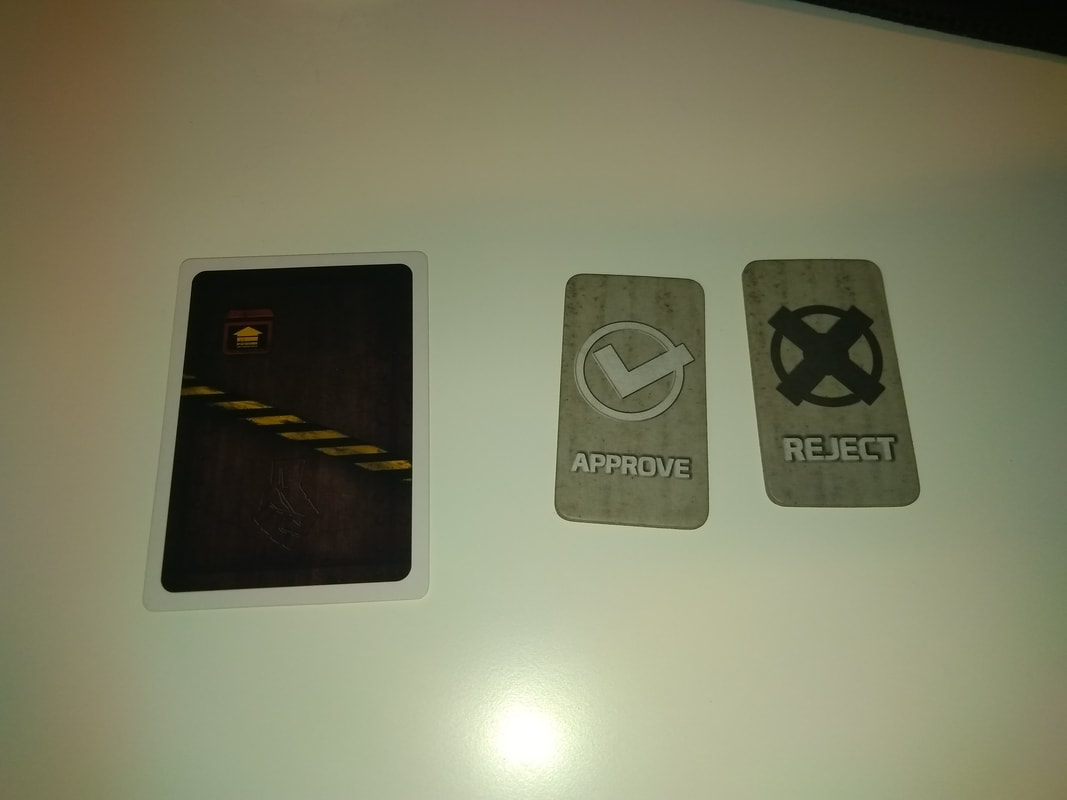
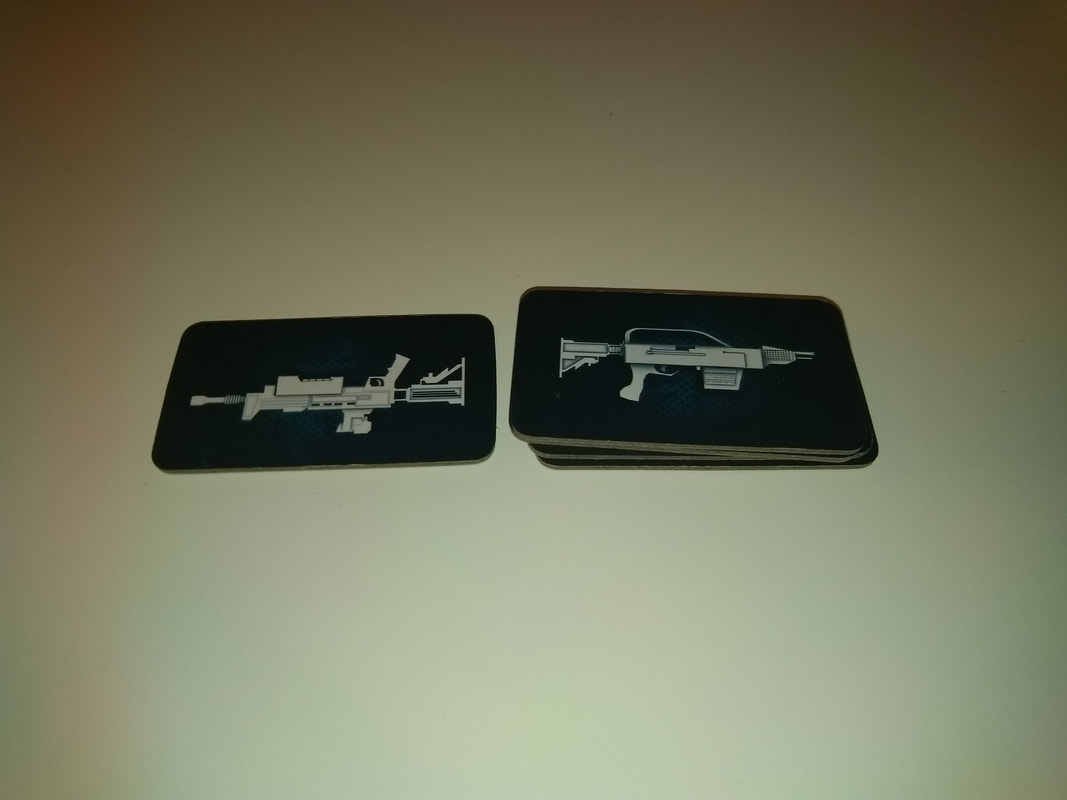
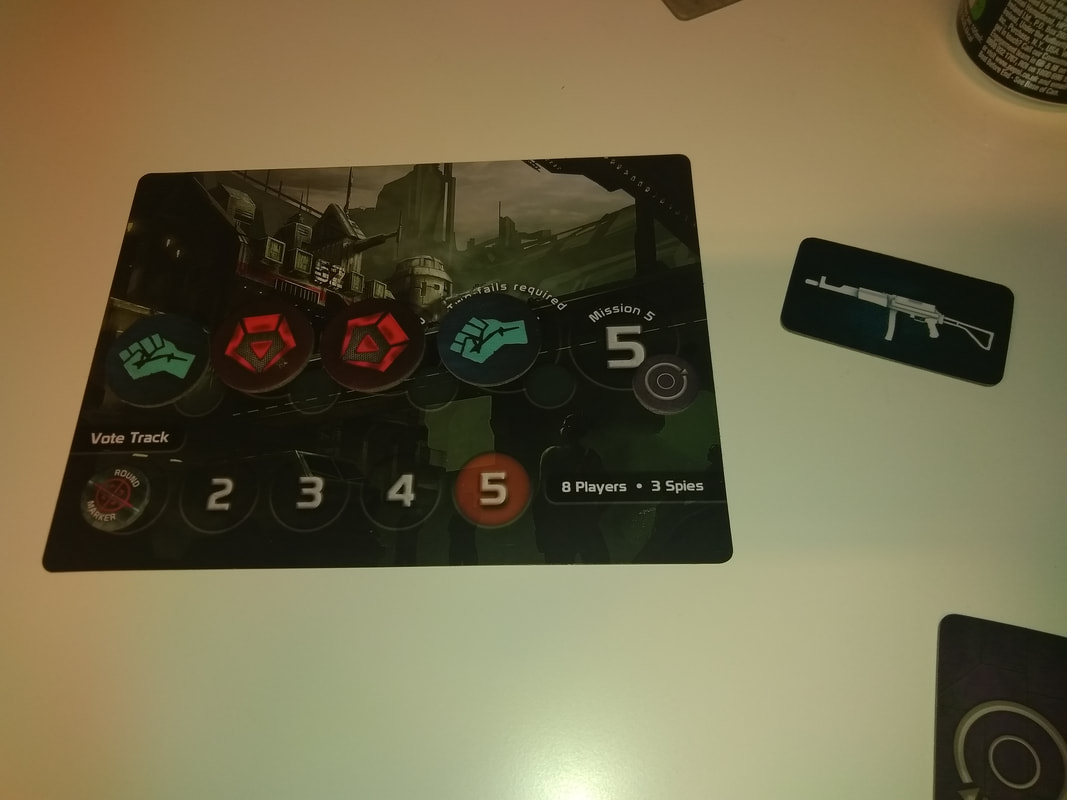
Joking Hazard is an accessible party game that can be played by up to 10 participants and is equal parts mildly amusing and mildly offensive. Well... as offensive as the Cyanide & Happiness comic it's based on. So I guess if you're easily offended, you might want to give this a miss. From a gameplay perspective, you would be forgiven for thinking Joking Hazard is just the same as other 'you be the judge' games. However, Joking Hazard differs because individual cards have no context. There is no statement A and answer B. The players create context themselves, which gives the game a slight edge. Is it any good though? The answer is; sort of, which to be honest, is not a good answer really and a bit of a cop-out. But the truth is; this games clearly sits in the domain of beer-and-pretzels. If you're going to be playing it with a bunch of slightly dour-faced gamers who usually play 6 hour empire building, resource managing, epoch spanning games, no one's going to enjoy this. However, if you play it with some work colleagues or non-gamers who's only understanding of games is 'Is it like monopoly?' then they'll probably have a blast, especially if they've had a drink or two and that's who the game is targeted anyway. 13th May 2022 Friday the 13th! And I'm in Farnborough with work colleagues for some gaming fun. Viva la resistance! Will you overthrow the tyrannical oppressive government or welcome your new overlords? Let the cards decide. Resistance is a hidden role card game that is also the predecessor of Arthurian themed The Resistance: Avalon and as such is mechanically almost identical to that game. In fact The Resistance or at least the basic version of it is actually a simpler game than The Resistance: Avalon. Reading my blog about The Resistance: Avalon will tell you everything you need to know about The Resistance. A full write-up here would be pointless. There's only 1 notable difference: The basic version of The Resistance only has 2 role cards, resistance fighter and spy. Otherwise the games play identically. At the start, each player is given a secret role as a resistance fighter or spy. The key thing here is that the spies know who each other are and are trying to sabotage the missions while the resistance fighters are trying to uncover the spies. The mission leader chooses a team and all players vote on whether to approve or reject that team. When a team is finally chosen, they all go on the mission. This involves the team voting on whether a mission succeeds or not. Resistance fighters must choose to succeed at missions but spies can choose to either succeed or fail. All of these decisions and voting are done in secret and resistance fighter will need to watch the voting, who votes in what and the outcomes of the voting. Spies will need to be patient, revealing their hand too early will flush them out. If by then of the fifth mission, the spies have not sabotaged 3 missions, then the resistance wins. If 3 missions are sabotaged Overall
There's not too much to add here, everything I said about The Resistance: Avalon also applies here, but that was sometime ago and I can't remember exactly what I said. So I'll summarise here. Mechanically, The Resistance is pretty solid with a easily understood set of rules that give opportunities for lying, deception and deduction. There's nothing to fault there. The quality of the game though, comes almost entirely from the participants. Players who love to bluff and mess with other players will revel here and be in their element. Whilst those who aren't fans of this type of game are likely to find it slightly uncomfortable, won't enjoy it and thus probably won't play it as well. So if you're fan of hidden role games and are playing with like-minded people, The Resistance is definitely worth trying. |
AuthorI play, I paint. Archives
March 2024
Categories
All
|


 RSS Feed
