3 Spellcasters and a Dwarf
  • Home
  • Special Effect
    • Special Effect
    • The Final Return of The Indiana Jones Charity Globe Trot
    • The Warlock of Firetop Mountain Challenge
    • Return of The Indiana Jones Charity Globe Trot
    • Bard's Tale Challenge
    • Fighting Fantasy Challenge
    • The Indiana Jones Charity Globe Trot
    • Mirkwood Charity Walk
    • Middle-earth Charity Walk
    • Dungeon Daze
  • RPGs
    • The One Ring
    • The Evils of Illmire
    • Beach Patrol
    • The Surrendered Lands
  • Game Blogs
    • RPG Blog
    • Gaming Blog
  • Painting Blog
  • Contact

Gaming Blog

February '22: The month in gaming

28/2/2022

0 Comments

 
Welcome to the inaugural blog post of 'The month in gaming', a digest style post about all the games I've played in February 2022 which replace all the 'non-first play' blog posts. First play will still get a write up as usual.


In February 2022, I played:
​Total games: 53
Different games: 33
​First plays: 8

Tuesday 1st at The Sovereigns with the Woking Gaming Club
Space Base - 5
Race for the Galaxy - 11

Wednesday 2nd on Board Game Arena

Century: Golem Edition - (3)
Via Magica - 8
Sushi Go! - 10
Martian Dice - 11
Railroad Ink - 16

Thursday 3rd, round Simon's
My Little Scythe - First Play!
Nidavellir - First Play!

Sunday 6th February at The Sovereigns
Death on the cards - 6
Race for the Galaxy - 12
Deep Sea Adventure - 3

Sunday 6th on Board Game Arena
Cloud City - 8
Space Base - 6
Lucky Numbers - 12

Can't Stop - 9
Railroad Ink - 17
Love Letter - 54

Tuesday 8th at The Sovereigns with the Woking Gaming Club
Llamaland - First Play!
Fantastic Factories - First Play!

Wednesday 9th on Board Game Arena
Century: Spice Road - 4
Splendor - 16

Space Base - 7
Can't Stop Express - 3

Lucky Numbers - 13
Railroad Ink - 18

Wednesday 9th, round Simon's.

In the Hall of the Mountain King - First Play!

Sunday 13th on Board Game Arena
Carcassonne - 5
Shifting Stone - First Play!
Codex Naturalis - 18
Lucky Numbers - 14
Martian Dice - 12
Can't Stop - 8

Tuesday 15th at 
The Sovereigns with the Woking Gaming Club
Race for the Galaxy - 13
Port Royal: Big Box - 18


Thursday 14th, round Simon's
Star Wars: Outer Rim - 
First Play!

Friday 18th on Board Game Arena
Parks - 06
Railroad Ink - 19
Shifting Stones - 2

Sushi Go! - 11
Lucky Numbers - 15

Sunday 20th on 
Board Game Arena
Loco Momo - First Play!
Dragonwood - 9
For Sale - 7
Potion Explosion - 11
Dice Forge - 10

Lucky Numbers - 16
Love Letter - 55

Tuesday 22nd at 
The Sovereigns with the Woking Gaming Club
Fluxx - 3
Quacks of Quedlinburg - 3

Sunday 27th on 
Board Game Arena
Loco Momo - 2
Space Base - 8
Cloud City - 9
Can't Stop - 9
Lucky Numbers - 17
0 Comments

Loco Momo

20/2/2022

0 Comments

 
20th February 2022

It's a Sunday and we're logged into Board Game Arena for some gaming fun.

I don't know what Loco Momo means but I kind of hope it means crazy fun with cute animals. Hmm, that didn't sound right, how about wholesome crazy fun with animals.
Loco Momo is actually about (I kid you not!) organising the disarrayed wildlife population of the forest for a group photo! 

Caveat: We've only ever played Loco Momo digitally.

What's in a game?
  • ​Game board: The central game board displays 4 sets of 4 tile spaces, 16 tile spaces in total.
    A large part of the board is given over to the artwork which depicts a remote looking vaguely mysterious forest backdrop.
  • Player boards: Each of these boards has a 5x5 grid of tile spaces, along with some iconography explaining scoring rules. Again the background depicts a forest environment, only this time with a peculiar set of overgrown open-air stands (Or bleachers if you will.) against the vista of a waterfall.
  • Tiles: Loco Momo makes use of 105 square tiles that depict 5 wildlife species; bears, ducks, eagles, leopards and rabbits across 3 colours; blue, brown and green.
    It means there are 21 of each animal type and 7 in each colour.
  • Bag: Given that we played Loco Momo digitally, there's no bag. But in the physical copy it would be used to blindly draw tiles.
There isn't too much artwork to Loco Momo, just the 2 backgrounds on the 2 types of board and 5 wildlife illustrations.
It's good quality artwork though, a bright palette and bold cartoony style suit the game's light-hearted theme well.

The game's only iconography appears on the player boards. It's not immediately apparent what they mean but quick read of the rules makes them clear.


How's it play?
Setup
  • Central board: Put out the central board and randomly populate all 16 spaces on the board with wildlife tiles.
  • Player board: Give each player a personal board.
  • First player: Determine a first player.
That's it for setup.

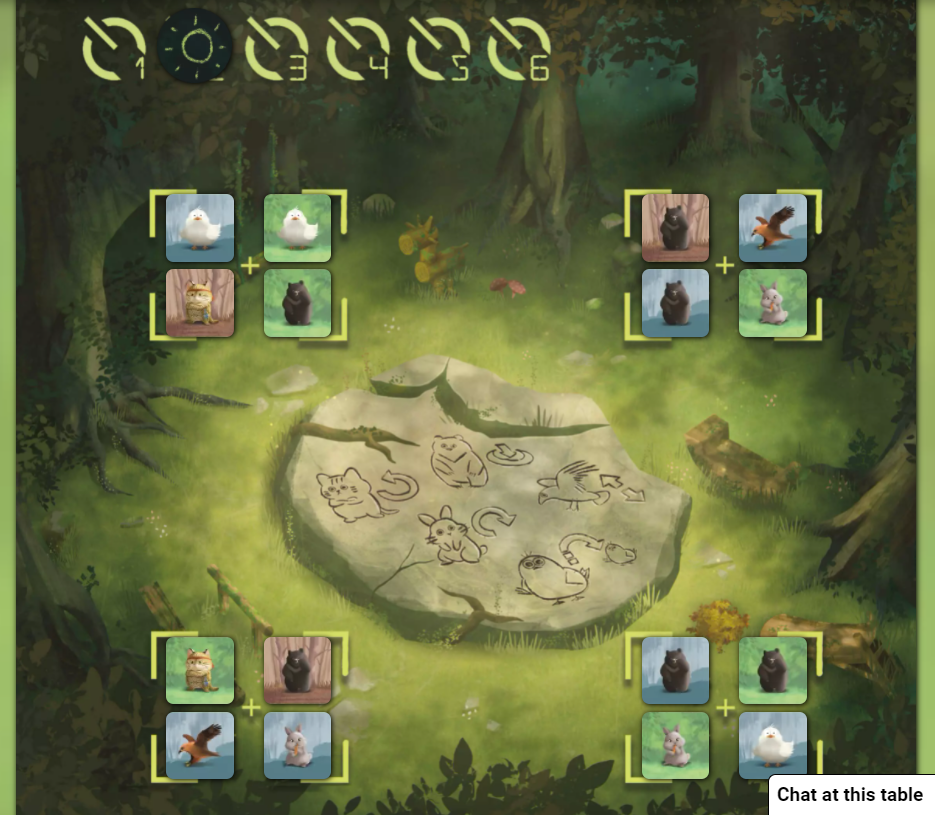
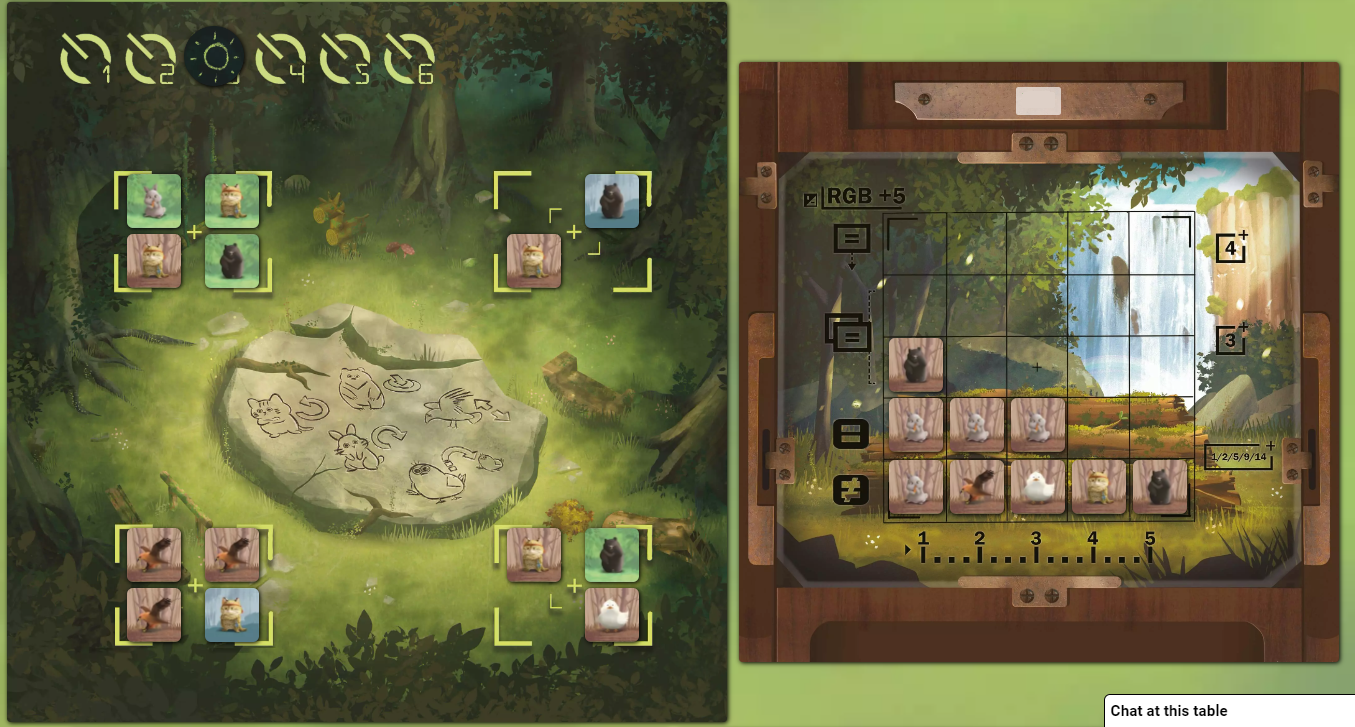
On to play
The objective of Loco Momo is for players to fill their boards with tiles to score VPs and the game provides various approaches to achieve this. Although this mostly involves collecting various kinds of sets.
Loco Momo uses the traditional structure with the active player taking their 2 actions -  a drafting action and placing action with play then moving to the player on the left.
  • Drafting: The active player chooses to take 1 of the 16 tiles, what happens next will depend on the type of wildlife on the tile that was picked and its colour.
    Bear: If a bear tile was chosen, then all wildlife tiles of the same colour as the bear from the same area as the bear are drafted by the active player along with the bear tile.
    Duck: Starting clockwise from the area where the duck tile was chosen, the active player looks at the other areas until they encounter another duck. Then all the wildlife tiles with the same colour as the duck are taken, along with the duck. If there are no other ducks, then tiles of matching colour are taken from the same area as the duck.
    Eagle: All wildlife tiles matching the colour of the eagle tile are taken from the diagonally opposite area to where the eagle tile was initially taken.
    Leopard: The active player should look at the next area going anticlockwise from where they took the leopard tile and take all the tiles with the matching colour.
    Rabbit: The active player should look one area clockwise form where they took the rabbit tile and take all the tiles with the matching colour.
  • Place tiles: The active player will now have 1-5 tiles of the same colour which must be played on to their board.
    The active player may put these tiles into any row on their personal board, however, tiles must always be placed on the leftmost available space. Thus tokens go from left-to-right.
  • Repopulate: Spaces that were created on the central board after drafting are now randomly repopulated with more wildlife tiles.
  • Next player: The player to the left of the active player now becomes active.

Endgame
Play continues until the 6th round is completed, then scoring occurs.
  • The bottom row: (Which I'll call row 1.) scores for each different type of animal in that horizontal row. Scoring goes from 1-14 VPs.
  • Row 2: Above the bottom row is row 2, this is scored for the biggest single set of any identical animal in that horizontal row, again scoring from 1-14 VPs.
  • Rows 3 & 4: Unlike rows 1 and 2, these 2 rows score vertically. Each vertical matching pair of animals in the same column score 3 VPs.
  • Row 5: Tiles in the top row will score by also matching the 2 identical tiles in the same column from the 2 rows below. This scores 4 VPs.
    Thus if all 3 animals in a column match types for rows 3-5, it scores 7 VPs in total.
  • Colours: Each row and column that has been filled with tiles of the same colour score an additional 5 VPs each.
Points are tallied, highest score wins.

Picture
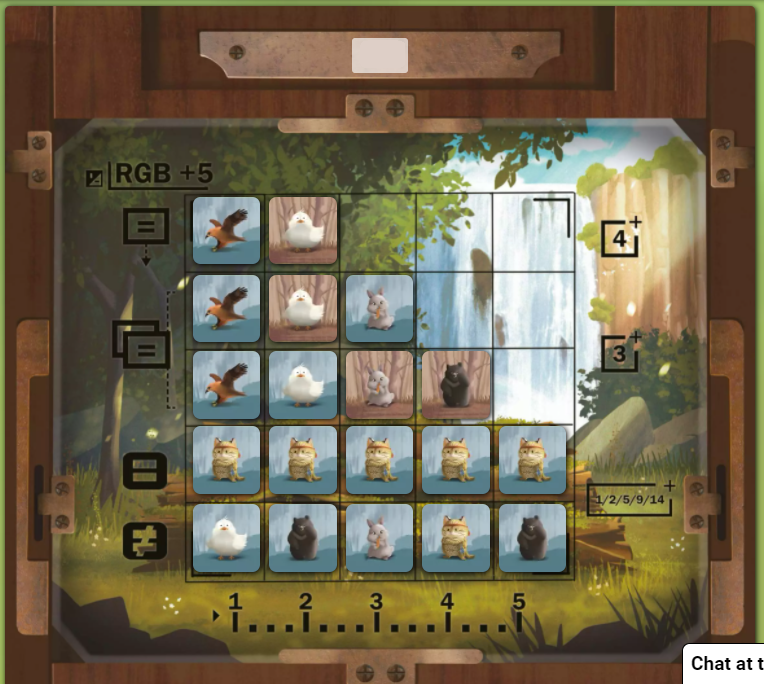
The bottom row has 5 different animals, scoring 14. Row 2 above has 5 identical animals, also scoring 14. The matching eagles in the 1st column for rows 3 & 4 score 3, plus the eagle in the top row above scores an additional 4. The ducks in column 2 also score 7. The 2 rabbits in column 3, rows 3 & 4 score 3. The bear scores nothing. Finally, 2 rows have the same colour as does 1 column, scoring 15 more. Total score: 60.

Overall
​Loco Momo is a fairly straightforward game, the gameplay strategies are more or less obvious and there's not much to say about it.

During drafting players will look for the optimal method to acquire the most tiles possible or, as will occur on occasion if there's little they want, try to avoid taking tiles.

Then, when placing tiles, players may need to make some meaningful choices.
Sure, it's easy putting down tiles when a player has got the ones they wanted but frequently, this won't be the case and dealing with those wayward tiles is very important.
Players will want to keep scoring opportunities for other tiles/sets open and minimise the damage caused by having to place unwanted tiles.

There's also a higher level of play that involves looking at what's available on the central board and what other players are working towards, then trying to anticipate what tiles they'll be looking to gain from themselves. It might be prudent to try and deny other players certain tiles.
Or if they're not interested in tile of a particular colour, it might be safe take that tile in a later turn.

This brings me to the one niggle I have about Loco Momo, which are the colour scoring rules.
We've only played Loco Momo 3 player and because there are 3 colours of tile, we tend to gravitate towards one colour each with little 'stealing' of other players' colours. Which is understandable as completing columns/rows with the same colours confers nice bonuses and during the late-game completing sets scoring the colour instead of the animal gets more VPs. Consequently it also makes decisions 'easier'.
I imagine with 4 players, this status quo would be shaken up and the game would become more interesting.
Despite the criticism, the game ultimately generally does provide players with meaningful decisions to make.

Games about about drafting sets of tiles and placing them on to a player board are pretty commonplace today.
So does Loco Momo do anything to stand out from the crowd?

I think the answer is... sort of.
Loco Momo is a bit unremarkable but at the same time it's an enjoyably light, easily learnt and accessible example of this kind of game with a reasonable playing time. A good introduction or crossover game
If this ticks your boxes, Loco Momo might be worth a look.
0 Comments

Star Wars: Outer Rim - First Play

18/2/2022

0 Comments

 
17th February 2022

​It's a Thursday night and we're round Simon's for some gaming goodness.

The game of the night was Star Wars: Outer Rim.
Turns out that playing a scoundrel in an open world Star Wars game ain't like dusting crops.

What's in a game?
  • Gameboard: Star Wars: Outer Rim's gameboard is segmented into 6 parts and put together like some sort of jigsaw puzzle. When made, it looks like a semi-circle or perhaps... a rim or an... Outer Rim,! Geddit? Sigh.
    The board contains a galactic map that shows different routes to and from various planets and 'stops' between planets known as Navpoints. Close to each planet are 2 spaces for contact tokens apiece who will be on that planet.
    ​Each segment of the board will contain 2 planets with 2 contact spaces each (Except for 1 segment which only has 1 - Kessel.).
    Finally, there are 2 pieces that go at each end of the rim which also each contain 2 spaces for stacks of patrol tokens.
  • Player board: This board has an unusual shape to accommodate a character card.
    5 tracks are displayed on the board, 4 for different types of reputation and 1 that tracks fame.
    There are spaces around the edge of the board to place/slot gear cards and mission cards.
  • Ship board: These largish boards feature illustrations of more-or-less recognisable spaceships from the Star Wars setting. They come in 2 types (Starter and standard.) and share the same set of 3 numeric stats; Hyperdrive, Ship Combat Value and Hull. Each will also have spaces/slots around the edge to place, crew, cargo or mod cards.
    Starter ships: These identical boards are double-sided and each side has a slightly different starter ship.
    Standard ships: During the game, players will have the opportunity to purchase other ships. Their stats will have different values and different amount/type of slots. additionally, these ships each have a ship objective of some sort. When the objective is completed, the ship may be flipped over to the other side to a better version of the ship with improved stats. Levelling up if you will.
  • Character cards: These are the 8 characters that the player will take the role of. As with the ship cards, there are a variety of characters here ranging from easily recognisable to lesser-known and each is double-sided and illustrated with the relevant character.
    Each character has 2 numeric stats, Ground Combat Value and Health and each character also has a special ability of some sort.
    Each character also has a personal goal, which when met, allows the controlling player to flip the character to the other side, levelling them up as they would with a ship.
    There will also be rules for setup at the start and finally, at the bottom will be several tags or words such as Piloting, Stealth, Strength etc. These come into play during skill rolls.
  • Cards: As well as character cards, Star Wars: Outer Rim comes with a whole bunch of decks that power the gameplay.
    Databank cards: This deck is numbered and interestingly, they are not shuffled but always kept in numerical order for easy reference.
    Encounter cards: These cards will be split into 7 decks, 6 of which correspond to a segment of the board, the 7th deck corresponds to navpoints.
    Market cards: These cards can be bought by players and represent everything from ships to crew to bounties and are split by type into a mere 6 decks!
  • Tokens: Star Wars: Outer Rim has numerous tokens.
    Patrol tokens: There are 4 of these card patrol tokens of escalating strength for each of the game's 4 factions, thus 16 in total.
    Contact tokens: There are 22 of these sort of rounded oblong shaped tokens and each one represents a character out of Star Wars,  on one side of each is a picture of the pertinent character. Every token also has a difficulty and which is represented by a green, yellow or red colour which is shown on both sides of the token - thus giving players an idea of what they'll be up against before revealing it.
    Credits: The game's currency is represented by these rectangular card tokens, I guess cash in the Star Wars galaxy is very square?
    Goal tokens: Fairly nondescript round card tokens.
    Damage tokens: These are hexagonal card tokens that display a 'hit' icon. They are placed on to a character or ship when they are damaged.
    Reputation tokens: These come in 4 types - 1 for each factions and are used on the player boards to track every player's standing with the aforementioned factions.
  • Standees: Each character has their own illustrated standee.
  • Dice: The game comes with 6 plastic dice. Unusually, especially for a high-profile licensed game, these are eight-sided! Furthermore, in place of numbers are symbols; 3 for Hit, 1 for Critical Hit and 2 Focus symbols, the remaining 2 faces are blank.
I've got no complaints about any of the game's components, they're made to the usual high standard that've come to be expected from modern games. There are no standout components but neither are there any bad ones.

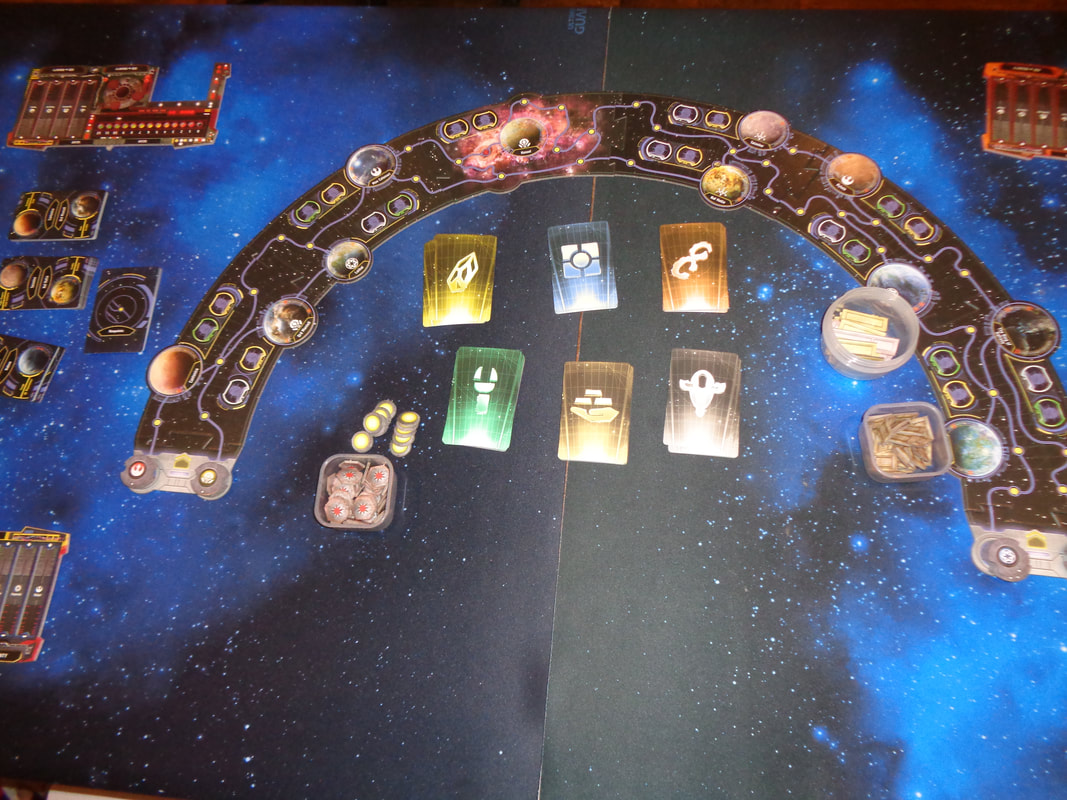
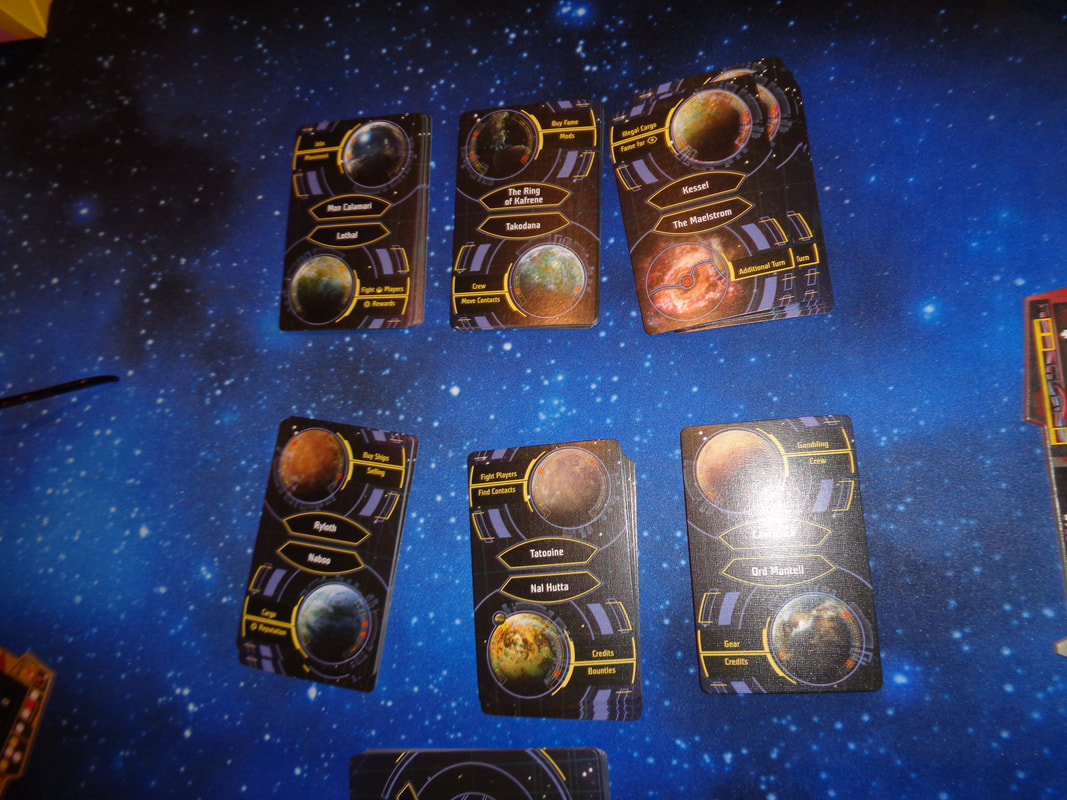
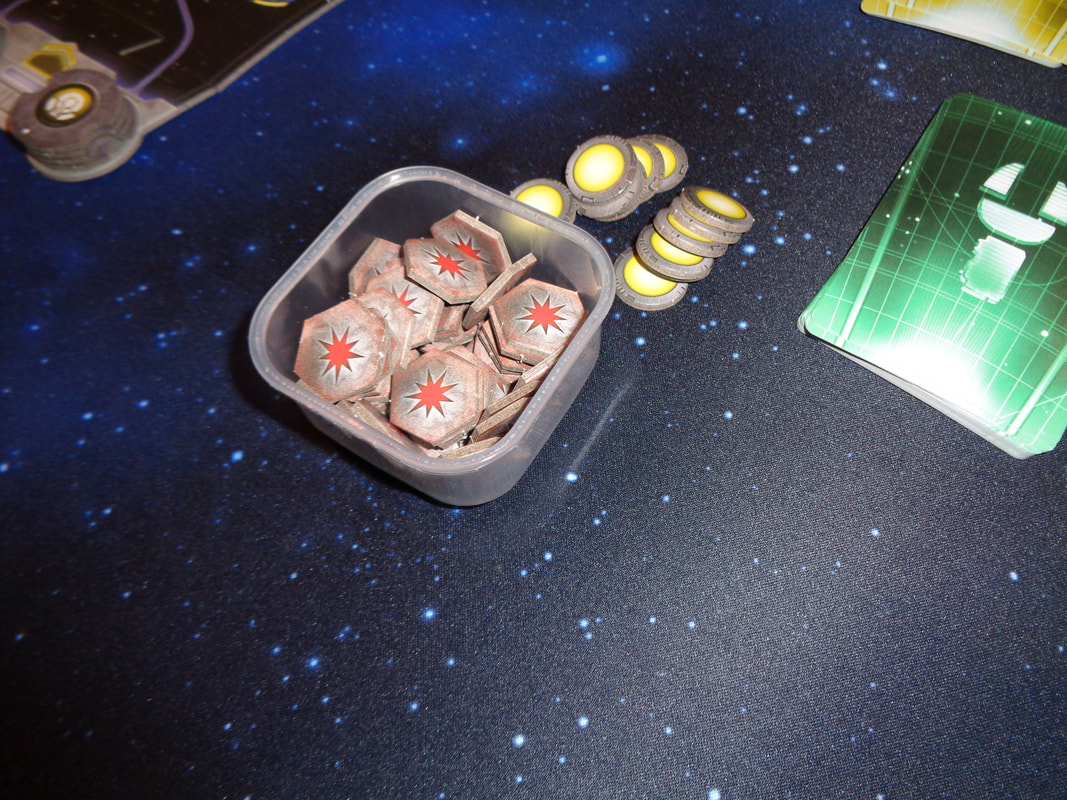
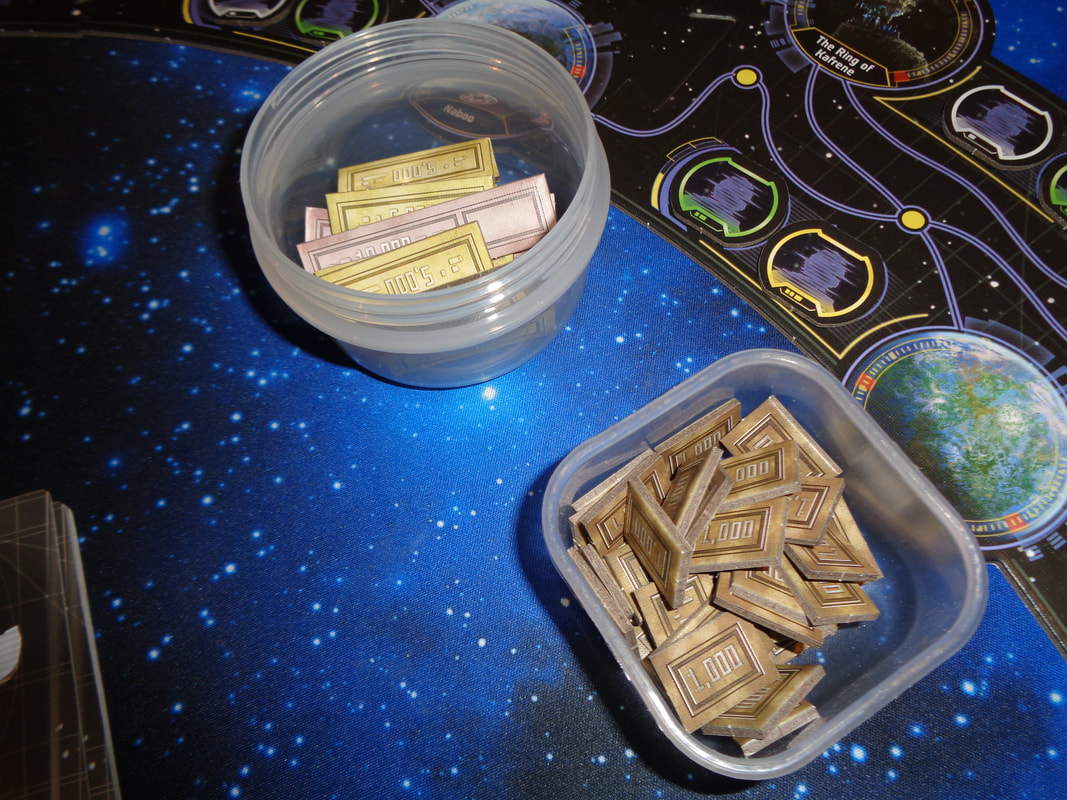
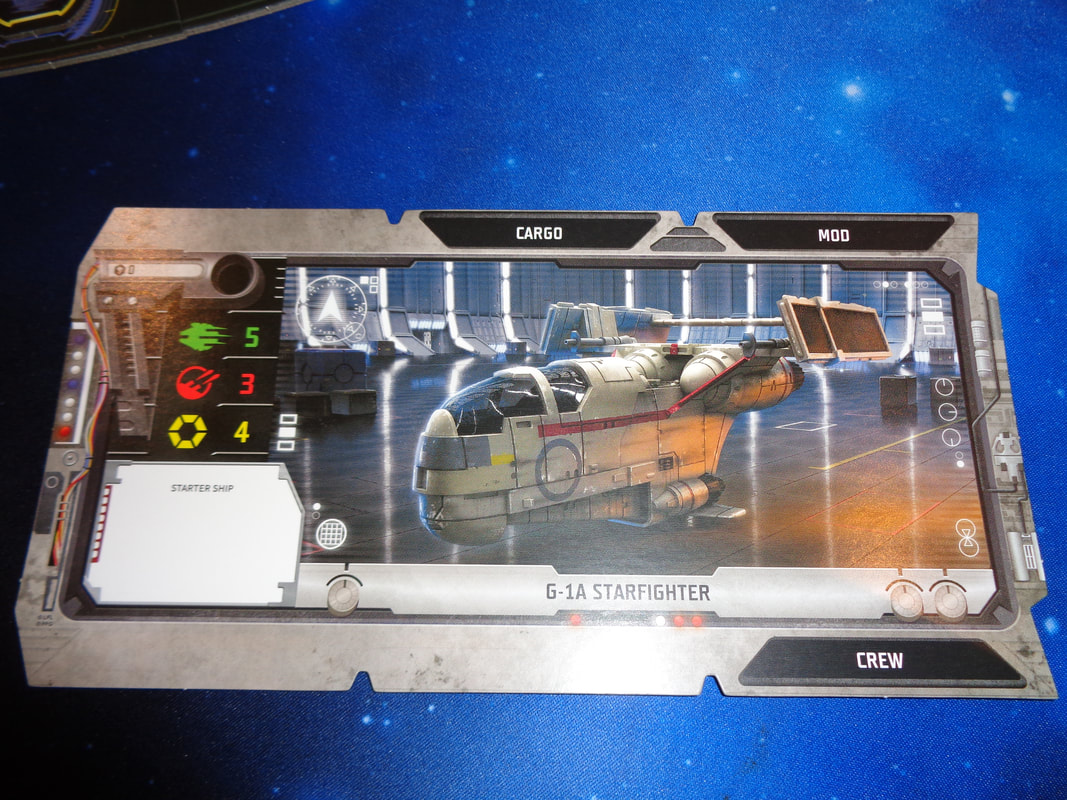
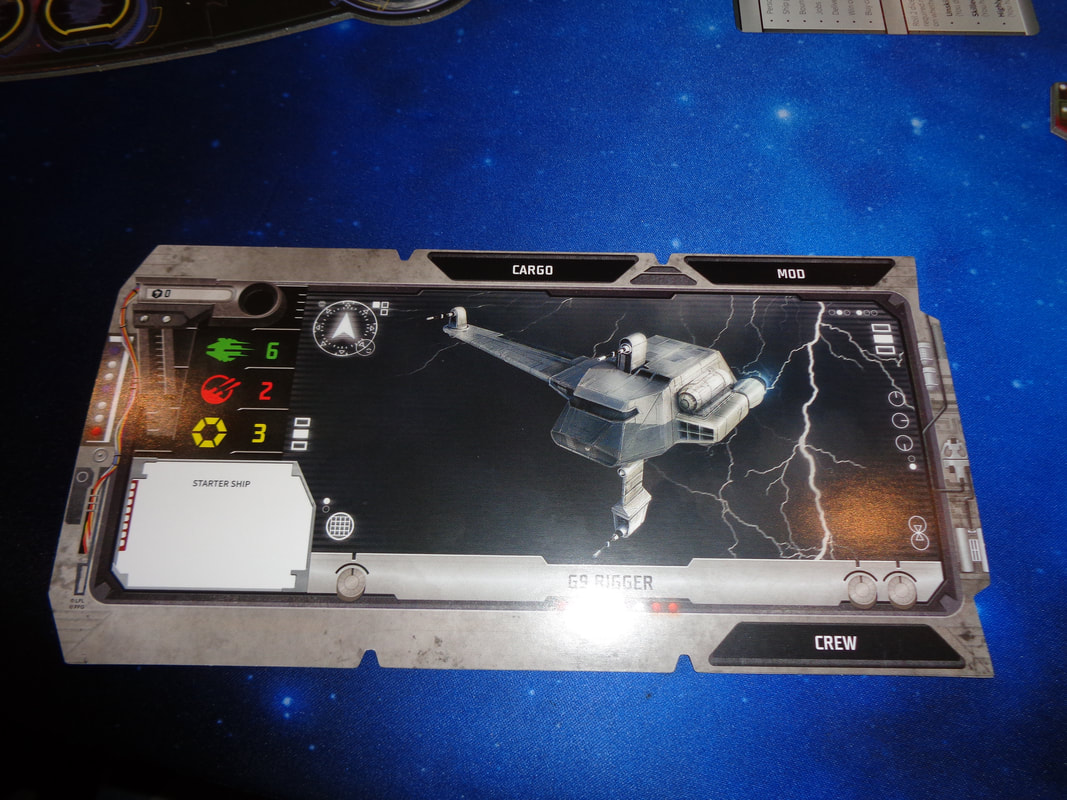
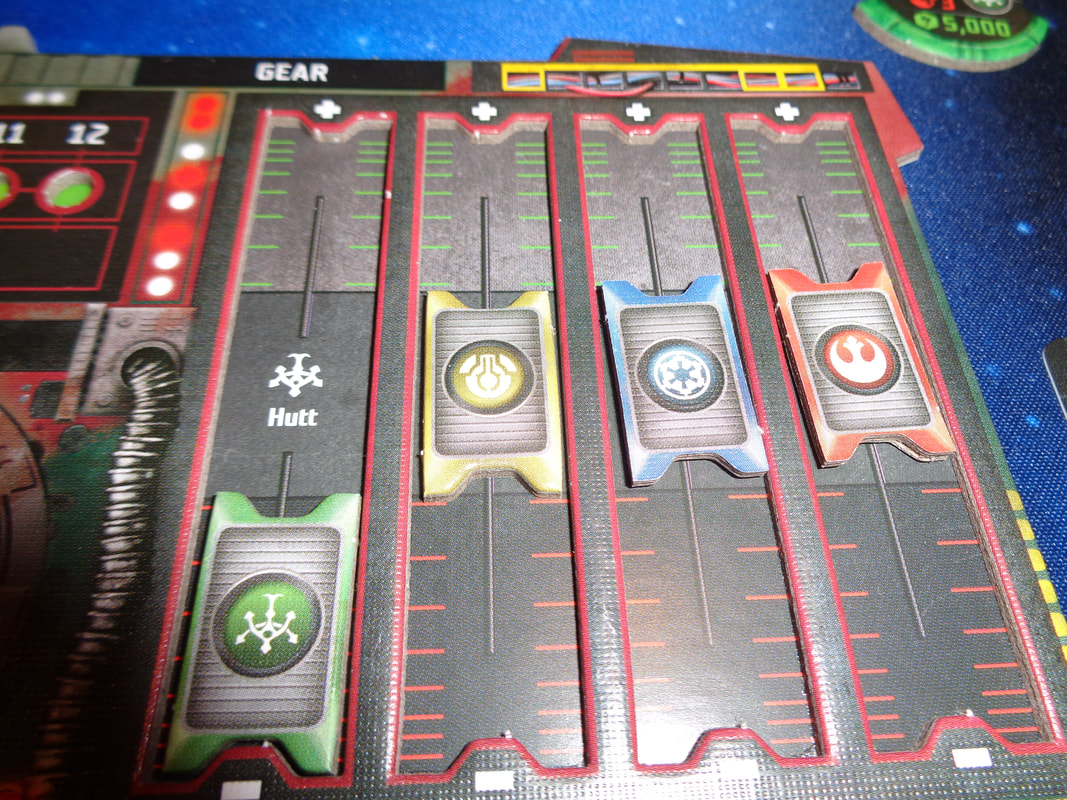
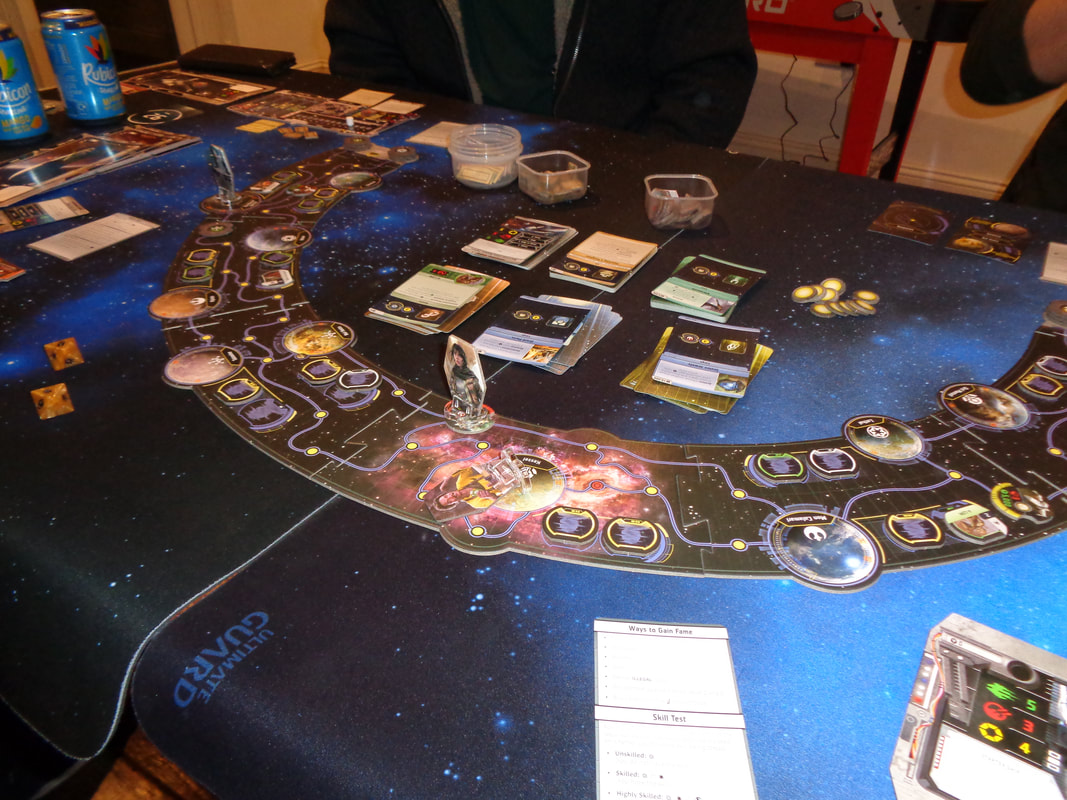
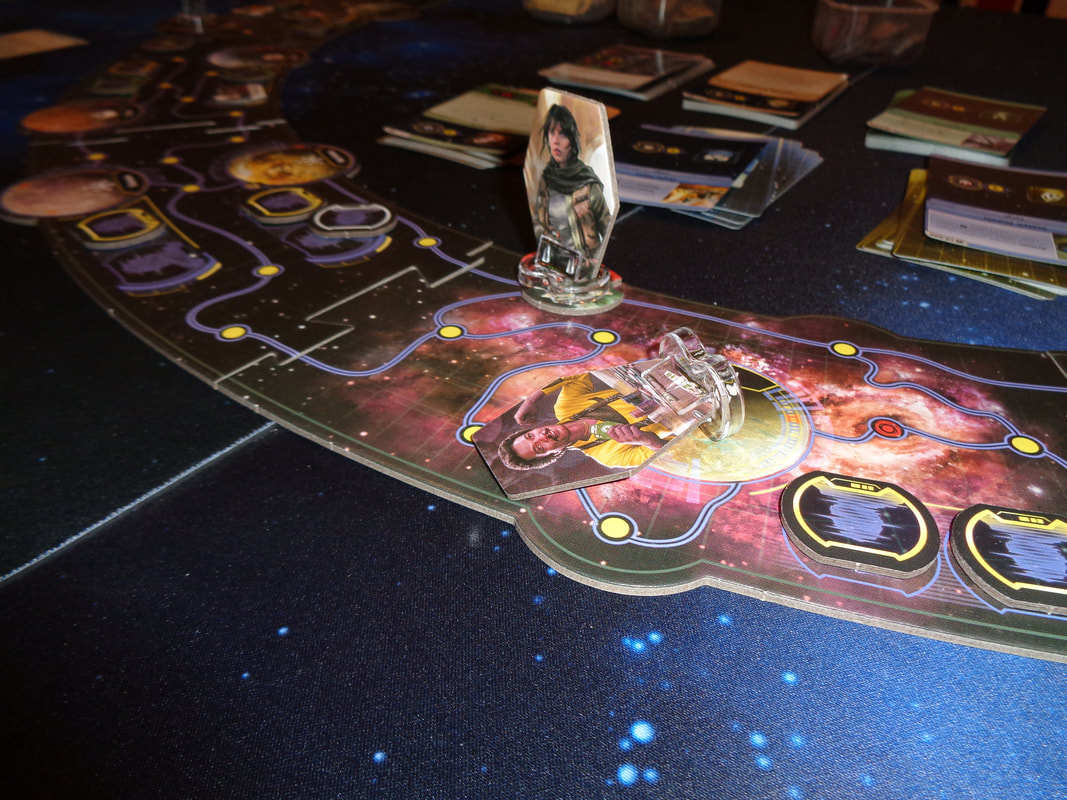
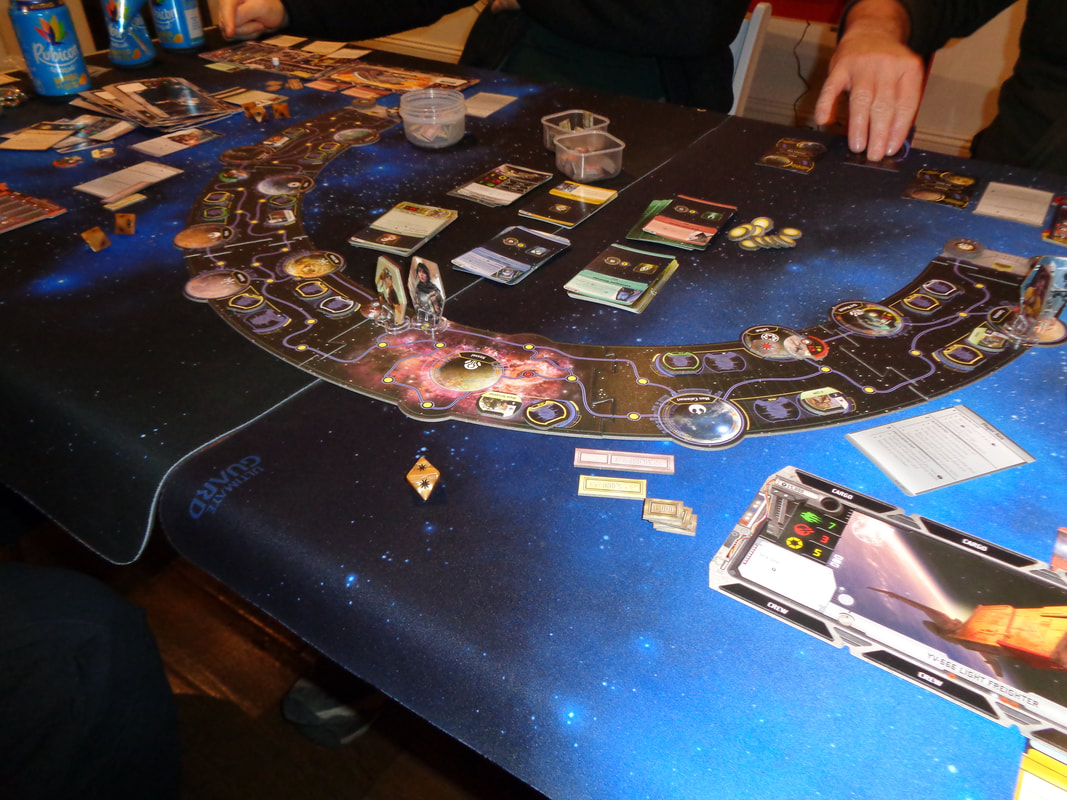
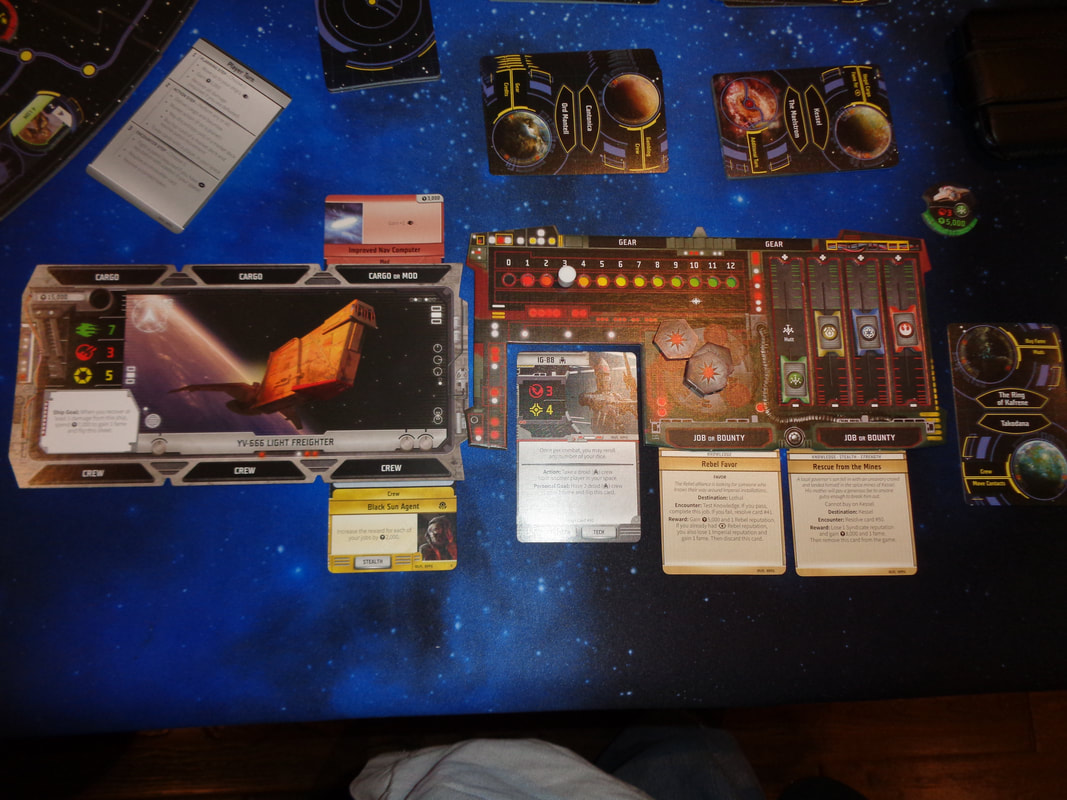
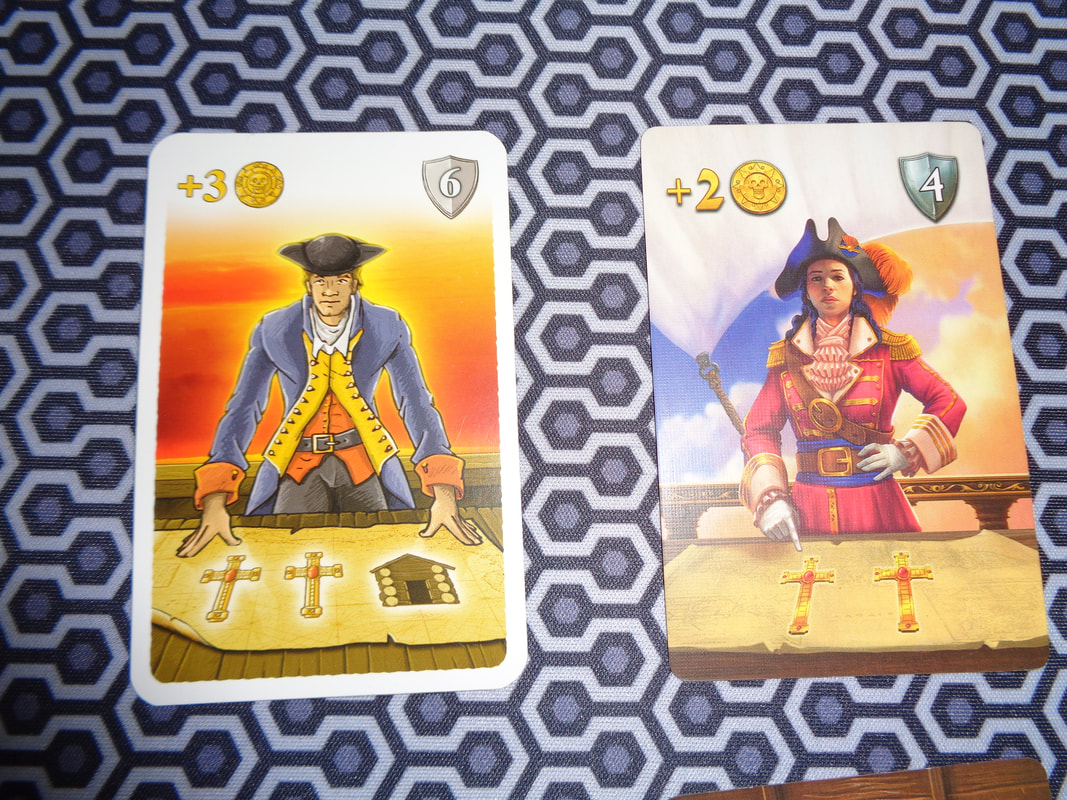
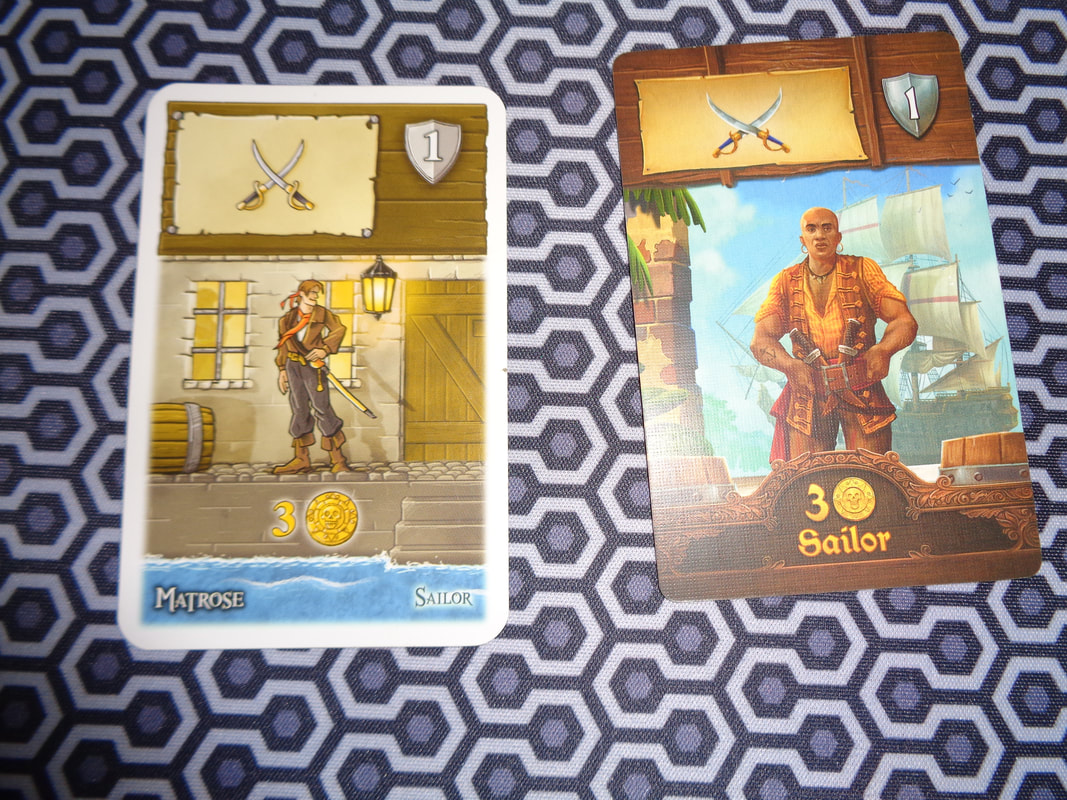
Regardless of whether it's practical or not, the semi-circular board looks like eye-catching.
From an art perspective, it's clear that they've used some photo-referencing from the films for some of the illustrations and I think that's fine, it still looks like good artwork and means the game wisely eschews using actual photos anywhere. The quality of the art is good.

Star Wars: Outer Rim uses quite a lot of iconography, for stats, for factions, on the dice etc. Fortunately, much of it is pretty clear and self-explanatory, it requires little referencing to the rulebook. This is helped by the use of tags which is easily understood.


How's it play?
​Setup
  • Board: Put together the board along with the end pieces.
    Patrol tokens: Sort the patrol tokens into their 4 factions, then create a stack for each with the highest value at the bottom and lowest at the top. Then place each stack on its allotted starting space.
    Contact tokens: Randomise the tokens face-down and place them face-down on their allotted contact spaces on the board according to the difficulty of each contact.
  • Databank deck: Ensure these cards are kept in numerical order.
  • Encounter cards: Sort the encounter cards into their 7 types and shuffle them into 7 face-down decks. It's probably a good idea to place the 6 planetary encounter decks close to the planets they represent.
  • Market cards: Sort the market cards into their 6 types and shuffle them into 6 face-down decks. Then draw 1 card from each deck and place it face-up on top of its respective deck. When the displayed cards are bought from these decks, new cards a revealed and placed on top of their respective deck.
  • Players: Give each player a player board:
    Characters: Players should choose or be assigned characters. They should take the character card and its standee. The character card should be placed on it's 'basic' side.
    Starter ship: Give each player a starting ship, the player can choose which one of the start ships to use.
    Setup: Every character has its own setup, which will tell them which databank card to take, what equipment they start with, what their standing will be with each faction and finally, where to place their standee at the game start.
  • First player: Determine a first player, then give players credits according to their position in the turn order.

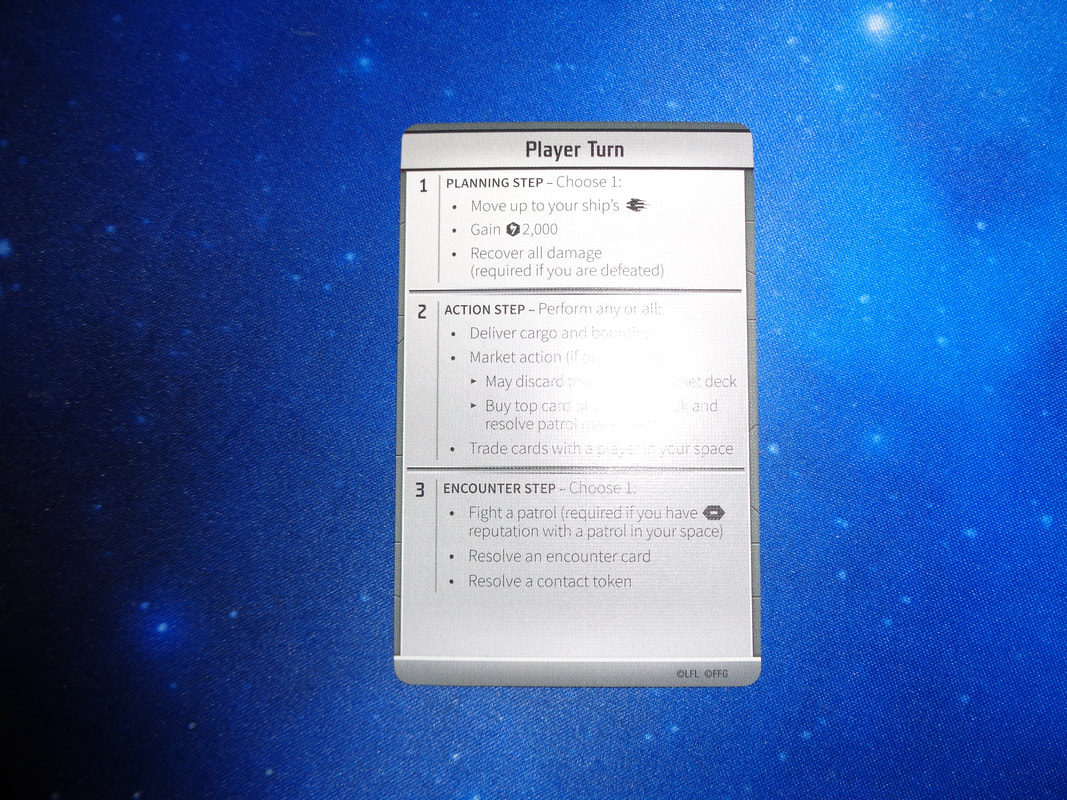
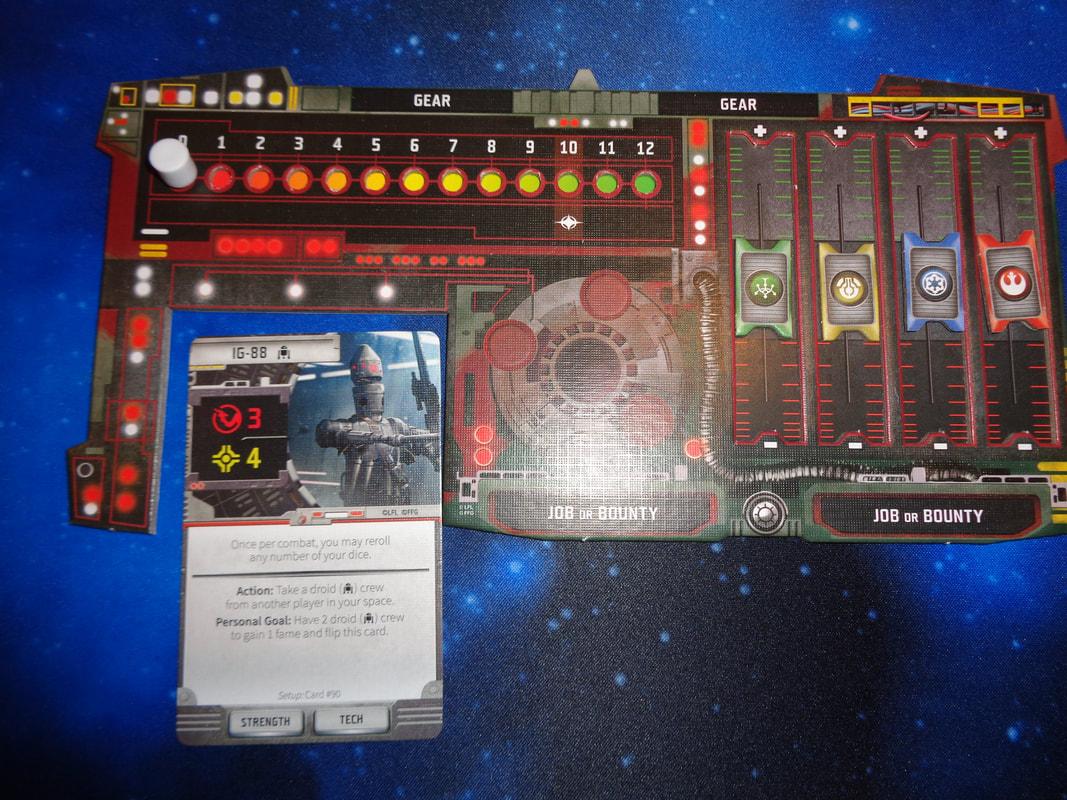
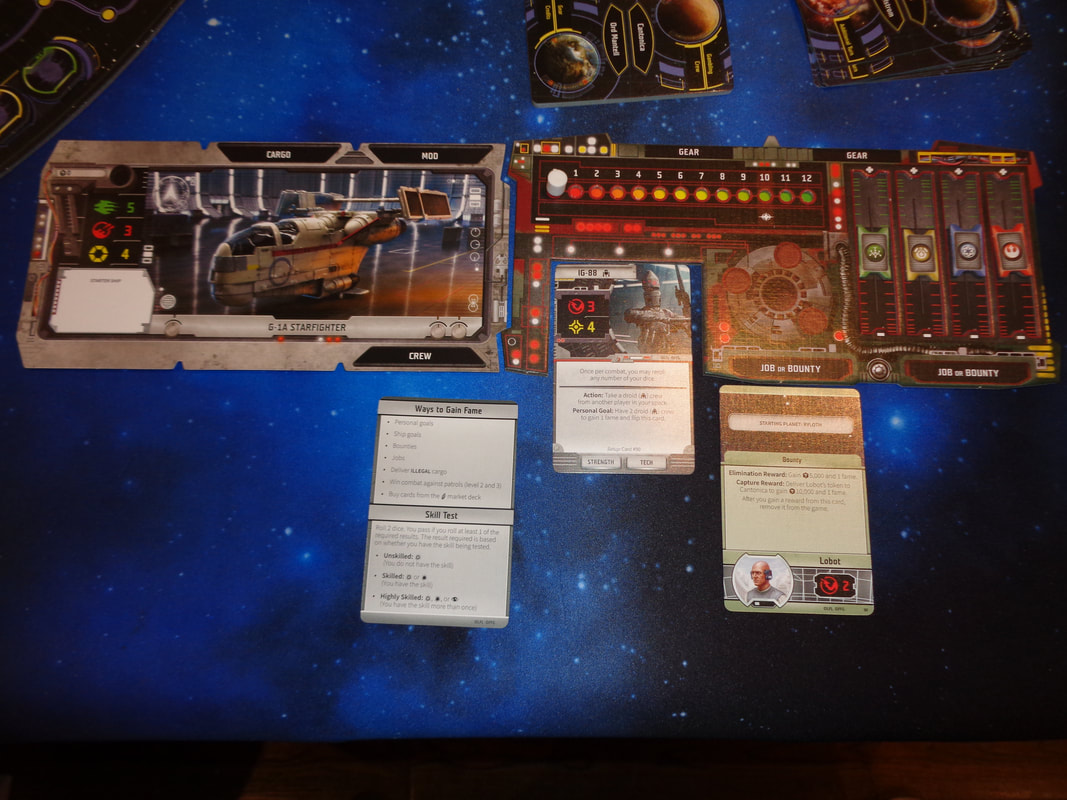
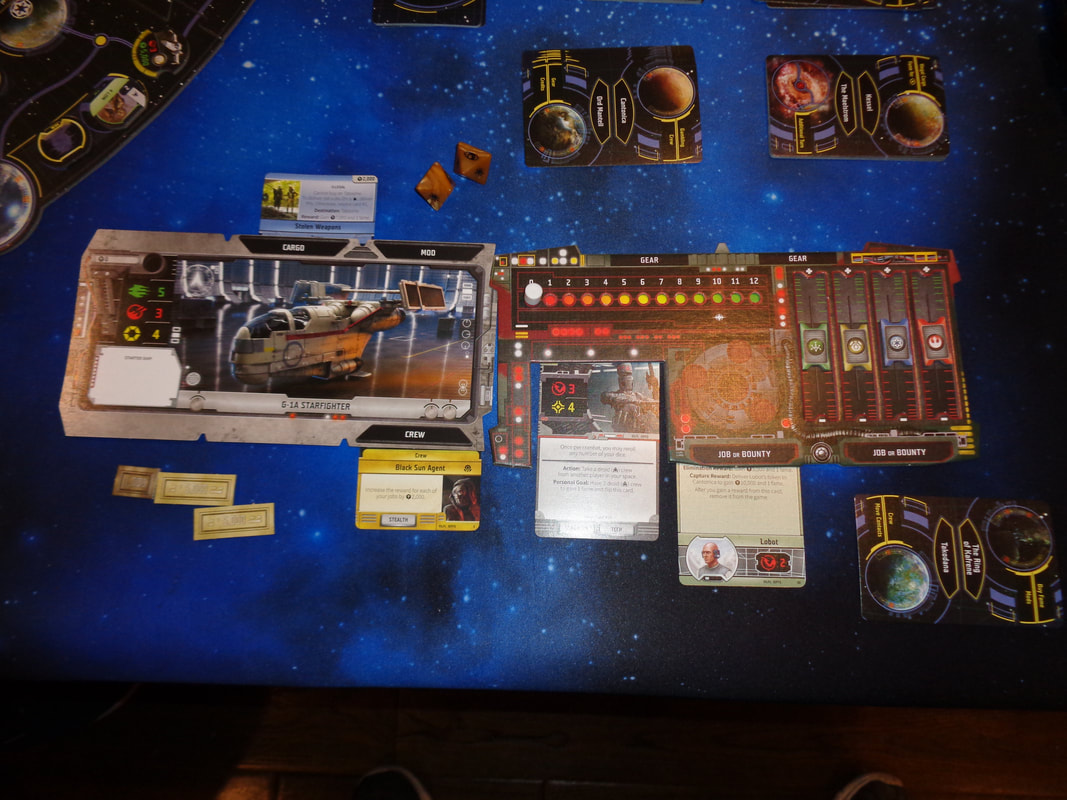
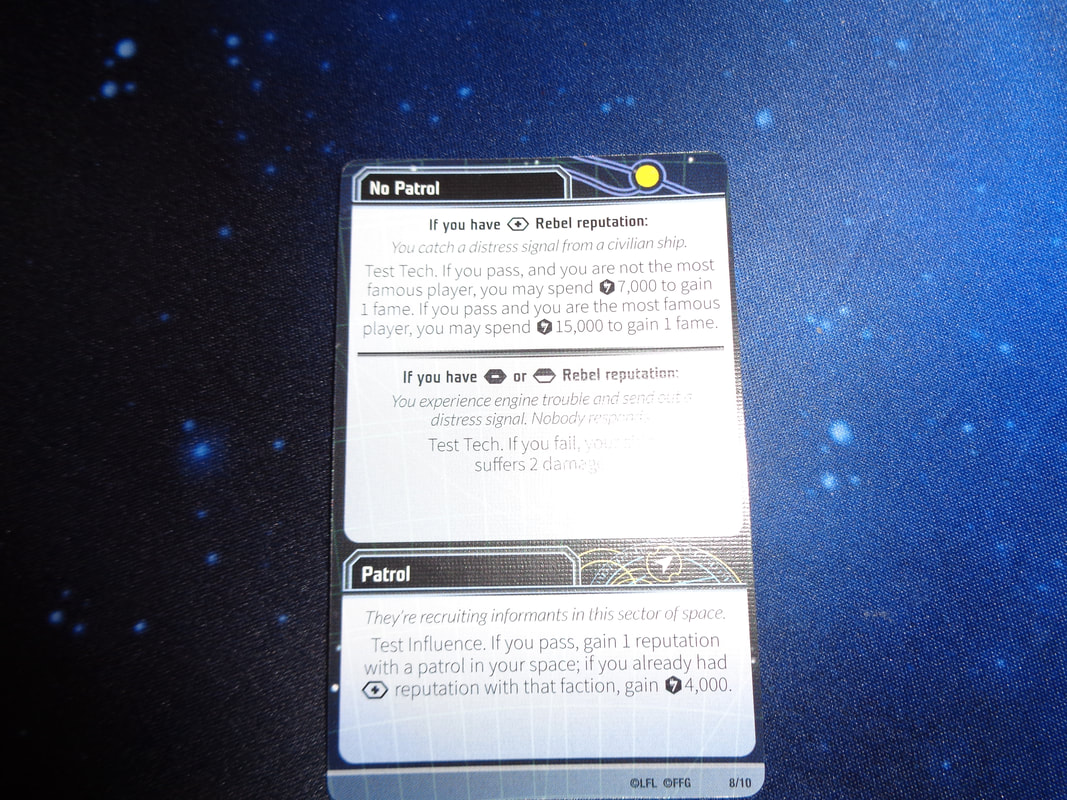
On to play
In Star Wars: Outer Rim players take on the role of outlaws, bounty hunters and scoundrels, the general scum and villainy of the galaxy I guess and the objective in Star Wars: Outer Rim is to acquire fame.
​There are varied paths to achieve this. collecting on bounties, delivering goods and other tasks or jobs that will occur during the game.
In their turn, the active player will perform actions in 3 phases before play moves on clockwise. These phases are Planning, Actions and Encounter.
  • Planning: The active player may carry out 1 of the following actions.
    Movement: This will probably be the most common action in this phase and allows the player to move their standee/ship along as many planets/navpoints as their ship's hyperdrive stat. There are a couple of caveats here though.
    If a ship enters the maelstrom that surrounds Kessel, it must stop.
    If the player's ship enters the same space as patrol for a faction the player does not have good standing with (Positive reputation.), the player's ship must stop.
    Recover: If a player chooses not to move, they may remover all damage done to both their character and ship. If the active player had been defeated in their previous turn, then the active player must choose the recover action during planning.
    Do nothing: Not strictly true, if the active player chooses this action they perform  some figuratively nondescript work or task and earn 2,000 credits. I guess in the deeps of space around a navpoint someone does want their crops dusted or moisture farmed.
  • Action: This second phase is pretty broad and the active player can perform as many actions as they are capable of.
    This involve buying cards from the market decks (And selling.), delivering goods/bounties and even trading with other players in the same space.
    Cards/missions that have the action tag have their action (Usually a skill roll.) completed during this phase.
    Actions can be very contextual, depending on location or other requirements.
    Curiously, buying market card is what determines if the patrol tokens move.
  • Encounter: The kind of encounter the player has in the 3rd and final phase of a turn will depend on the location they ended their movement. A player only has 1 encounter per turn.
    Planet/navpoint: If a player ended on a planet, draw card from that planet's encounter deck and resolve it. If they stopped on a navpoint, do the same with the navpoint deck.
    Contact: If the active player ended their movement on a planet, they may choose to encounter a contact there. This involves flipping the contact token face-up and revealing it. Each contact will have a databank card that will need to be resolved, this could be any of a number of tasks . It may involve skill rolls, completing a delivery bounty etc. Often when the task is completed, the contact will join the player's crew.
    Patrol: How an encounter with a patrol will go depends on the players reputation with that patrol's faction.
    If the player has positive reputation, nothing will happen.
    If the player has a neutral reputation with that faction, they may choose to fight the patrol. More on combat below.
    If the player has a negative reputation with the patrol's faction, they must fight it.
  • End turn: Once the active player has resolved their encounter, play moves to the player on the left.
  • Other rules: There are numerous aspects to the game I've not mentioned yet.
    Skill rolls: Actions or jobs may require the player to make skill rolls. Each skill roll  has a tag associated with it and there are 3 levels related to that.
    E.G., if a action has the tag Piloting and the player has no cards in their playing area with that that tag, it is considered an unskilled roll. If they have 1 card with a matching tag it a skilled roll and they have at least 2 cards with matching tags, it's a highly skilled roll.
    When making a skill roll, the active player always rolls 2 dice:
    If it's unskilled, for the roll to be a success, there must be at least 1 critical hit results showing on the result.
    For a skilled roll, there must be at least 1 hit or critical hit result showing.
    ​Finally, for a highly skilled roll, if at least any 1 of any of the hit, critical hit or focus icons is showing on the result, then it's a success.
    Combat: The rules for combat are quite different to skill rolls and furthermore, the game does not differentiate mechanically between ship or ground combat.
    When a player enters combat they are considered they attacker and who or whatever they are fighting is considered the defender. 
    The attacker rolls a number of dice equal to the combat value they are using; ​ focus result may trigger special effects depending upon circumstance but otherwise, each hit counts a 1, each critical hit counts are 2, the result is tallied up and this is the damage done.
    The defender does the same.
    Whoever dealt the higher damage wins the encounter, ties favour the attacker.
    Finally, damage is applied. In some cases, each combatant deals their damage to their opponent in the form of damage tokens put on the ship's hull for ship combat or character's health for ground combat. Although some opponents such as patrol tokens either win or are defeated.
    Regardless of who wins or loses a combat encounter, if at any time, the damage tokens put on the hull or health of a player's ship or character exceeds that value, then the player is defeated.
    Secrets: Most of the time, cards a put into a player's area face-up, they do not have a hand of cards in the usual sense. Some cards will however instruct the player to keep them secret. The player can simply place these in their area face-down.

Endgame
Play continues until the any player reaches 10 fame, the game then immediately ends and they are considered the winner.


Overall
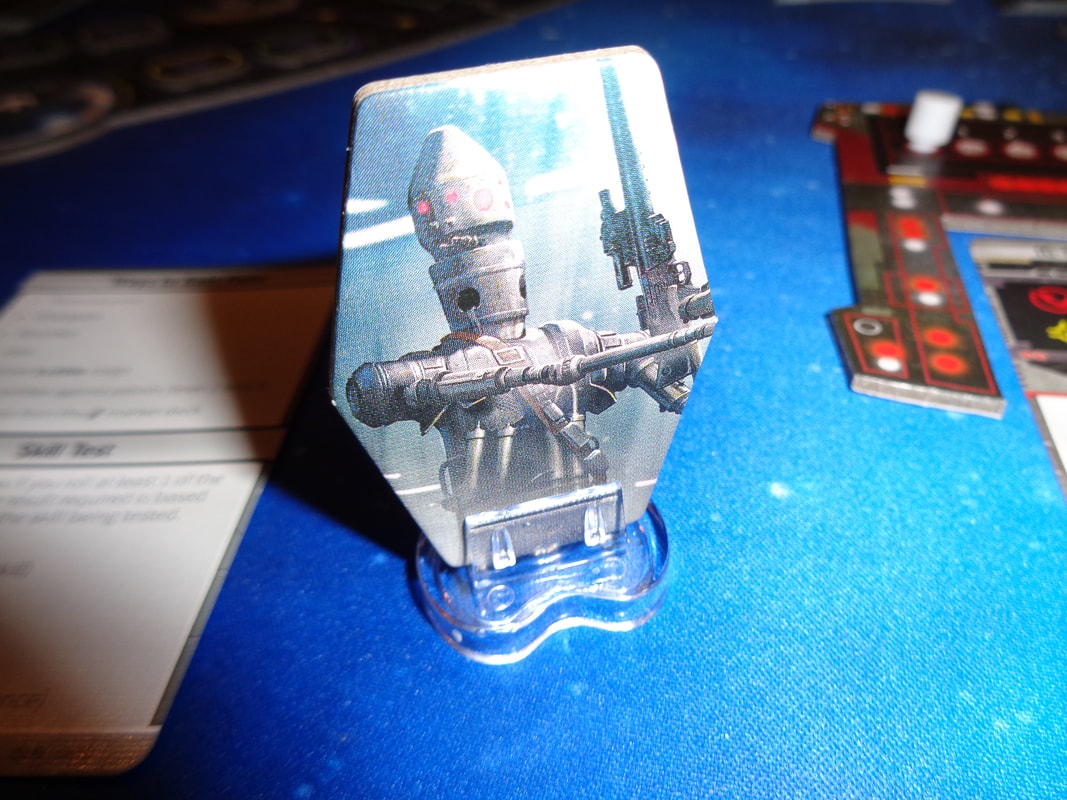
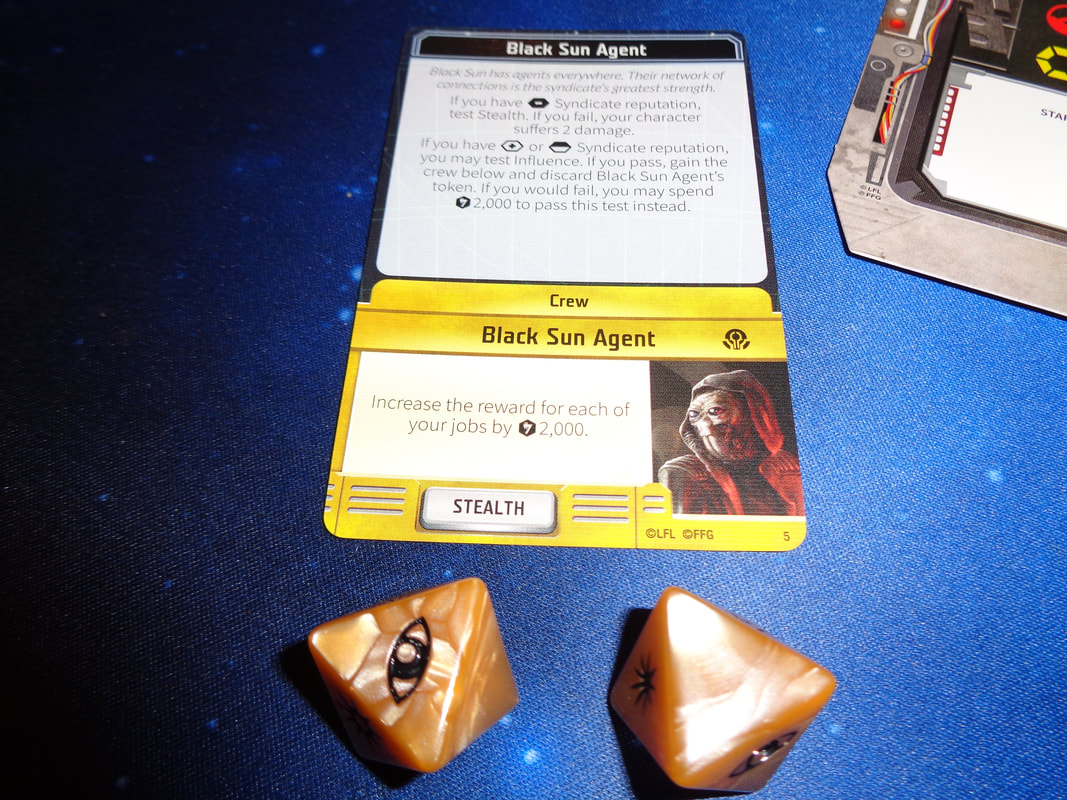
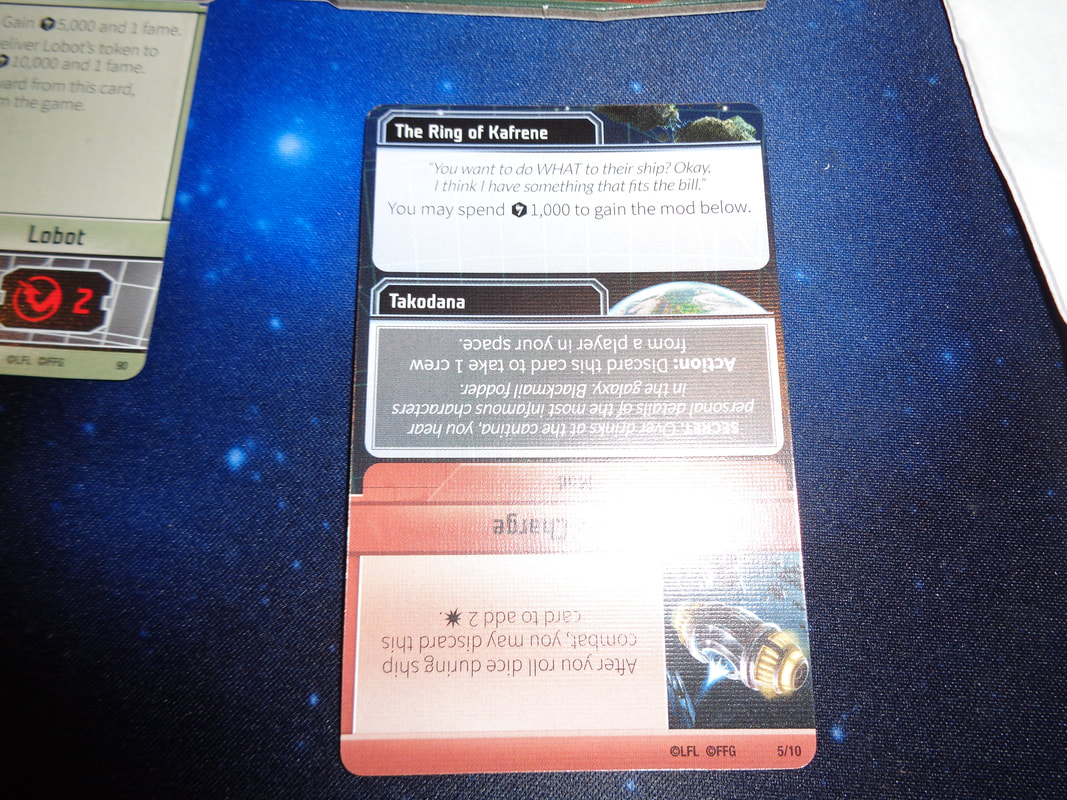
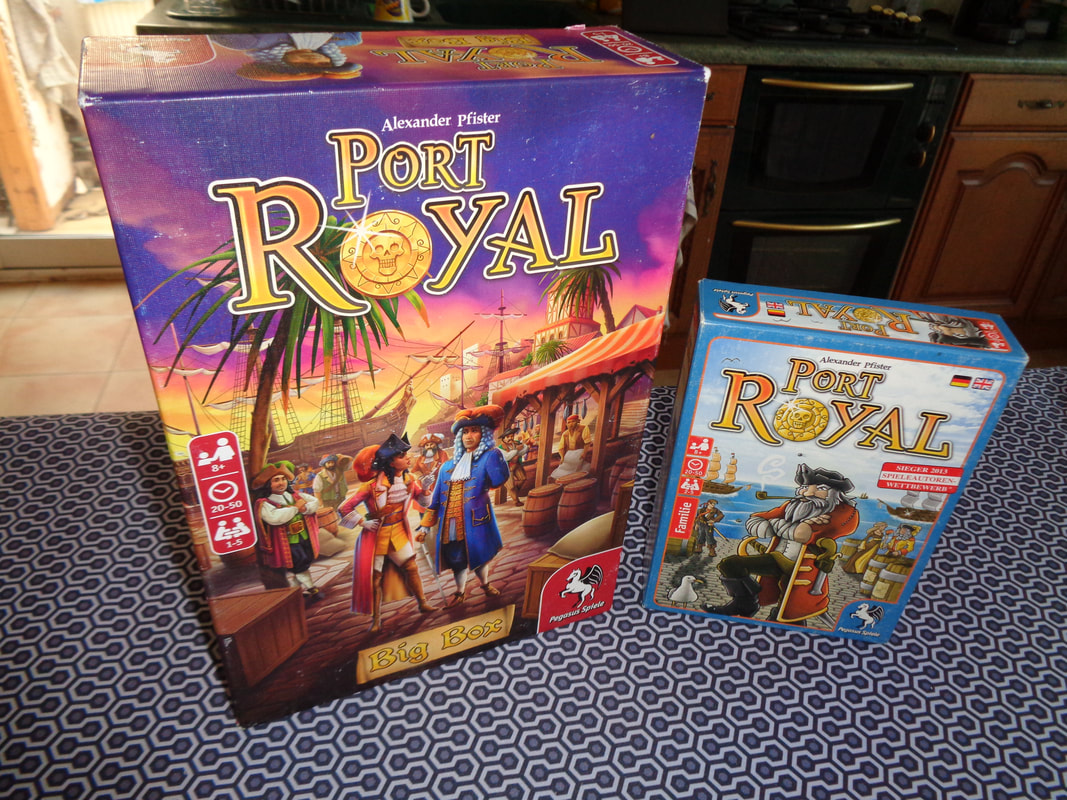
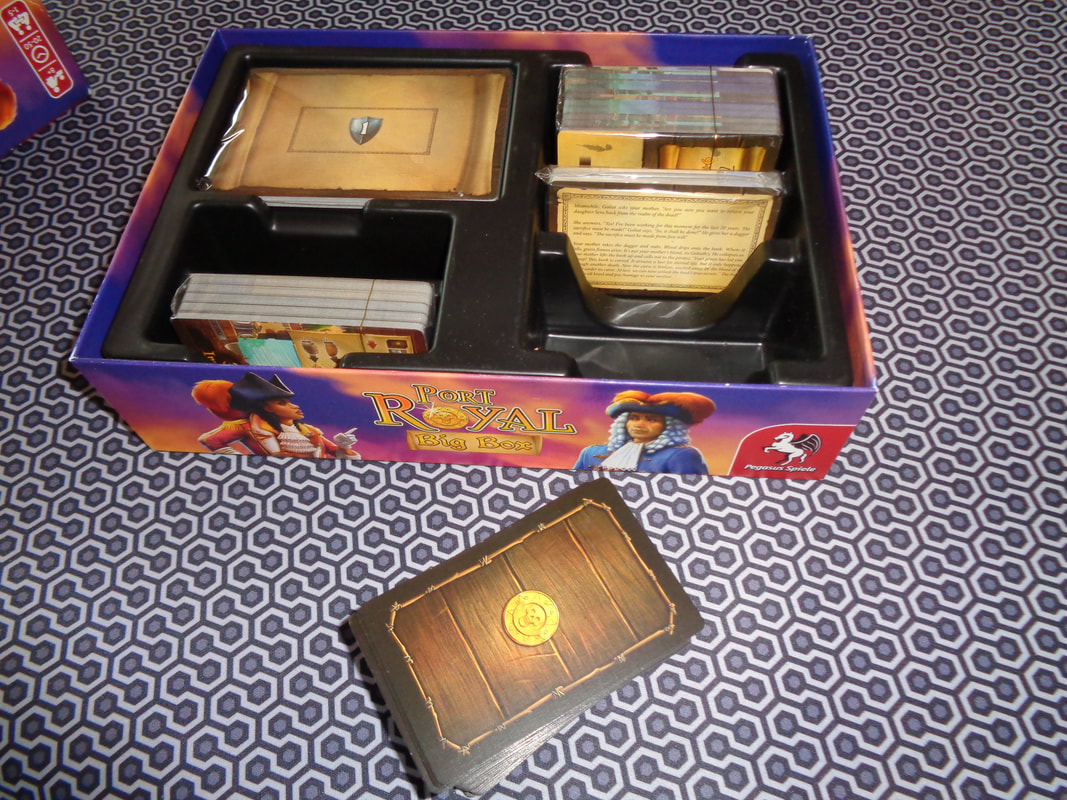
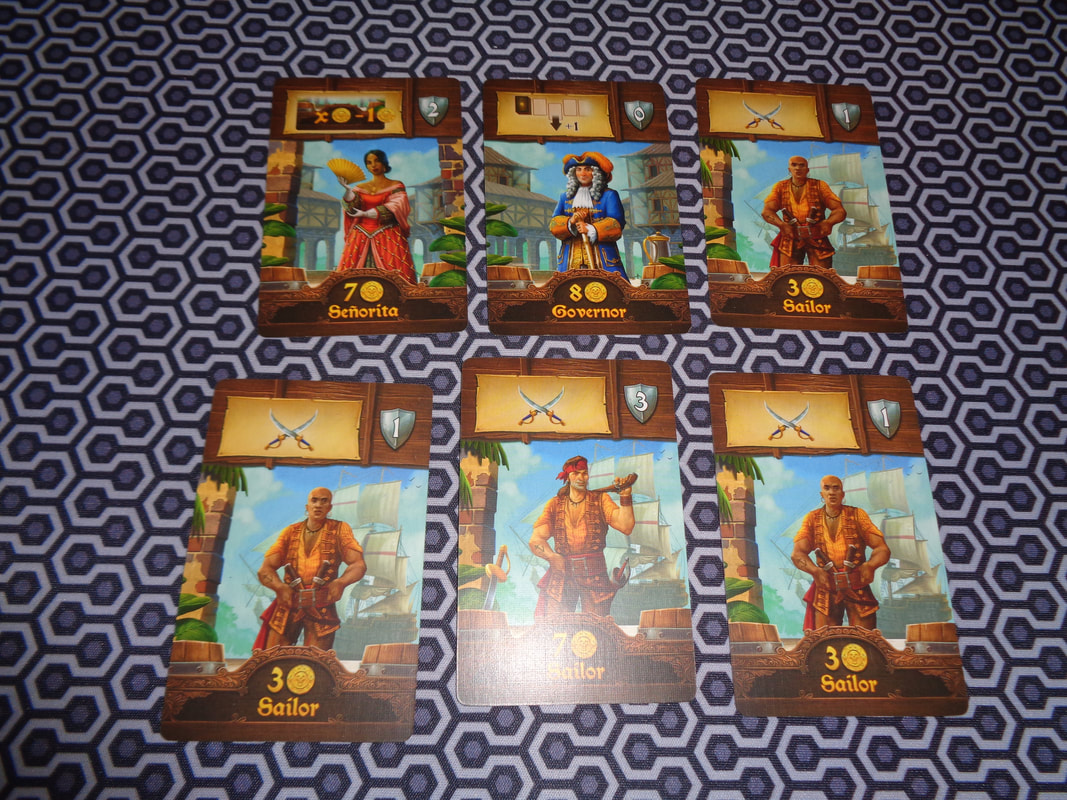
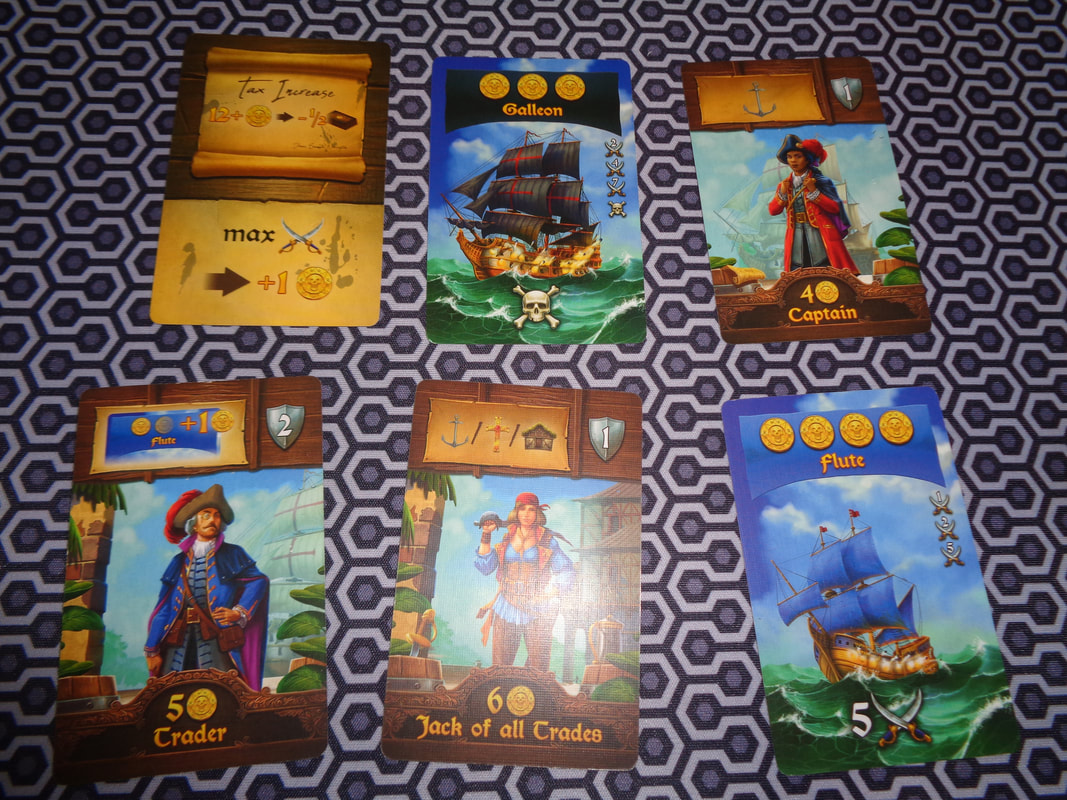
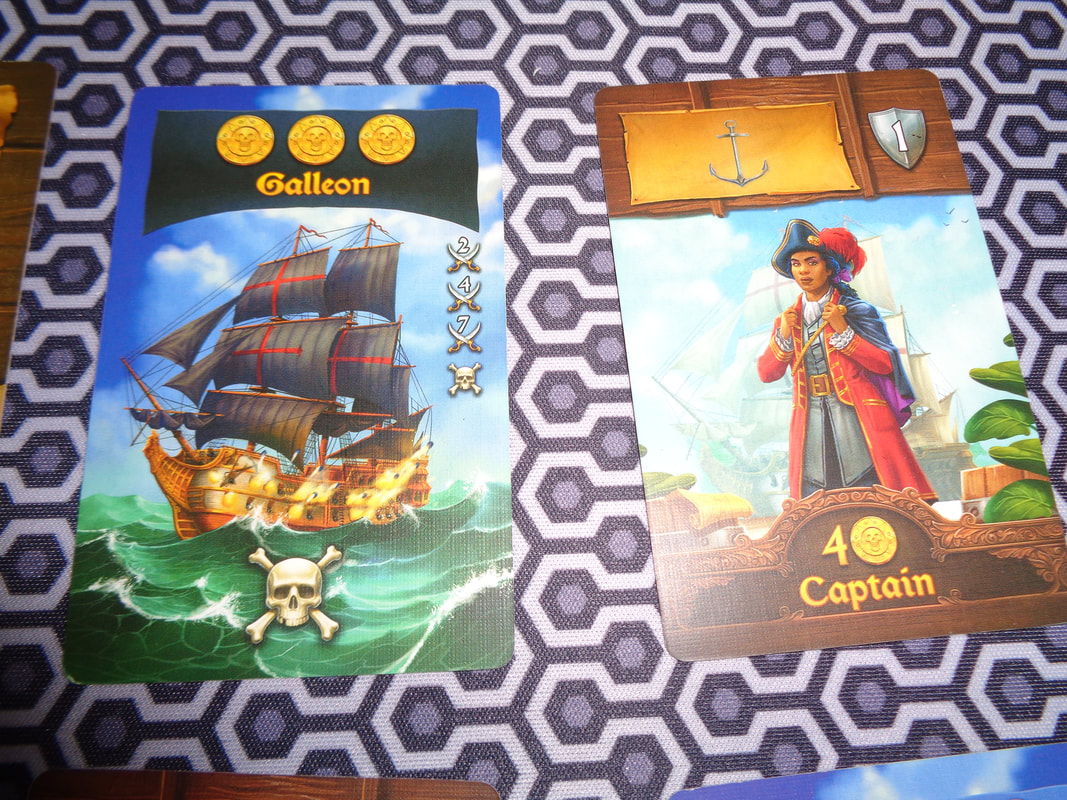
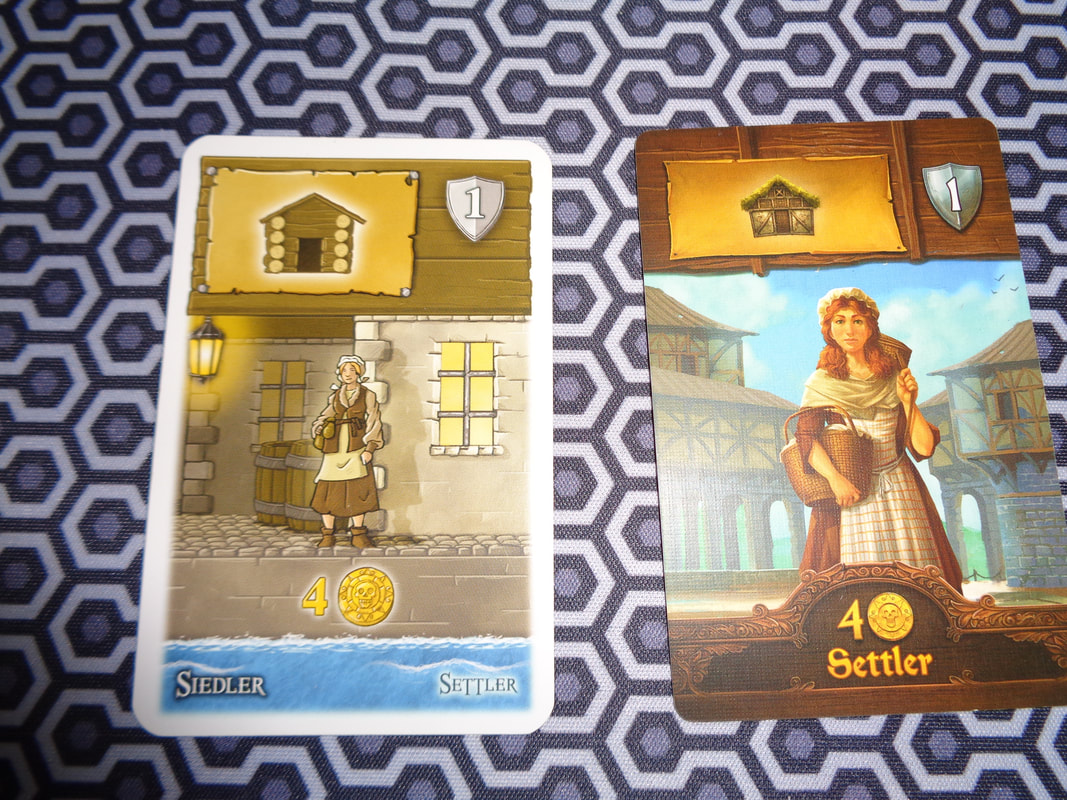
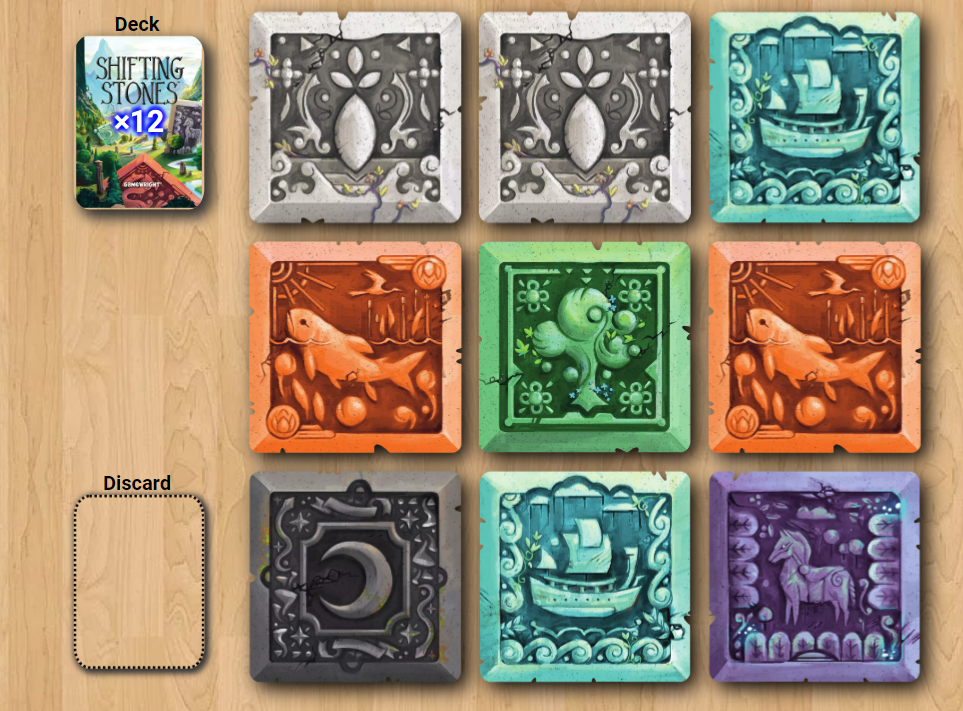
I haven't covered the entirety of the rules here but even so, from the perspective of complexity, Star Wars: Outer Rim isn't too bad or that complicated. You move a few spaces, perform actions, have an encounter and that's it.
There are a number of situational exceptions (Mostly coming from cards that are drawn.) that need remembering though, players will want to pay close attention to their playing area to know what they'll be good at, paying attention to their tags in particular.
The game also possesses some RPG aspiration here and makes use of very light RPG system, there's no XP as such but characters and ships can be levelled up after completing their goals.

Having said that, the rules will probably be a little too convulsed for non-gamer types.
I don't think that this is a game for Star Wars fans wanting a board game to play. It feels more like a board gamers who want a Star Wars game to play, which is not a thing necessarily bad and honestly, there's going to be a bit of crossover between the 2 groups.

Because of the fairly open nature of the game, it's quite hard to describe what players will expect and strategies they might employ.
Players will likely acquire jobs, encounters, bounties etc randomly to some extent, this will require them to adapt their strategies.
Optimisation, picking up and completing jobs while working towards other jobs is vital here, as this finding the most efficient route across the map, The board's unusual shape essentially funnels travel along 2 or 3 routes. All of this is provided of course, that all the pieces fall in the right place. This would include watching how patrols move and the reputation players have with their respective factions. There are also other paths to accruing fame points such as fighting patrols.
Players will also look to gain crew, improved ship and mods.

Additionally, there's nothing to stop players fighting other players, in fact, the game may sort of encourage this as circumstances ay put one player's bounty aboard another player's ship.

I'm not sure how I feel about Star Wars: Outer Rim.
One aspect that irks me is the entirely different set of mechanics used for skill tests and combat. 
Another is the shape of the board. For an open world game players are in essence limited to the choice of going one way or the other, clockwise or anticlockwise.
Yes. the board looks good and perhaps it makes sense within the context of the Star Wars setting but ,t feels like it's been done to nudge players to undertake tasks in a certain order, all in the name of game balancing or game play.

I also found the game a little unengaging. I think this was down to a mixture of what felt like a long downtime between turns and frequently slightly unexciting turns.

And as with a lot of open world games that sort try to implement a go-anywhere-do-anything theme. It feels like a bit more of an effort than it's worth. I wonder if it wouldn't be better to get a player to gamemaster an actual table top RPG instead.
0 Comments

Port Royal: Big Box - 17

15/2/2022

0 Comments

 
15th February 2022

It's a Tuesday evening and we're at The Sovereigns with the Woking Gaming Club for some tabletop entertainment and Simon has gifted me a copy of Port Royal: Big Box.

Strictly speaking, this isn't a first play, In fact, it would be the opposite! Port Royal is a firm favourite with pretty much everyone I game with and has seen a lot of play.
You can read about Port Royal here.

So what is in Port Royal: Big Box? You've probably surmised that the big box amalgamates the excellent base game along with it's 2 expansions, promo card and standalone game Port Royal: make Sail!
​What are these expansions like? I've never bothered playing them, I'm perfectly happy with the base game!


As you will have noticed, Port Royal: Big Box also features all-new artwork, there's some side-by-side comparisons below.

0 Comments

Shifting Stones - First Play

13/2/2022

0 Comments

 
13th February 2022

It's Sunday night and we're logged into Board Game Arena for an evening of gaming.

Shifting Stones is a light sort of puzzle-themed sliding tile game.

Caveat: We've only ever played this game digitally.

​What's in a game?
  • Tiles: Shifting Stones features 9 double-sided tiles. On all the tiles, each side is a different colour to the other. Each colour also has it's own illustration. The tiles brea down as follows.
    Black/yellow: 1 tile.
    Orange/red: 2 tiles.
    Blue/purple: 3 tiles.
    Green/grey: 3 tiles.
  • Cards: There are 72 cards in Shifting Stones. Each card displays a 3x3 grid in some manner or other and will contain pictures of 1-4 of the tiles in various positions in the grid. Each card also has a VP value, the more tiles on the card, the more VPs.
  • Player aids: Normally I don't bother mentioning player aids but in Shifting Stones, they're particularly useful as they show both sides of all 4 types of tile.

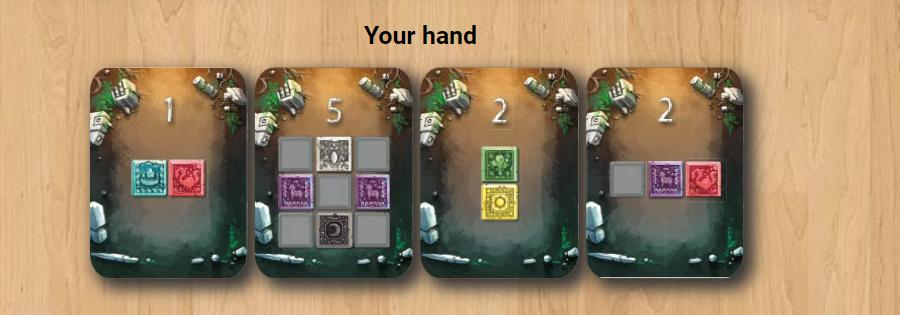
There's not much to say about the components. The illustrations on the tiles are nicely detailed and distinctive. However, I found the colours somewhat muted in lower lighting and a little indistinguishable, particularly the orange/red combination. The same is true of the cards.

The game has no iconography other than the tile illustrations.


How's it play?
Setup
  • Tiles: Randomise the 9 tiles and put them into a 3x3 grid with the illustrations orientated the same way.
  • Cards: Shuffle the cards into a face-down deck, deal 4 to each player.
  • First player: Determine a first player.

On to play
Shifting Stones uses a traditional turn order, the active player has their turn and when it finishes, play progress clockwise to the next.
During their turn, the active player perform any number of the score/swap/flips actions in any order so long as they have the cards to perform them. Alternatively, they may skip their turn.
  • Score: If the positioning of the tiles matches a card in the active player's hand, they may score it buy placing it down in their playing area.
  • Swap tiles: This action requires the active player to discard a card of their choice, then they can swap around 2 orthogonally adjacent tiles.
  • Flip tile: This action also requires the player to discard a card and allow them to flip a tile to it's other side.
  • End turn: When the turn ends, the active player draws cards until they have a hand of 4 again.
  • Skip turn: Instead of acting, the player may skip their turn entirely. This allows then to draw cards and temporarily increase their hand size to 6, giving them more option in the following turn. However, this action cannot be chosen during the subsequent turns. I.e., a player cannot skip turn twice in a row.

Endgame
Play continues until any player has scored (Dependant on player count.) 7-10 cards, after which the current round is completed.

Players add up the VPs of all the cards they've scored during the game.
Additionally, whoever played the most 1 value cards earns a bonus 3 VPs.

Points are tallied, highest score wins.

Overall
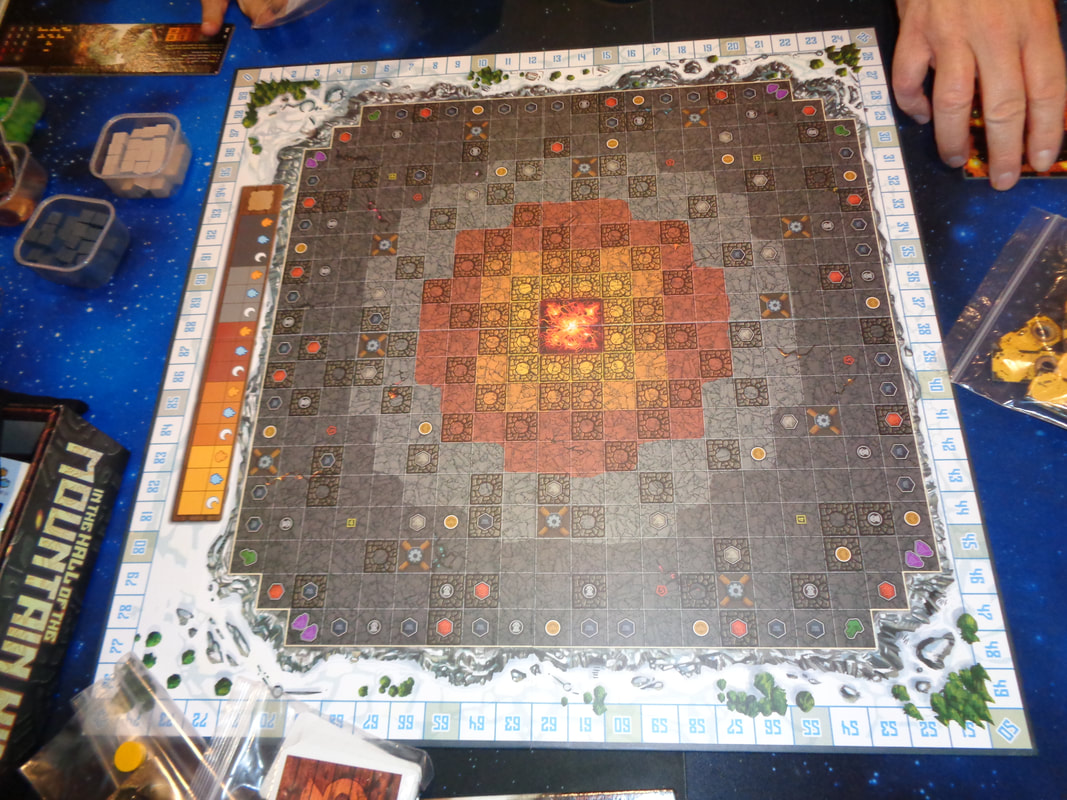
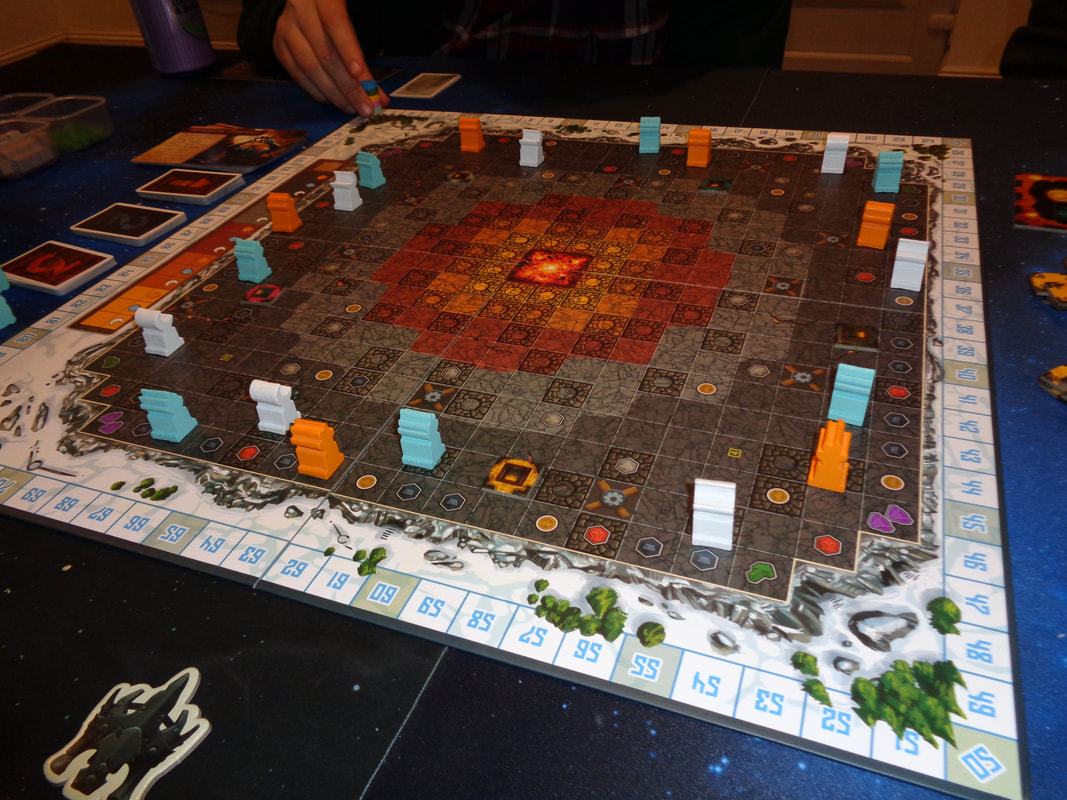
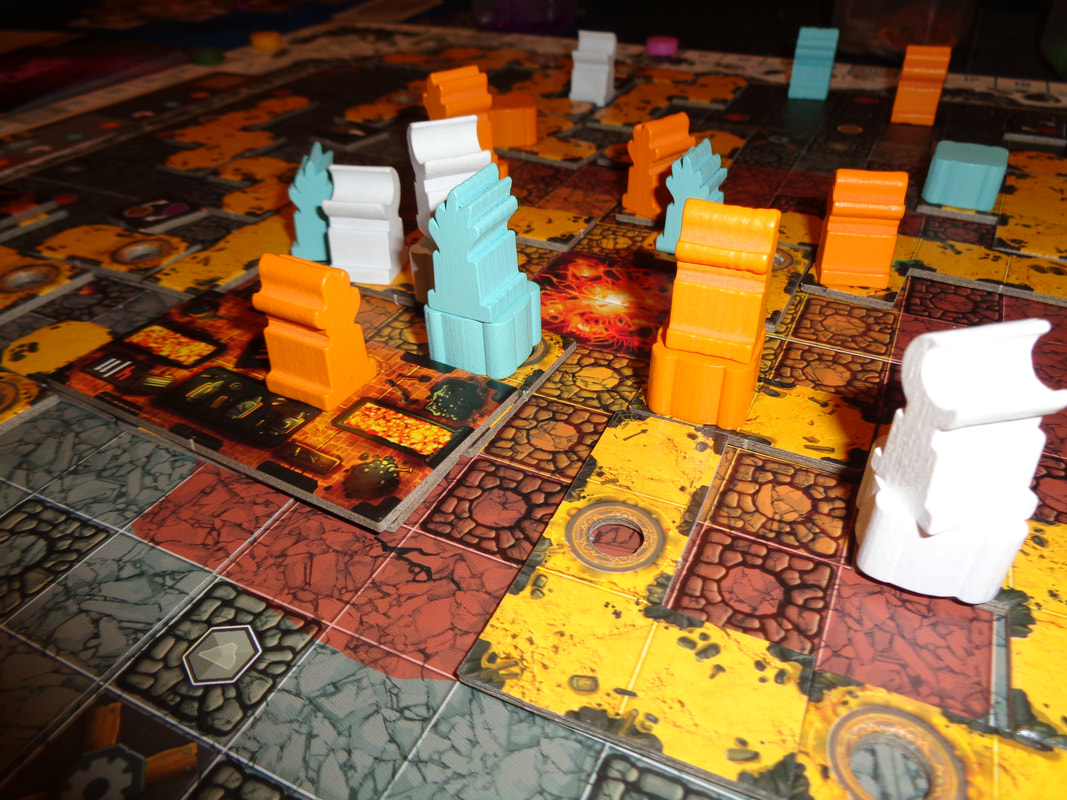
As you can see from the brief write-up, Shifting Stones is a fairly straightforward and accessible game, it could make a good introduction to new players or crossover game.

Despite the straightforward rules, there is actually a bit of depth to be found in Shifting Stones. The game makes use of a hand-as-currency mechanic to pay for actions and getting rid of cards that might prove useful is always a meaningful decision. Players will want to minimise this and find the most efficient way to swap/flip tiles to where they need them to be and hope to score at least 1 card per turn.
At the same time, hanging on to cards too long can earn nothing and trying to plan ahead is likely to be futile, it's too risky leaving things for another round as it players will invariably change the tile positionings, players will need to be decisive and exploit the opportunities that present themselves during their turn.

There's not much more else to say really, there's no noteworthy interaction between players and it's hard to gauge what others are doing, especially since whenever they refill their hand  - which is every turn, they'll be presented with newer options.

Other than I found the game a little bit of a frustrating experience.
Watching other players inadvertently wrecking the positioning I was try to set up between turns wasn't what I'd call much fun. I also found having to remember what was on the flip side of the tiles something of a chore, having to refer to the reference card wasn't much better. If perhaps. there was more engaging core gameplay, maybe I'd would make the effort to remember what's on the other side of the tiles. But there wasn't, so I didn't.

Shifting Stones is straightforward and clearly skews towards the lighter end of the complexity scale, it would possibly make a good filler game. I'm not sure there's enough here to appeal to me though and coupled with the frustrating experience means that this is not one for me.
0 Comments

In the Hall of the Mountain King

10/2/2022

0 Comments

 
9th February 2022

It's Wednesday night and we're round Simon's for some gaming fun. The evening's game was In the hall of the Mountain King.

Ask yourself: What is it that trolls like to do? Live under bridges perhaps; no. Chase goats maybe; no. What about make trouble on the internet; no. What trolls really like to do is dig tunnels (The fancier the better.) and move statues!

What's in a game?
  • Board: In the Hall of the Mountain King comes with a double-sided board and the player count determines which side is used. Regardless of this; both sides depicts a mountain surrounded by wilderness and features a square grid that contains a large number of icons and is divided into 5 zones.
    Heart of the Mountain: This fiery spot sits at the centre of the board and is surrounded by 5 bands of colour which form the game's 5 zones. The furthest zone away is dark grey, the next is light grey, then red, orange and finally yellow which is the closest band.
    Buried resources: Across the board are a number of these icons on spaces.
    Rubble spaces: These spaces will hinder players as they expand through the mountain.
    Start spots: There are player starting spots throughout the dark grey band.
    Statue spots: There are also starting spots for statues littered throughout the dark grey band.
    Workshop spaces: These are empty spaces upon which players can build workshop if they get the opportunity.
    Pedestal track: Outside of the grid is this track which keeps tally of which type of pedestal have been built in each zone. There 3 types of pedestal and thus 15 spaces.
    Score tracker: Finally a score tracker runs the perimeter of the board.
  • Player board: There are one of these long rectangular for each player in their colour and every board contains information on the pricing structure/scoring for tunnel tiles as well as listing turn actions and the scoring for statues/pedestals.
    Along the top row are 4 indicators for card positioning and finally, the central area has a storage space to place resources.
  • Tiles: The game makes uses of numerous types of tiles.
    Gate Tiles: These are small tiles that fit on a single space on the board, there are 4 of them in player colours and they represent the starting spaces for players.
    Great Hall tiles: These square and rectangular tiles of varying size display artwork for different types of rooms, they go from 2x2 up to 4x4.
    Each tile has an altar space which is a blue/orange/white circle. Each tile also displays two different VP scores - more on this later.
    Tunnel tiles: These are sort of like tetramino shaped tiles except they come with a varied number of blocks ranging from 2-5, some of which have holes in them called anchors. They allow players to see the colour of the square and thus the zone beneath the anchor.
    Workshop tiles: These single space tiles will be placed by players on the workshop spaces during the course of play. Workshop tiles have special abilities which can be utilised by players.
  • Cards: There are various types of cards that In the Hall of the Mountain King makes use of.
    Spell cards: Each of these cards contains a spell that will benefit the player who uses it in some way.
    Troll cards: These cards are subdivided into even more types! The top half of each card features a picture of a troll and the bottom half will display resources.
    Starter troll cards: There are 4 sets of the 6 starter cards in each player colour. The starter cards feature 2 rows of resources delineated by a dotted line
    Troll card: The subdividing continues! The standard troll cards are further divided into type 1, 2 and 3. The higher the type, the more resource symbols the card will contain and therefore produce.
  • Tokens: In the Hall of the Mountain King also makes use of various tokens.
    Coronation tokens: There are 2 of these round card tokens, valued at 5 and 3 VPs respectively. As well as scoring for players, they trigger the game end.
    Pedestal point tokens: These small square tokens are used in conjunction with the pedestal track on the board, consequently there are 15 of them, valued from 1-4 VPs each.
    Pedestal reminder tokens: That's right, the game has tokens to remind players to do something and that something is to do with pedestals! These tokens are each coloured blue/orange/white.
    Resource tokens : Yep, In the Hall if the Mountain King also makes use of lots of different types of resources, 7 to be exact.
    Stone: Little grey wooden cubes are used to represent this resource.
    Iron: These are little black wooden cubes.
    Heartstone: These little wooden cubes are red.
    Carts: These brown wooden tokens are actually shaped a little like carts.
    Hammers: Green wooden tokens shaped like... hammers!
    Runes: These are actually translucent acrylic purple gem shaped tokens.
    Coins: Standard round card currency tokens.
  • Draw bag: A bag used to blindly draw pedestal tokens.
  • Meeples: There are 2 types of meeple the game makes use of.
    Statues: There are 3 types of statue in the game, they are coloured blue/orange/white. Blue statues represent ice and at the top, are shaped a little like an ice crystal I guess. Orange represents fire and has a flame shaped top, while the white statues are shaped like a crescent moon.
    Pedestals: Pedestals are identically shaped and come in the same three colours as statues.
That's it for components and In the Hall of the Mountain King uses a lot of them!

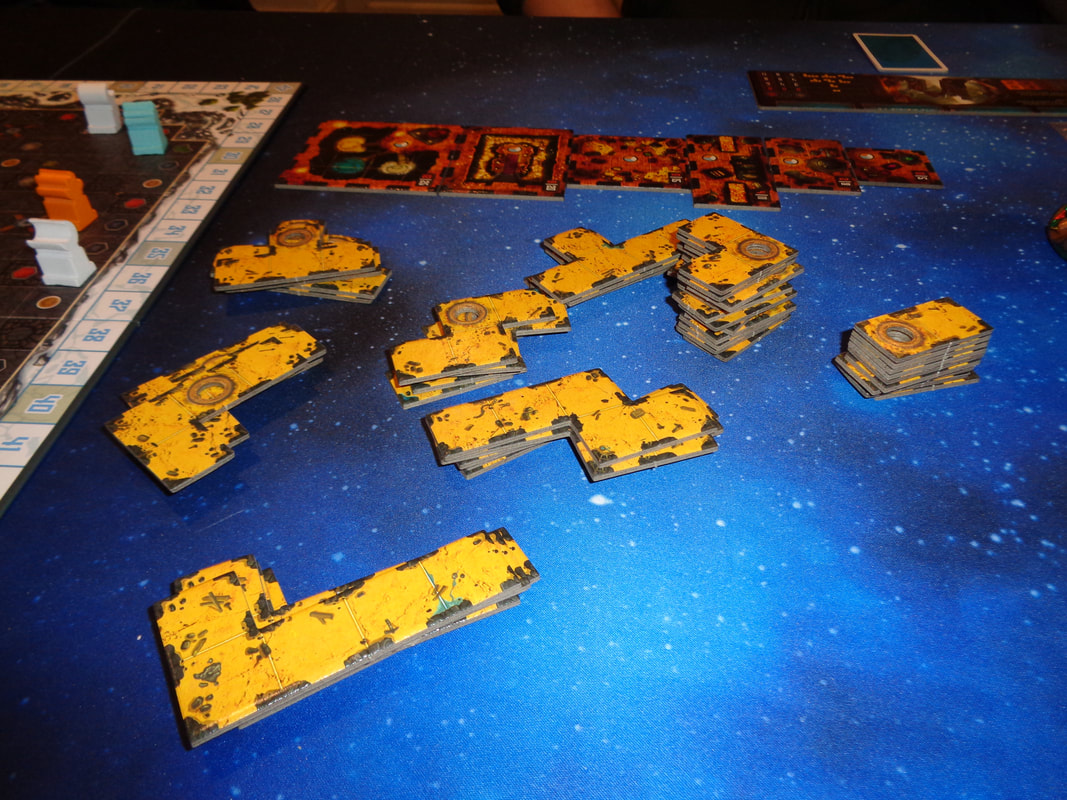
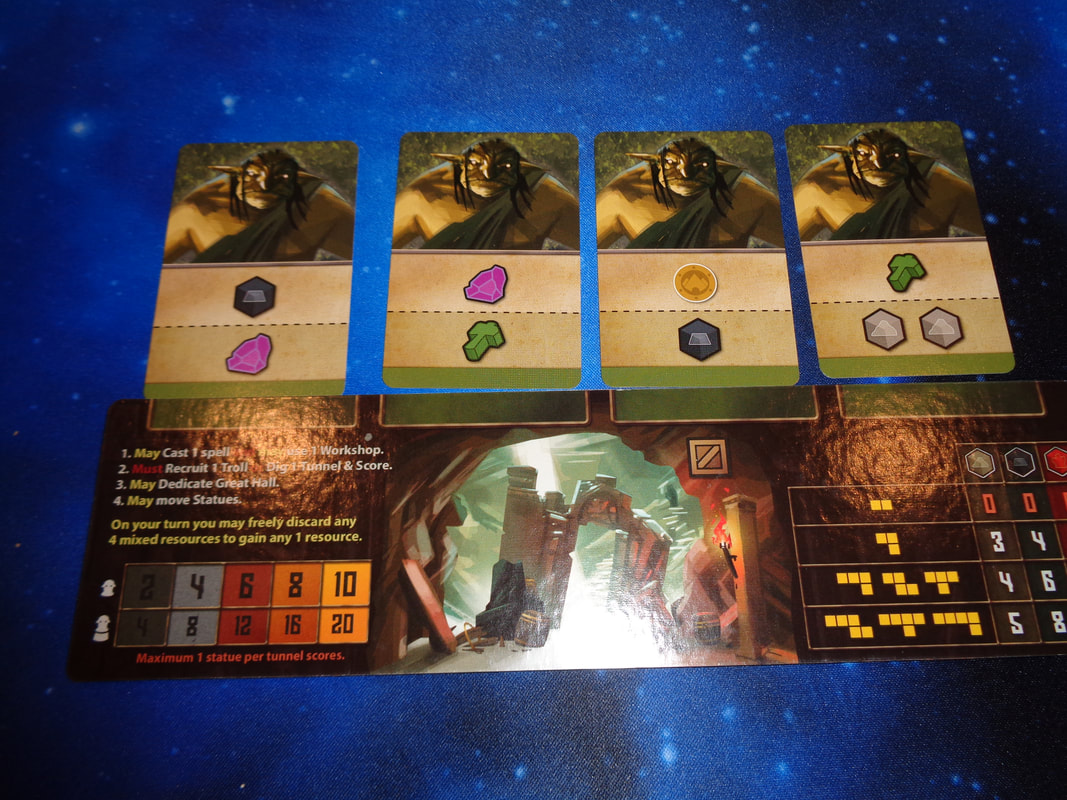
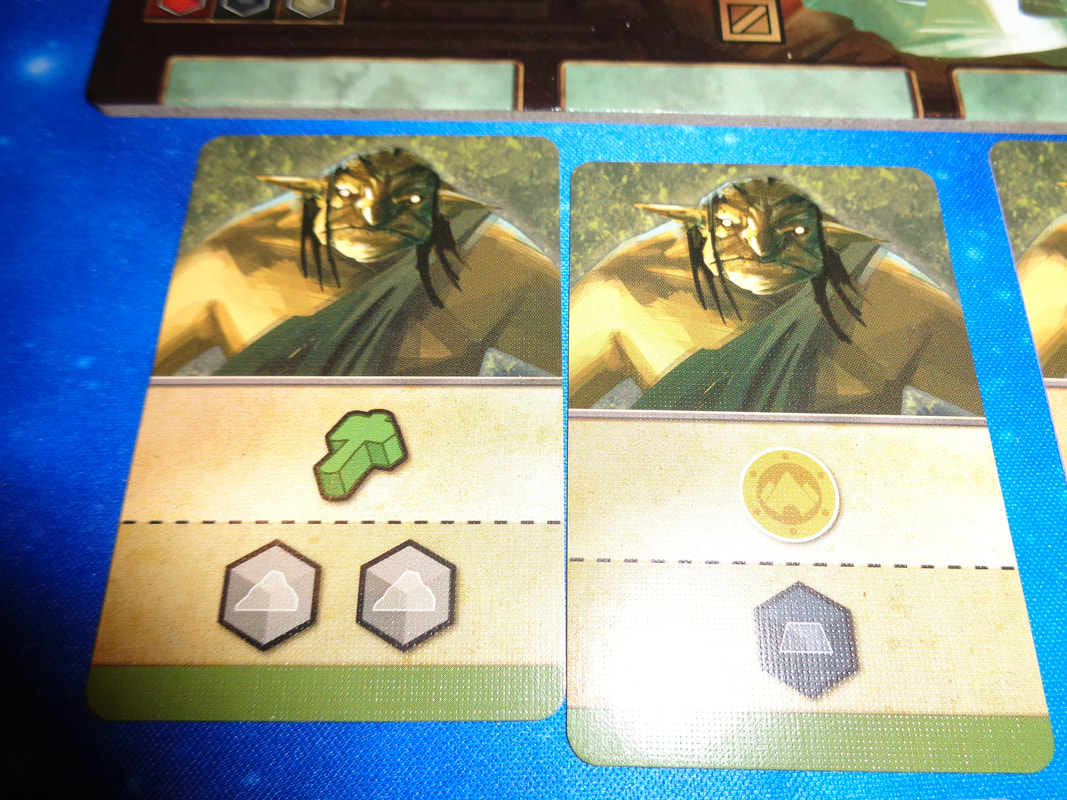
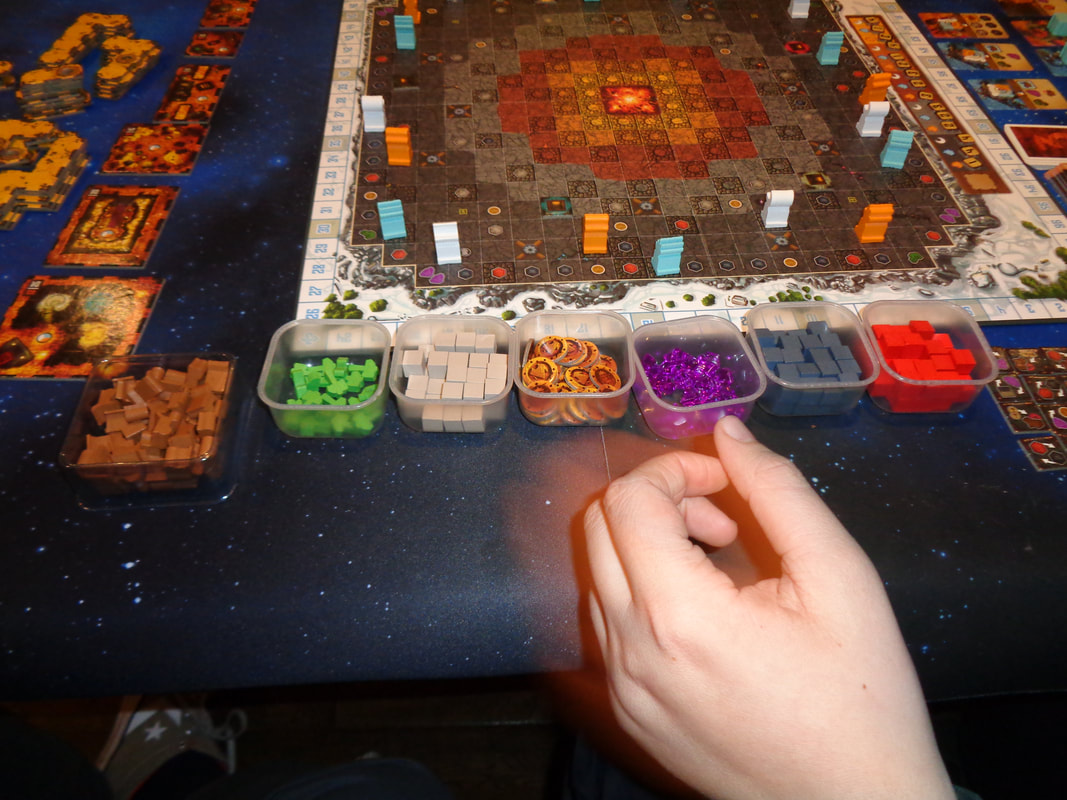
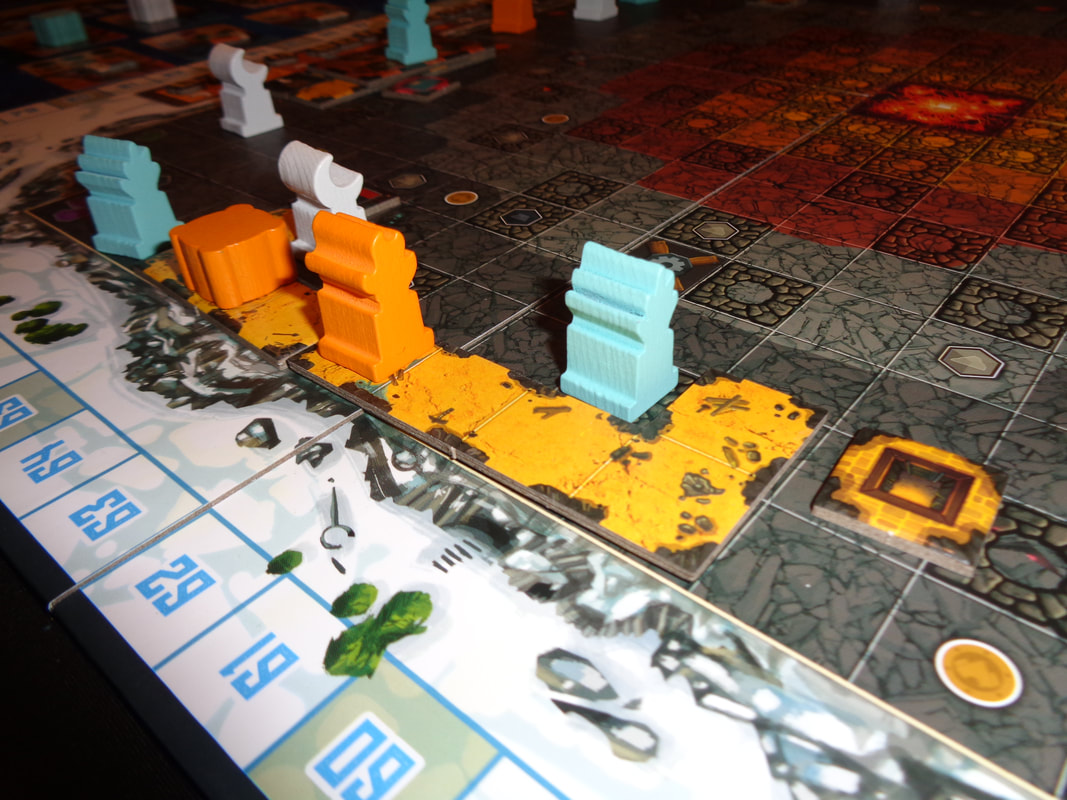
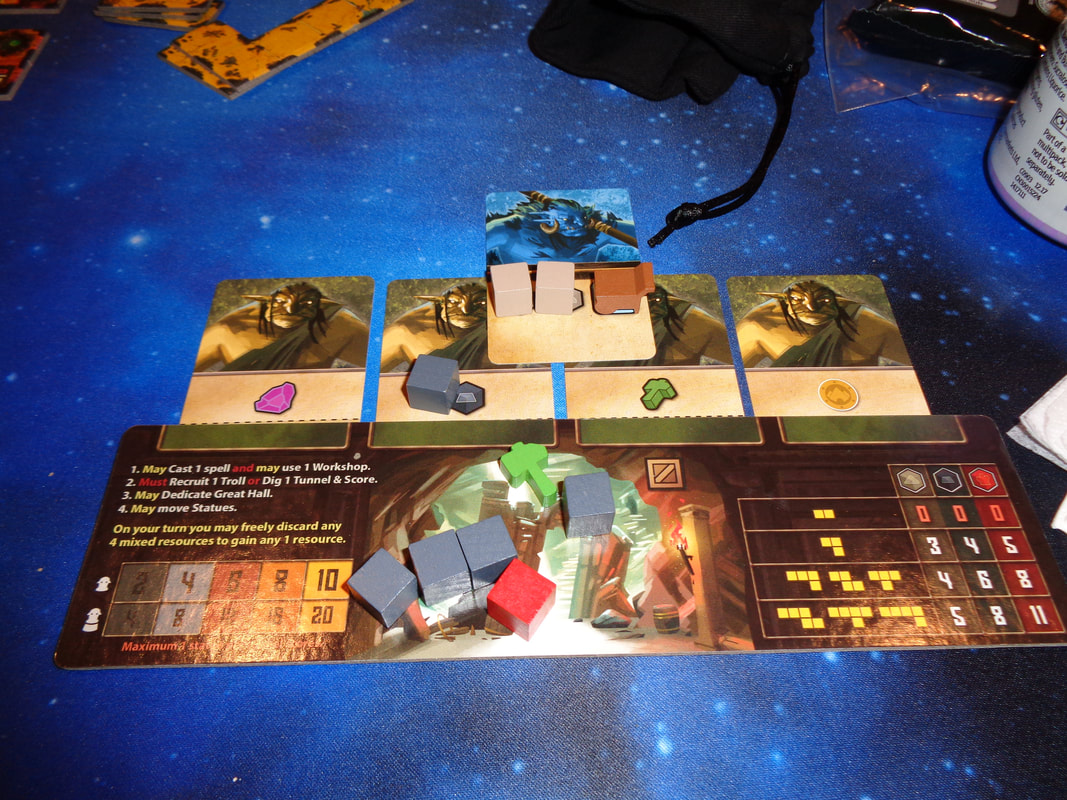
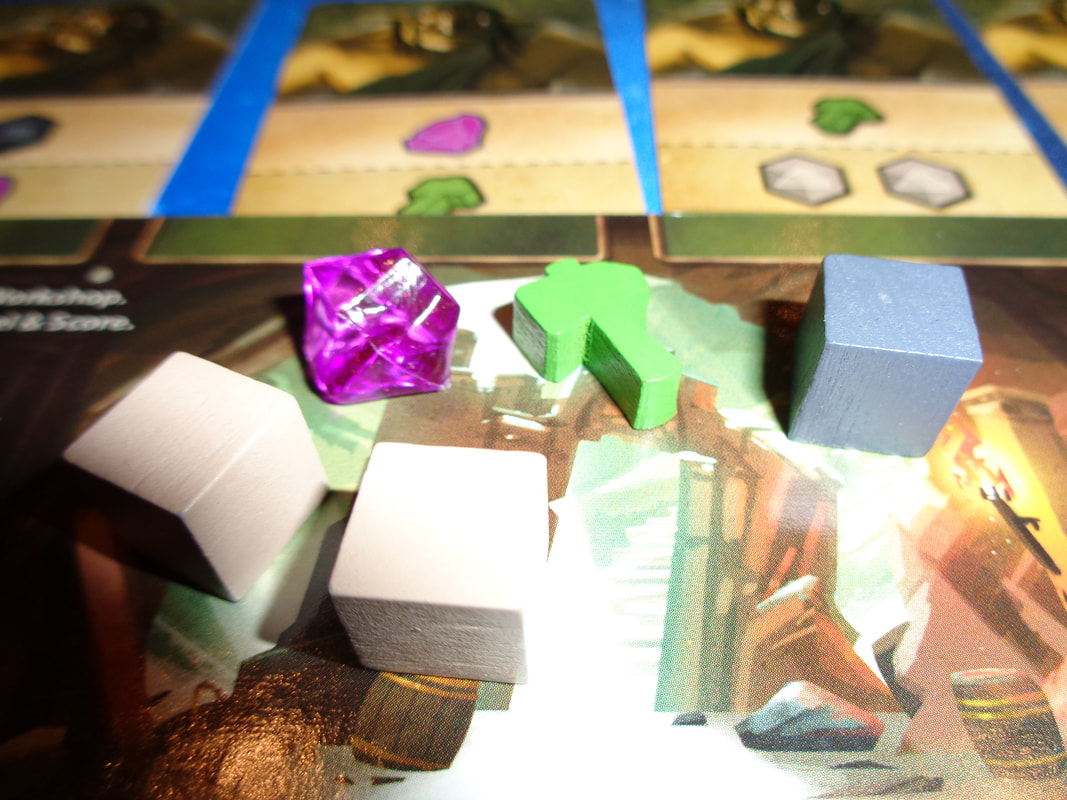
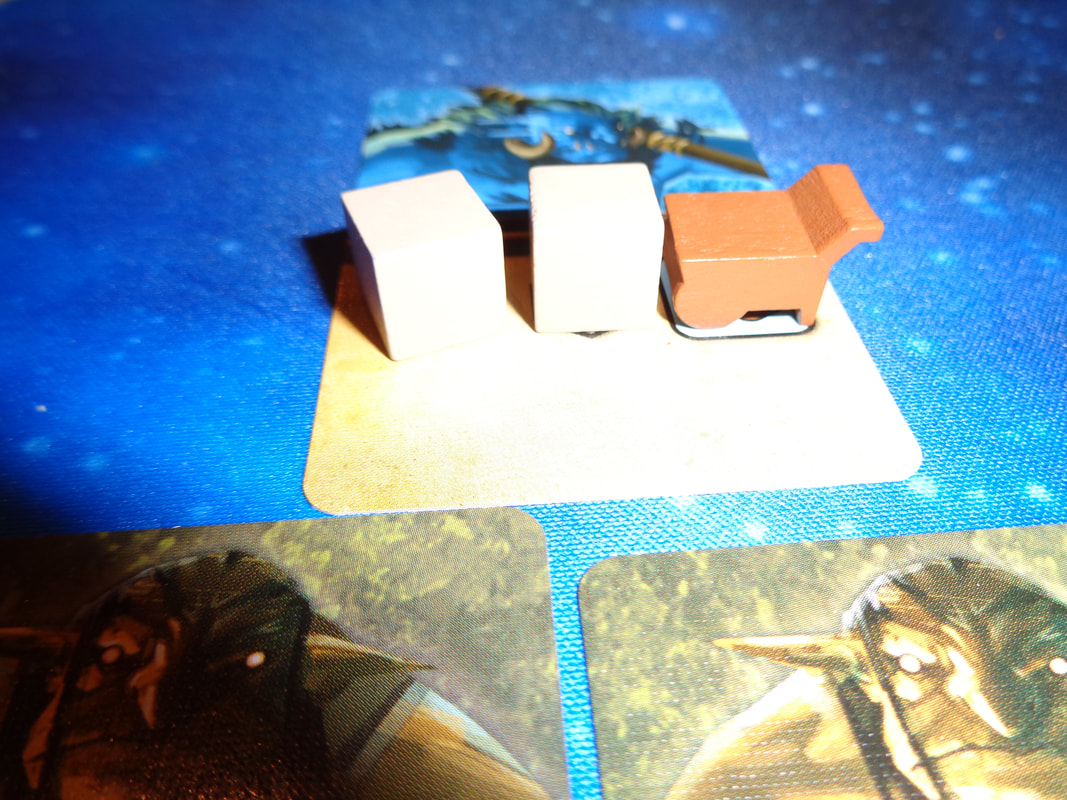
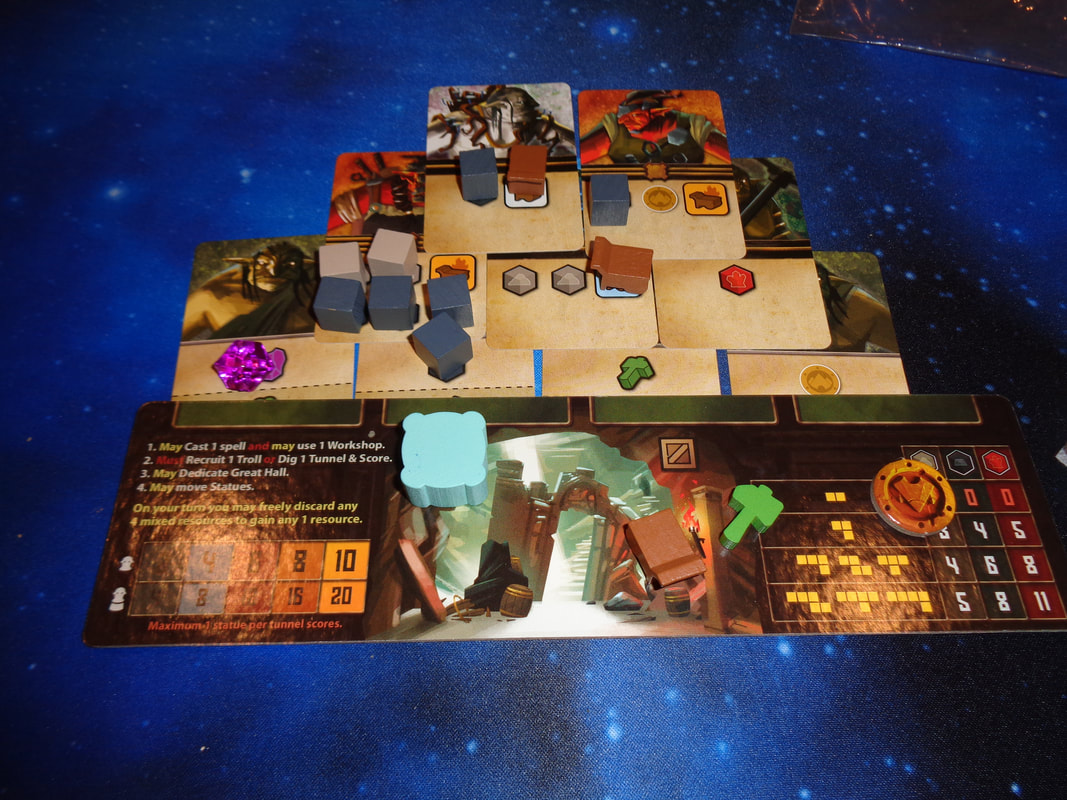
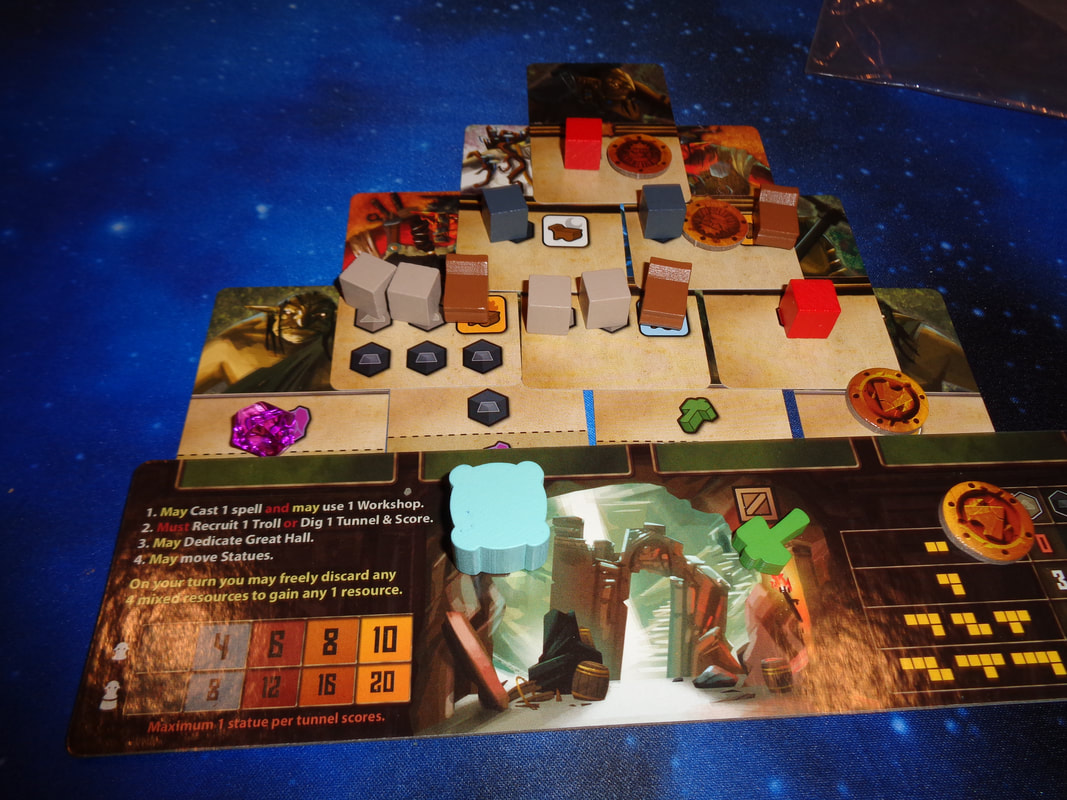
There's certainly a good amount of wooden tokens and meeples here, the acrylic crystals are also a nice addition.
None of the other components struck me as being poor quality and they're typical of what is expected in a modern game.
There are a couple of minor quibbles though.
The pedestal points tokens are a bit small and fiddly to handle
The second is a bit of personal grumble - which is that all the carts are brown but depending on where the carts are acquired from will represent different colours. Carts in a player's central area can be used for any colour of statue. But carts from icons on troll cards can only be used to move statutes of a certain colour - which is indicated by the colour of the icon used to acquire the cart! Makes sense... right? Maybe not? Surely it would have been useful to include some carts of the relevant colours?

There isn't a great deal of art in the game, mostly on on the spell and troll cards but it's all well illustrated with bold colours and and is fairly varied. There are 4 types (Or clans.) of troll cards and 3 types correspond to the blue/orange/white colour motif that runs through the game and I quite like how those trolls cards have a colour pallet to match it their types.
Having said that; the starter cards all feature the same piece of artwork that has been coloured matched to each player colour which is a little disappointing.

For the most, the game's iconography is actually straightforward and easily understood. Only the aforementioned issue with carts being a small problem. If the cart icon has a coloured background then a cart that is sourced from that icon can only be used for that colour of statue.
Luckily it's not a gamebreaker although it's finicky rule to remember.


How's it play?
Setup
  • Board: Which side of the game board that is used will be dictated by player count.
    Statues: The board must be populated with statues. Randomly choose the colour of the first statue and put a statue meeple of that colour it in any statue space, then randomly select a statue from the remaining 2 colours and place it in the next statue space going clockwise. Finally place the final colour of statue clockwise after the second statue.
    Now that there's a pattern of 3 colours, repeat the pattern going clockwise until all statue spaces are occupied
    Pedestal point tokens: Randomize the tokens face-down and place them in the 15 spaces on the pedestal track. Then flip them face-up
  • Workshop tiles: Shuffle the workshop tiles into a face-down and stack and draw 2 per player plus 1 more and place them out face-up. The remaining tiles have no use in the game.
  • Tunnel tiles: Sort the tunnel tiles by type.
  • Spell cards: Shuffle the spell cards into a face-down deck and deal 3 face-up. These 3 cards are called the spell book.
  • Bag: Put all the pedestal meeples into the draw bag and give it a vigorous shake.
  • Troll cards: Sort the troll cards by type and shuffle them into respective 3 face-down decks, then deal cards from the deck according to their type. When they are all placed, they should form a sort of ziggurat shape so they don't line up in columns, they are known charmingly as the Horde.
    Type 1: Deal 5 type 1 cards and place them in a row at the 'bottom' of the ziggurat.
    Type 2: Deal 4 of these cards and place them in a row directly above the type 1 cards but vertically positioned between the cards from the row below.
    Type 3: Deal 3 type 3 cards and also place them in a row above the type 2 cards, again vertically positioned between the cards from the row below.
    Pedestal meeples: Randomly draw 4 pedestal meeples from the bag and place them on the row of type 2 cards.
    Pedestal reminder tokens: Place 1 of these on each card in the type 3 row.
  • Coronation tokens: Depending on the player count put out 1 or both of these tokens.
  • 1st player: determine a start player.
  • Player boards: Give each player the player board, gate tile and starter troll cards in their player colour
    Gate tile: In turn order, each player should put their gate tile on to one of the starting spots on the board.
    Starting trolls: Each player should shuffle their 6 starter cards into a face-down deck, draw 2 and then should put 1 of the 2 cards into any of the 4 allotted spaces above their player board.
    Now draw another card and again put 1 of them into the 3 remaining spaces. Repeat this until all 4 spaces are filled in a row. This is the beginning of each players Trollmoot and as further cards are added will eventually resemble a pyramid.
    Each player should now have 1 card in their hand and 1 card left face-down.
    Resources: Each player gains the resources listed on the bottom row of the 4 cards they put into their playing area. Once the resources have been gathered, partially slide the cards under the player board so that the bottom row of resources are hidden.
    Bonus resources: The first player does not gain any bonus resources! However, all other player do. They will gain resources from the bottom row of 1 or 2 of the cards they didn't put into their play area depending on their position in the turn order.
    Regardless of whether players gain bonus resources or not, the 2 un-played starter troll cards are discarded out of play.
Phew! We're ready to go now.


On to play
Play during In the Hall of the Mountain King will have active player performing 4 actions before play moves clockwise to the next player.
  • Spells and workshop: The active player may perform one or both of these actions.
    Spells: The active player may spend a rune token to use the ability of any one of the 3 revealed spell cards by placing it on the pertinent spell card.
    Once a spell has accumulated 3 runes, it's discarded and new spell is drawn from the deck.
    Workshop: The active player may make use of one workshop's abilities which is connected to their tunnel network. It can be used as many times as it is connected to any tunnel network - even that of another player.
    Typically workshops allow players to swap around resources, any gained this way are placed into the storage on the active player's board.
  • Dig or recruit: The active player must perform only 1 of the 2 following actions.
    Dig: This involves spending resources to acquire a tunnel tile and place it on the board, there are obviously some restrictions and quite a few rules here.
    ​The cost of purchasing a tunnel tile is equal to the spaces it occupies, i.e., a 4 space tile costs 4 resources. This can be paid in only stone or only iron or only heartstone and not any mix if the 3. Players can trade any 4 resources for 1 of their choice at any time. When a tunnel tile is bought, it immediately scores VPs depending on it's size (Except the 2 space tunnel which scores nothing.) and the type of material used to construct the tunnel. Stone scores the least and heartstone scores the most as indicated in the bottom right corner of the player board.
    Next, the active player must put the tunnel tile on to the board; all positioning of and measuring of these tiles is done orthogonally. A tunnel tile can be rotated or flipped anyway the player chooses but must go adjacent to the active player's gate tile or a tunnel tile connected to the active player's tunnel network. Furthermore, there must always be at least 1 space between the networks of all players - no 2 networks can connect.
    If the tile covers any rubble spaces, the active player must spend hammer tokens equal to the rubble spaces being covered.
    If the tile covers any buried resources icon(s) or a statue meeple, the player gains them. Resources are placed into the storage space on their player board and statues are placed back on the same space on the game board but now on the tunnel tile.
    If the tile has been placed adjacent to an empty workshop space, the active player may place one of the available workshop there.
    If the tile that has been place has an anchor point on it and the active player has a pedestal in their storage then they may put the pedestal on the anchor spot, this can only ever be done just after the tile has been placed. There's a further restriction, each zone can only ever contain 1 pedestal of any colour. Since there are 5 zones, there can only be 5 pedestals of one colour in the game at any time and only 3 (One of each colour.) in each zone. There can be a maximum of 15 pedestals in the game which matches the 15 spaces on the pedestal track. Speaking of which, when a player puts a pedestal on the board, they immediately gain the pedestal point token from the space that matches the zone where the statue was placed and the statue's colour. This should be kept face-down in the players storage and revealed during scoring.
    Recruit: The active player may recruit one of the trolls from the Horde and depending on which level the troll is recruited from, it may cost 2 or 5 coins.
    If a type 1 troll is recruited, it costs nothing, if a type 2 troll from the middle row is recruited, the 2 troll cards beneath it must be bribed​ with 1 coin each, thus 2 coins. If a type 3 troll is recruited, then the 2 trolls beneath them must be bribed and then the 3 trolls beneath the the 2 must also be bribed for a total cost of 5 coins. all bribes are placed on the troll card itself. If a troll card acquires 4 coins, it's removed from play and replaced.
    When the active player takes a troll card, they also get anything on the card, including coins. So for a type 2 troll that would be the pedestal on it and on a type 3 the pedestal reminder token means they can take the pedestal of their choice from the bag.
    After a troll card has been taken, it is immediately replaced from it's relevant deck. For type 2 trolls, new pedestals are randomly drawn from the bag and for type 3, the reminder tokens are placed on them.
    Now the player must put the troll card into their Trollmoot. When doing this, it must go position above 2 other troll cards and overlap their top corners. Thus the 2nd row of a Trollmoot will contain 3 cards, the 3rd 2 troll cards and the top row will contain a single troll card, who become the chieftain of the Trollmoot. When the active player gains their chieftain, they can take one of the coronation tokens if there is one available.
    Additionally, when a card is added to the Trollmoot, it is activated, this means that the player acquires the resources listed on the card. Not only that, the 2 cards beneath the card are also activated and then the 3 cards beneath the 2 are activated and so forth in a cascading effect. This means that when the chieftain card is placed, it will activate all cards in the Trollmoot.
    When resources are acquired this way, they are placed on the troll card that generated them and not on the storage space on the player board. This is important to remember because if a troll card is already contains a resource it produces, then the player does not acquire it.
    This means it's a good idea to use resources on troll cards before those on the storage or to use workshops to cycle resources off of troll cards.
  • Great Hall: The active player may place 1 great hall tile per turn into their network by placing it on top of their tunnel tiles. However, the player's tunnel network must contain an area at least as large the great hall tile to accommodate it. E.g., a tunnel network must contain an area at least 3x3 in to to accommodate the 3x3 great hall tile.
    Every great hall tile has an altar space and 2 differing VP values. The 2nd value is what the tile is worth if a statue of any colour is placed on the altar space
  • Move Statues: The active player spend cart tokens to move statues.
    Cart tokens that come from the players storage on their player board can be used to move statues of any colour.
    Cart tokens that come from troll cards can only move statues that match the colour of the cart icon on that troll card. I.e., the cart token on a troll card with a white cart icon can only be used to move a white statue - even though the cart token itself is brown!
    Each cart token spent allows the active player to move a statue to anywhere on another tunnel tile (Or another space on the same tile - only 1 statue can ever occupy a single space.).
    This can involve putting the statue on a pedestal of matching colour which doubles the statue's VP value.
  • Next player: when the active player has completed all 4 phases, play progresses clockwise to the next player.
Okay, that's it for the main rules.

Endgame
The endgame is triggered when there no coronation tokens left to acquire.
The current round is completed and 2 more rounds are played.
Players then calculate VPs, a player's VPs may come from the following sources.

Score tracker.
Statues - depending on their position in the 5 zones and doubled if the player managed to place them on a pedestal.
Great hall tokens in a player's network - with or without statues.
​Pedestal points for placing pedestals.
Coronation tokens.
Unspent resources; these can earn points. Every 3-of-a-kind scores an extra VP.

Points are tallied, highest score wins.


Overall
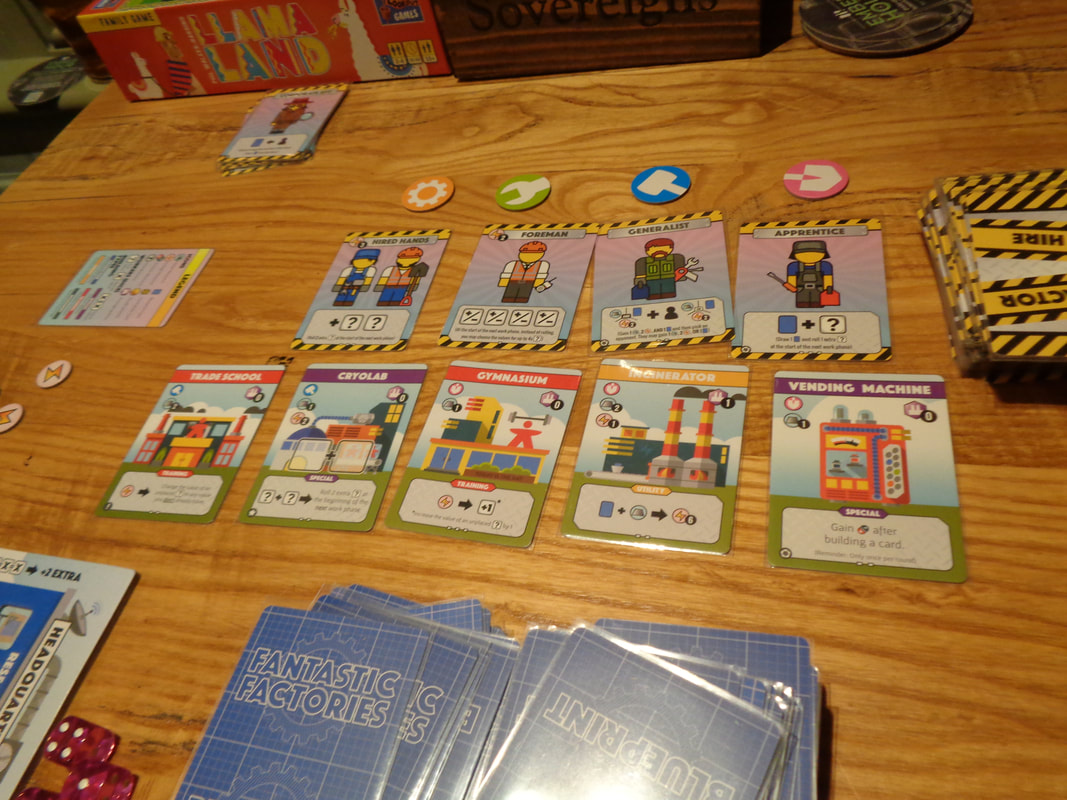
Despite having quite a few rule to remember and sounding quite complicated, In the Hall of the Mountain King is actually pretty straightforward in practice and many of the rules are obvious when in action.

​There's definitely a couple of finicky rules though, and again - it's to do with the carts and pedestals. It feels like an unnecessary complication to have these differently coloured carts to move statues.
The rule that restrict pedestals to 1 per colour in each zone also feels a but cumbersome. I know why the rule is there: It encourages competition in a game that otherwise has little interaction between players.
​Players will want to be the first to get a pedestal as close to the Heart of the Mountain as possible. It locks out completing players and offers a big scoring opportunity.

It means that players are put into a balancing act of needing build their tunnel network but also acquire resources to make this expansion happen. Clever placement of tiles will earn players some resources but recruiting trolls is the best way to get them and you'll note that digging and recruiting are pretty much the only 2 mutually exclusive actions in a turn.

There's more to tunnel tile placement too, pedestals and thus statues have to go on anchor spots and it's these need to be as close to the centre of the board as possible, sometimes it'll be tricky to get it right, or it'll require not getting something else. Being able to avoid rubble spaces helps as well.
Resource management also has more to it. Spending resources from troll cards first is prudent, as is using workshops to change them into other resources - because they go back on to the storage space and not the troll card. It does involve trying to think ahead about what resources can be acquired and what will be needed.

This brings me neatly to the Trollmoot/Horde elements of the game, with their overlapping and cascading mechanics for both buying cards and acquiring resources they almost feel like a different game to the tile placement taking place on the game board.
I have to say that I like the cascading mechanic, it's simple but provides some interesting decisions for players to make. Building up a Trollmoot, like much of In the Hall of the Mountain King requires a little forethought.
If my calculations are correct, the cards in the centre columns will be activated the most. Players will want to identify and prioritise what resources they'll need in their Trollmoot setup. Additionally, deciding where to place a troll card will determine what resources the player immediately.

I do also have some concerns about the game, I found using the tunnel tiles, creating pedestals and moving statues more of a chore than satisfying and the game it didn't quite gel with me.
I'm also not sure how much value there is in replaying the game. The player and statue starting positions and workshops may vary but mostly the board's resources stay unchanged. And while the card mechanics are good, the cards themselves only vary in which resources they provide.

In the Hall of the Mountain King is another one of these games that does nothing really wrong and I've got nothing against the game. If someone else wanted to play it I would happily join in but somehow it's missing that 
special something that makes me want to play it again.
0 Comments

Fantastic Factories

9/2/2022

0 Comments

 
8th February 2022

Tuesday night games with the Woking Gaming Club at The Sovereigns continued with Fantastic Factories.

I don't know if factories are fantastic but I guess we're going to find out.

What's in a game?
  • Player board: These rectangular boards contain recessed spaces to assign 3 rows of up to 3 dice each and considered each player's headquarters.
    Research: This is the first row, dice of any value can be assigned here.
    Generate: Dice showing values 1-3 can be assigned here.
    Mine: Finally, dice displaying 4-6 can be assigned here.
  • ​Dice: Fantastic Factories comes with quite a few dice. They're normal six-siders constructed of translucent acrylic with rounded corners and dots.
    There are 5 sets of 4 dice in player colours and a generic set of 8 grey-white dice which players can acquire temporarily.
  • Tokens: The game makes use of various types of card tokens.
    Energy tokens: These round tokens are unsurprisingly marked with lightning bolts.
    Metal tokens: Metal bars are used to indicate these are metal tokens
    Goods tokens: There are 2 types of these token that show 1 or 2 crates and correspondingly represent 1 or 2 goods.
    Tool type tokens: There is 1 each of these 4 tokens and they show a cog, wrench, hammer and shovel. They are used to determine the type of tool required to hire contractors (See below for more on contractors.). Tool type symbols also appear on blueprint cards.
  • Cards: There are 2 types of cards in Fantastic Factories.
    Blueprints: These are the factories that players will build.
    In the top left it lists the cost to build the factory, this will include some combination of energy and metal as well as a tool. Additionally, when a blueprint is discarded, it will generate that tool type.
    In the top right corner it shows the VPs the card is worth when built. 
    Finally, in the bottom half, the card shows what kind of ability that blueprint will have when built, e.g, spending energy to get goods or something along those lines.
    ​Contractors: These cards have once-only abilities that are triggered when the card is bought (Contractor is hired.). Hiring contractors will cost a tool, the exact type of tool is determined by the tool type tokens.
  • First player marker: The game features a wooden first player token shaped like a factory, it even has a pair of polluting smokestacks!
The components in Fantastic Factories are average in quality, which means they're perfectly acceptable, there's nothing poor here. Having said that, the translucent dice look good despite not being wooden, speaking of which, the wooden first player marker is a nice touch.

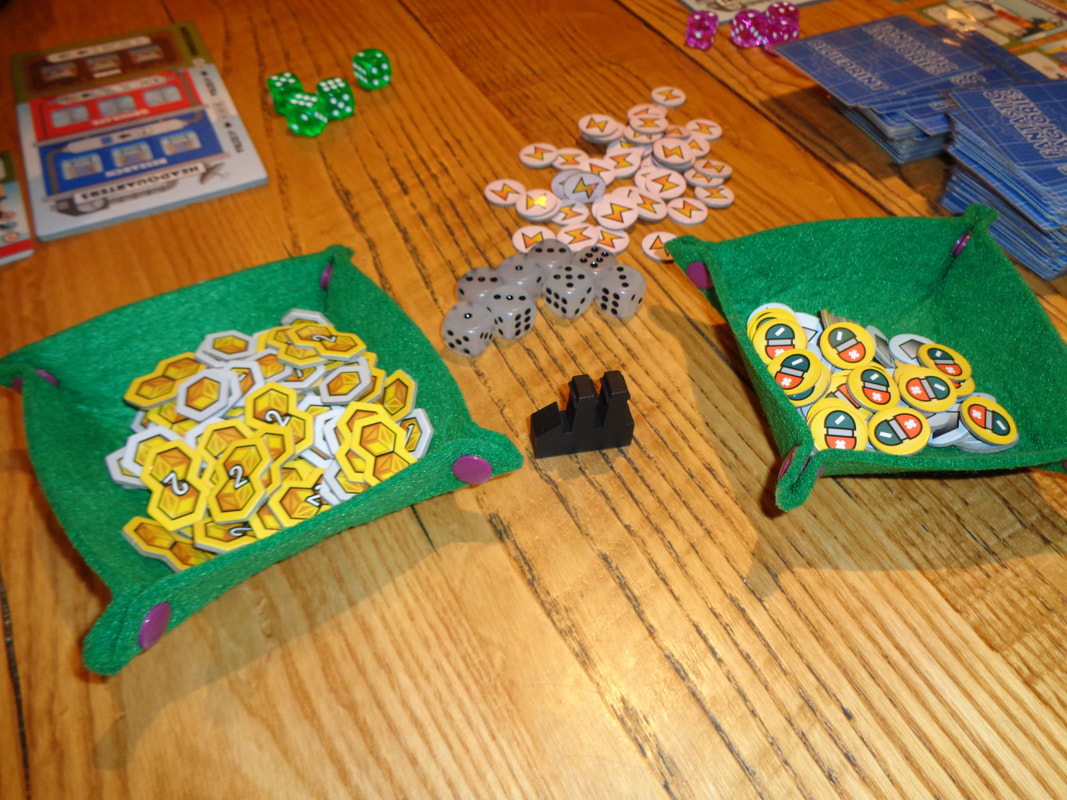
From an art perspective, the game makes good use of cheerfully bright colours. The art itself uses heavily stylised illustrations of both factories and contractors which is fine and suits the game's slightly light-hearted theme.

When built, factories provide a varied amount of special actions, consequently the game makes use of quite a varied amount of iconography. For the most part it's straightforward, however, on occasion 2 cards may seem similar but they'll be a small difference between denominated by a single small icon or sometimes they'll just be something 
​I wouldn't say it's any kind of a gamebreaker or that there's too much iconography but for a few turns players will probably end up referring to the rules.


How's it play?
Setup
  • Tool tokens: Put out the 4 tool tokens in a line, the order does not matter.
  • Contractors: Shuffle the contractor cards into a face-down deck, then deal 4 face-up with each one in line beneath each tool token.
  • Blueprints: Also shuffle these into a face-down deck and again, deal 4 face-up, this time below the contractor cards.
    Marketplace: Thus this row of 4 tokens with 2 rows of 4 cards beneath also forms 4 columns and is what is called the marketplace.
  • Players: Give each player a player board, 4 dice in their player colour, 2 energy and 1 metal token.
    Finally, deal 4 blueprint cards to each player.

On to play
Broadly speaking, a round is broken into 2 phases; a market phase which occurs in turn order and a work phase, which can be performed simultaneously by all players.
  • Market phase: Starting with the first player and going in turn order, everyone may perform the optional action, then must choose one of the following 2 actions.
    • Optional action: By spending an energy or metal token, the active player may wipe one of the two rows of cards in the marketplace and have 4 new cards revealed.
    • Hire contractor: The active player may hire 1 contractor card by paying it's cost which will a combination of whatever energy/metal tokens it may require plus the tool symbol for the column it's in, the active player does this by discarding a card from their hand with a matching tool symbol.
      When a contractor is acquired, it's ability is used immediately and the card is discarded.
      That's not very realistic, if it was, the contractor would do nothing for 3 rounds and then charge the player again before doing anything!
      OR
    • Gain blueprint: The active player may buy a blueprint much as they would do with a contractor card except they do not need to pay the tool cost. When the active player acquires a blueprint card, it goes into their hand.
  • Work phase: This phase can be carried out by all players simultaneously if they wish.
    Roll dice: The first action that occurs in the work is rolling dice.
    After this, there are several types of action that can be performed during the work phase and players carry them out in any order they choose.
    • Headquarters/basic actions: All 3 basic actions involve assigning the rolled dice to spaces on the headquarters board. The numbers rolled will affect where those can be assigned and what they do.
      • Research: Dice with any value can be assigned to this action. For each dice assigned this way, the player can draw a card from the blueprint deck (Not the face-up cards.)
      • Generate: Only dice numbering 1-3 can be assigned to this action, then the player would acquire energy tokens equal to the value of the dice assigned. E.g., if a 1 and a 3 are placed in generate, the player would gain 4 energy.
      • Mine: Only dice numbering 4-6 can be placed here and each die assigned earn the player a metal token.
        Matched numbers: If a pair of matching numbers are assigned any single basic action, it increases the amount the player gain by 1. If 3 matching numbers are assigned, it would earn the player an extra 2.
        Putting 5 and 5 into research or mine would earn the player 3 blueprints/metal tokens.
        If a player somehow would manage to put 3, 3 and 3 into generate, it would earn them 11 energy!​
    • Build blueprints: Players may build any number of blueprint cards from their hand provided they can meet all the costs, this will of course involve discarding blueprint cards with the identical tool symbol.
    • Activate buildings: Players may activate buildings that have been built in any order they see fit. Each building can only be activated once per turn however.
      Buildings have an activation cost, this might be a resource or even a die and will produce some other resource for the player.
  • Extra dice: Some abilities allow players to acquire extra dice to use, these always come from the supply of grey/white dice, are temporary and will return back to their supply at the end of the round.
  • Next round: Once all players have finished their actions, the first player marker moves to the player on the right and a new round begins with the next market phase.

Endgame
Play continues until either a player has built their 10th card or acquired their 12th good.
In either case, the current round ends and 1 more round is played.
Players then total the VPs from their buildings and the goods they gained.

Points are tallied, highest score wins.


Overall
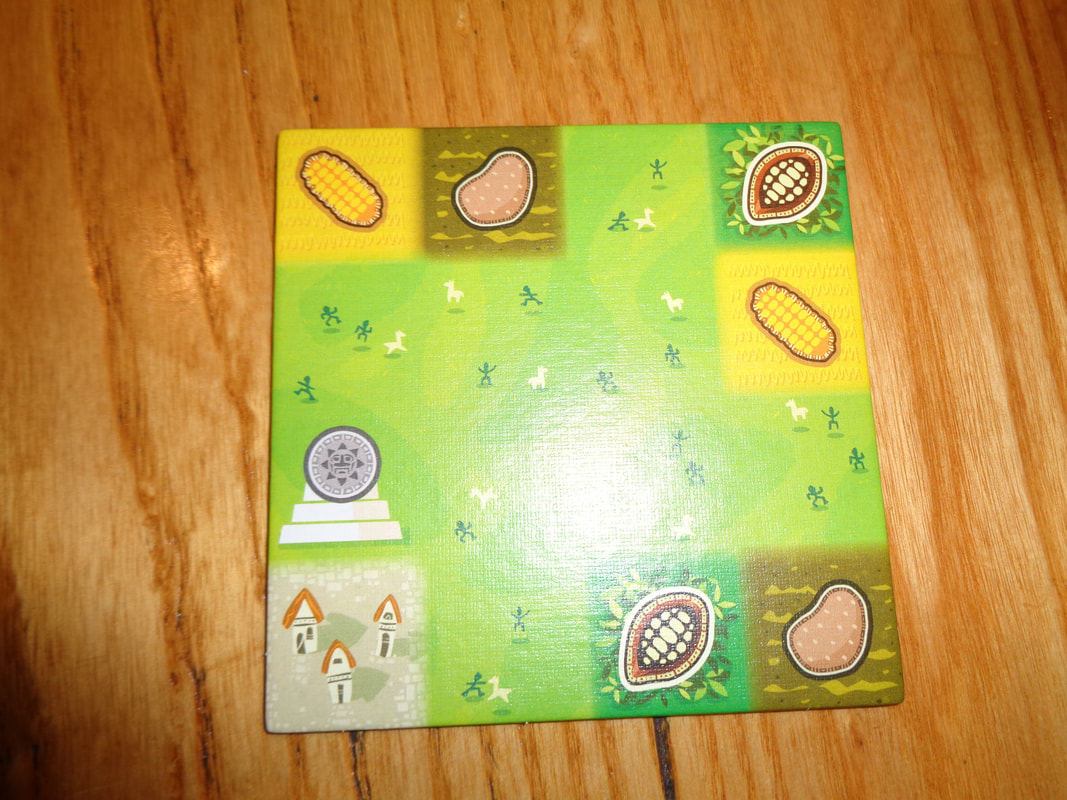
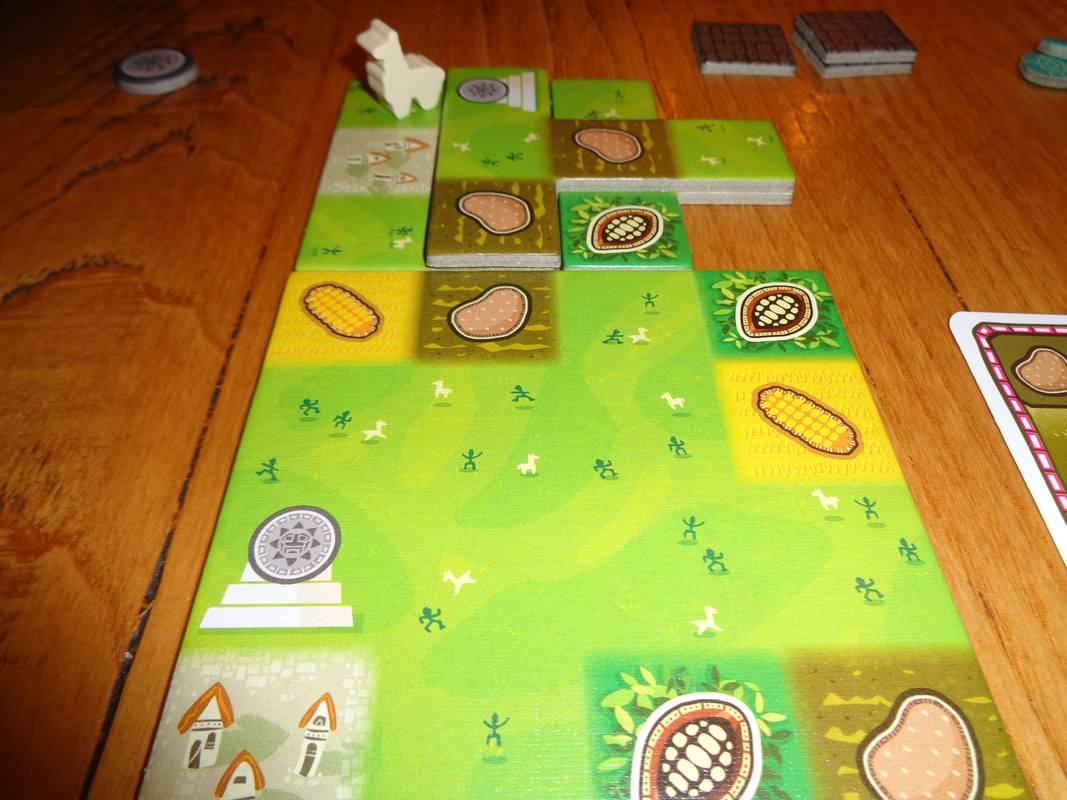
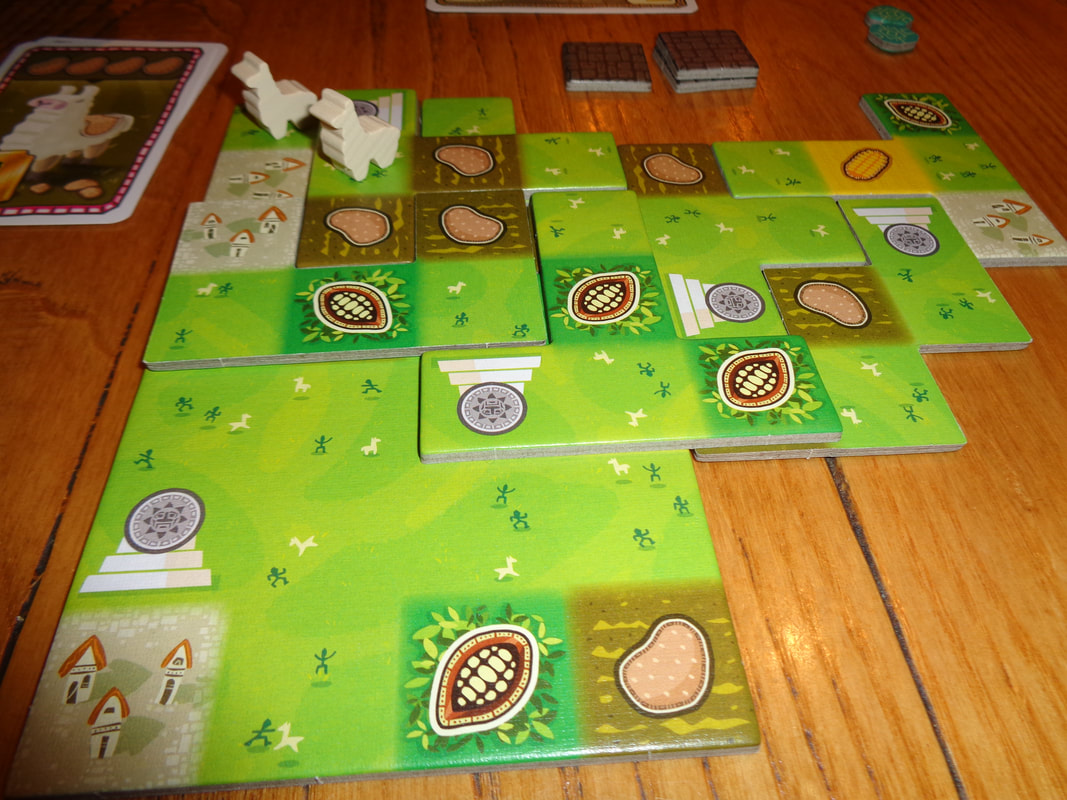
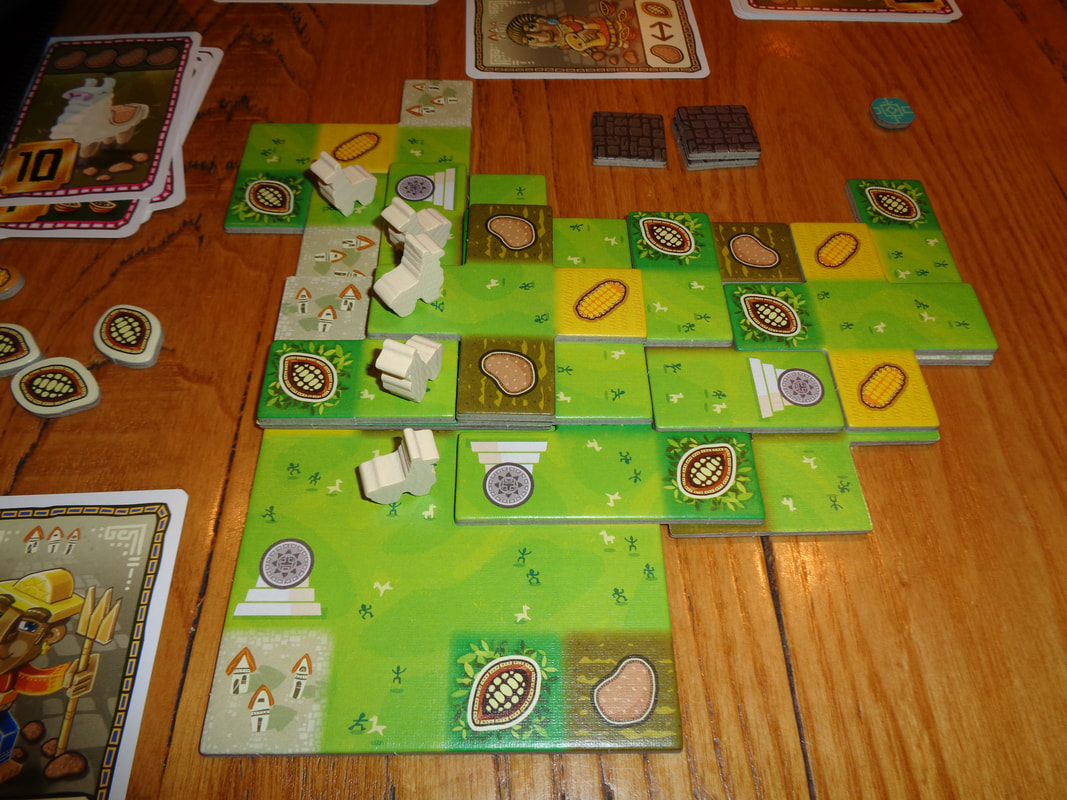
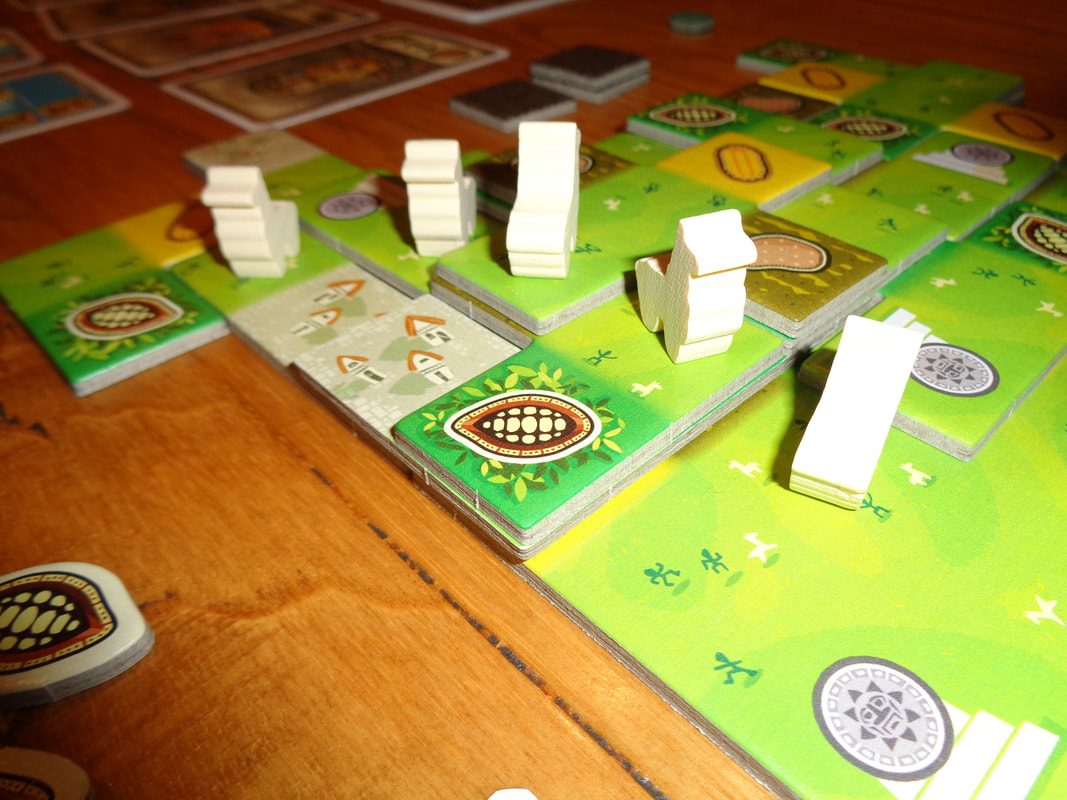
On a basic level, Fantastic Factories is mechanically pretty straightforward; acquire blueprints, acquire resources to build factories, use factories to acquire resources.

It's a mid-weight engine building game that provides players with strong card synergy and offers a good selection of choices and avenues to follow for building that engine.
I feel for the most part that players will want to focus on blueprints and building them, which is natural as this is what gets resources and VPs.
Players shouldn't neglect the contractors who provide instant if transitory benefits for a relatively low cost. Applied at the right time, they can be game changers - provided they're available at the right time! Once again, it's a case of reacting to opportunities as they are revealed.

There are a couple of there elements that make Fantastic Factories interesting.

Firstly; dice rolling. Players will never be guaranteed getting the results and thus the resources they want. It means that players may not be able to build the card they originally wanted to and will need to adapt and react to the situation as it arises for optimal play. Of course it's always possible to play it safe and have all the required resources before getting a card, it's safer but it's also slower.
Secondly; Fantastic Factories makes use of a hand-as currency mechanic. This forces players to think ahead, players may need to get blueprint cards just to discard for another building, or may be forced to discard a blueprint they still want in order to build another, it can be a tough decision.

There's also some high level play, where it pays to watch what other players are working towards then wipe the marketplace to deny another a player a card they want.

Fantastic Factories is a well balanced game, it's rules aren't particularly complicated and are easy to learn but also have depth that comes from recognising how to exploit the available cards that appear during the game to build their engine optimally and to maximum efficiency.
​The gameplay is solid and will appeal to fans of engine building games, which I am. so I guess factories can be fantastic!
0 Comments

Llamaland

9/2/2022

0 Comments

 
8th February 2022

Tuesday evening is here and we're at The Sovereigns with the Woking Gaming Club for some gaming goodness.

The 1st game of the night was Llamaland.
A whole land full of llamas, they get everywhere, all over the fields, hills and mountains!

What's in a game?
  • Player tiles: One of these starter tiles is given to each player and represents the beginnings of the player's estate. They're double sided and feature a grassy landscape overlaid with 4x4 grid which in part contains various icons for coins, villages, cacao, corn and potato.
  • Land tiles: There are 12 each of these 5 types of tetramino shaped tiles. Similarly to the player tiles, they are double sided and feature a grid with icons and grassy land.
  • Foundation tiles: These are small square tiles and depict brickwork, their use is explained below.
  • Cards: Llamaland makes use of various types of card.
    Llama cards: You can't have a game called Llamaland without llama cards!
    These come in three types; cacao, corn and potato which are displayed at the top in a row 4 of the relevant icon. There are 16 of each and they are numbered from 5-12 VPs and feature illustrations of moody llamas!
    Objective cards: There are blue and purple objective cards which feature objectives for players to achieve. Each objective card also has 3 numbered rows with spaces for players to place their markers.
    Character cards: These cards represent villagers and when acquired by players,  can be used to acquire bonuses of some sort. Each card has a stylised, cartoony picture of a fairly generic looking South American native.
  • Tokens: Llamaland also makes use of various types of tokens.
    Player markers: There are 4 of these small, square-like card tokens in each player colour.
    Coins: Grey coloured round card tokens are used for money.
    Crops: There are 3 types of crop token, potato, corn and cacao which correspond to their llama cards and are essentially other forms of currency. Not only does each have it's illustration, they are also differently shaped.
    Shepard's crook: This staff shaped token is the first player marker.
  • Meeples: Perhaps unsurprisingly, the game's wooden meeples are llama shaped, I guess they're lleemples?

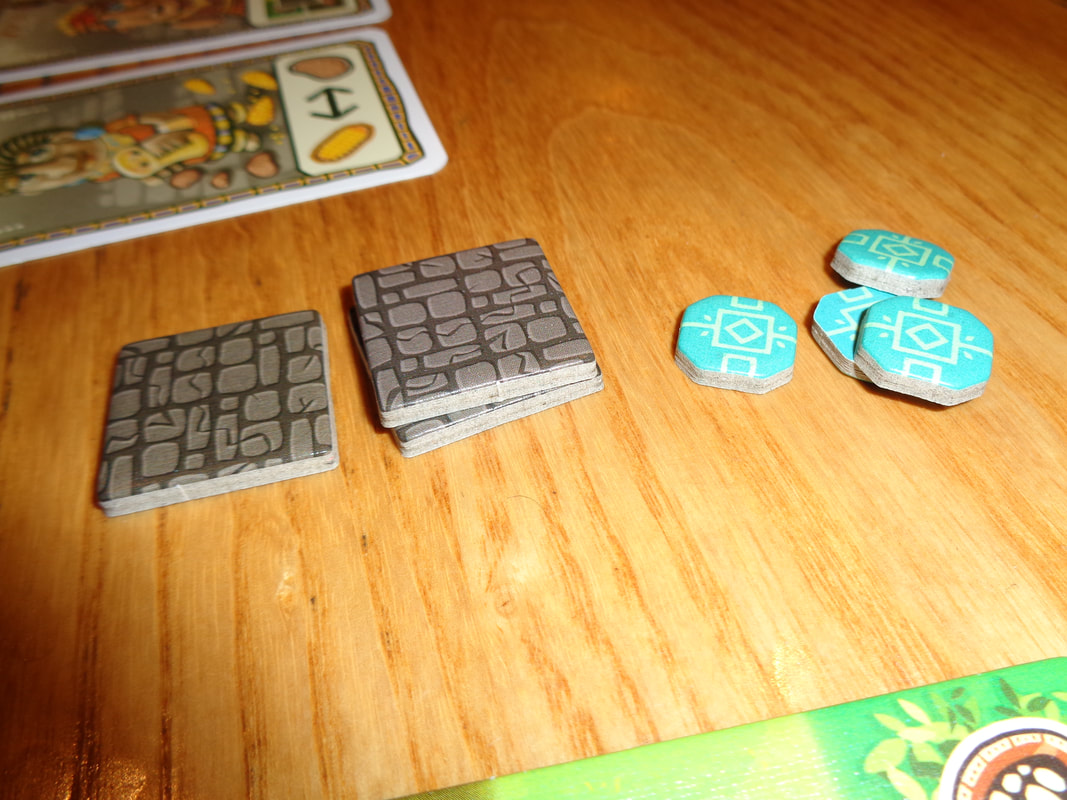
Most of Llamaland's components are good quality, the cards feel a little flimsy but unless they're abused, they should be fine. Otherwise it's all good, the tiles all feel suitability solid and chunky. The tokens are fine, I like how they're the different shaped.
​
The most noteworthy component though, are the cute little llama meeples.

The art in Llamaland is nice and colourful, all the tiles are bright and eye catching, the art for the character cards is heavily stylised but I like it.
The illustrations used for the llama cards depict them as llama meeples. If you look carefully at several cards, you can see that some of them have slightly different expressions! It's a nice touch and I wonder how often these kinds of detail get noticed?

Much of the game's iconography is easily comprehended, however, some of the icons on the character cards can be unclear, this generally applies to cards that confer bonuses for covering other icons because they show the relevant icons being covered and those icons are a little obscure.
The blue objective cards will probably require referring to the rulebook to understand.
None of this is a gamebreaker though. It's unlikely that players will need to look up anything more than once or twice.

How's it play?
Setup
  • Land tiles: Sort the land tiles into their 5 types and shuffle them into individual stacks.
  • Llama cards: Sort the llama cards into their 3 types, give each deck a shuffle and then according to the player count draw cards from each deck. Turn these cards face-up and then sort them by value, with the highest at the top and lowest at the bottom
    The remaining llama cards are not used the game.
  • Character cards: Shuffle the character cards into a face-down deck, then deal a row of 5 cards face-up next to the deck.
  • Objective cards:
    Blue objectives: Shuffle the blue objective cards and deal 4 face-up into the central playing area.
    Purple objectives: Shuffle the purple objective cards and deal 3 face-up into the central playing area.
    Remaining objective cards are not used in the game.
  • Players: Give all players a starter board, each can choose which side to start the game with.
    Then give each player the 4 markers in their player colour and 3 foundation tiles.
  • First player: determine a first player and give them the Shepard's crook. All other players gain 1 or more coins depending on their position in the turn order.

On to play
LLamaland is played using a traditional turn structure, with the active player taking a turn adding tiles to their estate. Once that's concluded, play moves to the player on the left.
  • Take tile: The active player takes a land tile and places next or on to their estate, there are 2 ways to do this and each has a different 'bonus' action. When a land tile is placed, it can be freely rotated or flipped as desired.
    • Extending: When a tile is placed orthogonally adjacent to the estate on the 'ground level' it is considered to be extending. 
      Free action: The active player may place a marker when extending, more on markers below.
    • Building: Land tiles can also be placed on top of the estate but there are some requirements.
      A land tile cannot be placed exactly on a identical tile and cannot cover a space containing a llama meeples. Additionally, there can be no 'gaps' underneath the tile being played. The active player can use any number of their 3 foundation tiles to fill in gaps.
      Free action: The active player may 'collect benefits' for covering icons.
  • Place marker: When the active player has this action available, they can take 1 of their markers and put it on a empty row on an objective card - or if their markers are all already on cards, they can move a marker. A row can only contain 1 marker at a time.
    There is no immediate effect for doing this and it only comes into play at the game end. Whereupon the marker will score VPs for whoever placed it provided they met the objective.
    Blue objectives: These tend to be objectives about the placing of llama meeples (See below about placing llamas.) such placing 4 llama meeples in a row.
    Purple objectives: These objectives are concerned with acquiring llama cards.
  • Collect benefits: When building upwards, land tiles will be placed on top of the estate. If this land tile covers any icons, then the active player gains those resources. Thus covering coin, cacao, corn or potato icons will gain those tokens, covering a village icon allows the player to take a character card of their choice from the row, or draw one blindly from the deck.
  • Feed a llama: Once the active player has extended or built upwards and completed the associated action, they can choose to feed exactly 1 llama in their turn by spending 4 of the required crop, players may choose to spend coins in place of crops by spending 2 coins per crop, then the active player performs the following 2 actions.
    Take llama card: The active player takes the topmost llama card form the stack associated with the crops they spent and puts it into their play area.
    Take llama meeple: The active player must also take a llama meeple and put it on to their estate. The meeple must go on to a empty green space. Furthermore, going forwards, land tiles can now no longer be placed on top of a meeple.
    10 crops: if the active player has 10 or more resources during this stage, they must feed a llama in this turn.
  • Character cards: These cards can be used once per turn each. Some cards which allow one resource to be swapped for another have double ended arrows, these means the swap can go either way.
  • Next player: Once the active player has finished, play move to the person on the left.

Endgame
Play continues until one of the following criteria is met.
There are 4 or less land tiles less, regardless of type.
There is only 1 type of llama card left.
In either instance the game goes into the endgame and play continues until all players have had an equal number of turns, then it goes to scoring.

Every llama card acquired earns its listed VPs.
A player marker on a objective card that the player has successfully completed earns that player its listed VPs.
Unused crop tokens earn 1 VP each.
Every 2 unused coins earns 1 VP.


Points are tallied, highest score wins.


Overall
Broadly speaking, Llamaland's gameplay is divided into 3 areas.

I'd say that primarily the game is concerned with tile placing mechanics. Much of the gameplay here will be familiar ground. Players cannot predict exactly what tiles will be available when drafting tiles will be available in their turn and will need to adapt to circumstances and look for opportunities. Pretty standard stuff.
The unusual element here is building upwards, it adds an extra axis (sic) to the gameplay. It's vital to build upwards efficiently, there's no other way to get resources and players will want cluster desired resources in such a way that it makes covering them quick and easy.

The second element is acquiring and placing llama meeples. When placing them, players will not only have to think about completing blue objectives but also trying to not hinder the placement of later tiles.
Chances are that players will have more than one objective for placing llama meeples and they'll want to maximise the placing and there's definitely some synergy going on between objectives. Many purple objectives require 4 of a kind llamas and some blue ones require placing 4 llama meeples on the estate in a certain, thus it's possible to work to both objectives together.

The third mechanic and one I find interesting is placing markers on objectives.
Placing markers later in the game is safer as players will have better idea on what they can achieve, or might already have achieved however, they end up having to put their markers lower value rows. Placing markers earlier though, means players can go for the bigger VP rewards - provided they can complete the objective. When a player puts one of their marker on an objective, they're essentially making a bet that they'll complete the objective.
It's a classic risk and reward mechanic.
It also makes individual objectives pretty apparent to all players, if someone's just put their marker on the collect 4 potato llamas objective card, it's safe to assume what they'll be going for and others can respond as they see appropriate.

Llamaland is a cheerfully colourful game that manages to always provides players with meaningful choices to make and strategies to utilise which I found it an engaging and fun.
0 Comments

2021: The year in Gaming

5/2/2022

0 Comments

 
Since I've managed to acquire a massive backlog of games to blog about, some of the games mentioned here won't have links or blogs yet. They'll be added as and when possible.
​
At the start of 2021, I wondered whether my gaming would pick up in '21? The answer is a resounding yes! The breakdown is below.

Number of different games played: 78.
Of which were new (To me.): 46.
Total number of gaming sessions: 333.

2020's numbers.
Total number of different games played: 29. 
Of which were new (To me.): 13.
Total number of gaming sessions: 49.

Why have the numbers have significantly increased? Put simply, it's due to Board Game Arena: Around May 2021, we reconnected with an old friend who had moved abroad and we started playing games on BGA and playing games digitally is really quick! There's no unpacking and packing, or setup and clean up, there's even no need to tally scores, it's all done automatically. As a result, it's easily possible to play 4 or 5 games in a 3-4 hour window and this includes playing a game several times! Hence the six fold increase in game sessions.

Which games were played the most?
  1. Love Letter: 42 (+1) sessions
  2. The Crew: Mission Deep Sea: 25 sessions.
  3. Codex Naturalis: 16 sessions.
  4. Railroad Ink: 12 sessions.
  5. Forbidden Island, Happy City, Potion Explosion & Martian Dice all came in at 10 sessions.
Love Letter is the clear winner at 43, I've included a +1 because of a session of Love Letter: Batman that we played, which is 95% identical to the original.
Love Letter is a fairly quick game to complete and we probably play 2 or 3 games per session on BGA, so I don't doubt we've played it over a 100 times in 2021; not bad for a game that only consists of 16 cards.
Over 2021, Love Letter became more of a ritual than a game, the calculating, the guessing and double-bluffing, twists of luck and reversal of fortune, along with the banter and bragging made it our mainstay over BGA.

Enough of boring numbers; it's time to now talk about the highly coveted and still world-beating 3 Spellcaster and a Dwarf 2021 game awards!
These are not necessarily new games, but they are games I first encountered in 2021. 

Game of the year: The Crew: Mission Deep Sea.
What a game! It blends analytical, cooperative gameplay and whist-like trick-taking to pack so much longevity and replay value into a 40 card deck, a 96 card task deck and some tokens; it's almost mind boggling.
Even after the final level has been completed it remains re-playable.
We only started playing The Crew: Mission Deep Sea in late October and by the year's end had played 25 sessions.
​It was an instant hit.

Disappointment of the year: New Frontiers.
I find it hard to believe that I'm saying this about a game that shares DNA with the singular Race for the Galaxy, but I found New Frontiers just frustrating to play.
It takes the core concepts of Race for the Galaxy and turns them into a board game, also adding 2 currencies (Money & colonists.) to the mix, this serves to add complexity to the game, yet somehow New Frontiers seems quicker to play and makes for a less satisfactory experience? So quick in fact, that often the game ended before I managed to do anything interesting.
It's not bad because it's based on a great game, just.... disappointing.

Surprise of the year: The Crew: Mission Deep Sea.
I'm going have to give it to The Crew: Mission Deep Sea for the reasons above. 
​
Honourable mention: Railroad Ink.
This roll-and-write, dice-rolling and route-building game is accessible, easy to learn and a pleasure to play. It throws a healthy dose of luck into the game, but because of the way the game plays, this luck affects all players equally, so if a player doesn't score well, they've only got their planning and themselves to blame.
0 Comments

Nidavellir

3/2/2022

0 Comments

 
3rd February 2022

Thursday night gaming at Simon's came to a conclusion with the 2nd and final game of the evening; Nidavellir.

Google tells me that Nidavellir might mean the wane of the moon and is derived from Norse cosmology.

Protect the dwarf kingdom from the ravages of a dragon by taking on the role of a Elvaland councillor and collecting sets of cards... err... gathering the bravest army of dwarves possible by trawling pubs (I kid you not.).
Where's Sneezy when you need him eh? More like boozy!

What's in a game?
  • Player board: There one of these unusually shaped boards for each player.
    At the top of each board is an circular indentation to slot in an 'Elvaland gem'.
    Down the left side are 3 large 'tavern' illustrations for the Laughing Goblin, Dancing Dragon and Shining Horse taverns which are also respectively marked with 1, 2 or 3 flagons and below them are 2 more circular indentations around an illustration of a money pouch
    Finally, each board has 2 columns of numbers that run down the right side, one in green and the other in purple. The green is labelled with a hunter's horn and the purple with a blacksmith's hammer.
  • Tavern sign tiles: These 3 largish tiles each have illustrations identical to the tavern symbols found on player boards.
  • Trade gem tiles: There are also 3 of these and they go with the tavern sign tiles.
  • Elvaland gem tiles: Unsurprisingly these card tiles are styled after gems, they're also number 1-5 and there's a 'special' gem numbered 6.
    Gems are used to break ties during the game.
  • Coins: The coins in Nidavellir are generously sized, circular card tokens and there are a lot of them too! They come in 2 types.
    Starter coins: These bronze coloured coins come in sets of 5 and are numbered on with a 0 and 2-5 (There's no 1!) and the 0 coin also has a special action called coin trade which is explained further below.
    There is 1 set of 5 per player.
    Upgraded coins: These coins are numbered 5-25, they are identically sized to the starter coins. Broadly speaking there are 2 each of the lower half of numbers and 1 each of the higher values.
  • Cards: Nidavellir also features a lot of cards that come in a lot of types.
    Dwarf cards: These form the bulk of the game's cards and also the sets that players will collect. Firstly they are classified in 2 categories; Age 1 and Age 2.
    In the top-right corner, they will have a coloured rank symbol that may also a numeric bravery value (A.K.A VPs) and beneath that will be a icon that indicates the dwarf's class. There are 5 classes/colours: Blacksmith, Explorer, Hunter, Miner and Warrior.
    Hero Cards: These are basically less common and better versions of dwarf cards. They typically come with some benefit or bonus for the owning player.
    Royal offering cards: There are only a few of these cards which confer some sort benefit on the owning player, they are also categorised by Age 1 and Age 2.
    Distinction cards: There are 5 distinction cards which can be earned midgame and provide a boost or benefit to the owning player.
    Royal offering cards: There are Age 1 and Age 2 royal offering cards that can be used to upgrade coins - more on this below.
  • Card holders: The game comes with 4 little plastic card holders that allow the hero and distinction cards to be displayed in a up right more visible position.
  • Royal treasure: This is a fancy name for a cardboard rack that has slots to hold all the upgrade coins. To be fair, it does also serve the purpose of allowing players to see which coins have been taken.
The physical components in Nidavellir are all good. The tokens and tiles are all thick and chunky, I quite like the large sized coins, they feel a bit like poker chips.
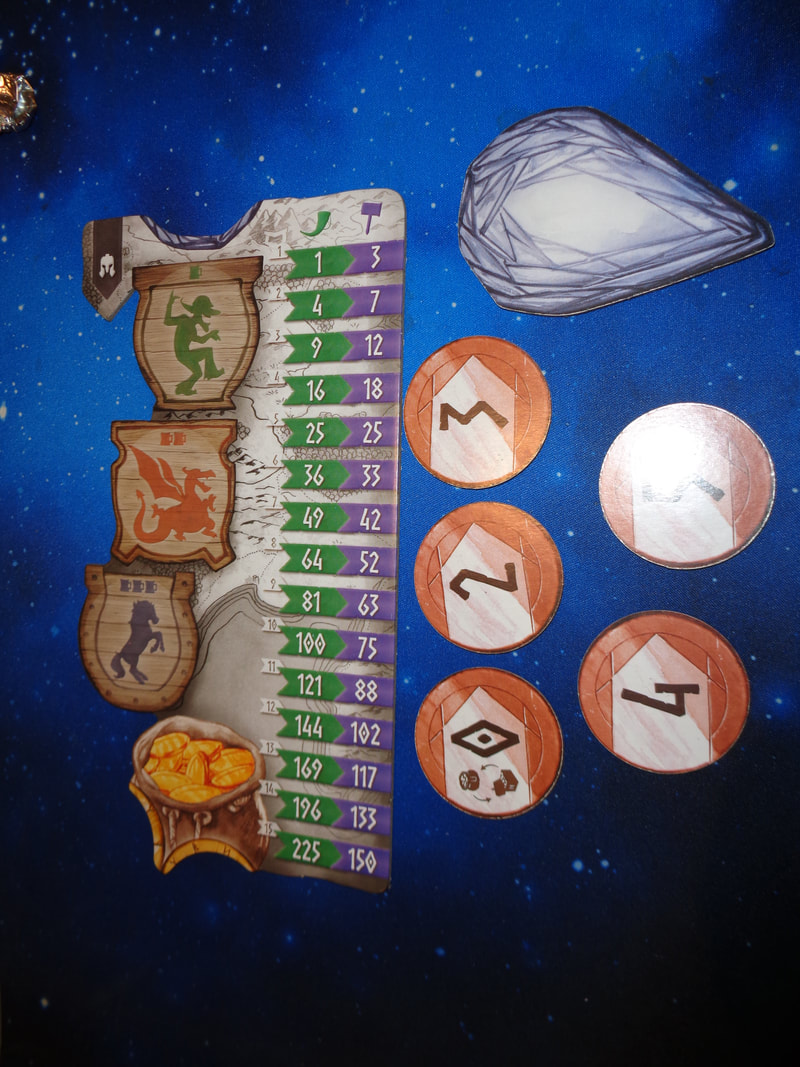
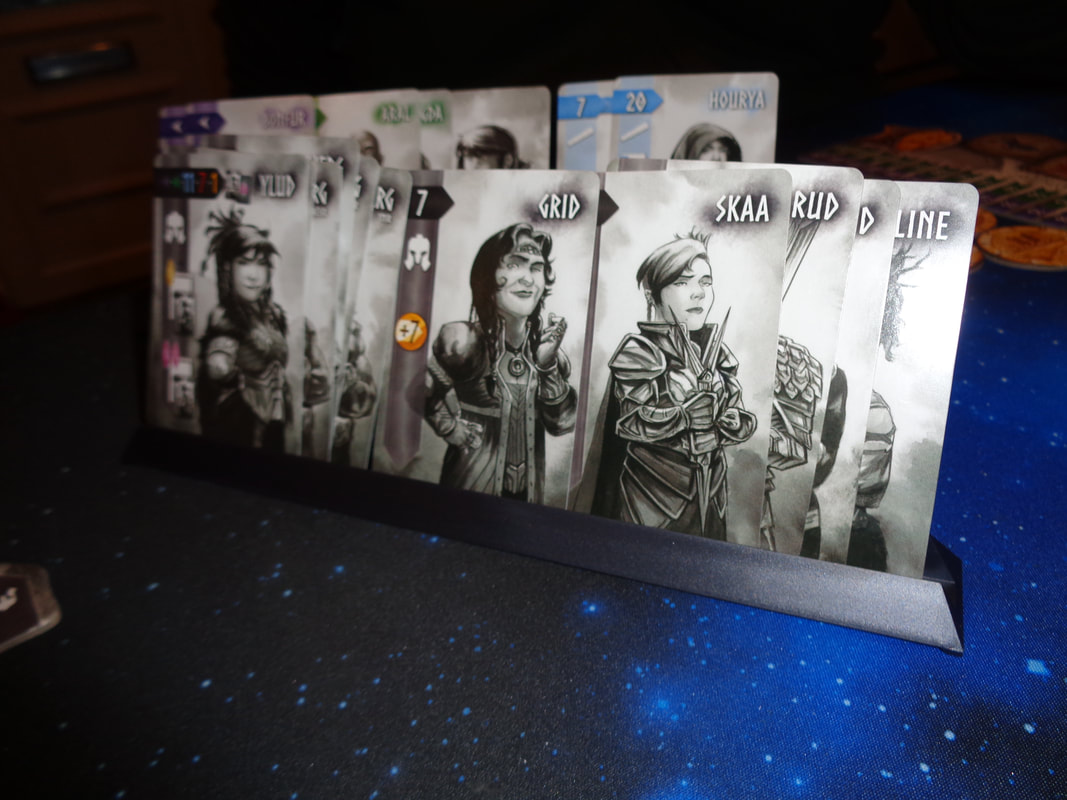
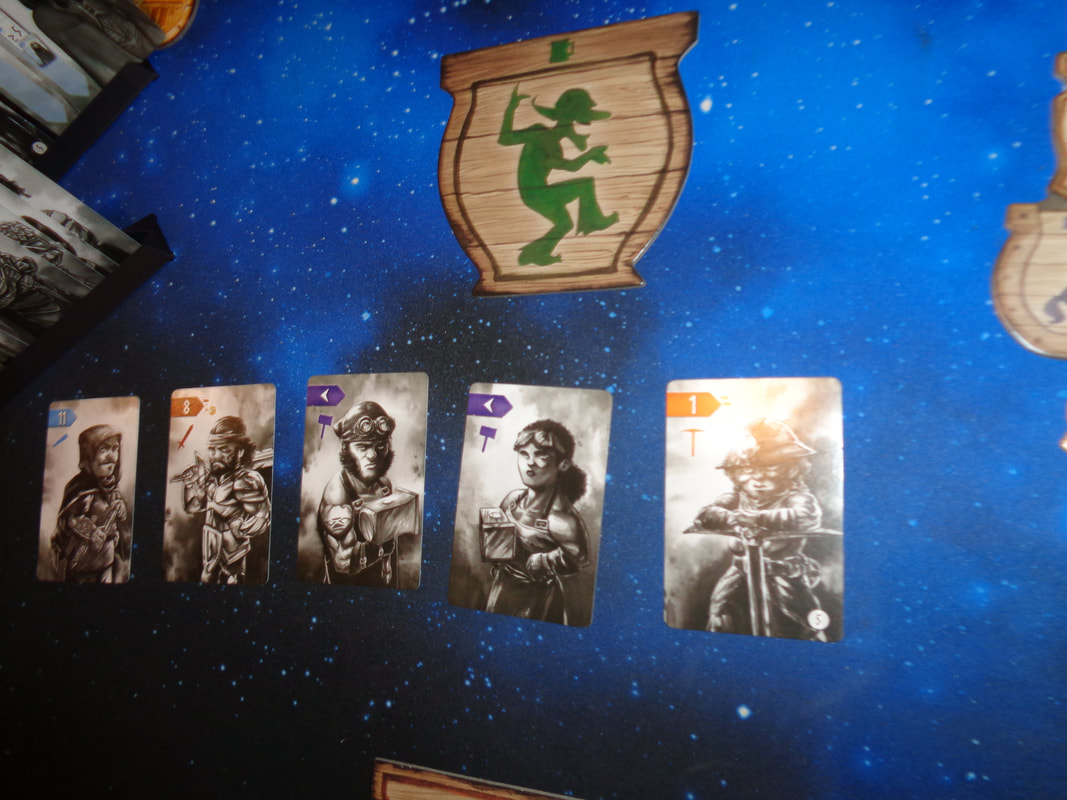
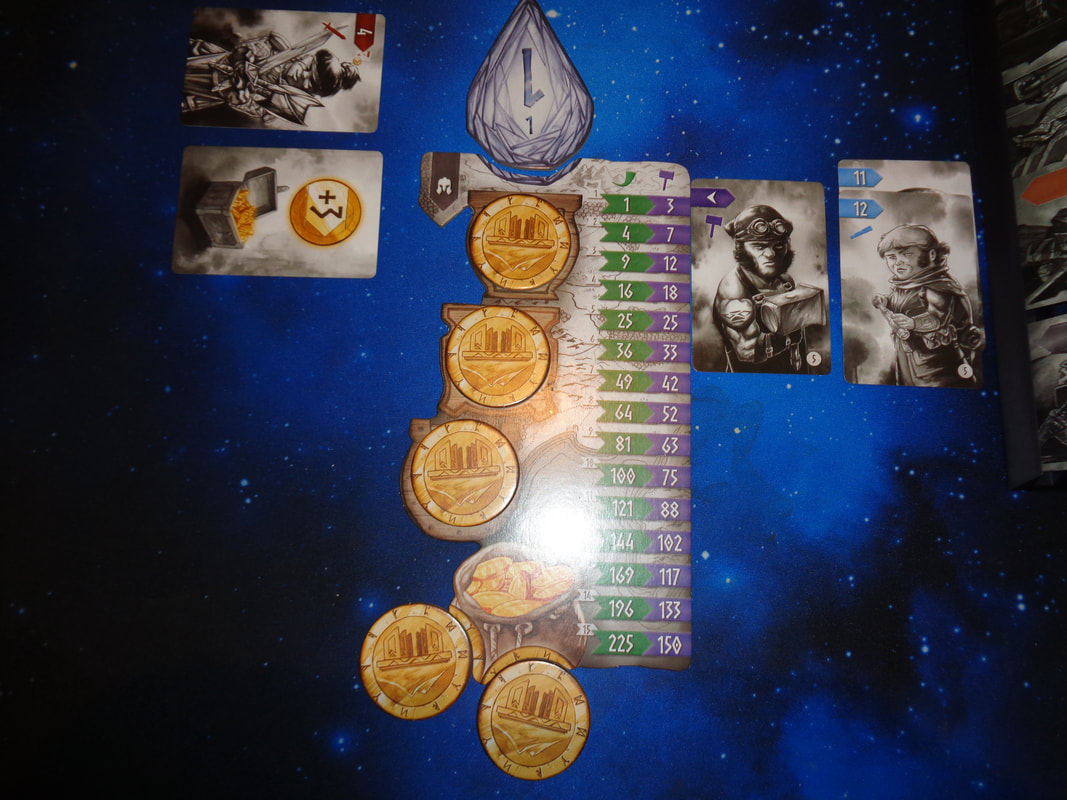
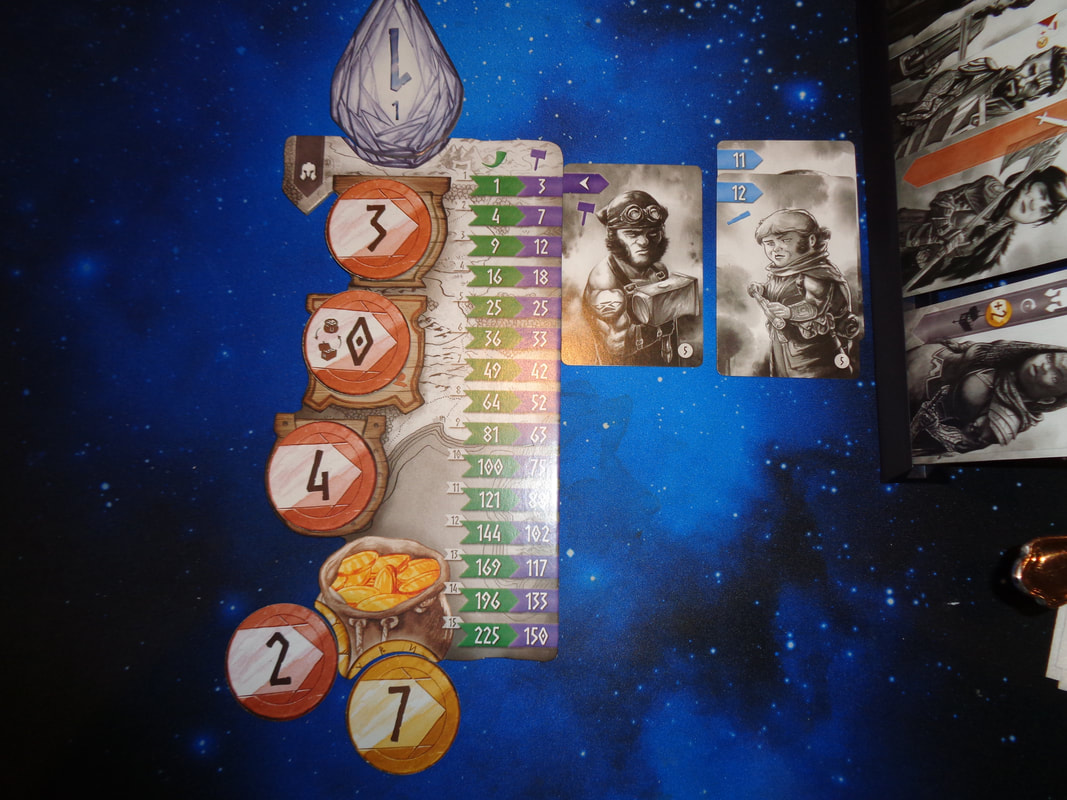
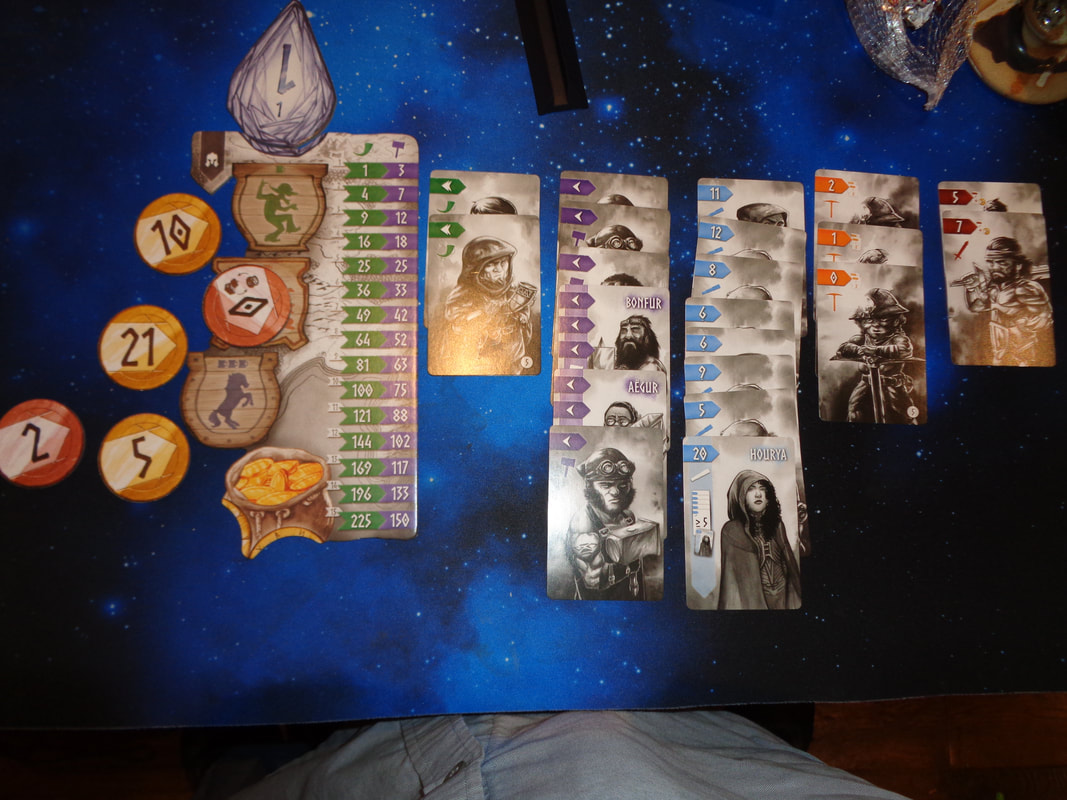
The cards holders and especially the royal treasure are a nice touch too. However, since they can only be easily viewed from one side, it sort of forces the game to have a strange setup where the card holders and treasure rack are along one edge of the playing area instead of in the centre with all the players along the other edges. 

Nidavellir also makes good use of artwork, most of which appears on the cards, they contain well detailed, good quality illustrations of different dwarfish characters painted in a sort of monochromatic watercolour style along with a dash of a single colour. Usually I'd find this kind of art a bit dull, but here it works and gives the game a distinctive look.

Much of the iconography is clear but some of the hero cards have symbols which are quite small and may also need looking up occasionally.

How's it play?
​Setup
  • Royal treasure: Put out the royal treasure rack, filling it with all the associated coins that go on it.
  • Distinction & hero cards: Put out all the distinction cards on 1 card holder and the hero cards on the remaining 3 holders. spread out so that everyone can see the information on the left edge of the cards.
  • Tavern Tiles: Put out the 3 tavern tiles in a vertical line with the goblin tile at the top, dragon tile below it and horse tile at the bottom, matching the order on the player boards.
    Then place a trade gem tile next to each tavern tile.
  • Cards: Shuffle all the Age 1 cards into a face-down deck, do the same with the Age 2 cards.
  • Players: Give each player a player board and 5 starting coins.
  • Elvaland gems: Finally, take the Elvaland gems as determined by player count, shuffle them and deal 1 to each player face-down. Each should then reveal their gem and place it in the indentation at the top of the player board.

On to play
Nidavellir is an auctioning game that has players simultaneously perform series of 3 blind bids during each round. Once bids are revealed, actions are resolved in an order determined by the bids.
  • Populate Taverns: Those dwarves certainly need their liquid lunches.
    From the Age 1 deck draw cards and place them face-up next to each of the 3 taverns, keep adding cards until each tavern has a number of cards equal to the number of players.
  • Blind bids: In each round all players must make 3 blind bids using 3 of their 5 coins.
    To do so, they must put a coin face-down on each of the 3 tavern spots on their player board, this will be their bid for the cards at the corresponding tavern tile. Thus a coin put on the goblin space is what the player is bidding to take a card from the goblin tavern tile.
    Each player's 2 remaining coins are placed in the indentations around the money pouch.
  • Resolve bids: Once all bidding has concluded, all bids are simultaneously revealed.
    Then, starting with the Laughing Goblin tavern, the player who bid the most on that tavern takes the card of their choice, the 2nd highest bidder goes 2nd and so on until all players have taken a card, it means the turn order will change from bid to bid.
    The same is done with the Dancing Dragon and finally the Shining Horse.
    Ties: If 2 or more players bid the same amount, then Elvaland Gems are used to break the tie and the highest value goes first.
    After a tie occurs, the players who tied must swap gems.
    Trade coin: This is 1 of 2 ways to upgrade coins.
    It occurs when the 0 value coin is used in one of the bids, whoever played it must reveal the 2 coins they put in their money pouch.
    The value of the 2 coins is added together, then a coin equalling that value is taken from the royal treasure and replaces the highest valued coin that was placed in the money pouch which, if it's a starter coin, is discarded out of the game. If it was a upgrade coin, it's returned to the royal treasure.
    A player can only ever have 5 coins and unusually for an auctioning game, the players' bids are never discarded.
  • Place card: When a player takes a dwarf or hero card, they must be placed into that player's area in a specific manner.
    All cards of the same class/colour must go into a single vertical column on the right side of the player board. Blacksmith and hunter cards should ideally be on the leftmost cards with their rank symbols lined up with the pertinent symbols on their player board.
    Since there are 5 classes/colours, players will end up with 5 columns of cards.
    Other cards: Cards that do not have a class should be put on the left of the player board.
    ​Rows: When a player puts down a card that creates a row of 5 cards - which is row of one of each class/colour, they immediately take a hero card and add it to their playing area. If that card completes 2nd row, then a 2nd hero card can be taken and so on.
    This ability is triggered any time a row is completed.
  • Next round: Once all taken cards have been resolved, play progresses to the next round, more cards are drawn from the Age 1 deck and placed next to each tavern.
    Players then flip their coins face-down again and begin blind bidding again.
  • Transforming coins: This is the 2nd method to upgrading a coin. Typically this'll be the result of a special ability or royal offering card and will increase the value of a single coin. So a '+4' would turn a '6' into a '10'. Again, a 10 coin taken from the royal treasure would replace the 6.
  • Distinction cards: When the Age 1 cards have been depleted... it's the end of an age! The game then goes to allocating distinction cards.
    There are 5 distinction cards, one for each of the game's classes.
    For every class, all players compare the cards that they have each collected. The player with the majority of cards in that class collects its distinction card and whatever benefits it confers.
    This is done for all classes.
  • Age 2: The game now continues as before, except dealing the Age 2 cards to the 3 taverns

Endgame
Play continues until the Age 2 cards are also depleted, then the game goes to scoring.
Each of the 5 classes has it's own way to score VPs, suffice to say; the more cards a player has in a class, the more that set scores.
Bonus VPs which can come from various sources should then also be added in.
Points are tallied, highest score wins.


Overall
Nidavellir does a good job of mixing set collecting with auctioning.
The set collecting element is  about a mixture of getting the cards you want and sometimes collecting a card just to deny it to another player. Sometimes you'll be completing to build sets and sometimes you'll want to take a card no one else does on the cheap. Pretty standard stuff for set collecting and what you'd expect.

The auction mechanics offer something a little different.
​I have to say I'm not the biggest fan of auctioning games, I don't dislike them and I've enjoyed some of them but they're not really my jam. I've often found bidding decisions could be a little stress inducing, which is probably why some people love them so much! Nidavellir cleverly bypasses some of this with it's auction system because players never lose their bids.
Instead of trying to out bid someone or bluff a bid up, players will be trying to gauge how others will bid.

This requires not only watching what cards others have been collecting and trying to anticipate what they will prioritise in each bid but also paying attention to how they've been upgrading their coins. 
If another player has a coin that's got a higher value, it will never be possible to simply outbid them and it might not be even worth going against them and could be a good time to play that 0 coin and get an upgrade instead. There may also be other times when players want to bid low such as when all the cards in a tavern are not valuable or if they're not valuable to other players.

This means that Nidavellir has 3 avenues of strategy that the player must take into account.
Not only do players have to keep an eye on which dwarf cards to try and acquire, they'll want to think about creating rows as well as columns to earn hero cards which cna prove very useful.
Players will also need use that 0 coin to upgrade coins - which is essentially a form of arms race that can't be ignored - unless a player thinks they can win by being last in every auction!

Nidavellir is a solid game and I can't find anything to fault about it. It isn't particularly complicated but there's definitely enough depth here to keep players engaged and generally give them meaningful decisions to make.
If you like auctioning or set collecting games, it's probably worth a look. If you like auctioning and set collecting games, Nidavellir is definitely worth a look.
0 Comments
<<Previous

    Author

    I play, I paint.
    ​This is where I talk about what I play.

    Archives

    March 2024
    February 2023
    January 2023
    December 2022
    November 2022
    October 2022
    September 2022
    August 2022
    July 2022
    June 2022
    May 2022
    April 2022
    March 2022
    February 2022
    January 2022
    December 2021
    November 2021
    October 2021
    September 2021
    August 2021
    July 2021
    June 2021
    May 2021
    April 2021
    March 2021
    February 2021
    January 2021
    December 2020
    November 2020
    October 2020
    September 2020
    August 2020
    July 2020
    June 2020
    May 2020
    April 2020
    March 2020
    February 2020
    January 2020
    December 2019
    November 2019
    October 2019
    September 2019
    August 2019
    July 2019
    June 2019
    May 2019
    April 2019
    March 2019
    February 2019
    January 2019

    Categories

    All
    2 Player Only
    50 Fathoms
    Abstract
    Annual Quiz
    Area Control
    Asymmetrical Play
    Auctioning
    Black Hack
    Bluffing
    Board Game
    Campaign Play
    Card Game
    Clockwork & Chivalry
    Cooperative
    Cthulhu Hack
    Deck/Bag Builder
    Deduction
    Dice Game
    Drafting
    Engine Builder
    Hand Management
    Hidden Movement
    Hidden Role
    In Darkest Warrens
    Legacy
    Merry Outlaws
    One Vs Many
    Oubliette
    Party Game
    Programming
    Push Your Luck
    Real Time
    Renaissance
    Resource Management
    Roll And Move
    Roll And Write
    Route Builder
    RPG
    Sand Box
    Savage Worlds
    Set Collecting
    Storytelling
    Tableau Builder
    Team Based
    The Month In Gaming
    The Year In Gaming
    Tile Placement
    Trading
    Traitor
    Trick Taking
    Voting
    Wargame
    Wasted Hack
    WFRP
    Wogglecon
    Word Game
    Worker Placement

    RSS Feed

Powered by Create your own unique website with customizable templates.
  • Home
  • Special Effect
    • Special Effect
    • The Final Return of The Indiana Jones Charity Globe Trot
    • The Warlock of Firetop Mountain Challenge
    • Return of The Indiana Jones Charity Globe Trot
    • Bard's Tale Challenge
    • Fighting Fantasy Challenge
    • The Indiana Jones Charity Globe Trot
    • Mirkwood Charity Walk
    • Middle-earth Charity Walk
    • Dungeon Daze
  • RPGs
    • The One Ring
    • The Evils of Illmire
    • Beach Patrol
    • The Surrendered Lands
  • Game Blogs
    • RPG Blog
    • Gaming Blog
  • Painting Blog
  • Contact