|
20th February. Matt bought a copy of 2-player game Fog of Love round and we had a go. First impressions: High production values, looks nice, quality components. The game has a long set-up - particularly for a 2-player game. It has a specific tutorial set up for the first play. Fog of Love is a game about a relationship between 2 players, how it starts and how it possibly ends. The game is a strange mix of sort of 'area-control and the old TV show 'Mr & Mrs' and is a bit tricky to explain. So when you play this game, you're meant to narrate your actions in the game as a story. We did it a little bit, but not much. Before I talk about how the game is played, I think I need to explain what you need to do to win. To win, a player must have the highest happiness. There appear to be 4 ways to gain happiness.
Traits Your fictional relationship with the other player is defined through 6 'personality dimensions', these are such things a discipline, extrovert etc, each personality dimension has a plus and a negative. At the start of the game you will pick some traits, traits are hidden from the other player and represent most of your goals for the game. Achieving these goals helps you win the game. Usually the goal of a trait will be to acquire a certain score in a certain personality dimension by the end of the game. This could be something like have +4 in Extrovert or -3 in Sensitivity. The twist here is that the score is shared between both players. Thus if you put a point in the positive score of a personality dimension and the other player puts a point in the negative score, the total score for that personality dimension will be 0. Getting the scores you want in specific personality dimensions appears to be the key to victory. At the start of the game you pick a profession and 3 traits, after this you pick some features which you give to the other player. Features like tall, or slow talker etc. This defines the other players character., it will also change their scores in the the personality dimensions. Both players are then dealt a hand of 'scene' cards. These represent events that couples might have in their relationship., such as going on holiday, buying gifts. There's loads of them and they come in 3 different flavours. Sweet, serious and drama. Then play begins. 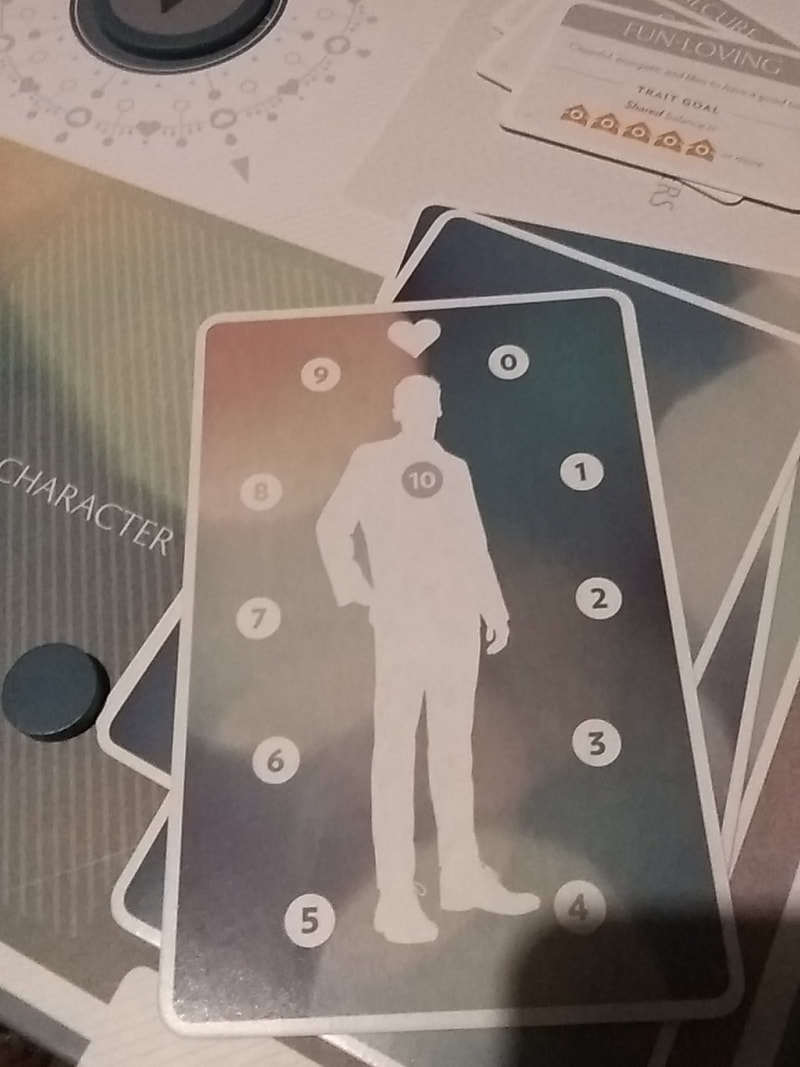 Questions & Answers
Alternating between the players, each one plays a scene card. A scene card consists of a description of an event and up to 4 different responses that can be given. This is done by reading the card out to the other player. Cards basically come in 2 types, a question that the other player must answer or a question that both players must answer. For example: Question: Holiday in Rome (both players must answer). There might be 4 answers. A: Yes for a month. B: Yes for a fortnight C: Yes for week. D: No. Each answer will give you points in a personality dimension. Different types of answer will give you points in different areas. So saying 'No' might increase your score in 'Discipline', saying 'Yes' might increase your score in 'Extroversion'. If it's a question both players must answer, then they must do so in secret (using some nice chunky poker chips marked A-D). Then answered are compared. Generally, if the players answers match, they tend to get some bonus for it. When answering these questions, you will know what you get if you have to provide an answer as well. But when the question is posed by the other player, you have to try and guess which answer will give you points in the personality dimension that you want to increase (as dictated by your traits). Play proceeds like this until you have completed all 3 'chapters' of the game. Each chapter has a number of scene cards you need to play. Secrets You can also get 'Secret' cards that are hidden until revealed, either during normal play or as part of the endgame. It will give different rewards, dependant on when it is revealed. Destiny Finally you have 'Destiny' cards. Both players keep at least 2 hidden destiny cards (but not part of their hand) that they must choose one to play during the endgame. If the criteria on the destiny card is met, then extra points are scored. So finally, all relevant points are applied to happiness and the player with the highest happiness, wins! Fog of Love is an interesting idea and ok to play. But I'm not sure on it's depth or longevity. There doesn't appear to be any strategy other than trying to use questions (or answer questions) that match your traits as closely as possible. The destiny cards seem very hard to complete and thus irrelevant. You appear to start the game with the same 4 cards every time, I don't know if you can pick up more during play. There are apparently other chapters you can play that alter the types of scene cards you can play in different chapters. But I don't know if this add enough to the game. This game requires at least another play before I settle on a opinion on it.
0 Comments
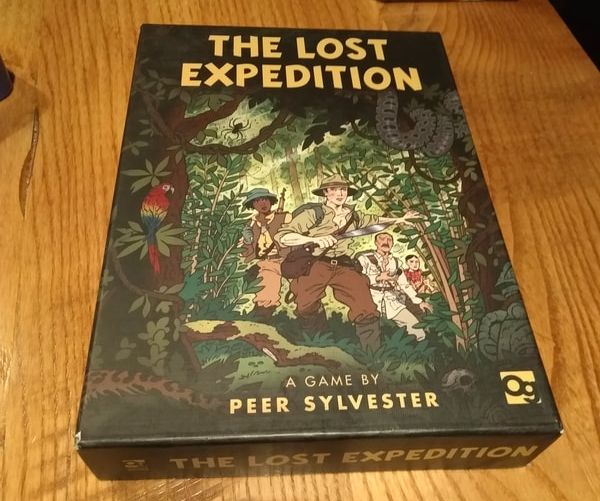
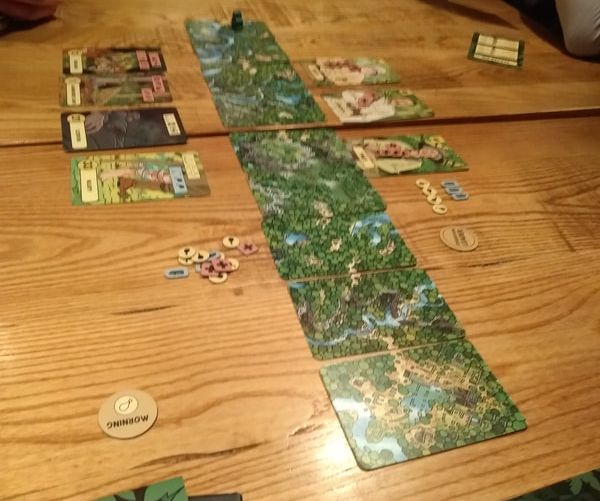
19th February. Game Night at The Sovereigns. The first time I saw 'The Lost Expedition' I though 'Wow - a Tintin game'! It looks like a Tintin game. It's not a Tintin game, but it's still a good game. Inspired by actual real reality! The Lost Expedition tells the tale of 3 intrepid explorers searching for 'The Lost City of Z', which as the name hints... is lost deep in somewhere nasty, somewhere you (and I'm assuming you're reasonably sane) would never want to go. Additionally, each of the 3 explorers has an area of expertise, these are; Jungle, Navigation and camping. more on expertise later. The Lost Expedition is a co-operative card game for up to 5 players. At the game start, a series of 9 'expedition' cards at laid out in order from left to right. A meeple representing the actual expedition is placed on card 1. The game is collectively won by getting the meeple on to the last card. Each expedition member is given 4 health tokens and the expedition is also communally granted some food and ammo tokens. The basics of game play are: Each player is dealt 4 cards, these are 'adventure' cards. Adventure is the game's way to saying 'really horrible'. Each turn is broken up into a day phase and a night phase. During each phase, every player will (one card at a time) play 2 adventure cards from their hand. These form the 'path' that the expedition must follow for that phase. However, the order in which the adventure cards become the path differs between night and day.
So now we know that adventure cards have encounters on them, but what are encounters and how do we deal with them? Dealing with an encounter usually involves spending some sort of resource, you may or may not get something in return for spending it. For example; you may encounter a dangerous wild animal that gives you 2 red options (you must pick 1 of the available choices). These options might be:
The game is full of these choices where you have to look ahead and figure out what is the best approach. A lot of the time dealing with an encounter is a matter of diminishing returns (with regards to your resources). Which is what makes your decisions tough and therefore important, which is what makes the game good. Spending resources; below is a list of the resources you will need to spend over the game:
So when you complete a path, discard all adventures cards and switch from day to night. When you complete a night phase, you spend a food and change back to day and deal new adventure cards to all players. Repeat until you reach the end of the game. You lose if:
And there you have it. The lost expedition can also be played solo and competitively in 2 teams, neither of which I've tried. But in co-operative play it's a good game, where every decision can matter and your constantly having to make hard choices. God alone knows how hard it was for real explorers. I'm glad that The Lost Expedition is as close to it as I'll ever need to get. One last nod goes to Garen Ewing's outstanding illustrations. They lend the game a whole adventure story feel, which I really liked. Port Royal - 022nd game of Port Royal.
You can find my original blog here. 16th February.... I think?
Our play-through of Oubliette continues with Matakishi as GM. In the first session we were mostly just ghosts. But things have got better.... sort of! We're actually corporeal now, yay! But we're sorely lacking in equipment, weapon, light sources and food. Most of all, were sorely lacking in any idea of where we are or what we should be doing. We explore the region and frequently encountered warms of nasty crawling or flying things which do nothing other to make trouble for the party. - They can just sod off! I spent most of these altercations as a observer, without a decent weapon I had nothing to contribute other than being a (rather small it has to be said) HP sponge. During our fumbling we encountered weird rock columns, adorned with talking heads. Typically, Remuz was entranced by these heads and chatted with them a lot. He even took one with him. We also found a horrible looking fly-hive, after driving off yet another swarm, we made a hasty exit. We also discovered a river that runs through the centre of the area and discover 3 bridges. The first bridge we encountered led to a dead end with some sea shells and suspicious puddles of water. I suggested we leave, worried the place might flood. We took some shells, it turns out that their magical. The second bridge looked rickety and rotten. We decided against trying to cross it and moved on. The third and final bridge was guarded by a troll. He seemed a friendly sort and was happy to chat. But in no uncertain terms, he made it clear that there was no way he would allow us to pass. The session ended with us facing a choice. Which bridge to try and cross. 12th February Gaming night at The Sovereigns in Woking Bohanza is a card game about growing beans and trading beans. Mostly it's about trading beans. Bohanza is a 'set-collecting' game with a great little wrinkle. Unusually, it supports up to 7 players and on this occasion we got up to 7! I've never played it with that many people - excellent! Gameplay is reasonably simple. First, there is one important rule everyone must remember. At the start of the game, each player is dealt a hand of cards.
This rule is the crux of the game, it's what drives the entire game. Here's why.
So you need to get rid of the wrong cards in your card before you have to play them. How do you do that? You trade them away of course. Once the active player has played their mandatory card, they can choose to play another card from their hand. After this, they draw 2 cards from the deck and places in them in front them in the play area. Now trading begins.  At this point, the active player can trade any card from their hand, or any of the 2 face up cards with any other player. The active player can also 'donate' cards to other players (although the other player can reject the offer). Curiously other players can try to donate card to the active player. Trades can only occur with the active player. Once trading has concluded, all traded cards must be immediately planted. If the active player still as any of the 2 face up cards they just drew. And that's how trading is done. The only other thing to explain is selling crops. Players can sell a crop at pretty much any time. This will earn them up to 4 gold, depending on how many cards they have collected for that set. Different beans require different amounts of cards to earn gold. The player then keeps a number of cards from the set as their gold. The remaining cards are placed into the discard pile. This is worthy of noting, because not all the cards from a set is put back into the set. When the draw deck is depleted, the discard pile is shuffled and becomes the draw deck. This is done twice (thus the deck played through a total of 3 times). Once the deck is depleted a 3rd time, the game ends. The player with the most gold, wins. There you have it. Bohanza is good because it forces players to negotiate and trade. Most games that include trading have it as a option or a choice. But in Bohanza, choosing to not trade will probably have dire consequences. Deep Sea AdventuresIn Deep Sea Adventure each player is a treasure-hunting diver who is looking to score big. The game is played over 3 rounds and the player with the most valuable treasures after the end of the 3rd round is the winner. Deep Sea Adventure packs a whole lot of push-your-luck fun into a little box. Whilst this is a competitive game, it sneaks a co-operative little mechanic into the rules which in turn players can try to twist to their own advantage. The game begins with all the players' meeples in a submarine. Beneath the sub is a winding trail of face down markers. Each marker represents a treasure that can be collected by a diver. The value of the treasures also vary, but the deeper you dive, more valuable the treasure. The more sides a marker has, the more potential value it has. 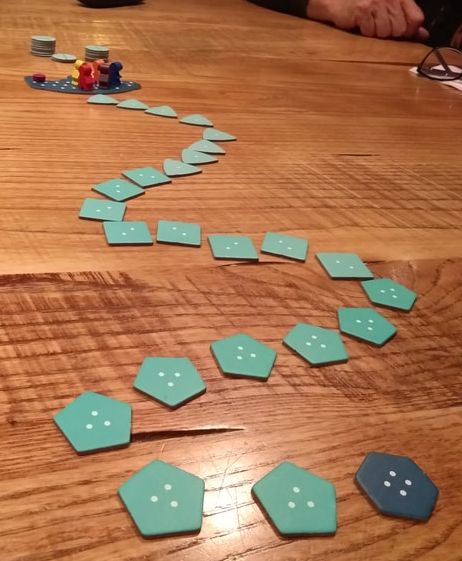 Play goes like this:
And that's it, that's it for the rules. Ok, there's a bit more.
And that really is it for the rules. Deep Sea Adventure is all about pushing you luck. Pushing your luck in picking up treasures (so tempting to pick up one extra treasure, just one little treasure - it won't make much of a difference, right). Pushing your luck in movement. The hop mechanic can prove helpful or can push you way too deep into the depths. Finally, pushing your luck with the communal oxygen supply. This is the game's best mechanic. This is what turns it from a 'OK' game into a 'good' game. The communal oxygen means that you have watch what the other players are picking up. It forces you to try and think a whole round ahead. When playing Deep Sea Adventure, there comes a point when oxygen starts to matter. For a couple of turns, no one picks up treasure. Everyone wants something a little better and is willing to dive a little deeper to get it. But then, it all changes, as treasures are picked up, oxygen is used up. The change may seem quite subtle, but can actually be quite dramatic. No oxygen being used, to suddenly 4-5 every round. Being able to spot and react to this change is key to winning in my opinion. In a six player game, at some point every player will have picked up at least one treasure, that means six points of oxygen will be used up before your next turn. That's about a quarter of all the available oxygen. Some players will try and load themselves with treasures to burn up oxygen as they return to the sub, (this is in itself a risky strategy as it also slows movement - several times I've seen loaded down players one or 2 spaces away from the sub and not move at all until the oxygen runs out). All of this means that you can never be complacent about the oxygen supply and this Deep Sea Adventure is good fun and a good game. 9th February The 2nd gaming session of the weekend was in the evening around Matakishi's place. We started the evening with Port Royal, a push-your-luck card game with naval/pirate theme. In this game, players take the roles of profit seeking merchants who must recruit crews, fulfill expeditions, deal with taxes and see off pirates. I have to say this has consistently been a popular favourite game with nearly everybody of I've played it with. Port Royal is one of the best £12 that several of us have spent. Port Royal is won by scoring 12 victory points. The first thing to mention about Port Royal is how money works. Port Royal is a card game with a deck of 120 cards. The cards also count as currency in the game (kept in pile face down next to you). This means that it is very hard to to card count, it also makes the game unpredictable. As it is impossible to guarantee or predict what cards will appear during play. As players accumulate and spend money, face down cards are constantly drawn from the draw pile and replaced into the discard pile. It's a great little mechanic for stopping the game getting too stale. Each turn is broken up into 2 phases, Discover and Trade & Hire. In the discover phase, the active player draws cards and places them face up in the central playing area (called The Harbour Display). The active player can continue drawing cards as long as they want to or until they go bust. What constitutes going bust? I'm glad you asked, that's where the push your luck mechanic comes in. Populating the deck are ships, they come in 5 different colours. If you draw 2 ships of the same colour you go bust. Now you might ask, why would you continue drawing cards after the 1st ship has appeared. The answer is; several reasons.
Once the active player decides to stop drawing cards, play moves on to the next phase; Trade & Hire. Here the active may take a single action (unless they've acquired additional actions). The player has the choice of 2 types of action.
Once the active player has finished their trading & hiring, other players may now take trading and hiring actions (in the active player's turn). What's so good about this? Well, when they trade in a ship, you get a cut of the earnings, similarly if other players buy a card, they have to play you a little extra on top. So you see, drawing extra cards has benefits. Quite often you won't have the money to buy a card and trade a ship in the same turn and must choose one or the other. This frequently gives you a hard choice to make. Having extra actions makes those choices easier. Additionally, having a good selection of cards on display allows other players to buy them - which earns you more gold. First player to buy cards with a total of 12 victory points, wins. There are other events that occur during the Discover phase, such as expeditions and taxes (taxes are a good way to incentivize players to not hoard their gold - another neat idea in this game). But that is the basics of the game. Nearly everyone I play this game with, ends up liking it. Plus it's cheap, has a low set up time and is small and portable as well as having buckets of replayability. The only minor criticism I have of the game is that you frequently have to shuffle the discard pile into the draw pile - that's it. A really good game in my opinion. Machi KoroThe 2nd game of the night was Machi Koro, another game we play a lot and is popular with everyone.
Currently there is the base game and 2 expansions. 'The Harbour' and 'Millionaire's Row'. Generally we only play with the first expansion. The base game is average, if I'm being honest. But The Harbour expansion makes it a much, much better game. None of us have been sold on the Millionaire's Row expansion and were not certain it adds enough to the game to warrant its inclusion. Anyway enough of that and on to describing the game. In Machi Koro, each player is the mayor of a blossoming city on the cusp of rapid expansion. The game is won by being the first player to build all of their city's landmarks. Landmarks and city establishments are represented by cards. The first thing to do is to create a marketplace, this involves turning over 10 different city cards and placing them in a central area. If you draw a double of a card you simply stack on the other one. You keep doing this until you have ten different cards available. Each player then takes a set of landmark cards and put them in their own playing area face down. Each player then receives their starting cards, a wheat field and a bakery. These too are placed in their own playing area, but face up. Finally each player takes 3 coins from the bank. Next I need to explain the anatomy of the cards before writing more about the rules. Each city card contains 3 pieces of vital information:
Right - so this is how play goes. First the active player rolls the die or dice, then cards may be become activated according to the rules above. Once this has been dealt with, the player has the choice of buying a card from the marketplace or building a landmark in a turn (or passing). Both of which cost coins. Acquiring establishments increases the chances to earn more money, the more cards with different activation numbers the more chance that a card of some sort will be activated. When a landmark is built, it grants the player a special ability. First player to build all their landmarks, wins! And that's it for the basic rules. What I like about this game, is that there is no single winning strategy (Other than the Tuna Boats - we all know about the Tuna Boats!!!). The cards that appear in the marketplace are random and you have to adapt to what it available to buy. It keeps the game fresh. Machi Koro blends quick set up and play-time with replay-value and enough strategy and depth to keep us interested. This is a game that we've played a lot, probably more than any other single game in the last few years. 9th February.
Session 04 of 50 Fathoms begins us in 'Shark Bay'. We plan on heading to 'Bluth's Crown and on the last day in port we notice some people watching 'The Delilah'. Our trip to Bluth's Crown is quick and uneventful. As we approach the area we spot 4 large rocks rising above the waves, at the far end of the beach we also see 4 towers surrounded by smaller buildings. Win informed us that the 4 rocks and the 4 towers each had a elemental rune carved into it. Furthermore, our skiff behaved quite strangely when we drew close to the 4 rocks. We docked and were approached by some elemental wizards. They explained that there elemental towers were damaged and needed repairing. We smelt a profit and agreed to help; our reward is a 1,000 pieces of eight. This will involve collecting elemental objects from their respective areas. We must travel to a volcano to get fire, the deepest sea to get water etc. We begin preparations for our journey and some of go hunting. During this time another ship arrives at the dock. The captain seems to know the people here. He introduces himself as Capitan Domingo and asks us to help rescue his brother who is a prisoner of the Kieran Empire. We smell a profit and agree to help. In exchange for our help, Domingo gives us his sword 'Spada del Vampiro'! This second quest is quite convenient as it take us into the Kieran Empire; where one of the elements awaits us and past Torath-Ka where another awaits us. We depart in a little convoy with the other ship. As we sail along we spot another ship that appears to be going on the same heading as us. Or perhaps it's following us. Soon Capitan Domingo and us go our separate ways. He will sail around the north of Torath-Ka and we will go round the south (in a longer journey) to collect our elemental stuff. we agree to meet in a town called 'Victoria'. We make very good time around the south of Torath-Ka and notice that the pursing ship is no longer in sight. Perhaps we have outdistanced it, or perhaps it follows the capitan. Making our way along the southern coastline of Torath-Ka we eventually spy a unpopulated bay close to where we need to go inland. As we prepare to disembark, since it is a undiscovered place: Win decides to name is Bubbly Bay! 8th February.
The Enemy Within continues. The PC arrived at Middenheim, even though they are wanted for murder - a year or more has passed and they feel safe. A look for their contact. At Middenheim they receive instructions telling them to go to Altdorf. They don't particularly like following orders, but a combination of blackmail and cash keeps them compliant! Stick and carrot! Anyway, now they are to travel to Altdorf, where they are also wanted for murder! Well they were, but the real murderer was captured long ago. The PCs don't know this and have done their best to avoid the city as much as they can ever since. The PCs began their 12 day journey south. They encounter other travellers and news of chaos attacks closeby and warring principalities in the Empire. The session ends with the PCs 4 days from Altdorf. |
AuthorI play, I paint. Archives
March 2024
Categories
All
|
 RSS Feed
