|
26th July 2022 It's Tuesday! That means it's time to meet up with the Woking Board Gaming Club at the The Sovereigns. Time to steal the idol... and escape, Indiana Jones has nothing on this real-time, cooperative dice game, well at least until those crappy rolls inevitably turn up! What's in a game?
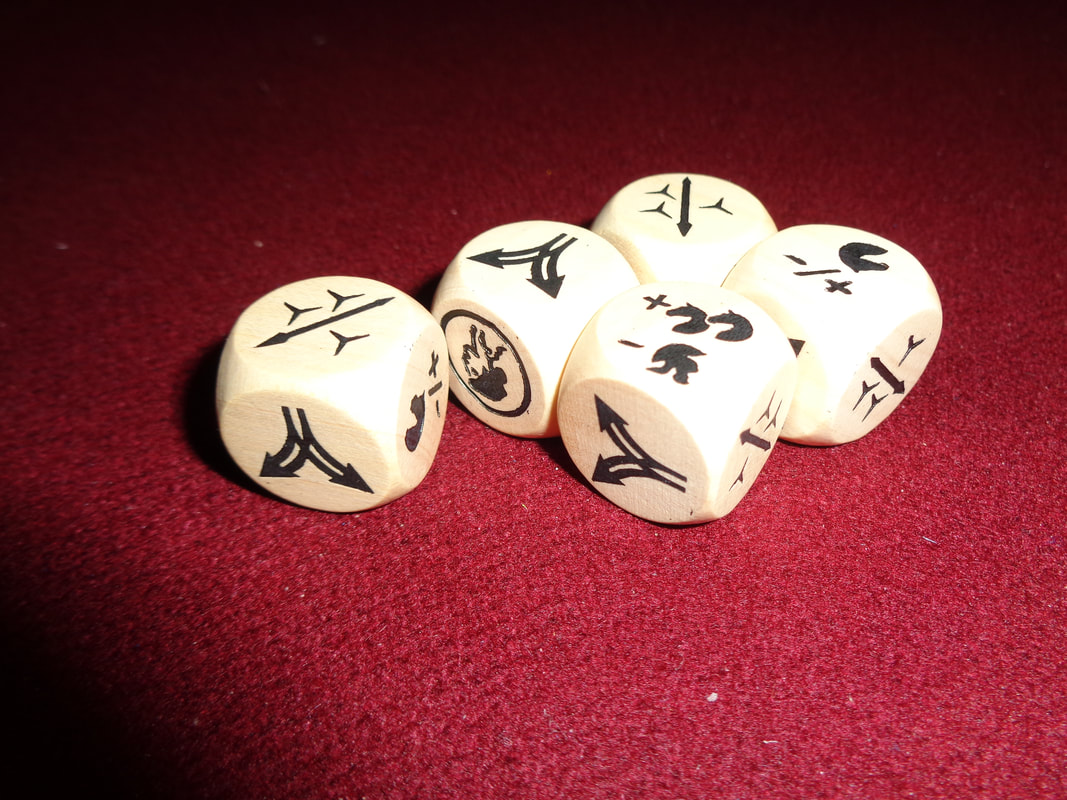
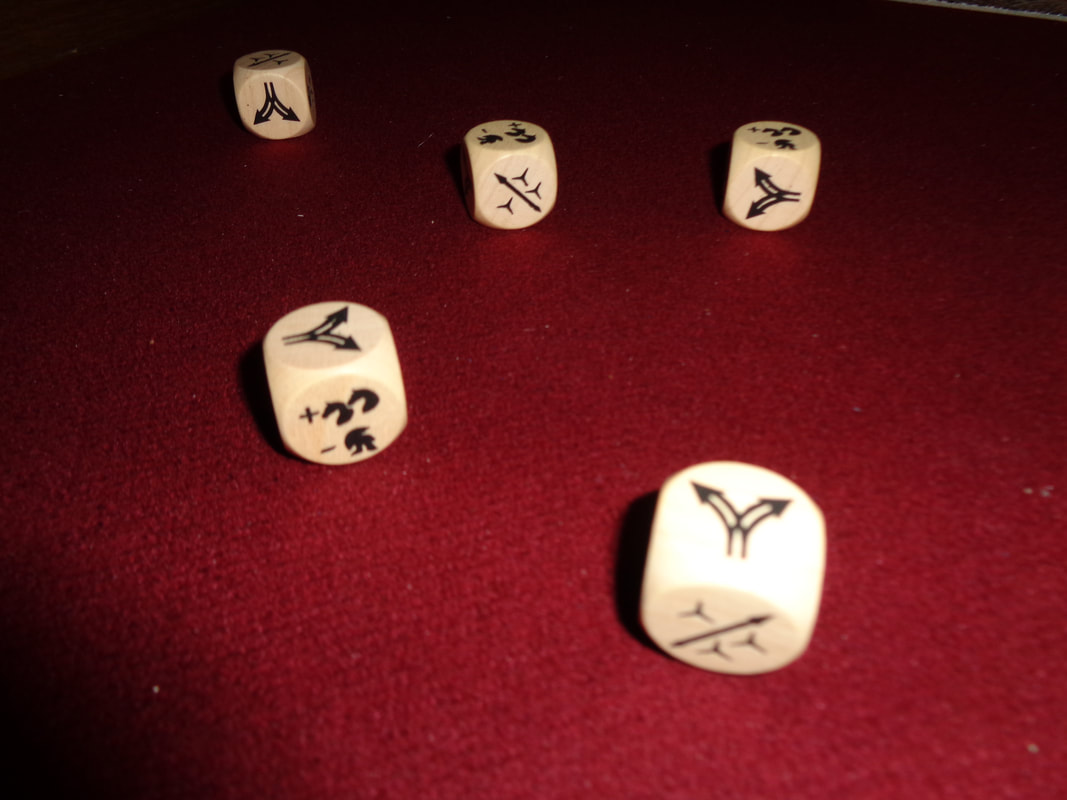
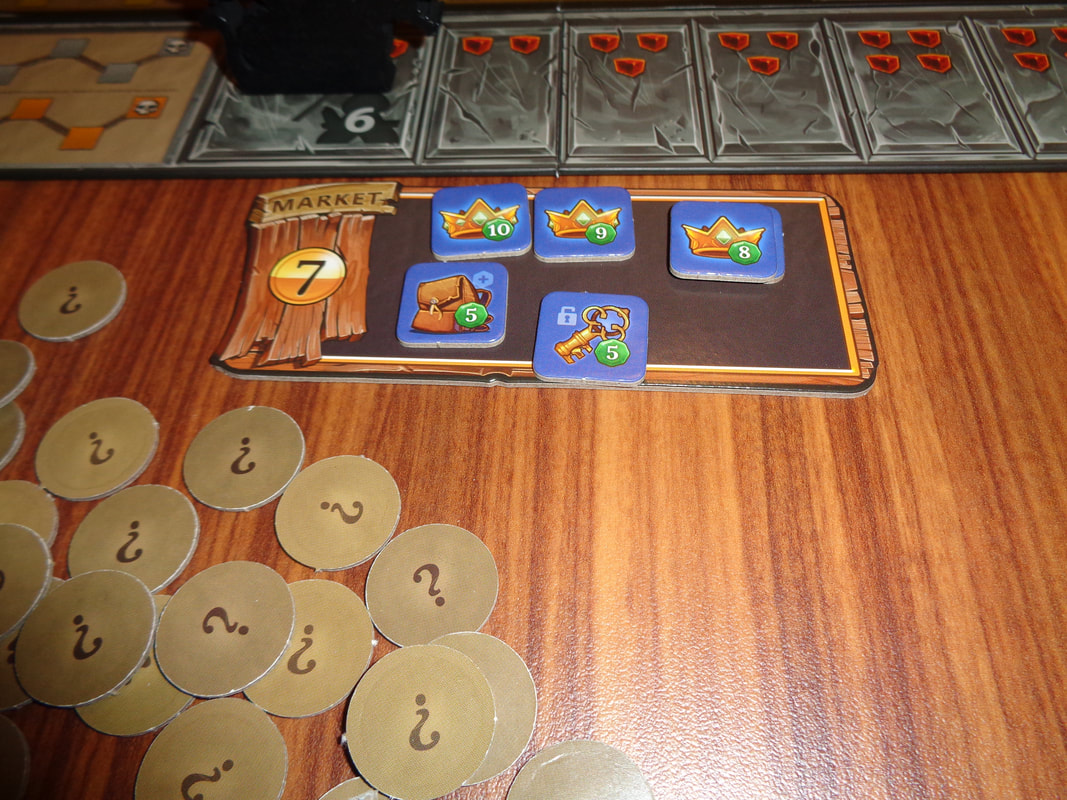
Escape: The Curse of the Temple has good quality components. The tiles all feel suitably thick and sturdy. The acrylic gem tokens are kind you see in a lot of games which use them to depict gems, they are a sparkly, pleasing shade of green though. The bespoke dice and meeples are wooden which is always a nice touch. There's not much art to speak of, the tiles show flagstones and that's about it. It's clear artwork that does not get in the way. About half a dozen icons are used throughout the game, luckily they most relate to the dice and there's never a need to refer to the rules - which is a good thing since this is a real time game with a countdown. How's it play? Setup
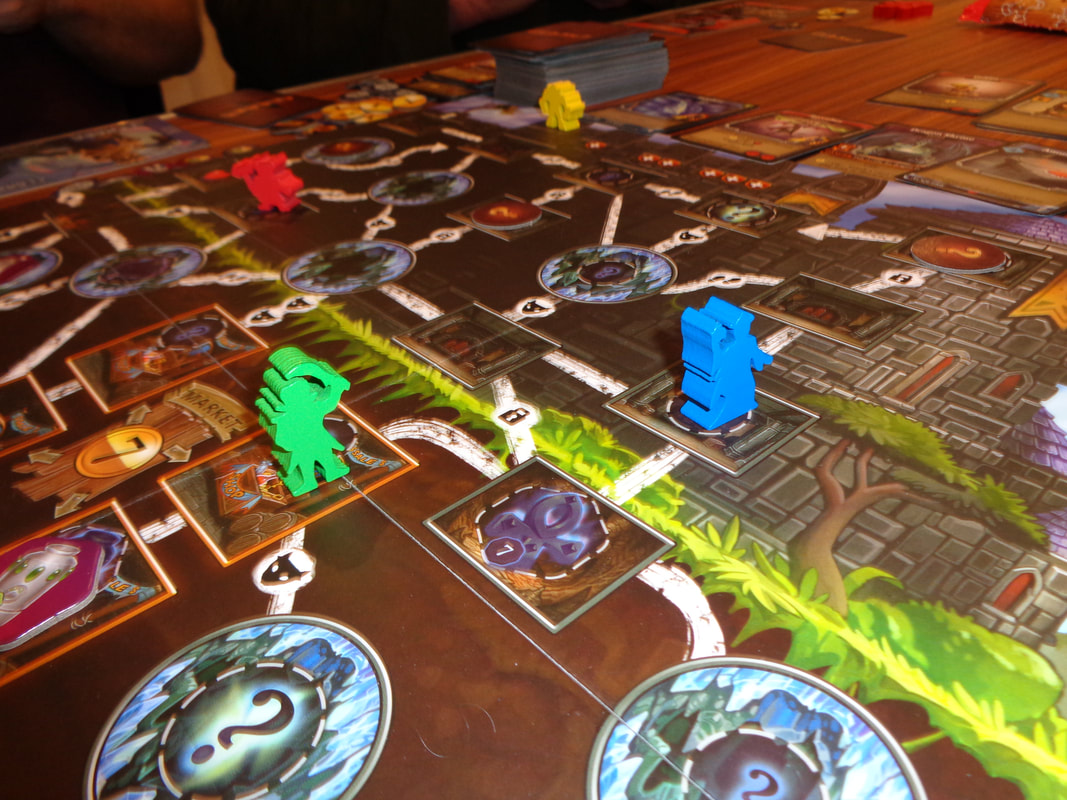
On to play In Escape: The Curse of the Temple players are collectively attempting to explore a lost temple to find the exit and escape before becoming trapped. It's not so simple though; not only must they find the exit, they'll also need to activate the gem tiles and spaces to make their escape possible. The game is played over 3 rounds and does not use a typical turn structure. Instead, turns are actually synchronous, in other words, players perform all their actions at the same time and in real time! This involves all players rolling their dice and resolving their actions simultaneously. How is this all done? Read on.
Endgame When the 3rd and final round begins, all players must get to the exit tile and successfully perform the escape action.
The soundtrack has a total countdown across all 3 rounds of 10 minutes. If one or more players are still in the temple when the countdown has finished, then they collectively lose the game. If all the players have escaped before the time runs out, then the players collectively win! Overall
I'm going to start by saying that I'm a bit ambivalent towards real time games. I've played some good ones and can see how they have their place in gaming but for me but broadly speaking, it's not why I like and play board games. I like to think out my decisions and choices at least a little bit. Add to the mix a push-your-luck dice mechanic and you've a game of a lot of quick frantic rolling. You really don't want to roll those dice off the table! Having said all of this, I think Escape: The Curse of the Temple is a solid game and there's a lot to like about it. Firstly, rules and theme mesh together well. Chucking dice as quickly as you can to escape feels good. The synchronous dice rolling is a clever little system. Generally real time games are always trying to impress upon players that they're up against the clock, this can be a little jarring in a game where players are having to wait for another player's time to run our and get their turn. By having synchronous actions, it heightens the sense of urgency as everyone is in it together. Being able to provide assistance another player on the same tile is equally clever. It's an elegant mechanic that also feels organic and makes sense. This means it would seem like a good idea to have players explore the temple as a group, it would make shifting gems and unlocking dice easier... But there's a couple of rules that throws a spanner into that strategy. Firstly; exploring as group can slow down that exploration. Players can't escape if they don't shift enough gems or find draw exit tunnel from the stack. Secondly; players will want to avoid creating single long corridors, they will need to return to the starting tile twice and the further away they are from it, the further it is to get back. This will force players to split up or go in pairs or stick close by if they have the option, at least for the first 2 rounds. This can change contextually when certain tile are revealed or have to be put in play in a certain way or a player get too many locked dice and so on. Players will have to think quickly and decisively as well as adapt to emergent events. Escape: The Curse of the Temple obviously has a quick playtime - 10 minutes! That feels a little strange because the setup and explanation time almost feels longer than a single game. It's reasonably easy to learn, I can't imagine novice gamers struggling to learn the concepts here. It also not a game to be taken too seriously and leans heavily on luck which is not unusual for cooperative games. Although, even accepting this, a bad run of rolls can sour the experience. But treat Escape: The Curse of the Temple as a cooperative, silly, fun, filler of a game and it will be a enjoyable time. So long as your luck is better than mine... much better!
0 Comments
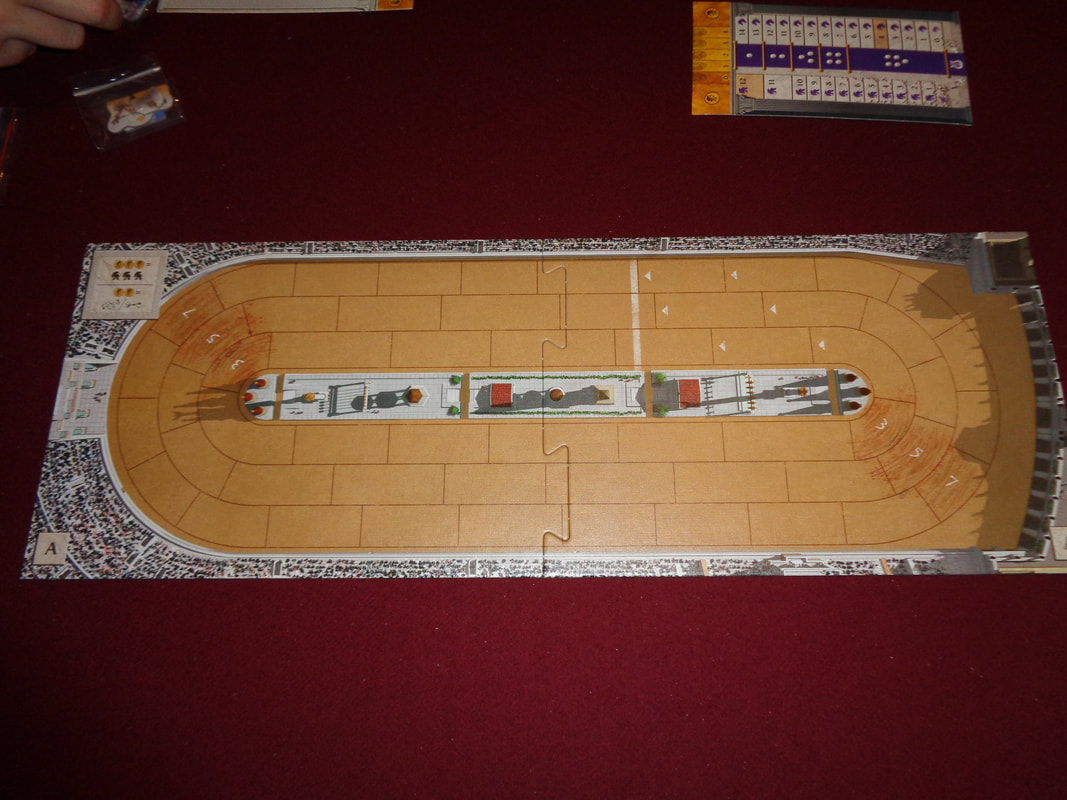
9th June 2022 Gaming night Aldershot continues with Chariot Race. As you might have guessed from the title, this game about managing railway companies in the 19th Century on a hex-based map of North America. NO WAIT, THAT'S NOT RIGHT! Chariot Race is about chariot racing in ancient Rome. That name is sure is confusing! What's in a game?
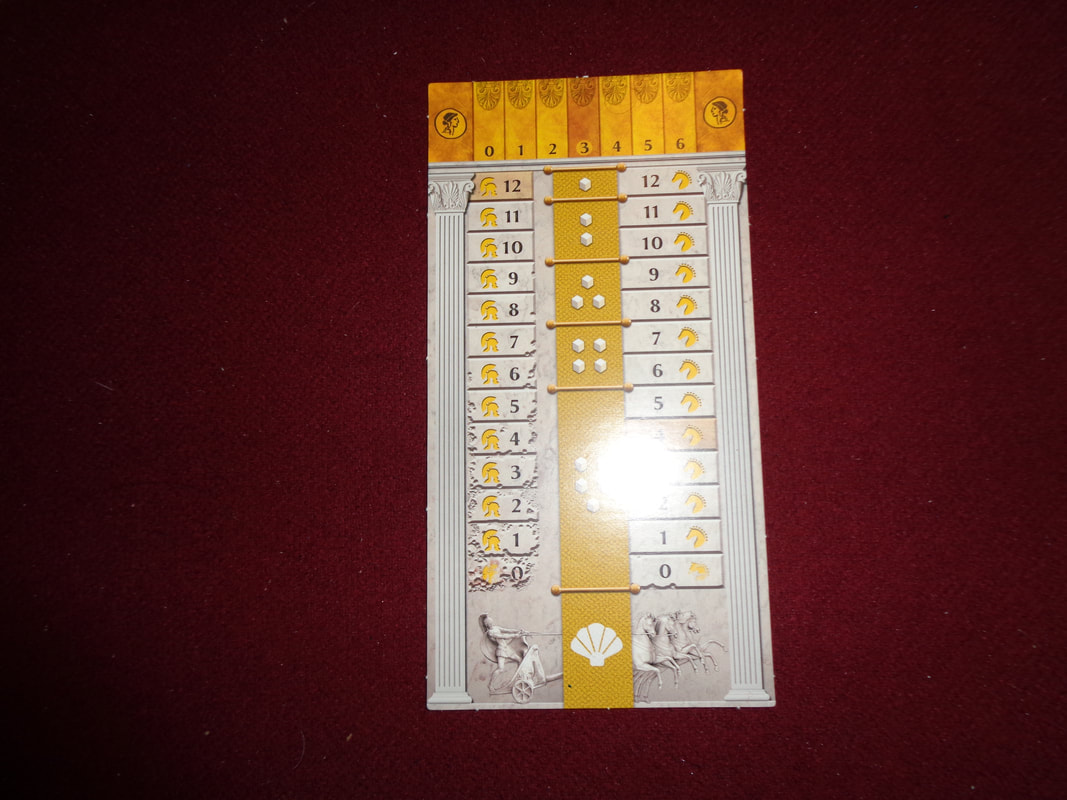
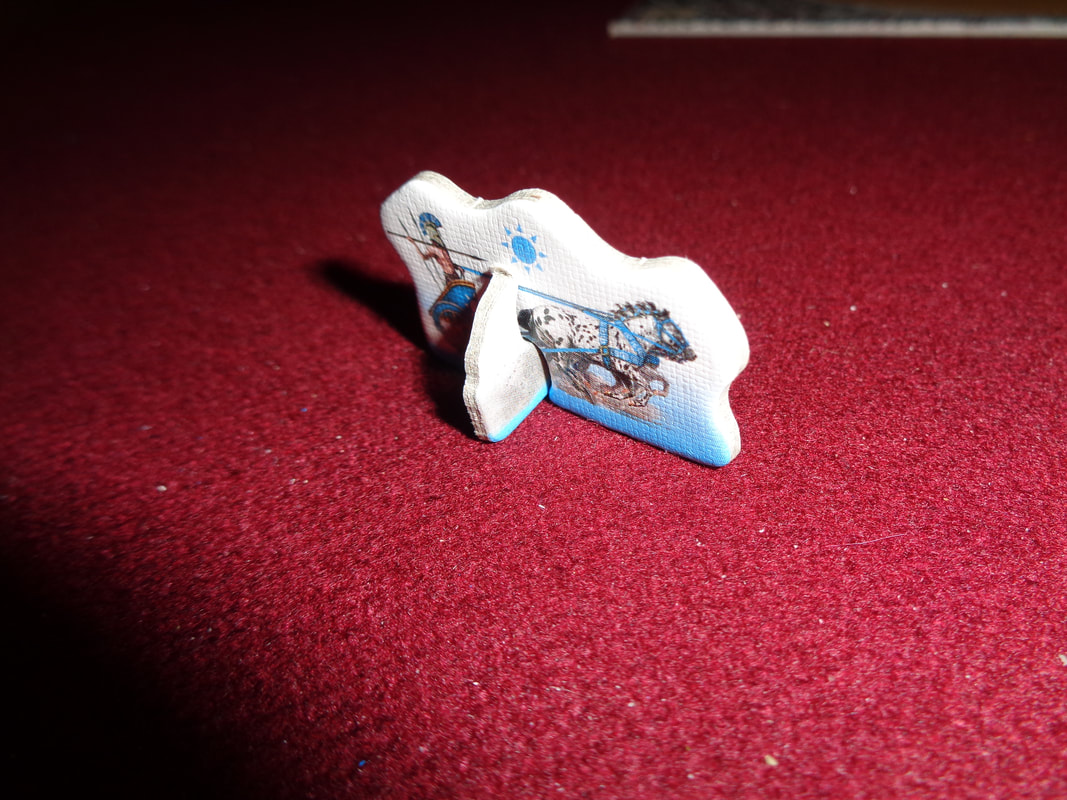
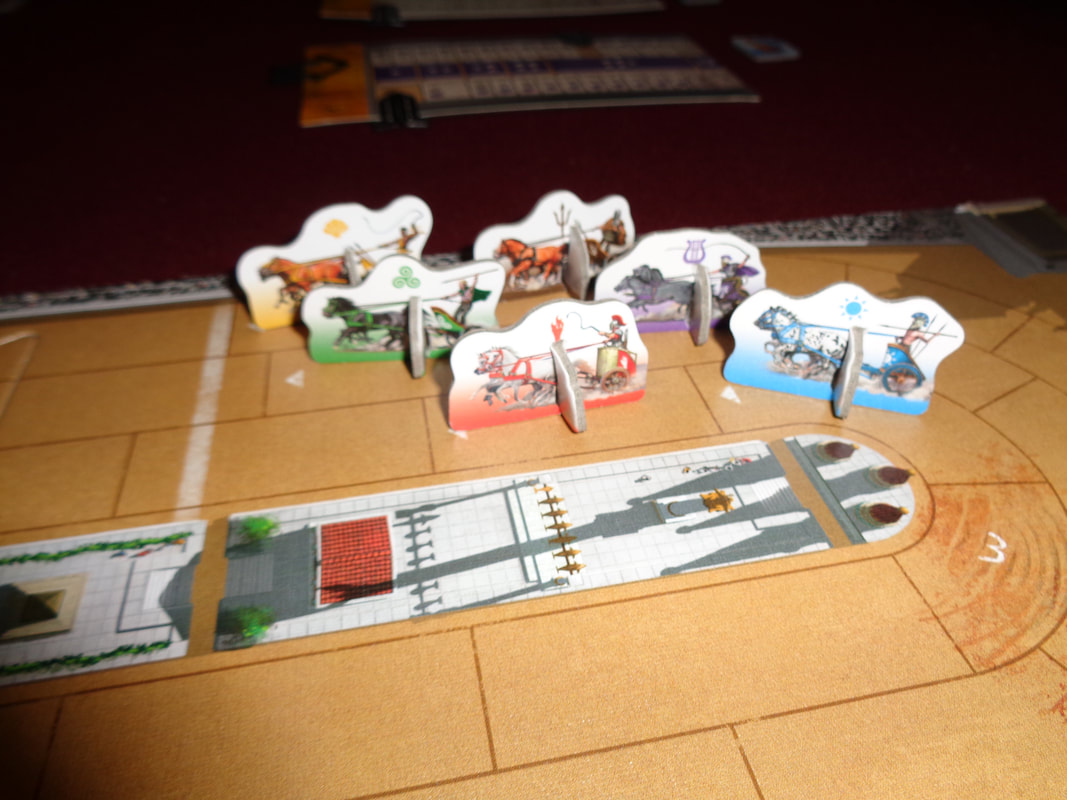
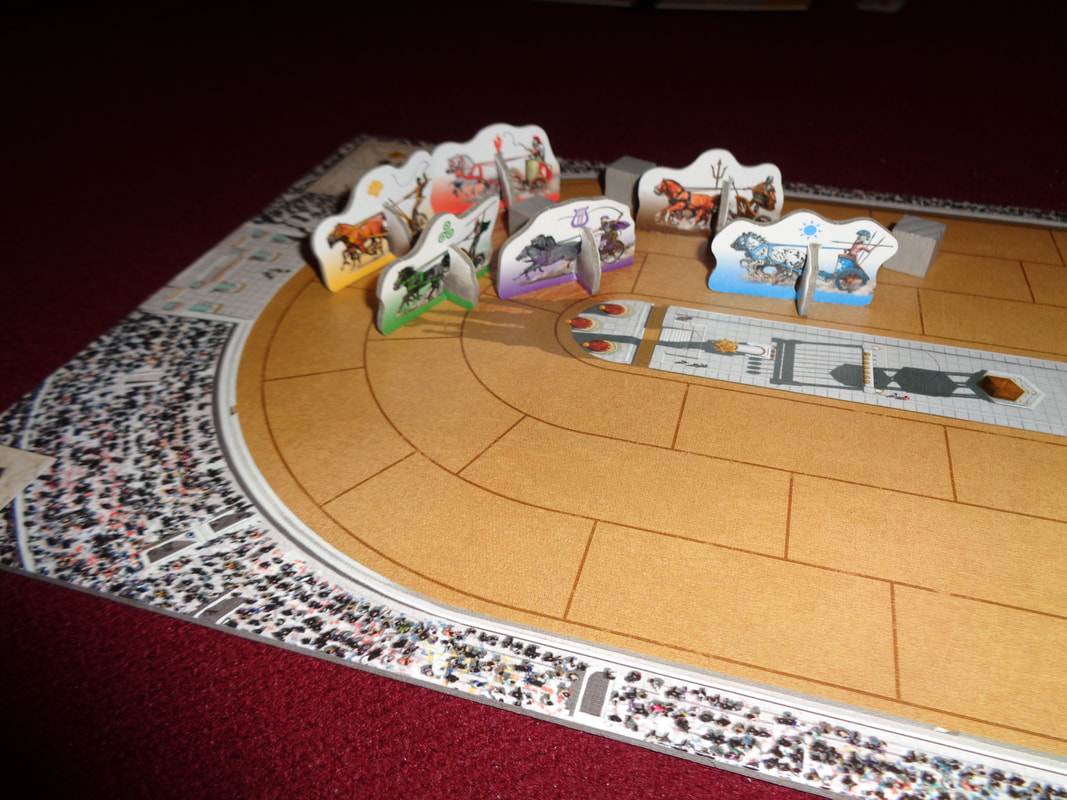
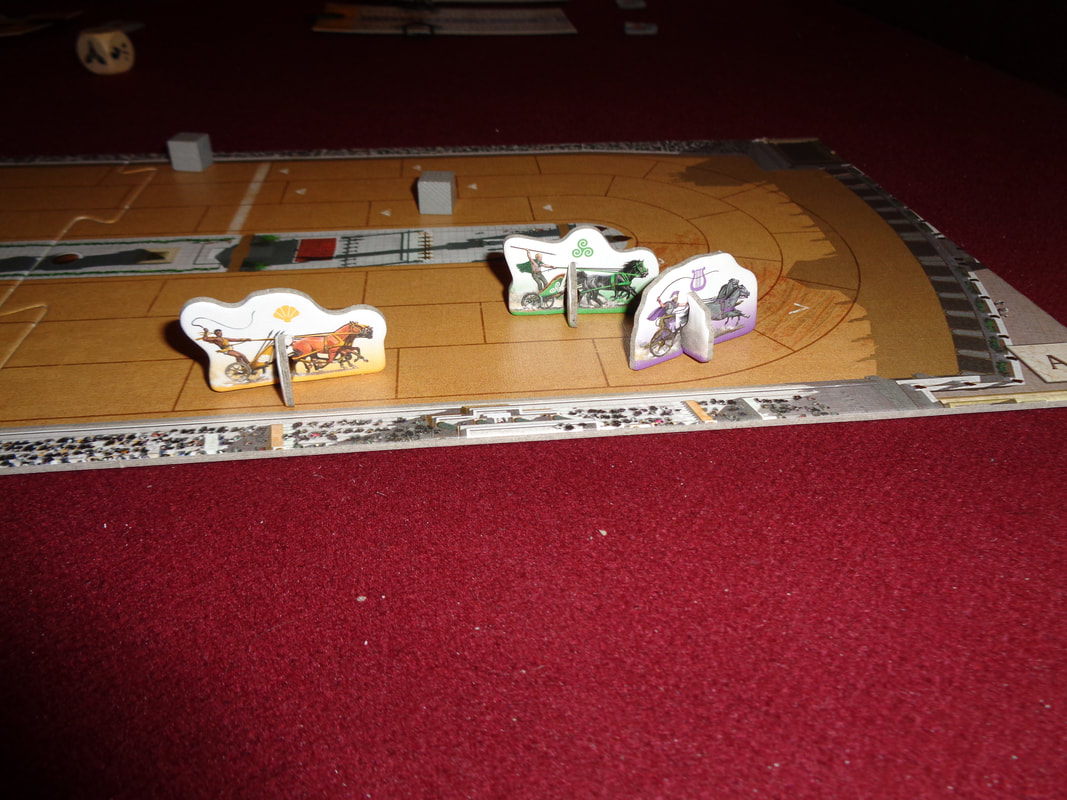
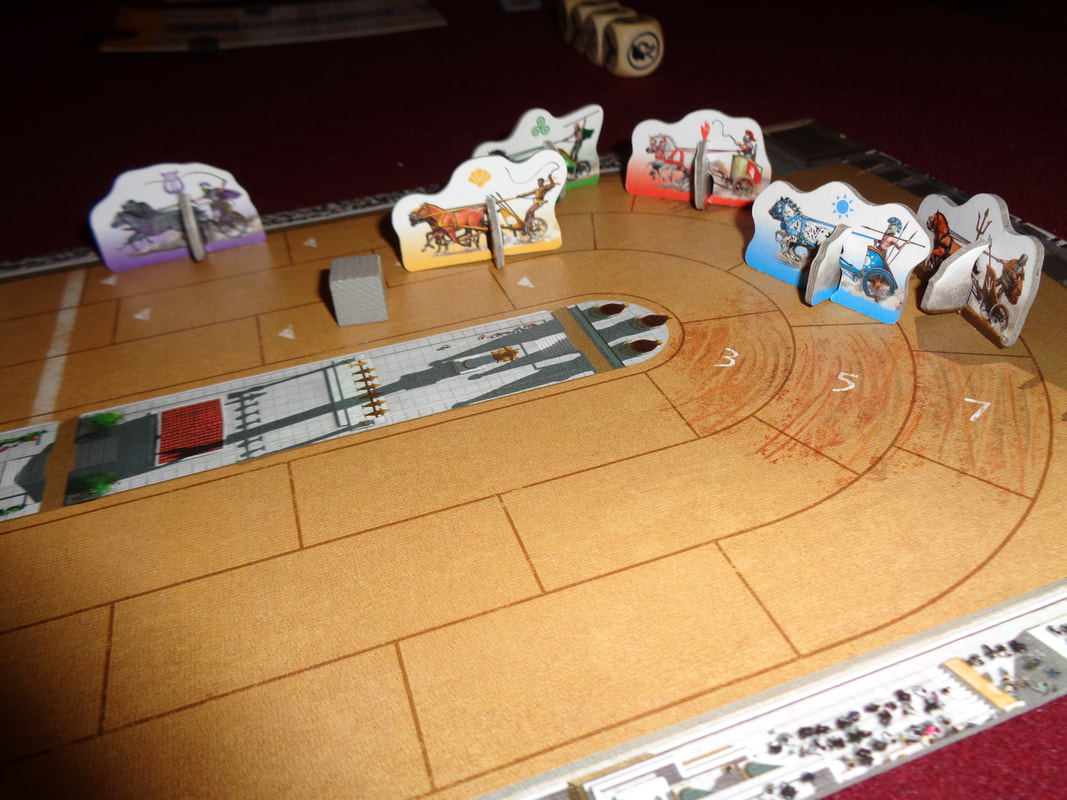
The components for Chariot Race are pretty good, the tokens and boards all feel suitably sturdy while the wooden dice are a nice touch. Having chariots made of 2 pieces or card seems a little bit of a weird choice perhaps but it's not like it's a dealbreaker or anything and was probably done to keep the cost down. There's very little artwork to write home about in Chariot Race which may be why I'm blogging about instead? There are illustrations on the chariot standees but they'll hardly be noticed since they're quite small, especially when placed on the arena/game board. There's some artwork on the game board as well and it's a fair depiction of a crowd watching the races. Otherwise Chariot Race looks fairly clean and minimalist in a unfussy kind of way, perfectly acceptable in my opinion. The only iconography that can be found during the game is on the dice, those symbols are self-explanatory and I can't imagine they'd be an obstacle to any players. Although, I will say that it feels a little odd and counterintuitive that the damage track is labelled 'damage' instead of something like 'health' since 12 on the damage track is completely undamaged and 0 is wrecked. How's it play? Setup
On to play In Chariot Race, players are attempting to complete 2 laps of the track, avoid being wrecked and of course, finish first. This is done by each player in their turn rolling dice and resolving the results. Chariot Race does not use the usual turn order. Instead it's determined by position on the track round-by-round, whoever is 1st on the track goes 1st, 2nd on the track goes 2nd and so forth. When the player in last place has gone, the round is over and play returns to the player in the lead at the start of a new round. Of course it's likely the turn order will now have changed. In their turn, the active player will have several phases they can act in.
Endgame Chariot Race is played over 2 laps and there are several criteria which can determine the winner. If a player's chariot completes their 2nd lap and no other chariot crosses the finish lap, they win the race. If 2 or more chariots finish the race in the same round, then the chariot that went the furthest past the finish line wins. Finally, a wrecked chariot cannot win, even if it crossed the finish line first or got furthest past it. Overall
Chariot Race is a fast playing and mechanically speaking, actually a fairly straightforward game; roll the dice and carry out the resulting actions displayed. The decisions that players get to make are also fairly straightforward, although their consequences can be significant - which is good. Meaningful decisions are always good. Player decisions take the form of choosing which dice to keep and which to re-roll, players must choose what to try and prioritise, this will of course be contextual and change from round to round. The other area where player's will probably be making the most is going to be about speeding up and slowing down. It's obvious that players will want to be fast in the straights but manage their speed through the race's 4 corners. Managing speed is the game's best mechanic, I like that the faster a chariot goes, the less dice the player gets to roll and consequently, the less options they have. It feels suitably thematic, not only does it represent having less thinking time at speed but also that this a horse race and players are never entirely in control of them. Players can find themselves hurtling through corners and taking damage, the question is how fast for how much damage? There's only 4 corners, so this means it's ok to take damage... right? This brings me neatly to damage. There's definitely a combative edge to Chariot Race which makes it an usual racing game. Damaging opponents has its benefits. Firstly; it lowers their maximum top speed, hindering them and secondly, it can lead to their elimination for the game. It's vital to keep an eye on damage, in the early game players will probably be congenial, but in the late game, that will all change. Having low damage points can make a player a big target, especially if that player is ahead and which others will look to exploit this to put them out of the race. It does mean that Chariot Race can have a lot of direct conflict and there may well be some 'pick-on-the-leader' tactics going on as well. If this isn't your cup of tea, it's one to probably avoid. The game also has player elimination as a mechanic, which is something I have little fondness for but fortunately, this is a quick playing game so there isn't too much downtime. In conclusion though; while it won't set the world alight, it is quick to learn and quick to play, Chariot Race is a fun light game If you like your racing theme with some extra competitive zing and a generous dollop of luck, then this might interest you. 14th May 2022 It's a Saturday and I'm in Aldershot after a impromptu get together with some friends. Flip City AKA Design Town is a light and uncomplicated push-your-luck deck building game about developing a city. What's in a game?
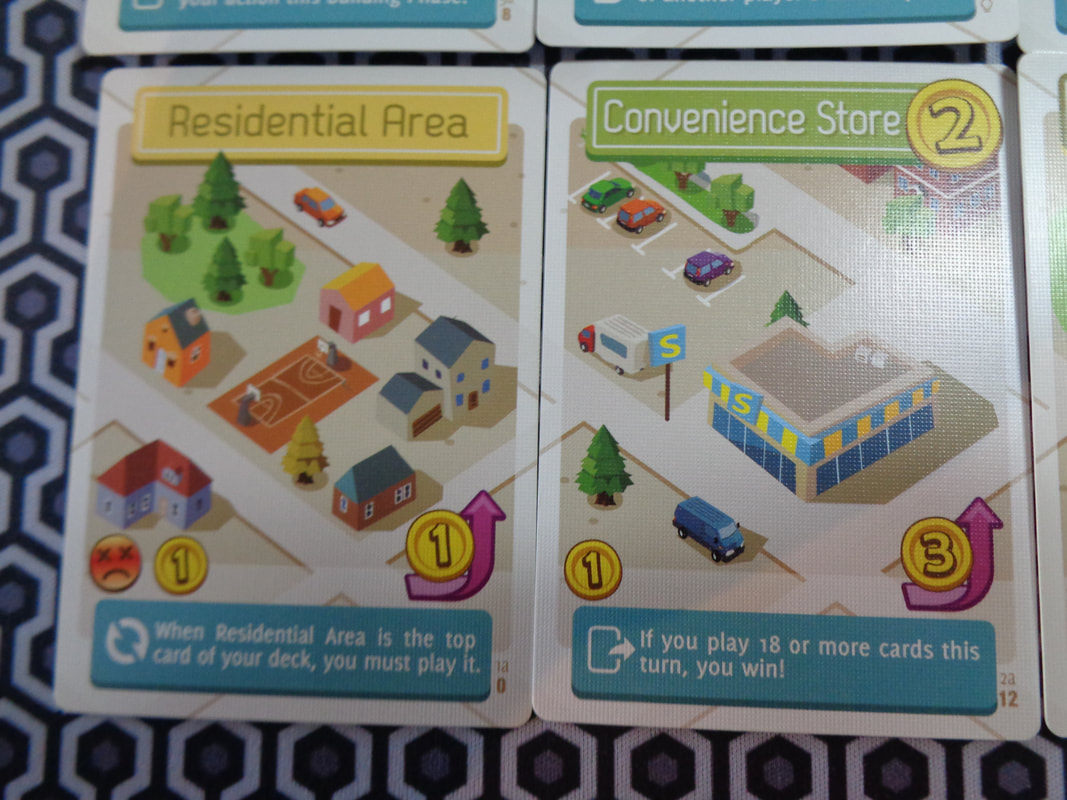
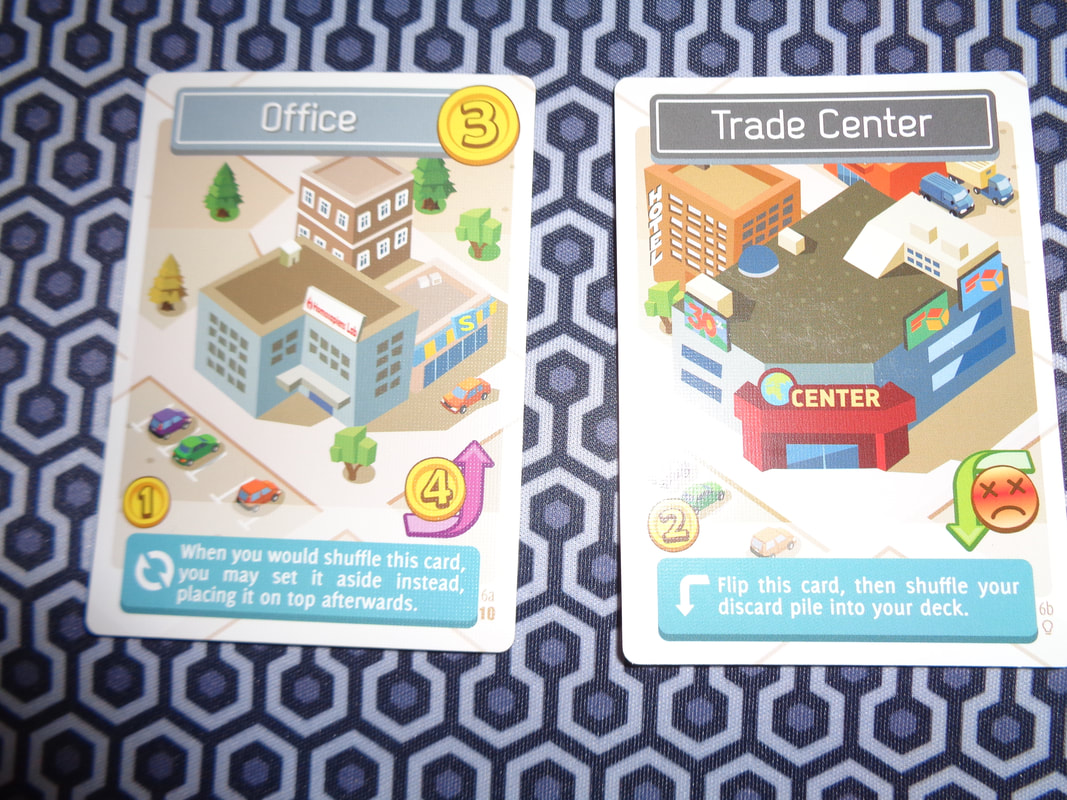
The cards are all the standard quality you'd expect from a card game. The game uses brightly coloured stylised art throughout and I always like this kind of artwork and I think it looks good here. additionally, the cards can be placed next to each to make a city landscape. Yes, it's unnecessary but it's a nice touch and shows some extra thought has gone into the presentation. Flip City uses some iconography, but all of it is clear and easily learned or understood. How's it play? Setup
On to play Each's active player's turn will consist of up to 2 phases, a play cards phase in which they play as many cards as they want or go bust and a buying phase.
Endgame Play continues until 1 of 2 winning criteria is met.
Overall
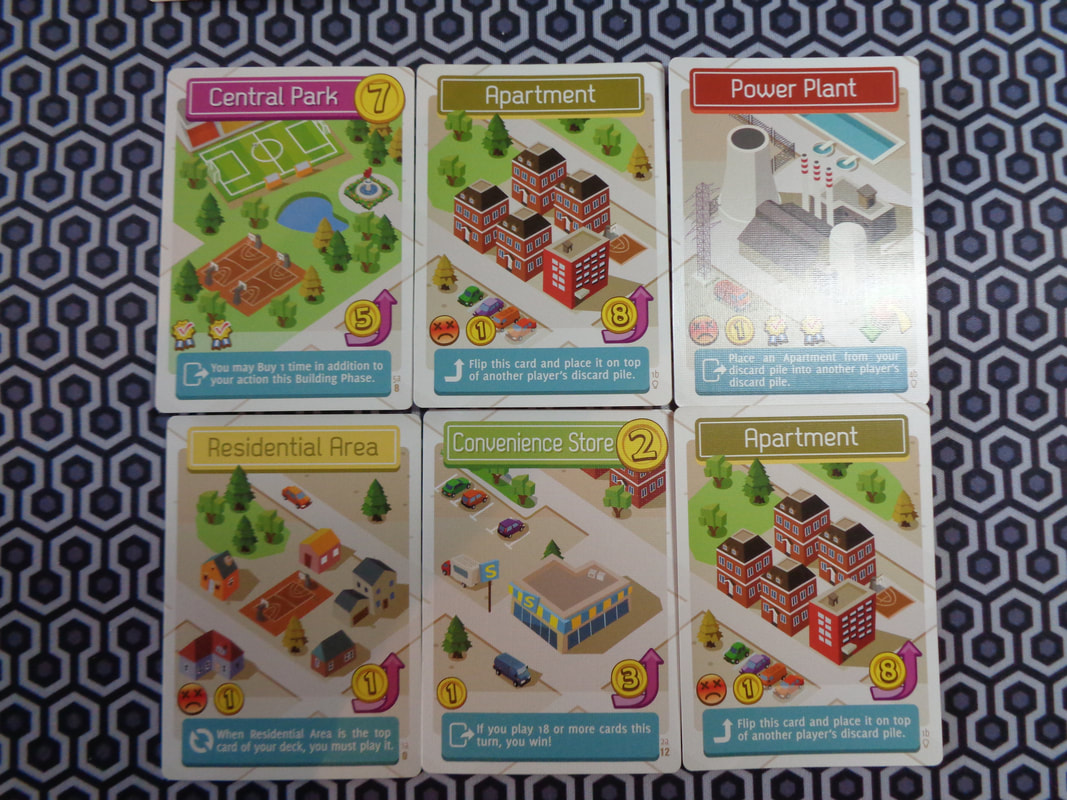
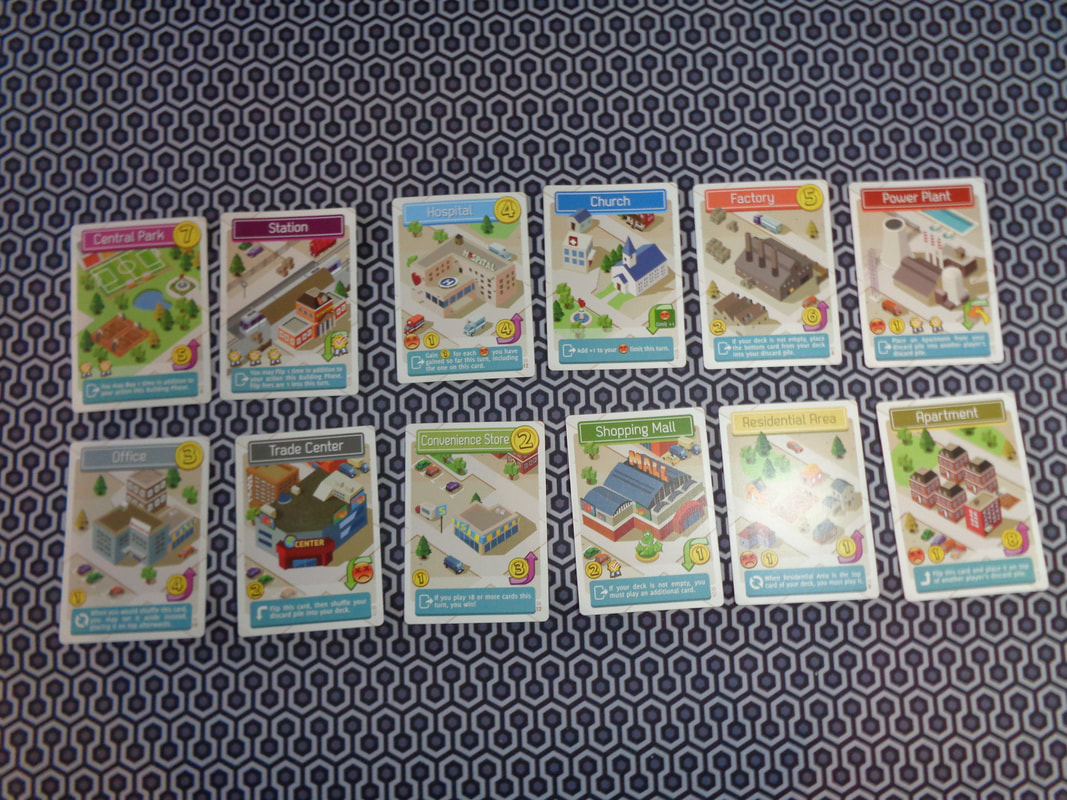
Flip City describes itself as a microdeckbuilder and it's not really wrong. Most deck-builders come with a supply-market of 10 card types or so but Flip City makes do with 4 types (5 if you include the micro-expansion), although they are double-sided, so there are actually 10 types of card. Even so, it's a very compact feeling game. For me however, where Flip City differentiates itself from other games of its kind is the implementation of a push-your-luck mechanic. It works well here, especially in conjunction with meeting the winning conditions, essentially forcing players to continue drawing cards and pushing their luck until they either have 8 VPs or 18 cards in play. As a result, Flip City is a little different to many deck-builders, which at their core are more-or-less about creating cash-generating engines to purchase cards that will earn them more cash during the early-game or VPs during late-game play. In Flip City, generating cash is still important because it allows players to acquire more cards but some of those cards will have to work towards being able to draw 8 VPs or 18 cards. Flip City is a quirky, charming, fairly light and quick to play pocket-sized deck-builder that presents players with some meaningful paths to winning and choices as well as some unusual game play and a nice little risk-and-reward mechanic. Given it's light nature, I'm not sure how the game will hold up to repeated play but that's sort of missing the point. This is a fun filler game that is good to ply every once in a while. It's worth a try and if deck-builders are you thing, then this will probably appeal to you. 24th January 2022 It's time for some impromptu Monday gaming in lieu of Sunday and we're logged into Board Game Arena. Can't Stop Express is the roll & write cousin to the excellent push-your-luck dice game; Cant' Stop. Caveat: We have only ever played this game digitally. What's in a game?
And that's it!, Can't Stop Express is a very minimal game and that applies to all of it. I can't comment on the quality of the components, there's no art to speak of in the game and no iconography either. How's it play? Give each player a scorecard and you're ready to go. Can't Stop Express has in one regard a similar mechanic to Can't Stop, which is that after every dice roll, players are putting together 2 sets of 2 dice, the 5th die has a different role (Sic). Where Can't Stop Express differs is that once the dice are rolled, the results are used by all players simultaneously.
Endgame When a player fills the 8th and final checkbox in any one of their 5th die rows, then they stop scoring and the game is over for them. Once all players can no longer score dice, the game is over and players calculate their scores for all scoring rows, rows that have no boxes checked off score 0. Points are tallied, highest score wins. 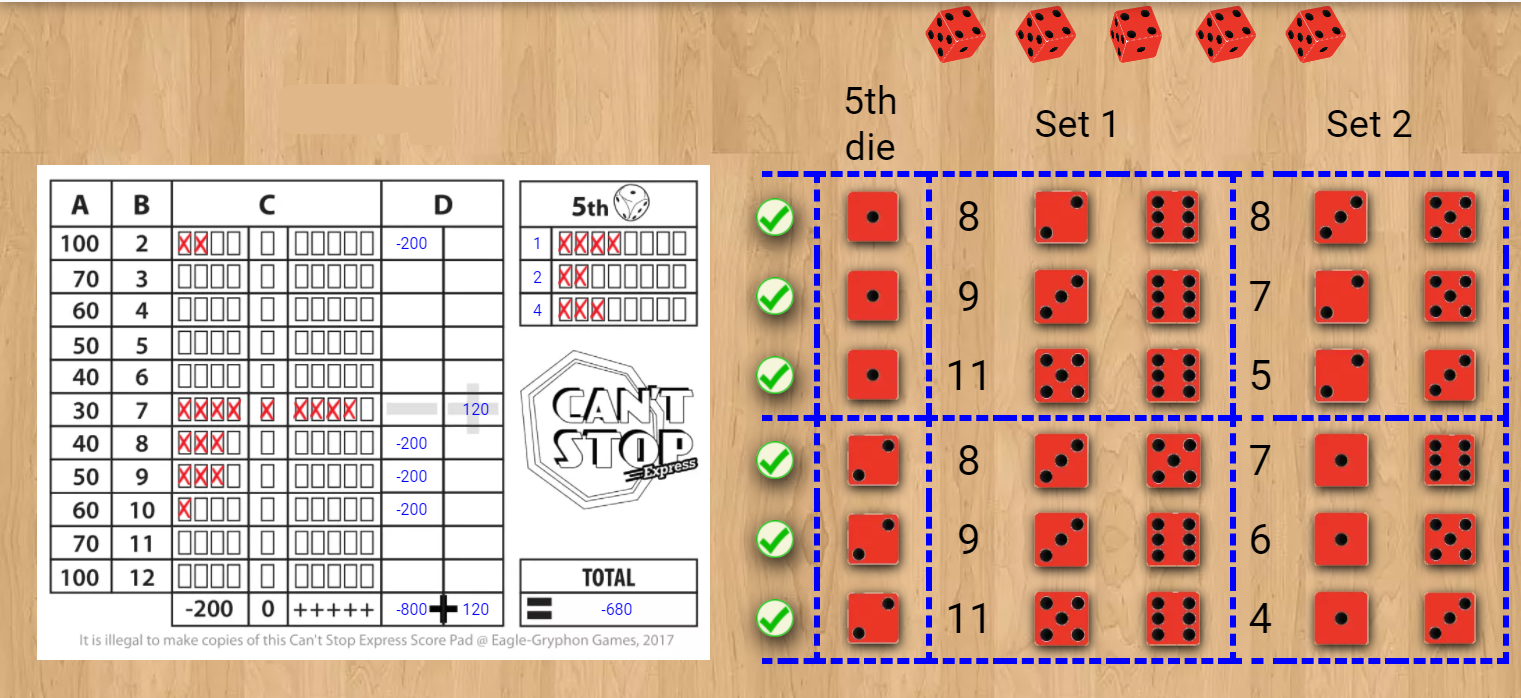 Mmm.... spreadsheets! Overall
One thing I found interesting about Can't Stop Express is how it twists the paradigm of Can't Stop. In Can't Stop, the objective is to reach the top of any 3 tracks using the results of the dice rolls, which tracks are used is unimportant; they all score a point each. Since it's much easier to get a 7 than a 2, this is balanced out by needing to get many more 7s to reach the top than you would for 2s. The points have equal value but getting them requires varying numbers of dice results depending on the number. In Can't Stop Express players are also trying to move along tracks but it is changed around. To reach a scoring position for both 2 and 7 requires getting the same number of pertinent results, either six 2s or 7s, but in Can't Stop Express, they score differently. Six 7s will score 30 but six 2s will score 100 and in fact seven 2's would more than all ten 7 results. The dice results required for each track to score are equal but they score varying amounts depending on the number. Anyway, talk about mechanics aside, I found Can't Stop Express to be a bit of a middling game. I like how it shares a concept with Can't Stop of setting aside 2 sets of 2 dice and it probably plays a little quicker. There's no going bust, so no 'wasted' rolls - at least in theory. Luck can mess with players in Can't Stop Express, just in a different way! The push-your-luck element works very differently here, there are no extra dice rolls to make here. Instead players will need to judge which rows to try and fill out and it's in the planning where players push their luck, when a player decides to start marking off the checkboxes in a specific row, they're essentially gambling on that number reappearing again and again. The 7 row is the safest bet but is not much of a scorer. The further away from 7 you move, the greater the rewards but also riskier it is to fill out 6 or more checkboxes. In terms of what I don't like Can't Stop Express is a game completely lacking in theme and feels a little dry (Although to be honest Can't Stop's mountain climbing theme is paper thin.). My biggest bugbear though is the scoring; those first 4 checkboxes that penalise players 200 VPs, occasionally being forced to mark off checkboxes in rows you don't want to and watching your score drop by hundred of points can be very frustrating. I know why it's there, it replaces drawback of going bust from Can't Stop, even so, it makes the game feel negative and I'm not fond of it. I don't think Can't Stop Express is a bad game, mechanically speaking it's pretty solid but it lacks the extra bit of thrill that comes with deciding to re-roll the dice from Can't Stop and doesn't really bring anything new or different to the table. I'd have no issue with playing Can't Stop Express more times but if given the choice between this and Can't Stop, I'd pick the latter every time. 4th January 2022 It's a Tuesday and we're round Simon's for the first in-person game of the year! 'Here be dragons', is something you don't want to shout in Clank! Instead you'll want to silently tippy-toe around without waking the damn thing up, then steal its stuff and run! NOTE: When we played Clank!, it was with an expansion that took the player count up 6 (Which was useful, as there were 6 of us!) and added characters with individual starting decks. What's in a game?
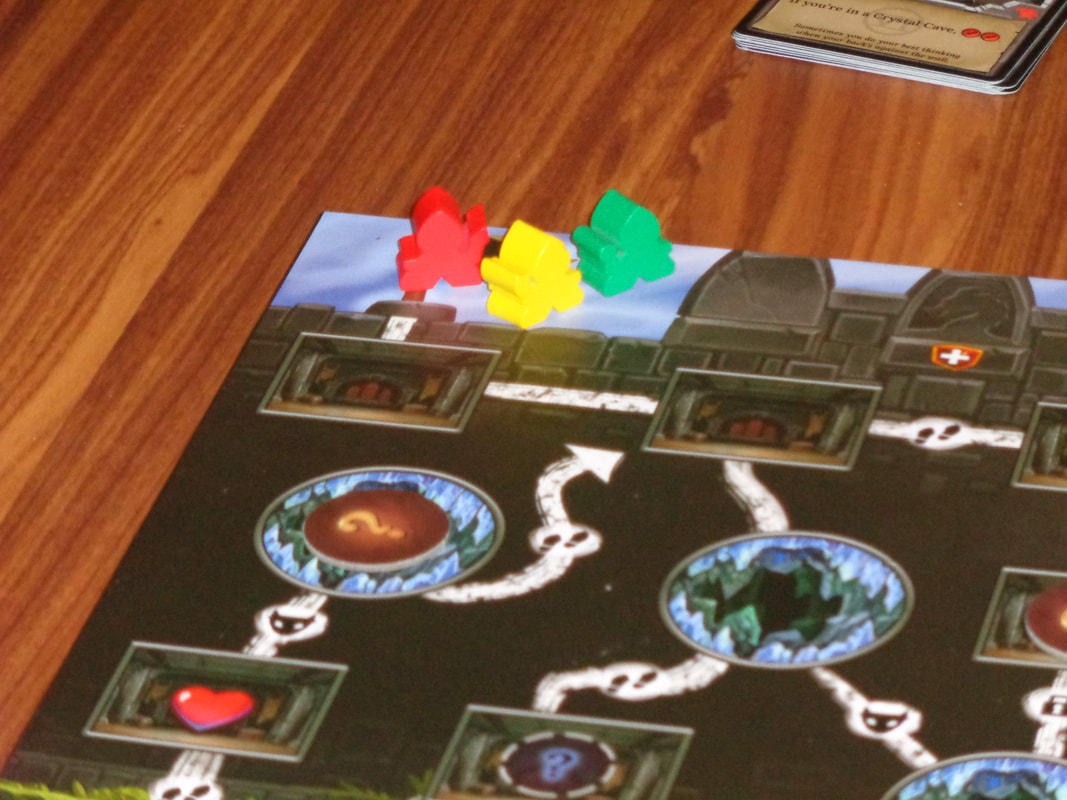
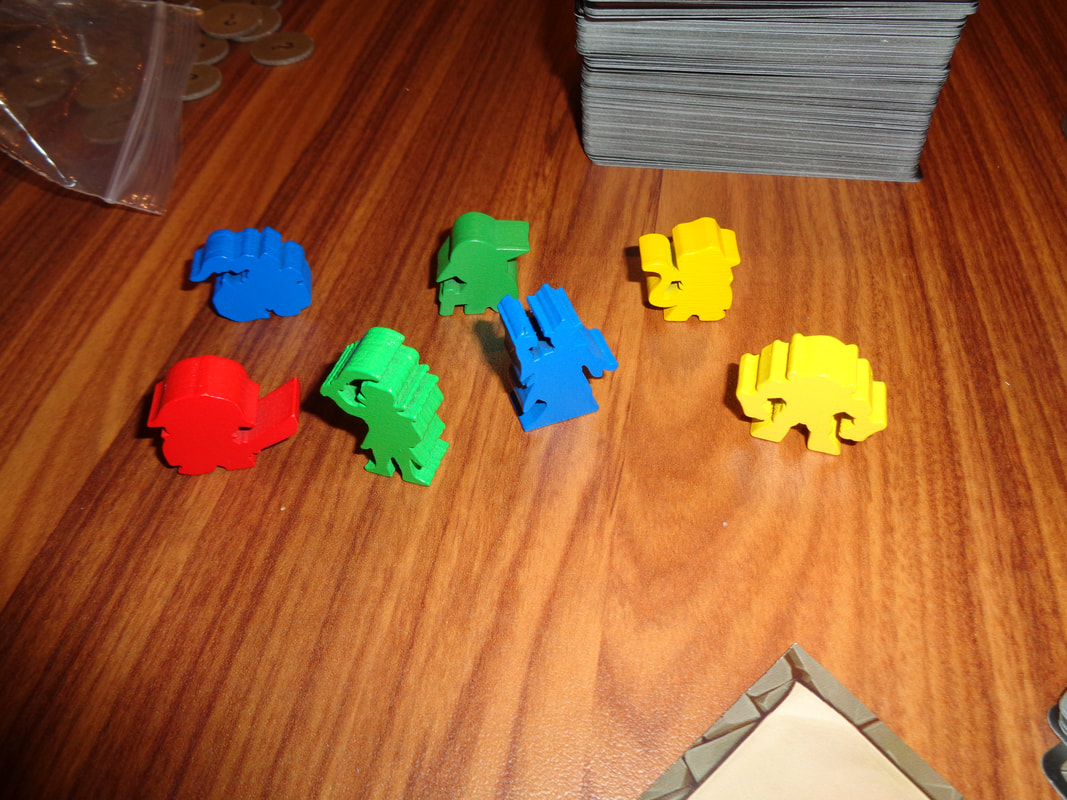
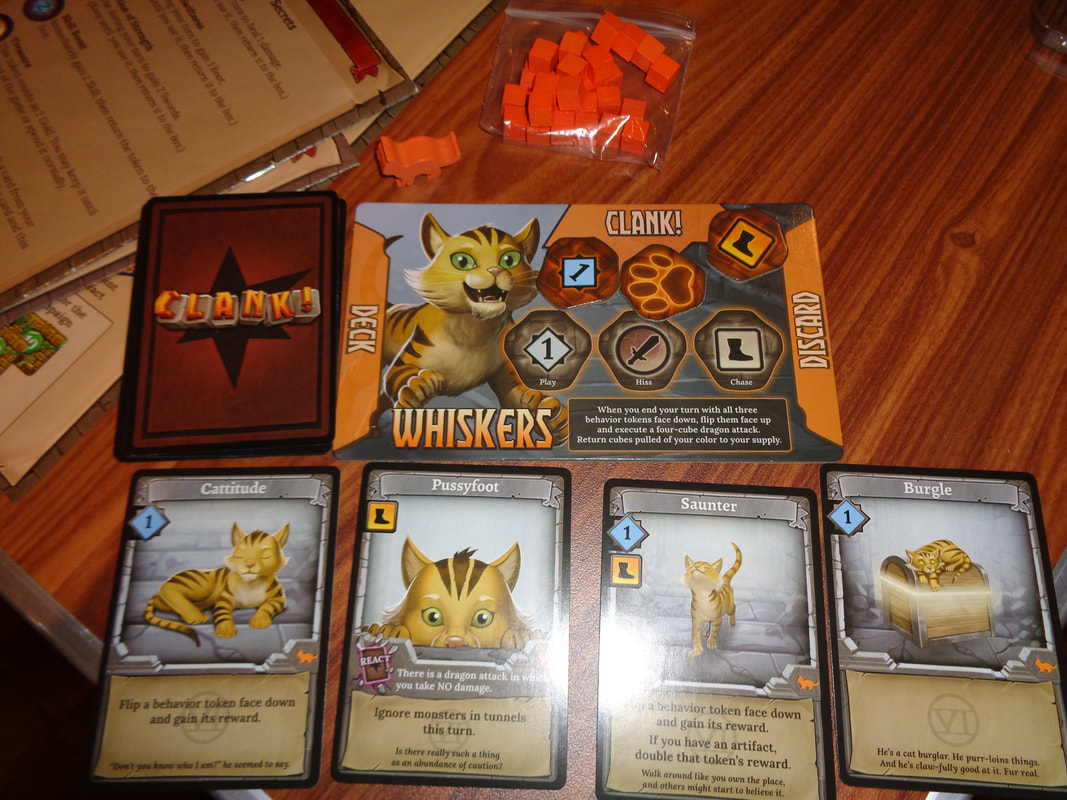
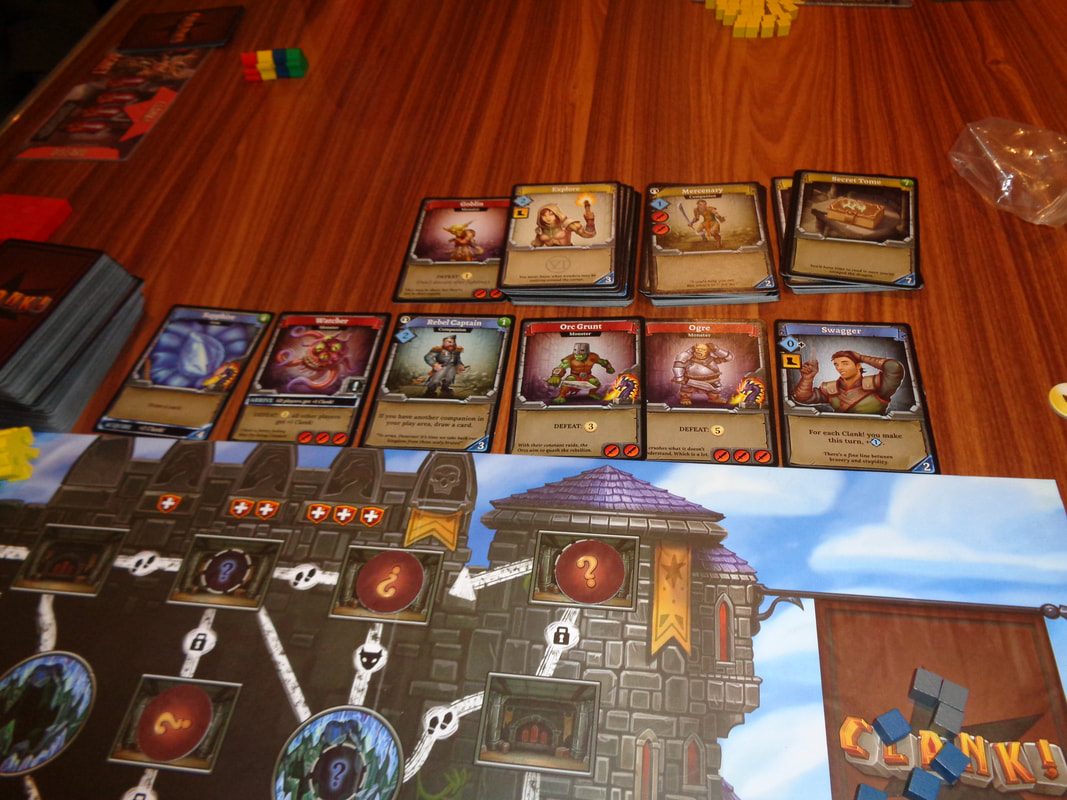
Clank features good, colourful artwork throughout, the board has a fairly unique look to it and is clearly illustrated, the cards and tokens also feature good artwork with well illustrated characters and monsters. The game uses a fairly small assortment of iconography and it's all easily understood. How's it play? Setup
On to play The objective in Clank! is to grab an artefact from the depths and escape the out of the dungeon alive! A player cannot leave the dungeon without an artefact neither score points. Play progress in traditional clockwise order during Clank! and the active player plays cards from their hand to generate resource pools which they can then utilise to perform associated actions.
Endgame There are 2 ways to trigger the endgame. It can be triggered by the 1st player to acquire an artefact and leave the dungeon or the 1st player to be knocked out. In either circumstance, the player who triggered the endgame places their meeple on the countdown track. Then when they become the active player, all they do move their meeple along the track. This will trigger a worsening dragon attack every round for the next 3 rounds, then on the final round the dragon will knock out all players who are still in the dungeon, regardless of whether they are in the depths or the upper levels. After this, the game goes to scoring, players who did not acquire an artefact or who were for any reason knocked out while in the depths do not score any points! Points may be accumulated from the following sources: Artefacts score 5-30 VPS. Tokens acquired. Card with VP values that players bought. Gold; each gold scores 2 VPs. Points are tallied, highest score wins. Overall
Clank! has an unusual mix of deck-building and push-your-luck mechanics and it's the push-your-luck element that interests me the most. Clank! makes use of this mechanic in several aspects of the game. Firstly, there's a definite push-your-luck element to generating clank. Players will obviously want to minimise how much clank they add to the banner and lessen the chances of their cubes being pulled when the dragon attacks. Having said that, lessening the impact of clank may slow a player's progress, sometimes generating clank will give a bonus, the question is; is it worth it? how much do you want to push it. There's also a contextual angle here, if you see other players are generating a lot of clank, that means it should be safer to generate a little bit of clank yourself. If the opposite is true, they you'll need to be even more careful. The most obvious use of push-your-luck is when collecting an artefact. Every player needs to collect 1 but there's quite a spread of VPs. The higher scoring artefacts are found lower down in the depths. Getting one and getting out will be more risky, but more rewarding. Compounding this is the rule that you can't drop an artefact once it's been picked up. There's no hedging you bet here, if you want a higher value artefact, you have to go for it. It's basically stick-or-twist. This also ties in with the game's other aspect of push-your-luck. The countdown mechanic adds an interesting wrinkle to all this, dramatically altering player priorities and objectives. If the countdown is triggered by another player, you'll find yourself wondering whether you can get one last scoring token before heading to the top or not - probably better to run? The penalty for getting caught in the depths is catastrophic and that 20 VP mastery token is pretty good. Conversely, if you're the player who has an opportunity to escape the dungeon and trigger the countdown, should you do it? Or should you try and get more points? It might seem like a no-brainer, but is it? Chances are the first player to get out didn't go too deep and got a lower value artefact. The combined value of a mastery token and a 5 point artefact is still less than the highest value artefact and I'm sure this is no coincidence, I put it down to well balanced scoring. Rushing to get out and put pressure on other players may work or it may not. The deck-building aspect in Clank! is light-ish and fairly straightforward, which I think is a good thing because it can have quite the influence on a player's turn. There's little in the way of card combos and mostly all the cards stand on their own. The only trash cards (And they're not really trash.) are the secret tomes, which score 7VP at the game end but otherwise clutter up a deck. This brings me to perhaps the only niggle I have about the deck-building and Clank! In most deck-builders, it's all about buying more cards, either to improve your deck or score you points and Clank! is unlike those deck-builders. In Clank! your needs may change from round to round; in a particular round you may want to move a lot, in the next you may want fight points and sometimes, the cards may just not give you what you need. Sure, in most deck-builders, the cards will screw you over but somehow it can feel worse in Clank! It can be frustrating when you don't enough quite have the movement you to reach an artefact for example and feels like nothing is going on. It's not a dealbreaker though and I guess learning to adapt as much as possible is key. Otherwise, Clank! is hard to fault. Colourful with an interesting theme and mechanics, not too tricky to learn, reasonably fast to play and with a dramatic endgame. What's not to like. If you like deck-builders or push-your-luck games or both, Clank! is worth a try. 19th December 2021 We continued our Sunday gaming on Board Game Arena with Can't Stop. Can't stop, addicted to the shindig. Chop Top, he says I'm gonna win big. No... wait..., this isn't a song. It's a sharp little push your luck game. Caveat: We've only ever played this game digitally. What's in a game?
That's it for components, there's not too much that can be said about such a minimalistic, almost abstract game. The only art featured is the mountainous picture on the board which is a nice enough illustration which keeps the board from looking plain. Although it's obviously been used as a theme to fit the mechanic. There's no iconography to the game unless you count the numbers on the dice!  Just why have you decided playa push-your-luck game Because it's there! How's it play? Setup
On to play The objective in Can't Stop is to get 3 of your 11 tokens to the top of the board (Or mountain.) first. Each player takes turns rolling the dice and using them to move their tokens up the lines, they can continue doing this until they choose to stop, reach the top or go bust.
Endgame When a player's 3rd personal token reaches the top of a line and they stop, then they immediately win. Overall
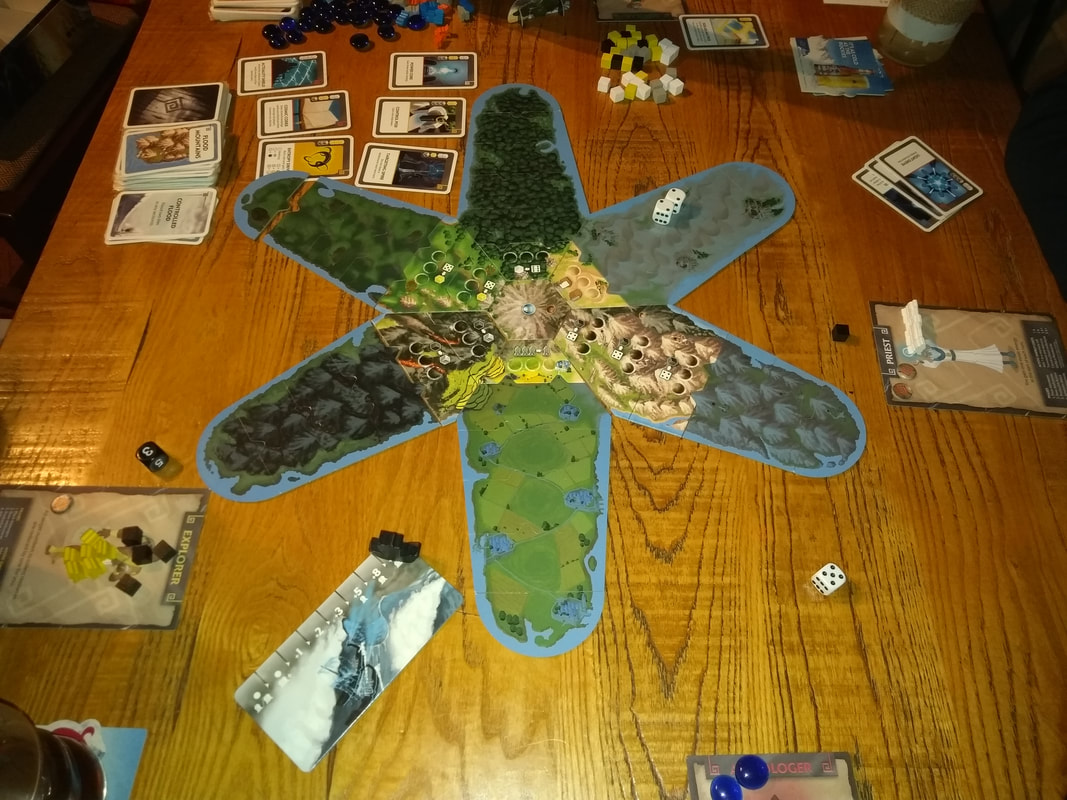
First off; if you don't like push-your-luck games or games that introduce significant amounts of randomness or chance, then you can probably stop read right here! Chances are that you'll hate Can't Stop. Only Joking, please keep reading! Maybe I can convince you that it's worth trying! I think that Can't Stop is a good 'crossover' game that will appeal to casual-gamers, the luck element is a good balancing mechanism that levels the playing field somewhat and will probably prevent dedicated players from always winning, allowing players of differing levels of experience to play together. Simple rules make the game accessible to anyone. For such simple rules, there's a few things I want to say about Can't Stop's elegant gameplay that has been stripped down to pure, distilled, unadulterated push-your-luck mechanics. There's no gimmicks here or clever twists, just you and the dice. Speaking of dice; using 4 of them was a piece of inspiration. If the game was played with only 2 dice, it'd be too easy to predict outcomes. Any dice-slinger worth their salt would know that getting 2 or 12 is a 1-in-36 chance, or getting a 7 is 1-in-6. Adding an extra 2 dice into the mix that need to be paired off changes everything but also sort of keeps it the same! While it would take a little effort to try and figure out the probabilities with 4 dice, it doesn't change the fact that 7s will still be more common than 2s or 12s. The probability curve is now just skewed to some degree, how much, I don't know, l haven't bothered to make that effort to figure it out. This is reflected in the game's design. You only need 3 2s or 12s to to reach the top, while you require 13 7s to do the same. While luck undoubtedly plays a big part in Can't Stop, there's also some strategy involved. Like many chance based games, it's important to employ good judgement on when to push-your-luck and when not to. It also pays to think about how dice are paired off. Generally, when you get movement markers in the 6-8 range, it's the best time to push it, there're no guarantees though... And the longer a player can go without putting all 3 movement markers on the board, by managing the dice pairing, the better. If I have a criticism, it's that the game can slow down towards the end as columns become locked off. We've played this 3-player frequently and at times, when players have captured 2 lines each it means 6 out of 11 lines are no longer in play so everybody ends up going bust a lot more often. As a filler, I think Can't Stop is pretty good fun, it provides some entertainment which allows me to turn my brain off and chill out for a little while (Provided bad rolls don't infuriate me!). I don't take it too seriously and neither should you. 30th November 2022 It's a Tuesday night and we're at The Sovereigns in Woking with the Woking Gaming Club. The main game of the evening was Atlantis Rising. Atlantis; the mythical civilisation swallowed by the seas and lost to time, how did this happen? Clearly it was caused by a band of bumbling table-top gamers! What's in a game?
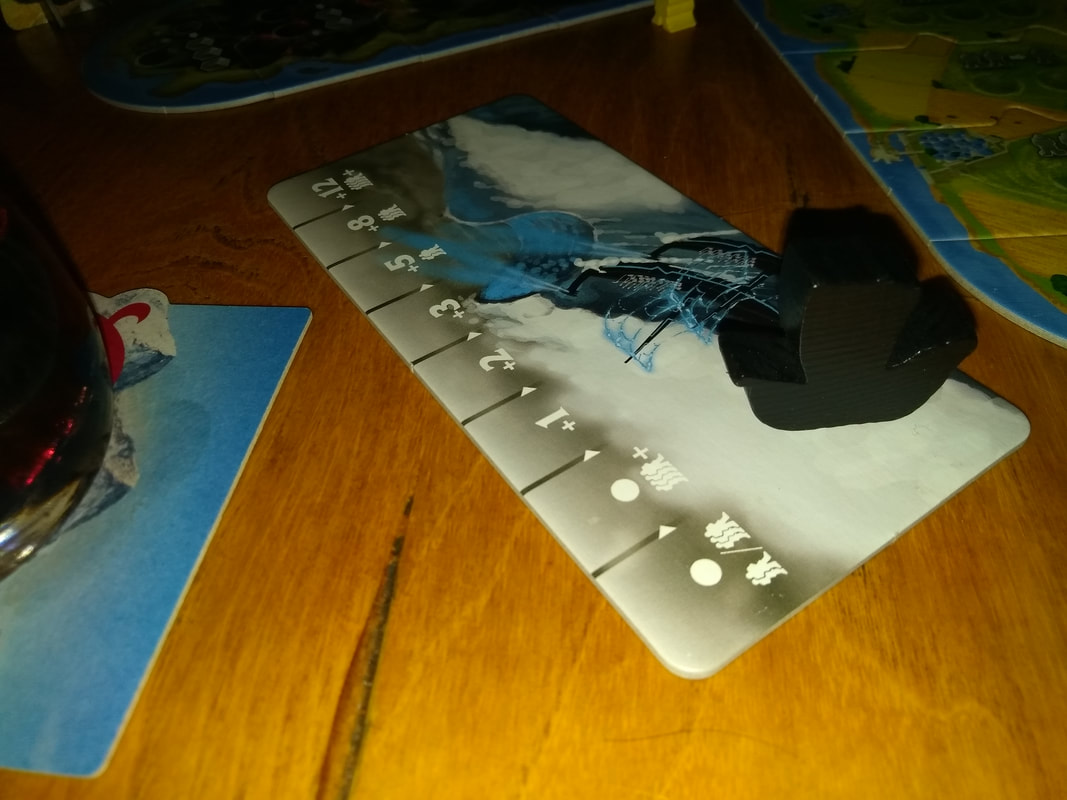
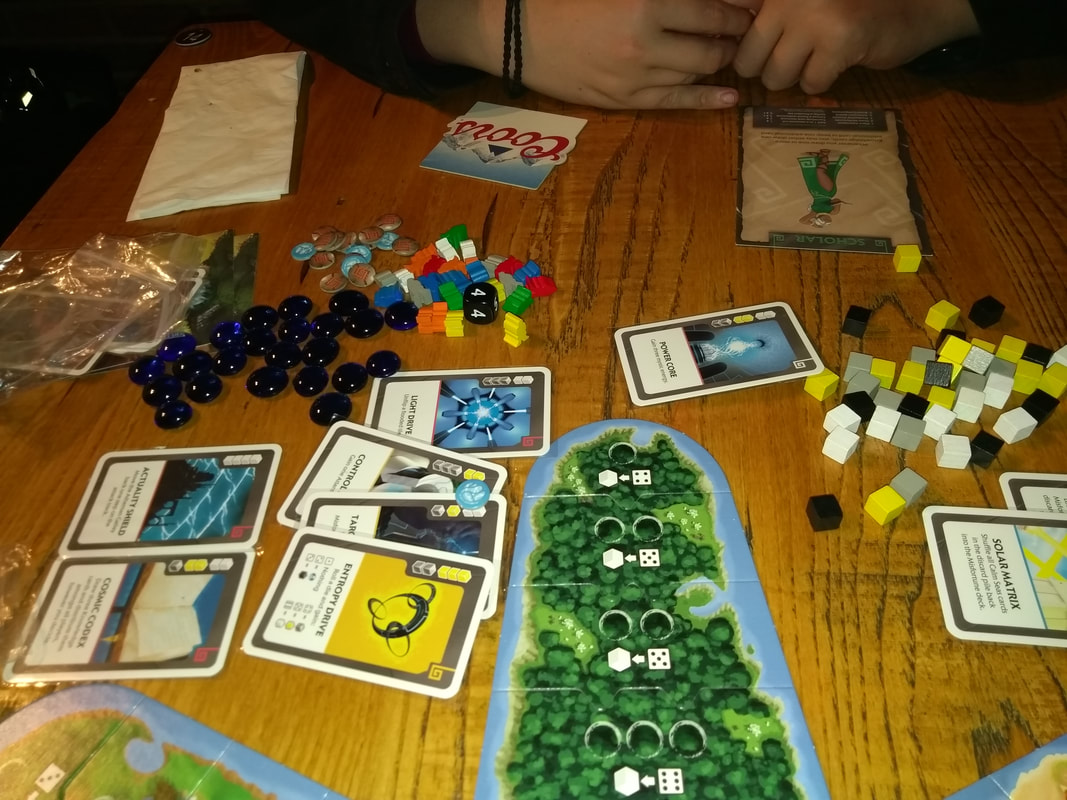
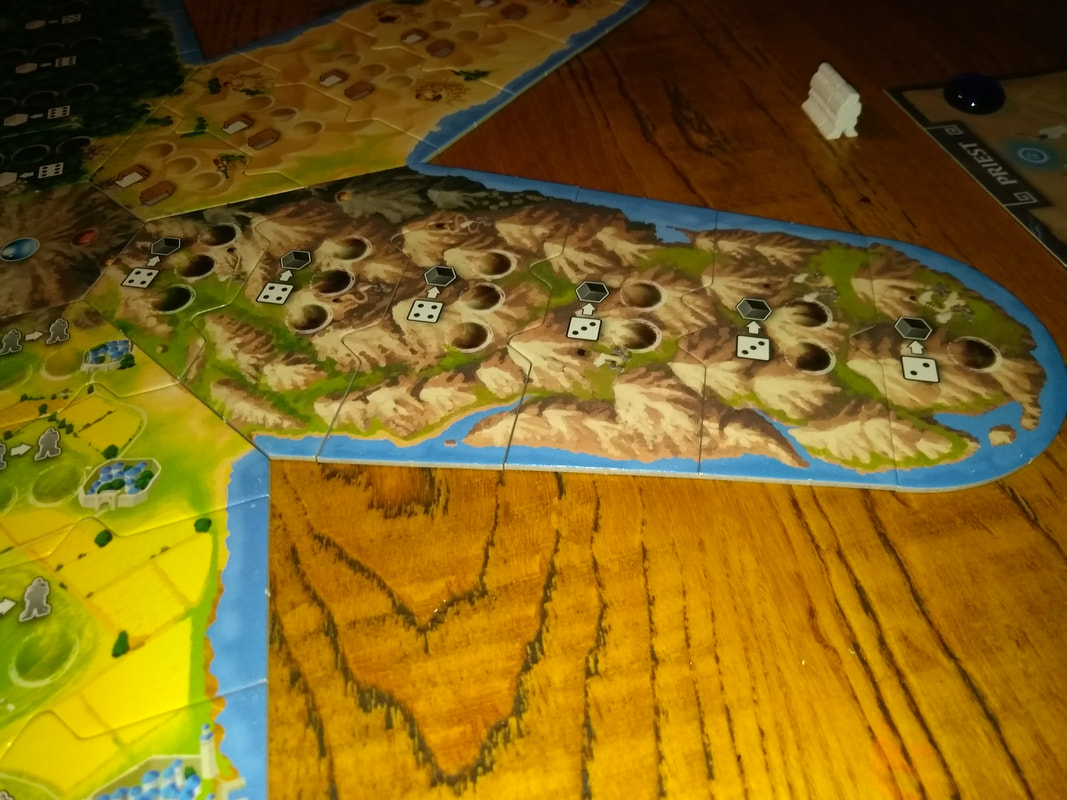
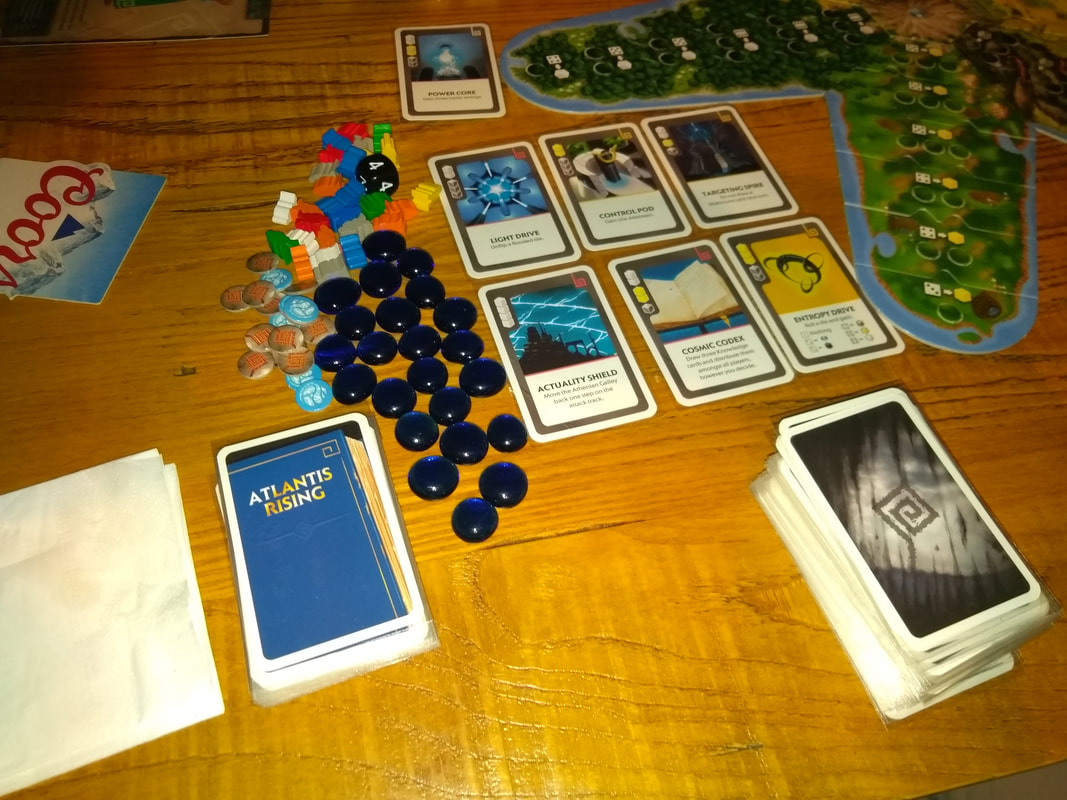
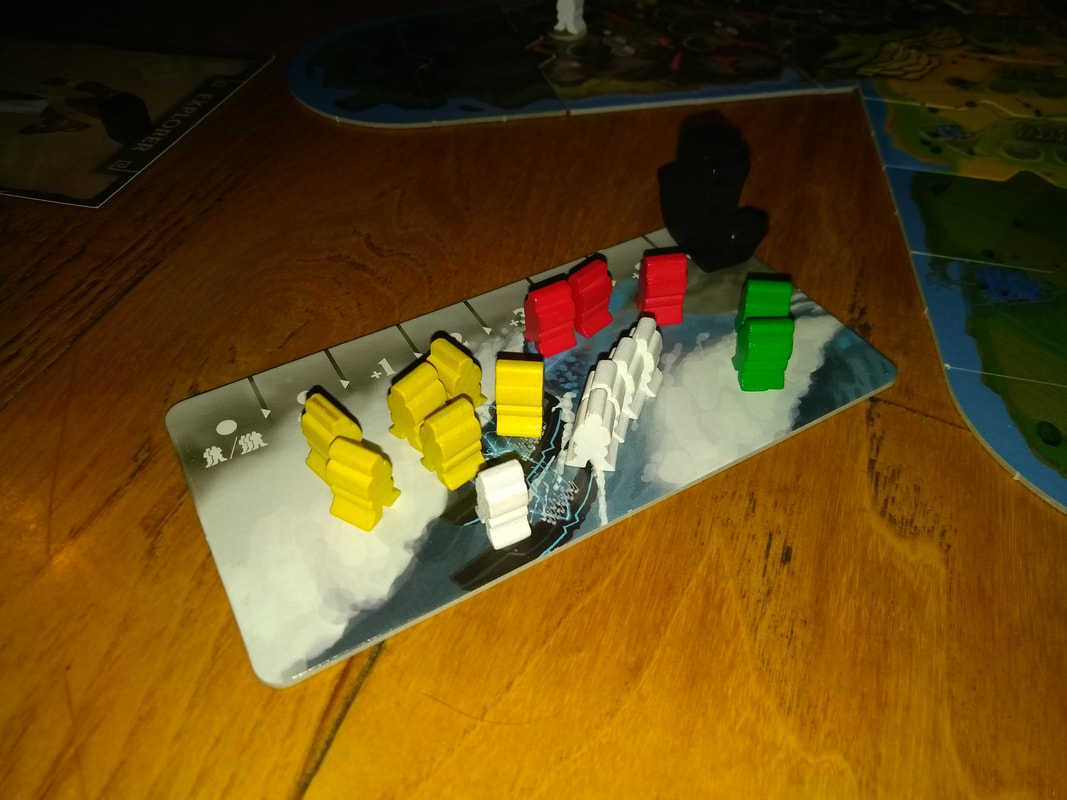
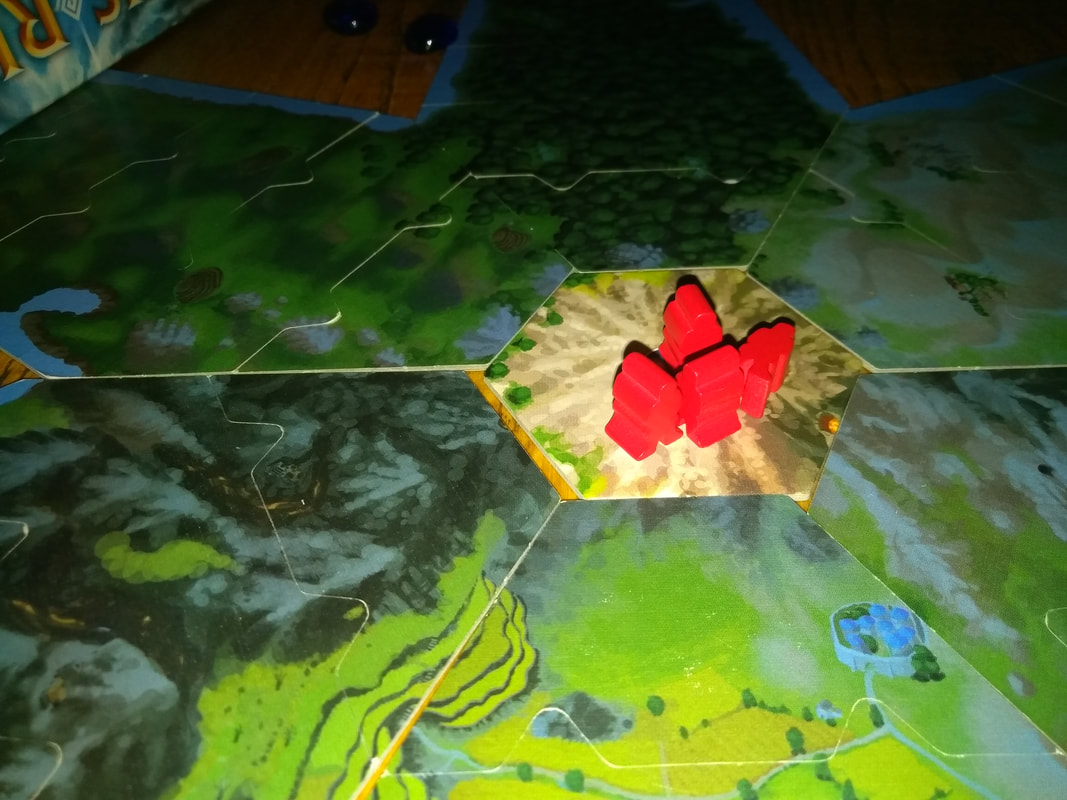
The quality of the components is as you'd expect from modern games universally good, the game makes extensive use of wooden tokens for meeples, resources and even the Athenian ship, which I like. The addition of glass tokens is also a nice touch and appreciated. From the perspective of art direction, I'd call the art good but not exceptional, it is however, clear and functional when needed, the different terrains are always easily discernible. I'd be remiss if I didn't comment on the board. It genuinely looks unique and eye-catching. It's not a gimmick either and makes sense in relation to the game's mechanics. The game's iconography is straightforward and easy to understand. How's it play? Setup The setup for Atlantis Rising is relatively simple.
On to play Each round in Atlantis Rising consists in a number of phases.
Endgame Play continues until 1 of 2 conditions is met. If all the tiles on the Atlantis map are flooded - including the centre tile, then the players collectively lose. If the players manage to build all 10 cosmic gate blueprints, they immediately win. Overall
Just to clarify, it was the the 1st edition we played, there is a 2nd edition which has some notable changes. Despite its nifty, unorthodox board, Atlantis Rising's central premise will be familiar to players of cooperative games. That is; players will be faced with the choice of working towards completing objectives to win the game or firefighting whatever will cause them to lose, in the case of Atlantis Rising that's 2 sources, the misfortune deck and the Athenian attacks. What Atlantis Rising brings to the table though, is a push-you-luck element. Luck is an inherent part of cooperative games and is used to mitigate players' abilities to out-strategize a game, but these push-you-luck elements add something quite different. When picking an action, players will also have to decide how much they want the resource, card or whatever, playing it safe might not get you what you need or enough of what you need. The same is true when dealing with the Athenians, it requires a lot of meeples to be fully safe from them, but the true number required is never known due to the attack die roll. Sometimes it might better to put a meeple or 2 less, it might be riskier, but it gives you 2 workers that could have a vital use elsewhere. In both instances it's a solid use of risk/reward and it gave me the feeling that it's hard to win the game by playing cautiously and at some points players just have to take risks. Having said that, I do have an issue with the whole Athenian attack mechanic. I really don't like how the players have to collectively commit more and more workers to fighting the Athenians off. It can mean players are making effort to acquire workers simply for this purpose and feels like quite a negative mechanic. I'm not alone in this thought as this was revised for the 2nd edition. This also brings me to another element of the game; as it progress on and more tiles flood, players will get less and less choice where to place their workers. It feels counter to how games - especially worker placement games flow, typically a player's choices and options expand as a game goes on but Atlantis Rising does the opposite, I know that it's part of the game's challenge and players need to work to prevent this but still sort of feels off. Other than these two criticisms, Atlantis Rising is a perfectly acceptable game that cooperative gamers will be comfortable with. Atlantis Rising doesn't stand out from the crowd but neither does it do anything wrong. Personally, I like how it looks, especially watching Atlantis gradually sink! 3rd October 2021 It's time for more Sunday gaming goodness on Board Game Arena. The first game of the night was Incan Gold. Brave the temple, get the gold, avoid the traps, escape! Indy never had it so easy! He should something really frustrating - like Incan Gold. Caveat: We've only ever played Incan Gold digitally. What's in a game?
Incan Gold's utilises good, evocative art that suits its theme. How's it play? Set up
On to play Incan Gold is played over 5 rounds of varying turn lengths, in each round players decide whether to continue exploring or run away! Cards are drawn from the quest deck by the first player until everyone has chosen to flee or the game goes bust.
Endgame Play continues until 5 rounds have been completed. Players count points from the 3 types of treasure they might've acquired and any artefact cards they collected. Points are tallied, highest score wins. Overall
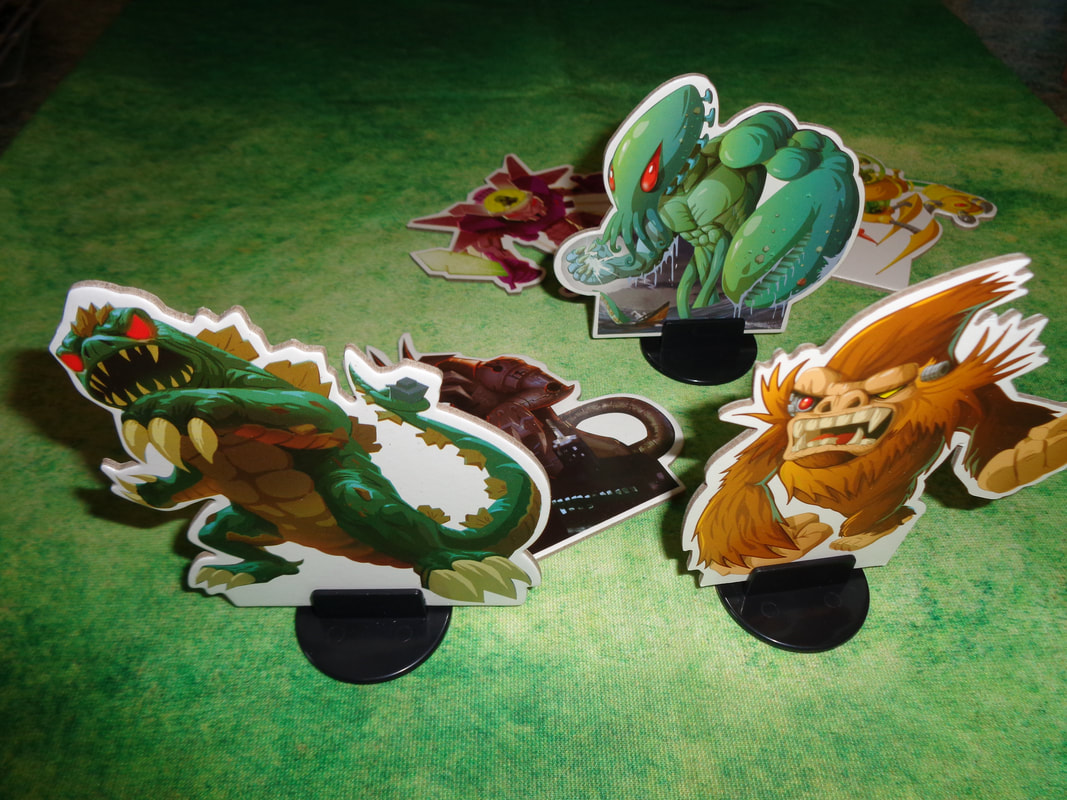
Incan Gold is a very focused push-you luck game, a couple of cards may be added or removed to the quest deck every round, but broadly speaking the quest deck is split 50/50 between treasures and hazards, flipping a card is like flipping a coin. It really is pushing your luck. There are also some other interesting things going on in Incan Gold. At the start of a round, the length of the exploration into the temple will have already been determined by shuffling the deck and there's no way for players to alter this. It means the game's 'luck' affects all players equally, if one player got further into the temple than all the others, it because they had the guts to push their luck further. Conversely, if a player went bust when others got back to camp, then they foolishly pushed their luck too hard! Of course, there will be occasions when both approaches may prove beneficial and players will have to judge when it's a good idea to return to camp or not. The artefact rules add a wrinkle to the game; acquiring an artefact can earn a lot of points, especially in games with higher player counts where treasures are split between more people. This of course means outlasting all the other players and surviving, adding a game of 'chicken' to Incan Gold. Using cards to secretly choose whether to continue or retreat is the final interesting rule for various reasons. Treasure on the path is split between all retreating players, so sometimes, retreating when it's obvious to retreat may not be the optimal strategy, as those treasures will get split amongst all retreating players. Pushing your luck here may prove beneficial, depending on how much treasure you've already got, but other players are thinking the same thing... When an artefact appears, it can add an extra element to this, how far is a player willing to push their luck to get the artefact? Is it worth retreating to collect treasure on the path instead? Can an opponent be bluffed into going too far. Are the other players going to fold? If a player's behaviour and motives can be predicted, it can be exploited. While a round will have a limited number of turns before it busts, a player doesn't have to reach the end, they need to be last explorer exploring. Incan Gold is a game with just 2 decisions, but there's always risk and reward behind those decisions, it can give players tricky and meaningful decisions to make. We've only played Incan Gold digitally and it's a game that employs a significant amount of randomness, something which computers are not very good at handling. It can lead to weird or erroneous results appearing in games, so it's hard to discern if our experience of the game was influenced by this not. We found Incan Gold to be a frustrating experience. The push-your-luck element of the game felt too harsh, too punishing to be fun. The 2nd hazard card seemed to pop up far too often and players frequently busted very early. Eventually we ended up barely turning over any cards before returning to camp, it seemed the most efficient move to make. It felt like the risk far outweighed the reward and it made for an unexciting experience, one we didn't feel like repeating. 12th September 2021 Up from the depths. Thirty stories high. Breathing fire! HIS HEAD IN THE SKY! GODZILLA! GODZILLA! GODZILLA! ….and Godzoo- OK, that's going too far. Take on the role of a kaiju as they rampage against each other for the right to flatten Tokyo! What's in a game?
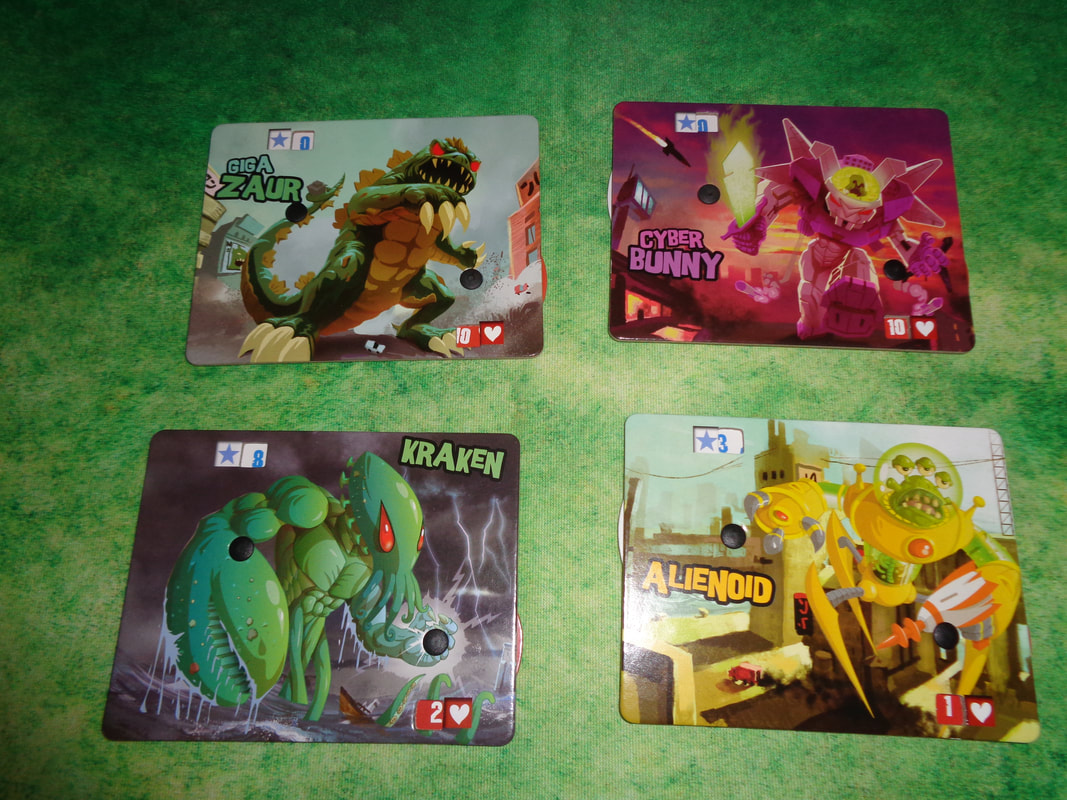
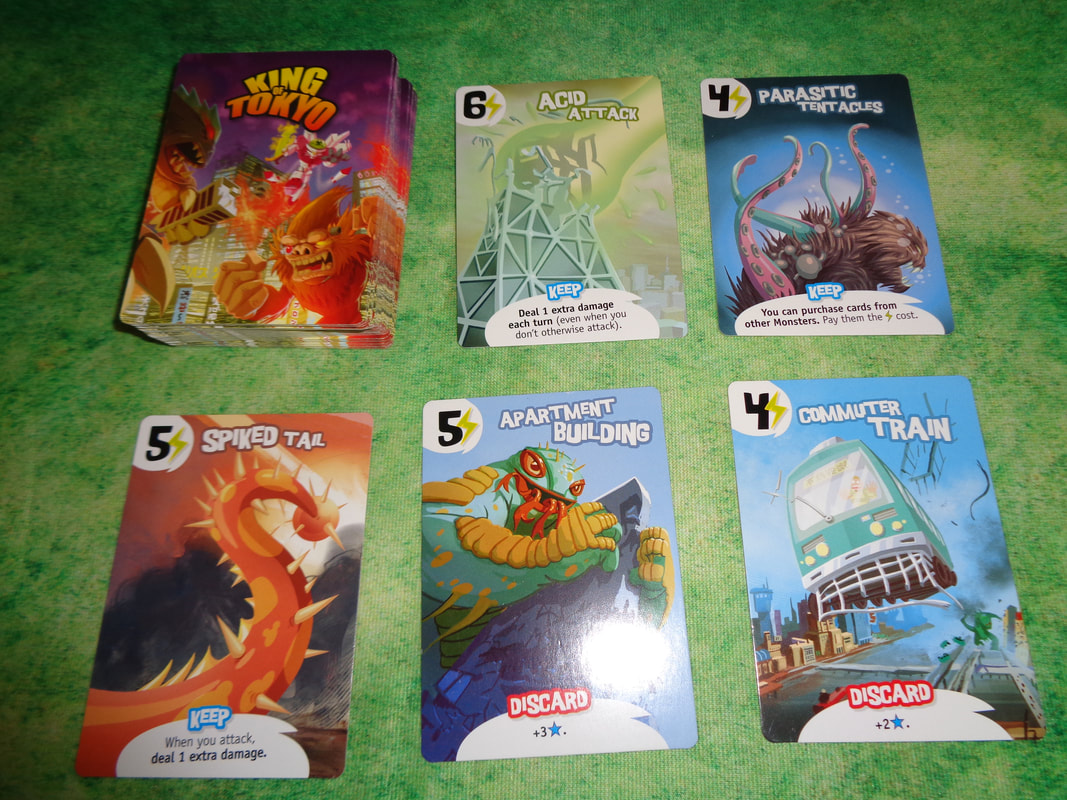
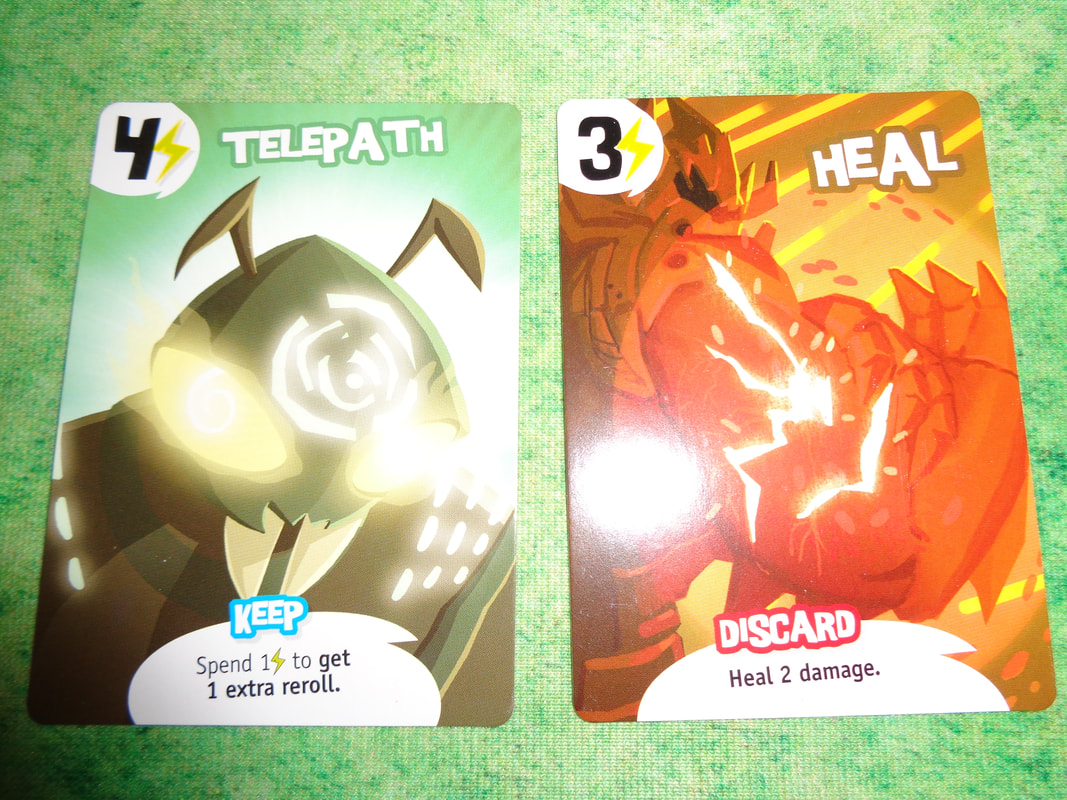
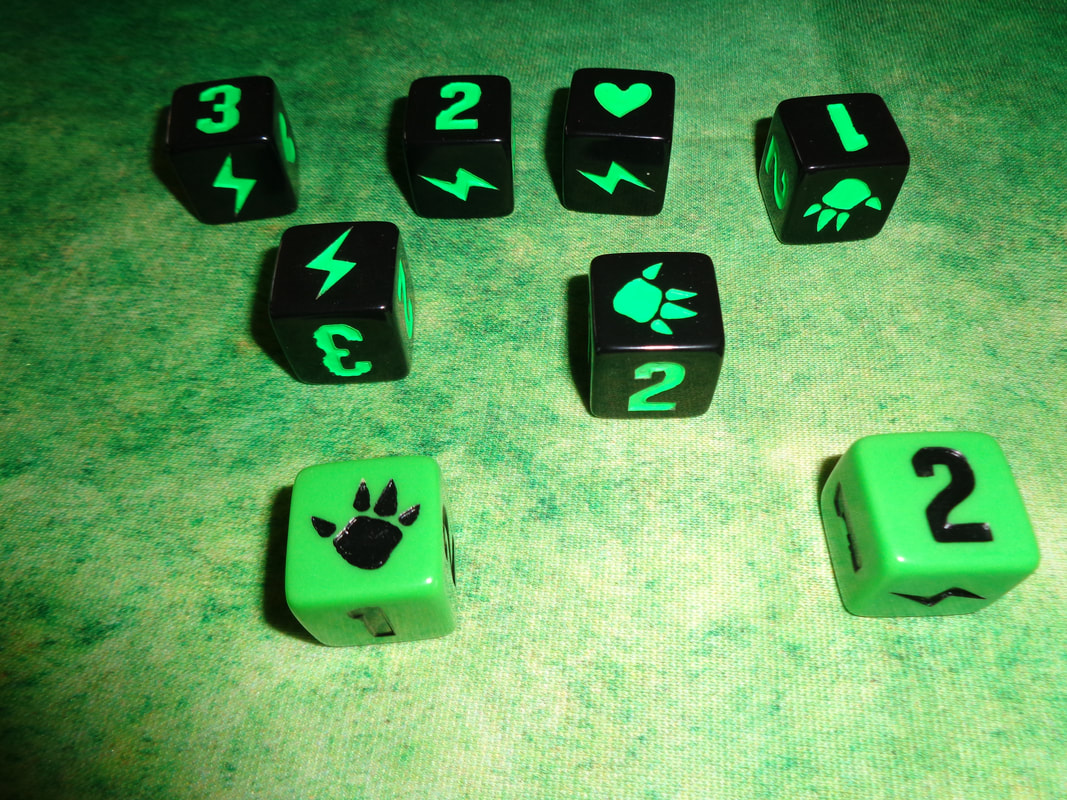
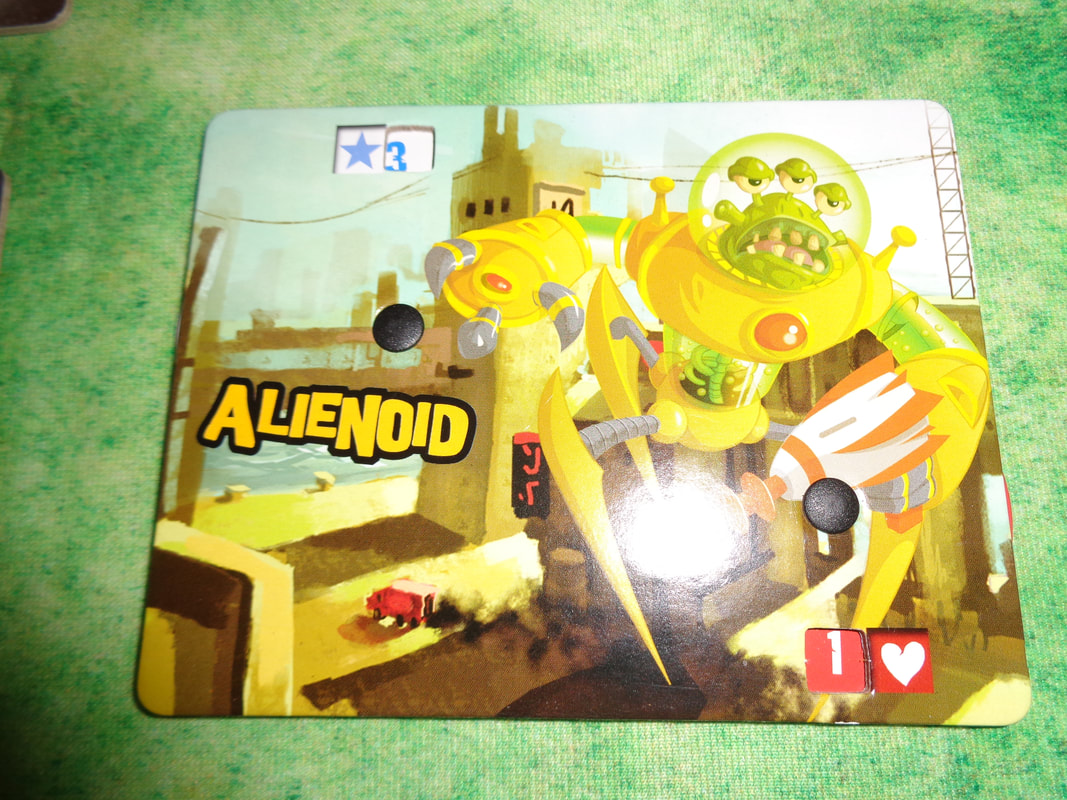
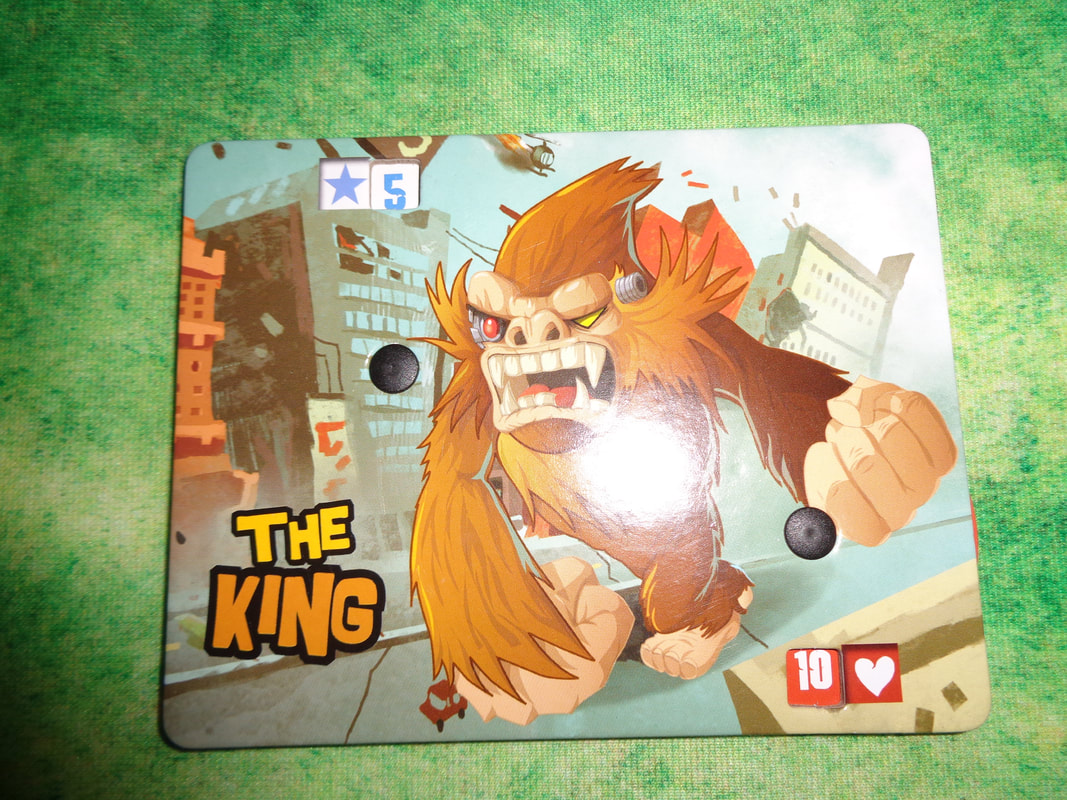
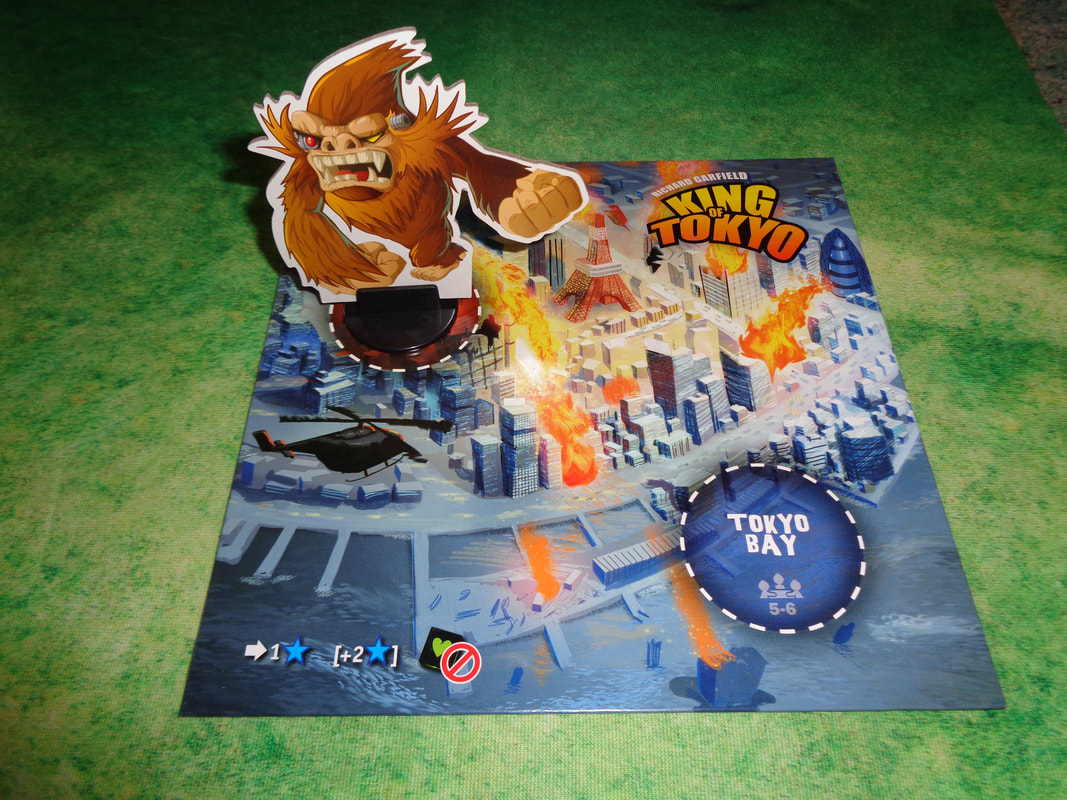
The dice are very well constructed and feel satisfying weighty to heft, which is good because they be getting a of of use. The boards, cards and standees are lavished with brash, colourful and cartoonish art, it's comical style perfectly fits both the game's style and over the top theme. The game has little iconography which is easy to understand. How's it play? Setup
On to play In King of Tokyo, players take turns rolling and re-rolling dice, then using those results to try and gain some benefit to work towards their objectives. During play there will always be a monster inside Tokyo, while the others are outside, in a 5+ player game, there can be 2 monsters inside Tokyo. A turn goes like this.
Endgame Play continues until one of two conditions are met. A player has reached 20 victory points - in which they immediately win or all monster bar one have had their health reduced to 0, in which case the last monster standing wins. Overall
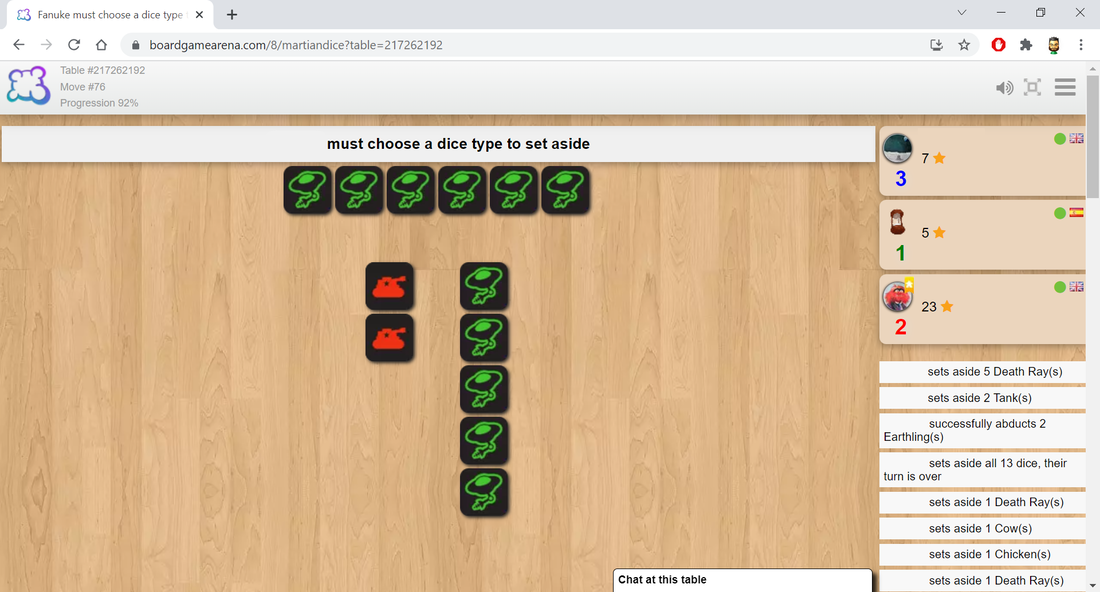
King of Tokyo is a push-your-luck game with a difference, most other games of this type task players with essentially beating the odds and doing so more efficiently than other players, getting to whatever the victory criteria is first. But King of Tokyo has an extra wrinkle, in King of Tokyo, players can target and eliminate other players, I'm not a fan of player elimination but it gives the game an extra approach and dimension to gameplay. Not only that, players will look to prioritise different results at different times, if they're low on health; they'll want hearts. If there's a power card they like the look of; they'll want energy. The rules for getting into Tokyo compliment this well. Getting into Tokyo works for scoring points or attacking enemies. There's an inherent risk to do so, because it makes that player the central target. Managing to stick it out in Tokyo however, earns the player 2 victory points per turn, which on the surface might not seem like much but is actually 10% of the required victory score. Additionally, being in Tokyo is the best way to dish out damage to all other players, hit them hard enough and they'll probably want to heal instead of attack, giving the player in Tokyo more time, because sometimes, attacking the player in Tokyo is a risk. A canny player might yield Tokyo to another player who is low on health because it then puts them on the spot! Throw the usage of power cards into the mix and King of Tokyo becomes an enjoyable blend of strategy, risk and reward and push-your-luck mechanics. Furthermore, players will need to adapt to the unpredictability the game sends their way. King of Tokyo is a easy to learn, light and fun game not to be taken too seriously, it's perhaps a little too long for a filler game but is definitely worth trying, especially if you're a fan of push-your-luck games. 29th July 2021 It's a Thursday and we're logged into Board Game Arena for some gaming entertainment. The first game was Martian Dice, it turns out that in Martian society abducting humans is a highly popular and competitive past time, players take the role of opportunistic Martians, flying around looking for hapless humans to kidnap as well as those old favourites - cows and errrrr.... chickens? Meanwhile, they'll also have to dodge all those pesky Sherman tanks sent by the US Government to harass them. Caveat: We've only ever played Martian Dice digitially. What's in a game? You'll be unsurprised to learn that Martian Dice is a dice game that comes with 13 standard 6 sided dice. All dice are identical and come with the following symbols on their faces.
How's it play? Martian Dice is a pretty straightforward push your luck game and players can continue rolling dice until they choose to or are forced to stop.
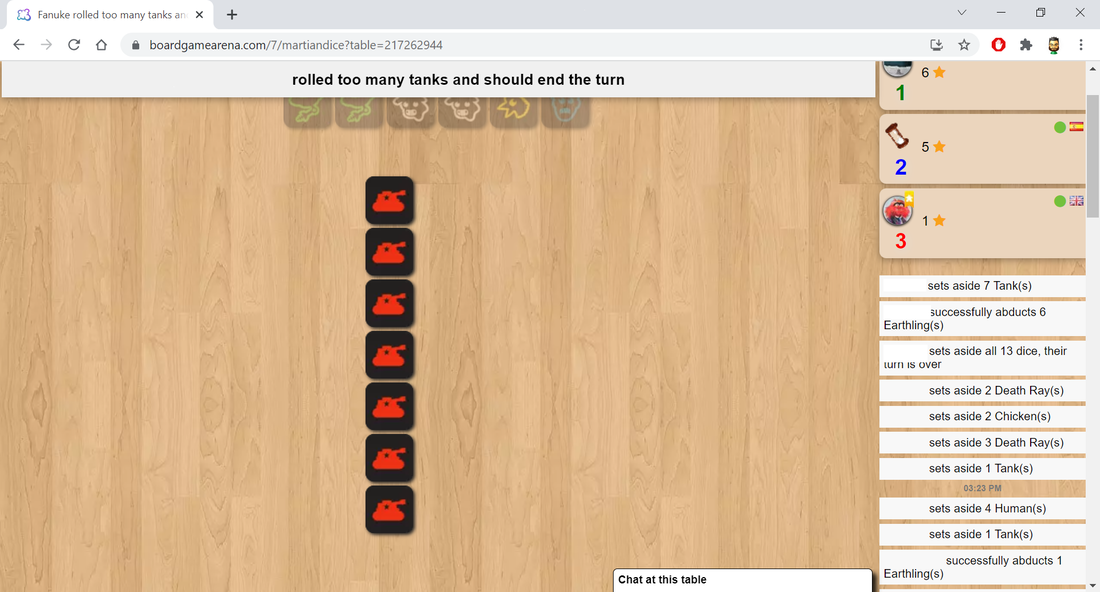
Endgame The game continues until a player scores 25 or more points, then the current round is concluded. Points are tallied, highest score wins. Overall This is usually where I blog about what I think of a game, but with Martian Dice, it's a little trickier. This is because at the time of writing, we've only ever played the game digitally and the version of Martian Dice we played on Board Game Arena appears to be quite broken! Why? In a word (Or acronym.); R.N.G. - random number generation. Computers can't actually, truly, generate numbers randomly, they can only do an approximation of it and any game that contains any random element will be affected by this to some lesser or greater degree - and that's probably most tabletop games on Board Game Arena! So why am I singling out Martian Dice? In game that's only about throwing lots of dice, when the randomness does go skew-whiff, it can become readily apparent. Look at the examples below.
I don't know the odds of the rolls that occurred above, but they must've have been very long. These kinds of results weren't particularly uncommon either, every few rounds something would pop up that just looked too improbable.
This skewed randomness did however, generally appear to affect all players equally which mitigated it somewhat, but it did alter the way we played the game. Anyway back to my conclusion. Martian Dice really only ever gives players 2 decisions to make. What dice shall I keep? Should I continue my turn or not? Luckily, at least 1 of these decisions is generally always a meaningful decision. Players will only get 3 scoring opportunities per turn, they'll sometimes be faced with the decision of scoring fewer points now and locking out that scoring type or hoping to get a better result later at the risk of getting 0 points. It can put players in a painful predicament - in a good way! The other key hard decision players will have to make is choosing to put aside scoring dice or death-rays to battle tanks, especially as invariably a couple of tanks will have turned up. Go for the points now and hope to be able to deal with the tanks later? Or deal with the tanks now and hope points will turn up on another roll, albeit one with fewer dice? Perhaps a player will get lots of death-rays early on; they could put them aside to deal with tanks that will appear in later rolls, on the other hand, putting aside this many death-rays lessens the chances of getting scoring results. Finally players will frequently have to decide whether to push their luck or not. Because of how the scoring mechanism works, it obvious when there's no point pushing on and when it's got a chance to score more points. The question is; is it worth the risk? Sometimes players will have to roll because they've got too many tanks in play, other times - well getting just one of that type a player hasn't got would score 4 extra points! However, if the tanks and death-rays set aside are close in numbers, an unfortunate roll will bust they player. All of these decisions will of course be contextual, but the game gives players a fairly clear risk/reward choice to make. Martian Dice is a light, quick to learn and play, luck-based (sic) game, it definitely has some nuance and strategy but it will also appeal to fans of push your luck mechanics. If you want a game not too taxing on the grey matter and works as a filler, Martian Dice could work well for you. We found it a good finisher at the end of an evening of play. |
AuthorI play, I paint. Archives
March 2024
Categories
All
|


 RSS Feed
