|
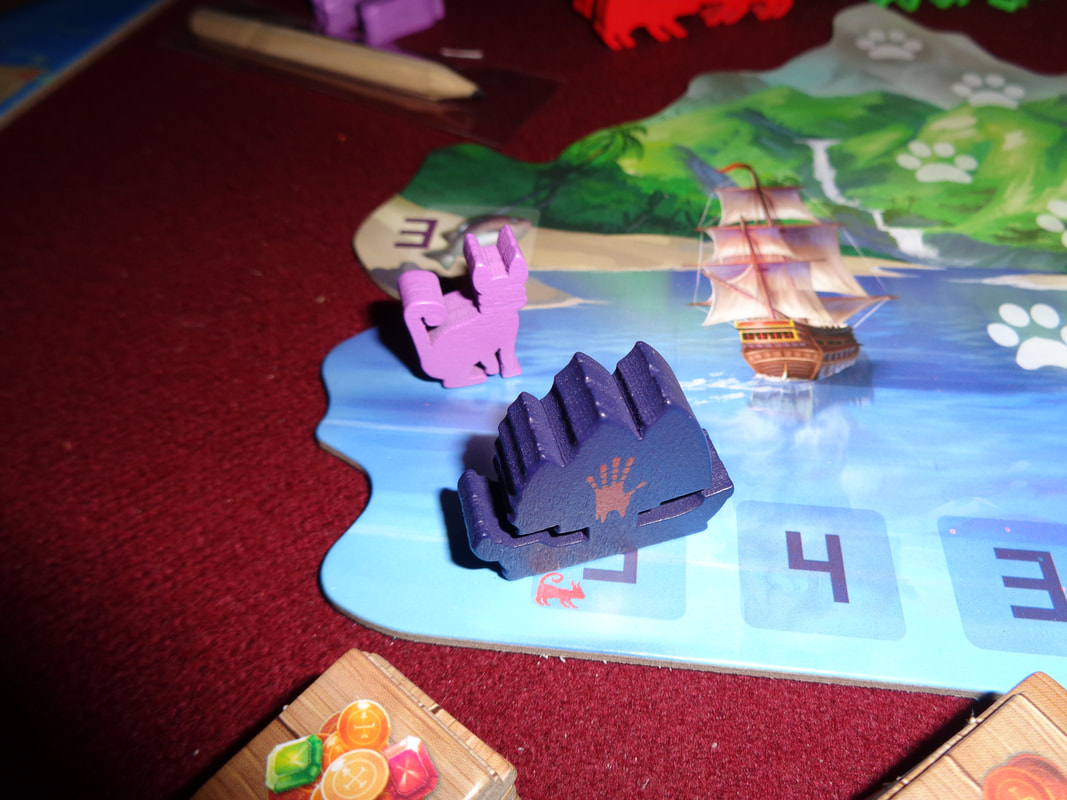
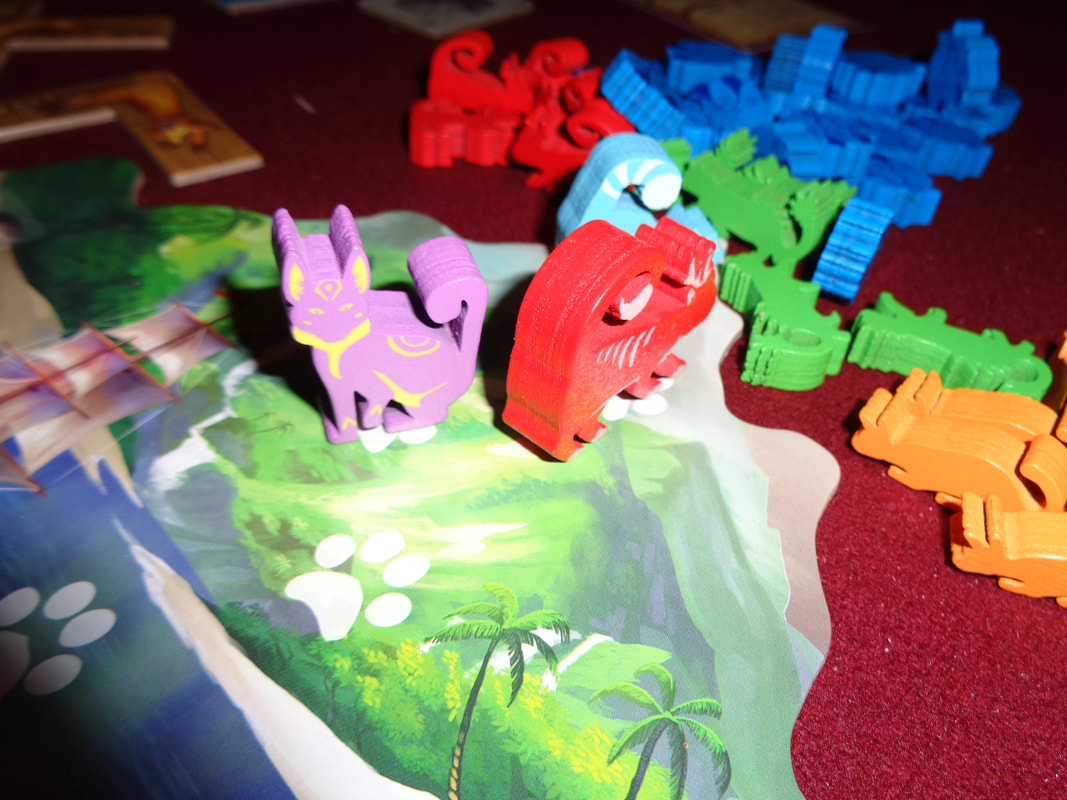
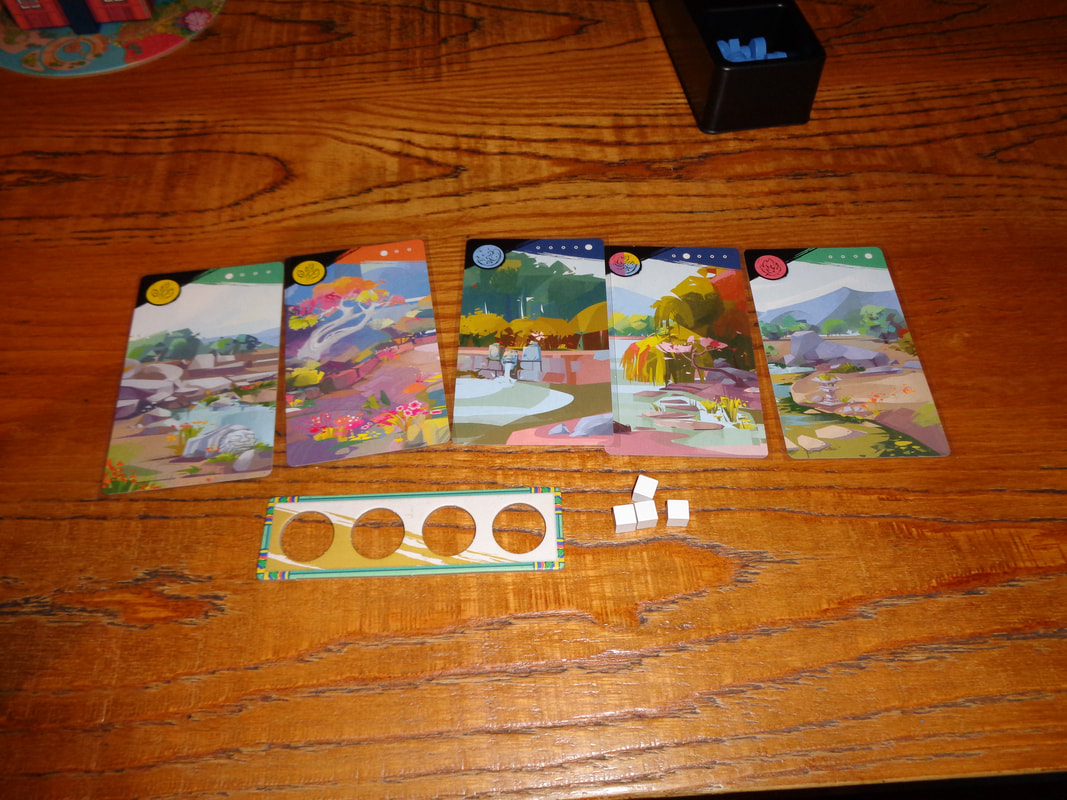
5th August 2022 It's a Friday and we're in Aldershot for some gaming! When you go into a national park, you may find yourself hiking along trails. Which is a slightly tortured segue into how Trails is actually a follow up to the excellent Parks game and shares some similar concepts. So let's hit the errr... trail and see how it stacks up? What's in a game?
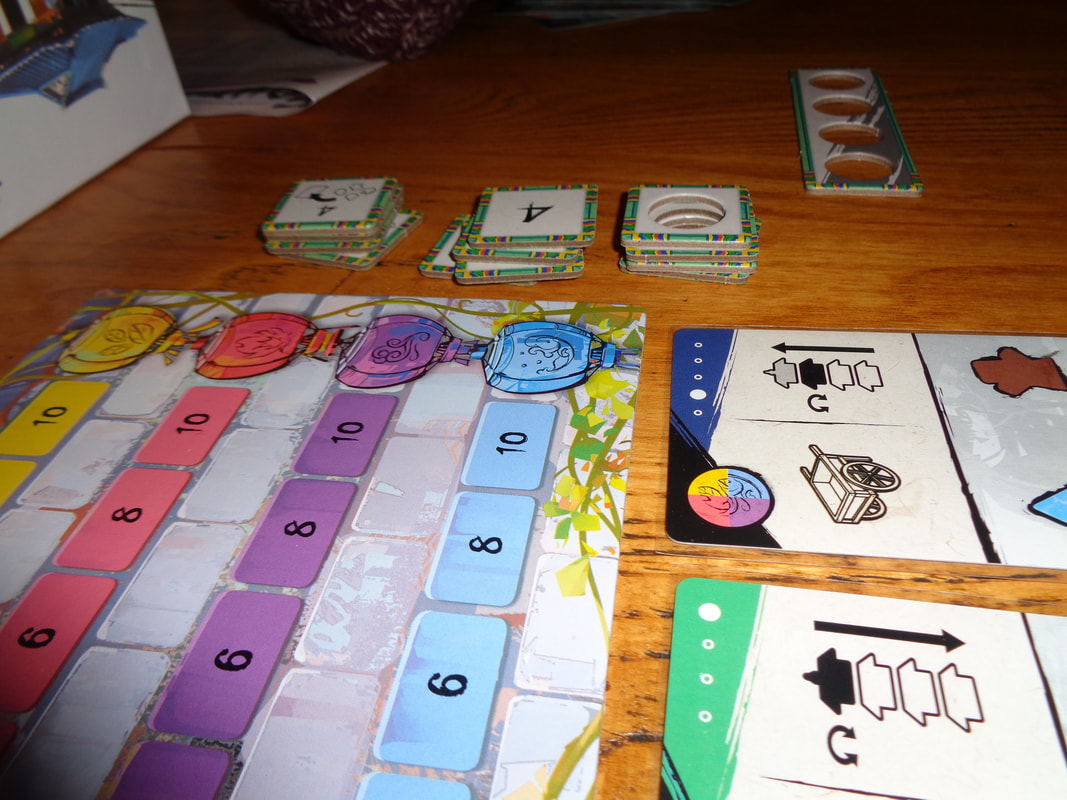
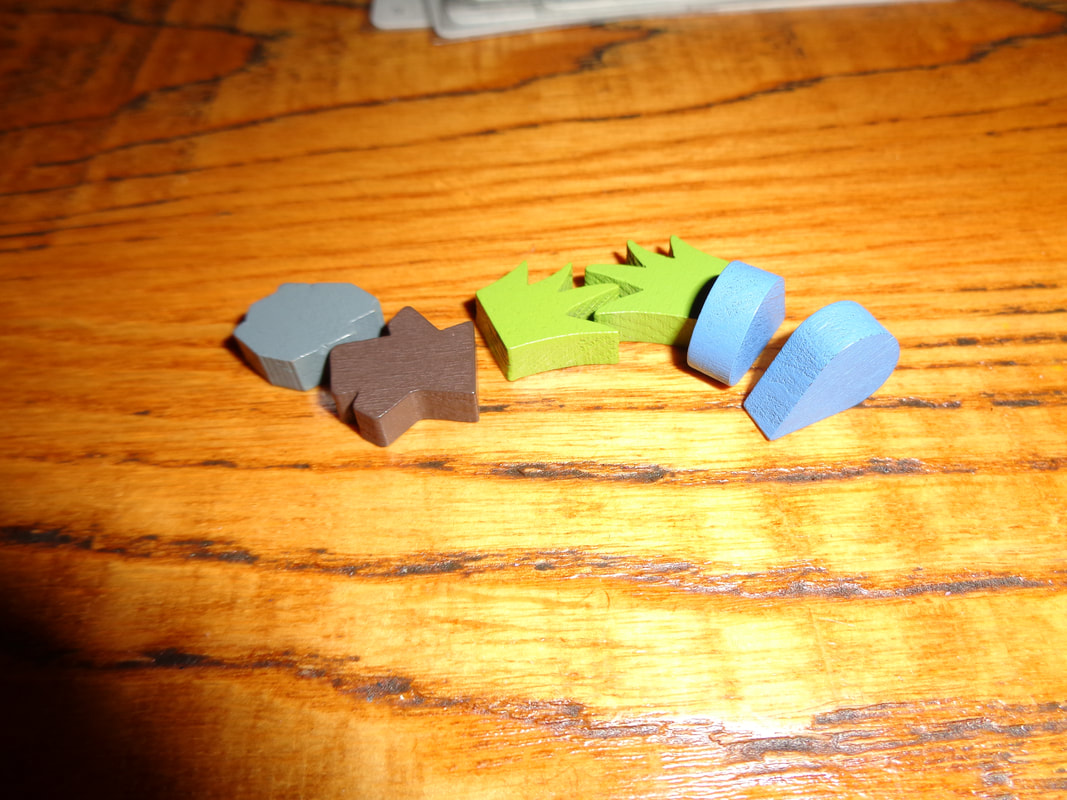
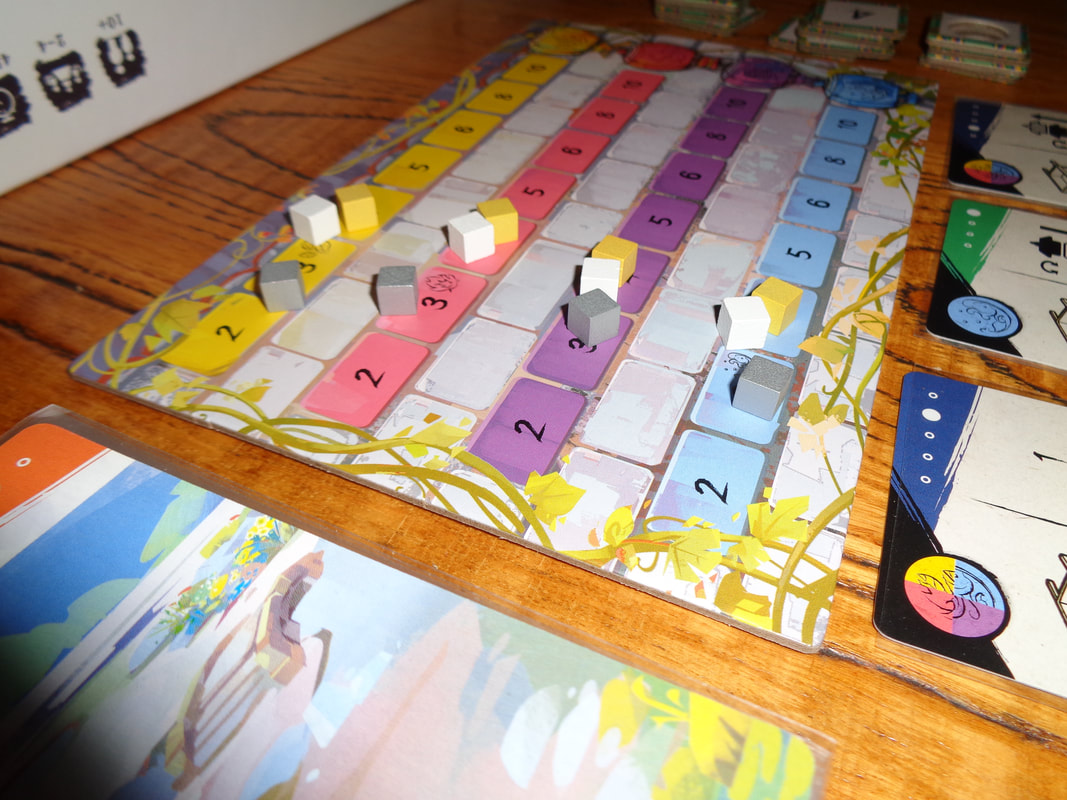
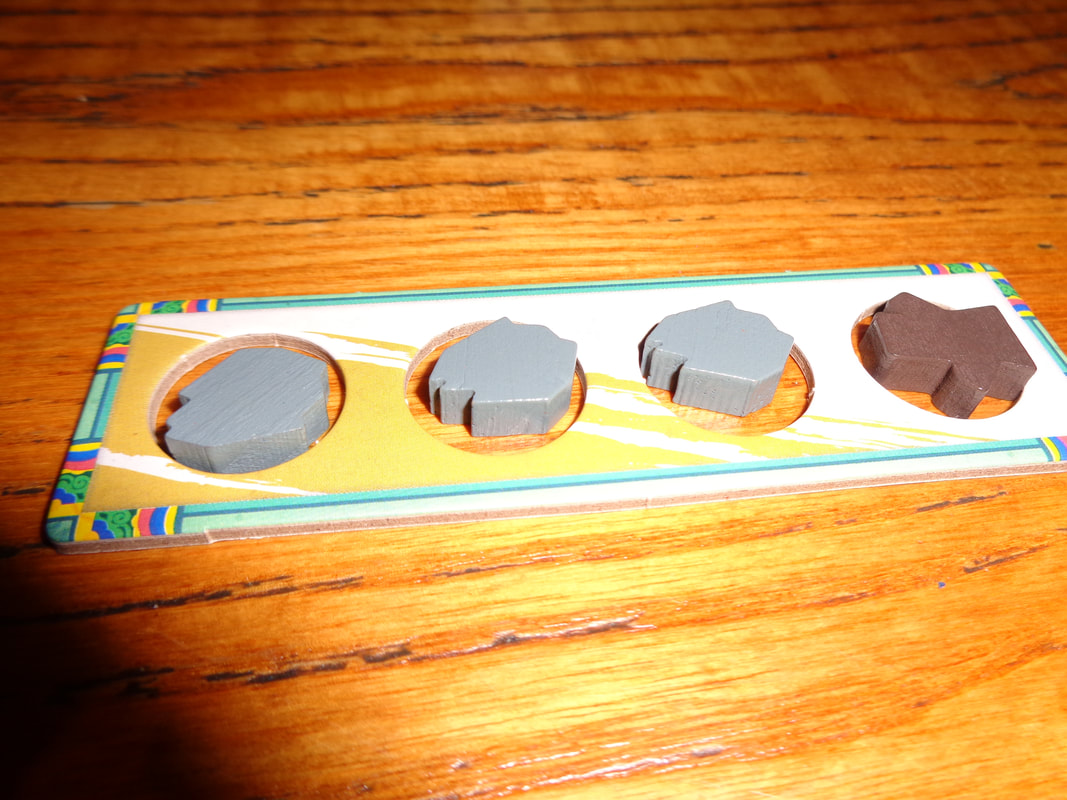
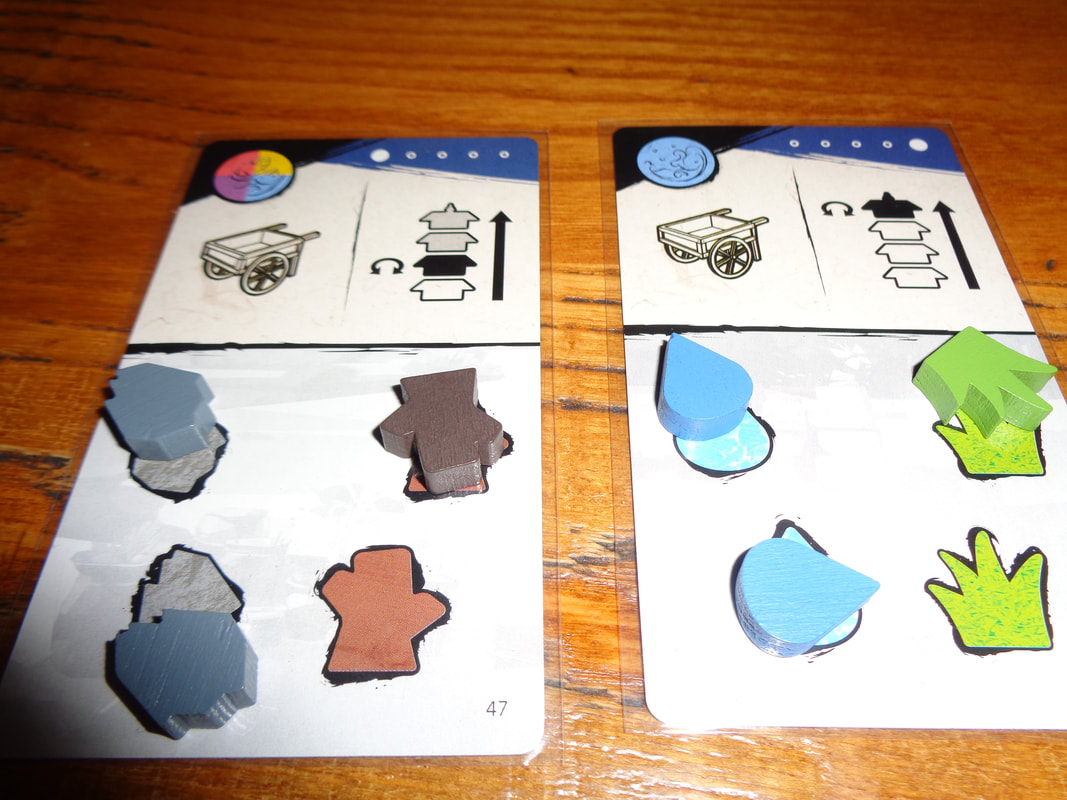
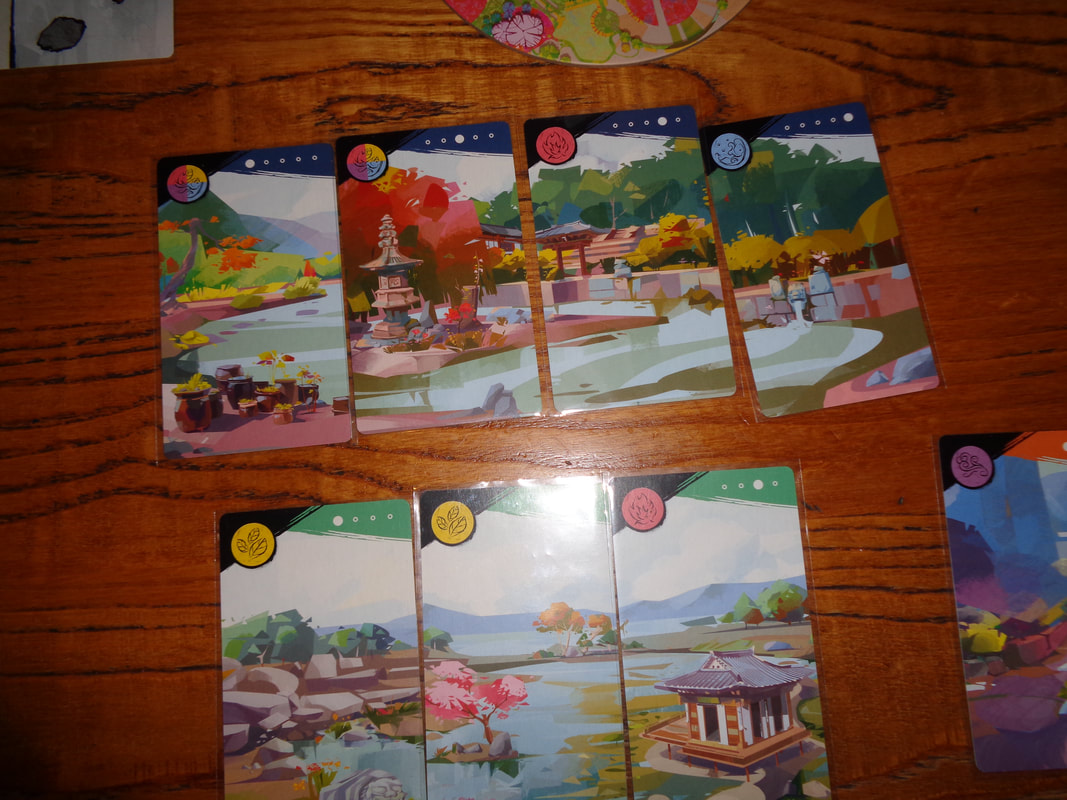
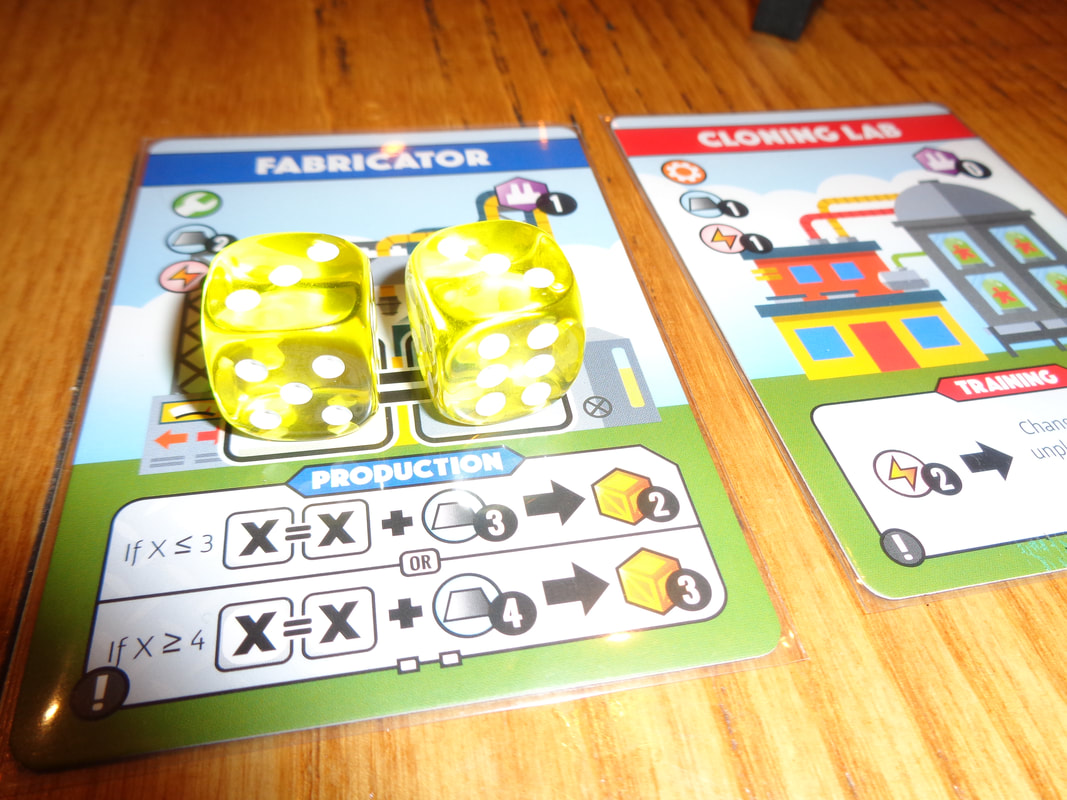
For the most part, component quality in Trails is good. The wooden meeples look and feel good as does the die. I also like the wooden resource cubes, although I'm not a big fan of the colours which I feel are a little too muted and sometimes in poor light, the grey and the green colours can feel hard to distinguish. I also found the player colours a little muted too. All the tiles and tokens are constructed of thick card and feel weighty. However, I would describe all the cards as average in quality and perhaps a little flimsy. It's not really an issue though, Trails is not a card game and they won't be handled much so should stand up to repeated handling. Without a doubt, all the art in Trails is excellent. Much of it is sourced from the Fifty-Nine Parks art project which also provided the same art for Parks and will be familiar to players of that. So even though Trails is reusing artwork, it doesn't matter because it's such good quality. Having said that, a lot of images are heavily cropped and the fact they're all on relatively small components means they just don't look as impressive. Original art appears on the badge cards in the form of a series of quite stylised images. It's a different style to art that appears on the tile and photo cards but I have to say I think it looks good. All the main icons which appear on the tiles and die are easily understood. It's not quite so obvious with some of the rewards on badge cards and players will need to refer to the rules and clarifications on occasion. It's nothing game breaking though. How's it play? Setup
On to play In Trails, players will travel back and forth along the path, taking photos and accumulating resources which they will use to buy badge cards. The game follows a typical turn structure with the active player resolving their turn before play progresses to the left. As their action, the active player can move their meeple and resolve the tile it lands on.
Endgame When a player take as sun action that moves off the last leftmost icon on the trail end, they resolve that action as usual and take the sun token. Play progresses normally, until the player to the right of sun token holder has completed their action, upon which the game ends. I.e., once sun has taken the sun token, all other players get 1 more turn. Players now calculate their VPs.
Overall I'm not over fond of comparing one game to another, a game should be taken on it own merits but in this case, there might be some value in doing so. Parks and Trails come from the same family of games and as such share some thematic elements. Both are about hiking along tiles, collecting resources to acquire photos and cards, as well as using canteens for a bonus. However, Trails differs in several ways as explained below. Unlike it's predecessor, hikers from multiple players can happily coexist on the same space so the stress and need to try and anticipate where other players' hikers will go is gone, as the tactic of trying to block other players. It makes the game a little lighter (By no means a bad thing.) and focuses players on getting badge cards (Which are the game's biggest source of VPs.) and players will encounter something of a conundrum here. They may have the urge to collect as many resources as possible which can be prudent but at the same time, they'll want to reach the trail head & end tiles quickly to get a certain badge card before other players. Trails is a game about optimisation especially since there are only 3 types to manage - although that 8 cube limit can be punishing. I also like the addition of the day turning into night mechanic, not only is it visually pleasing to watch the sun set, it adds some momentum to the game, upping the ante by giving players more resources and making it easier to get more badge cards. Players that have done well in the early game are not guaranteed victory. So is Trails a sufficiently different game to Parks to warrant having both? I would say yes. I bought copies of both and I'm glad I did. Trails felt like an easy game to learn and despite the fairly lengthy rules writeup above, is a reasonably light game that requires a little less brain power and also a little less directly competitive. Although for a lighter game is has a reasonably long play time - far too long to be considered a filler game. That's a minor criticism though and ultimately, Trails is a fun experience and is worth trying.  Big brother, little brother.
0 Comments
5th July 2022 It's a Tuesday and we're at The Sovereigns with the Woking Board Gaming Club for an evening of gaming. The world of Victorian anthropomorphic railroad magnates is a cutthroat one in this game of acquiring train lines and towns. Buy low and sell high to become the... Raccoon Tycoon! What's in a game?
Raccoon Tycoon has excellent production values. Wooden tokens are used for commodities and first player token which is a good move, they always have a quality to them and also look cool. The cards (And paper money) have a sturdy feel to them while the tiles are satisfyingly thick. The game's art direction is also equally high. Anthropomorphic art is used throughout the game and I've found that it's a divisive style which most people do or don't like. Regardless of your view on this, it's undeniable that the quality of the art is high. The standouts are the railroad cards which use a oil painting style to display whimsical characterful animals in Victorian clothes. Curiously, the building tiles use a completely different style, instead displaying line illustrated buildings and subjects with mostly flat and barely shaded colours. It's a striking contrast that should theoretically be jarring but actually fits quite well. Icons used to represent commodities on cards are easily understood. Most other game information is relayed via text which is usually very clear. How's it play? Setup
On to play Players are trying to earn VPs in Raccoon Tycoon, this can be done by collecting sets of railroad cards, acquiring town cards to pair with railroad cards and gaining building tiles which are not only worth VPs but can provide avenues to scoring more VPs. All of this requires money and commodities, players will need to manipulate the commodities market to maximise the profit gained from selling their own commodities while trying limit the profit of other players. Racoon Tycoon follows a traditional turn order with the active player resolving their action before play moves on to the player on their left.
Endgame Play continues until one of the following 2 criteria is met.
VPs come from a variety of sources. Sets of railroad cards. Town cards paired with railroad cards. Building tiles earn 1 VP each. Bonuses from building cards may also provide additional VPS. Points are tallied, highest score wins. Overall
Even without the anthropomorphic artwork, Raccoon Tycoon would be something or a quirky game. It packs quite a lot of mechanical systems into a single game albeit to a fairly simple level. A little bit of stock market manipulation, a touch of set collecting, a dash of auctioning and a sprinkling of engine building. It could be a recipe for disaster but in the case of Raccoon Tycoon; the whole is greater than the sum of the parts. A large part of this I feel is due to the building tiles. Their unique bonuses both provide some asymmetrical gameplay elements and can also give players a bit of strategic direction. Raccoon Tycoon is a bit of a balancing act between acquiring cash for railroad cards/building tiles and commodities for town cards. It's hard to work towards both at the same time. Adaptation is important here, as is planning ahead. Players could look to finding ways to raise commodity values to increase profit when selling them later This brings me to commodity manipulation. There isn't too much interaction between players other than auctioning and commodity manipulation, Watching what opponents are doing can prove useful and is something of a higher level of play. I.e., if 2 players are accumulating the same commodity, there's a possibility that one of them will sell it, causing that market to crash. Beating a opponent to the punch so to speak, can cost them lots of cash! Raccoon Tycoon is fairly rules light and I think seasoned gamers won't have any problems grasping all the systems at work here. For less experienced gamers, the curve will be steeper, I don't feel it's a gamebreaker but I imagine it could be off putting. While there's enough gameplay to give players thoughtful and meaningful decisions to make and a fun experience, I also found the game to be a little unengaging and uncompelling, I never felt like I was building railroads or towns and despite the unique art style, it didn't feel like it stood out from the crowd. here's nothing wrong with Raccoon Tycoon but it wouldn't be my first pick for a game, although I'd have no problem playing it if someone else wanted to. 30th June 2022 It's a Thursday and we're at Aldershot for some gaming goodness. Burger Boss! What's better than being a king? Being a boss of course! Be a boss of those burgers in this game of resource management and worker placement or if you want to be specific; dice-placement. What's in game?
All the game's cards are finished in vinyl/plastic and as such feel quite sturdy. The dice plastic, although they have nicely rounded corners. Wooden components are always a plus in my book. The discs used to represent burgers and ingredients are obviously wrongly proportioned but if they were correctly sized, they'd have to be much bigger, otherwise they'd make the handling ingredients even more fiddly than it already is - which is quite fiddly and is my one criticism of the components. Presentation wise, Burger Boss uses a cheerfully brash palette along with cartoonish illustrations. It's a bright, colourful art style that suits the game's light-hearted approach perfectly. There's little iconography used in the game and it's easily understood, mostly consisting of symbol ingredients and and dice values. The manager's special cards use text to provide information, which is a little sparse and will probably have players referring to the rules. It's not something that will occur too often though. Packaging I don't usually talk about a game's packaging - because usually it's just a box. Burger Boss however, comes in a giant burger! Inside are several layers to hold all of the game's components. Yes I know that it won't stack with other games and the manual doesn't fit in the burger and it'll just have to be put all back into it's normal, typical box anyway which technically defeats the purpose of the burger packing - but it gives the game a unique, eye-catching presentation and I like that. Yes, I also know it's just a gimmick but I like gimmicks! How's it play? Setup
On to play The objective in Burger Boss is to fulfil customer orders to earn money, this is done by gaining and cooking the required ingredients. All of these actions are achieved by putting dice on cards, many of these cards will require dice of specific values. The game does not have a traditional turn order and instead uses a mechanic that mixes randomness and player choice to determine player order. Once player order is established, whenever someone becomes the active player, they can take an action by using a die. Each round consists of the following phases.
Endgame The endgame is triggered when the customer card deck is depleted - although there will be customer cards in play. There is then 1 final round of playing then the game goes to scoring. Players total money from the following: Money earned from selling food to customers. Money earned from their secret objective card. Anything still on the grill earns $1 apiece; food in storage earns nothing. Cash is tallied, highest amount wins. Overall
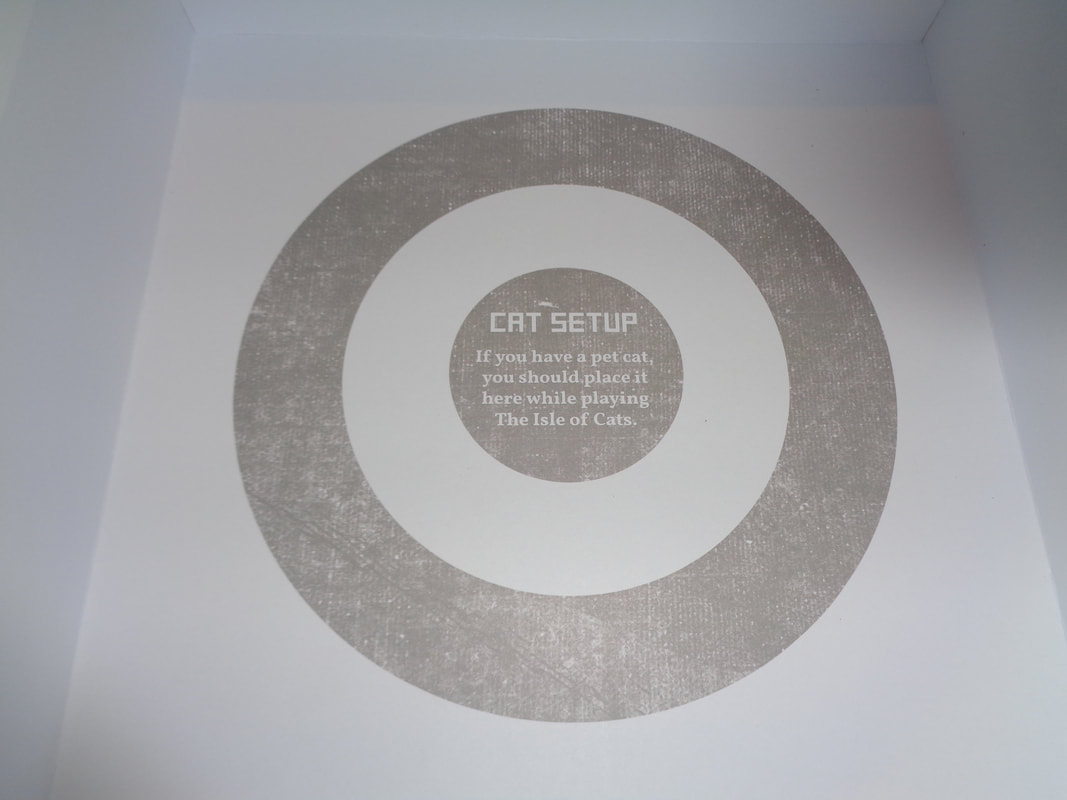
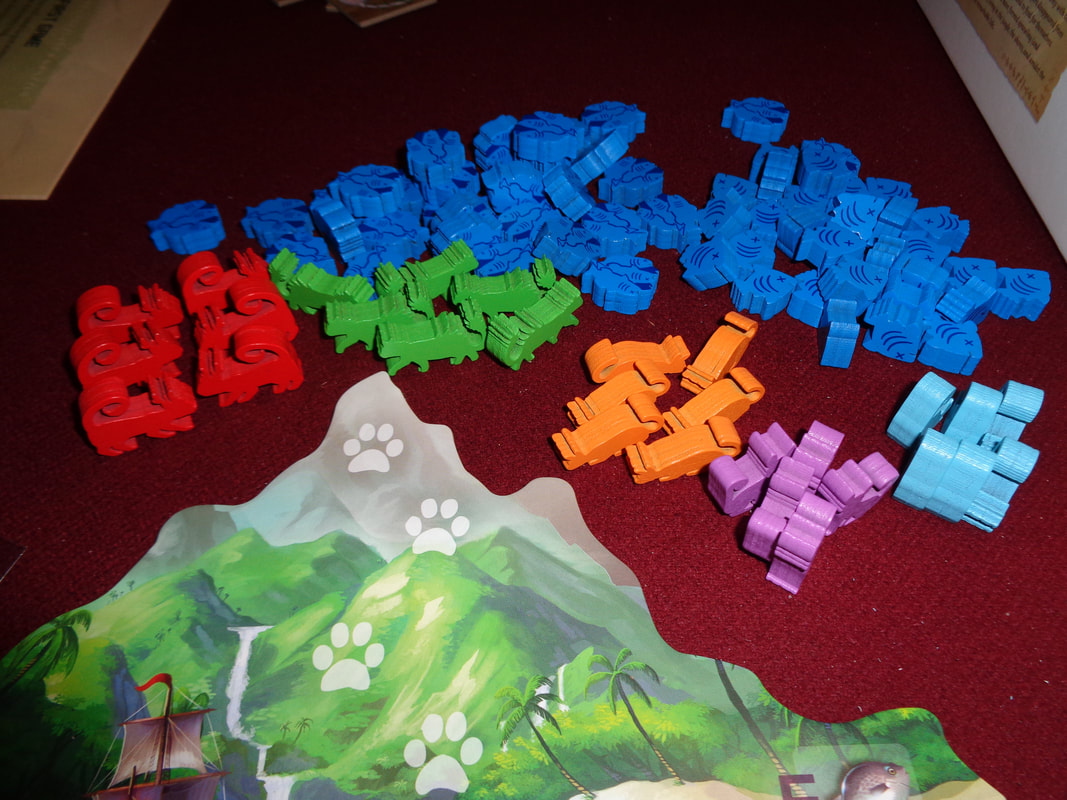
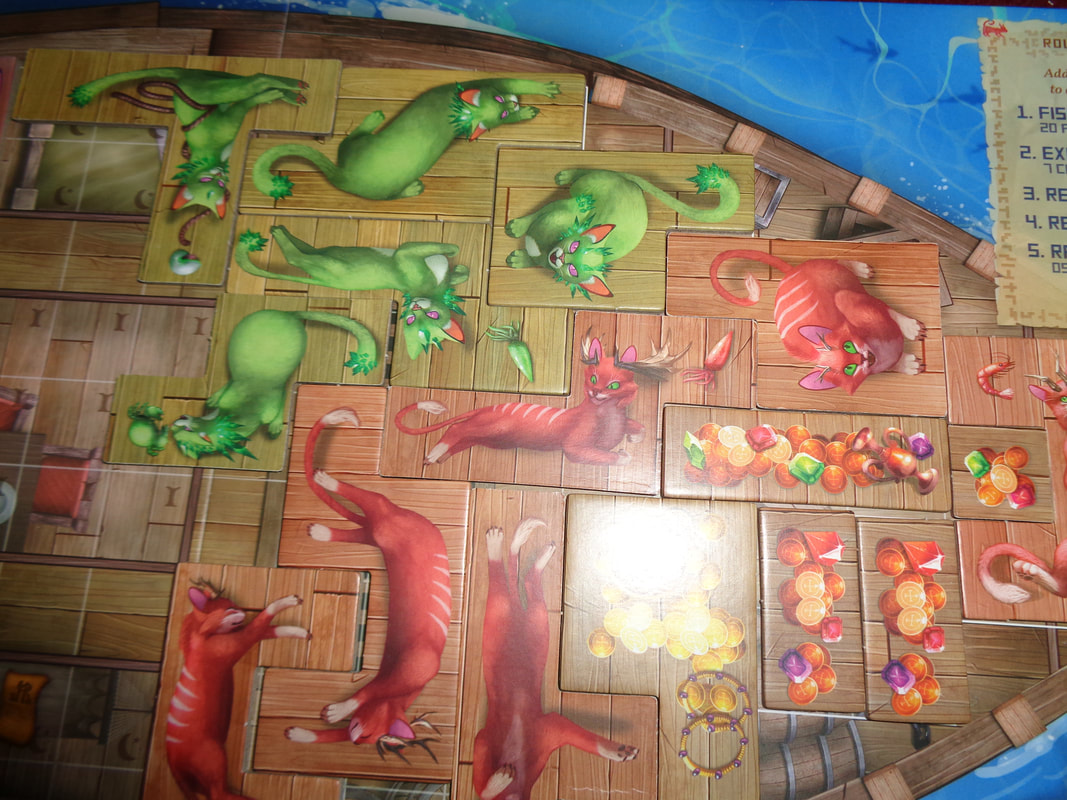
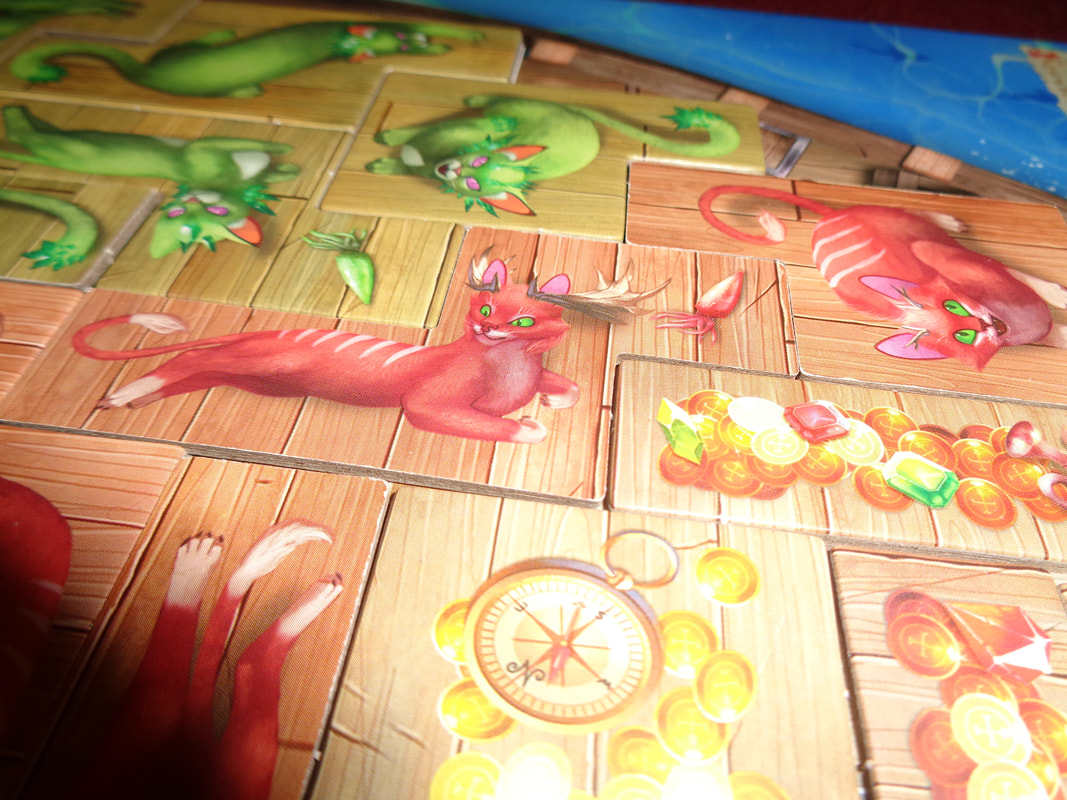
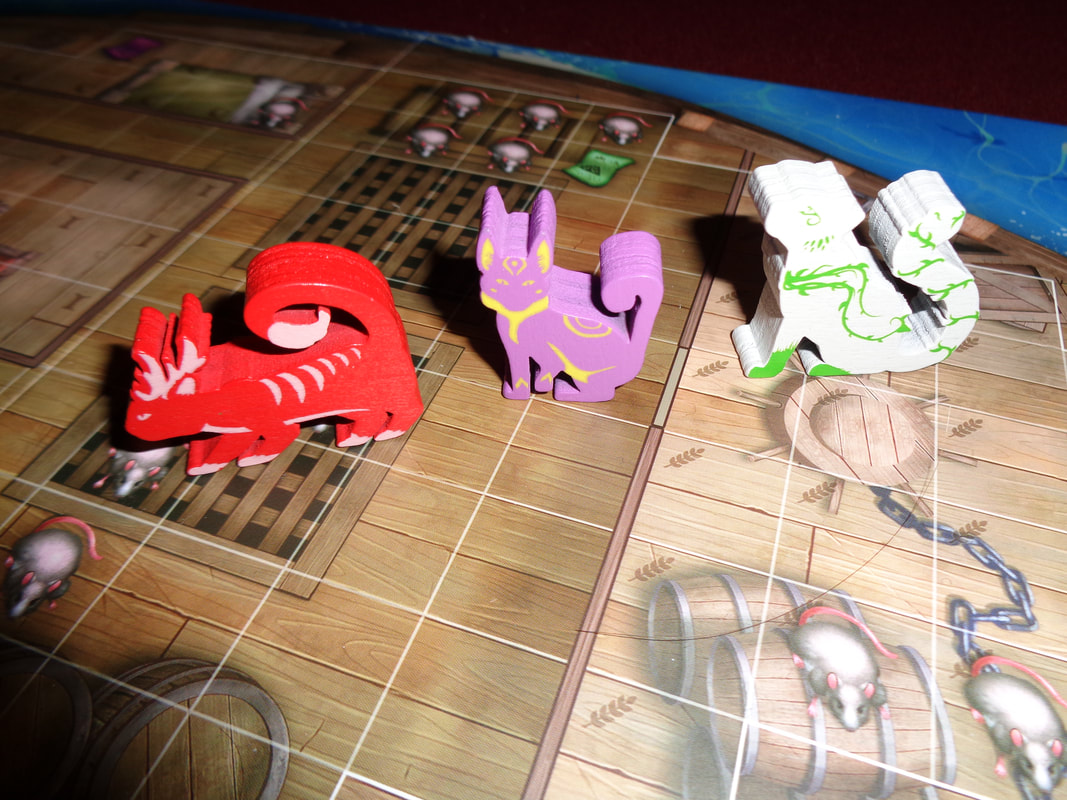
Burger Boss is a light-to-midweight game, as written above, the rules seem a bit complex but in practice they're fairly straightforward. That's not say it's a good game for beginners - because it's not! There are several mechanics and concepts in Burger Boss that that require thinking ahead and someone nuanced decisionmaking. Quite often, it'll be impossible to complete a customer's order in a single round and generally there isn't enough cold storage to hold the required ingredients. This means that players will probably have to put ingredients on to their grill and hope to complete them in a later round. Mistake's can be costly and $1 is scant compensation for losing food. Which brings me to customers. There's a balance to be found between completing a customer order as quickly as possible and waiting for a later turn to earn more money but risking another player getting that customer first! While there is no direct interaction between players in Burger Boss, the game has a lot of open information and it definitely pays to watch what other players are doing; what they've got on their grills, where they're putting their workers and responding to this. This ties in with the turn order mechanic, sometimes players will want to use less workers to go earlier. Worker spaces to gain ingredients are limited and turn order can play a vital role when fulfilling customer orders, in both cases, going later and being stymied by other players' actions (Whether accidentally or deliberately.) can be infuriating. Burger Boss also has a a bit of the unexpected, manager's special card can also throw spanners into the works with unexpected special actions, especially when used judiciously. Despite this, the game provides options to gaining other benefits - or benefits other ways, if the baker or butcher is inaccessible for any reason, there's always the supermarket. There's a pretty generous number of worker spaces on the card for the aforementioned manager's cards. All of these means that rarely is a player presented with meaningless decisions which is always a good thing in games. I found Burger Boss to be a colourful, visually appealing game of making burger (OK, they stacks of ingredients, but still it looks good.) and fun worker placement and resource management game with a reasonable play time and gameplay that's tricky enough to tax the brain enough to be engaging, along with a side order (SIC) of competitiveness. 9th June 2022 We're in Aldershot for an evening of board gaming fun. So; in Isle of Cats, some evil bad guy is heading to the titular island (Which as the name might suggest, is filled with the felines.) to kill al the cats!!! Players have a limited number of rounds to save as many as possible. What's in a game?
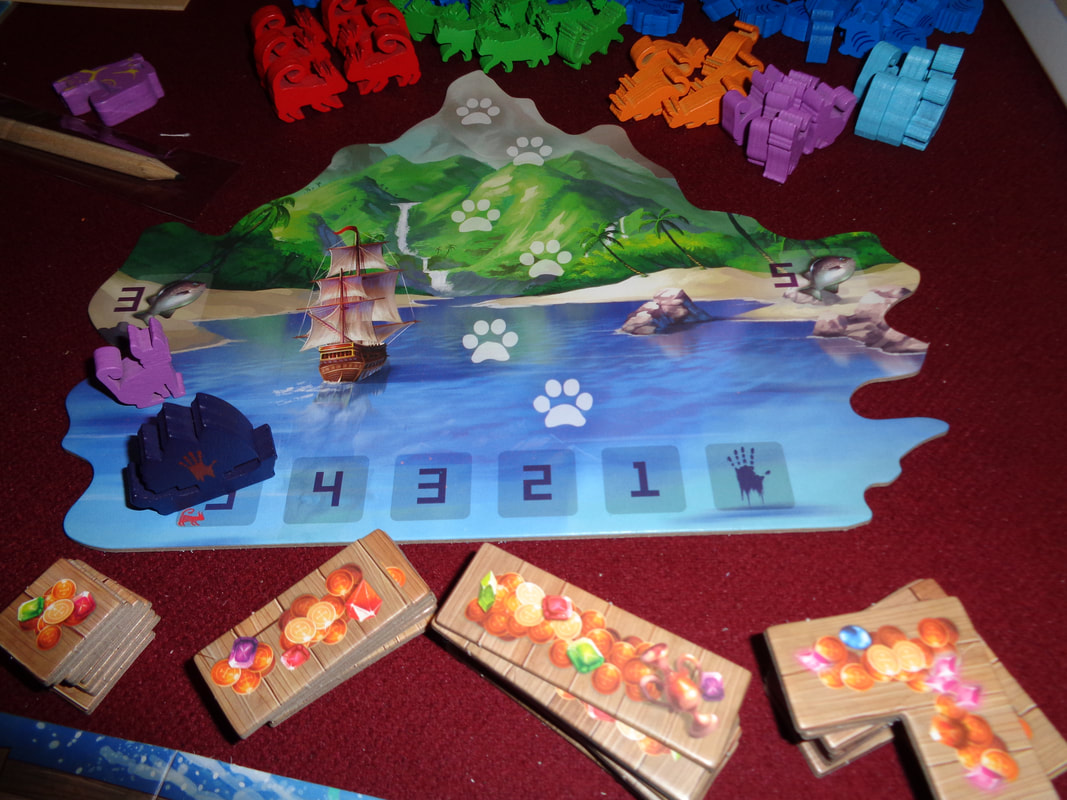
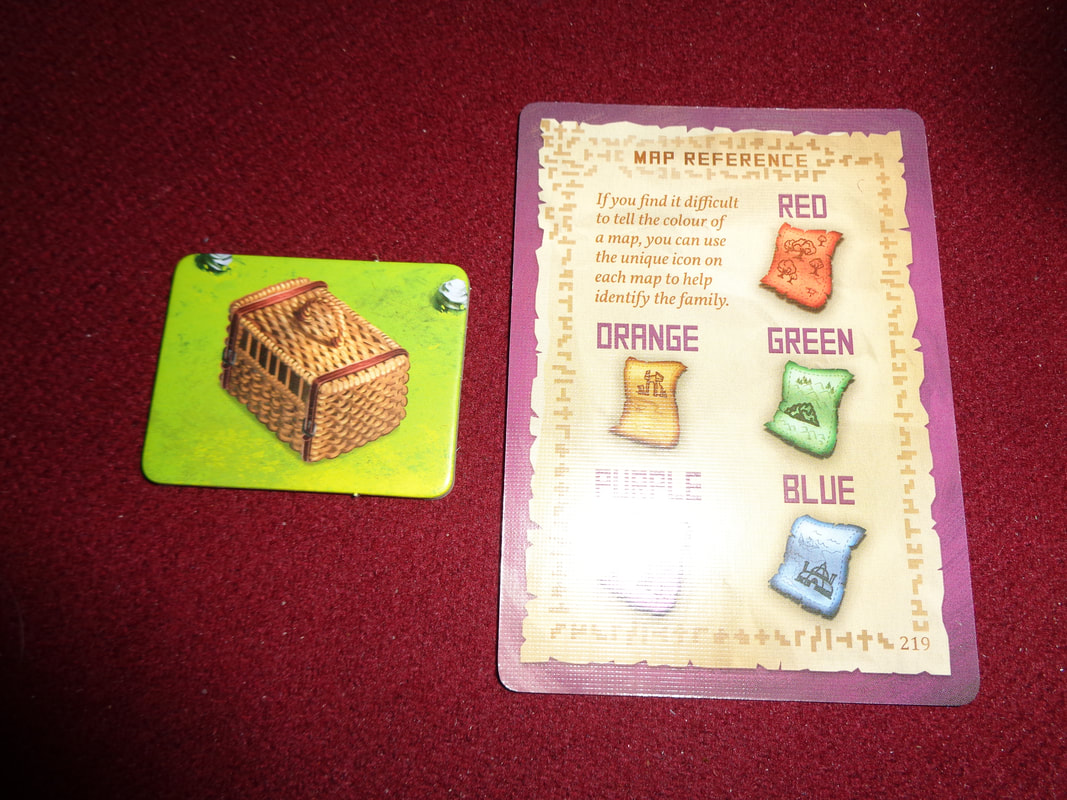
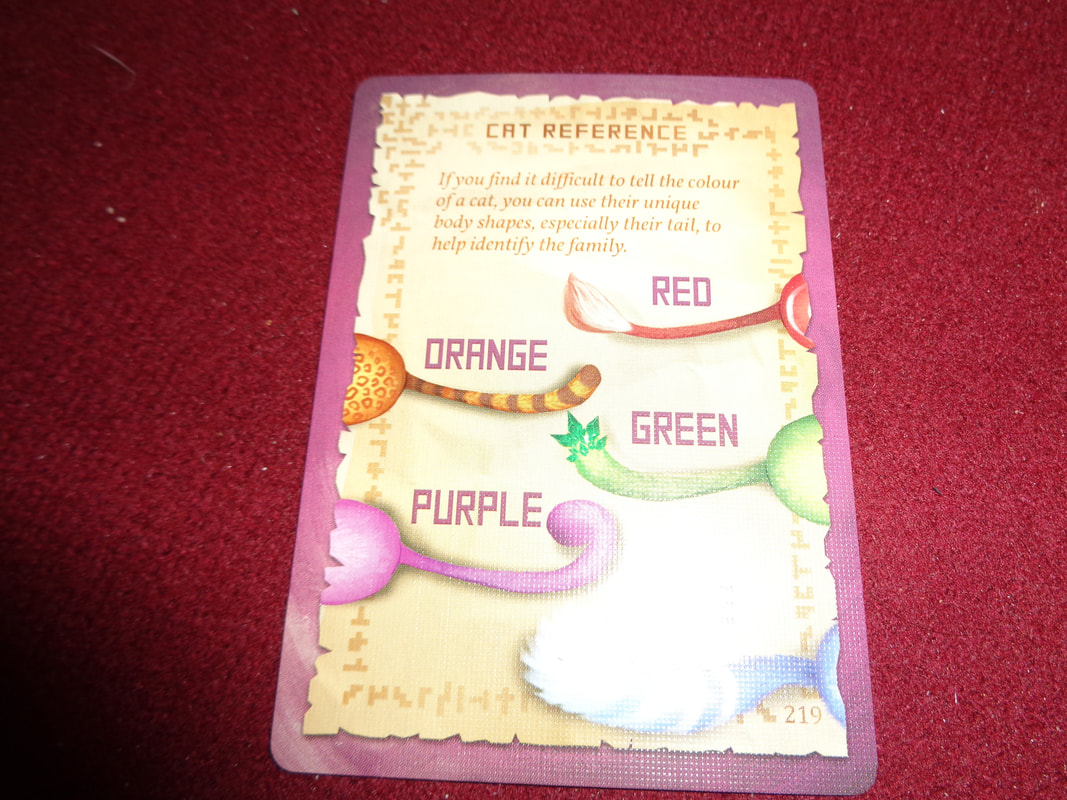
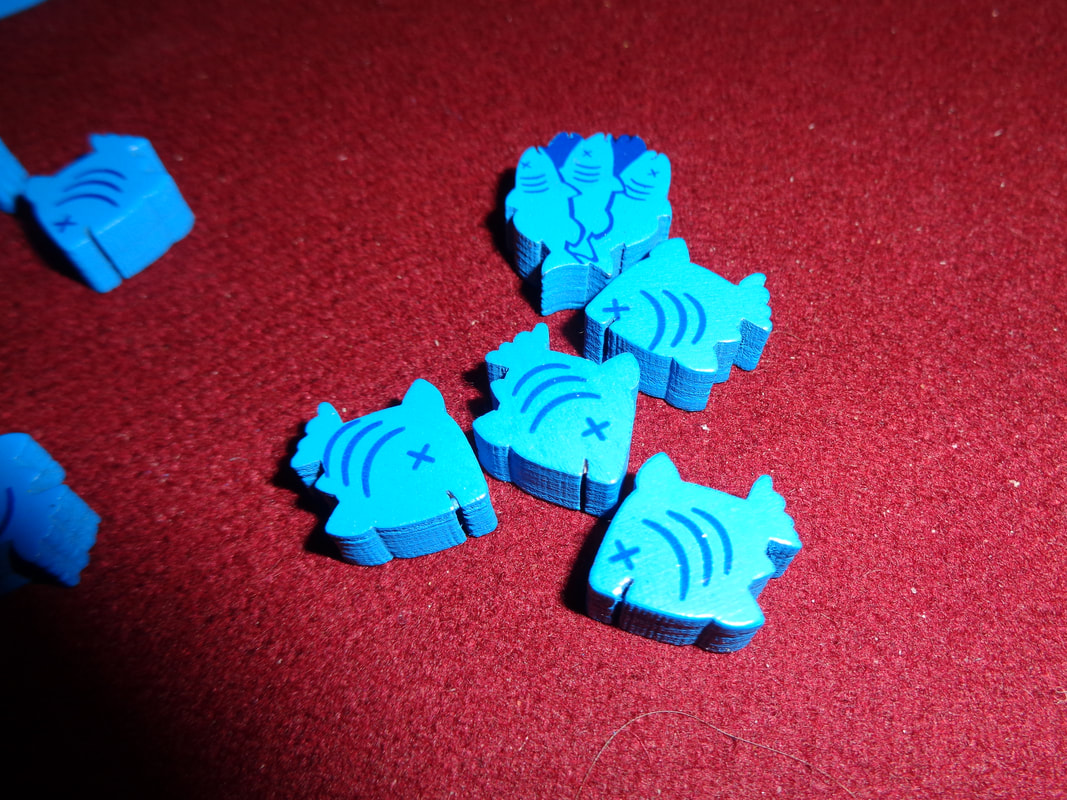
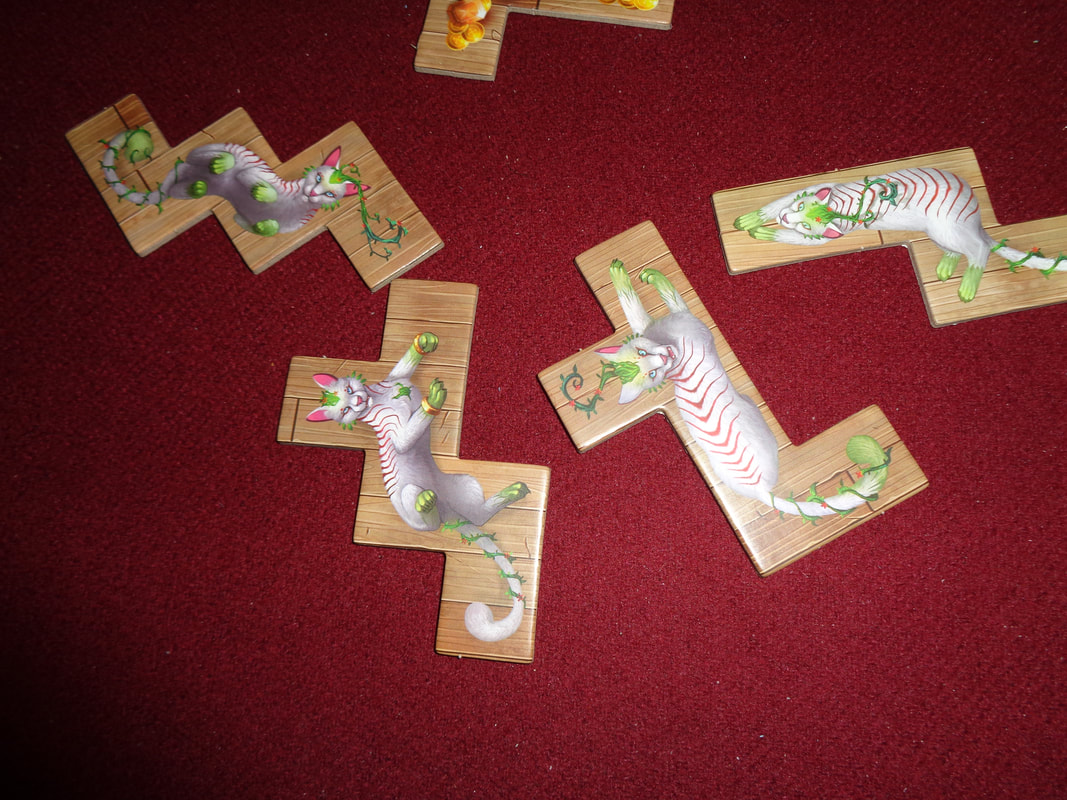
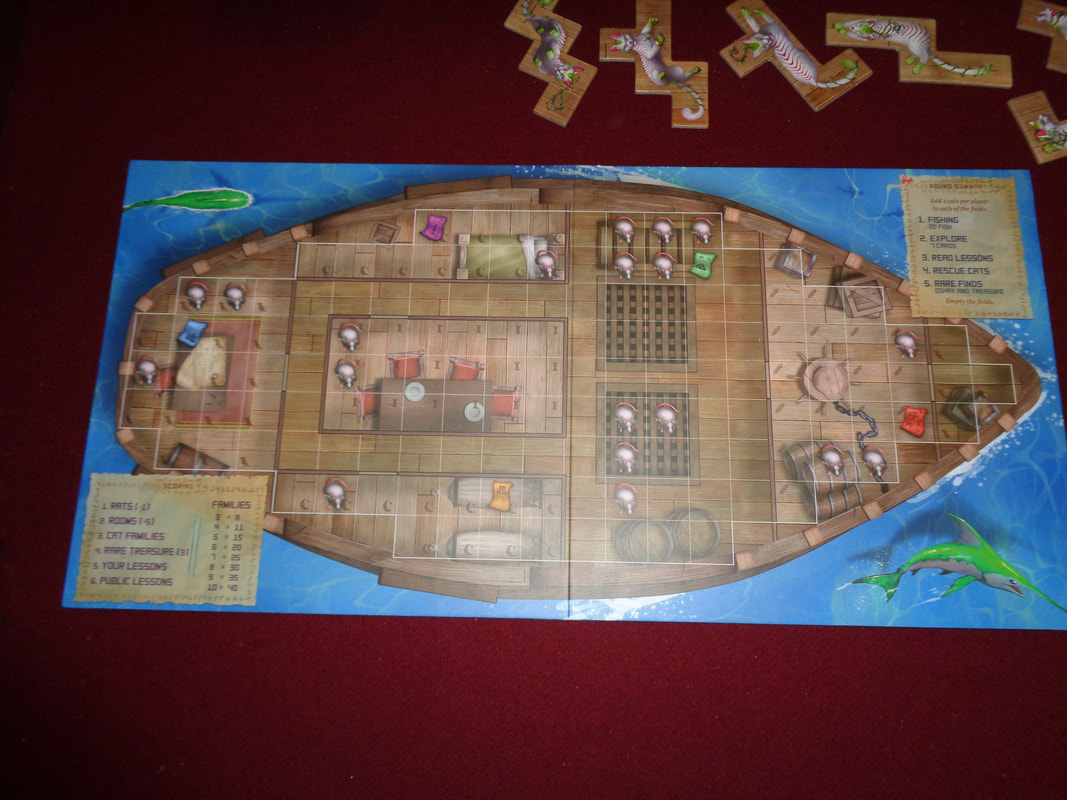
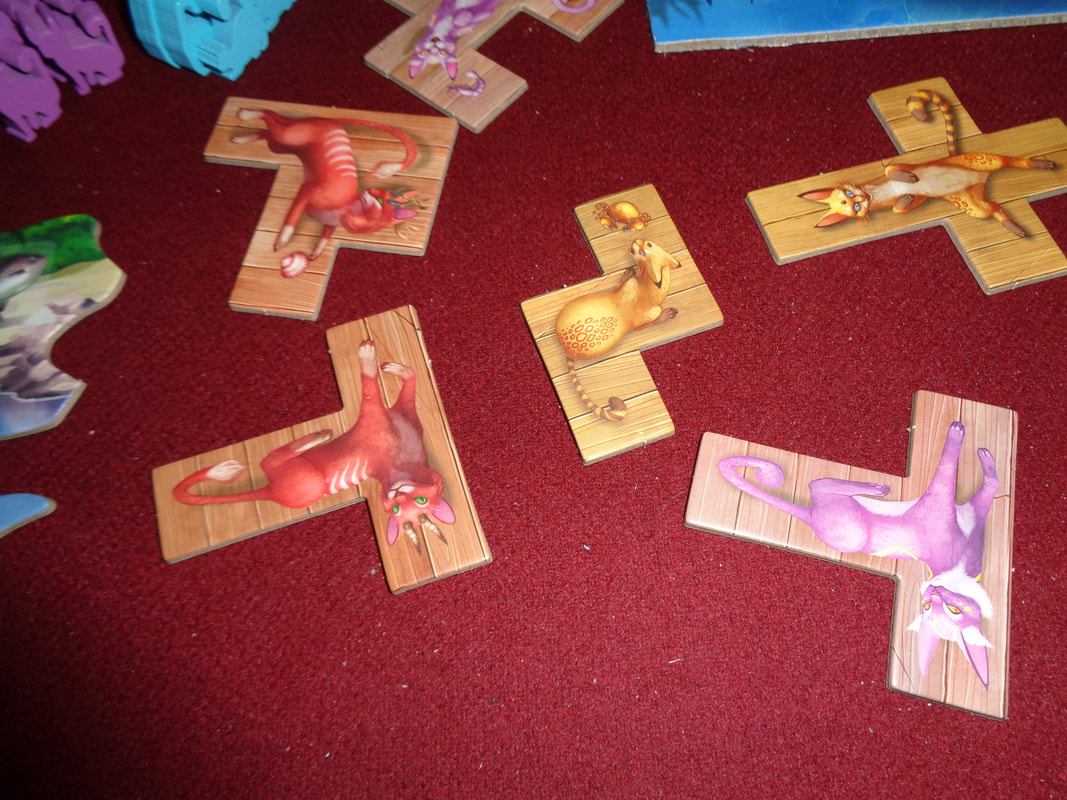
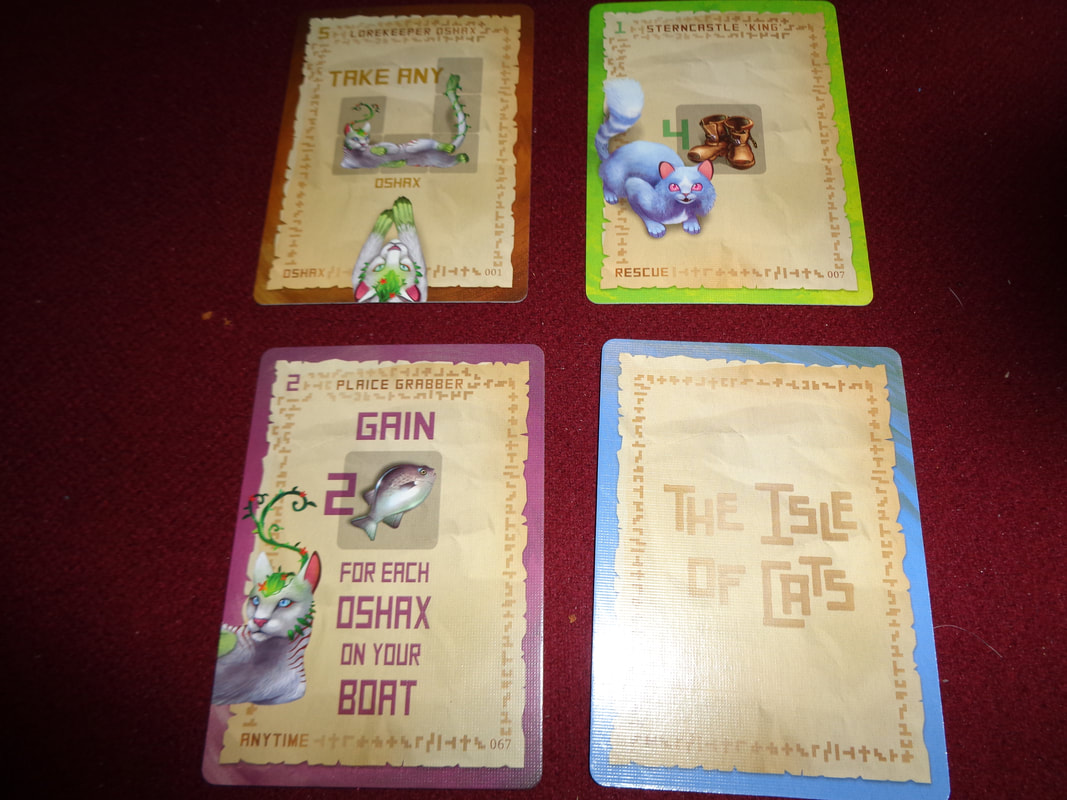
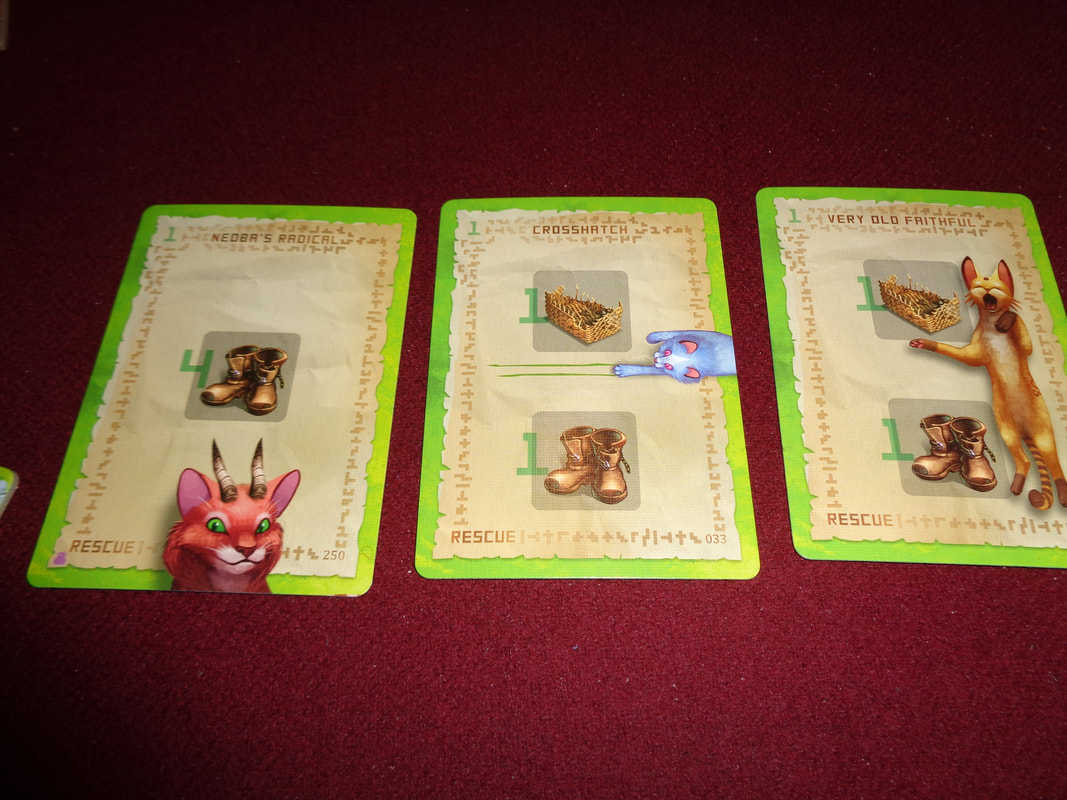
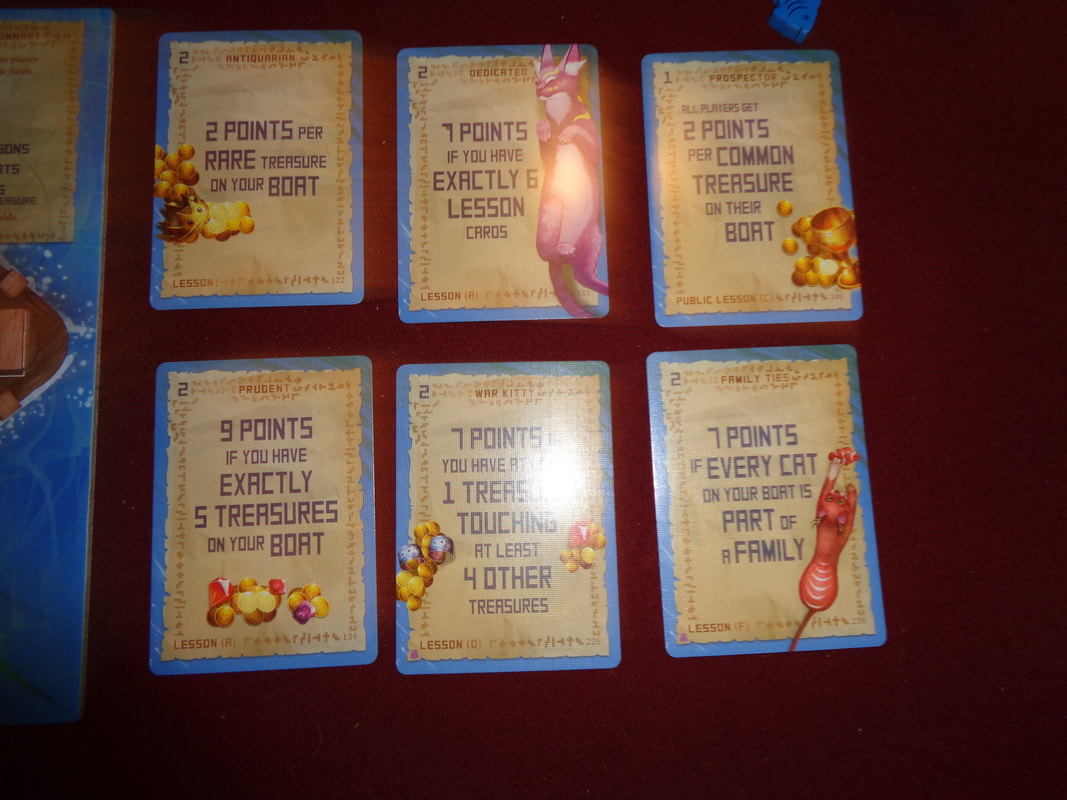
Component quality is for the most part very good. Tiles are suitably thick and chunky and all the wooden tokens. The game boards feel fine too. The only quibble I have is that the cards feel a little flimsy. The artwork in Isle of Cats is excellent throughout with plenty of illustrations of weird and wonderful looking cats on all the tetromino tiles and many of the cards. The boards and other cards also display nice colourful artwork. I do have a minor criticism here too: The colours for the common and rare treasures is a little too similar to each other, they could have done with being a bit more distinct. There are few icons used in the game and they're all clear, however, I do have a of minor grumble. Each personal game board is divided up into 7 'rooms'. It can be hard to see how the board is split up in this manner, particularly when scoring at the end with all the clutter of tiles. The publisher's were aware of this as they put distinct little icons in the square for each room to help but even so, it's tricky thing to comprehend. How's it play? Setup
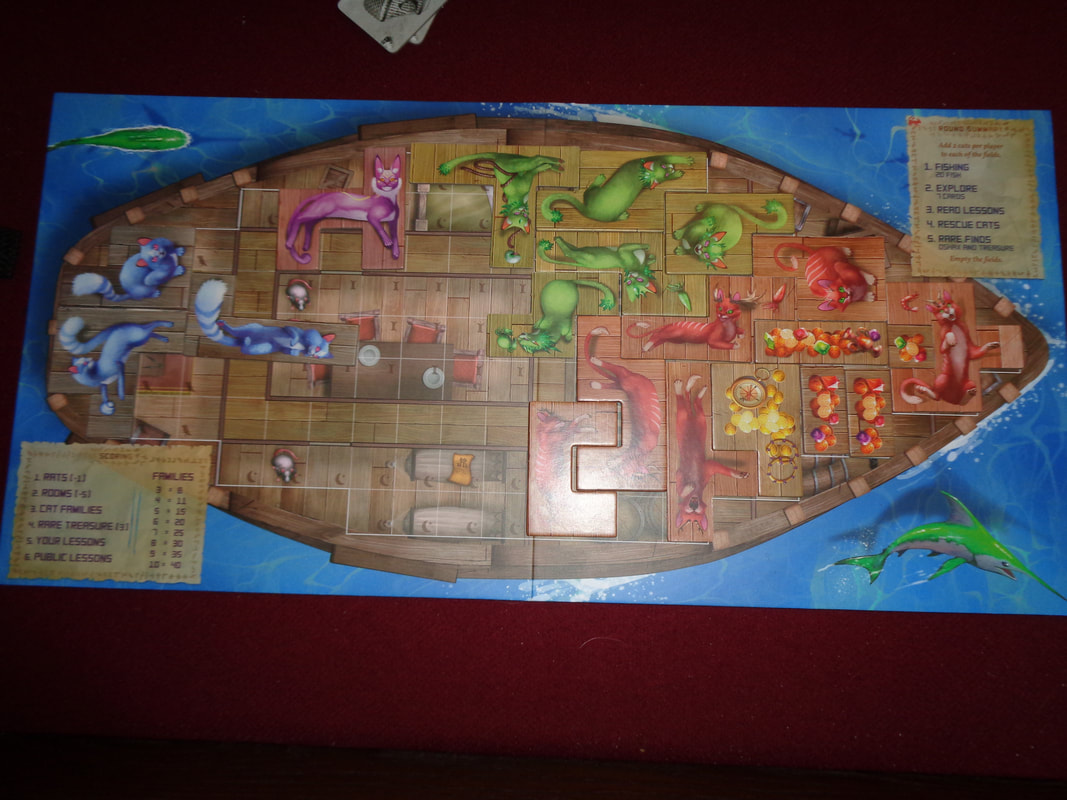
On to play In Isle of Cats, players are competing to cover as much of the the grid that is shown on their personal board as possible. This is done by acquiring and placing cat and treasure tiles. Players will also be looking to group cats by colour (Or family.) as much as possible as well as fulfilling whatever objectives they gain during the course of the game. Isle of Cats is played over a number of phases, with players acting in turn order during each phase. Note that the turn order is different to player order in Isle of Cats and can and probably will change from turn-to-turn,
Endgame Once the 5th round has finished, the game is over and it's goes to scoring. There are several sources for scoring points and the lesson cards in particular provide many ways to score:
That's right, it possible to lose VPs!
Points are tallied, highest score wins. Overall
There's a few things to think about in Isle of Cats but it's all paced out fairly well and never feels too complex. That's not to say there's no strategising to be done - because there is. The chief concern for players should be the management of their fish! Fish are not only used to buy cats but also discovery cards and they're the route to not gaining more VPs but initiative or gain bonuses. E.g., if you really want a certain tile, playing rescue cards with high 'boots' is important, but you'll need to keep them during the drafting phase - and pay for them. Players will need to balance their spending with their priorities and recognise when and what is more important at what time. Acquiring cat tiles is very important, building families, filling rooms, covering rats and treasure maps are all significant but so are going first or getting lesson cards and so on. Despite players having their own player boards, there's also a higher level of play about watching the actions of other players. For example; if another player has a big family of a certain breed of cats, it might be a good idea to deny them a beneficial card during the drafting phase and so But since this is a drafting game, players will also have to adapt to circumstances as they occur, such as having to take a cat tile that isn't wanted and finding a way to place it to maximise it's potential - or minimise it's damage! Isle of Cats is a mid-weight game that's pretty easy to learn and combines several mechanics in to a engaging cat-themed game. Whether it's deciding which cards to keep and later which ones to play, as well as what tiles to take and where to place them, Isle of Cats All nearly always gives players meaningful decisions to make and that's the sign of a good game. 29th May 2022 Sunday gaming on Board Game Arena continued with mancala styled game Fruit Picking. I'm not the fruit picker, I'm the fruit picker's son, I'm only picking fruits 'til the fruit picker comes. Hmm, it doesn't work... Caveat: We've only ever played Fruit Picking digitally. What's in a game?
The boards in Fruit Picking feature a couple rural landscapes depicted with a appealingly stylised illustrations showing idyllic countryside. The fruits are also well illustrated and Fruit Picking has solid art style. Other than the fruit and waterdrop symbols, there's no iconography in the game and it should not prove any problem to players. How's it play? Setup
On to play In Fruit Picking, players take turns moving their resources clockwise around the spaces on their board which allows them to active one space to gain more seeds or buy a card. Play begins with the first player and once their turn is over, proceeds to the left.
Endgame Play continues with players acquiring fruit cards until one player has the cards to meet one of the criteria which triggers the game end. Fruit Picking provides players with 4 ways to do this. A pair and 3 of a kind, 4 of a kind, 3 pairs and 1 of each fruit. When this occurs, the current round is completed and if the player who triggered the game is the only one to have met any of the criteria, then they win. In the likelihood that more than one player has met any of the criteria by the end of the last round, then ties are broken by quantities of fruit and seeds on cards. Overall
Fruit Picking is a lightweight games that has a good mix of logic and luck. Logically, it's not hard to think several moves ahead if you want. Once farm cards have been distributed on to the player boards, moving seeds and activating farm cards is entirely predictable and only driven by player decisions. Manipulating the Harvest House action to game more actions is a key tactic, especially as it can be used to quickly fill the Harvest House and used to purchase cards. Fruit Picking is essentially a race to acquire cards before other players. When cards are drafted, everything can change, which neatly brings me to the next facet of the game The game's unpredictability comes into play on the market track. As play progresses, cards will come into play randomly, not only that, their costs will also vary, especially as they move along the track. It means that some times, the cards appearing will play into certain players' strategies and other times, potentially scupper those strategies. Players will have to be prepared to change direction for long term plans when this occurs and adapt their approach according to what is available. It's something I've encountered in other games and found to be irritating, Fruit Picking is no different. I know that this can be an important element of a game because without some randomizer, it can sometimes very quickly become obvious who's going to win. Even so, it irritates me. Fruit Picking also sits in a strange place of feeling a bit overlong for a filler game but definitely a bit too light for a main game. Having said that, it's accessible game that's easy to learn. For people who want something which engages some tactical thinking but is not along time brain burner, Fruit Picking may hit that sweet spot. 2nd May 2022 It's a bank holiday Monday and we're round Simon's for some gaming fun. Waterdeep, famed city in The Forgotten Realms and home to many a adventurer, ready to brave the wilderness in the search for treasure and glory... oh wait... This Dungeons & Dragons setting licensed game is nothing to do with Dungeon & Dragons... It's actually a political-intrigue themed worker placement game! What's in the game?
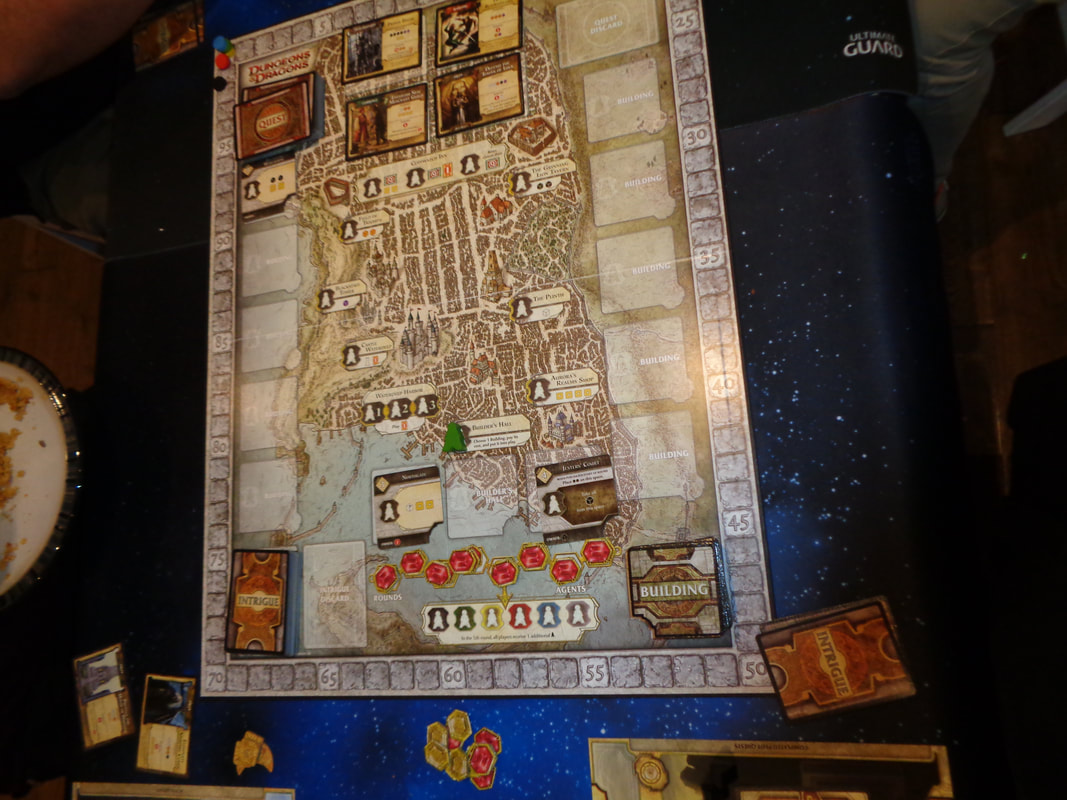
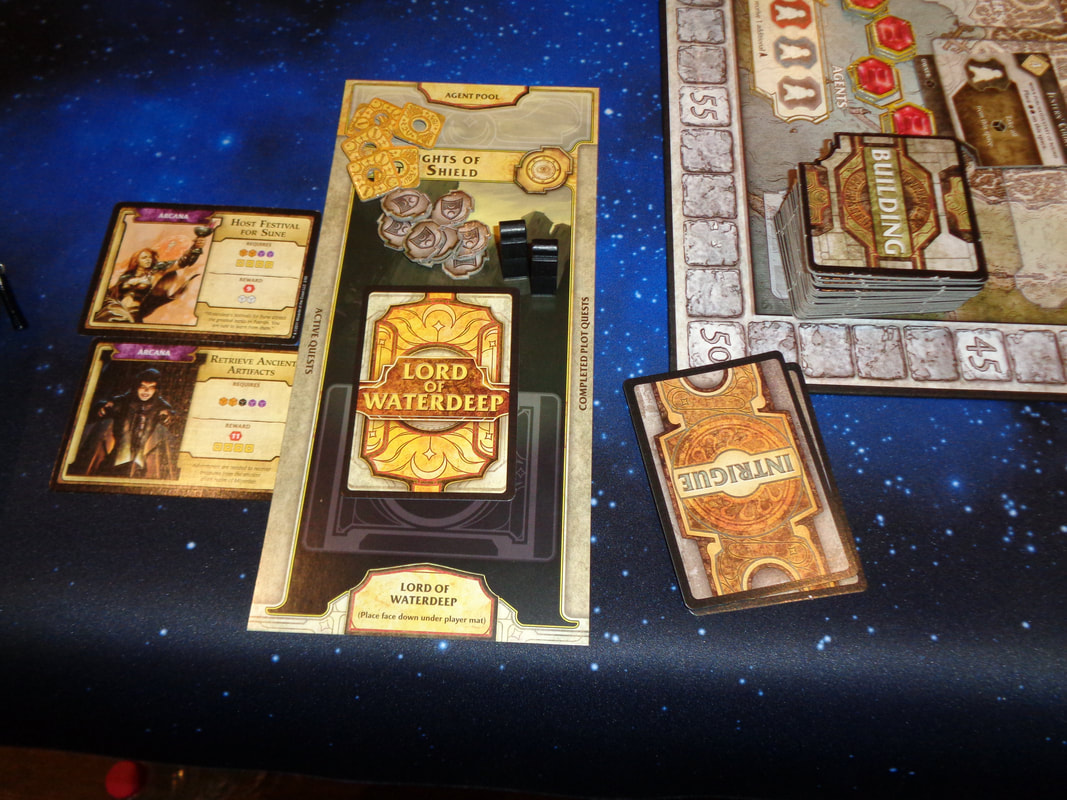
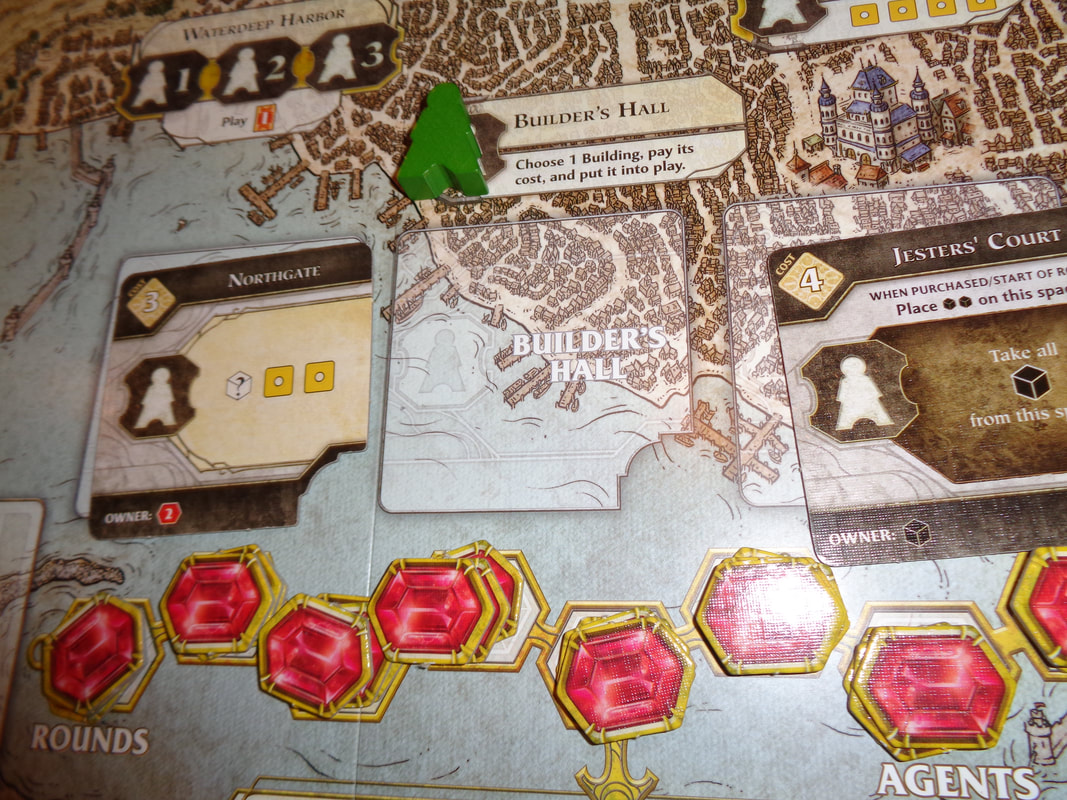
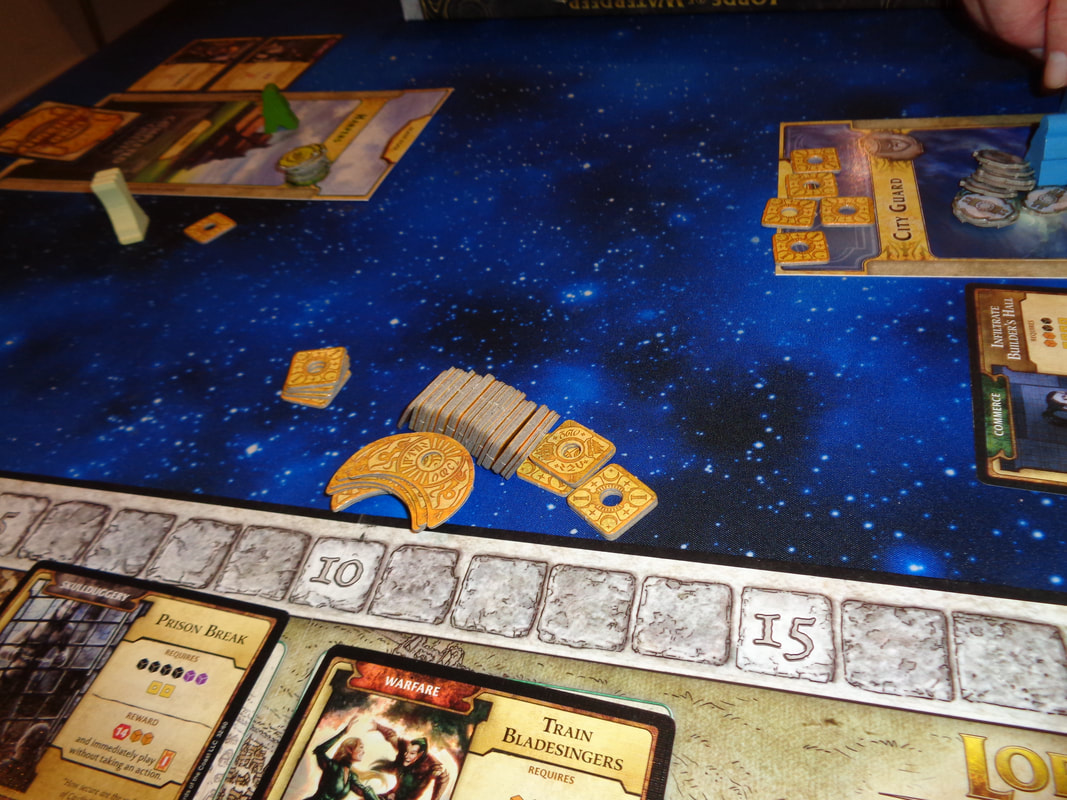
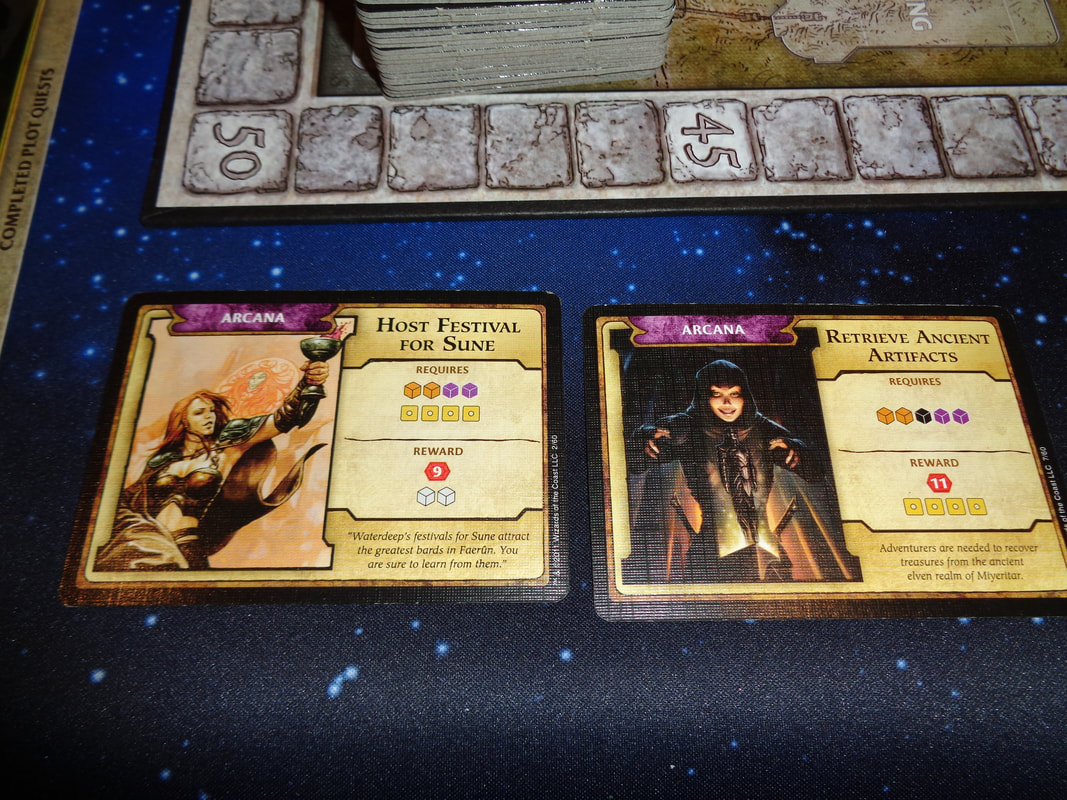
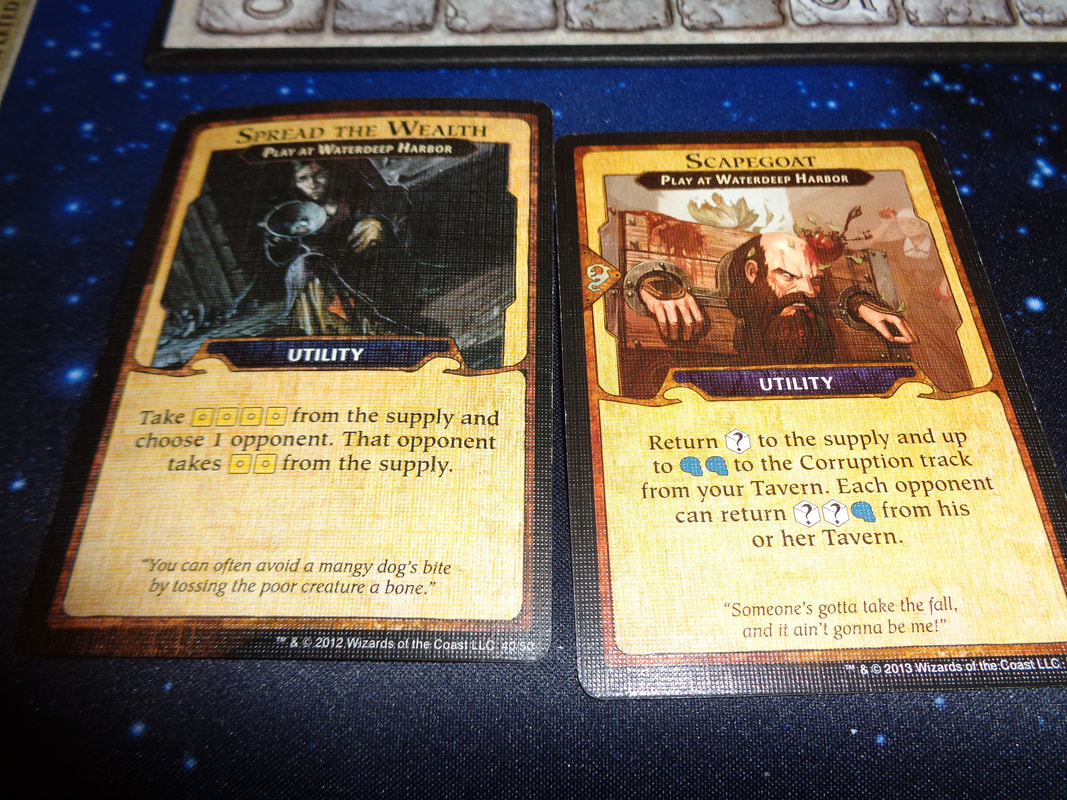
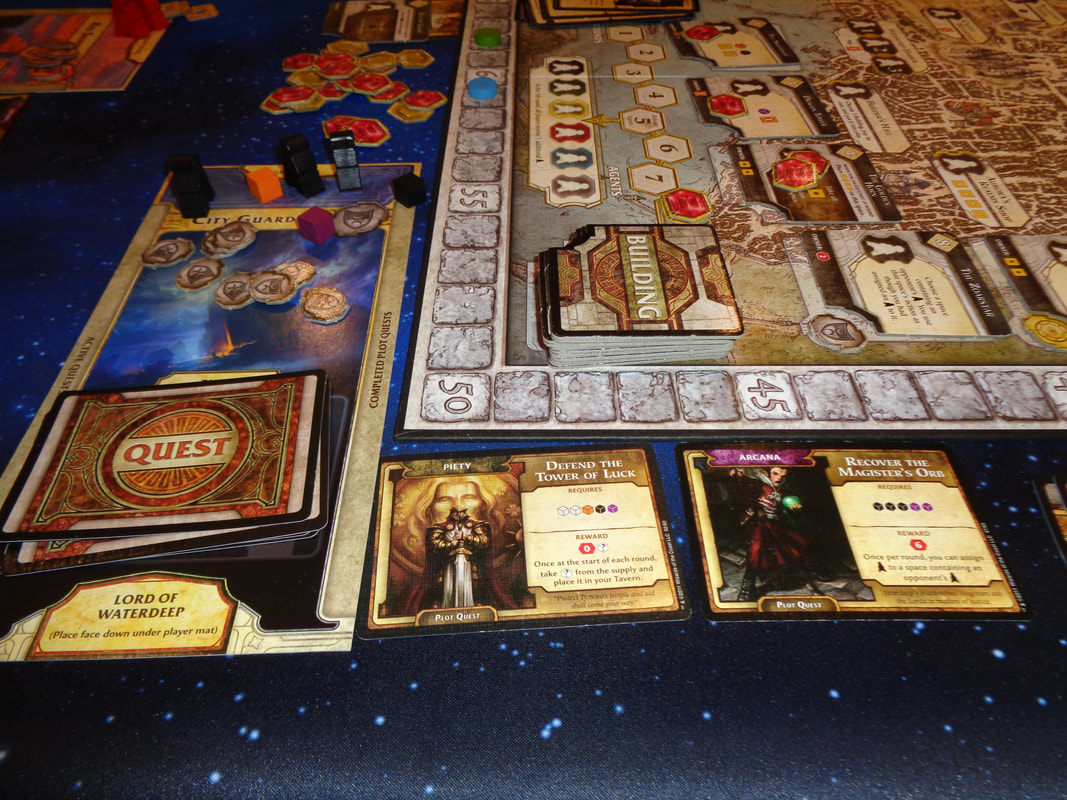
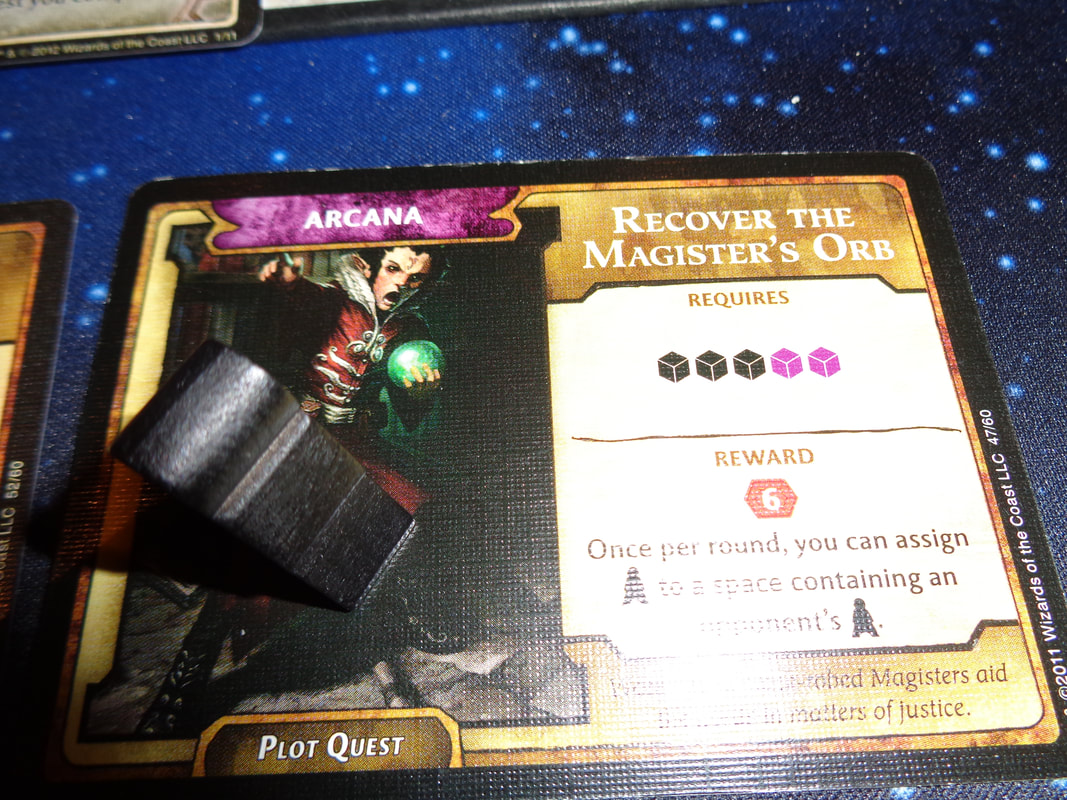
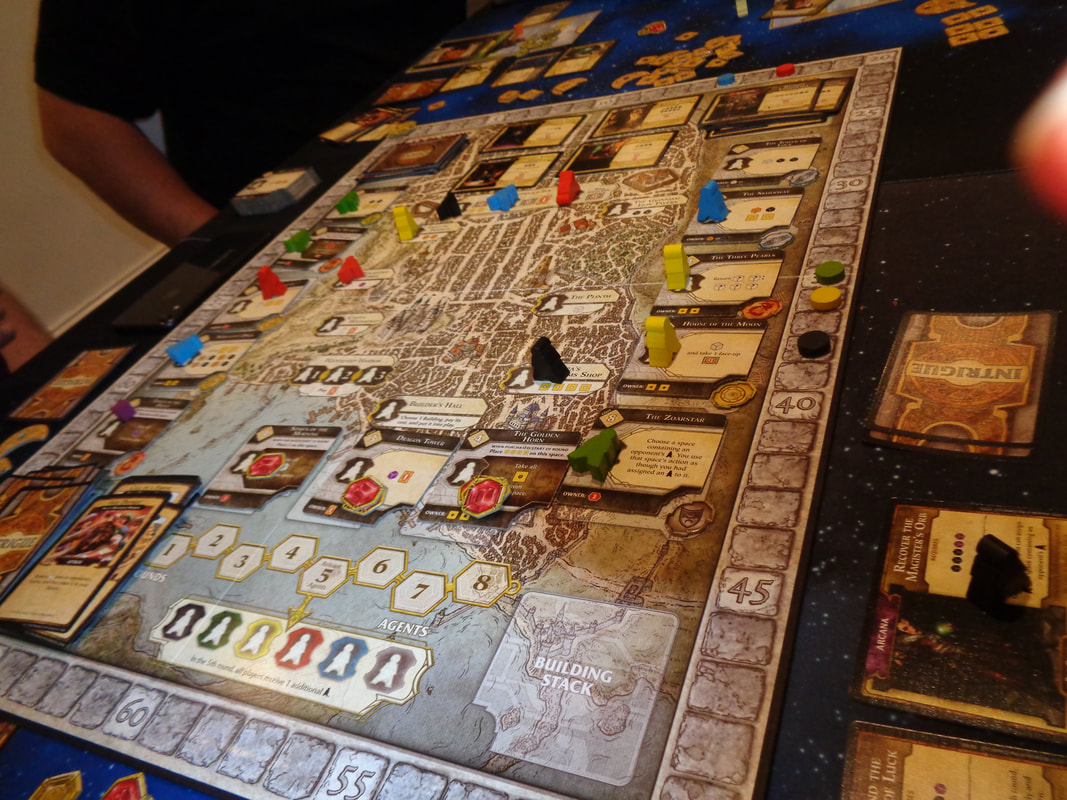
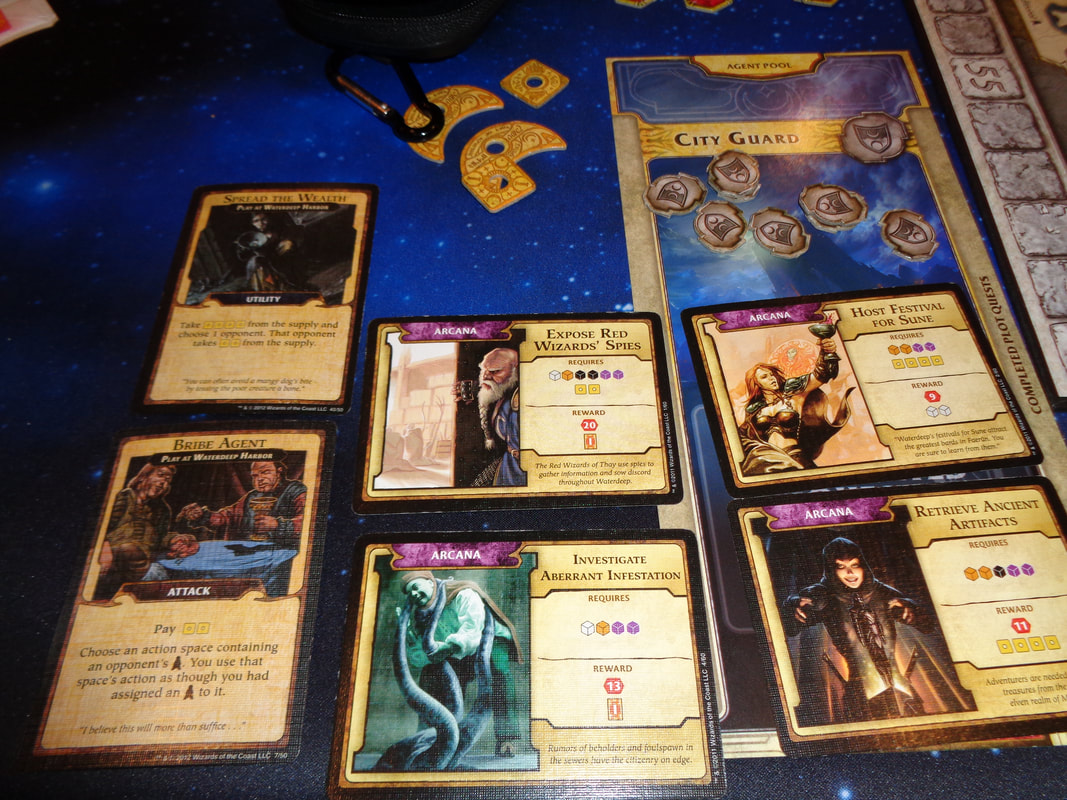
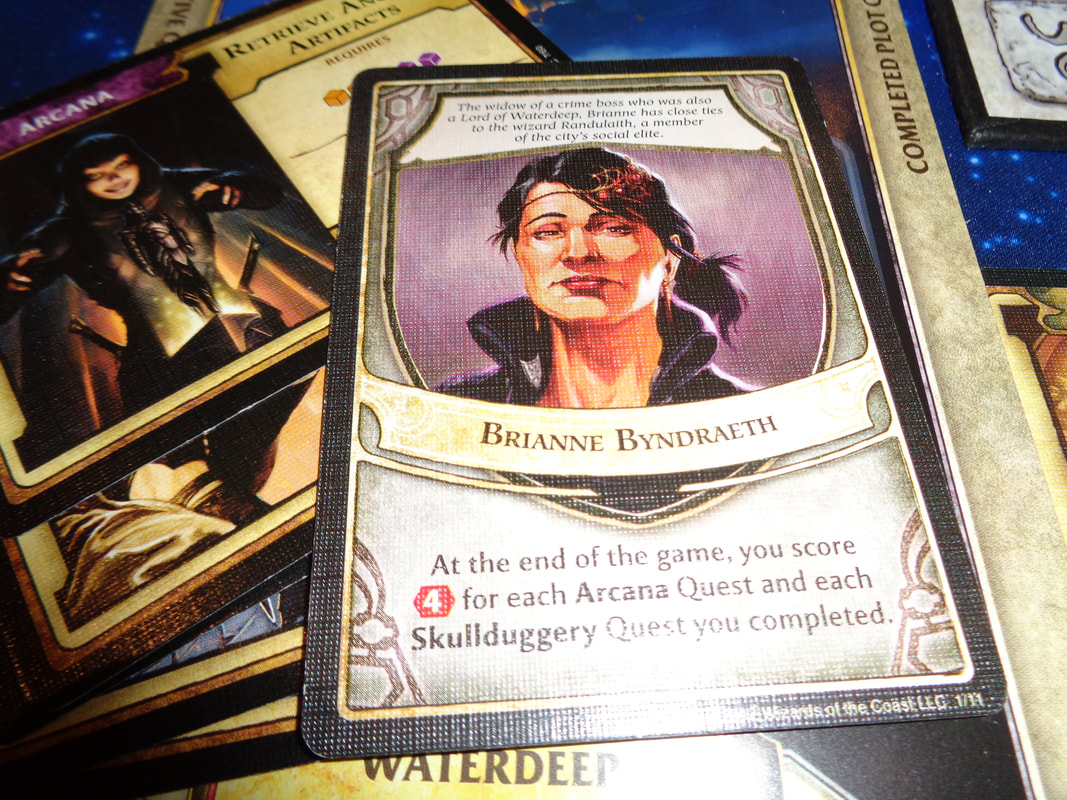
There's a lot of excellent art throughout the game. I'm not sure if it's been created specifically for Lords of Waterdeep or sourced from the large amount of Forgotten Realms/D&D artwork that's been produced over the decades but either way, it's good quality and generously used on all the game's cards. The other piece of significant artwork is the map on the board, it's very well detailed, although it does make the board look a little 'busy'. Regardless of this I still quite like it. The game does use a fair amount of iconography, for the vast majority of icons, it's pretty clear what they mean and there was minimal need to refer to the rules. How's it play? Setup
On to play Lords of Waterdeep uses the traditional turn structure with the active player taking an action and play progressing to their left. When someone is the active player, they can act in 2 phases. Firstly they must take their action, a player can only pass when they have no more agents to play. finally, the active player may complete a quest if possible.
Endgame The game ends at the end of the 8th round and goes to final scoring. VPs come from the follwing sources.
Points are tallied, highest score wins. Overall
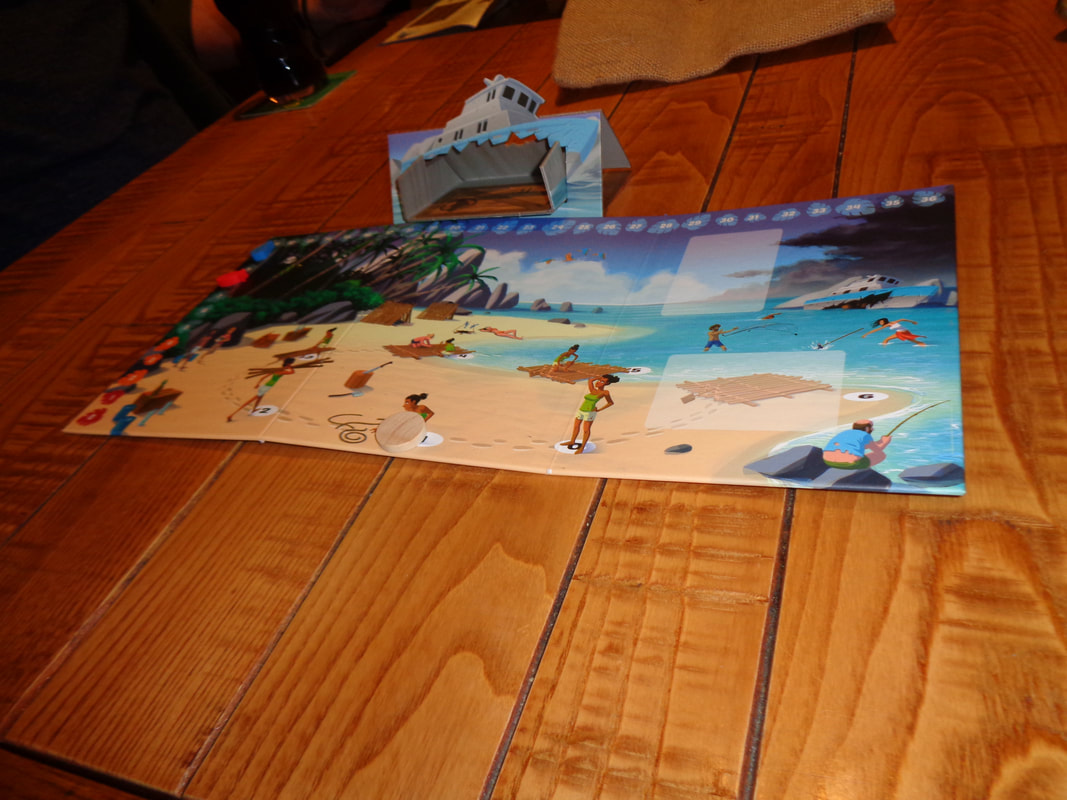
Now, I'm by no means whatsoever particularly knowledgeable about the Forgotten Realms setting but it's quite impressive how Lords of Waterdeep manages to marry a worker placement game with the flavour of the setting, or at least a part of it that takes place in Waterdeep. It's not vital to the rules or gameplay but conversely, neither is it jarring or hindering. The game is all about optimising actions to gain required resources as efficiently as possible to complete quests which must also be acquired while at the same time trying to predict and out manoeuvre other players: Most of the locations that confer resources will only have space for a single worker, making it unlikely that players will get all the resources they want in a single round, prioritising is very important because completing quests is very important, not only do quests provide VPs, they can confer useful benefits as well. This ties in with the Lord cards which are essentially secret objectives. Not only may players be competing for certain quest types and their respective resources, there's also a higher level of play where resources and quests can be denied to other players, provided their objectives can be guessed of course. The advanced buildings is an interesting proposition, it adds an element of emergent strategy to the game, changing the status quo, giving players new options and making them re-asses their plans. Constructing a useful building also has the benefit of earning the builder its bonus and inevitably, it'll be used by other players. There's not much else to say really, the gameplay is solid if somewhat unremarkable; players of worker placements games will find themselves on familiar ground here which may or may not be good thing - depending on your mileage. Perhaps the playing time is a touch too long for what it is but none of this stops Lords of Waterdeep from ultimately being an enjoyable game. If the Forgotten Realms setting doesn't put you off for some reason and you want to try a worker placement game, then Lords of Waterdeep is probably worth a look. 26th April 2022 Tuesday is here and we're at The Sovereigns with the Woking Gaming Club. Does Hellapagos mean hell in the Galapagos islands, I didn't see any giant tortoises in the game? Anyway; Hellapagos is a (Somewhat!) cooperative game about surviving the ordeals of being shipwrecked on what would in other circumstances be a tropical paradise, building rafts and escaping. What's in a game?
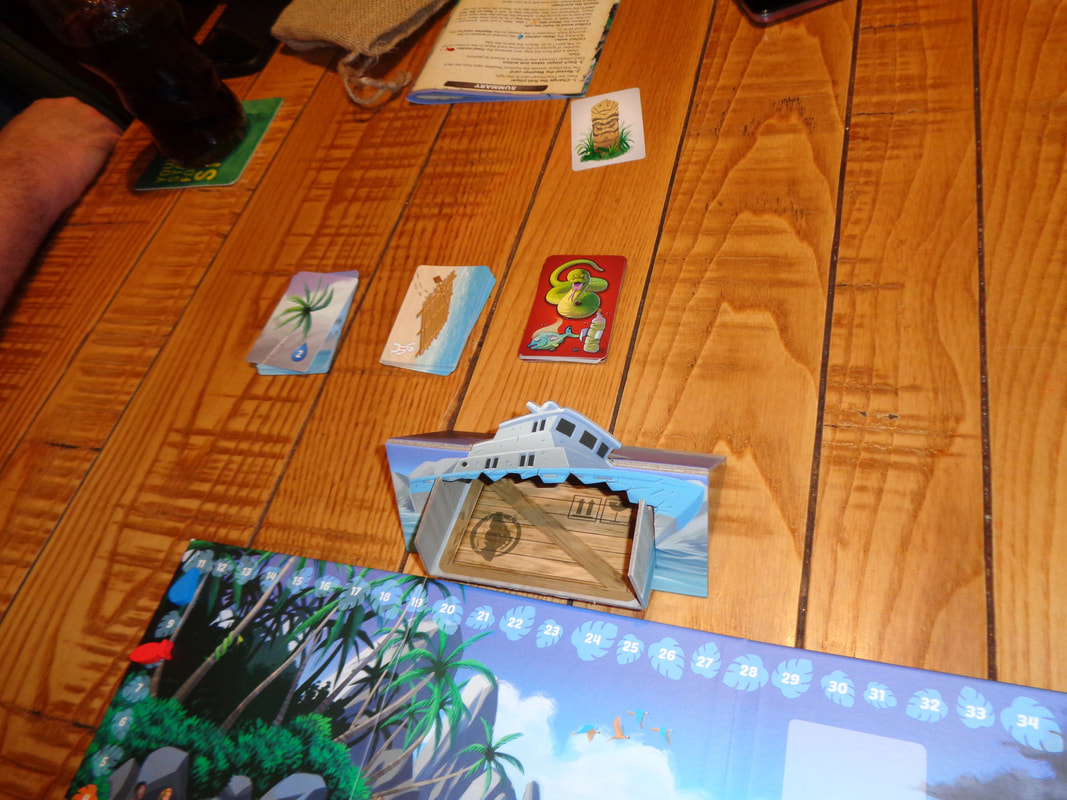
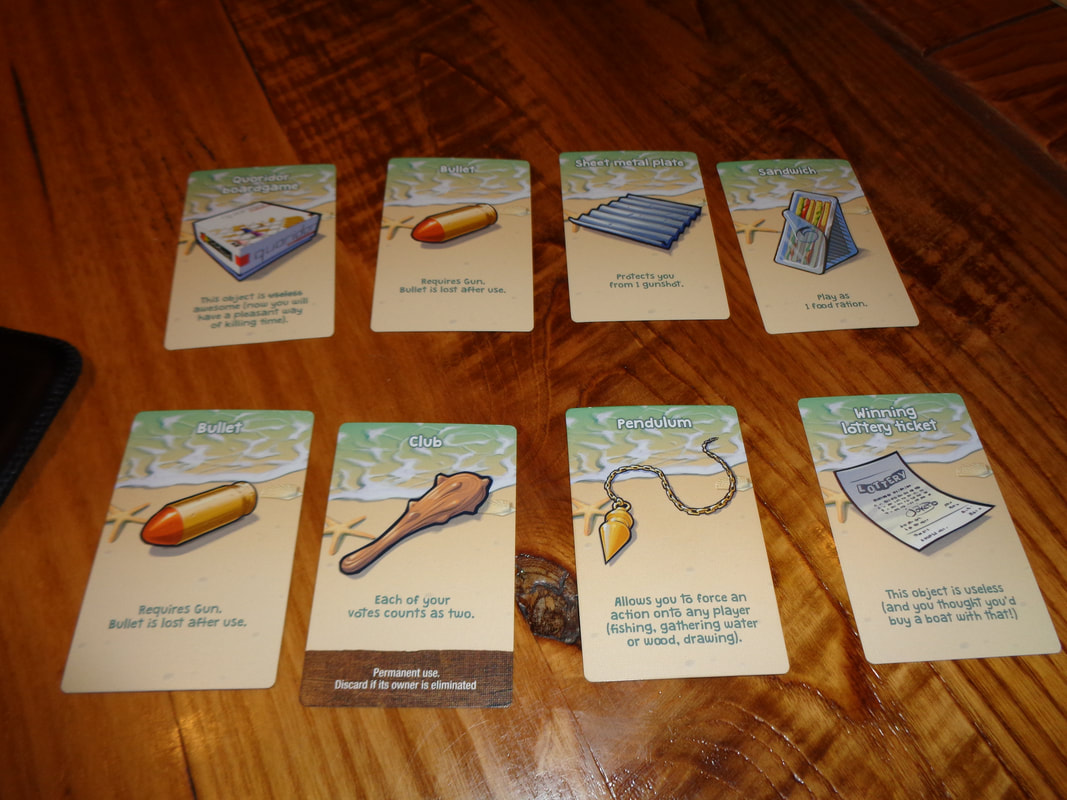
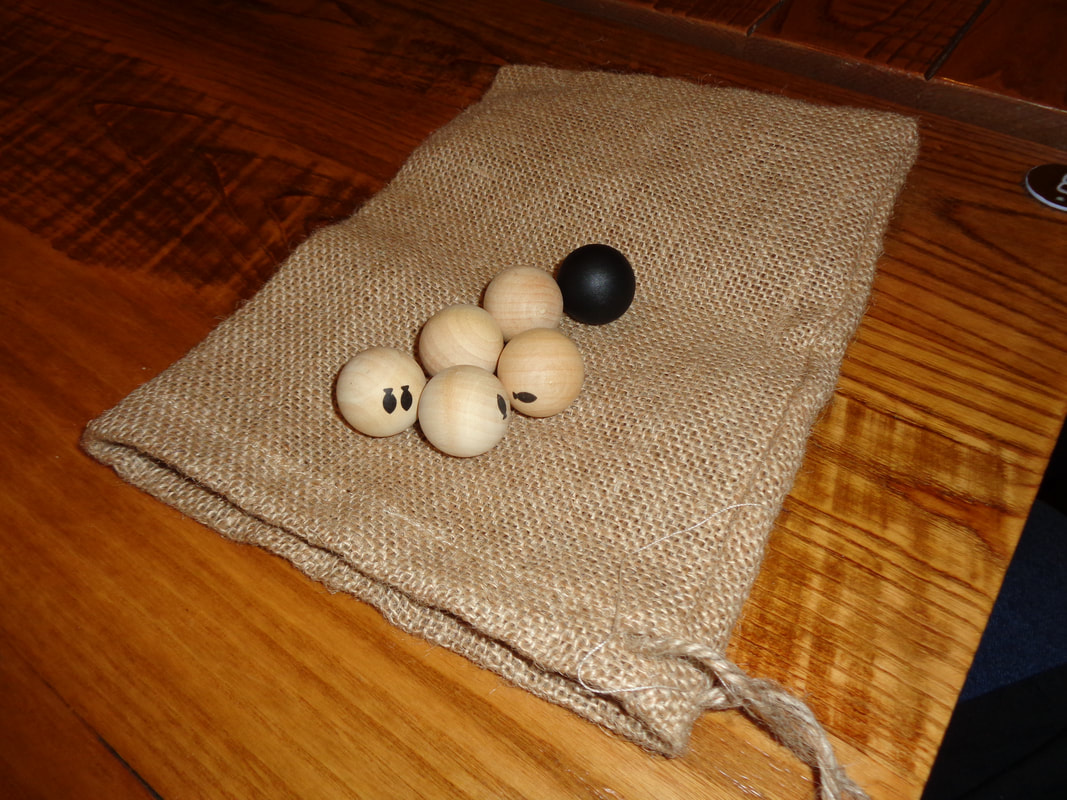
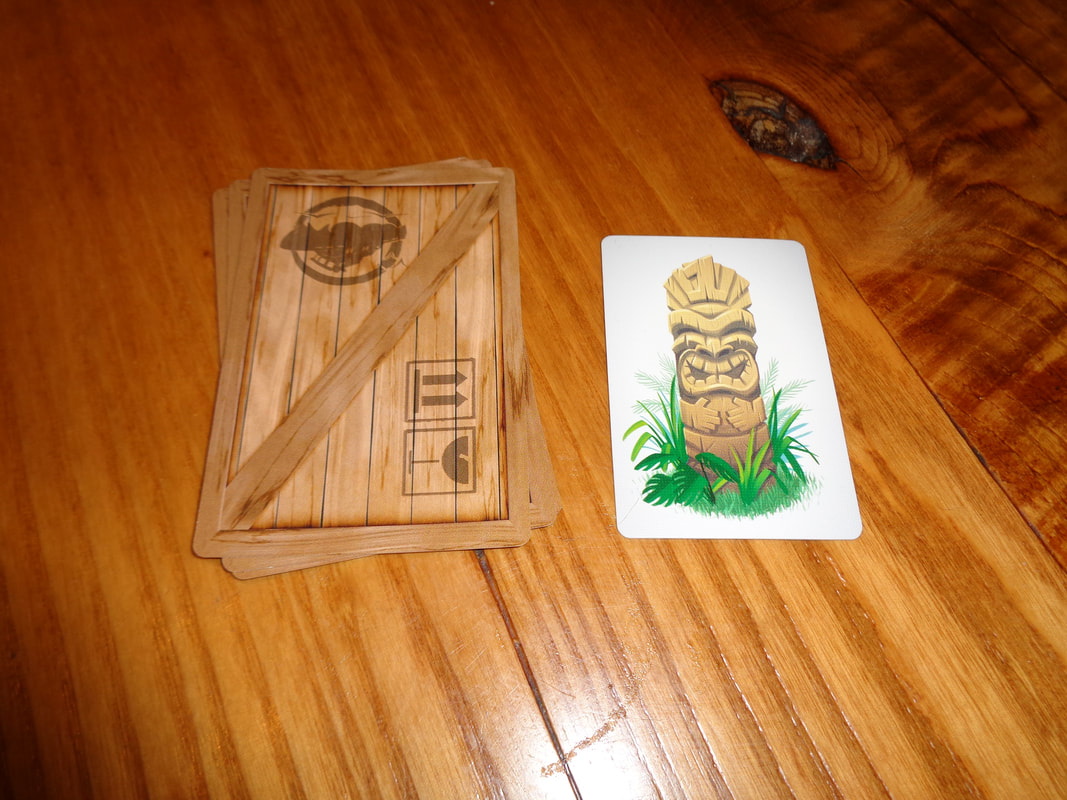
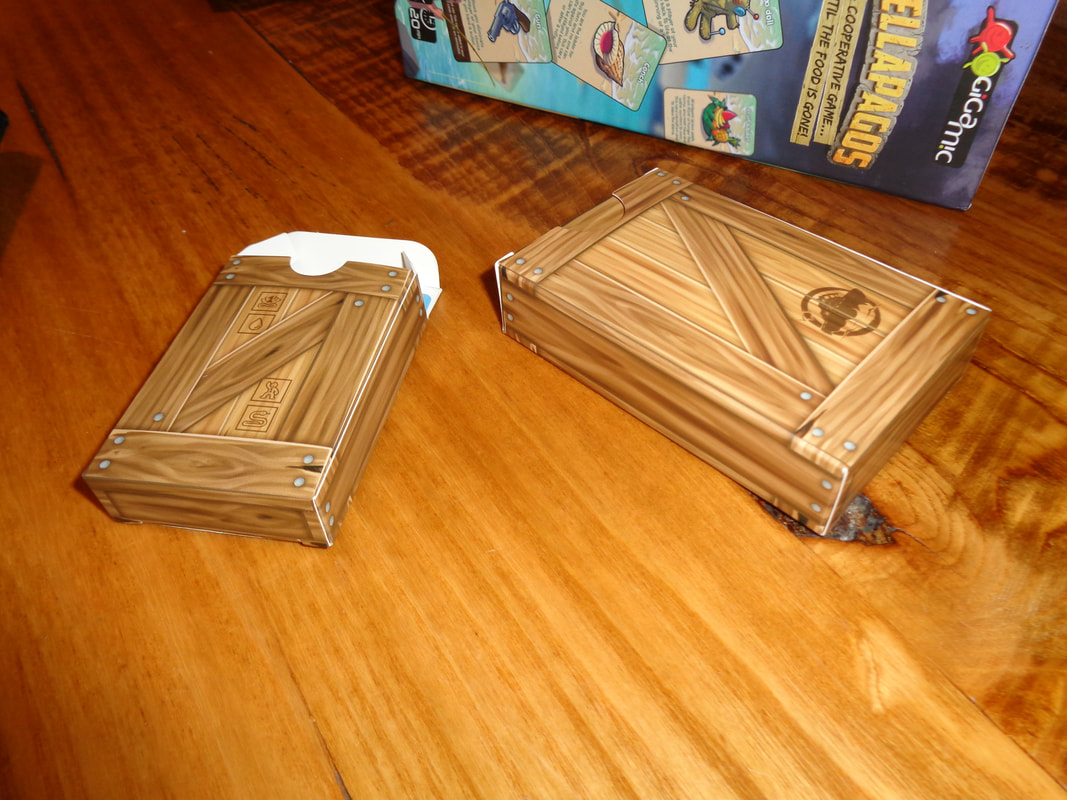
Only the cards are what I would consider average in build production, which is to say, they're fine. The tokens feel suitable chunky, as do the balls and bag (Sic) which are a nice touch. The standout component is the completely superfluous cardholder which displays like the wrecked hull of a half sunken ship. Hellagapos makes use of excellent bright and colourful artwork throughout, especially on the cards. With thick black lines and lots of colour it has an almost ligne claire quality to it. Furthermore, there's also a lot of humorous subtext to the art. Like the pendulum that makes another player take a one action of their chosen by the card-player (Hypnotises them!) and so on. There's minimal iconography in the game and what there is, such as water or fish icons are easy to comprehend. Actions on the survivor cards are all detailed by text instead. How's it play? Setup
On to play Hellapagos uses a normal turn structure with the active player taking their turn before play progresses to the player to their left. The game has 4 basic actions a player can perform but because it's a cooperative game, there can be a lot of discussion about moves and strategies among players and later, negotiation taking place. A round represents 'a day' and plays as follows
Endgame There 3 ways Hellapagos can end.
Overall
There's a lot to unpack with Hellapagos and I'll start with the mechanics. The write-up is a little long and belies the fact that in play, the game is pretty straight foward to understand and play. More importantly; it's clear that the game's mathematics have been balanced so that it's very hard to get all players off the island. Which makes sense from a game-perspective, it forces players to consider different late-game strategies. If say, a group of 6 players had 9 days to get off the island, they'd need the following. Water: 6 per day +6 to leave -12, which is their starting water. So 48 water. Food: 6 per day +6 to leave - 10, which is their starting food, so 50 food. Rafts: At 6 wood per raft, they'll need 36 wood. In other words 5.4 water per day, 5.5 food per day, 4 wood per day. If the player split their labour evenly per task, that would mean: 2 players getting 2.7 water per day each. 2 players getting 2.75 food per day each. 2 players getting 2 wood per day each. Getting both water and food at that rate is pretty hard. Each player would essentially have to get 3 or their chosen resource per day, every day. Since 3 is the top end result players could hope for, it's unlikely this will occur. Getting 2 wood per day per player seems easy but each player has a 16% chance of being poisoned, this might not seem high but when it does occur, it means that they only get 1 wood and lose their next action. Catching up in a following round mean getting 5 wood, this is a lot more tricky. Of course players may want to search the wreckage and rightfully so, there are some very useful cards to be found in there, including for example; cards that skip the consume food action among others. On the other hand, it's equally as likely that something which helps a player personally might be found... Players may want to divide their labour differently as well; when lots of rain appears, it might be good to get more people gathering water and 'get 'ahead' on the water track. A game like Hellapagos thrives on player social interaction, if people don't engage with it, it won't be a particularly interesting or memorable game. Ultimately though, players will sooner or later come to a conclusion; there won't be enough resources for all the players to get off the island. This changes the game in 2 ways. Firstly, players will begin looking at who to vote off as food and water become scarcer. Players will try to emphasise their own usefulness and see who can be a good target for elimination during voting. This is where having a valuable item can keep a player alive. Some ongoing cards are very handy and eliminating the player who controls it, also eliminates the item. Not a coincidence in the rules I think. Additionally, players may also look to horde rations on wreckage cards, waiting until voting has occurred, allowing others to be eliminated and only using it when they have been voted out. However, other players can look at this very negatively and it can draw their ire. players are free to form alliances or betray one another, gang up on other players, openly or otherwise and so on. Needless to say negotiation and voting can become very tense. Secondly, people will start to realise that when player counts are sufficiently low, that eliminating players after collecting resources can leave the survivors with enough resources to escape the island. The thing is though; it's likely that they'll be enough food and water to prevent any voting from going ahead. Players will have to resort to 'other methods' to removing opponents. This is where the game gets brutal and the pistols start getting used. Hellapagos mixes cooperative game play with a large dose of 'take that' actions. In the early-game it's all pleasant enough but once it progresses on, everything can change. I, like many other people I imagine, am not a fan of games that have player elimination, luckily for Hellapagos, players won't generally spend too long just watching. It doesn't frequently occur early in the game and once the eliminations start, they don't stop until the game does! I will also add; if game with lots of direct 'in-your-face' conflict and player elimination aren't your thing, it would prudent to give Hellapagos a miss. but if this sort of thing is your jam, then with it's 12-player count! Hellapagos is a good game to try. 15th March 2022 We're with the Woking Gaming Club at The Sovereigns for some Tuesday evening entertainment. Four Gardens is a game about you guessed it... four gardens, it's also about spinning a pagoda! I'm not sure if Spinning Pagodas would be a better name or not? Why are players spinning a pagoda? Apparently, the pagoda contains some gods! Who... I guess... like... being spun? What's in a game?
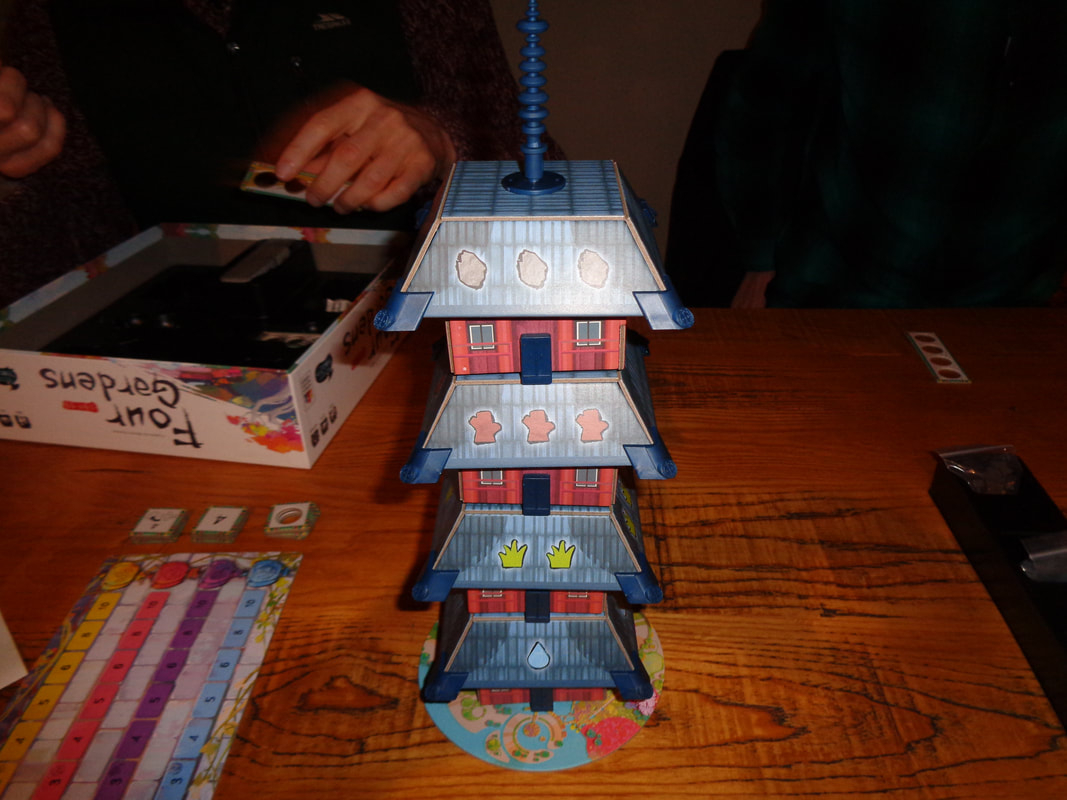
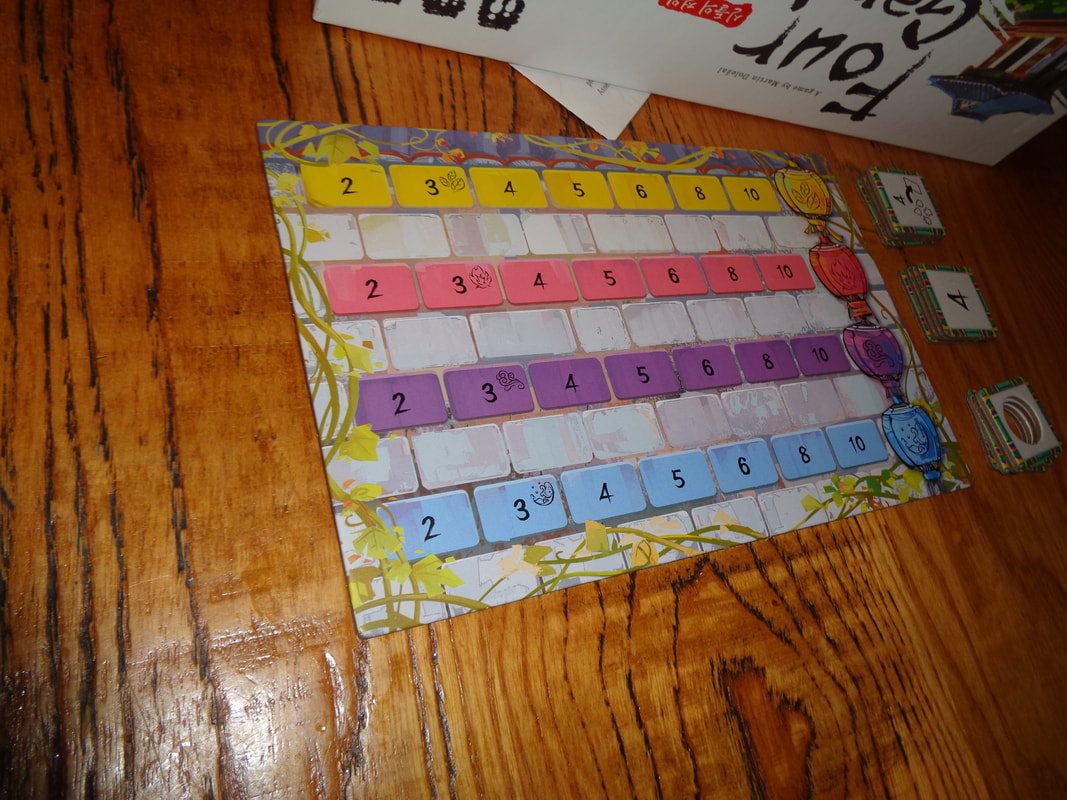
The resource tokens felt like they were wooden and the wooden cubes were pretty standard wooden cube components, which is something I like. The tiles were standard quality card tile and fine, I thought having tiles with little hole to hold resource tokens was a pretty smart move. The card were also pretty standard quality from what I could tell. From the large, eye-catching and rotating pagoda to the tactile resource tokens shaped and coloured identically to their icons in the game; Four Gardens has excellent presentation. The backs of the cards which, when placed together form the panoramic views of the titular feature excellent, colourful and interesting art. Four Gardens features a fair amount of iconography, from the 4 scoring tracks and types of gardens to symbols for resources and different actions available on cards. For the most part, it's instantly understandable and there should be few problems with the iconography. How's it play? Setup
On to play As the name suggests, the objective is to create 4 garden panoramas using the backs of the cards. Four Gardens uses the traditional turn, with the active player acting with play then progressing to the player on the left. During their turn, the active must perform exactly 3 actions. Each action also requires the player to play or discard one of the cards in their hand. There are 4 actions that can be performed, these can be performed in any order the player sees fit. The actions are:
Endgame Depending on the player count, once 8-10 panorama cards have been constructed by any player, play goes into the endgame and the current round is completed. Players calculated VPs earned from the 4 scoring tracks and points they may have gotten from a bonus VP track. Points are tallied, highest score wins. Overall
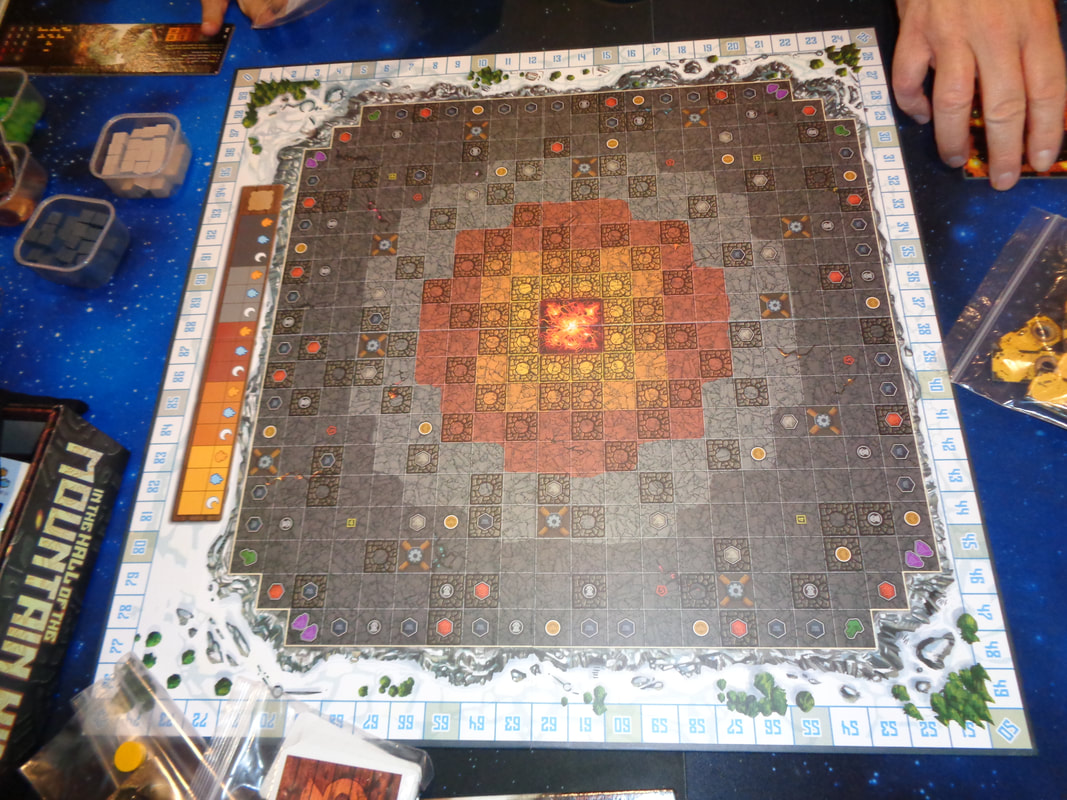
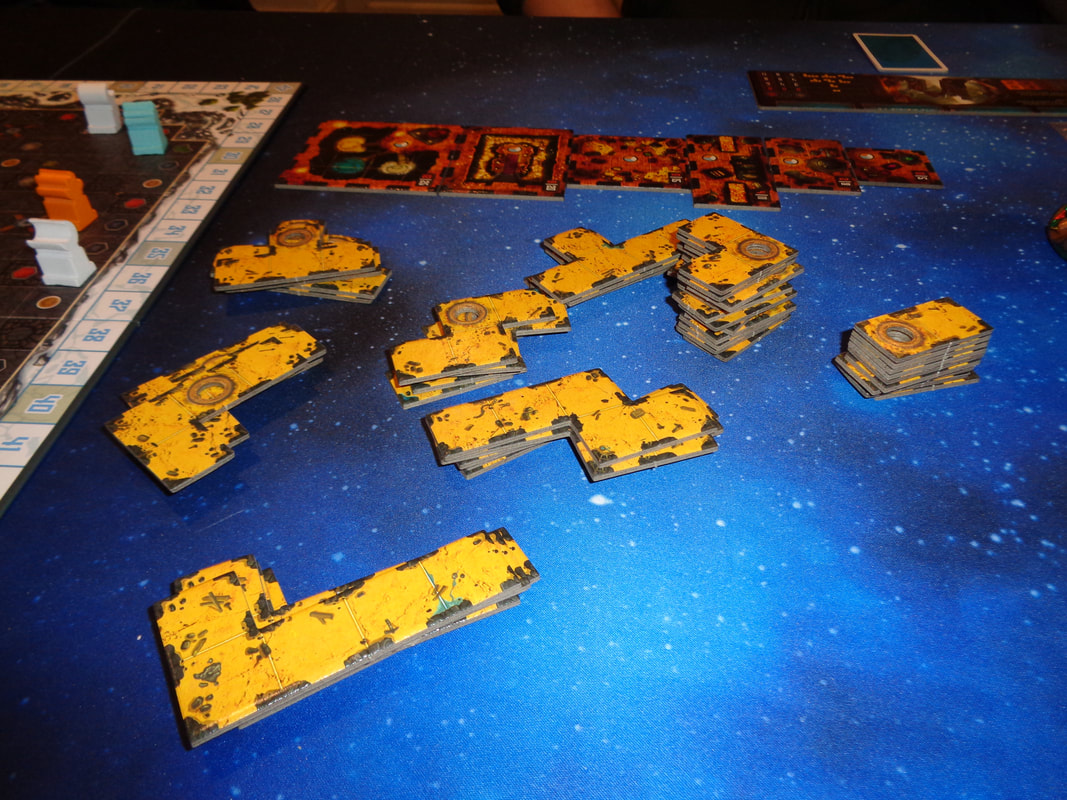
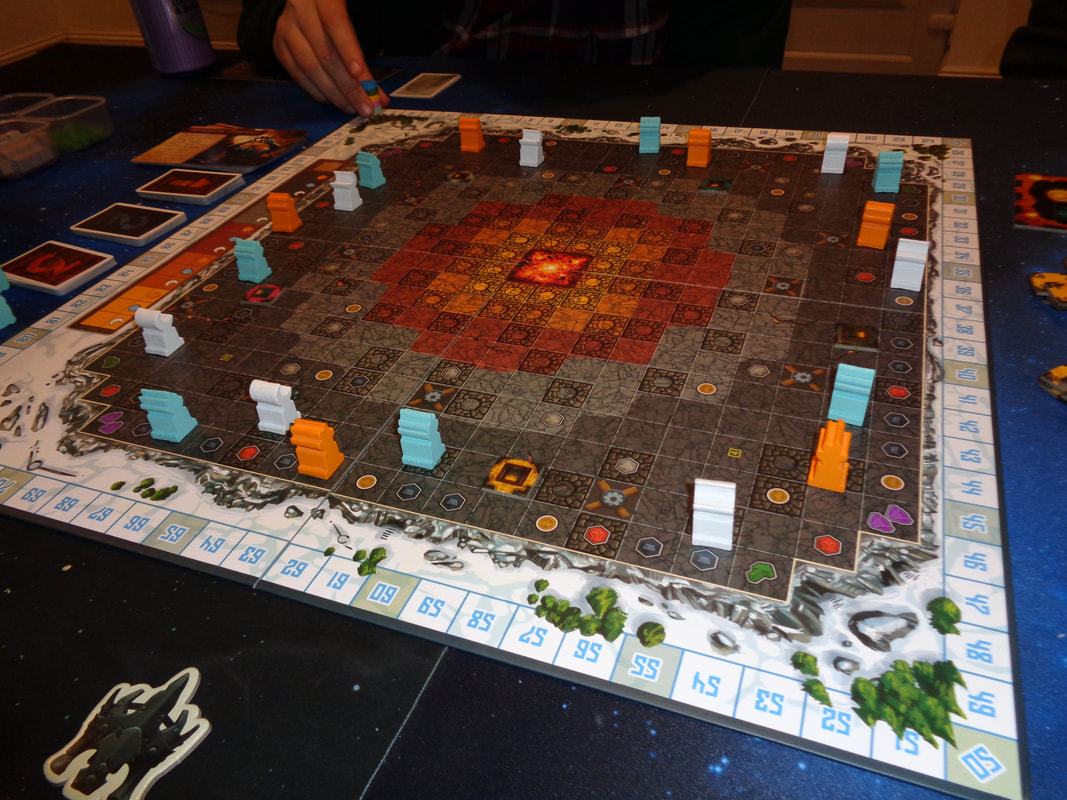
I'll start by discussing the pagoda - the game's most obvious feature. Is it a gimmick mechanic? Maybe. Does it work well? Definitely. It's also quite a unique mechanic and not something I've seen anywhere else. When used in conjunction with the rule limiting how many resources can be collected on the planning tile, it forces players to really think about how they have to manipulate the pagoda to get the resources they need: It takes an action to empty a planning tile that's been filled unnecessarily and that's an action that could be used elsewhere. I think it's a set of mechanics that works very well. Talking about the pagoda does lead me to one gripe: Which is the rule where all players should sit around the pagoda at 90' angles. Players don't always have the right gaming space to accommodate this and while strictly speaking, it's not necessary as players can remember what side of the pagoda is meant to be facing them, it's inconvenient and finicky. The card-synergy, or more accurately score-synergy is a pretty clever rule, providing players a reason to work towards completing panoramas. The 4 scoring tracks seem a little unnecessary but in practice they work fine. This brings me to the knock-back mechanic. It feels a little harsh that, if a player gets their scoring marker knocked off the board, it can't come back into scoring. On the other hand if a player has reached maximum on a track and other players are lingering at the bottom, it's probably not a priority for those other players, so not that much of a loss. So yes, it feels a bit harsh but it's not game breaking. All of this means players will look to optimise the order in which they play cards to optimise how they increase their scores. Concentrating on increasing scores in 1 or 2 tracks can potentially knock-back other players. Conversely, working towards completing panoramas can earn bonuses which may prove useful elsewhere; sometimes you'll be able to do both but sometimes not and looking for opportunities to exploit these times is vital. The also makes use of a variation of the hand-as-currency mechanic, except here it's used to trigger actions and not to actually pay for something. Despite this difference, it places that same conundrum on players; which is how to choose which card to discard? Obviously, they'll be times when it has to be a card with the action they need but otherwise, it's another meaningful decision to make. In conclusion; Four Gardens is a fairly easy to learn set-collecting game that provides players with enough decisions to be engaging, fun and provides unusual resource gathering and scoring mechanics which makes it feel unique. I enjoyed it and think it's worth a try. 9th February 2022 It's Wednesday night and we're round Simon's for some gaming fun. The evening's game was In the hall of the Mountain King. Ask yourself: What is it that trolls like to do? Live under bridges perhaps; no. Chase goats maybe; no. What about make trouble on the internet; no. What trolls really like to do is dig tunnels (The fancier the better.) and move statues! What's in a game?
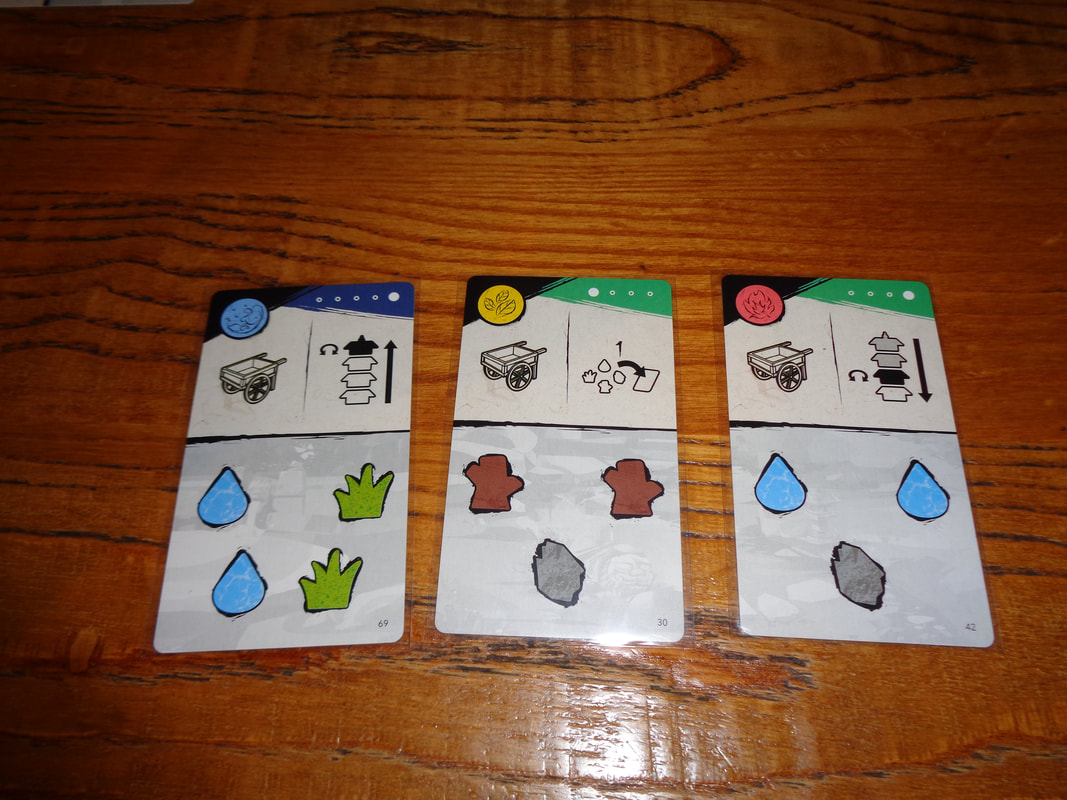
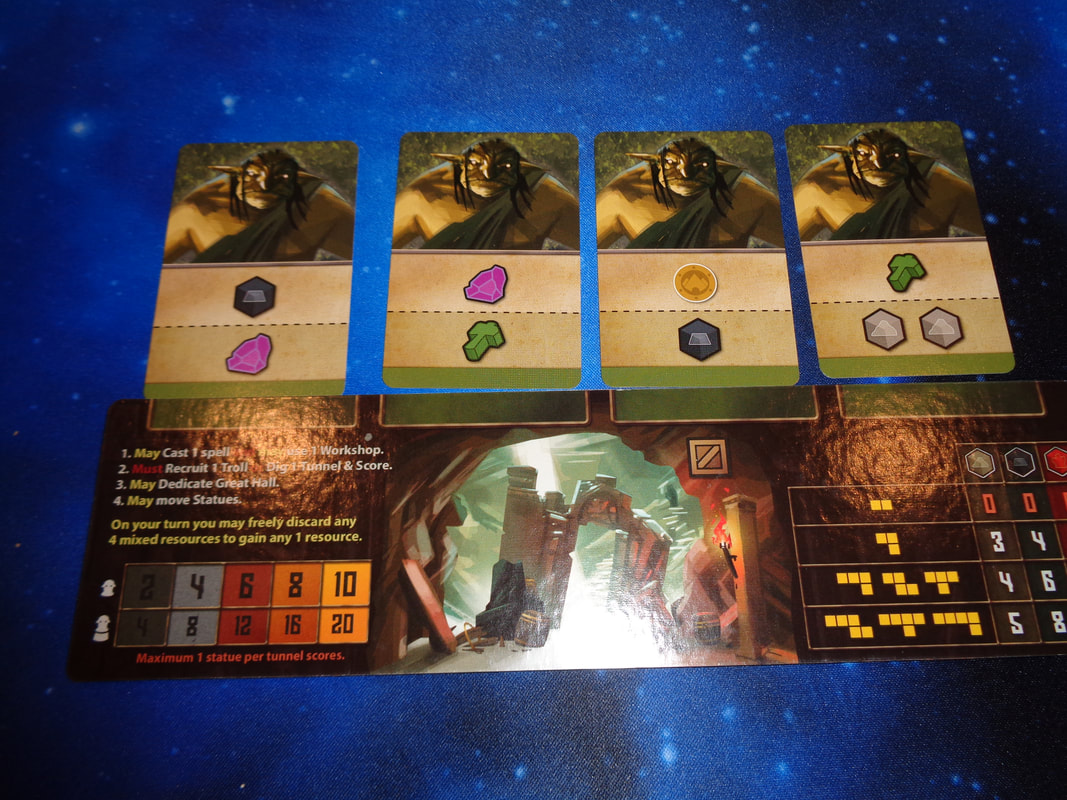
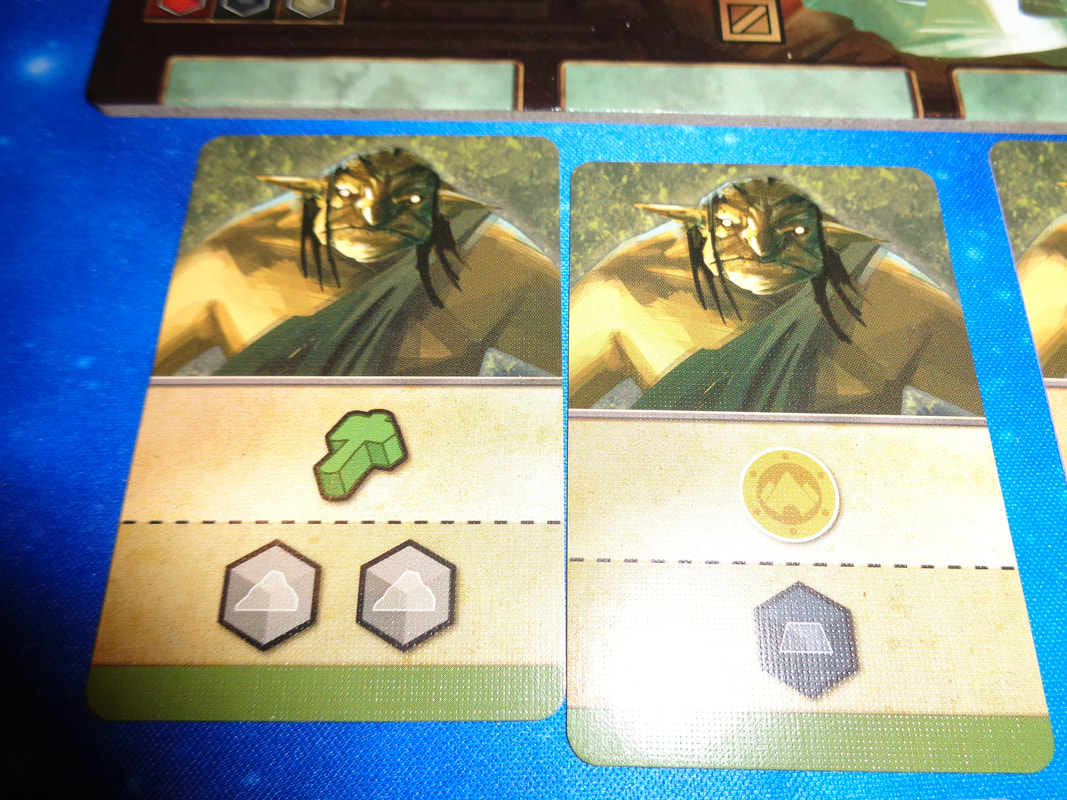
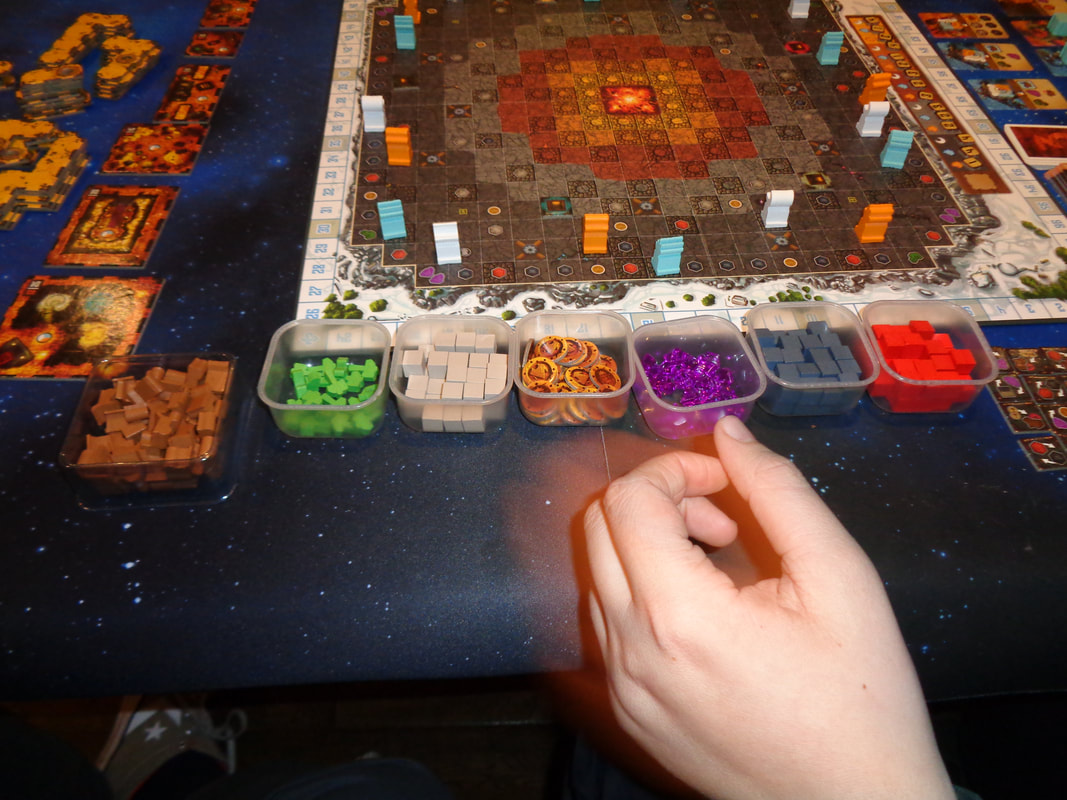
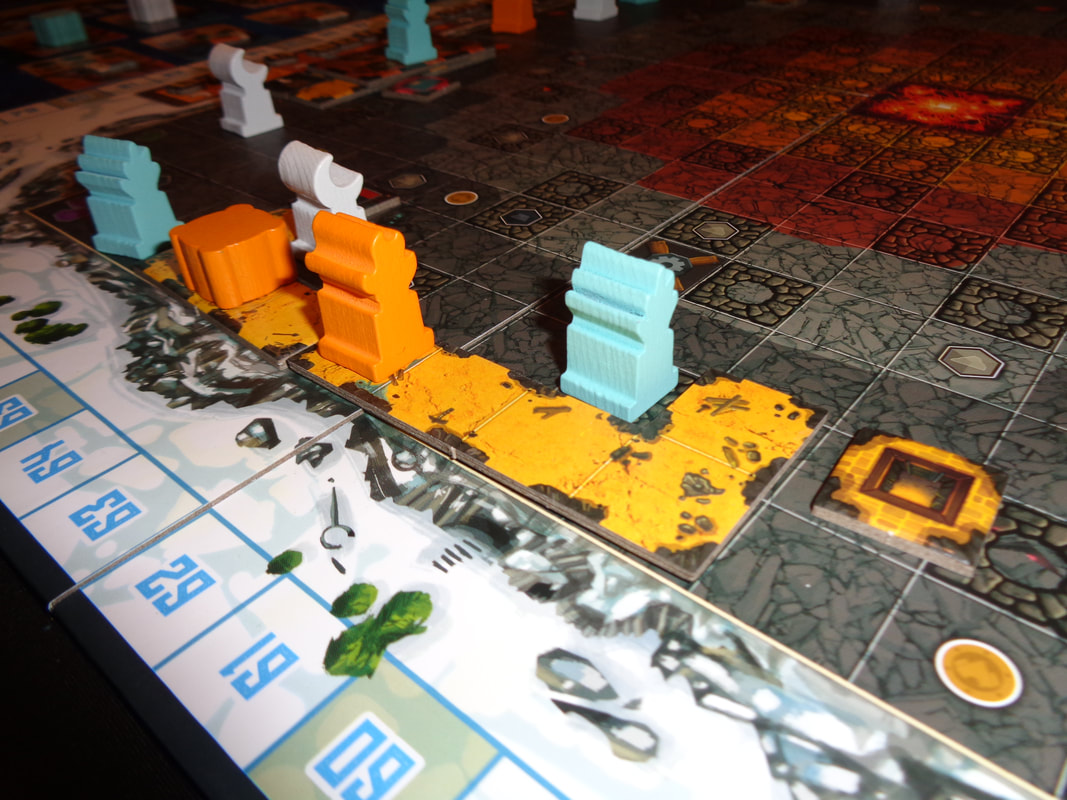
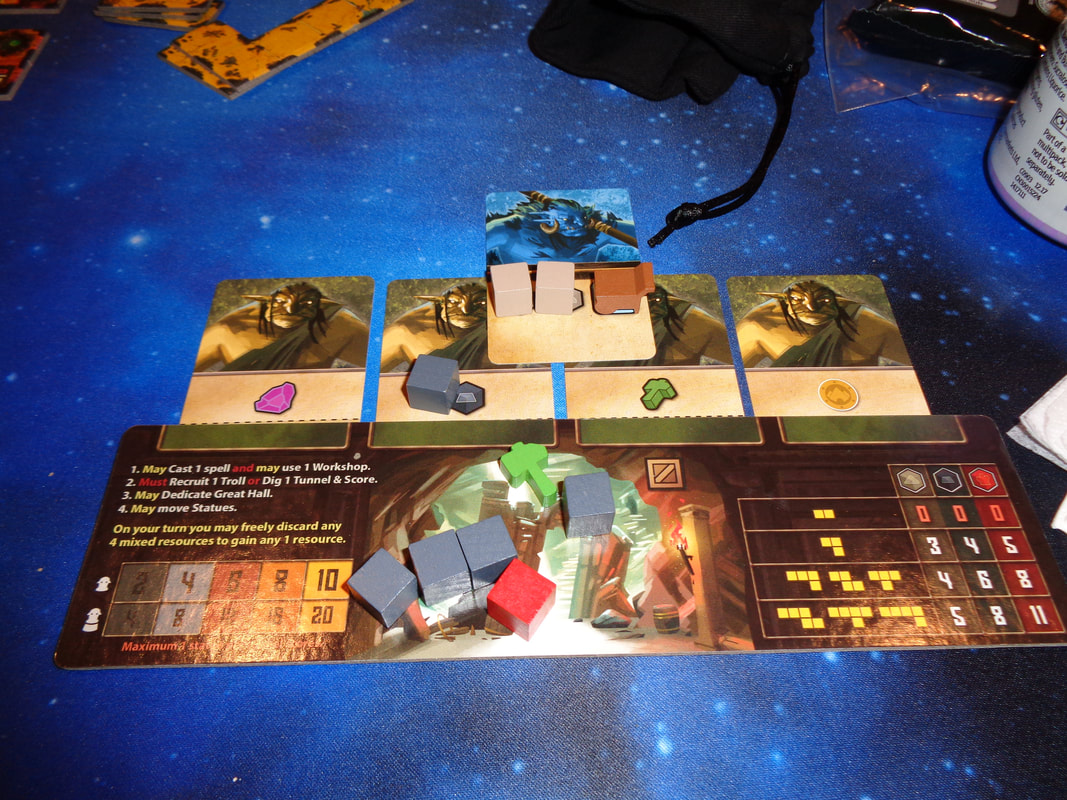
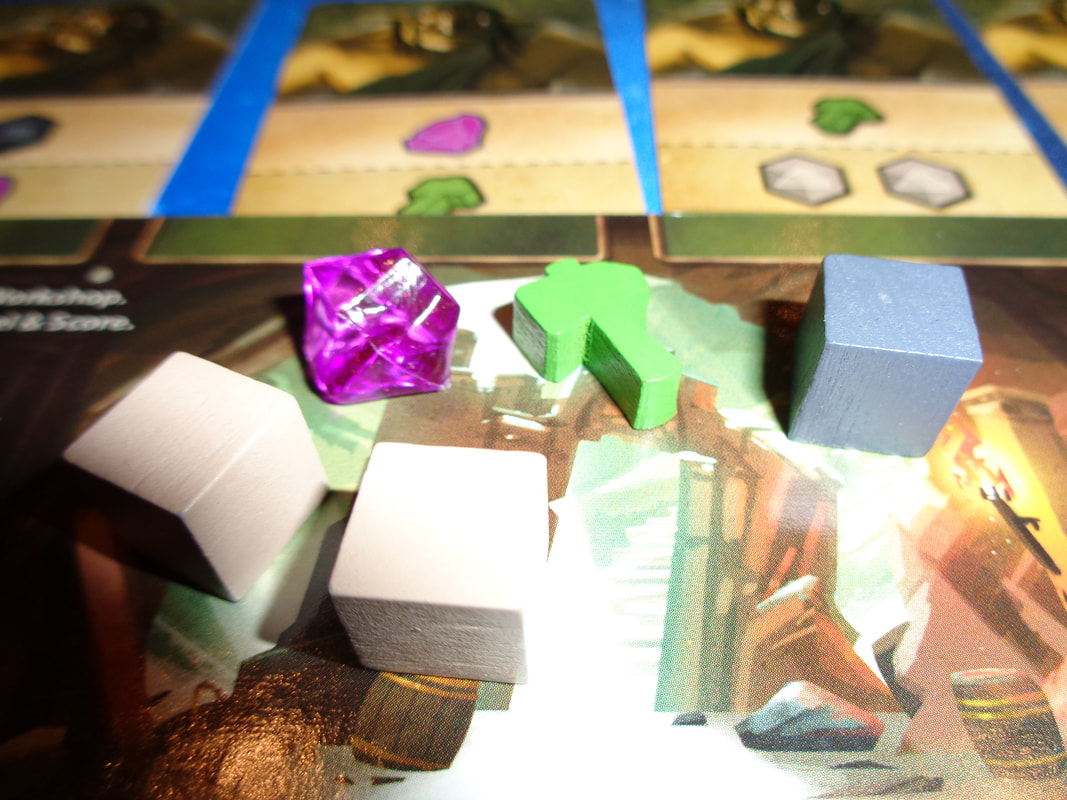
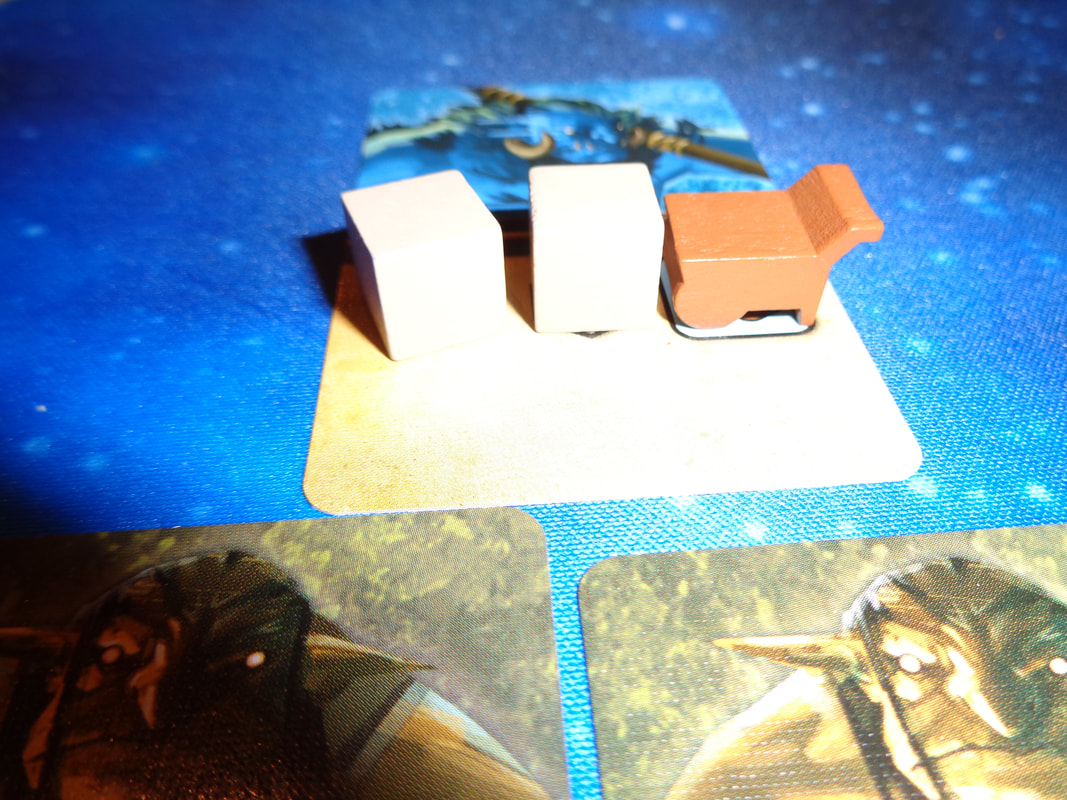
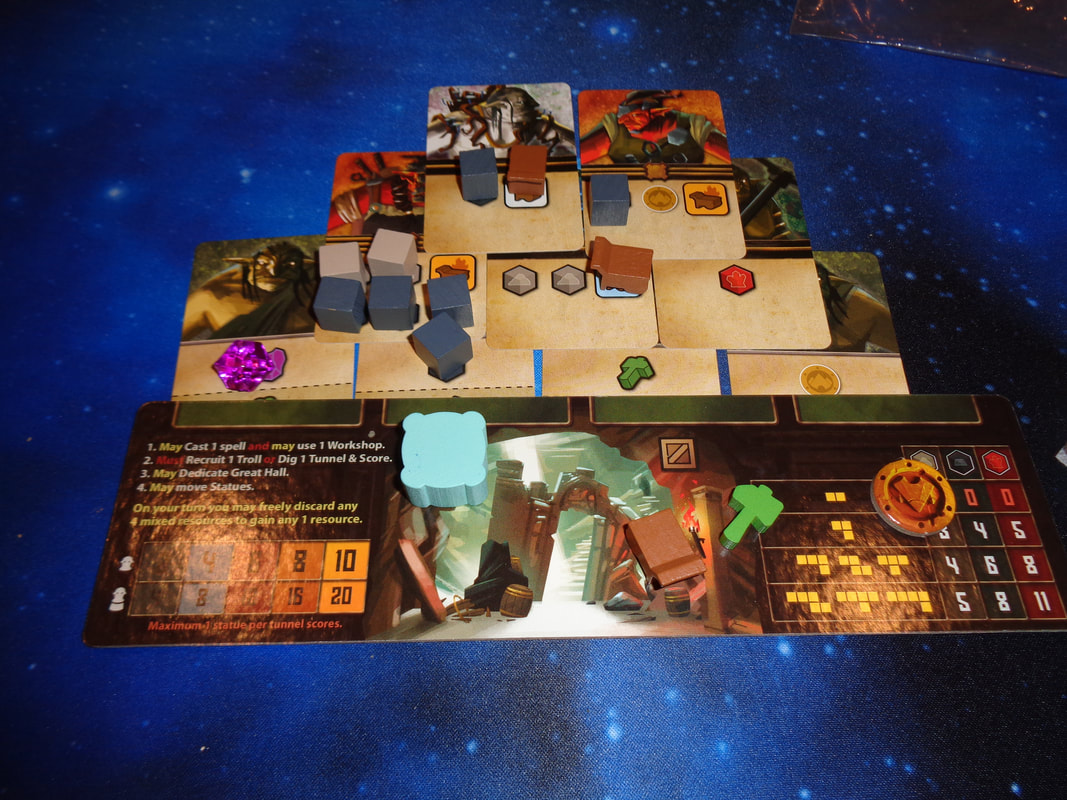
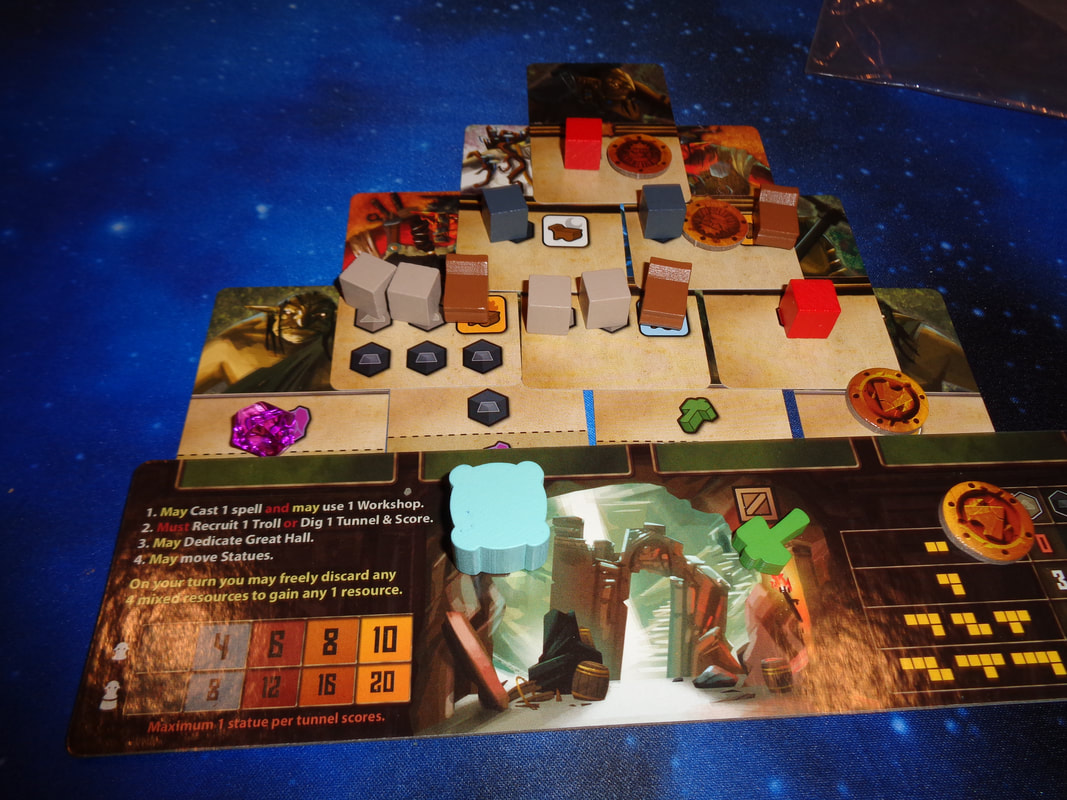
There's certainly a good amount of wooden tokens and meeples here, the acrylic crystals are also a nice addition. None of the other components struck me as being poor quality and they're typical of what is expected in a modern game. There are a couple of minor quibbles though. The pedestal points tokens are a bit small and fiddly to handle The second is a bit of personal grumble - which is that all the carts are brown but depending on where the carts are acquired from will represent different colours. Carts in a player's central area can be used for any colour of statue. But carts from icons on troll cards can only be used to move statutes of a certain colour - which is indicated by the colour of the icon used to acquire the cart! Makes sense... right? Maybe not? Surely it would have been useful to include some carts of the relevant colours? There isn't a great deal of art in the game, mostly on on the spell and troll cards but it's all well illustrated with bold colours and and is fairly varied. There are 4 types (Or clans.) of troll cards and 3 types correspond to the blue/orange/white colour motif that runs through the game and I quite like how those trolls cards have a colour pallet to match it their types. Having said that; the starter cards all feature the same piece of artwork that has been coloured matched to each player colour which is a little disappointing. For the most, the game's iconography is actually straightforward and easily understood. Only the aforementioned issue with carts being a small problem. If the cart icon has a coloured background then a cart that is sourced from that icon can only be used for that colour of statue. Luckily it's not a gamebreaker although it's finicky rule to remember. How's it play? Setup
On to play Play during In the Hall of the Mountain King will have active player performing 4 actions before play moves clockwise to the next player.
Endgame The endgame is triggered when there no coronation tokens left to acquire. The current round is completed and 2 more rounds are played. Players then calculate VPs, a player's VPs may come from the following sources. Score tracker. Statues - depending on their position in the 5 zones and doubled if the player managed to place them on a pedestal. Great hall tokens in a player's network - with or without statues. Pedestal points for placing pedestals. Coronation tokens. Unspent resources; these can earn points. Every 3-of-a-kind scores an extra VP. Points are tallied, highest score wins. Overall
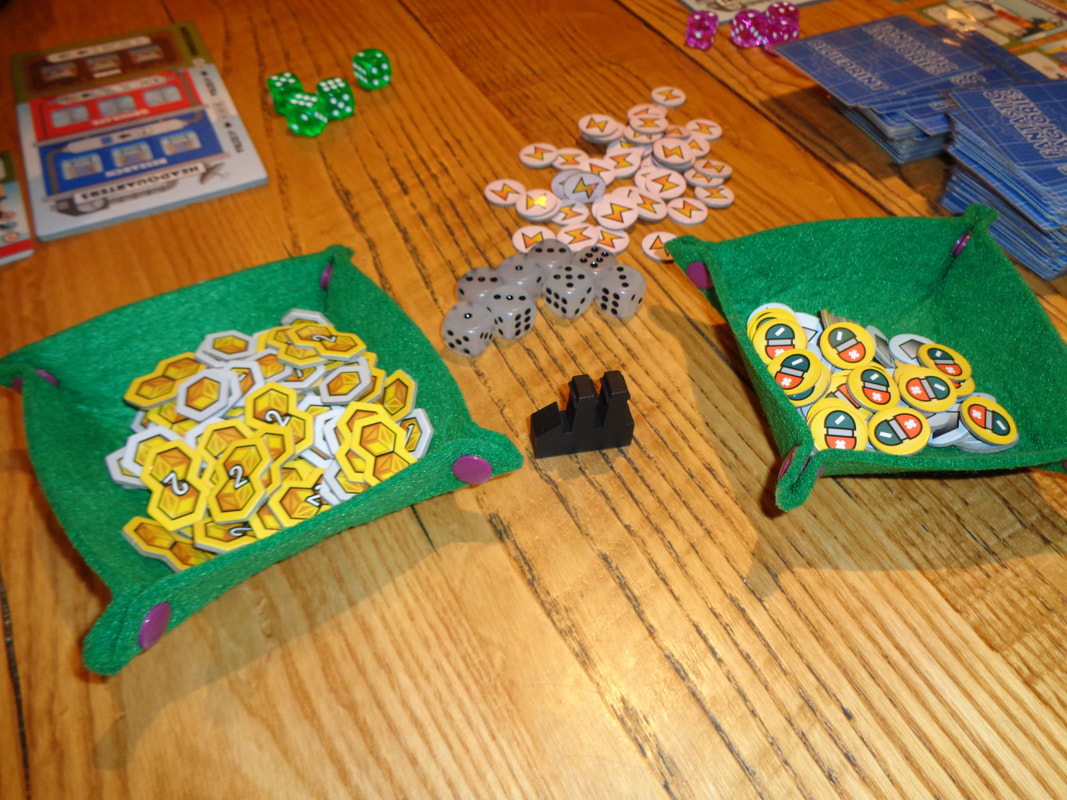
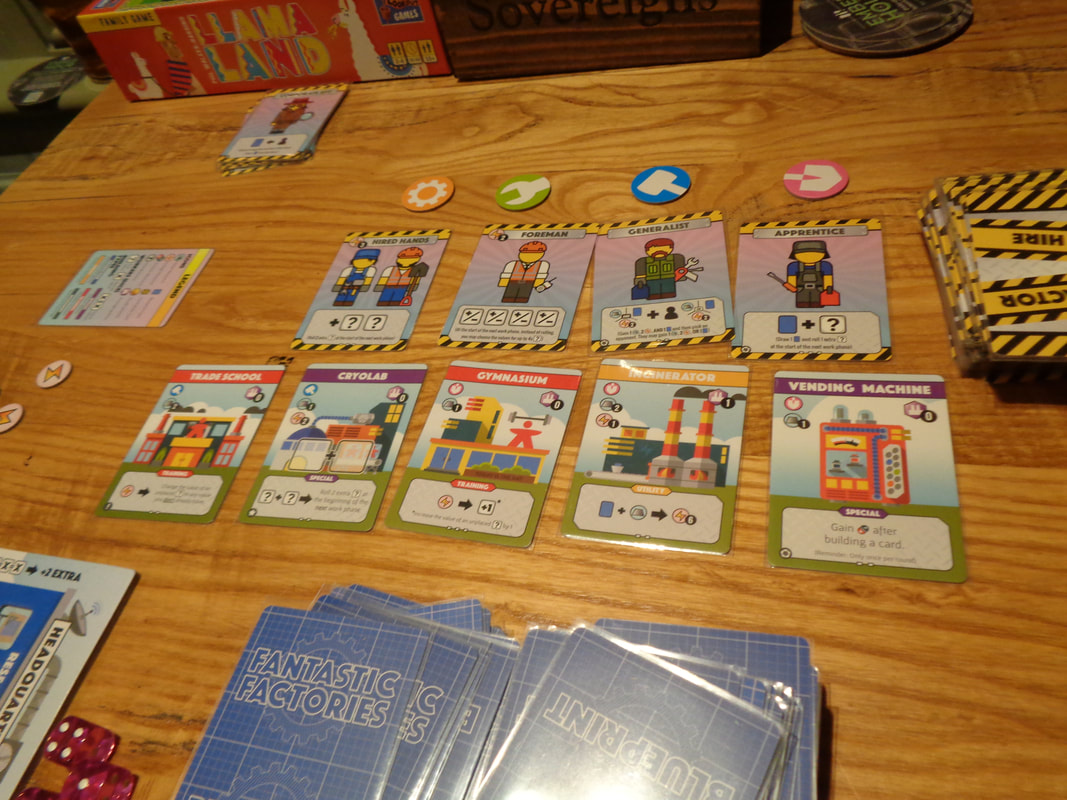
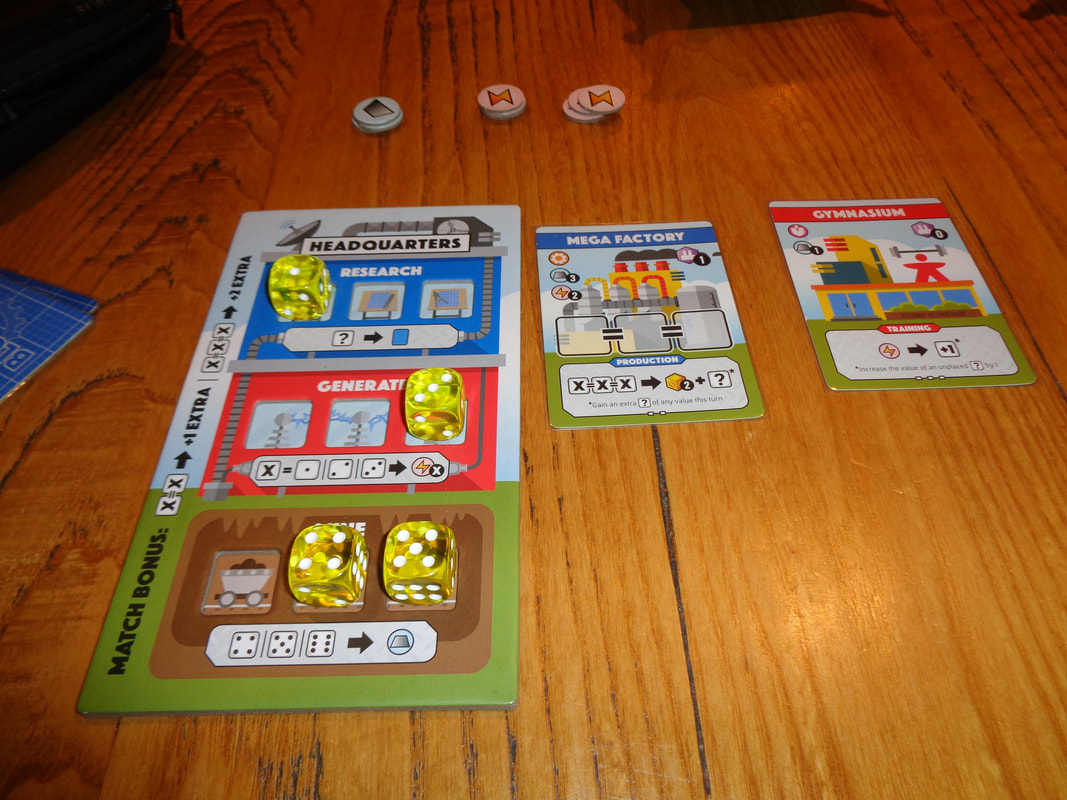
Despite having quite a few rule to remember and sounding quite complicated, In the Hall of the Mountain King is actually pretty straightforward in practice and many of the rules are obvious when in action. There's definitely a couple of finicky rules though, and again - it's to do with the carts and pedestals. It feels like an unnecessary complication to have these differently coloured carts to move statues. The rule that restrict pedestals to 1 per colour in each zone also feels a but cumbersome. I know why the rule is there: It encourages competition in a game that otherwise has little interaction between players. Players will want to be the first to get a pedestal as close to the Heart of the Mountain as possible. It locks out completing players and offers a big scoring opportunity. It means that players are put into a balancing act of needing build their tunnel network but also acquire resources to make this expansion happen. Clever placement of tiles will earn players some resources but recruiting trolls is the best way to get them and you'll note that digging and recruiting are pretty much the only 2 mutually exclusive actions in a turn. There's more to tunnel tile placement too, pedestals and thus statues have to go on anchor spots and it's these need to be as close to the centre of the board as possible, sometimes it'll be tricky to get it right, or it'll require not getting something else. Being able to avoid rubble spaces helps as well. Resource management also has more to it. Spending resources from troll cards first is prudent, as is using workshops to change them into other resources - because they go back on to the storage space and not the troll card. It does involve trying to think ahead about what resources can be acquired and what will be needed. This brings me neatly to the Trollmoot/Horde elements of the game, with their overlapping and cascading mechanics for both buying cards and acquiring resources they almost feel like a different game to the tile placement taking place on the game board. I have to say that I like the cascading mechanic, it's simple but provides some interesting decisions for players to make. Building up a Trollmoot, like much of In the Hall of the Mountain King requires a little forethought. If my calculations are correct, the cards in the centre columns will be activated the most. Players will want to identify and prioritise what resources they'll need in their Trollmoot setup. Additionally, deciding where to place a troll card will determine what resources the player immediately. I do also have some concerns about the game, I found using the tunnel tiles, creating pedestals and moving statues more of a chore than satisfying and the game it didn't quite gel with me. I'm also not sure how much value there is in replaying the game. The player and statue starting positions and workshops may vary but mostly the board's resources stay unchanged. And while the card mechanics are good, the cards themselves only vary in which resources they provide. In the Hall of the Mountain King is another one of these games that does nothing really wrong and I've got nothing against the game. If someone else wanted to play it I would happily join in but somehow it's missing that special something that makes me want to play it again. 8th February 2022 Tuesday night games with the Woking Gaming Club at The Sovereigns continued with Fantastic Factories. I don't know if factories are fantastic but I guess we're going to find out. What's in a game?
From an art perspective, the game makes good use of cheerfully bright colours. The art itself uses heavily stylised illustrations of both factories and contractors which is fine and suits the game's slightly light-hearted theme. When built, factories provide a varied amount of special actions, consequently the game makes use of quite a varied amount of iconography. For the most part it's straightforward, however, on occasion 2 cards may seem similar but they'll be a small difference between denominated by a single small icon or sometimes they'll just be something I wouldn't say it's any kind of a gamebreaker or that there's too much iconography but for a few turns players will probably end up referring to the rules. How's it play? Setup
On to play Broadly speaking, a round is broken into 2 phases; a market phase which occurs in turn order and a work phase, which can be performed simultaneously by all players.
Endgame Play continues until either a player has built their 10th card or acquired their 12th good. In either case, the current round ends and 1 more round is played. Players then total the VPs from their buildings and the goods they gained. Points are tallied, highest score wins. Overall
On a basic level, Fantastic Factories is mechanically pretty straightforward; acquire blueprints, acquire resources to build factories, use factories to acquire resources. It's a mid-weight engine building game that provides players with strong card synergy and offers a good selection of choices and avenues to follow for building that engine. I feel for the most part that players will want to focus on blueprints and building them, which is natural as this is what gets resources and VPs. Players shouldn't neglect the contractors who provide instant if transitory benefits for a relatively low cost. Applied at the right time, they can be game changers - provided they're available at the right time! Once again, it's a case of reacting to opportunities as they are revealed. There are a couple of there elements that make Fantastic Factories interesting. Firstly; dice rolling. Players will never be guaranteed getting the results and thus the resources they want. It means that players may not be able to build the card they originally wanted to and will need to adapt and react to the situation as it arises for optimal play. Of course it's always possible to play it safe and have all the required resources before getting a card, it's safer but it's also slower. Secondly; Fantastic Factories makes use of a hand-as currency mechanic. This forces players to think ahead, players may need to get blueprint cards just to discard for another building, or may be forced to discard a blueprint they still want in order to build another, it can be a tough decision. There's also some high level play, where it pays to watch what other players are working towards then wipe the marketplace to deny another a player a card they want. Fantastic Factories is a well balanced game, it's rules aren't particularly complicated and are easy to learn but also have depth that comes from recognising how to exploit the available cards that appear during the game to build their engine optimally and to maximum efficiency. The gameplay is solid and will appeal to fans of engine building games, which I am. so I guess factories can be fantastic! |
AuthorI play, I paint. Archives
March 2024
Categories
All
|


 RSS Feed
