|
26th July 2022 It's Tuesday! That means it's time to meet up with the Woking Board Gaming Club at the The Sovereigns. Time to steal the idol... and escape, Indiana Jones has nothing on this real-time, cooperative dice game, well at least until those crappy rolls inevitably turn up! What's in a game?
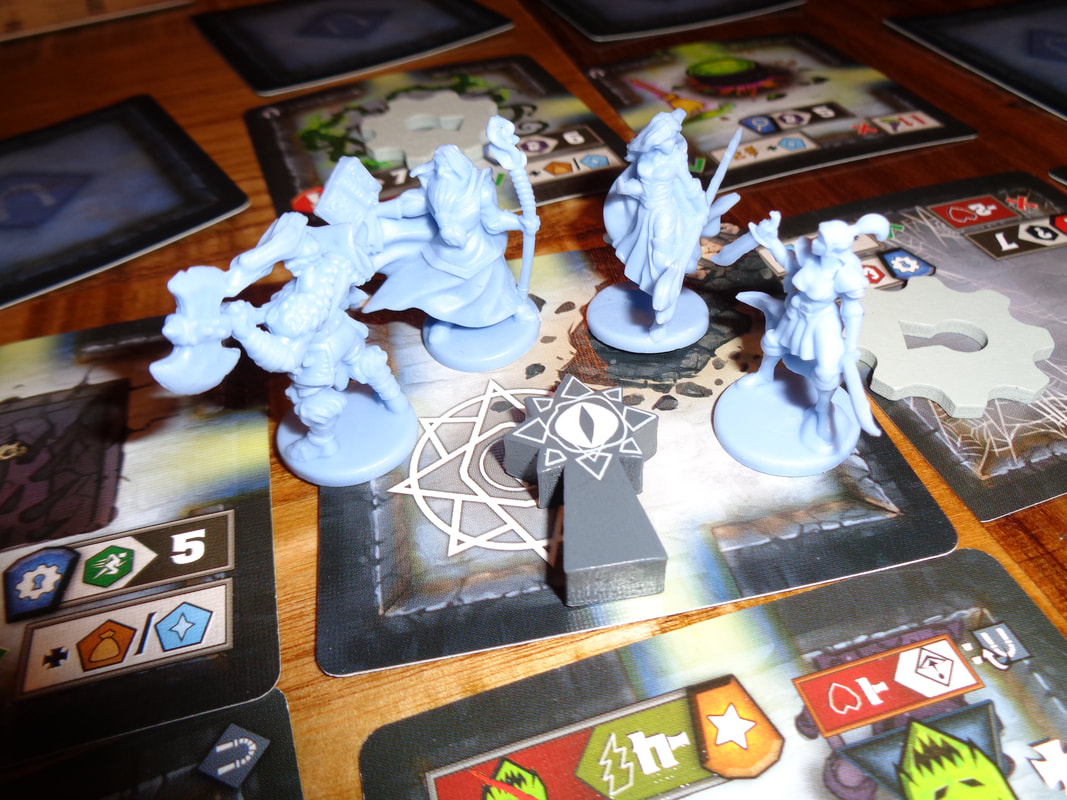
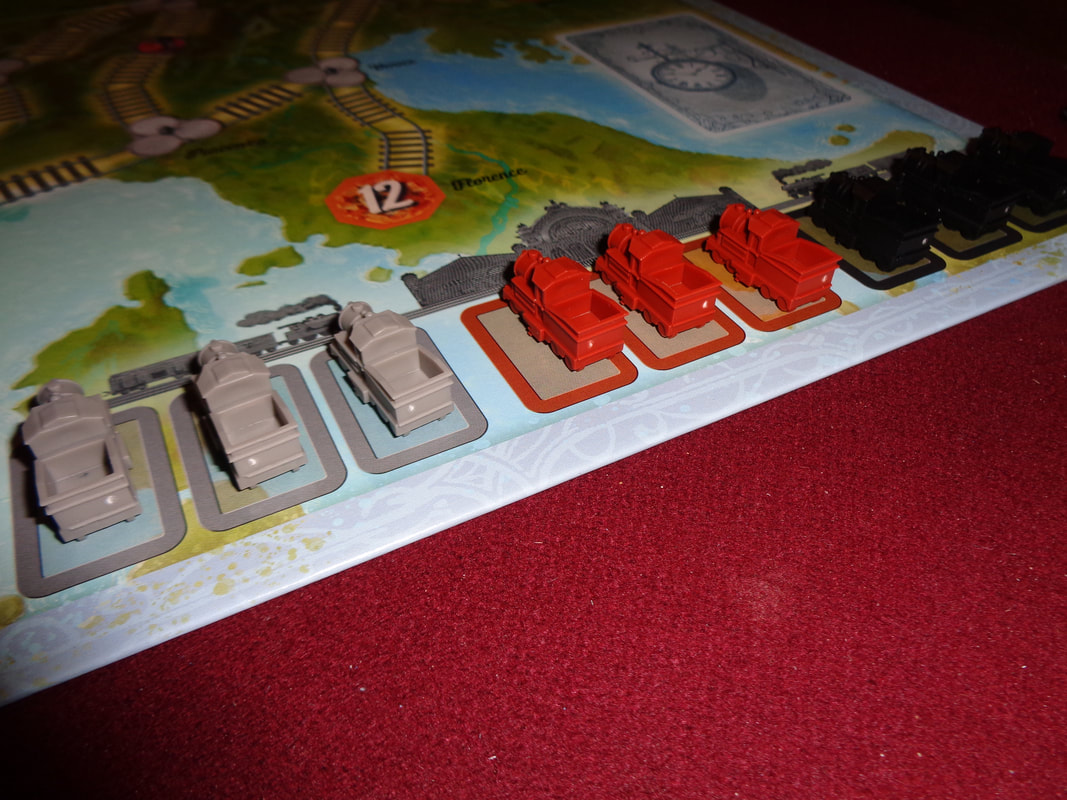
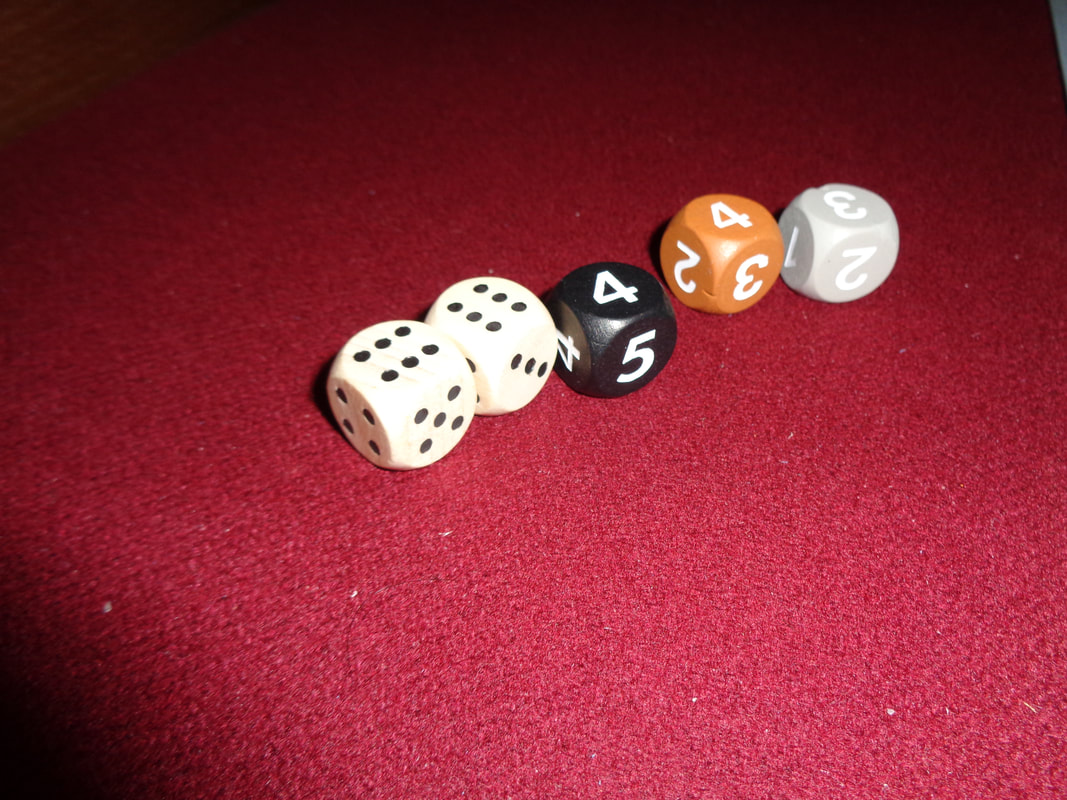
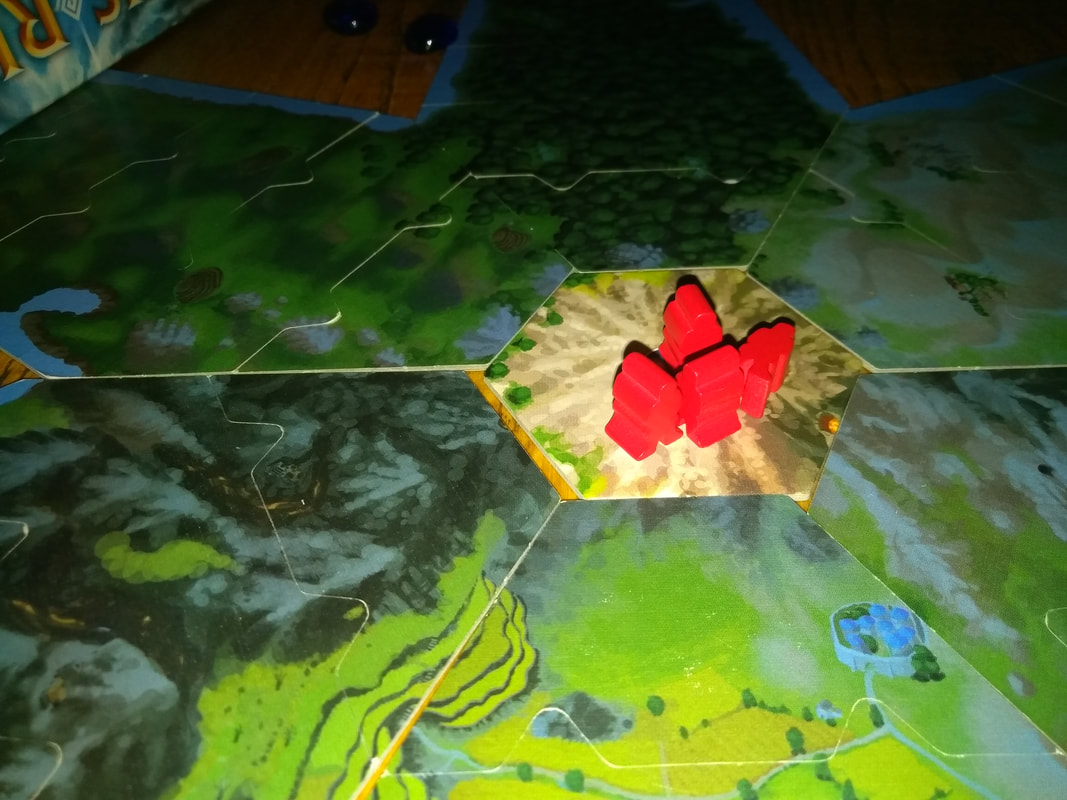
Escape: The Curse of the Temple has good quality components. The tiles all feel suitably thick and sturdy. The acrylic gem tokens are kind you see in a lot of games which use them to depict gems, they are a sparkly, pleasing shade of green though. The bespoke dice and meeples are wooden which is always a nice touch. There's not much art to speak of, the tiles show flagstones and that's about it. It's clear artwork that does not get in the way. About half a dozen icons are used throughout the game, luckily they most relate to the dice and there's never a need to refer to the rules - which is a good thing since this is a real time game with a countdown. How's it play? Setup
On to play In Escape: The Curse of the Temple players are collectively attempting to explore a lost temple to find the exit and escape before becoming trapped. It's not so simple though; not only must they find the exit, they'll also need to activate the gem tiles and spaces to make their escape possible. The game is played over 3 rounds and does not use a typical turn structure. Instead, turns are actually synchronous, in other words, players perform all their actions at the same time and in real time! This involves all players rolling their dice and resolving their actions simultaneously. How is this all done? Read on.
Endgame When the 3rd and final round begins, all players must get to the exit tile and successfully perform the escape action.
The soundtrack has a total countdown across all 3 rounds of 10 minutes. If one or more players are still in the temple when the countdown has finished, then they collectively lose the game. If all the players have escaped before the time runs out, then the players collectively win! Overall
I'm going to start by saying that I'm a bit ambivalent towards real time games. I've played some good ones and can see how they have their place in gaming but for me but broadly speaking, it's not why I like and play board games. I like to think out my decisions and choices at least a little bit. Add to the mix a push-your-luck dice mechanic and you've a game of a lot of quick frantic rolling. You really don't want to roll those dice off the table! Having said all of this, I think Escape: The Curse of the Temple is a solid game and there's a lot to like about it. Firstly, rules and theme mesh together well. Chucking dice as quickly as you can to escape feels good. The synchronous dice rolling is a clever little system. Generally real time games are always trying to impress upon players that they're up against the clock, this can be a little jarring in a game where players are having to wait for another player's time to run our and get their turn. By having synchronous actions, it heightens the sense of urgency as everyone is in it together. Being able to provide assistance another player on the same tile is equally clever. It's an elegant mechanic that also feels organic and makes sense. This means it would seem like a good idea to have players explore the temple as a group, it would make shifting gems and unlocking dice easier... But there's a couple of rules that throws a spanner into that strategy. Firstly; exploring as group can slow down that exploration. Players can't escape if they don't shift enough gems or find draw exit tunnel from the stack. Secondly; players will want to avoid creating single long corridors, they will need to return to the starting tile twice and the further away they are from it, the further it is to get back. This will force players to split up or go in pairs or stick close by if they have the option, at least for the first 2 rounds. This can change contextually when certain tile are revealed or have to be put in play in a certain way or a player get too many locked dice and so on. Players will have to think quickly and decisively as well as adapt to emergent events. Escape: The Curse of the Temple obviously has a quick playtime - 10 minutes! That feels a little strange because the setup and explanation time almost feels longer than a single game. It's reasonably easy to learn, I can't imagine novice gamers struggling to learn the concepts here. It also not a game to be taken too seriously and leans heavily on luck which is not unusual for cooperative games. Although, even accepting this, a bad run of rolls can sour the experience. But treat Escape: The Curse of the Temple as a cooperative, silly, fun, filler of a game and it will be a enjoyable time. So long as your luck is better than mine... much better!
0 Comments
26th May 2022 It's a Thursday evening and I'm in Aldershot with friends for some gaming goodness that's been a long time coming! Is it tiny? Yeah pretty much. Is it in a dungeon? Definitely. Is it epic?... Well, you'll just have to see! Tiny Epic dungeons is a cooperative tile laying (Or card laying really.) dungeon crawler with players taking on the roles of various heroes who will spend much of their time managing a goblin epidemic before being chased around by the big bad before hopefully defeating it. What's in a game?
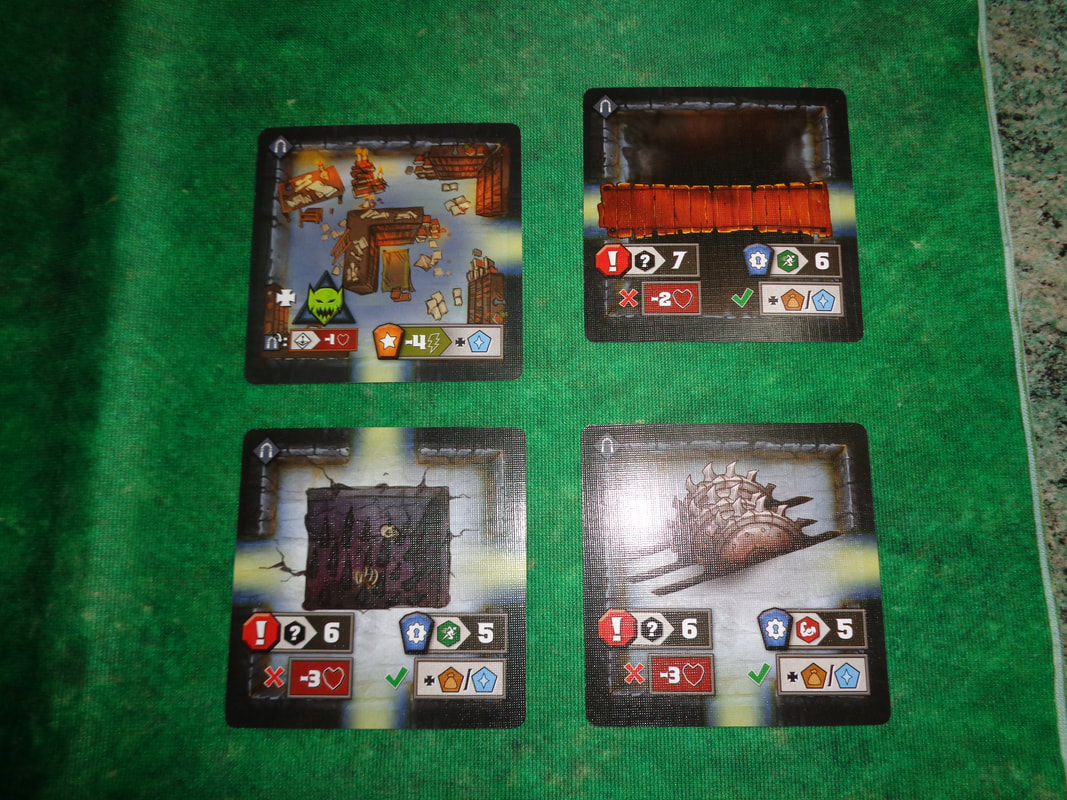
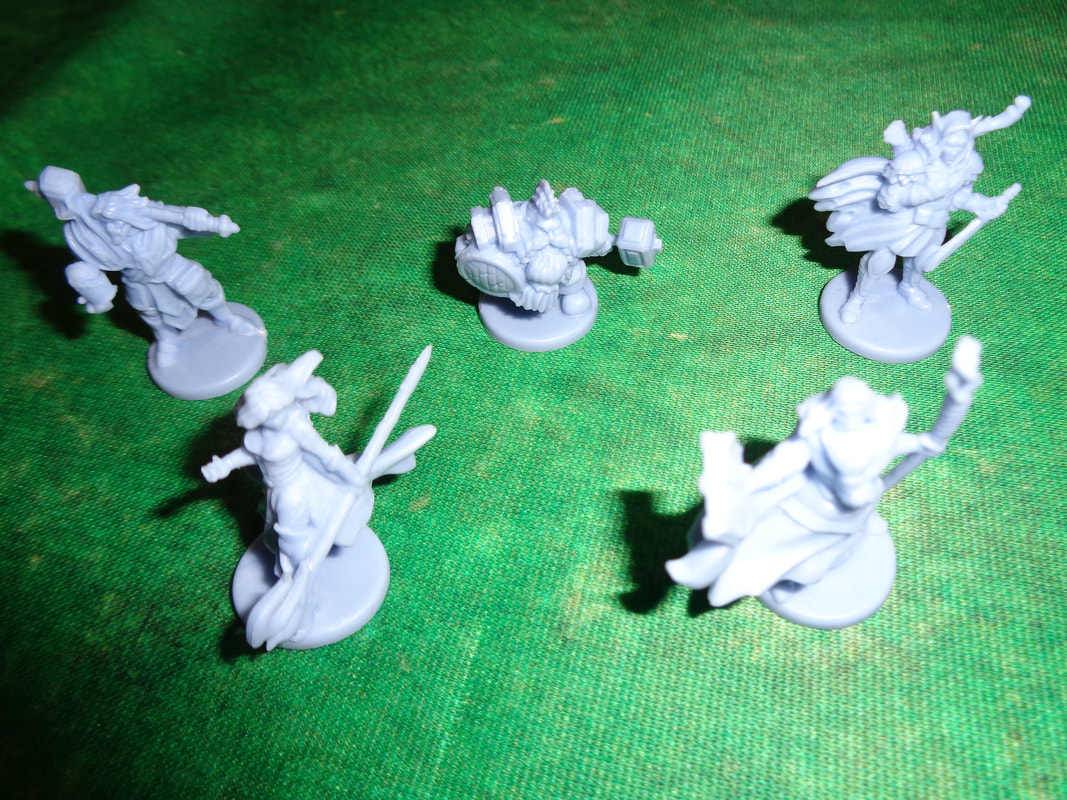
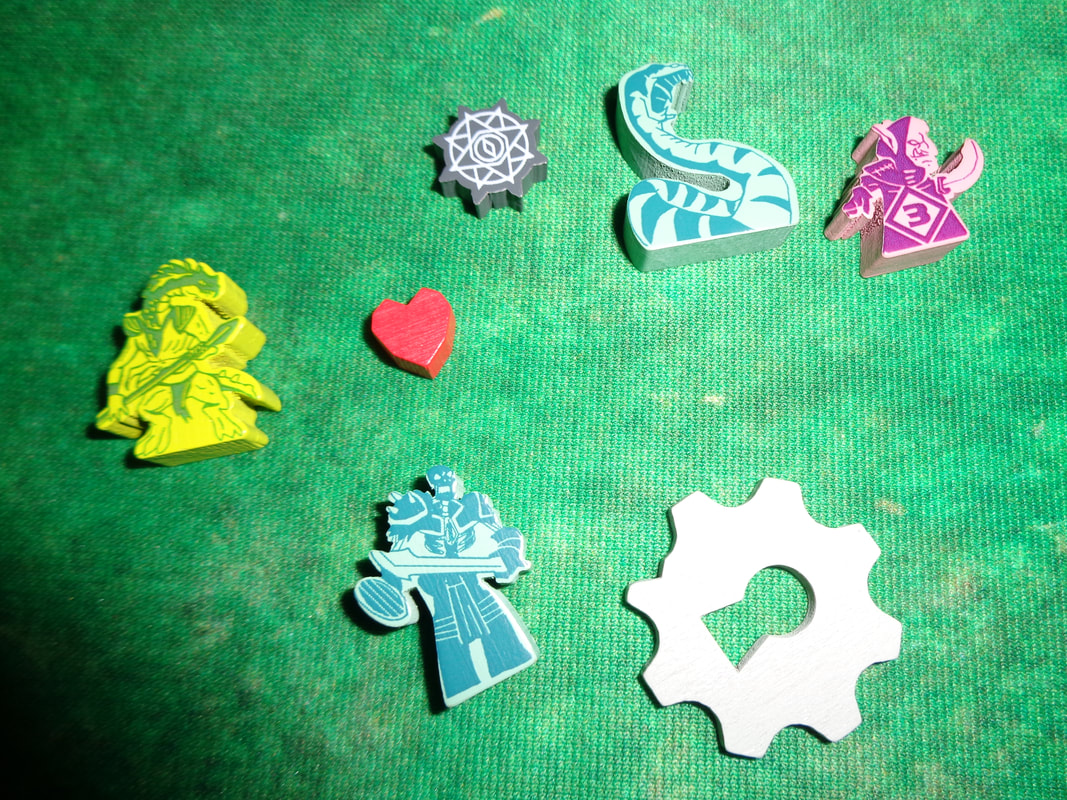
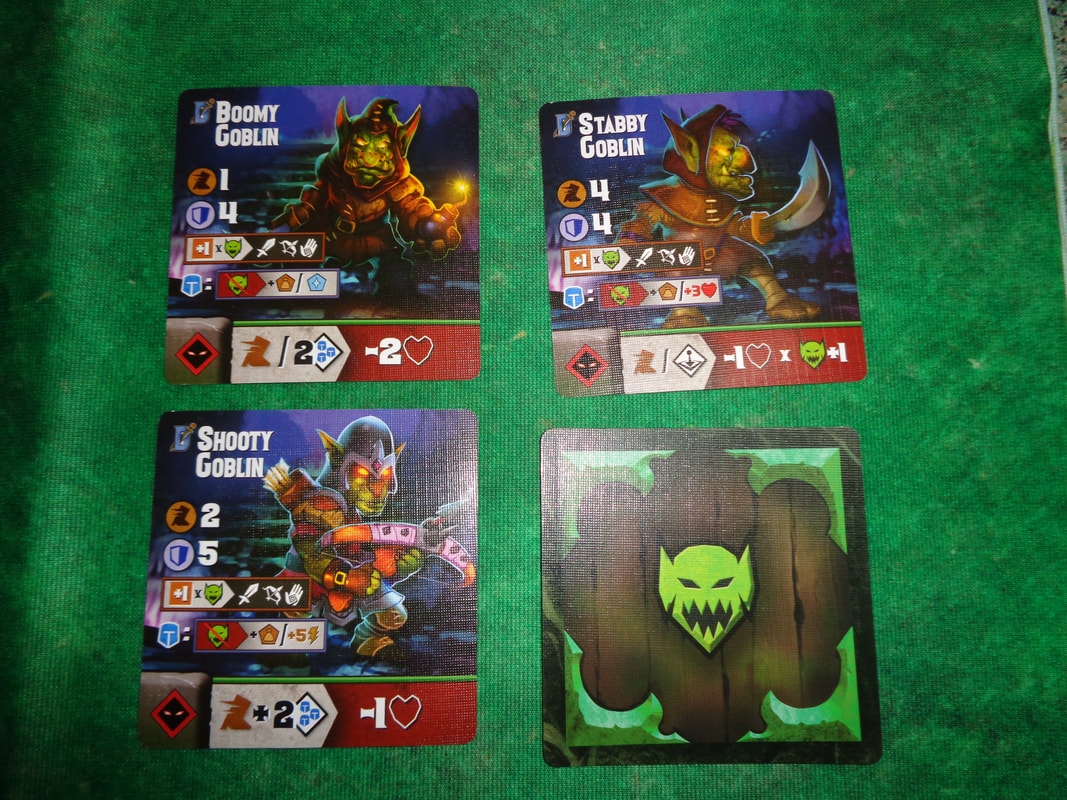
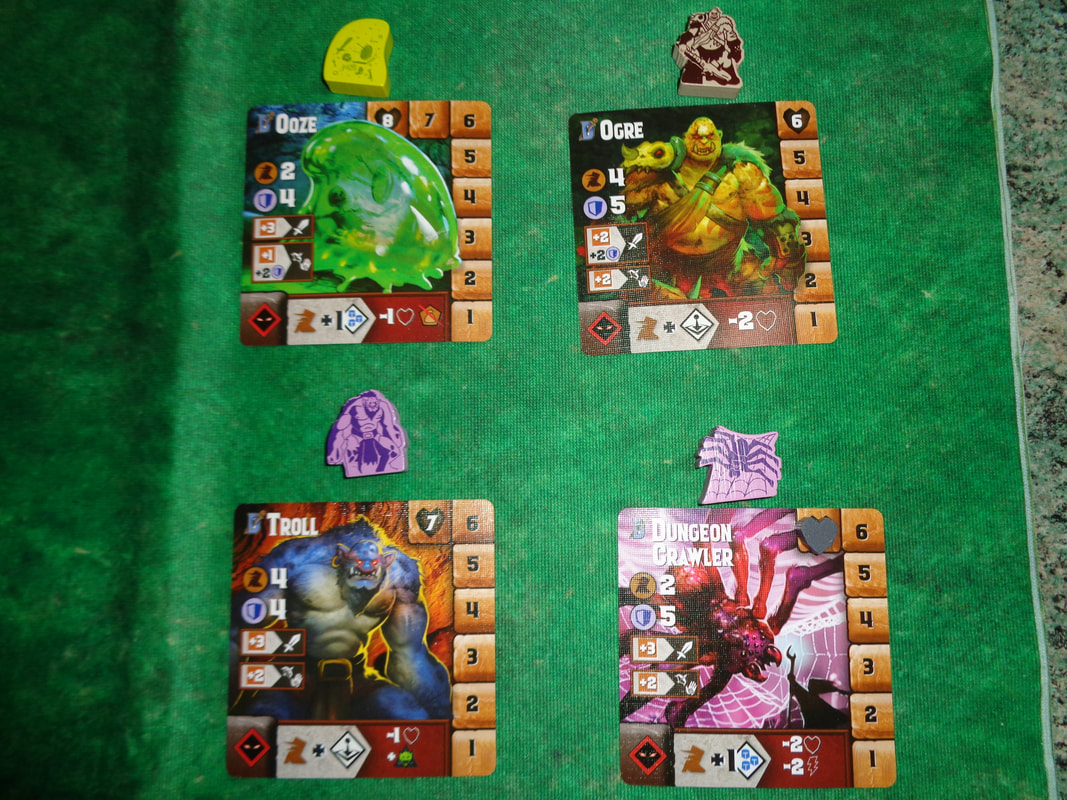
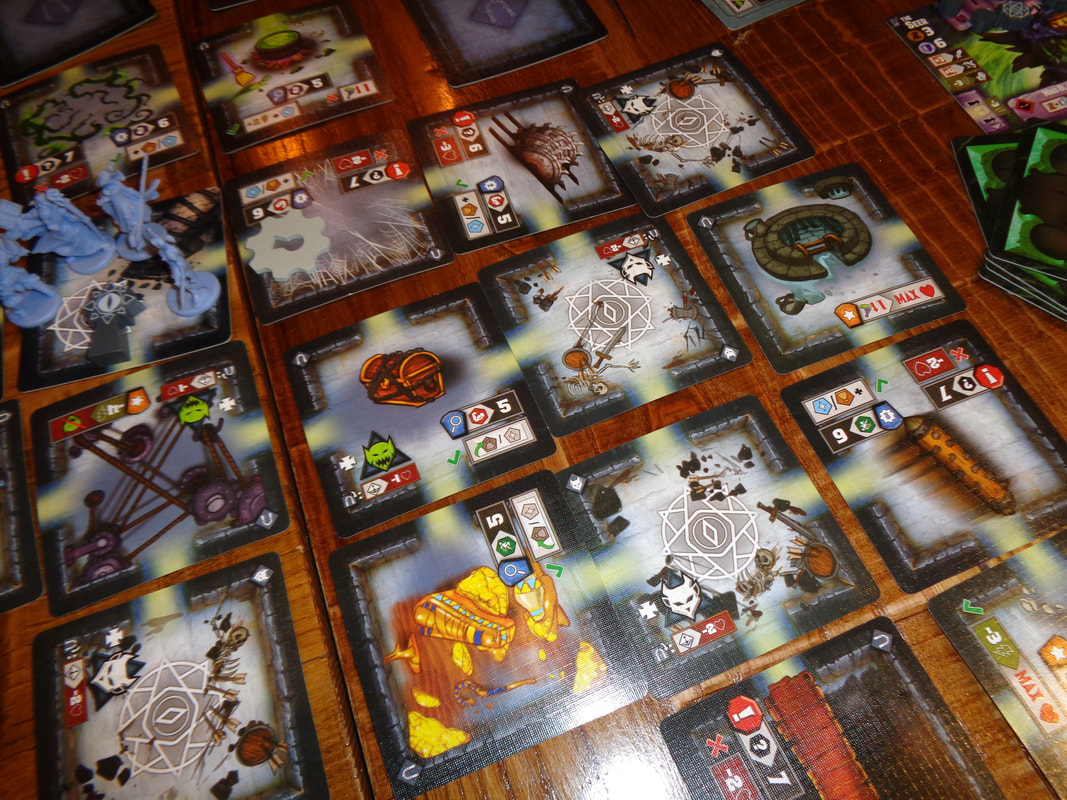
Tiny Epic Dungeons packs a lot into a small box. The cards feel a little flimsy and the dice are plastic and feel a bit average but other than that, the components are all good quality. The character figures are sizable and a pretty cool touch for a game of this proportion, while for the most part the tokens are small (Other than the disarm tokens.), they're still solid and well made. But for me, the standout components are the meeples, not only are they nicely shaped wooden tokens, they also illustrated. It shows some thought and care has gone into the production. The use of art is also good throughout the game, portraits of heroes, minions and bosses are all chunky and colourful, utilising a cartoony style that's used in a lot of modern fantasy games, it's a style I like Artwork used on the dungeons cards is also pretty good, there's a nice contrast between somewhat grey looking rooms and the colourful dressing and scenery that inhabit them and even the box lid features some evocative art. This brings me to iconography. It's rare that I'm critical of a game's iconography and this is one of those occasions. It's just that there's so much of it. A good proportion of it is instantly comprehensible, but a smaller proportion of it is not and a smaller proportion of a lot is still quite a lot!
I know that this is the result of game that is trying to emulate a D&D RPG style dungeon-crawl experience without a dungeon but even so: we played the game several times and I still did not recognised some icons. Between the fairly extensive rules and the extensive iconography, it gives the game a bit of steep learning curve. Additionally; not only are so many icons, some of them are quite small, icons in the corner of the dungeons cards and the first time we tried to play I didn't notice them! How's it play? Setup
On to play In Tiny Epic Dungeons, the players must explore and reveal the dungeon, fighting goblins and acquiring loot and magic until they defeat enough minions in order get into the boss' lair and defeat them. The dungeon in Tiny Epic Dungeons is always a 7x7 grid in size, with the entrance always being the exact centre of the dungeon. When it comes to the active player's turn, they can broadly speaking: move, perform exactly 1 'heroic' action and any number of free actions.
There are also some other rules that need covering.
Endgame In the first act, if a 5th goblin comes into play before any of the 4 adjacent to the torch mat are defeated, then the players collectively lose. If at any time the torch token reaches the end of the track on either side of the torch mat, then the players lose. If the players get to act 2 and reduce all the boss's health tracks to 0, they collectively win! Overall
So, Tiny Epic Dungeons has quite a lot rules, I feel it's not particularly complicated but there's certainly a lot going on and that means that there's a lot to remember in this fairly ambitious attempt to recreate the D&D style dungeon-crawling experience. The question is, does it succeed? Well... sort of. The thing is, Tiny Epic Dungeons can't hide it's cooperative board game DNA. it utilises a commonplace cooperative mechanic of making the players choose between working towards their objectives (In this case exploring the dungeon, finding and defeating minions and finding the boss lair.) with managing an ongoing, constantly expanding threat (In this case preventing 5 goblins spawning in the game.). Players will be faced with choosing between the two. Furthermore, the constant ticking countdown of the torch track will encourage players not to dawdle and cooperate as much as possible. Another challenge facing players is placement of dungeon tiles all current passageways must be honoured and the game has a strict 7x7 size. If player don't think a step ahead, there's a risk that a pathway may lead to a dead-end too early, leaving a portion of the 7x7 grid inaccessible. Mechanically, these are all good, they put players in the position of having to make meaningful decisions. However, they do feel a little un-RPG-ish. During this early stage of the game we did encounter a noteworthy quirk; one character could not leave the entrance for about a quarter of the game! At the start of their turn, there was always a goblin on the entrance card thanks to spawning from the torch track. Once they defeated the goblin, they could no longer move and by the time of their next turn, there was another goblin on the entrance! One thing I like is how the game clearly differentiates between the early and late game. When the boss is revealed, everything changes and priorities shift somewhat. Exploration and goblin management become less important and dealing with the boss more so which thanks to the altar tokens requires more than just dealing damage to the big bad. All of this should serve to make Tiny Epic Dungeons a good game but truth be told - it's all a little unremarkable. Combat feels unexciting, particularly when dealing with goblins again and again, it felt repetitive and frustrating. They're not a threat because they're tough (They're not tough!), they're a threat because the rules say that you lose if you don't defeat them quick enough. The dice mechanic used is pretty cool though. I like that the unused dice can give a benefit, e.g., not using a 6 as the result of a skill check because as it provides a point of health gives players a meaningful decision to make when choosing which die to use for a skill check. The dungeon exploration experience it provides is pretty standard and OK but the lengthy rules and having to interpret fiddly icons mires the game in slowness and interfere with the pacing. Even after several play throughs, I look at the icons and think, 'Wait, what does that do?'. After more play throughs I'm sure that the rules will provide no obstacle but I feel little compulsion to play it again, which is a bit of shame as it looks really nice. While there's nothing wrong with Tiny Epic Dungeons and I can't find any fault with it, I also can't find a reason to like it. 19th May 2022 It's a Thursday and I'm enjoying an evening of gaming in Aldershot for the first time in actual years! Take that Covid-19! Cho chooo! Switch & Signal is a cooperative board game about managing train schedules, that's right - you're playing the generously proportion controller and how do you control these schedules. With switches and signals of course! What's in a game?
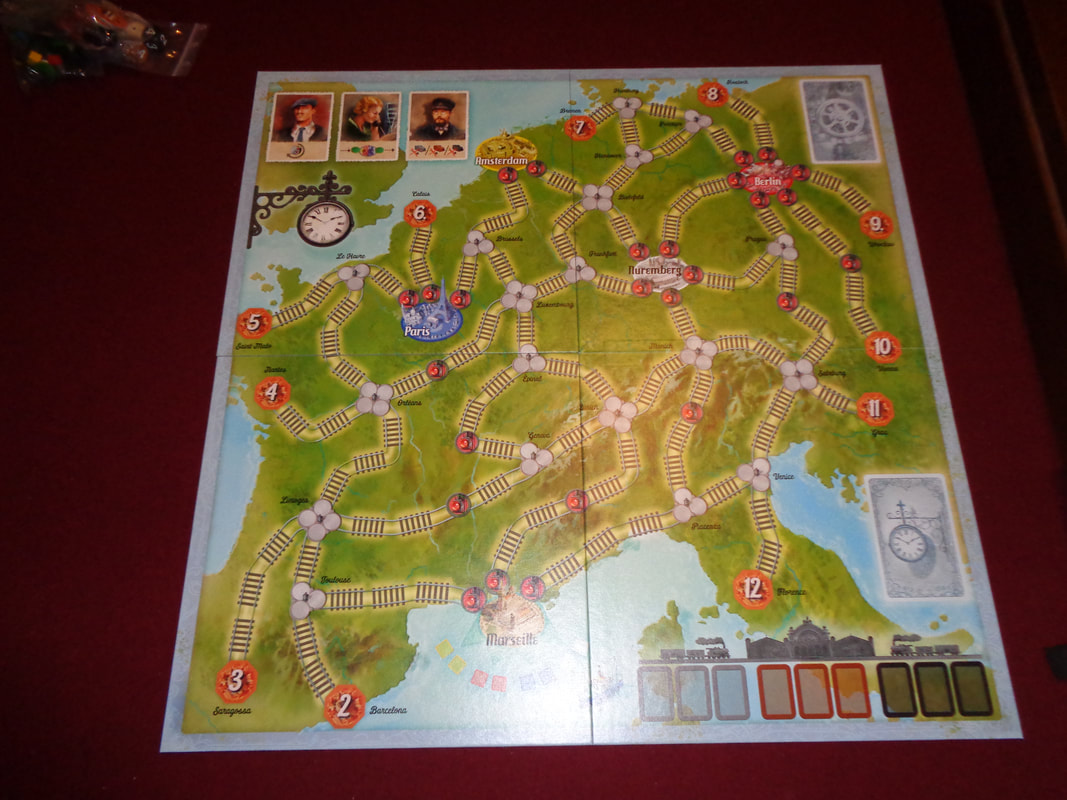
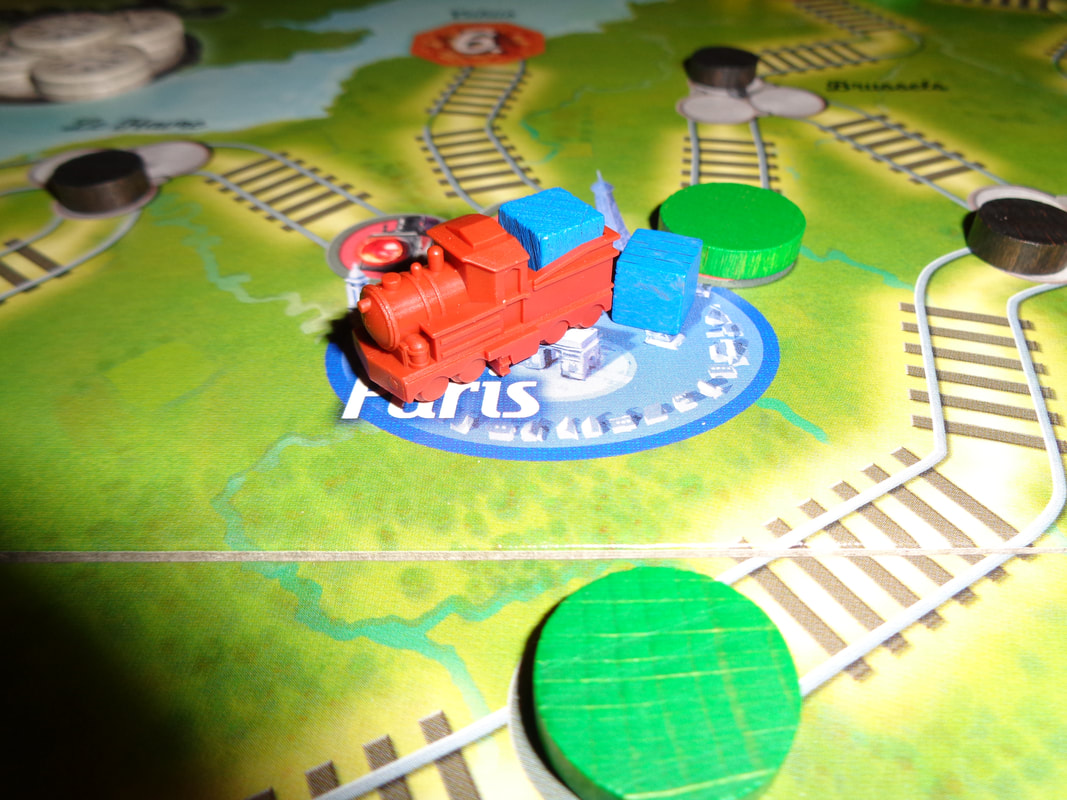
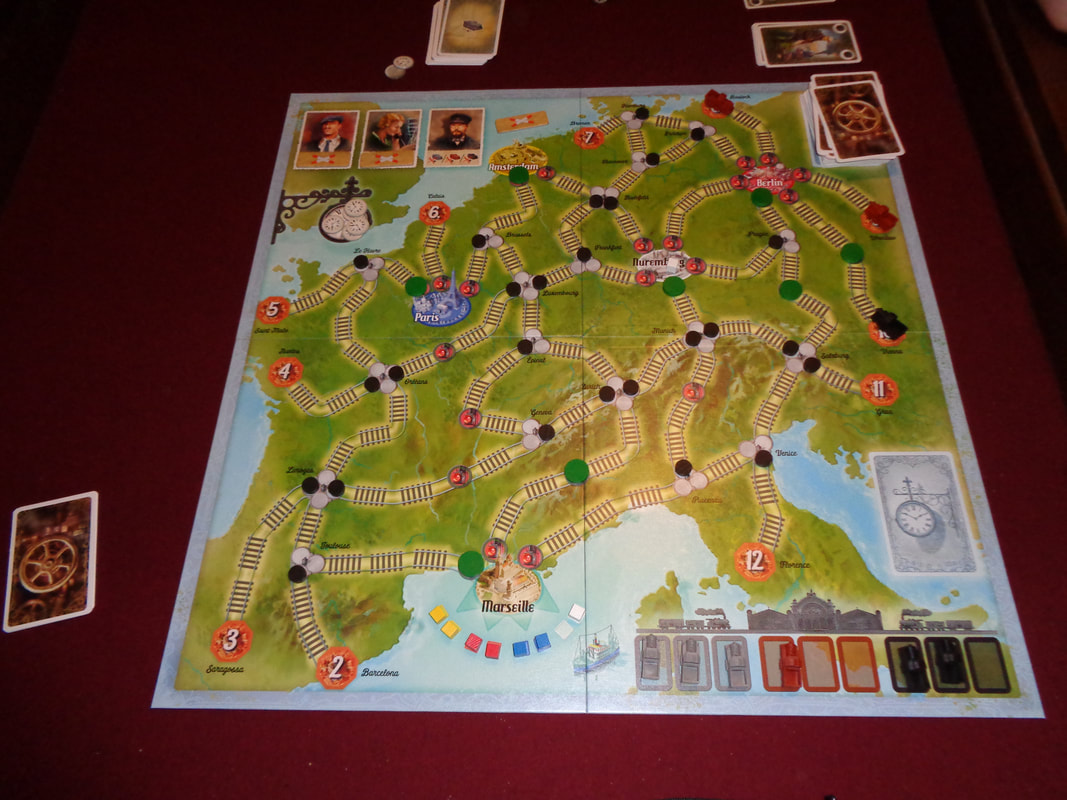
Quality-wise, all of Switch & Signal's components are made to the usual high standard we've come to expect from modern game and nothing feels particularly flimsy. The game makes good use of a wooden components, especially the dice that are nicely rounded and is something I always like. The notable components are the little plastic trains which each contain a space to put a wooden goods cube. The art is good, the boards are colourful and uncluttered with some nice illustrations for various cities. The art on the cards is equally good. The game's use of iconography is straightforward, easily understood and doesn't prove an obstacle. On to Play Setup This set up is for the European beginning default game, the rules provide options to alter the game's challenge and the U.S. side has some different rules.
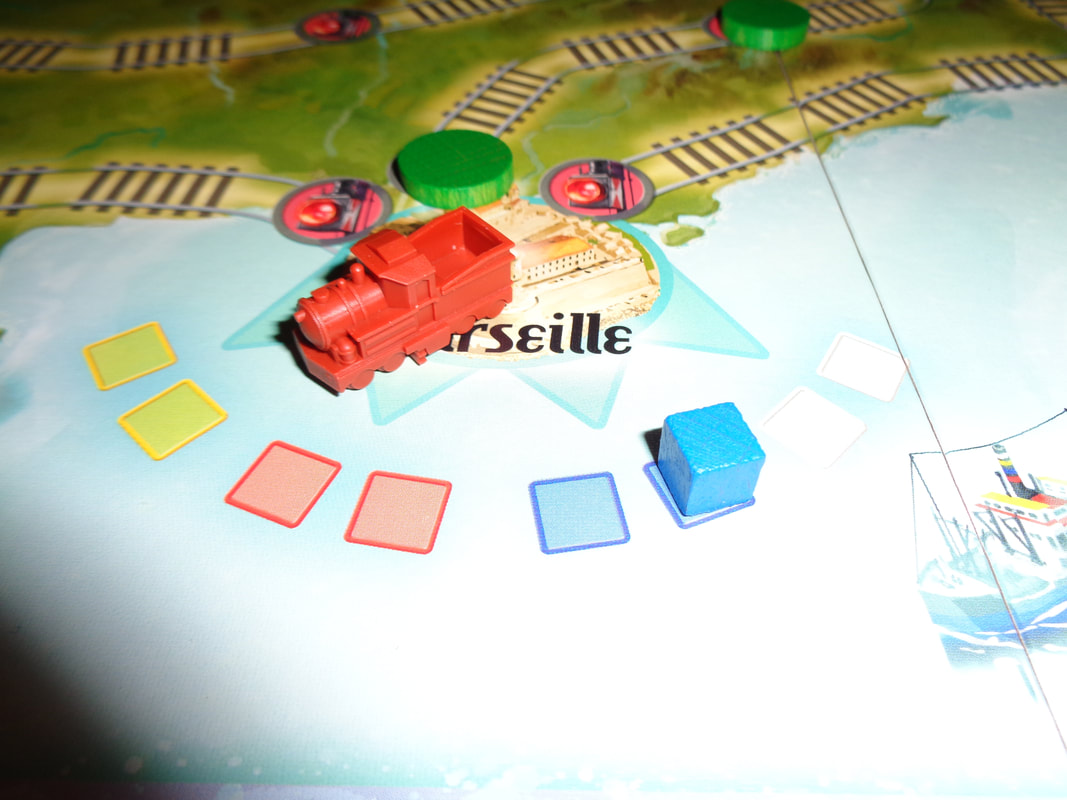
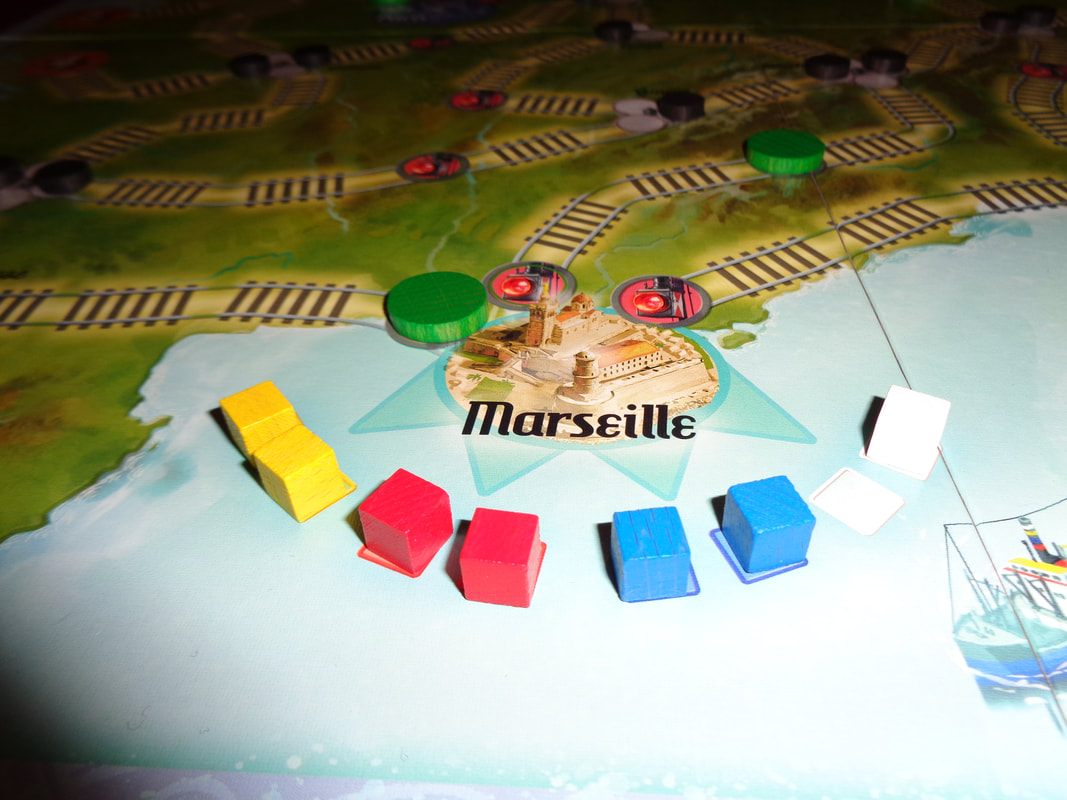
On to play The objective in Switch & Signal is to collect all 8 cubes from the 4 cities using the trains and deliver them all to Marseille. Switch & Signal functions much like a lot of cooperative games; that is the active player flips a card and resolves it's actions on the board. Then the active players takes their action(s).
Endgame Play continues until one of the following conditions is met. If the players run out of departure cards and they have to draw one, then they collectively lose. If all 8 cubes are delivered, then the players immediately win. Overall
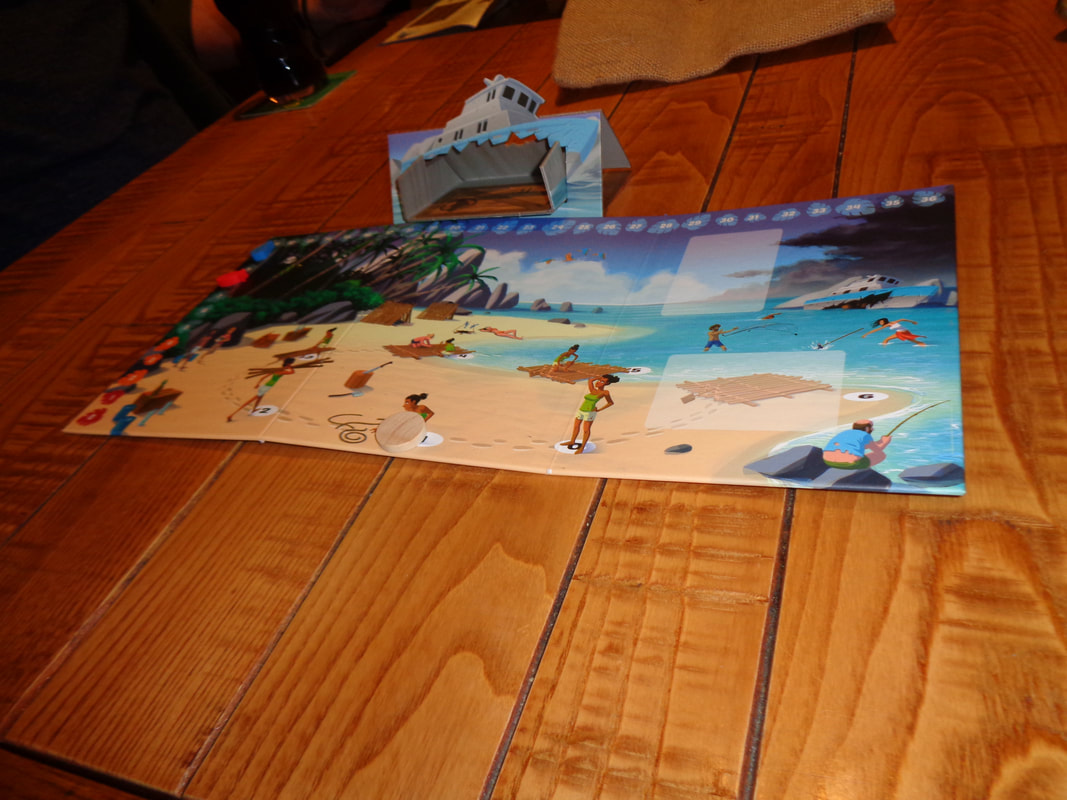
If you play a lot of cooperative games, the basic mechanics will be familiar here: Turn over a card and resolve it's action which will create obstacles for the players, then have them perform some actions and choose between progressing the objective or mitigating the problems caused by the drawing of cards. Rinse and repeat. Something about Switch & Signal feels a little different though. Maybe its because the departure cards are so contextual. The trains being moved by the departure cards are both the cause of problems for players and also the means to victory. On more than one occasion, we wanted to move a train but didn't want to spend a card to do so, instead we left it to the 'game' and departure cards to do the job for us. It's pretty rare for players to want the 'bad things happen' card to actually do something in a cooperative game. How trains are moved is vital. Not only do players have to move them into cities to pick up goods, they'll need to manage the different speeds they move at. Getting a fast train behind a slower one is a disaster, no two ways about it. This is exacerbated by the random nature in which trains are deployed on to the board by the dice. Players will also to manage the titular switches and signals. They'll look to create clear routes with full green lights to the port and funnel trains down that route in the correct order. It's a real balancing act though, it's hard to get the junction points where you want them and there's are never enough green lights. I have to say, that when it works, it feels extremely satisfying. I've never been a train controller but Switch & Signal genuinely makes me feel a little like one as I think about how to prioritise trains and set up routes with minimum card expenditure. This brings me to a final point about the game. I said earlier that being forced to discard a departure card is not good and I meant it! Switch & Signal is a well balanced game and it seemed every victory, every loss came down to the wire, came down to the last departure card or two and losing one felt very risky. I found it a lot of fun. If you like train-themed games, Switch & Signal is worth a look, how many cooperative trains games are there? If you like cooperative games, you really should give this a try. It's blend of familiar and unique mechanics makes it easy to get into yet different to other cooperative games. 26th April 2022 Tuesday is here and we're at The Sovereigns with the Woking Gaming Club. Does Hellapagos mean hell in the Galapagos islands, I didn't see any giant tortoises in the game? Anyway; Hellapagos is a (Somewhat!) cooperative game about surviving the ordeals of being shipwrecked on what would in other circumstances be a tropical paradise, building rafts and escaping. What's in a game?
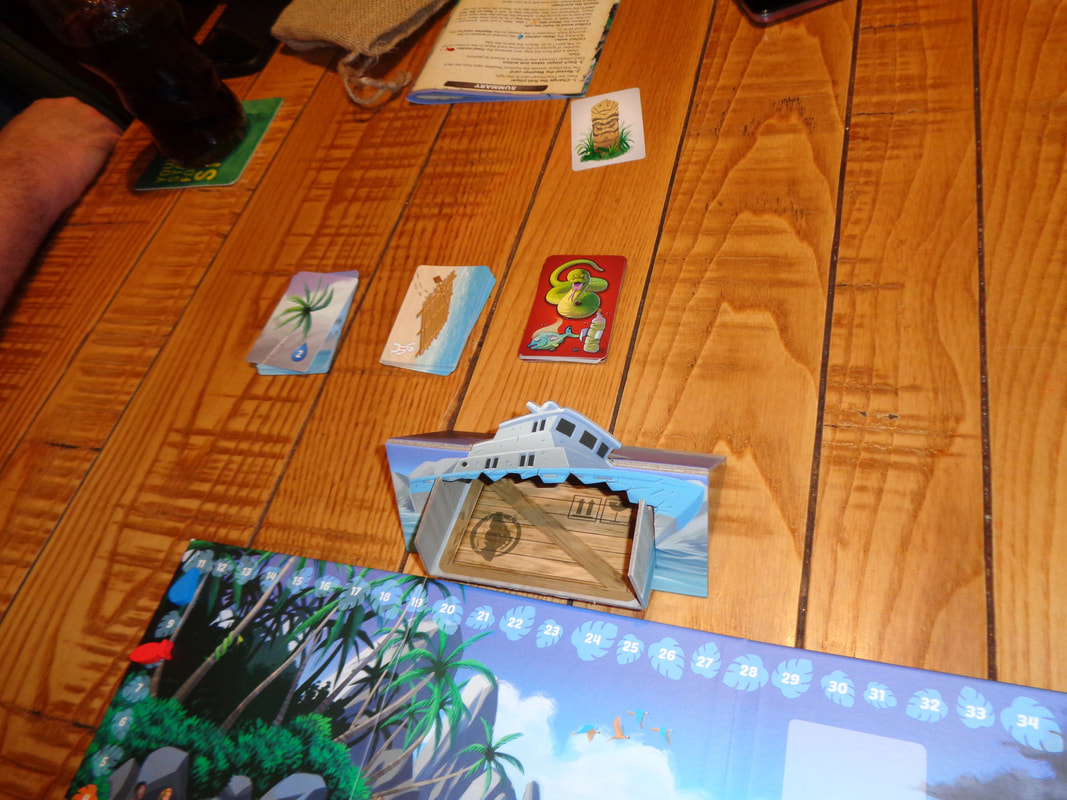
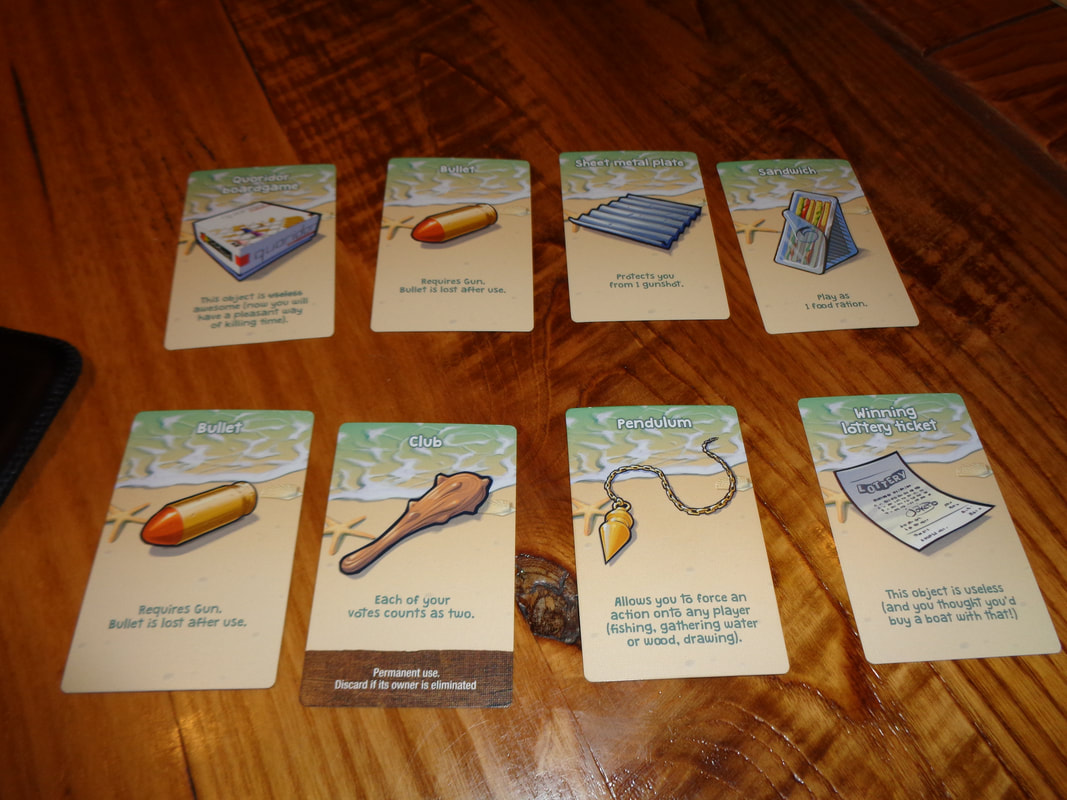
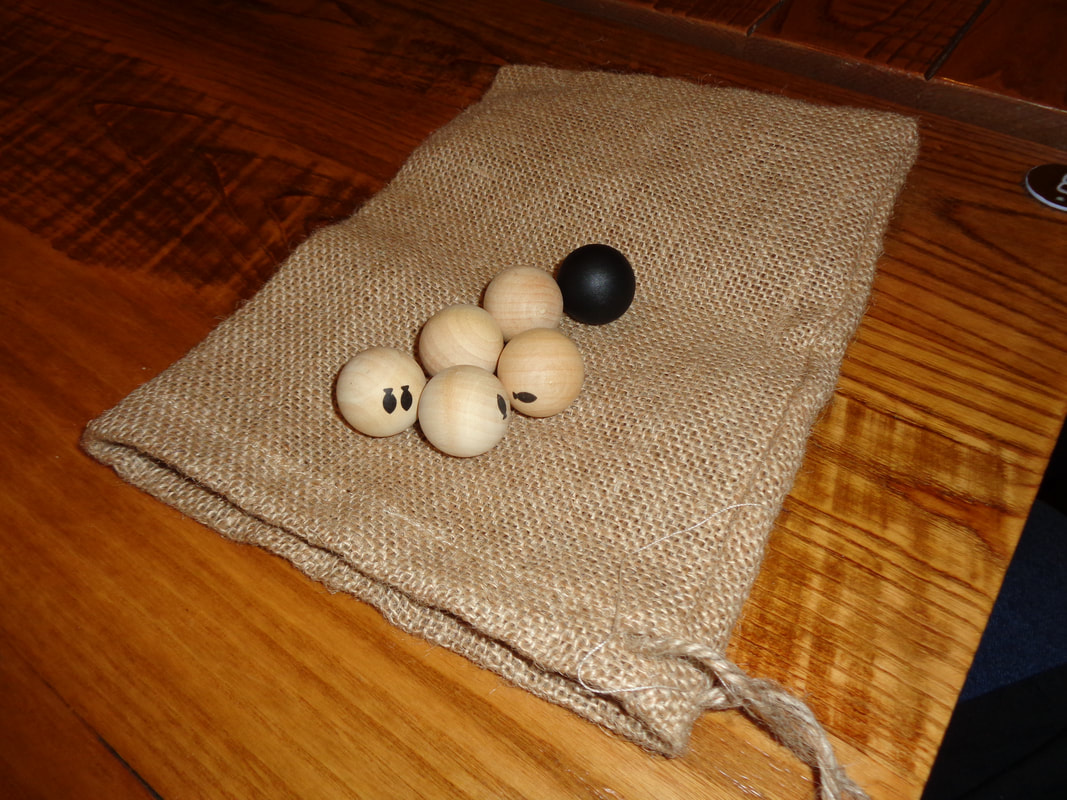
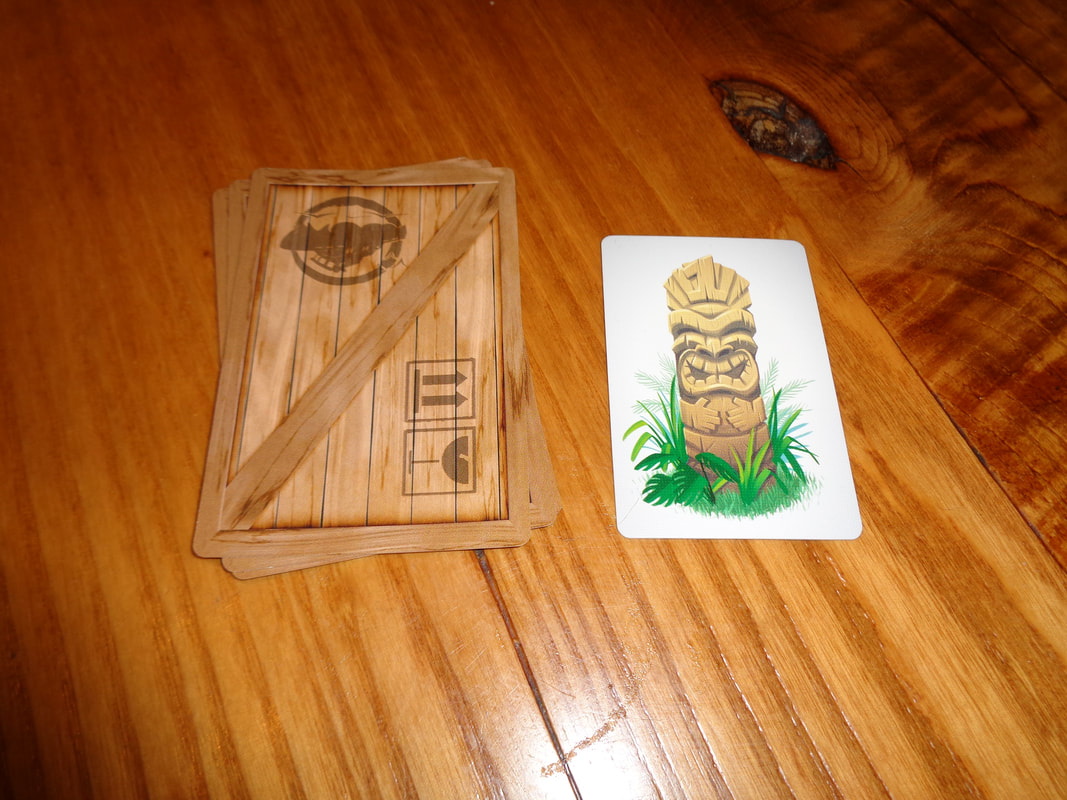
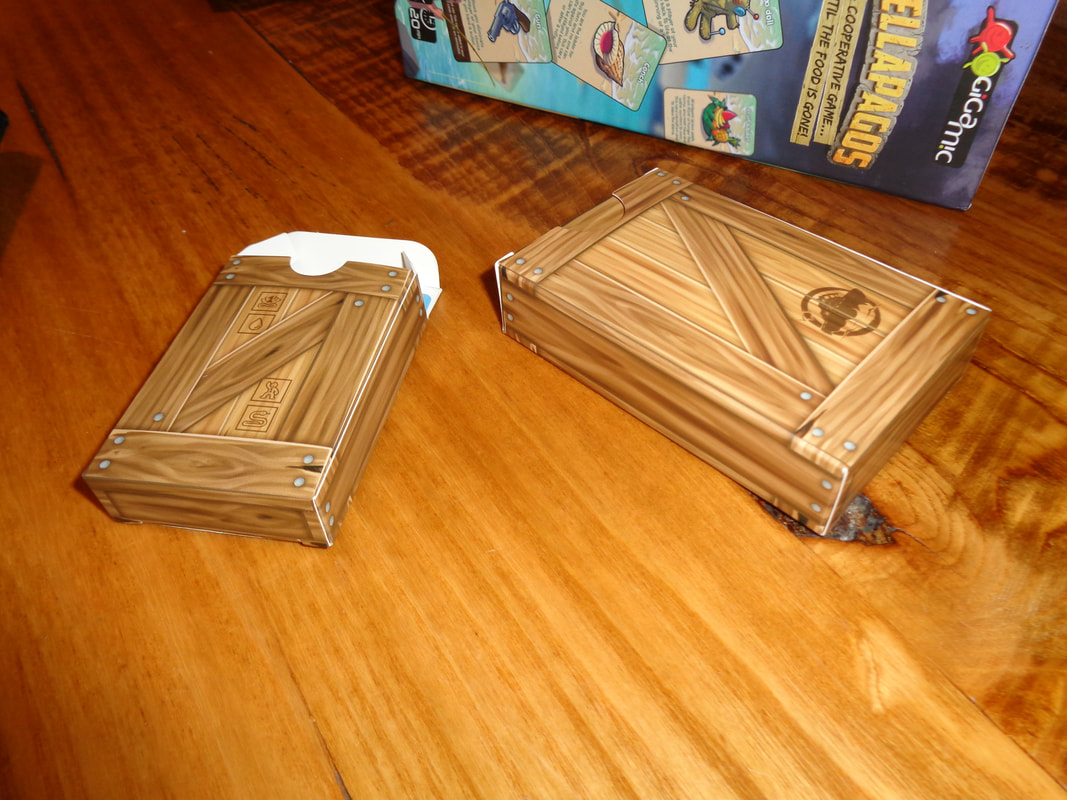
Only the cards are what I would consider average in build production, which is to say, they're fine. The tokens feel suitable chunky, as do the balls and bag (Sic) which are a nice touch. The standout component is the completely superfluous cardholder which displays like the wrecked hull of a half sunken ship. Hellagapos makes use of excellent bright and colourful artwork throughout, especially on the cards. With thick black lines and lots of colour it has an almost ligne claire quality to it. Furthermore, there's also a lot of humorous subtext to the art. Like the pendulum that makes another player take a one action of their chosen by the card-player (Hypnotises them!) and so on. There's minimal iconography in the game and what there is, such as water or fish icons are easy to comprehend. Actions on the survivor cards are all detailed by text instead. How's it play? Setup
On to play Hellapagos uses a normal turn structure with the active player taking their turn before play progresses to the player to their left. The game has 4 basic actions a player can perform but because it's a cooperative game, there can be a lot of discussion about moves and strategies among players and later, negotiation taking place. A round represents 'a day' and plays as follows
Endgame There 3 ways Hellapagos can end.
Overall
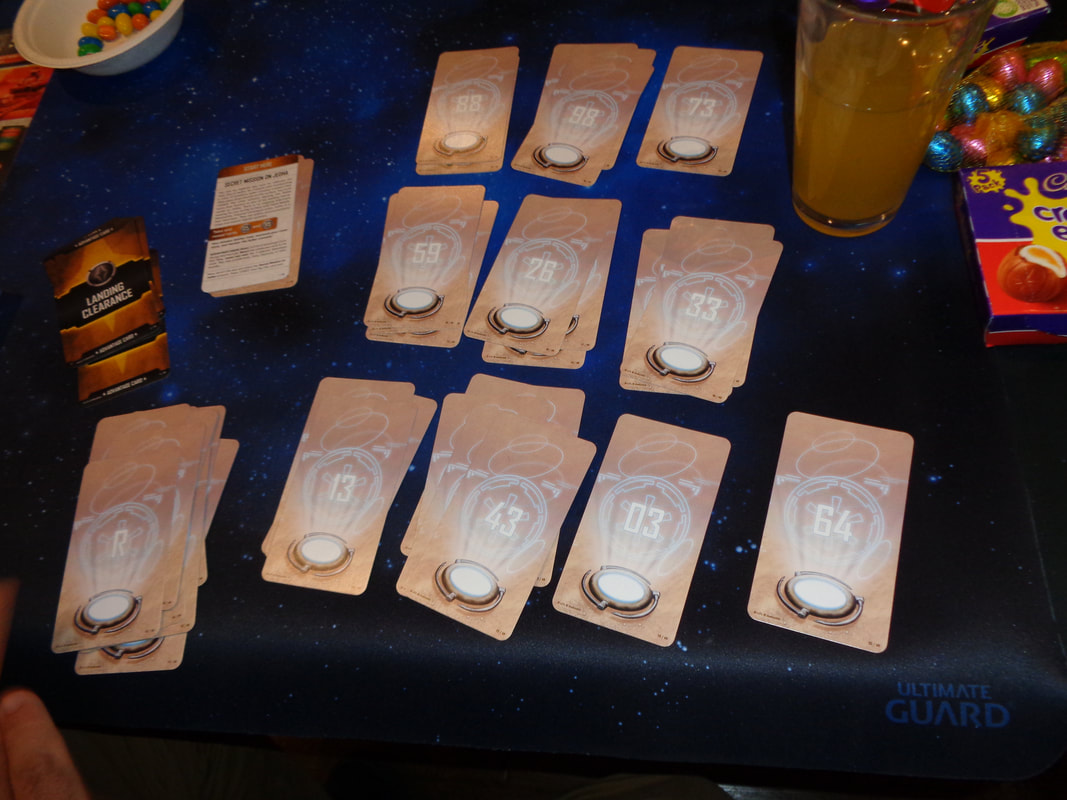
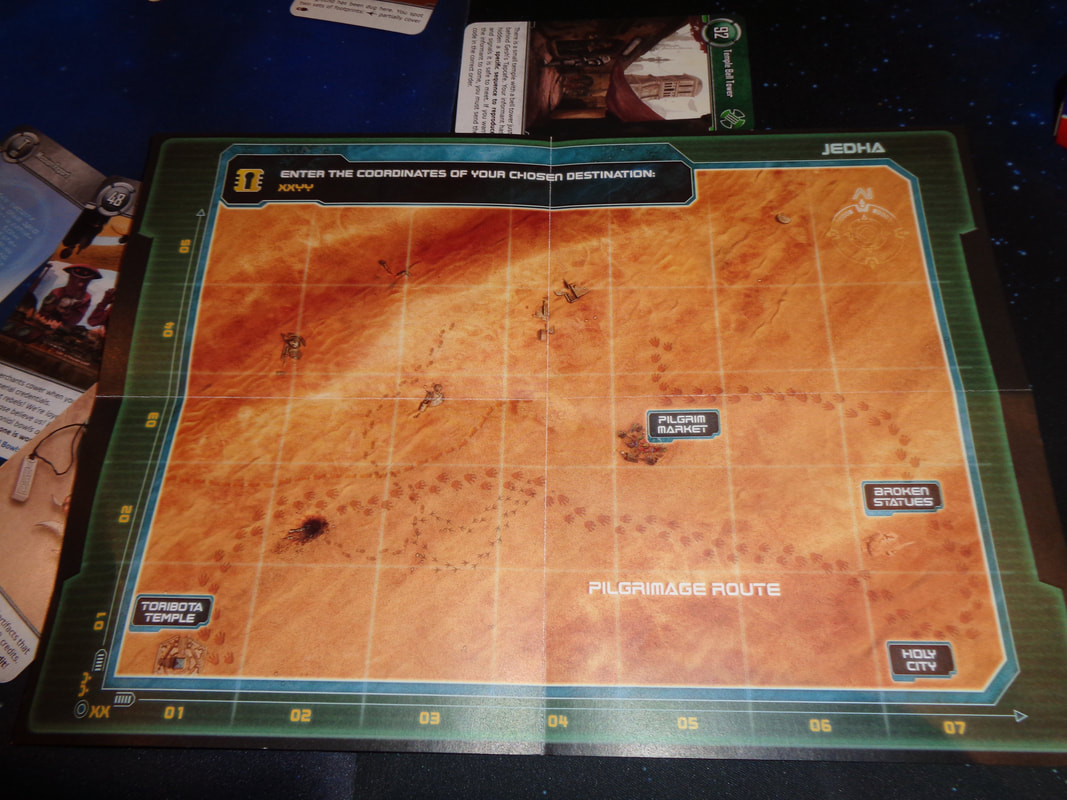
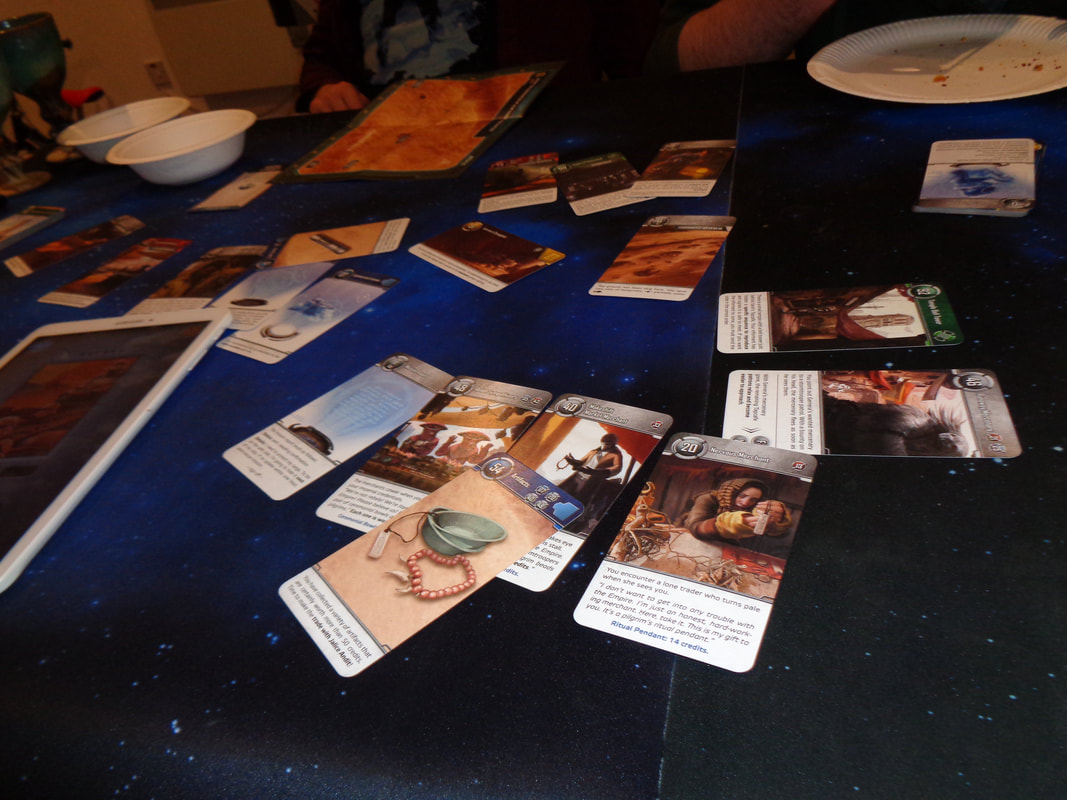
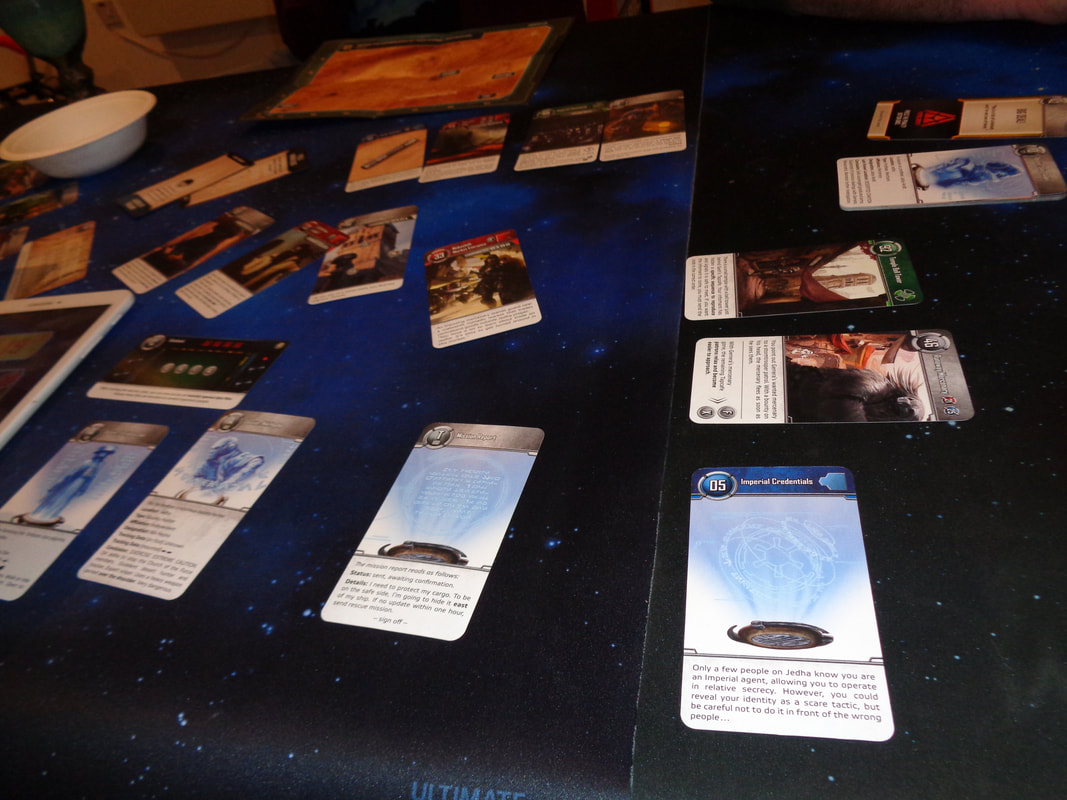
There's a lot to unpack with Hellapagos and I'll start with the mechanics. The write-up is a little long and belies the fact that in play, the game is pretty straight foward to understand and play. More importantly; it's clear that the game's mathematics have been balanced so that it's very hard to get all players off the island. Which makes sense from a game-perspective, it forces players to consider different late-game strategies. If say, a group of 6 players had 9 days to get off the island, they'd need the following. Water: 6 per day +6 to leave -12, which is their starting water. So 48 water. Food: 6 per day +6 to leave - 10, which is their starting food, so 50 food. Rafts: At 6 wood per raft, they'll need 36 wood. In other words 5.4 water per day, 5.5 food per day, 4 wood per day. If the player split their labour evenly per task, that would mean: 2 players getting 2.7 water per day each. 2 players getting 2.75 food per day each. 2 players getting 2 wood per day each. Getting both water and food at that rate is pretty hard. Each player would essentially have to get 3 or their chosen resource per day, every day. Since 3 is the top end result players could hope for, it's unlikely this will occur. Getting 2 wood per day per player seems easy but each player has a 16% chance of being poisoned, this might not seem high but when it does occur, it means that they only get 1 wood and lose their next action. Catching up in a following round mean getting 5 wood, this is a lot more tricky. Of course players may want to search the wreckage and rightfully so, there are some very useful cards to be found in there, including for example; cards that skip the consume food action among others. On the other hand, it's equally as likely that something which helps a player personally might be found... Players may want to divide their labour differently as well; when lots of rain appears, it might be good to get more people gathering water and 'get 'ahead' on the water track. A game like Hellapagos thrives on player social interaction, if people don't engage with it, it won't be a particularly interesting or memorable game. Ultimately though, players will sooner or later come to a conclusion; there won't be enough resources for all the players to get off the island. This changes the game in 2 ways. Firstly, players will begin looking at who to vote off as food and water become scarcer. Players will try to emphasise their own usefulness and see who can be a good target for elimination during voting. This is where having a valuable item can keep a player alive. Some ongoing cards are very handy and eliminating the player who controls it, also eliminates the item. Not a coincidence in the rules I think. Additionally, players may also look to horde rations on wreckage cards, waiting until voting has occurred, allowing others to be eliminated and only using it when they have been voted out. However, other players can look at this very negatively and it can draw their ire. players are free to form alliances or betray one another, gang up on other players, openly or otherwise and so on. Needless to say negotiation and voting can become very tense. Secondly, people will start to realise that when player counts are sufficiently low, that eliminating players after collecting resources can leave the survivors with enough resources to escape the island. The thing is though; it's likely that they'll be enough food and water to prevent any voting from going ahead. Players will have to resort to 'other methods' to removing opponents. This is where the game gets brutal and the pistols start getting used. Hellapagos mixes cooperative game play with a large dose of 'take that' actions. In the early-game it's all pleasant enough but once it progresses on, everything can change. I, like many other people I imagine, am not a fan of games that have player elimination, luckily for Hellapagos, players won't generally spend too long just watching. It doesn't frequently occur early in the game and once the eliminations start, they don't stop until the game does! I will also add; if game with lots of direct 'in-your-face' conflict and player elimination aren't your thing, it would prudent to give Hellapagos a miss. but if this sort of thing is your jam, then with it's 12-player count! Hellapagos is a good game to try. 20th April 2022 It's a Wednesday and we're round Simon's for an evening of gaming. Unlock! The Escape Game are a series of games drawing inspiration from escape room games and as you'll have gathered from the name, Star Wars: Unlock is a Star Wars themed Unlock! game. Time to escape Star Wars! Note: Unlock! games come with 3 scenarios and in the case of Star Wars: Unlock!, we played the Secret Mission on Jedha scenario, one of the harder scenarios and which involved being nasty Imperial spies running round a desert. What's in a game?
Star Wars: Unlock! is a card game with a map, quality wise it's exactly what you would expect of cards and a small paper map, which is to say; perfectly acceptable. Art-wise, like all Star Wars licensed games I've seen, the quality is consistently high throughout. I don't know whether the art was created specifically for this game or was sourced from what must be a huge archive of art that has been produced and accumulated over the decades but regardless, it's all looks good and has a appropriately Star Wars feel to it A few icons are used throughout the game, they're pretty clear and self-evident, I can't imagine they would prove an obstacle to players. How's it play? Setup
On to play Star Wars: Unlock! is all about discovery and deciphering clues which will eventually lead to the scenario's conclusion. Functionally, the game works a little like a gamebook where players would get to choose which numbered paragraph to read, except in this game it's done with numbered cards instead of paragraphs. There's also a bit more to Star Wars: Unlock! than most gamebooks though, especially in relation to how the app is utilised. It's tricky to describe how the game plays, especially without some sort of spoiler but basically, the players collectively try to solve the puzzles presented to them. What follows are descriptions for actions players can take.
Endgame There's no way to lose Star Wars: Unlock! per se, when the countdown reaches 0 it instead simply goes into 'negative time'. After reaching a scenario's conclusion, the app will then rate the player's collective performance from 1-5. Computer says you get only 1 Star! Overall
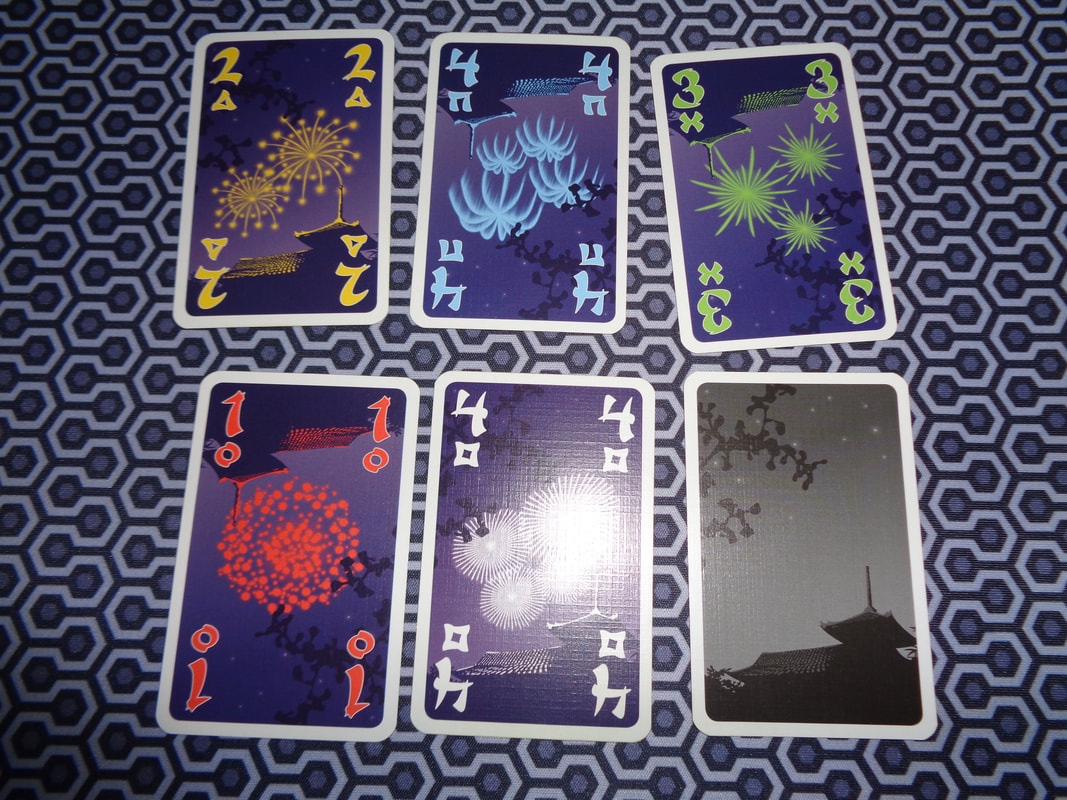
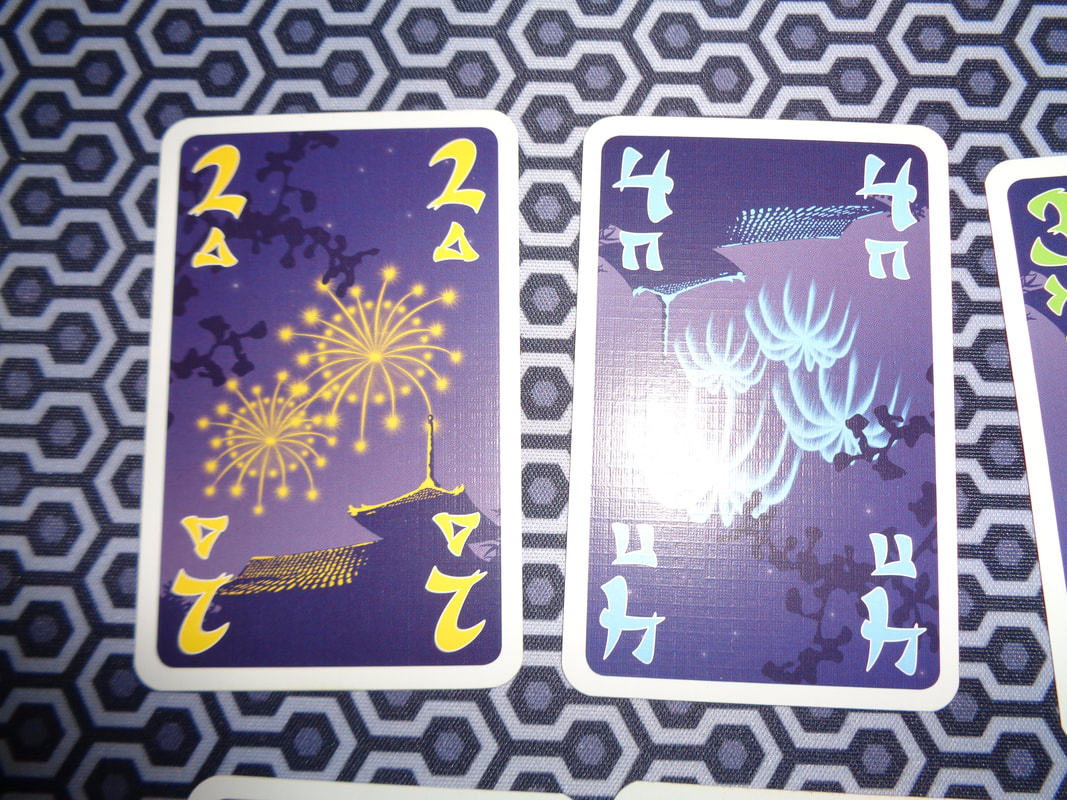
Star Wars: Unlock! pulls some clever tricks with how it uses cards and how it combines them with the app to provide some engaging obstacles to overcome. We're not geniuses by any stretch but nor are thick, so for the most part the scenario was well balanced, we were stumped for a while on a couple of occasions and referred to the app's hint system for a card once. Otherwise the game was more or less straightforward. The play time is fairly brisk in Star Wars: Unlock! with players facing with some unusual problems to solve while under the pressure of a ticking clock. The box states that 1-6 people can play but I'm sceptical about this. I just don't think that there's enough to do to occupy 4 people, let alone 6! By the the game's very nature, there tends to be a lot interconnectivity between cards and the clues they represent. This means that it's not particularly conducive for solving challenges to split cards between players and as a result, the cards will tend to be be hogged by some players while others are left twiddling their thumbs. Playing with 3 people might be OK, 2 players and you're golden. I'm also not a fan of app-driven games and licensed ones even less so: Eventually that game license will eventually and what happens to the apps distribution then? Having said that, there's little replay value to the game, once all 3 scenarios are completed successfully, players will have no reason to return to the game. Putting those (Non game.) criticisms aside, if you like puzzles and problem-solving, then this may well appeal to you and if you also like Star Wars, then doubly so. Especially since it's also a fairly accessible crossover or gateway game the could attract fans who are non-gamers. 20th March 2022 It's a Sunday and we're logged into Board Game Arena for an evening of fun. Hanabi is a cooperative game about lighting a series of larger and larger firework displays. The catch is that everyone must rely on other players to give them clues to do so. Get it wrong though and the show could end early. Who thought fireworks could be so stressful, well... other than pets! What's in a game?
All the artwork on the cards are understandably themed after fireworks in their respective colours. For the most part it looks clear but I've found that in dimmer light, the colours can look a little weak. Hanabi makes minimal use of iconography, the cards are cleared numbered while icons are also used to designate different colours. 2 symbols are used on tokens. How's it play? Setup
On to play The objective in Hanabi is to create a stack of face-up cards for each colour by playing them in numeric order, starting with the 1 and finishing with the 5. All of this must be done without any player looking at their own cards. Players should hold their cards up with the backs facing them so that all others can see what cards they have. Players then provide clues to each other and use these clues to deduct which cards to play. Hanabi uses a standard turn structure with the active player taking a turn before play progresses to the left. The active player must perform one of the following actions.
Endgame Play continues until 1 of the following 3 criteria are met. Win: If the 5th card of all 5 stacks are correctly played, the players immediately win the game. They have achieved a perfect score of 25. Lose: If the 3rd and final storm token is flipped over, the players immediately lose, scoring a big fat 0! Deck depletion: If play progresses until the last card is drawn from the deck, all players get one more turn. After this, the game is scored and the players collectively gain a score equal to the value of the top card on each stack, thus the maximum score of a incomplete game is 24. 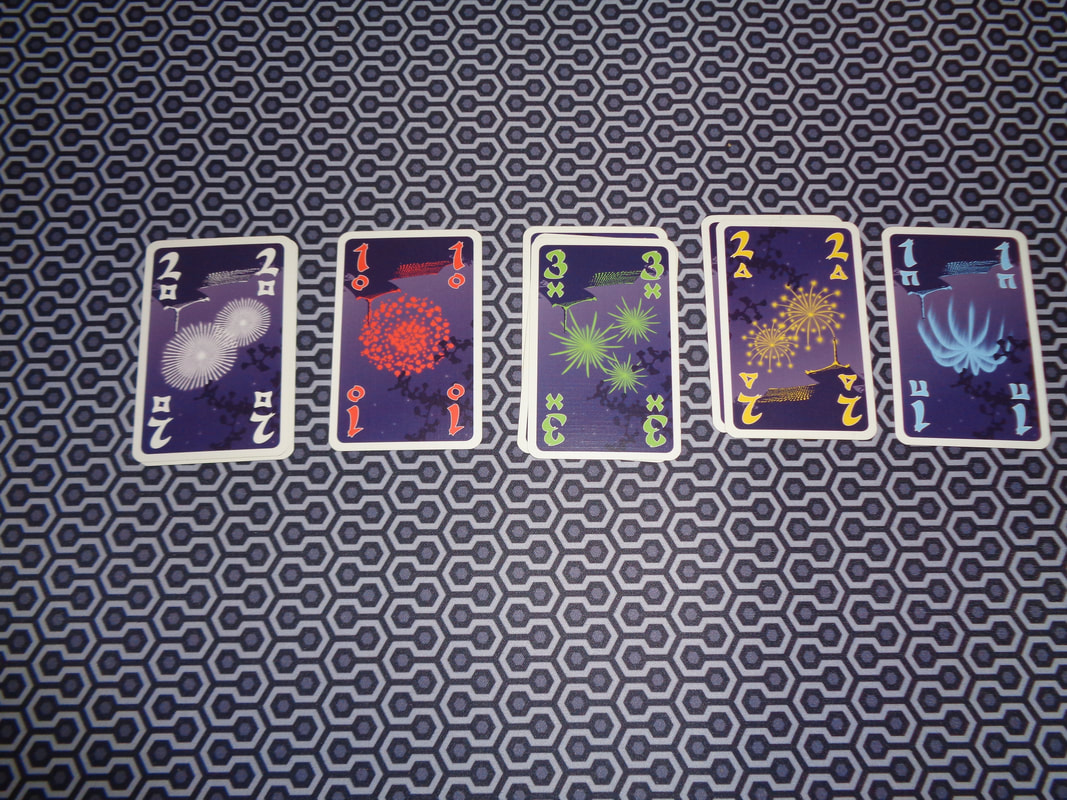 5 stacks of fireworks. Overall
One of the things I like about Hanabi is that it's a small, fairly easy to learn cooperative game that provides a solid challenge, it has a reasonably quick playing time and would work well as a filler game. What's interesting in my opinion are the mechanics for clues and also clue tokens as they are inextricably linked. The game does a good job of balancing the usefulness of clues with their scarcity. When giving clues, players will want and need to give clues as efficiently as possible, it takes 2 clues to clearly define what a card (Both colour & number.) is and this uses a quarter of the available clues which is a lot! Frequently that means a clue might need to have a implicit meaning attached. E.g.; the clue, "You have one green," might implicitly mean 'Play that green card!' Players receiving clues will need to interpret and deduct meaning from the information they have now been given, combining it with the information they see in other players' hands before deciding what to do. Sometimes they won't have all the information they want, sometimes they'll need to gamble on a decision. Flipping clue tokens back to their unused side can be vital to doing well, usually this will involve discarding cards and it also allows players to draw cards and put new options into play. Blindly discarding cards can be tricky though, if a 5 is discarded, there goes the chance to get a perfect score. - Not that getting a perfect score is easy, it's not! Consequently, it's sometimes a good idea to give players clues about what to get rid off. not keep. It should also be noted that like many cooperative games, luck can play a big role in Hanabi. If those lower value cards don't until later in the game, players will end up discarding higher value cards to get to them. Hanabi does have some minor drawbacks though. Having to constantly hold up cards so others can see them feels a like a little bit of a pain. The same is true of drawing new cards and remembering not to look at them. When a player is given clues about their cards, it can be a chore to remember not only what the clues are but also the location of those cards in their hand. Otherwise that can lead to some pretty devastating plays! Interestingly, the digital version of Hanabi remembers the clues for players. I also found Hanabi to be slightly frustrating, although this may be due to the behaviour of other players. It's definitely stressful watching another player not get the hint when they've given a clue. These are minor quibbles and Hanabi is a unusual and challenging cooperative game that forces players to think hard and logically, provides meaningful decisions and some solid fun: Some big gameplay delivered in a small package. Hanabi is definitely worth trying. 15th March 2022 It's another Tuesday evening with the Woking Gaming Club at The Sovereigns and we're playing Regicide Is Regicide a cooperative game about recruiting heroes from a local tavern to go fight epic battles and raid a castle against a series of bosses (Who happen to be regents!), or is it just a deck of cards? Turns out it's both. What's in a game?
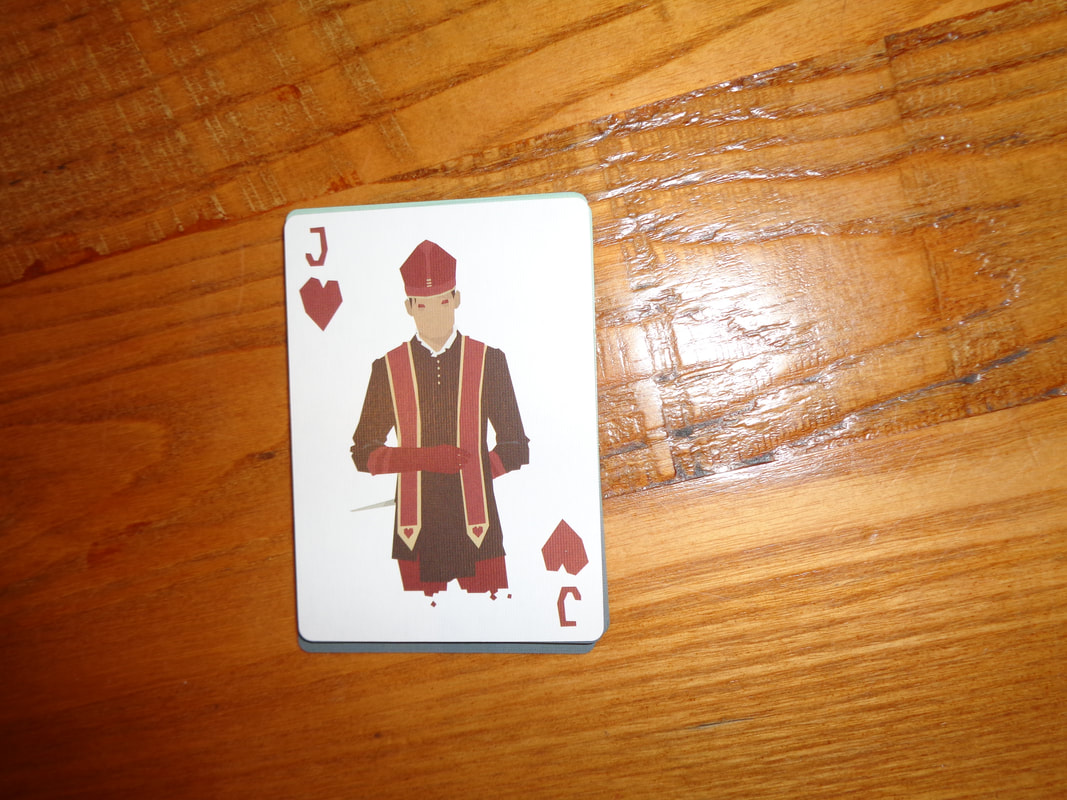
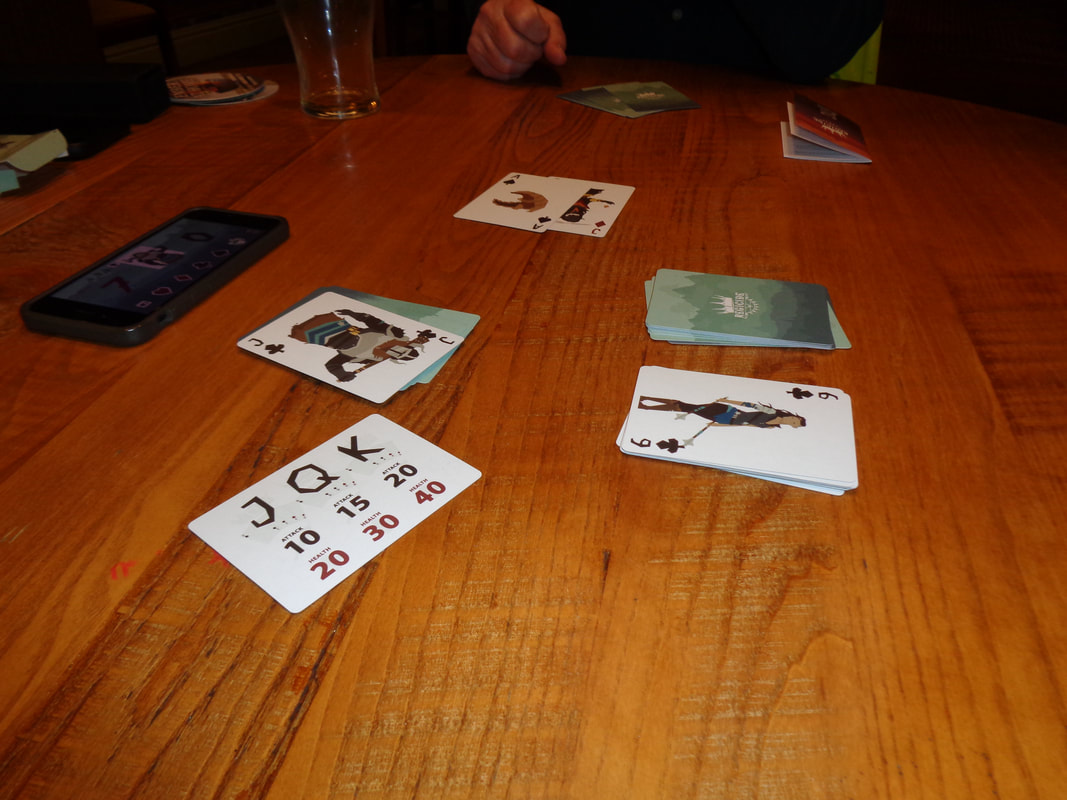
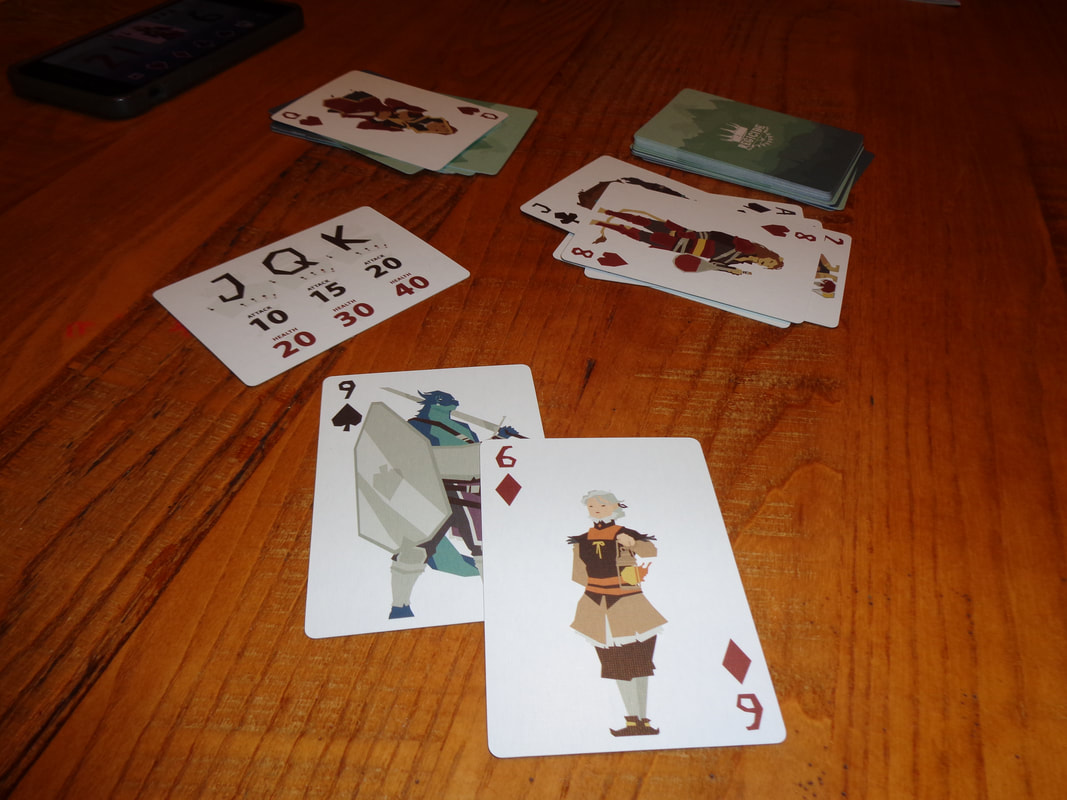
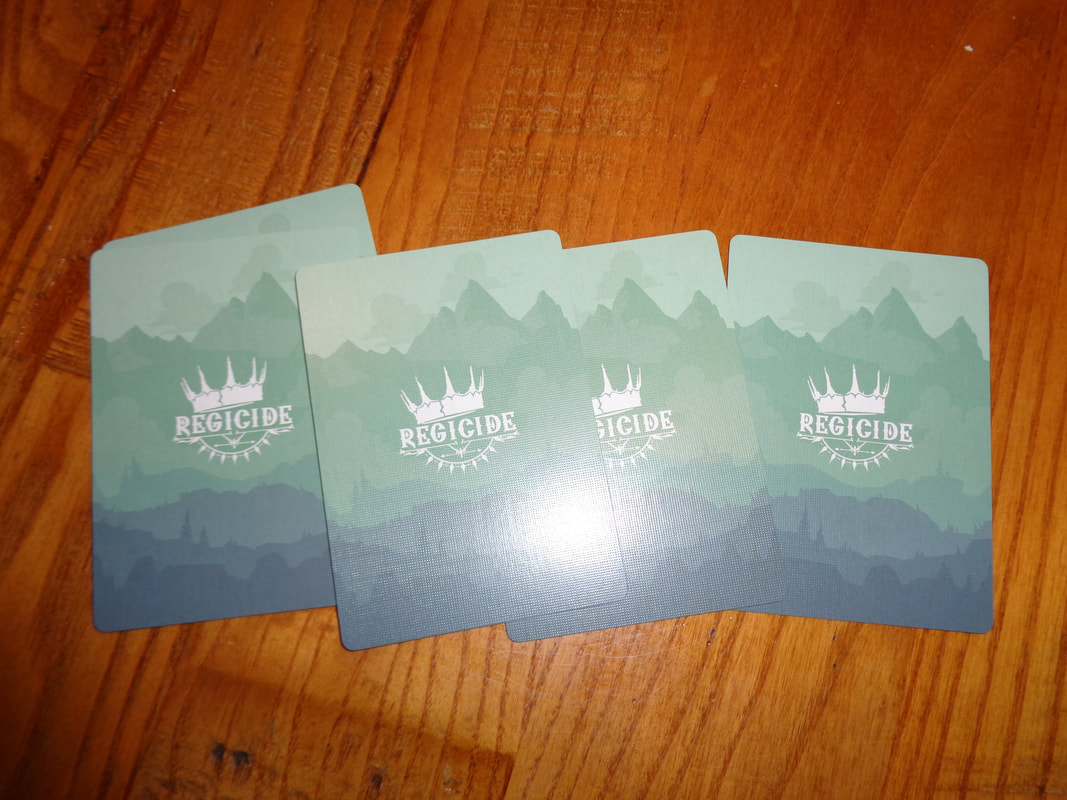
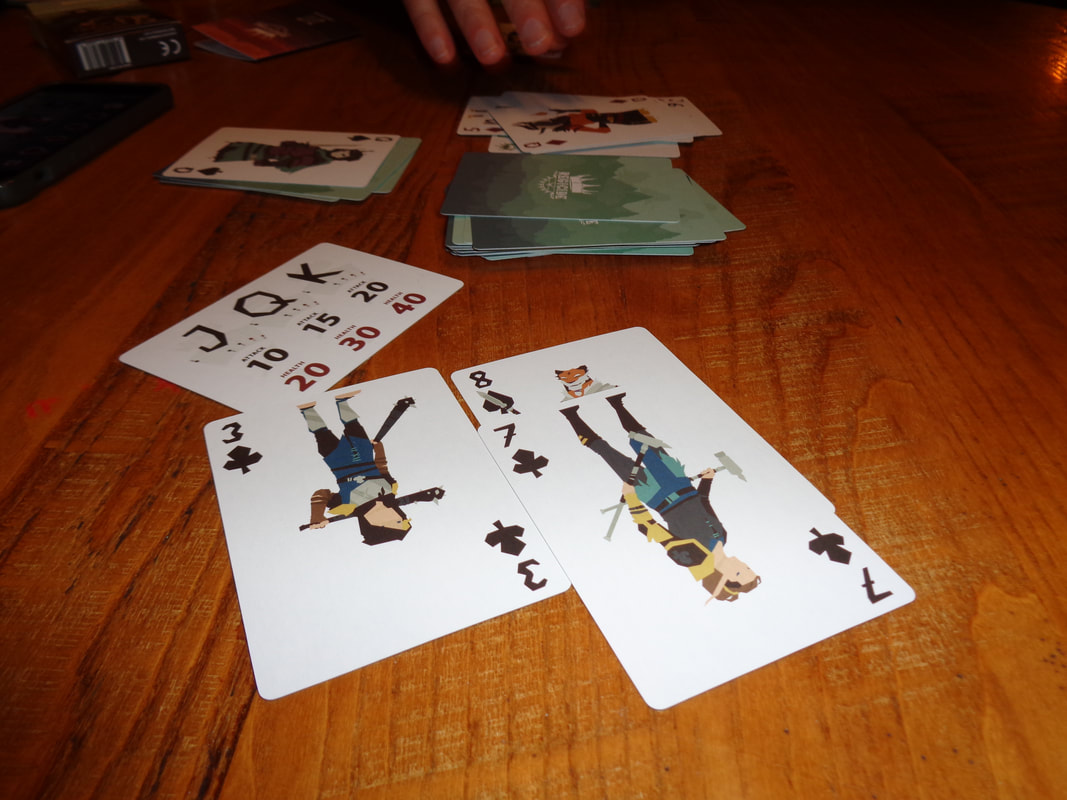
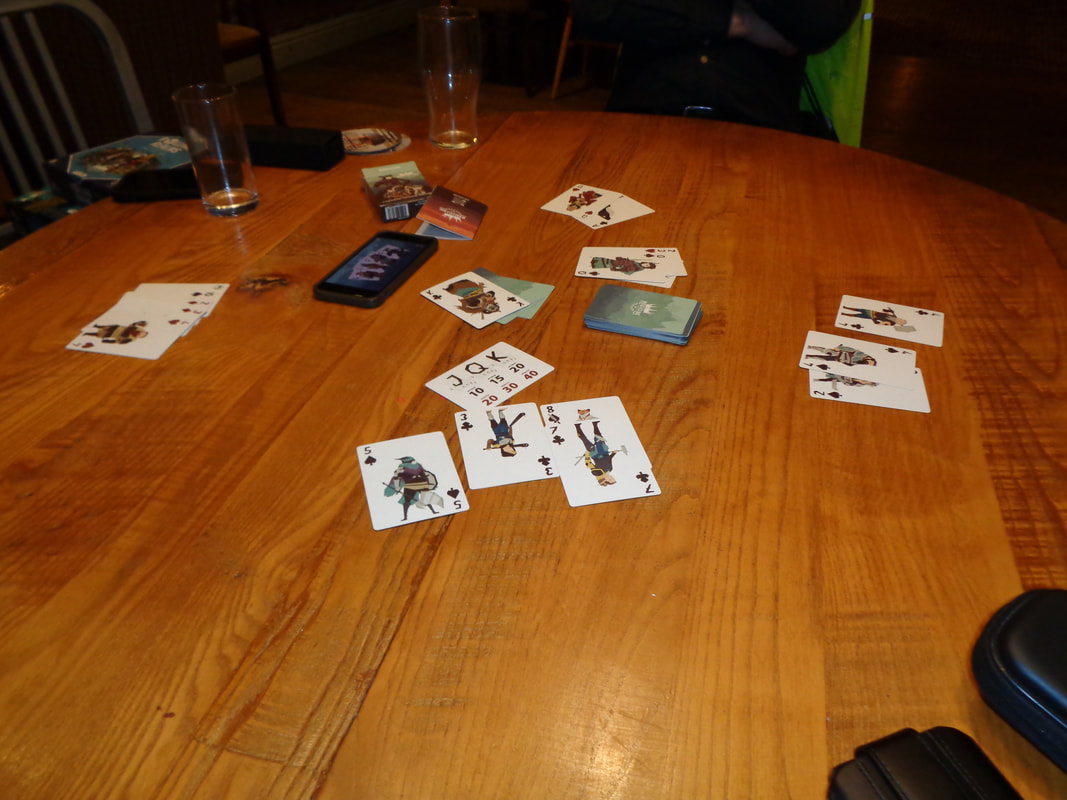
Well... there's not much that can be said here. It's a game that can be played a deck of ordinary cards and that's what it look like. The official Regicide deck is nicely illustrated with some stylised and quirky fantasy themed artwork but it's still recognisability a standard deck of card. And the game's iconography, well they're clubs, diamonds, hearts and spades. You get the idea. How's it play? Setup
On to play In Regicide, players must coordinate actions in order to prevail, however, they cannot communicate with each other. During their turn, the active player uses one or more cards in their hand to attack the current enemy before then using more cards to resist the enemy's counterattack. Play then continues to the next turn and the player on the left.
Endgame Play progress until 1 of 2 conditions are met. If the players defeat the 12th and final enemy, then they collectively win. If at any time a player cannot discard enough cards to cover an enemy's attack, then the players collectively and immediately lose. Overall
On a basic level players are faced with 4 choices when attacking and how to use the 4 suits and their respective abilities when playing Regicide is vital. The advantages of each ability are contextual and players will need to learn recognise when to use which suit. Suffice to say, players will need to make use of all the suits appropriately. Of course it's not as simple as I'm making it sound. As with all cooperative games, luck plays an important part here and players will frequently find themselves lacking the cards they want, the immunity rule can also well and truly throw a spanner in the works too. This forces them to make tricky decisions or find other approaches to how they attack and or indeed manage defence. It should also be said that Regicide is a very hard game, very hard! I heard someone state that players can expect to win about 1 in 6 times but I feel this is an underestimation of the game's difficulty. We've played it numerous times and never won, we barely ever made it to the kings! Not only is the game hard off the bat, it just gets harder and harder! I would argue that the Regicide is too hard, which would be my one gripe with it. Although it's entirely possible that there's some strategy that we overlooked. Regicide has a fairly quick playtime which is in part due to it's brutal difficulty curve and could be a good filler game, although bear in mind that it definitely tests the grey matter. It's a fascinating game that condenses a fair chunk of cooperative gameplay into a deck of 54 cards and gets a lot out of it. The rules are as impressive as the game is ruthlessly hard. Regicide is a game worth trying if only to experience how such a game plays, just so long as you don't mind losing. 4th March 2022 It's a Friday and I'm in Farnborough with some workmates for some evening games. The first game of the night is essentially 3 Wise Monkeys: The Game, known as Team3, although I'm not certain any of us are particularly wise? What's in a game?
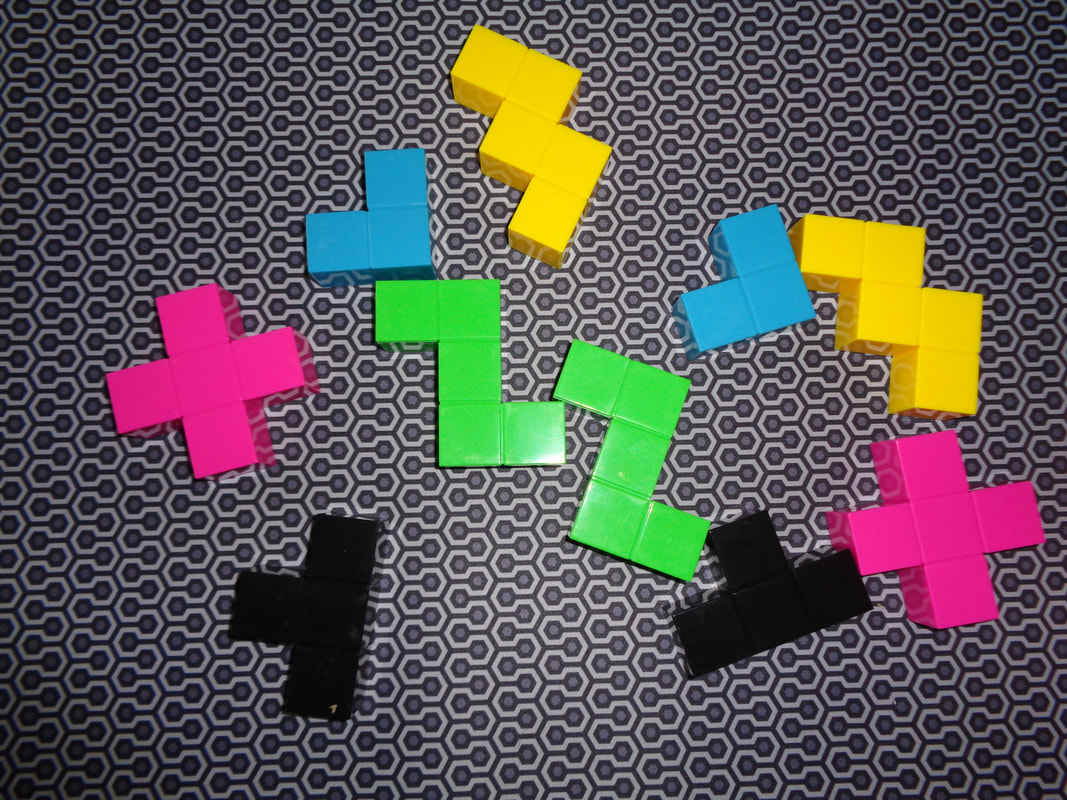
The blocks are made of sturdy colourfulplastic and feel very tactile, handling and playing them feels quite satisfying. Otherwise, the cards are pretty standard quality. The game's art is monochrome and only appears on the role cards. The 3 illustrations are slightly cartoony looking but also fairly good. Other than the images on the blueprint cards, there's no other iconography in the game. How's it play? Team3 can be played cooperatively as a team if 3 or competitively as 2 teams of 3. The 2 play styles are practically identical, the only real difference being how the blocks are allocated. For the purposes of this blog, I'm going to describe the competitive game and point out how the cooperative game is different. Setup
On to play Both teams play simultaneously and have the objective of putting together their blocks in the shape/configuration shown on the card which was drawn. However, there are some complications to this...
Endgame The team that reaches 6 points first, wins. Although this limit is fairly arbitrary and players can choose whatever score limit they want. Cooperative In the cooperative game, the team gets 3 minutes to complete a blueprint, if they take longer, they fail. 3 minutes might seem a lot, but the 2 and 3 star difficulties get much more complex. 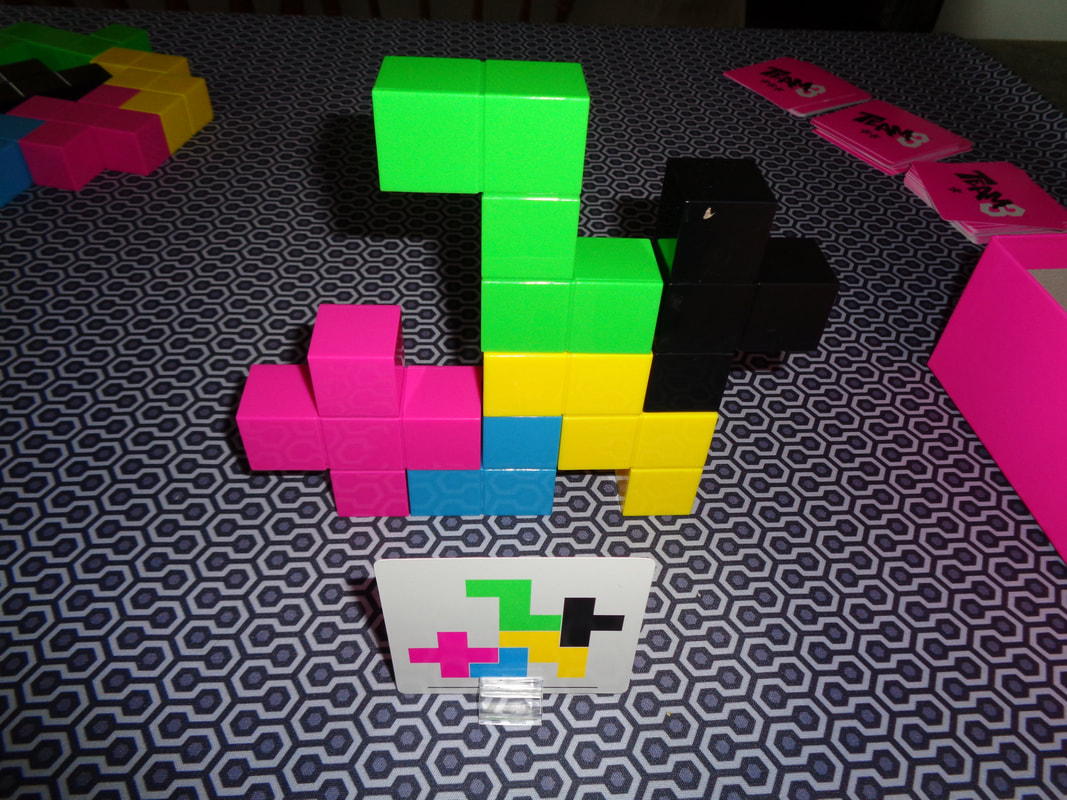 A completed blueprint. Overall
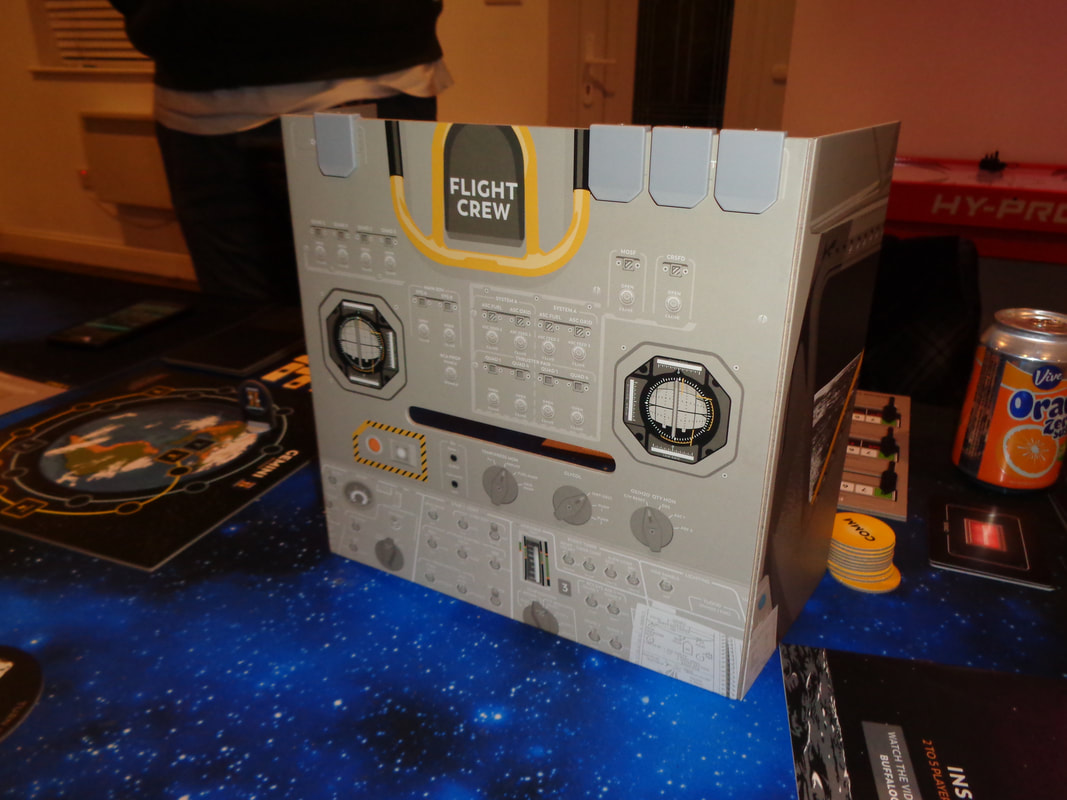
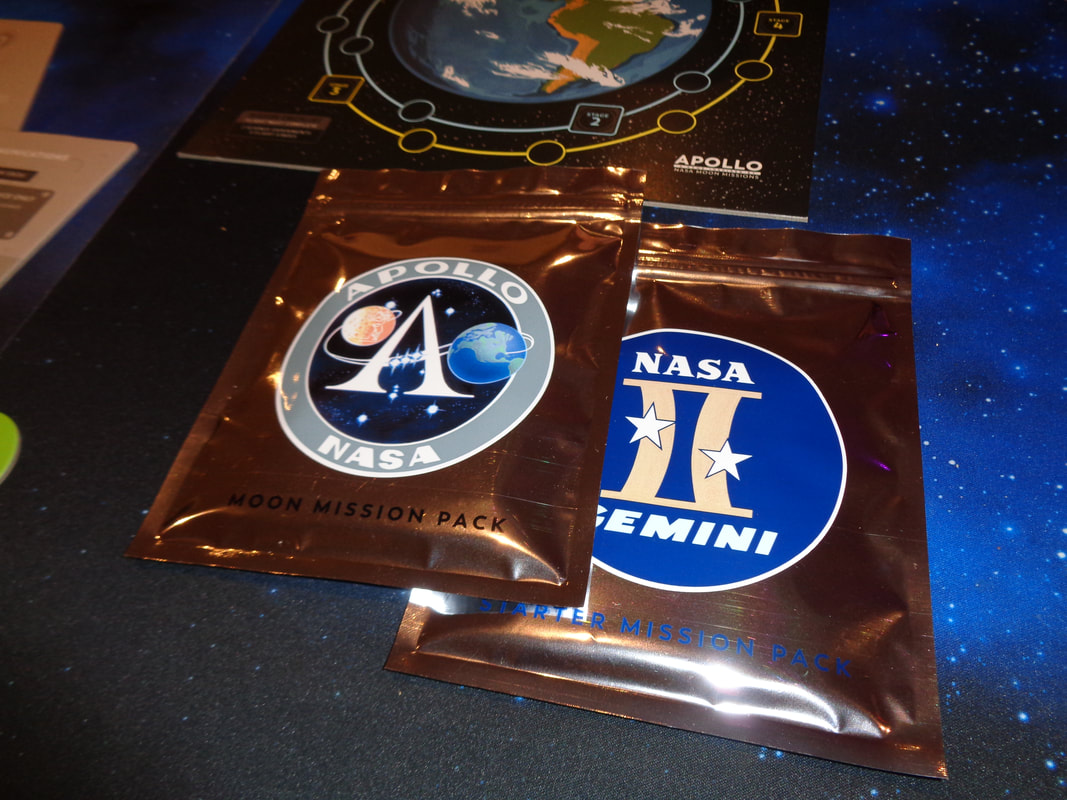
There's little strategy that can be adopted when playing Team3, that's not a criticism though, Team3 is sort of a hyped version of charades that's all about communication and interpretation between teammates. As with actual charades, players will probably very quickly adopt some standard gestures to represent certain things. It's also worth adding that the game comes in 2 versions Green and Pink, which can be combined to support up to 4 teams of 3 players. There's not much more to say about the Team3 really. It's a light party game that is easy to learn and will have a lot of crossover appeal, it's not something to be taken seriously. If you looking for deep gameplay, look elsewhere. With the right people though, Team3 can be a fun diversion or a good filler game. 28th January 2022 It's Friday evening and we're round Simon's for a night of gaming. The game of the night was Apollo. Houston.... we've had a game here. One small step for gaming and errr, umm... one cooperative game for gamers? Anyway, enough of the bad jokes. What's in a game? Apollo is an symmetrical cooperative game where 1 player take on the role of mission control and the other players take on the role of astronauts on the titular mission.
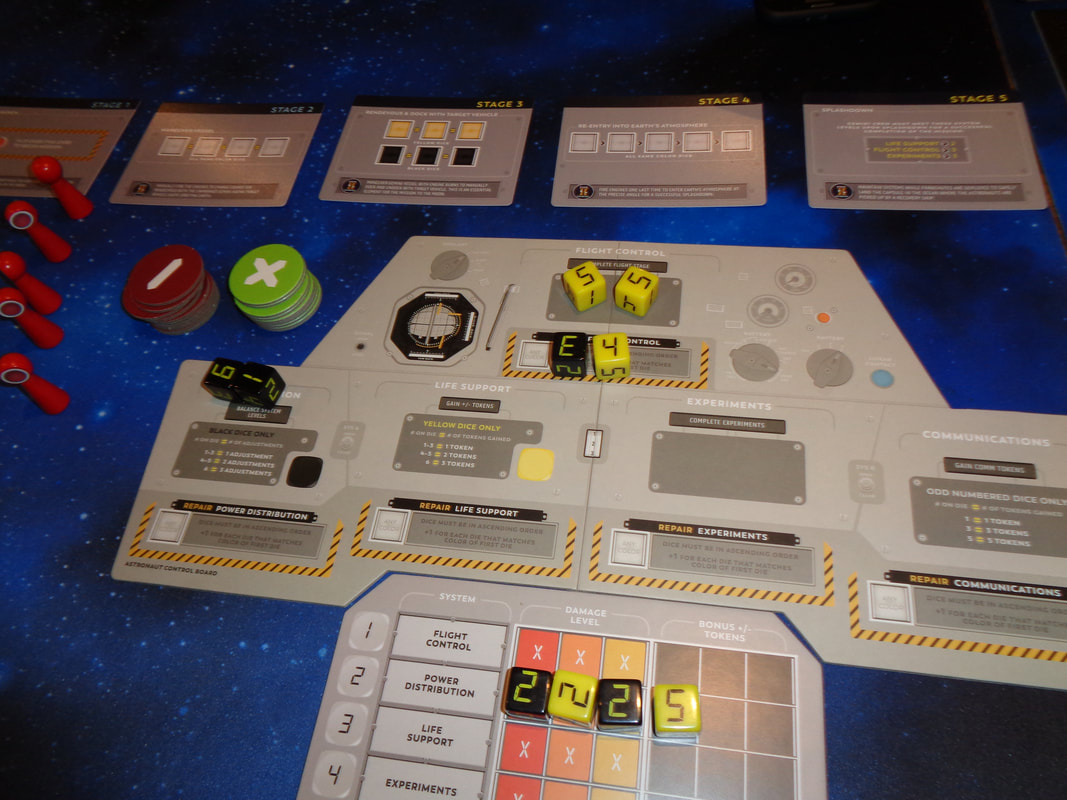
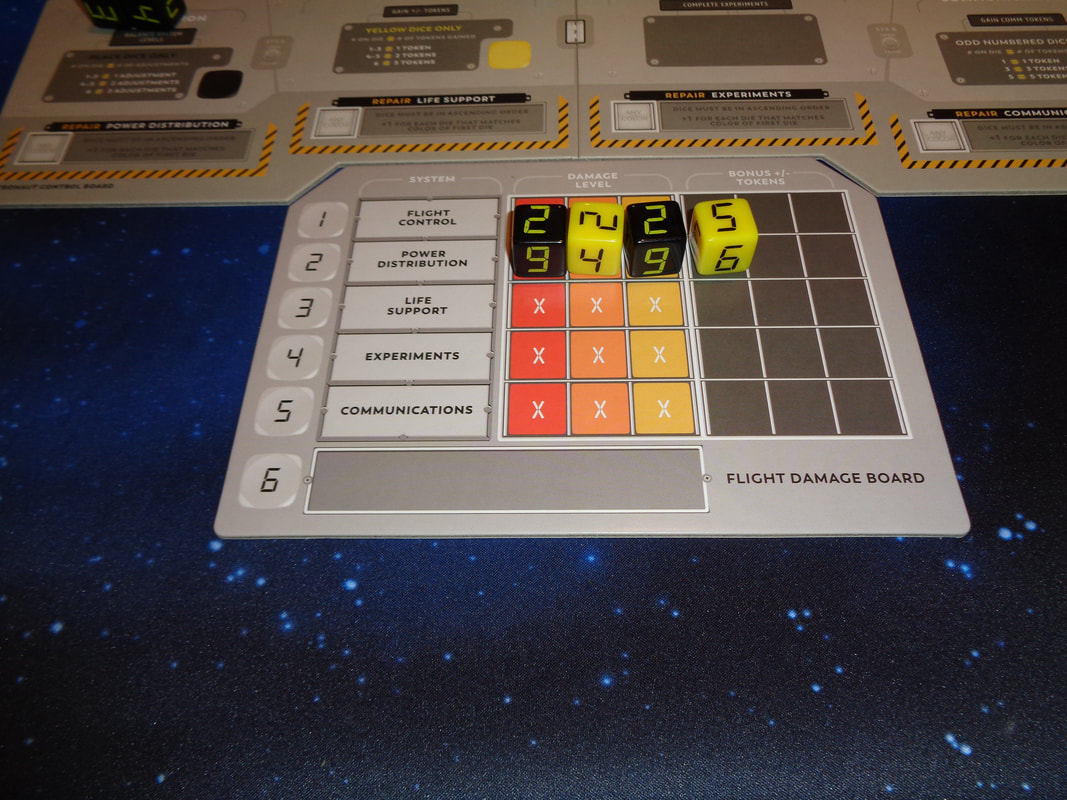
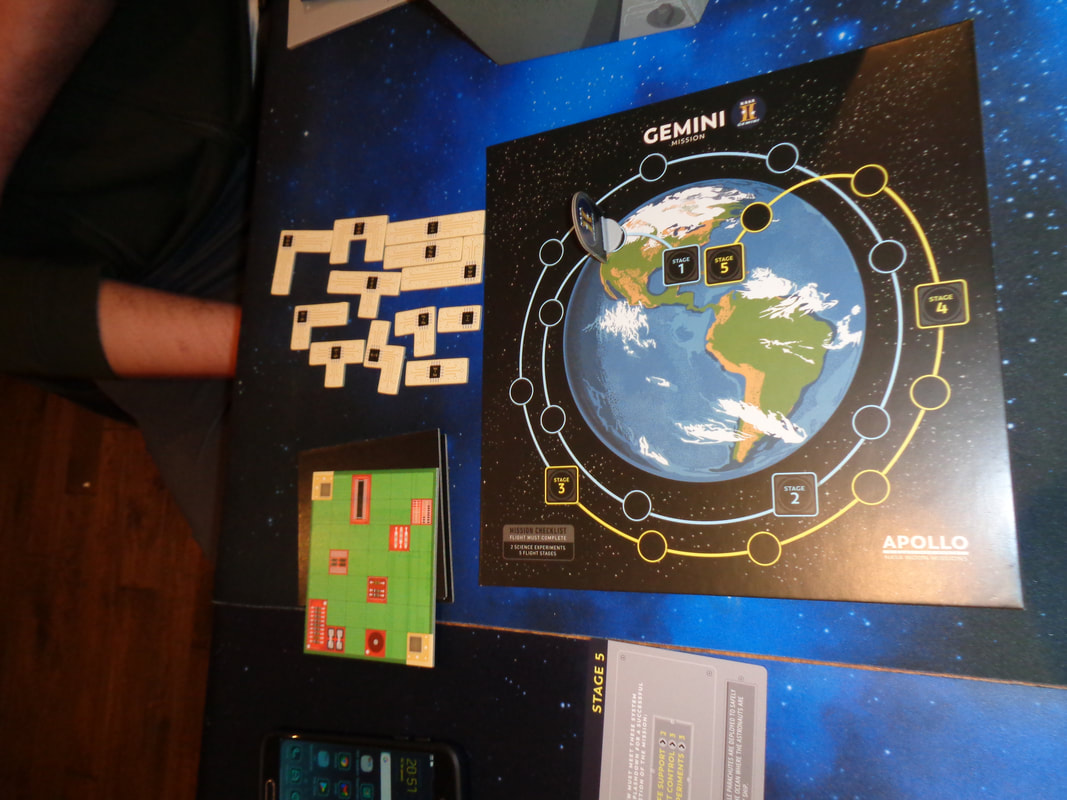
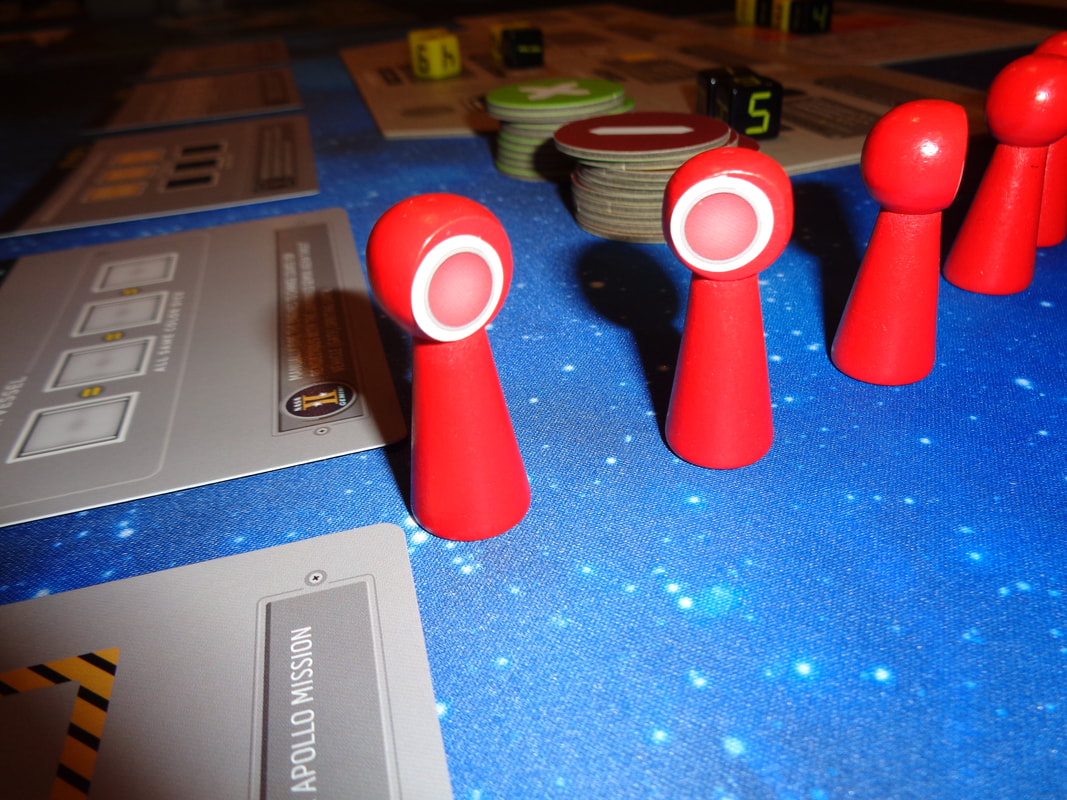
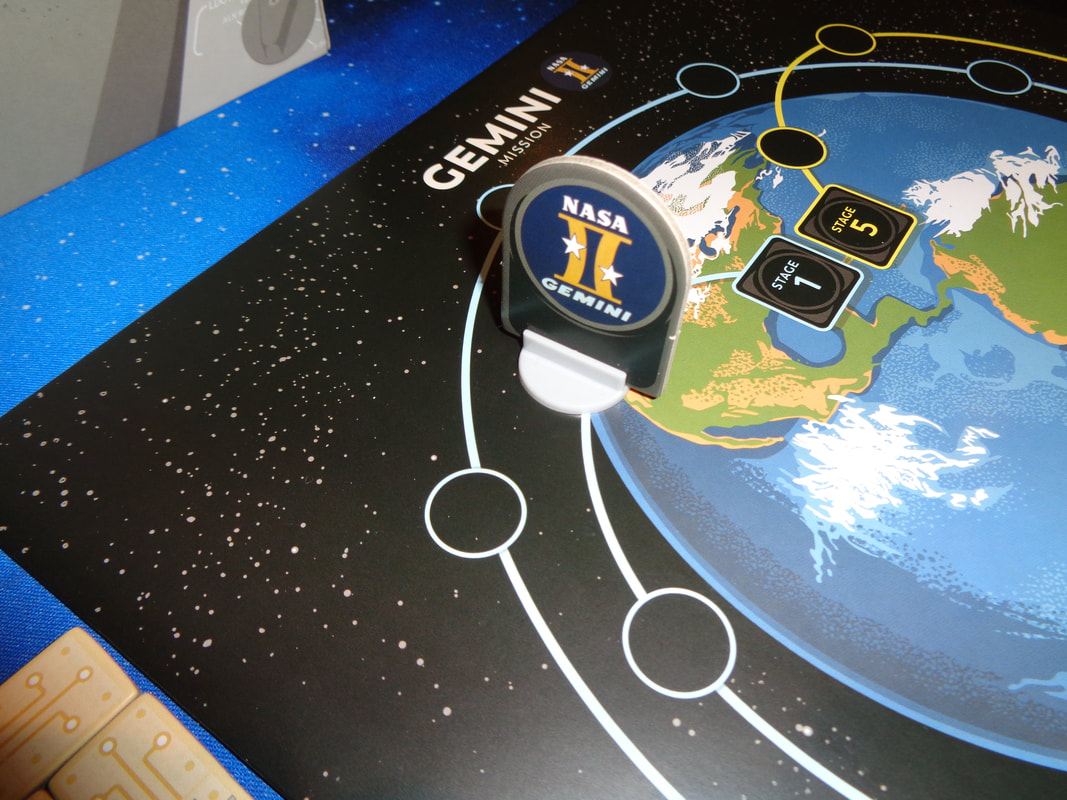
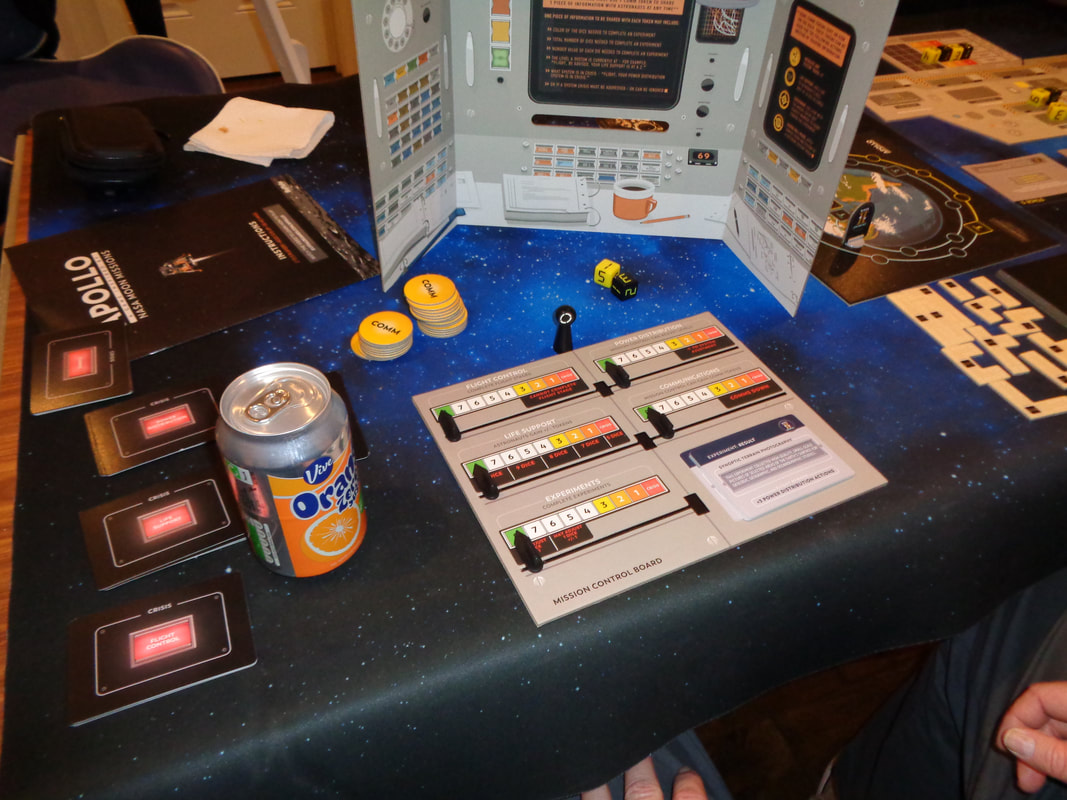
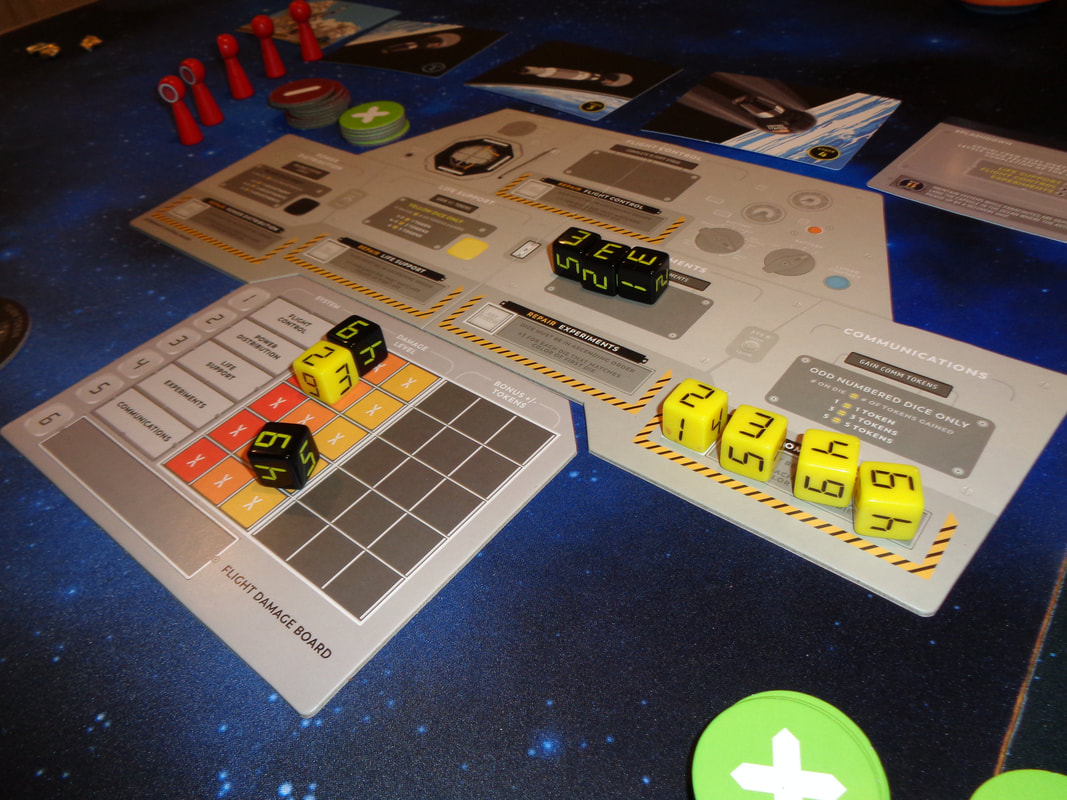
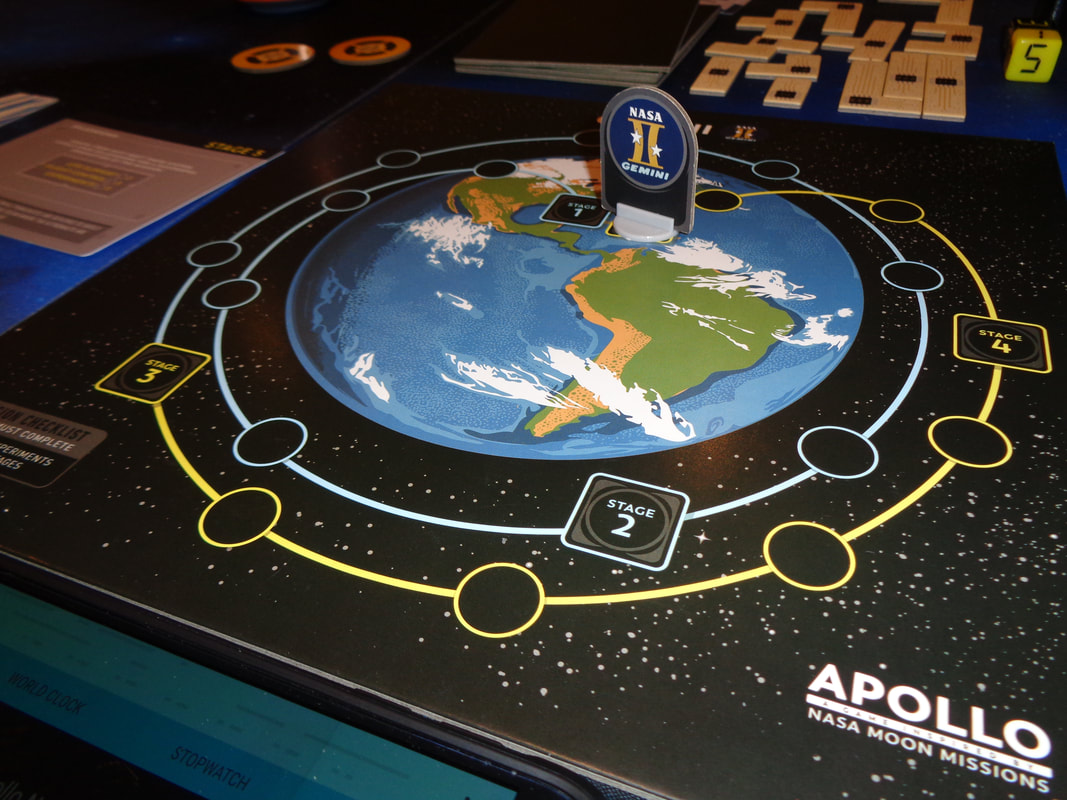
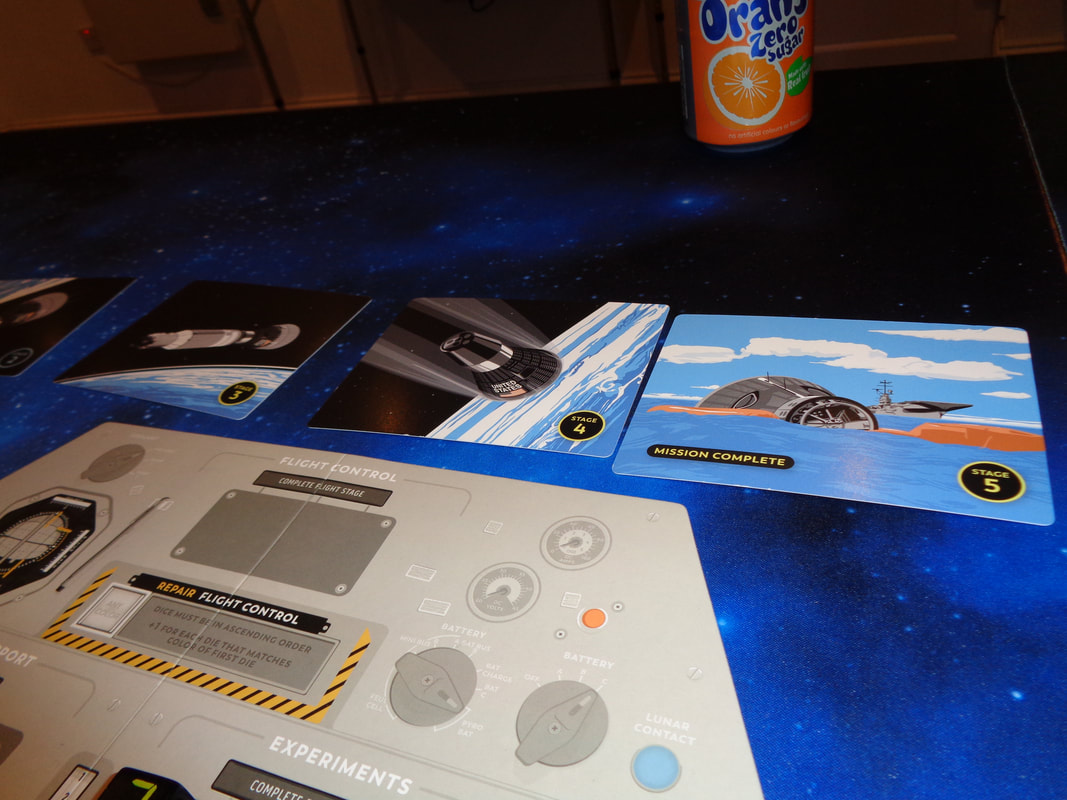
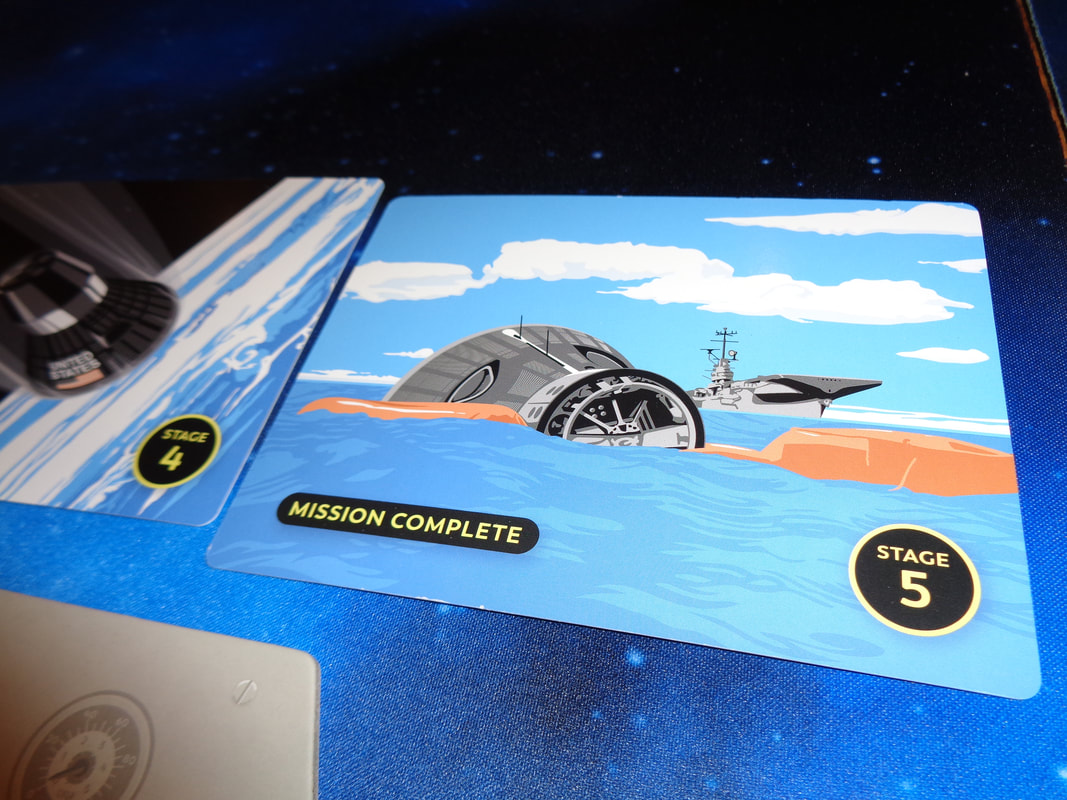
The boards, tokens and player screen are all constructed of suitability thick card. While the dice are not wooden, they use a old school LCD numeric font for the numbers which is pretty cool, as are the pouches to store the mission cards. The astronaut board and particularly the player screen feature very well themed artwork that calls back to sixties computer tech. The art on the astronaut board displays various dials and buttons is perhaps a little sparse but is also clean and doesn't interfere with the game element. Most of the player screen is decorated with evocative artwork of of what I imagine is module controls, the inside has some game information but the rest is an illustration of what mission control might look like. Dig the cup of coffee! The art that depicts the Earth and the Moon is perfectly fine, they look like what they're meant to. Finally, the flight stage cards are double-sided and as each one is completed, it's flipped over to show an illustration of that actual stage, which is a nice touch. The game features little in the way of dedicated iconography, all the information is presented clear terms and is easy to comprehend. How's it play? Setup Since Apollo is a asymmetrical game, it has a asymmetrical setup.
On to play Apollo is played over a number of rounds, each round has its setup and then is played over a number of turns. To make matters worse, Apollo is played in real time and each round only lasts 4 minutes.
What are these actions and how do they work?
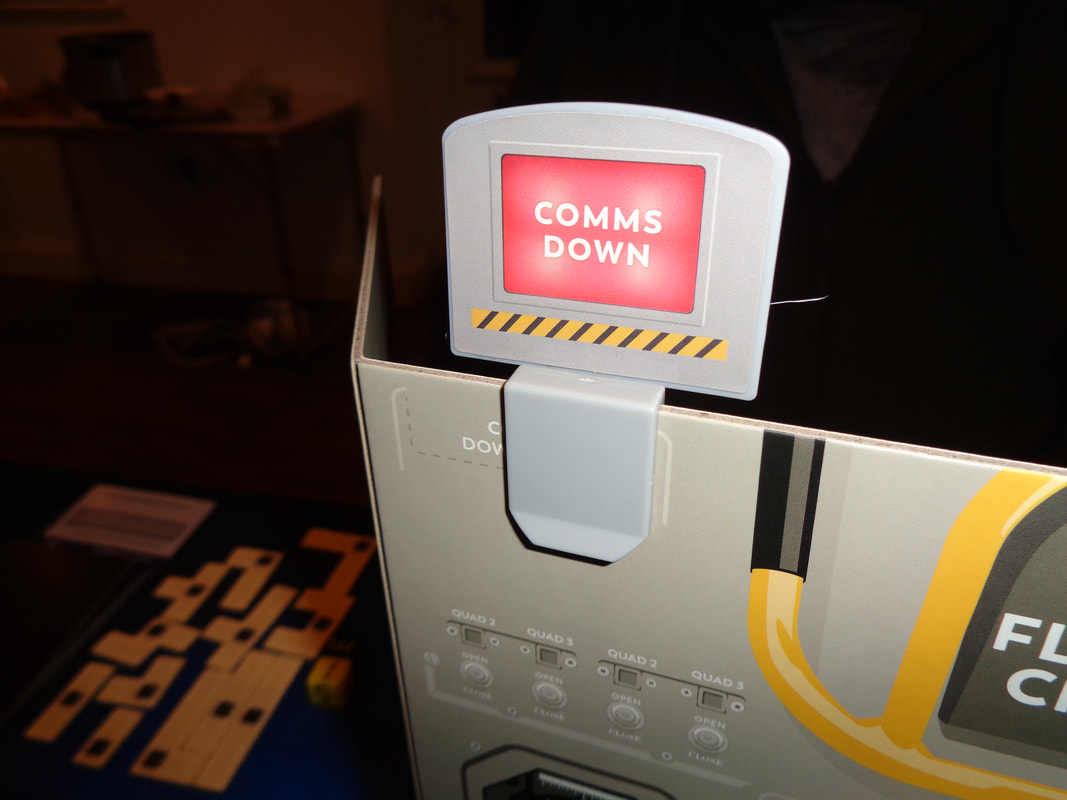
Endgame During play, if the module passes a flight stage space on the board without completing its requisite task or the flight control rating is lower then 4, then the mission immediately fails. If the module reaches splashdown without completing the required number of experiments, then the mission fails. However, if all the flight stages and experiments are completed, then mission is a success and the players win the game. Overall
The rules for Apollo sound quite clunky in writing but in actual play, they felt straightforward and once players begin performing actions, it becomes quite understandable. I wouldn't call it a crossover game but I imagine that it would be easy to pick up. Apollo is quite unusual, being an asymmetrical cooperative game and I think it fits its theme quite well too. Having that slight disconnect between mission control and the astronauts somehow lends the game a greater sense of teamwork. Astronauts having to rely on mission control to get information and mission control having to rely on the astronauts to get comms tokens and to be able to make changes to systems means players have to work together. It's definitely a bit different to the typical cooperative game where players are cooperating but generally sort of off doing their own thing. Another noticeable and welcome difference is how there's no characters running round a global board trying to stop the spread of something here. During the game, players will be, broadly speaking, faced with 3 types of obstacle; successfully completing flight stages, successfully completing experiments and firefighting damage that occurs during the flight. There's a real need to strike a balance between these 3 priorities and players will also have to approach this as efficiently as possible, the flight module moves along the board after every turn and is in essence another countdown timer. It means planning for the known variables of the flight stages, somewhat knowable experiments and also reacting and adapting to unpredictable damage inflicted on the command module and there will be damage! There are 15 damage spaces on the flight damage board and only 10 dice to cover them, that means at least 5 damage to the systems every round. Being a cooperative game, Apollo uses the luck or specifically the bad luck that arises from rolling those dice to challenge players. The game also features a time limit in the form of a 4 minute timer: On paper this might not seem like much time but in play it's perhaps a little overgenerous. 4 minutes to assign 10 dice works out to be 240 seconds for 10 dice or 24 seconds per die, which we did not find much of an issue. We played the Gemini mission board a couple of times and it didn't present too much challenge for us, there were a definite couple hiccups and dicey (sic) moments but otherwise it was pretty much plain sailing or more accurately, plain err.... orbiting? Mission control never had to reach for the puzzle boards. However, we are a fairly experienced band of players and maybe for once, the luck went our way this time. We didn't get round to playing the Apollo mission board which is probably where the meat of the game lies and certainly looks more challenging, so I'm reserving judgement on the game's difficulty. I'm not certain about the game's replay-ability either, it wasn't boring but at the same time felt a little samey, players are ultimately just assigning dice to tasks, some of which may become quite familiar over multiple plays. Easy to learn with a reasonable play time and providing some interesting decisions to make, I'd say that Apollo is a good game to play every once in awhile and if cooperative games are your cup of tea, then it's definitely worth checking out this fresh take on cooperative gameplay. 30th November 2022 It's a Tuesday night and we're at The Sovereigns in Woking with the Woking Gaming Club. The main game of the evening was Atlantis Rising. Atlantis; the mythical civilisation swallowed by the seas and lost to time, how did this happen? Clearly it was caused by a band of bumbling table-top gamers! What's in a game?
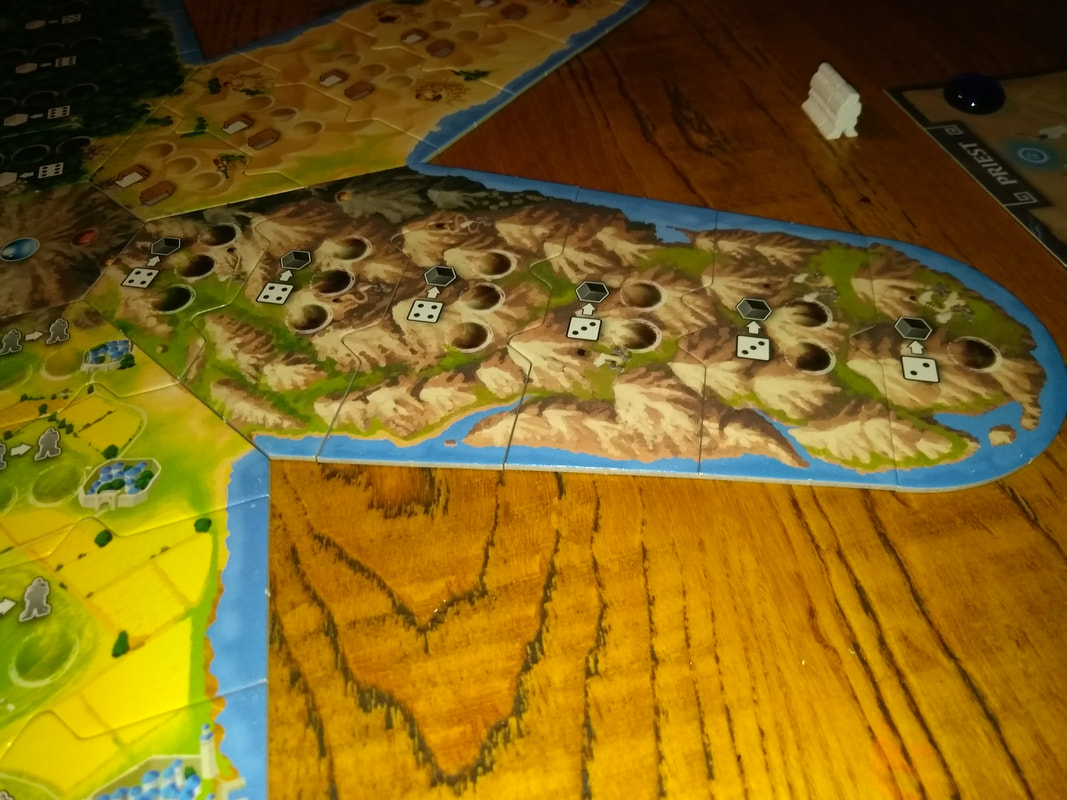
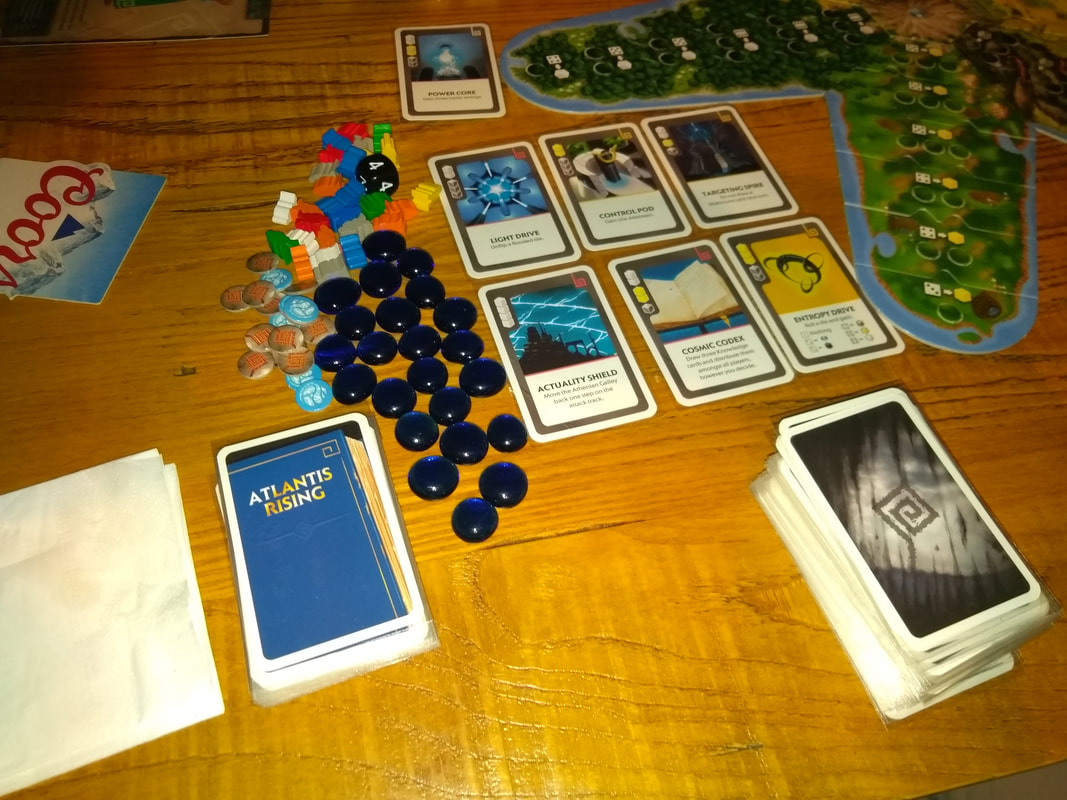
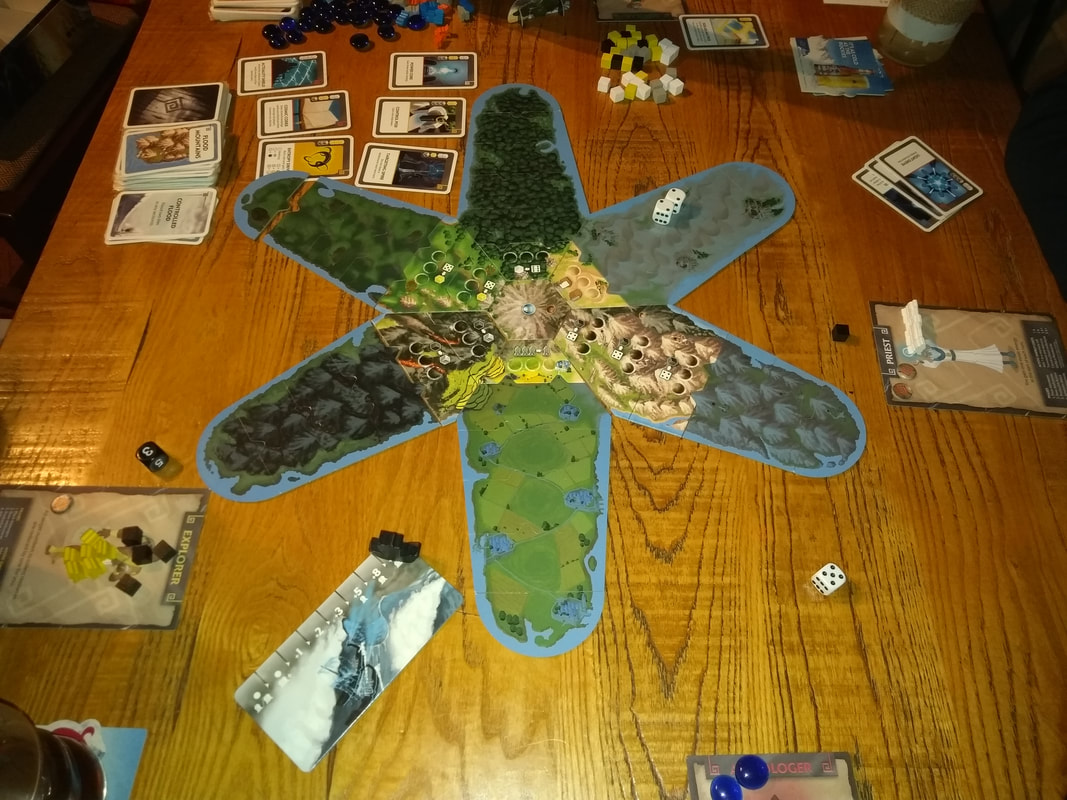
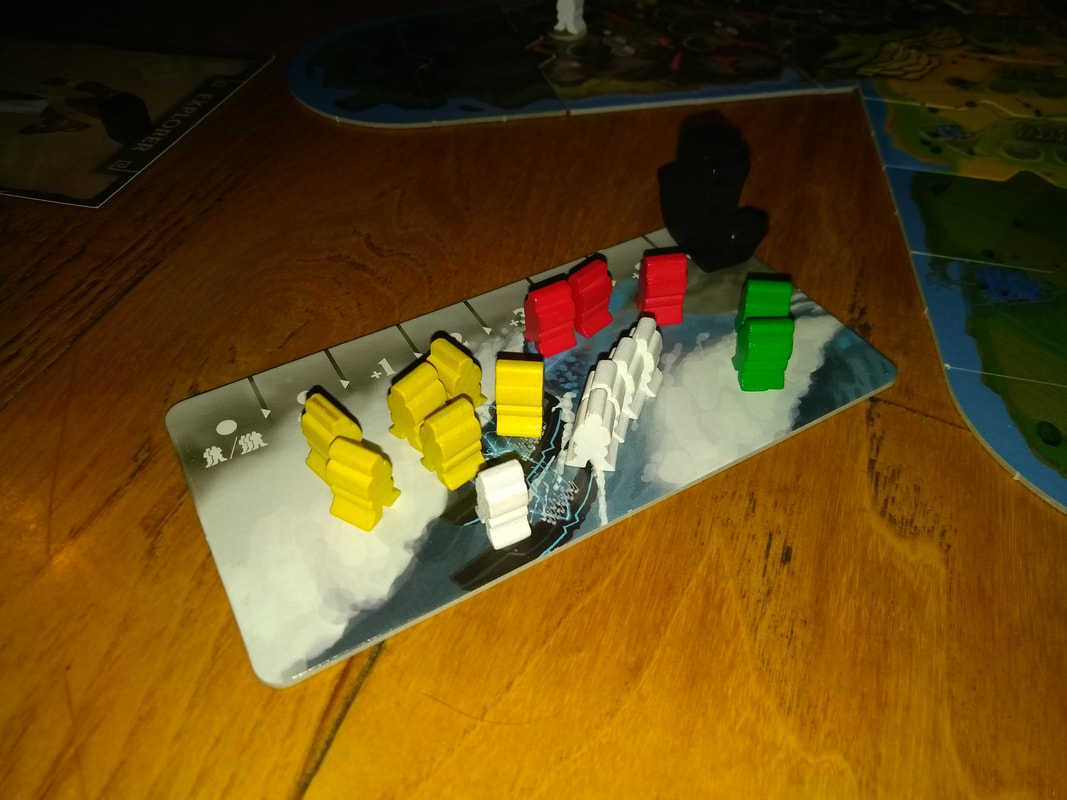
The quality of the components is as you'd expect from modern games universally good, the game makes extensive use of wooden tokens for meeples, resources and even the Athenian ship, which I like. The addition of glass tokens is also a nice touch and appreciated. From the perspective of art direction, I'd call the art good but not exceptional, it is however, clear and functional when needed, the different terrains are always easily discernible. I'd be remiss if I didn't comment on the board. It genuinely looks unique and eye-catching. It's not a gimmick either and makes sense in relation to the game's mechanics. The game's iconography is straightforward and easy to understand. How's it play? Setup The setup for Atlantis Rising is relatively simple.
On to play Each round in Atlantis Rising consists in a number of phases.
Endgame Play continues until 1 of 2 conditions is met. If all the tiles on the Atlantis map are flooded - including the centre tile, then the players collectively lose. If the players manage to build all 10 cosmic gate blueprints, they immediately win. Overall
Just to clarify, it was the the 1st edition we played, there is a 2nd edition which has some notable changes. Despite its nifty, unorthodox board, Atlantis Rising's central premise will be familiar to players of cooperative games. That is; players will be faced with the choice of working towards completing objectives to win the game or firefighting whatever will cause them to lose, in the case of Atlantis Rising that's 2 sources, the misfortune deck and the Athenian attacks. What Atlantis Rising brings to the table though, is a push-you-luck element. Luck is an inherent part of cooperative games and is used to mitigate players' abilities to out-strategize a game, but these push-you-luck elements add something quite different. When picking an action, players will also have to decide how much they want the resource, card or whatever, playing it safe might not get you what you need or enough of what you need. The same is true when dealing with the Athenians, it requires a lot of meeples to be fully safe from them, but the true number required is never known due to the attack die roll. Sometimes it might better to put a meeple or 2 less, it might be riskier, but it gives you 2 workers that could have a vital use elsewhere. In both instances it's a solid use of risk/reward and it gave me the feeling that it's hard to win the game by playing cautiously and at some points players just have to take risks. Having said that, I do have an issue with the whole Athenian attack mechanic. I really don't like how the players have to collectively commit more and more workers to fighting the Athenians off. It can mean players are making effort to acquire workers simply for this purpose and feels like quite a negative mechanic. I'm not alone in this thought as this was revised for the 2nd edition. This also brings me to another element of the game; as it progress on and more tiles flood, players will get less and less choice where to place their workers. It feels counter to how games - especially worker placement games flow, typically a player's choices and options expand as a game goes on but Atlantis Rising does the opposite, I know that it's part of the game's challenge and players need to work to prevent this but still sort of feels off. Other than these two criticisms, Atlantis Rising is a perfectly acceptable game that cooperative gamers will be comfortable with. Atlantis Rising doesn't stand out from the crowd but neither does it do anything wrong. Personally, I like how it looks, especially watching Atlantis gradually sink! |
AuthorI play, I paint. Archives
March 2024
Categories
All
|


 RSS Feed
