3 Spellcasters and a Dwarf
  • Home
  • Special Effect
    • Special Effect
    • Bard's Tale Challenge
    • Fighting Fantasy Challenge
    • The Indiana Jones Charity Globe Trot
    • Mirkwood Charity Walk
    • Middle-earth Charity Walk
    • Dungeon Daze
  • Games
    • Beach Patrol
    • The Surrendered Lands
  • Game Blogs
    • RPG Blog
    • Gaming Blog
  • Painting Blog
  • Contact

Gaming Blog

Above and Below

5/8/2021

0 Comments

 
3rd August 2021

Tuesday is here and I'm in Woking with the Woking Gaming Club at The Sovereigns pub for gaming night.

The game of the night was Above and Below. Published by the same company who also produce a game  called Near and Far.
Left and right, up and down, in and out: wiggle it all about, here and there, out and about, Far and Away and Home and Away! Some great suggestions for naming more games!

As the name suggest, the players will concerning themselves with the above ground settlement and exploring the caves below the village.

What's in a game?
  • ​Reputation board: This central game board shows an area above ground that displays a 5-space track for 'special villages' with a cost beneath each spaces that starts at 2 and rises to ​5.
    Below ground, the board depicts a series of caves which serves as a round tracker and what appears to be a tunnel, which is used as a reputation tracker.
    Additionally, on the left is an allotted space for a barrel token and a column that depicts the game's many goods in increasing rarity.
  • Player board: This board depicts a grassy landscape dotted with a few buildings.
    The top left corner displays the player's colour as well as being a trading spot.
    Along the top it shows the different actions a player may perform. These are Explore, Harvest, Build, Train & Labour.
    The grassy landscape is divided into 3 areas by 2 vertical columns of trees. These 3 areas are the ready area, exhausted area and the injured area
    Finally, along the bottom is the goods advancement tracker which runs from left to right, as each space is filled with goods, it will increase the player's income as well as generating victory points at the game end.
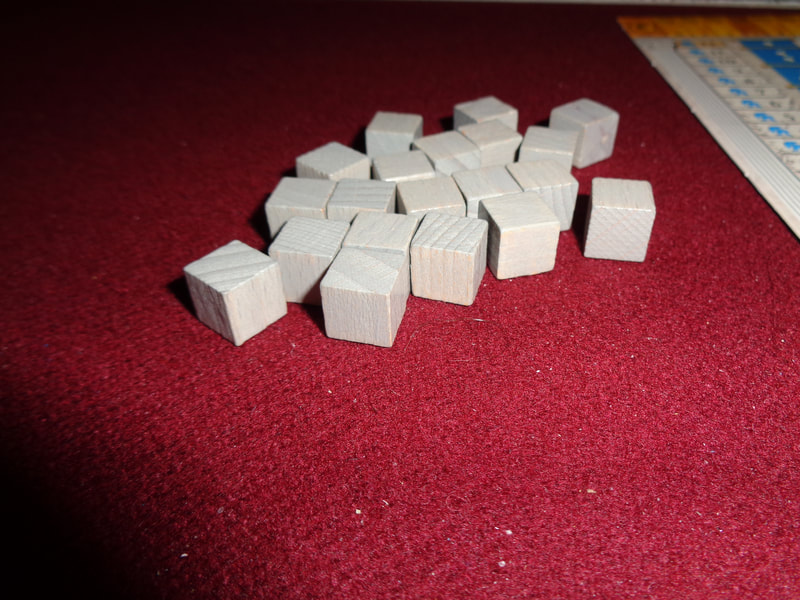
  • Player cubes: One each for every player in a colour that matches their player board.
  • Starting villager tiles: There 4 copies of the 3 identical villagers. Villagers have a hammer (For building.), quill (For training.) or lantern (For exploring.) icon in their top left corner.
    All villagers will also have an icon in their top right corner, consisting of 1 or more lanterns along with associated die numbers above the lanterns, these are used in explore rolls.
  • Villager tiles: Villagers that can be trained and recruited during play. As with starting villagers, they will come with come with icons for hammers, quills and exploring.
  • Special villager tiles: Not just villagers, but special ones, one that come with special actions! Special villagers can only be found by exploring the caves.
  • Starting house cards: There are 4 of these identical cards that each depict 3 beds along the bottom. Beds allow injured villagers to heal and exhausted ones to rest.
  • House cards: These 25 cards can be bought during the game and list a cost in the top left corner and whatever special ability they confer along the bottoms; this may be extra beds or ways to earn victory points, or produce goods, increase reputation or money, etc.
  • Star house cards: These 6 cards are rarer, more expensive but more useful houses.
  • Key house cards: The rarest of house cards, there are 9 of them, but only 4 are used during a game.
  • Cave cards: These cards are double sided. On the front is shows a small cave and the numbers 1-6, next to each of these numbers is a further number - which is used in conjunction with the encounter book.
    On the back of the card, a open cave is shown.
    There are 25 cave cards.
  • Outpost cards: These are yet another type of house card, however, these can only be built underground as players explore. There are also 25 of these cards. As with other house cards, they may provide goods, victory points or other benefits.
  • Goods tokens: These small round card tokens depict the game's 8 types of good. These are:
    Common: mushroom, fruit & fish.
    Uncommon; rope, clay pot & Paper.
    Rare: Ore & amethyst. 
  • Barrel tokens: There 10 card tokens each depict a barrel and can be used to remove exhaustion from a villager without using a bed. Apparently those barrels are filled with cider, it must be pretty potent stuff considering what it does.
  • Potion tokens: These smaller card tokens depict some sort of drinking jar, no doubt containing some suspect liquid? Using one will remove injury from a villager.
  • Dice: Standard six-siders, there are 7 of them.
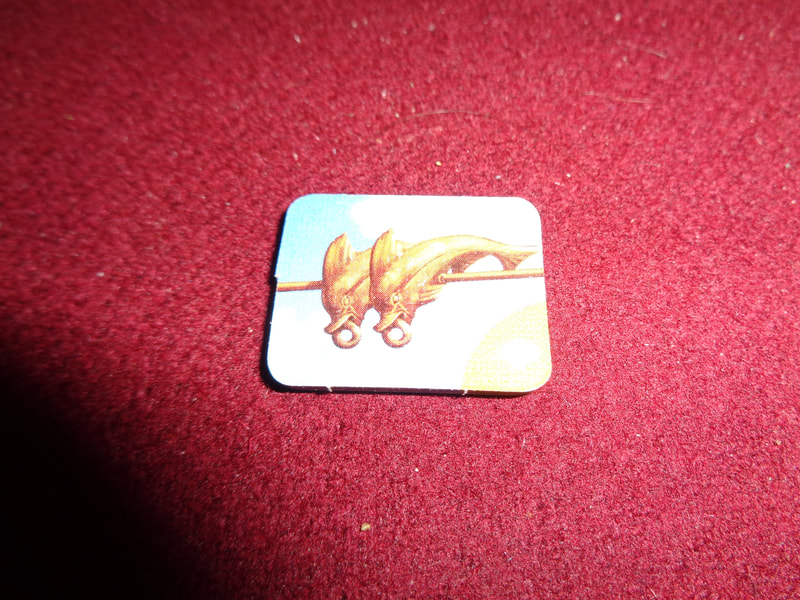
  • Money tokens. Unusually, these card money tokens are rectangular.
  • Encounter book: This book is a sort of 'choose your own adventure' book which contains a series of numbered and interlinked paragraphs which the players will encounter when they go exploring.
The components, which mostly consist of cards, tokens, tiles and dice are good quality and what you'd expect of a modern board game. It's nothing to write home about, but still solid.
The game makes good use of its cartoony artwork, particularly with the green, grassy landscapes and cloudy blue skies that appear on many of the cards. Buildings and villagers are also well illustrated. Finally, the underground cards have evocative, mildly forbidding artwork.
There is little iconography used throughout Above and Below and what there is of it, is easy to comprehend.


How's it play?
Setup
  • Give each player a player board, a starting house, the 3 starting villagers and 7 currency. The villagers should be placed on the board, where exactly on the board depends on the number of players.
  • Put out the reputation board, shuffle the villager tiles into a face-down stack and deal 5 into the tracks on the board.
    Place a barrel token on to its allotted space on the board.
    Place the round marker at the start and each player's cube on the reputation track's starting spot.
    Put the special villagers to one side.
  • Shuffle the house cards into a face-down deck and deal 4 face-up
  • Put out all 6 star house cards face-up.
  • Shuffle the key house cards and deal 4 face-up into the central area, the remaining 5 cards will not be used in this game.
  • Shuffle the outpost cards into a deck and deal 4 face-up.
  • Shuffle the cave cards into a face-up deck.
  • Determine a starting player.
On to play.
Beginning with the starting player and going clockwise, each player performs a single action using 1 or more of their villagers, play continues clockwise until all players have used all their available villagers or have passed. After this, the next round begins.
  • Actions: In order to perform actions, the active player must have at least 1 villager in their board's ready area. When undertaking an action, the relevant number of villagers must be moved to the exhausted area, with the exception of exploration - see below for further information.
    Explore: It requires at least 2 villagers to explore the caves below the village (I guess it's a scary place!).
    First a cave card is drawn by the active player, who then places the villagers they intend to use for the explore action on the top part of that card.
    The active player then rolls a die, this will determine which encounter they experience and its pertinent paragraph number.
    The player to the left of the active player takes the encounter book, finds the relevant paragraph and reads the text out to the active player, this usually includes a choice for the active player to make and a difficulty associated with those choices, sometimes there will be multiple paragraphs to play through in the style of a choose-your-own-adventure book. The active player chooses the action they want to attempt and then generates an explore roll.
    This is done by rolling a die for each villager sent exploring, if the die result equals or exceeds the value above the lantern(s), then that number of lantern(s) is added to the explore roll. Additionally, the active player may choose to have villagers exert themselves, which adds a further lantern to the explore result but sends the villager to the injured area on their player board.
    If the total of the explore roll exceeds the difficulty of the action they chose, then they earn the associated reward, this always includes the cave card which was just used for the encounter, which is flipped over to the other side and added to the player's area as an empty cave.
    If the player's explore roll is lower than the difficulty, they fail, which may result in a penalty.
    Regardless of success or failure, any remaining villagers are sent to the exhausted area on the player board.


  • ​Harvest: The active player may sent villagers to the exhaust area on their player board in order to harvest goods, each villager used this way allows the active player to acquire one good. This good must come from one of their houses or outposts that have generated a good.
    Once a player has good, they can choose to store it with their cash, put it up for sale in their trading spot or add it to their goods track.
    Putting goods into the advancement tracker both increases the players income and earns them victory points at the end of the game. However there are some rules about this.
    Goods must always be placed from left-to-right on the leftmost open space with no gaps between goods. Once a type of good has been put in a space, all goods of that type must now go on that space. Furthermore; goods placed on the tracker cannot be removed during the game.
    Players will need a variety of different goods to advance across the track to gain access to the higher income/victory points.
    Build: In order to build something, that is acquire purchase house or outpost card; the active player must exhaust a villager with a hammer symbol and pay the relevant cost for the house card or outpost. They may buy any house, star house, key house or outpost provided they can pay the cost.
    However, an outpost can only be built on top of an empty cave card, thus the player must first go exploring before they acquire outpost cards.
    When a building or outpost is bought, a new card is drawn to replace it so there always a choice of 4 to choose from.
    Train: The active player can exhaust a villager with a quill on their tile to recruit one of the 5 villagers along the top of the reputation board. They must also pay the associated cost, which increases going from left-to-right. Then the new villager is placed into their exhausted area on their board.
    Empty spaces are not refilled during a round, this is in contrast to how house cards are refilled.
    Labour: For each villager the active player exerts, they earn a coin, the first villager to be exhausted this way also earns the controlling player the barrel token in the reputation board. Only 1 barrel token may be earned a round.
  • Free actions: As well as the main action, players can perform any amount of the following 2 actions.
    Sell good: The active player may put a single good, barrel or potion for sale. They also swap the good they have for sale during their turn
    Buy good: The active player may buy whatever another player has put up for sale, the seller may charge anything they want for the good they're selling, as long as it's at least 3 coins.
  • End of round: Once all players have passed, the round is over and the following actions occur.
    Villagers: Move any villagers on the reputation board to the left to fill any open spots, new villager tiles are drawn to fill the spaces now on the right in a conveyor belt mechanic.
    Produce: Any house or outpost that has an empty goods production space will generate a good to fill that space.
    Rest: For every bed in a player's area, they can move a exhausted villager to the ready space. An injured villager may use a bed to move to the exhausted area, a villager cannot use 2 beds in a round, thus it will take 2 rounds to move a villager from injured to ready.
    Barrel and potion tokens change all of this though.
    A potion token can be used to move a injured villager to the exhausted area without needing a bed and barrel token can be used to move a villager from exhausted to ready without needing a bed. And yes, it is possible to use a potion and a barrel on the same villager in order to move them from injured to ready without using a bed.
    Income: All players acquire income. The base income is 4, the number of goods in a player's goods track will increase that, as will some times of building and outpost.
    After this, the player to the left of the starting player becomes the new starting player.

Endgame
Once seven rounds are completed, the game goes to scoring, victory points can come from a variety of places.
​Reputation: Whoever has the highest reputation gets 5 victory points and 2nd place gets 3.
Each house and outpost: Regardless of what it is, earns a victory point.
House/outpost bonuses: Some houses and outposts will confer additional bonus points, these may be straight up points or situational points, e.g., 1 point per barrel.
Advancement tracker: Players earn points for each good on their advancement tracker, depending on where the good is positioned. 2 goods on the 1st space would earn 2 victory points in total, 2 goods on the 8th and final space would earn 12 victory points! The type of good makes no difference here. The advancement tracker can earn a lot of points.
Points are tallied, highest score wins.


Overall
For the most part, mechanically speaking, Above and Below is a fairly straightforward, unremarkable game. Players use their workers to increase their resources to acquire more workers and buildings create a strategy to earn victory. Pretty standard stuff, not that there's anything wrong with that, no need to reinvent the wheel.
Even so, there's some depth here and quite a bit of balancing to perform. There's little good acquiring workers without the ability to rest them which means acquiring buildings with beds instead of other benefits, particularly to ability to acquire goods and so on.

This brings us neatly to the merchant track, which is one of the game's two interesting mechanics. Firstly, it more-or-less forces players to diversify in goods in order to reach the higher scoring spots.
Secondly, it does something unusual with the game's 8 goods; which is that the rarity of a good has no bearing of it's worth for victory points, position on the track determines a good's worth and this is likely to be different for each player, meaning they may have different priorities for different goods, regardless of rarity.
Finally, it gives players a conundrum to navigate: Logically, players will want to put the most common goods on the later, higher scoring spots because, well, there's more of the common goods available to stack up for more points. This means using rarer goods earlier in the track, but rarer goods are harder to come by. So should a player start filling out the merchant track as quickly as possible with whatever they get to reach the later spots? Or should they hold off, hoping to get the scarcer goods and use them to fill the earlier spots.
It's an interesting decision to consider.

The second interesting mechanic is exploring, Above and Below really stands out from the crowd when exploring the below. The inclusion of a 'lite storytelling' choose-your-own-adventure element with flavour text and all, is both fun and meaningful, presenting players with sometimes story-based choices and risks to take which directly affect what they earn from their exploration. It's cool and a great addition beyond the usual board game fare. It makes Above and Below worth trying.
0 Comments

Lorenzo il Magnifico

17/7/2021

0 Comments

 
13th July 2021

It's a Tuesday evening and I'm at The Sovereigns in Woking with the Woking Gaming Club. 

Where would eurogaming be without Renaissance Italy? The pageantry, the politics, the scheming and the vying for power, you know how it goes: A seemingly limitless mine of game design opportunities.
This is where Lorenzo il Magnificio comes in, a game where players control noble families in Florence competing to be the most prestigious, famous and of course.... most pious!

What's in a game?
  • Game board: Lorenzo il Magnificio is a worker placement game, as such, many parts of it are given over to spaces for workers. Unlike most game boards, this one sits in the portrait orientation, it depicts a scene from Renaissance Florence with a street and some businesses. However, towards the top, the lion's share of the board's space is given over to 4 towers.
    The 4 differently coloured towers each have spaces for 4 cards, going up each tower are a set of steadily increasing dice values and resources associated with those spaces.
    Below the towers is an excommunication space.
    Next to the excommunication spaces is The Council Palace.
    And below that, there's also a faith track, I guess it goes hand in hand with the excommunication spaces. Looks like things are getting serious!
    At the bottom of the board are spaces for resource gathering, whether they be building resources, money or whatever.
    A military track runs along one of the boards long edges.
    The board also has a turn order track and a scoring track that runs round the board's perimeter.
  • Development cards: These come in 4 different colours which correspond to the tower colours. Going further, each colour is subdivided into 3 periods, (Labelled 1, 2 & 3.). There are 8 cards for each period in all colours, which adds up to 96 cards in total.
    Development cards come in 4 types; territories, buildings, characters & ventures.
  • Leader cards: These cards represent individuals which can be recruited to a player's cause, they have bonuses that can be used once per round to aid players.
  • Resources: There are shaped tokens to represent some of the game's resources, stone, wood and.... servants. That's right, there's human resources in the game! Well it's renaissance Florence I guess.
  • Cash: Standard card tokens to represent money.
  • Excommunication tiles: There are 7 of these for each period. These tiles may hinder players during the game.
  • Dice: These are 3 normal six-siders, which come in white, orange and black.
  • Personal boards: Player's personal boards are identical. Each one has 2 tracks; a building track and a territories track, both of which run from left to right.
  • Personal bonus tile: This neat little long, vertical tile slots in next to personal boards and provide extra bonuses, they are double-sided to provide different sets of advantages.
  • Workers: Each player has 4 workers which represent family members.
    3 of these family members are in the player's colour, on top of each one is the colour white, orange or black, which corresponds to the dice.
    Finally, each player has an uncoloured neutral family member, however, the top of this family member is coloured in the player's colour.
  • Player tokens: Each player also gets some scoring/tracking discs and excommunication cube tokens in their colour.


The boards and tiles are suitably thick, the resource cards are of a standard quality as you'd expect.
Tokens are all made of wood, which I always like, including the nicely rounded dice. The standout components however, are the family workers, instead of discs, they're these tall cylinder shapes that are easy to pick up. It makes sense as I'm sure they're going to be the components that get handled the most; practical and appealing.
Lorenzo il Magnificio features attractive artwork throughout, the boards all display pretty, somewhat stylised art work cleverly produced to incorporate all the game's worker spaces.
Art on the cards is little pared back to make room for iconography. Talking of which, all the game's symbols and text was easy to read. Lorenzo il Magnificio has good, solid components and presentation.

Picture
Example of a leader card; that guy sure has a cool first name....

How's it play?
​Setup
  • Development cards: Sort the development cards by colour and then by period, there should now be 12 decks of 8 cards in total, then shuffle each deck.
    Next create 4 face-down decks, one for each colour. For all decks, the period 3 cards form the bottom of the deck, period 2 the middle and period 1 the top. Place each of the 4 decks above the tower with the corresponding colour.
  • Excommunication tiles: Sort the tiles by period and deal one from each on the pertinent excommunication spot on the board.
  • Leader cards: Deal 4 leader cards to each player face-down. Now each player chooses a card to keep and passes the remainder to the left. Repeat this until all players have drafted 4 leader cards.
  • Personal board: Give each player a personal board, bonus tile and workers in their colour, as well as starting resources.
  • Determine starting order: All players then receive starting funds according to their starting position.
On to play
Lorenzo il Magnificio is played over 3 periods, with 2 rounds per period, which equates to 6 rounds in total.
Each round has its own setup phase before the players act in turn order, additionally at the end of every period (2nd, 4th and 6th rounds.) there's an additional step; the Vatican report step.
A round progresses as follows:
  • Development cards: Deal cards from the 4 different development decks on to their respective tower, starting at the bottom and working upwards.
  • Roll the dice: Whoever is the starting player for the current round rolls the 3 dice and places them on to their allotted spot on the board. The dice will remain on those results until the following round.
  • Actions: Beginning with the starting player, all players carry out their actions, i.e., places their workers on the board, how's that done? This is where the game starts to show its complexity.
    Value: Each worker has a value equal to the value of the die with the corresponding colour. If the white dice is showing 5, then white workers are worth 5 and so on. The neutral workers always has a value of 0. Players may temporarily raise the value of a worker for the round by spending servant meeples. Why are values so important? It may determine where a worker can be placed, speaking of which.
    Placing workers: Every space on the game board will have a minimum value which must be met by a worker in order to place it there.
    Development cards: Each tower has 4 development cards with rising costs of 1, 3, 5 & 7 the further up the tower they are positioned, thus the highest spot requires at least 1 servant acquire, the higher will also give players some resources.
    Most cards also have an additional cost in cash or resources, even more so if another player has put a worker somewhere in a tower first. Depending on the card, these costs might come from any of the resources.
    Additionally, only 1 worker of a colour can be used on a tower at a time, however, a neutral family worker does not have a colour and doesn't count towards this limit.
    Development cards provide a once-only benefit when acquired, this may resources or points, most also provide some sort of ongoing benefit. They're 4 types of development cards.
    Buildings: Generally buildings allow players to convert one kind of resource into another, like wood into cash, i.e. selling wood. Buildings have worker values that can be used to trigger their abilities (More on this below.).
    ​Territories: These cards produce goods such as wood or stone, like building cards, they come with worker values that can be triggered. Territory cards initially have no specific cost, however, after acquiring more than a couple, it will cost military points, as bonus though, they will confer victory points in the endgame.
    Characters: Character cards always cost cash generally provide a once-off benefit and then an ongoing benefit.
    Ventures: As well as once-only benefits, ventures also grant bonus points the game end. Ventures tend to cost military points or resources
    When building and territory cards are acquired, they are placed on their respective tracks on a player's personal board from left to right. Character and venture cards are placed to the right of a player's personal board.

    Wood/stone production: Players may use workers to gain these 2 types of resource. For the 1st worker used this way, the minimum value is 1, for workers placed after this, the value must be higher.
    When a worker triggers wood/stone production, it can also trigger the personal board and building/territory cards placed on it.
    Personal board bonus tile: When wood/stone production is triggered, the active player's bonus tile is also triggered and they gain those benefits. Additionally, buildings or territories may be activated.
    Wood production actives the active player's row of territories, however, only cards with a worker value equal or lower than the worker that was played on the wood production spot are triggered. Furthermore, they are activated in the order in which they were placed on the personal board.
    The same is true of stone production and building cards.
    Thus territories and buildings are key to building an engine to generate or change the game's many resources.
    Market: There are 4 market spaces, these confer, money, servants, military points or council favours, which in turn may provide some of the game's resources. Each of these spaces has a minimum value of 1, only one worker may be placed in a market space.
    Council Palace: A worker must have a minimum value of 1 to be placed here, doing so will change the turn order for the following round and also confer them a council favour.
    Leader cards: Each player will have a hand of leader cards, each one has a requirement to bring into play, once this is met, the card can be put into play, players don't need to spend the requirements. Leader cards have either permanent or once per turn benefits without needing a worker.
  • Vatican Report: A Vatican report occurs at the end of a period, i.e. rounds 2, 4 & 6.
    At the end of these rounds, players must have faith points equal to a certain amount as specified by the round.
    A player who does not have enough faith points during a Vatican report is excommunicated and suffers the penalties listed on the current excommunication tile for the rest of the game, this is marked on the relevant tile with a cube in their colour.
    A player who has reached the current threshold for faith points may spend those points to avoid excommunication and earn some victory points along the way. However, they may choose to retain the faith points and instead suffer whatever excommunication penalty there is.
  • Round end: At the end of every round, the following actions occur.
    Development cards: All unacquired development cards are discarded from the game. An entirely new set of cards are drawn and placed for all 4 towers.
    New turn order: A new turn order is established as per the workers positioned in the Council Workers.
Once all 3 periods are completed, it goes to the endgame.

Endgame
Calculate points from the following:
Current score plus points for acquired territory cards and character cards, end-of-game victory points for venture cards.
The player with the highest military score gains an additional 5 victory points, 2nd highest acquires 2 extra victory points.
Finally, every set of 5 combines resources scores an additional point.
All points are tallied, highest score wins.
Picture
Overall
​Lorenzo il Magnificio sits towards the heavier end of games in my opinion, mechanically speaking, at it's core it's not a particularly complex game, but there's a lot of exceptions and variations to consider when trying to buy those all-important development cards and managing faith and military scores and the resources required to do all this. Don't forget those 2 engines you'll need to build either in order to gain and change those resources, or the abilities that character cards confer or the endgame points that venture cards grant.
Like I said, a lot to think about.

The game uses 4 types of resource and 3 types of score (Two of which can also be spent at times.) and mixes a few types of game mechanics; there's a bit of worker placement, a bit of engine building and a bit of resource management. Where it throws a spanner in the works though, is the use of dice to randomise the value of workers. A couple of low rolls can force players to change their strategies, particularly when competing for development cards, however, the use of servants can potentially mitigate low rolls, even so, players will have to adapt to circumstances.
Furthermore, players have relatively limited moves to play with, each player has 4 workers they can use over 6 turns, giving 24 placements in total, which is why building the engines that essentially get triggered for free is so vital. Synergy and move optimisation are also key to this game.

There are several approaches to scoring points in Lorenzo il Magnifcio, although these strategies are down to which development cards are acquired, development cards are the game's most vital element to winning and most actions are in service of getting those cards. However, the game seems a fairly well balanced, nothing felt overpowered or unimportant, decisions always felt meaningful and because of limited moves, these decisions generally felt tricky.
​If I had one criticism of the game; it's the excommunication tiles, they feel negative, but I guess that's the point of them.

If someone wanted to play this, I'd have no qualms joining in. It's not one of my favourites, but it's still enjoyable.

If you have a hankering for a heavy-ish worker placement game set in Renaissance Italy, you'll probably like this.
0 Comments

Railroad Ink

5/7/2021

0 Comments

 
4th July 2021

It's a Sunday evening and I'm logged into Board Game Arena. the next game of the night is Railroad Ink. Do you spend a lot of time coming and going? Because that's what you'll be doing in Railroad Ink.

Caveat: we've only ever played Railroad Ink digitally online. Additionally, we've only played the basic version of Railroad Ink Blue without the rives and lakes dice.

What's in a game?
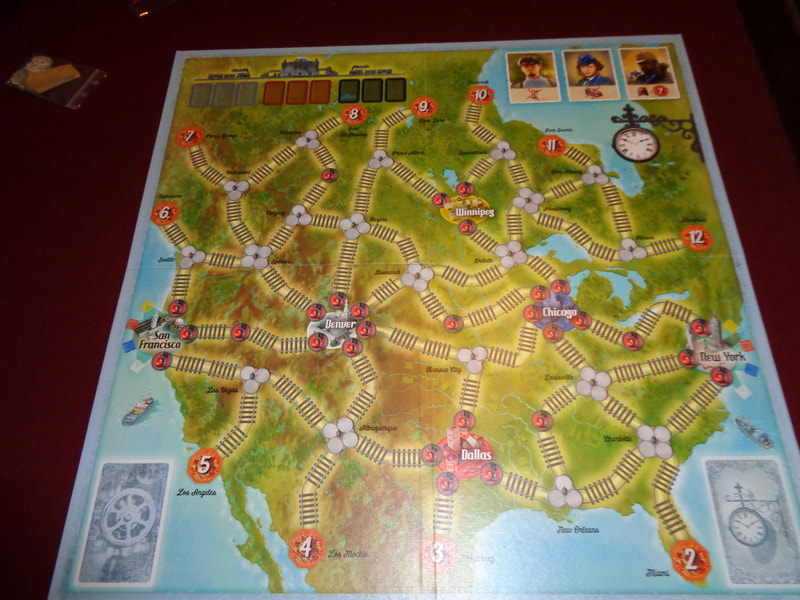
  • Game board: Railroad Ink has a game board for each player.
    Most of the game board is taken up with a 7x7 square grid, along each of the 4 outside edges of the grid are 3 exits, 12 in total and they alternate between railway lines and roads.
    Above that is some space for calculating and tracking scores.
    Up further are illustrations of all the possible results on the standard route dice.
    Finally, at the top are depictions of the game's 6 special routes. These are not actually dice that are rolled in game, but represent different types of routes and stations that a player can make use of.
  • Route dice: These six-siders don't have numbers, instead each face shows one of various different types of rail and road routes. Railroad Ink has 2 different types of route dice, 3 of one kind and 1 of the other, which makes 4 route dice in total.
    Type 1: These dice depict the following different routes that players can use on their board:
    A straight.
    A 90' turn
    A T-junction.
    They are depicted once each for both railways and roads, thus six times in total.
    Type 2: This die only has 3 symbols, each of which is printed on 2 of the die's faces. The routes depicted here are a little more specialised.
    Overpass: This allows a railway and a road to cross over each other (They do not connect.).
    Straight station: A station allows a route to change from a railway to a road or vice-versa.
    Curved station: A 90' turn that's also a station which allows transfers between railways and roads across the turn.
  • Rivers and lakes dice: These special dice can be introduced into games to add some extra complexity. We never made use of them.
That's pretty much it for the components.
Since we only played railroad Ink digitally, there's not much that can be said about the quality of the components.
Neither does the game have any significant artwork to speak of, the boards look bright and cheery, but that's about it.

Picture
An example of connections and scoring.

How's it play?
​Setup
  • Each player is given a player board and well.... that's it!
On to play
​Railroad Ink is played simultaneously by all players over 7 rounds.
  • Roll: All 4 route dice all rolled and thus 4 routes will be shown.
  • And Write: All players must draw all 4 routes on their game board according to the results of the dice roll. There are specific rules when doing this as explained below:
    Connection: At least 1 part of a route must connect to either; an exit at the edge of the grid, or a pre-existing route, this connection must be of the correct kind, i.e., rail-to-rail or road-to-road.
    When drawing the route, the dice result may be rotated into any orientation, or flipped/mirrored.
    ​Special routes: Each special route is a 4-way connection and can only be used once per game, furthermore, a player may only use 1 special route per round and total of 3 special routes in a game.
That's it for rules, pretty straightforward.

Endgame
Once all 7 rounds have been completed, the game goes to scoring.
Railway: Each player scores their single longest unbroken railway line, gaining 1 point per connected square.
Road: Each player scores their single longest unbroken road, also at 1 point per connected square.
Centre: Each of the 9 central squares on the grid scores the player an additional point for a railway or road that runs through it.

Exits: Each player scores their single biggest network of connected exits, it scores differently to railways and roads and there's a chart to calculate this. Generally each exit in the network scores 4 points, except if you manage to connect the 12th and final exit, which scores 5 instead!
Dead end: Each player loses a point for each route that is a dead-end, i.e. does not connect to anything or does not connect to the edge of the grid (does not necessarily need to be one of the 12 exits though.).
Final amounts are tallied, highest score wins!

Overall
Railroad Ink is a game that hits that sweet-spot between rules-simplicity and depth-of-choice that has good potential crossover appeal to non-gamers.
From the relatively short length of this blog, you can see that it's an easy game to learn, consisting mostly of; well, drawing what you see!

However, it also gives players lots of choices, all of which will have impact right from the start of the game. The game's grid has 49 spaces and the maximum that can be filled in (In a basic game!) is 31, enough room to manoeuvre and also enough room to commit error.
Players must try to maximise networks and connections and also minimise their potential losses. This involves equally trying to anticipate what they need and also adapting to rolls that don't give them that.
It's a game of shifting optimisation.

Railroad Ink has a lot of randomness and for gamers who like strategizing, this can be an anathema, but in Railroad Ink, the randomness is partially mitigated because it more or less affects everyone equally, i.e., everyone uses the same dice results.
Obviously one player may be luckier than another if the rolls go their way, but it never feels like the dice are treating you worse for you than any other player. Ultimately, despite the dice rolls, it feels like player decisions are still of paramount, finding a way to use a route die that initially seemed bad can be satisfying and it's this blend of randomness and decision-making is what I like about Railroad Ink.
0 Comments

Pandemic

27/6/2021

0 Comments

 
27th June 2021

​Sunday is here and I'm logged into Board Game Arena.

Playing board games is a great way to escape your troubles and ignore what's been happening outside your window and across the globe for the past 2 years and to do that, we chose to play a game about not 1 pandemic, but 4 of them!
The first game of the evening was Pandemic.


What's in a game?
  • Board: The board depicts a map of the Earth with a network of 48 interconnected cities spread across it and split into 4 differently coloured regions, red, blue, black and yellow.
    Outbreak track: As outbreaks occur, a marker moves along this track, when it reaches the final space.... well you get the idea.
    Infection track: As the game progresses, the rate at which new infections appear will increase as tracked on this board. In game terms, it determines how many infection cards are drawn during the infection stage, ranging from 2-4 cards.
    There are also spaces for the infection deck and player decks.
    Finally there's space for the cure markers.
  • Role cards: There are 7 differently coloured role cards, as you might expect, each one has it's own role and unique special ability.
  • Pawns: There are 7 of these and they correspond to the 7 role cards.
  • City cards: There are 48 city cards, one for each city, city cards come in the same 4 colours of their relevant cities
  • Event cards: There are 5 event cards, when used, they provide players with a one-off benefit.
  • Epidemic cards: These cards increase the game's infection rate and also trigger some other nasty effects.
  • Infection cards: There are 48 infection cards, one for each city and in the same 4 matching colours as city cards.
  • Disease cubes: These translucent cubes come in the 4 colours to represent the 4 different diseases, there are 24 in each colour and thus 96 in total.
  • Research stations: There are 6 of these little 3D models.
  • Cure markers: These jar-shaped, double sided chunky plastic markers are used to indicate when one of the diseases has been cured or eradicated.
  • Tokens: Used to track outbreak and infection rate.

The components in Pandemic are all of a reasonable quality as you would expect, nothing feels particularly cheap. The pawns are made of plastic and not wood, but that's a trivial quibble. The other markers are constructed of satisfyingly thick plastic.
The plastic 3D research stations are a nice touch as are the colourful, translucent, acrylic disease cubes, it also makes them easier to pick up and move - which for the cubes will occur frequently.
Artwork on the board is functional more than pretty, which is fine and everything's easy to understand, the same is true of city and infection cards which show locations on the board as opposed to containing illustrations.
​The small amount of artwork in the game mostly appears on role cards, which each have a good quality unique illustration that depicts their role, event cards also contain some unique artwork.


How's it play?
Setup
  • Shuffle the infection deck and place it face-down on the board.
    ​Draw 3 cards and place 3 disease cubes on to each city in the colour that matches each city.
    Draw 3 more cards and place 2 matching disease tokens on to those cities.
    Finally, draw another 3 cards and place a single matching disease cube on to each of those cities.
    All 9 cards should be placed into the infection deck's discard pile
  • Randomly deal a role card to face-up to each player and then give them the corresponding pawn, all pawns should be placed on the Atlanta space on the board.
  • Shuffle the city cards and event cards face-down to form the player deck and deal 2-4 cards to each player, depending on player count.
  • Pandemic uses 3 difficulty settings; easy, medium and hard, this is determined by the number of epidemic cards used, from 4 for the easiest to 6 for the hardest.
    Players should decide on which difficulty to use and select that many epidemic cards.
    ​Then take the player deck and divide it into a number of stacks equal to the number of epidemic cards being used, each stack should as close to an equal number of cards as possible. Now shuffle an epidemic card into each stack and place the stacks on top of each other into a single player deck, the epidemic cards should now be more or less equally distributed throughout the player deck. Place the player deck on the board.
  • Place on the outbreak and infection rate markers on the board in their starting positions and that's about it.
On to play
The turn structure for Pandemic is as follows: The active player has their turn, which consists of 4 actions, then they draw 2 cards from the player deck, finally the 'board' has its go. Once all of this has been completed, the player to the left becomes the active player.
  • Actions: The active player has 4 actions and can spend actions to perform the actions below.
    Move: Spend an action to move to a linked adjacent city.
    Play card: The active player may discard a city card to move to that city or if the card matches the city their pawn is currently on, then it can be discarded to move to any city. This always costs an action and the card must be discarded.
    Research station: For an action point, the active player can move between 2 research station, regardless of their positions on the board.
    Pass card: If the active player and any other player have their pawns on the same city, a player card may be passed between them for an action, provided it matches the location they are on.
    ​Build research station: To build the research station, the active player must discard the city card that matches the city they are on and also spend an action, place a research station token on that location.
    Treat disease: For an action, the active player may remove a disease cube from their current location.
    Cure disease: If the active player has 5 city cards of the same colour and they are currently on a location also has a research station, they can discard those cards and use a action to cure the disease of the matching colour.
    A cured disease can still spread, but is now much easier to cure - an action can be spent to remove all disease cubes of that colour from a city instead of a single cube. Once all the disease cubes for a cured disease have been removed from a board, then that disease has been eradicated and won't return this game.
    Special ability: Some special abilities require the spending of an action to use.
    Event cards: Playing an event card doesn't cost an action, furthermore any player can play one in any player's turn unless a card has been drawn but not resolved.
    Hand limit: It's worth mentioning that all players have a hand limit of 7, any cards above this number must be discarded or possibly played in the case of an event card.
    ​You will have no doubt noticed that needing 5 cards of a single colour out of a hand of 7 means that players will forced to discard other cards frequently in pursuit of their objective. This is par for the course for a Pandemic game.
  • Draw cards: Once the active player has finished their 4 actions, they must draw 2 cards from the player deck, if these are city or event cards, then it's all good. If however, it includes an epidemic card, things just went south.
    Epidemic Card: When an epidemic card is drawn, 3 events will be triggered.
    Increase rate: Move the marker 1 space along the infection rate track, this may increase the number of cards drawn during the infection stage.
    Epidemic infection: Draw a card from the bottom of the infection deck and increase the number of cubes of the corresponding colour on the revealed location to 3, if the location already contains cubes, an outbreak will occur (See below for more on outbreaks.).
    Resupply infection deck: Take all the cards in the infection deck's discard pile (Including the one just drawn from the bottom of the deck.) and shuffle them, then place them face-down on top of the infection deck, do not shuffle the unrevealed cards in the infection deck.
    In game terms, this means that cities that have already experienced infection will experience it again before other cities. The pressure is on!
  • Infect: Draw a number of cards from the infection deck equal to the infection rate, add a disease cube in the card's colour to each revealed city. Cities cannot hold more than 3 cubes of each colour, if a disease cube would be added to a city that already has 3 cubes in that colour, don't add the cube, instead an outbreak occurs.
    All revealed cards should then be discarded.
    Outbreak: When an outbreak occurs, 2 events will be triggered
    Marker: Move the marker on the outbreak track along by 1 space when an outbreak occurs.
    Expansion: Next, add a disease cube of the outbreak's colour to every adjacent connected city, if an adjacent city already 3 cubes in that colour, then another outbreak occurs, thus multiple outbreaks may and probably will happen, however, a city can only experience 1 outbreak per infection card drawn.
Play then progresses to the player on the left.


Endgame
Play continues until one of the following conditions is met.
If the marker on the outbreak track reaches its 8th and final space; the players collectively lose.
If, at any time a disease cube needs to be added to the board and none are available in that colour; the players lose.
If a player needs to draw 2 cards from the player deck and cannot do so because none or only one is available.... you guessed it; the players lose.
If all 4 diseases are cured, then the players immediately win. Diseases do not need to be eradicated in order to win.


Overall
Well, Pandemic.... what's there to say about this game?
​Pandemic is a pillar of modern cooperative games that has been followed up not only by a slew of expansions and spinoffs, but also a number of differently themed games such as Horrified that employ similar mechanics.
Some of Pandemic's elements and mechanics may seem a bit trite nowadays, but that's simply because they're part of a game that popularised those mechanics in the first place and is a testament to Pandemic's longevity and influence.

Pandemic utilises the tried-and-tested game flow of alternating between player turns and card-driven board actions in a game that is a globe-trotting race against time. In a turn, players are faced with the difficult choice of trying to stem the spread of the 4 diseases or instead trying to interact with the other players and swap the cards necessary to cure those diseases. Ultimately, players will need to find a balance between the two approaches.
As with other cooperative games, bad luck may play a major role in Pandemic and mitigating that bad luck is vital to winning.
Decisive actions, recognising priorities and acting on them are also vital to success, as are knowing when to use role special abilities.
Pandemic is also hard, I think this comes down to Pandemic's rules for swapping city cards between players which requires them to be in that card's city in order to do so. It's unlikely players will be able to collect 5 cards of single colour on their own so coordination between players is vital.
We
've played a few of the iterations that followed Pandemic and it always felt like this rule has been softened a little. Is that as bad thing, I suspect YMMV?


Pandemic does a good job at evoking the feel of a spreading global crisis and the desperate worldwide fight to contain it.

I have to admit, considering the events of the past 2 years, we haven't had much compulsion to play Pandemic. Even so and despite the difficulty, I feel that if you like cooperative games, it's still worth playing, it challenges players with making difficult decisions at nearly every avenue and is satisfying to win.
0 Comments

Pandemic Legacy: Season 0

5/6/2021

0 Comments

 
4th June 2021

It's Friday evening and we're logged into Tabletopia.
This evening we will be playing the first part of Pandemic Legacy: season 0. Time to battle the Soviets to save the world during the height of the 60's cold war.

Caveat: we've only played this game digitally online.
Caveat No. 2: This is a legacy game and we only played the prologue, so I'm not going to blog about it at length.

What's in a game?
Season 0 is a prequel to the other Pandemic Legacy games, none of which I've played.
If you've ever played a Pandemic style game before, then a lot of this will be familiar to you.
  • Game board: Depicts a number of interconnected cities and population centres across the globe. Unlike the traditional Pandemic board, all locations here are divided into Allied, Neutral or Soviet. Locations may also contain surveillance symbols.
    The Board also has spaces for the threat deck and the player deck as well as a threat level track.
  • Threat deck: All the Locations from the board will appear on cards in this deck and it's used to manage the influence of the Soviet agent network.
    Threat cards each also have a incident printed on the bottom which can adversely affect the players, more on this below.
  • Location cards: These cards form the majority of the player deck. Location cards have a region and a allied, neutral, Soviet affiliation as well as a location.
  • Event cards: These are also added to the player deck, event cards can be used in any player's turn and do not cost action points. Event cards always confer some kind of benefit.
    Escalation cards: These are shuffled into to the player deck, when a escaltion card is revealed, it means bad news for the players.
  • Alias cards: These give each player an individual role to play.
  • Agent figures: These are placed on the board to represent Soviet agents.
  • Safehouse models: Can be constructed by the players.
  • Team models: Teams can be assembled by the players, they have 1 of 3 types of 'cover' they use, Allied, Neutral and Soviet.
  • Incident markers: Used to track incidents, which are explained below.
The game has plethora of other components including passports, the physical game even includes stickers to place in passports to create aliases.
There's also a lot of components to deal with the legacy element of the game.

Picture
An alias.
Picture
Event & location cards.
Picture
Jakarta filled with agents, a safehouse & team nearby.
Picture
An agent appears in L.A., also notice the level 3 surveillance in Moscow.

How's it play?
Setup
The setup for Pandemic Legacy: season 0 will differ for each scenario as they have their won objectives, but will include the following:
  • Aliases: Each player creates their alias as required.
  • Player deck: Create the player deck and deal 4 cards to each player, then add escalation cards to the deck as required. This deck will contain a mixture of location, event and escalation cards.
  • Threat deck: Shuffle the threat deck and deal 3 cards, place 3 agents in the locations revealed by the threat cards. Reveal 3 more cards and add 2 agents to those locations and finally, reveal 3 more cards and add 1 agent to those.
On to play
Players of other Pandemic games will recognise most of the play mechanics. There are some other elements, but mostly during their turn, the active player will have 4 actions points to spend and their turn goes as follows:
  • Check Surveillance: This is unique to Pandemic Legacy: Season 0, if a player's character is in a city with a surveillance symbol at the start of their turn, then it affects their cover, which can be blown, which in turn will have ramifications.
  • Spend action points: The active player will have 4 actions points to spend on the following actions.
    Move: The active player may move their character to a linked adjacent location for an action point.
    Use location card: They may reveal a allied location card to move to that location, or discard a neutral card to move to its location, this cannot be done with Soviet city. Finally, if the active player has a location card that matches their current location, then it can be discarded to move to any location, including Soviet locations.
    Neutralise agent: For an action point, the active player may remove a Soviet agent figure from their current location.
    Share cards: The active player may give a card to or take a card from another player in the same location as them, provided the card's location also matches their location.
    Build safehouse: The active player can discard the location card for their current location to build a safehouse, a safehouse is required for a couple of other actions.
    Identify target city: When at a safehouse, the active player can discard 3 location cards with regions that match the current region to identify a target city, this is required to complete objectives.
    Create team: There are allied, neutral and Soviet teams, these represent their cover and which respective affiliated locations they can be active in.
    To create a team, the active player must be at a safehouse, to create a allied team they must discard 5 allied cards, for a neutral team 5 neutral cards and for a Soviet team, 5 Soviet cards.
    Move team: The active player may move a team to an adjacent location.
    Acquire target: An active team may acquire a target in their location as per the mission's requirements and may meet objectives.
  • Mop up: Active teams automatically remove all Soviet agents from their current location.
  • Draw 2 player cards: If location or event cards are drawn, then it's all good. However, if a escalation card is drawn, several actions occur, the threat level is increased, a new threat location is introduced and discarded threat cards are shuffled back on the top threat deck.
  • Draw threat cards: The number of threat cards drawn is dependant on the threat level.
    When a threat card is drawn, add a Soviet agent to it's location, if there are already 3 agents on the location, then do not add another agent, instead an incident will occur.
    Incident: Draw a card from the bottom of the threat deck and carry out the incident printed on it.
Play then progresses to the player to the left and continues until the endgame is triggered.

Endgame
Each mission will have it's own unique objectives to complete, when they are all either completed or failed, the mission immediately ends.
Missions will also immediately end if the following criteria is met:
Cards cannot be drawn from the player deck.
There are no more agent figures that can be used.
There are no more incident markers that can be used. 
If the mission ends and there are any incomplete objectives, they are marked as failed.
Then players will be rated as succeeding, adequate or failing, this will have an affect on later missions.
Incidents that occurred during a mission will impact the board for later missions as well.

There are 12 missions played over a period of 12 months, making it a busy year. There will also be numerous other actions will occur with regard to further missions, this being a legacy game.

Picture
Game board at start.
Picture
Example of the game's branching narrative.

Overall
I'll start by saying that I know some people gush over legacy games, but I've not really played much of any legacy games and I'm pretty ambivalent towards them.
I understand the appeal of an evolving game where player decisions have an impact on further games over time. At the same time, I'm so sure about a game where you have to play it 12 or 20 times to get the most out of it.
Anyway; since I've not played the legacy components of Season 0, I'm not really going to blog about them, instead I can write my thoughts about the general mechanics of the game.

​If you've played a Pandemic style game, then a lot of this will be familiar. It has the same, recognisable gameplay elements of racing against time and having to make difficult meaningful decisions to balance completing objectives with firefighting the spread of in this particular incarnation, Soviet agents.
Like all cooperative games I've played, mitigating bad luck is a key component to succeeding.

Reskinning Pandemic's mechanics for Season 0 could have been lazy and bad, but actually, they work and fit the theme pretty well, the changes introduce interesting concepts, although some of the changes only apply to long term play.
The addition of teams is an inspired change, instead of running around and doing actions myself, I could instruct teams of agents to do it, provided they had the correct aliases of course. Not only did it give players and extra decision to manage, it made me feel more of a spymaster than a spy, which I found quite appealing, it gave the impression that more was going on at any one time, it made the game feel bigger and that's good.
These changes differentiate Season 0 from Pandemic, but is it enough of a change to justify owning both? For me, as an owner of the original Pandemic; I'd say no. Would I play someone else's copy? Probably.
I have to say it would cool to have seen the agent mechanics employed in a standard spy-themed Pandemic game.
If you're a big player of legacy games and can commit to them, it's definitely worth a look. If you're also a fan of Pandemic, it might also be for you.
0 Comments

Horrified

30/5/2021

0 Comments

 
28th May 2021

It's a Friday night and we've met up at Simon's for some impromptu gaming.

Have you ever had the urge to run around being chased by Dracula? Or The Wolfman, or any other of the Universal movie monsters in a cooperative turn based race against time to defeat them? Then welcome to Horrified.

What's in a game?
Horrified is a cooperative board game in the vein of games such as Pandemic and has some loosely similar rules.
  • Board: The main game board depicts what looks like a city but is actually supposed to be a village! It contains a network of roads that link together about 20 suitability inspired locations, such as crypts, museums, docks and laboratories, that's quite a village! It also has a number of linked water based such as a lagoon or a waterfront!
    The board also contains the terror track (Explained below.).
  • Monster tiles: There are 6 monster tiles, one for each of the monsters except for Frankenstein's monster and his bride who come as a pair.
    Each tile depicts the special rules for that monster as well as the unique objectives by which it can be vanquished.
    Each tile also has some additional unique game components specific to each board such as coffin markers for Dracula, or the cure for The Wolfman, this includes overlay tiles for some monsters that change a location on the game board.
  • Monster figures: The game comes with 7 models to represent the fiendish monsters that the players will be trying to defeat. Among their numbers you'll find Dracula, The Invisible Man, The Mummy and other monsters from the classic Universal movie monsters.
  • Character tiles: Just as there are 7 monster models, so there are 7 character tiles. Each character will have a different special ability and 3-5 action points.
  • Character standees: Each of the 7 characters will have their own standee.
  • Villager standees: No respectable game about nefarious, evil monsters would be complete without hapless villagers for them to prey on. There are 10 villager standees.
  • Monster cards: A deck of 30 monster cards used to manage monster behaviour that also serves a countdown timer.
  • Perk cards: These cards can be acquired by players and can be played in any player's turn to provide some sort of benefit. There are 20 perk cards.
  • Terror marker: Used in conjunction with the terror track.
  • Frenzy marker: Used to track which monster is currently frenzied!
  • Item tokens: There are 3 types of token, red, blue & yellow, each one is rated in strength from 1-6. Each token also shows in which location on the game board it will appear. Red items are weapons, blue are scientific and yellow are supernatural. Some locations will only get items of one colour, other locations will get differently coloured tokens.
  • Draw bag: Used to blindly draw item tokens.
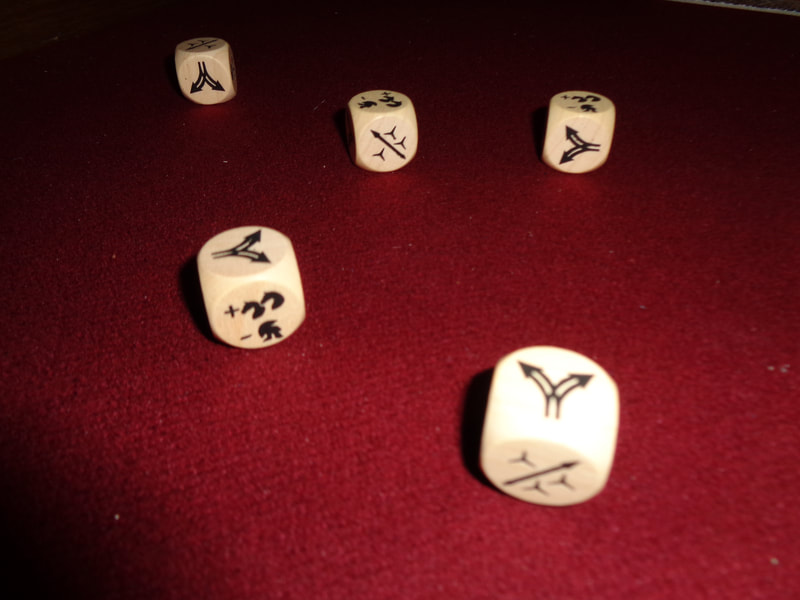
  • Dice: 3 identical black 6 siders, but not ordinary ones, 2 sides have an exclamation marks (Power symbol.), 2 have 'hit' symbols and the last 2 sides are blank.
That's it for the most important components, there's no need to list all the small bits that are associated with the monster tiles.
The monster figures seem good quality and stand about 32mm high. All the tiles and tokens are made of suitability thick cardstock, the standees are also fine. The quality of the 2 decks of cards what you'd expect.
​
The game's art is universally good, I particularly liked the board which is eye-catchingly coloured in blue and yellow.
All the art used on the monster components is also excellent, wisely drawing inspiration from its iconic source material, this includes the monster figures which are reasonably sculpted for game pieces and easily recognisable by anyone who knows their universal monsters.
Art on the other tiles, character and villager standees is also good, the same is true for the monster & perk cards.
Item tokens only feature monochrome illustrations and that's fine since the tokens are quite small and there will generally be a lot of them. Besides, just how exciting can you make a clove of garlic or a pitchfork look?

Picture
We Warned You!
Picture
Setup rules & standees.
Picture
The Heroes: Character tiles and their respective standees.
Picture
The Monsters: Creature from The Black Lagoon, Dracula & The Invisible Man.

How's it play?
In Horrified, players are tasked with travelling round the board to collect item tokens and use them to complete tasks to make monsters vulnerable, then they can be defeated. All the while, the players must avoid the monsters and also protect the very hapless villagers.
Setup
  • Put out the game board and either choose or randomly select 2-4 monsters, depending on the desired difficulty. The tiles must be placed in a specific sequence according to the value frenzy order on each tile, going from left to right and lowest value to highest, the frenzy marker is placed on the tile with the lowest frenzy order. Although it can move to another monster during play.
    Each monster also has it's own unique setup that may require putting overlays or markers on the game board or even the monster tile itself.
    The monster figures should be placed on their starting space.
    Place the terror tracker on the 0 space.
  • Shuffle the monster cards into a face-down deck.
  • Either choose or randomly select a character tile for each player. Each player should also take the associated standee and place it in the character's respective starting location.
  • Shuffle the perk cards into a face-down deck, deal one to each player.
  • Blindly draw 12 item tokens from the bag and place them on to their respective locations on the game board.
Now we're ready to go.

Picture
Dracula & The Creature from The Black Lagoon are the recommend monsters for the first game. Note that 4 coffins must be destroyed to make Dracula vulnerable & a maze that must be navigated in order to weaken The Creature.
Picture
The board at game start, note Dracula's 4 coffins distributed throughout the board and the overlay on the camp space at the top of the board which leads to The Creature's maze.

On to play
When the active player has their turn, it will be split into a character turn and then a monster turn.
Character turn
Let's start with the character's turn, each character will have 3-5 action points to that the player may spend per turn, they can be spent as follows:
  • Move: Spending an action point allows a character to move to an adjacent location. Characters cannot move along the water pathways or to the water locations.
    If a character has 1 or more villagers with them on the same location, then they can drag the villager(s) along with them when they move.
  • Guide villager: If a villager is in the same location as the active character, then the villager can be directed to move to an adjacent location for the cost of an action point. Conversely, if a village is in a location adjacent to the active character, then an action point can be spent to bring them to the character's space.
    Villagers are affected by the same movement restrictions as characters.
  • Collect: The active player's character may pick up all the item tokens in a location for an action point.
  • Share items: For a action point, all characters on the same location as the active player mat share any number of item tokens between themselves.
  • Objective: If the conditions are correct; for the cost of an action point, the active character may work towards completing the objective required to make a monster vulnerable, this will require spending item tokens, often the effectiveness of the advance will be increased by higher valued tokens. It's very likely that players will have to take this action multiple times to complete each monster's objective.
  • Vanquish monster: It takes an action to defeat a monster once it's objective has been met. The active character must be in the same space as the target monster. It will also require spending tokens as specified.
  • Special action: At the cost of an action point, the active character may use their special action.
  • Perk cards: it does not require an action point to use a perk card. A perk card can be used in any player's turn.
Monster turn
The monster turn is dictated by the monster card which is drawn. Each monster card has 3 elements to it.
  • Items: The number displayed at the top of a monster card determines how many item tokens are blindly drawn and placed on to their relevant locations on the board.
  • Event: Each card has an event, if it's a villager, then the named villager is placed on the specified location on the board.
    If it's for one of the monsters in the game, then that event is carried out, events for monsters not in the current game are ignored.
  • Monster actions: This is the most complicated part of the monster turn and comes in 2 parts.
    The first part lists which monsters are active on this turn (In that order.), obviously only monsters used in the game become active. It also displays if frenzy applies this turn, what's frenzy? More on that below.
    The second part lists how locations they move and how many dice they use in combat.
    Movement: Monsters move towards the closest prey but will target characters over villagers. Only The Creature can use the water paths and locations, the other monsters follow the same restrictions as the characters.
    Combat: If a monster ends it's movement in the same location as a character or villager, then combat ensues, monsters always attack characters over villagers.
    When attacking a character, the active player rolls 1-3 dice as specified.
    Blanks: Every blank that comes up is a miss, good for the character.
    Hits: Every die that comes up with a hit result means trouble the character, a character may discard a item token to negate a hit, multiple item tokens would be needed to negate multiple hits. If a character takes even a single hit, then they are defeated and placed on the hospital space. When a character is sent to the hospital, increase the marker on the terror track by 1.
    Power: Each result power symbol that comes up will trigger the active monster's special power. Probably not good for the character.
    Villager: If a monster attacks a villager, no dice are rolled, the villager is automatically defeated and meets their fate. Hapless! Additionally, if a villager is defeated, then increase the marker on the terror track by 1.
    Frenzy: If the monster card has a frenzy symbol on the monster actions section, then whichever monster currently has the frenzy token on it gets activated, it's possible that a monster may be activated twice!
So that's it for the monster turn, but one last thing needs to be explained.
  • Villagers: Villagers are dropped on to the game board by monster cards. Each villager wants to get to a specific location. If an active character manages to escort the villager there, then the player can draw a card from the perk deck.

Picture
Turning the tables on The Creature!
Picture
Combat dice.

Endgame
Horrified has 2 ways to lose.
If the marker on the terror track reaches 7, then everyone flees the village in errrr, well terror!
If, when it comes to a monster turn and there're no monster card to draw, then time has run out and it's game over! Monster overrun everything.
Players win the game by completing the objective for each monster and then vanquishing all monsters.

Picture
Board at a victorious game end.
Picture
The terror marker reached 7!

Overall
Horrified uses some interesting mechanics that set it apart from similar games.
The asymmetrical objectives that need completing for the different monsters is genuinely inspired game design.
Objectives like curing The Wolfman, solving The Mummy's sliding puzzle or proving the existence of The Invisible Man thematically it fits the monsters and mechanically it adds variety and longevity to the game.
The damage mechanic is also an excellent idea; forcing players to choose which item(s) to discard can be a meaningful and painful decision, choosing either to lose an important token that is needed or a high value other token is tough. It also does away with the need to track health or hit points.
Villagers too, are a good addition, keeping them alive can be a burden, but is also vital to keeping the terror track under control. If character manages to escort a villager to safety, then the reward is a perk card. Perk cards can be extremely useful and turn things around when played at the right time, they can be game winners.

Horrified is a little bit less finicky than it's counterparts but that doesn't make it an easy game, whenever we've won, it was only with a couple of actions in hand and when we've lost, it's been by a few actions as well.
Like every other cooperative game I've played, Horrified uses luck - or bad luck more precisely, to provide a challenge to the players, some bad dice rolls or an unfortunate monster card draw can really throw a spanner in the works. Like all those other cooperative games, how players manage the bad luck is important to victory.
Furthermore, every decision has to count, Horrified is a tightly balanced game. Since there are only 30 monster cards, that means that players basically have 30 turns to win, or on average 120 actions to spend. There's scant time to waste.

Horrified is a fairly accessible, fun to play and well presented game. It's one of the best cooperative games I've played and I'm to play it again.
0 Comments

Draftosaurus

23/5/2021

0 Comments

 
23rd May 2021

It's Sunday evening and I'm logged into Skype and Board Game Arena​ on my PC and it's time for the final game of the day.

Drafting. Rawr! Dinosaurs. Rawr! T-rexes. Rawr!
Draftosaurus has it all, drafting and well... you get the idea. This is a game where scientists have discovered how to clone dinosaurs and now parks of them are opening everywhere, all in a completely non-copyright infringing manner of course!

Caveat: We've only played Draftosaurus digitally online.

What's in a game?
  • Player boards: These boards are double-sided and each provide a slightly different game experience/difficulty. The 'summer' side is easier than the 'winter' side.
    Player boards represent zoos and are divided up into 4 different 'areas'; the grassland and woodland regions and left & right sides of the river, each area contains 3 dinosaur pens. There's some crossover between areas, so grasslands will be found on both side of the river for example and every pen is in 2 different areas, there are a total 6 pens. The player boards also have a 7th area called 'The River', this isn't a pen.
    This is true of both sides of the player boards.
  • Dinosaur meeples: There are 6 types of differently coloured dinosaur in the game and 10 meeples of each type, including t-rexes!
  • Placement die: This is a 6-sided die, each face has a unique symbol.
Artwork on the player boards is colourful and clear.
There's not much more I can say, I can't talk about the physical components which also include a draw bag.

How's it play?
Draftosaurus is about placing dinosaur meeples into the pens, different pens have different requirements, which is explained below.
Setup
  • In the physical game, meeples would be placed into the draw bag, the amount is dependent on the number of players.
  • ​Give each player a player board, all boards should be placed on the same side.
  • Determine the starting player and give them the placement die, they are the current active player.
Draftosaurus is played over 2 rounds and each round consists of 6 turns, thus each player will get to place a total 12 dinosaur meeples. Turns may and probably will play out differently for players other than the active player.
  • Draw meeples: At the start of each round all players draw 6 dinosaur meeples, these should be kept secret by each player.
  • Roll placement die: The active player should roll the placement die, the die's result will determine where the other players may place a dinosaur meeple (See below for info.).
    Conversely, the active player can place a dinosaur meeple into any pen they choose.
  • Place dinosaur meeple: All players choose a meeple and simultaneously play it, other than the active player, all players must place their meeples as dictated by the placement die.
    ​​Woodland: Other players must place a meeple into 1 of the 3 pens in the woodland area of their board.
    Grassland: Other players must place a meeple into 1 of the 3 pens in the grassland area of their board.
    Left of river: Other players must place a meeple into 1 of the 3 pens that are left of the river.
    Right of river: Other players must place a meeple into 1 of the 3 pens that are right of the river.
    Empty Pen: Other players must place a dinosaur meeple into any empty pen on their board.
    ​Not with a t-rex: Other players can place a dinosaur meeple into any pen that does not contain a t-rex.
    Different pens have different set collecting requirements to score points, one pen requires all the dinosaurs in it to be identical, another requires them to all be different or another only scores for identical pairs and so on, there are 12 different ways to collect and score sets across both sides of the board. Generally, the more you complete a set, the more you score for it.
    Players can choose to (Or may have to!) place meeples in the river, which scores each meeple a flat +1 point.
    T-rexes score bonus points, but depending on the placement die, can cause trouble.
  • Pass dinosaur meeples: Once players have placed their chosen dinosaur meeples, every player must pass their remaining meeples to the player to their left.
  • Pass placement die: The active player passes the placement die to the player on their left who will become the active player in the next turn.
Play continues until all players have placed 6 dinosaur meeples, then players draw another 6 and play resumes as explained above until another 6 meeples have been placed.

Endgame
Once the 12th and final dinosaur meeple has been placed by all players, the endgame is triggered.
​Players score all of the sets they've created on their board, plus any bonuses or penalties. Highest score wins.

Picture
Picture

Overall
When playing Draftosaurus, more often than not, players will find themselves having to place meeples into unexpected pens thanks to the placement die. Without this element, the game would be too predictable.
How players deal with, manage and anticipate these these situations is key to victory. Often there will be a conflict between which set to increase or start on and keeping a pen open for another type of dinosaur.
It also pays to try and remember which dinosaur meeples will be coming round.
The winter side of the board makes it harder to collect different sets and provides more challenge but somehow a little less fun?

It's hard to find a lot more to say about Draftosaurus, it's quick, fairly light game to learn and play that's also quite luck based. If you don't like this sort of game, Draftosaurus will probably infuriate you. I think that maybe it's a bit too luck based for me to play extensively.

Not taken too seriously and played as a filler game and Draftosaurus is a reasonable diversion.
0 Comments

Forbidden Island

23/5/2021

0 Comments

 
23rd May 2021

Sunday night game rolls on and I'm logged into Skype and Board Game Arena.

The final game of the night was Forbidden Island: A cooperative race against time to escape a mysterious island about to be swallowed by the ocean.

Forbidden Island is the older sibling of Forbidden Desert, you can read my blog about it here.

Caveat: We played the game digitally but in the past have played the physical game.

What's in a game?
  • ​Tiles: There are 24 square tiles, each one has an illustration that depicts a different location or landscape. These tiles are also double sided, one side features full colour, while the other has a monochrome blue and white illustration of the same subject. 8 of the tiles also display symbols that relate to the 4 figurines (More on figurines below.).
    These tiles are used to represent the titular island.
  • Flood cards: These 24 cards correspond to the 24 island tiles. Each flood card has an identical image to the island tile it represents.
  • Treasure cards: There are 4 types of treasure card that correspond to the 4 elements, fire, earth, water & air. There are 5 of each type, thus 20 in total.
    Also included among treasure cards are special cards, there are 3 types, Helicopter lift, Sandbag & Waters Rise!
  • Player cards: Each player assumes a different role in the game, these 6 different coloured cards explain each role's special ability.
  • Pawns: There are 6 differently coloured pawns that correspond with the 6 player cards.
  • Figurines: There are 4 figurines, each one is a stylised representation of 1 of the 4 elements and are the game's objectives/treasures.
  • Standee: Used to track the rising water level and increasing frequency of flooding that occurs throughout the game.
All the components are made to a level of quality that you'd expect from a modern game. The tiles and standee are appropriately thick, pawns are equally solid, the figurines are fairly chunky and weighty.
Eye-catching, good quality artwork is used on the flood cards & island tiles, they also come with suitably evocative names such as Temple Of The Moon, Cave Of Embers, Breaker's Bridge and so on. Art on the treasure cards is also good and matches the nicely sculpted figurines.
All-in-all, the components are good.

Picture
Island tile layout at the start of the game.
Picture
Examples of treasure cards & flood cards.

How's it play?
Forbidden Island is a race against time to recover 4 treasures (In the form of the 4 figurines.) and escape the ancient island as it collapses into the ocean waves. Collecting treasures is done by heading to certain locations with a set of cards and acquiring them,
Setup
  • Create Island: The island is randomly created each game by shuffling the 24 island tiles and laying them out in a sort of diamond-shape with their coloured sides face-up, this forms the game's 'board'.
  • Set difficulty: A marker on the standee is used to track the game's constantly increasing difficulty. There are 3 starting 'notches' for the marker that represent the 3 levels levels of difficulty.
  • Begin flooding: The island is already sinking into the ocean as the game begins!
    Shuffle the flood deck and place it face-down, then one-by-one draw 6 cards into the discard pile. For each flood card drawn, flip the corresponding island tile to its blue and white side, these locations are now flooded!
  • Deal player cards: Shuffle the player cards and deal one to each player, then place the corresponding pawn on it's starting location as indicated by the island tiles.
  • Deal treasure cards: Shuffle the treasure cards into a face-down deck and deal 2 to each player.
  • Determine starting order.
On to play
During their turn, the active player will have 3 action points to spend on various actions. Once all players have had a turn, then the game gets to have its turn.
  • Actions: There are 4 actions every player can perform, additionally each character will have a unique special ability they can use at the cost of an action point. Actions may be repeated.
    Move: Spending 1 action to move orthogonally to an adjacent tile.
    Shore up: For each action point spent, the active player may flip they are on or an orthogonally adjacent tile from it's flooded side to its normal side.
    Give a treasure card: If you or more characters are on the same tile, the active player may use an action point to give a treasure card to one of the close by characters.
    ​Acquire a figurine: Each of the 4 figurines has 2 island tiles associated with it; if the active player is on one of those 2 tiles and has 4 matching treasure cards, then they can spend an action to acquire that figurine.
    Use ability: Each character has a unique special ability such as being able to move other characters, or being able to move diagonally. Each use of the special ability costs an action point.
  • Special cards: Of the 3 types special card, 2 make be used by players in any player's turn. The Waters Rise! card is explained elsewhere.
    Helicopter Lift: Can move any number of characters from any one tile to another tile.
    Sandbag: Can be played to shore up any island tile on the board.
  • Draw Treasure cards: Once a player has completed their turn, they draw 2 treasure cards into their hand (Max hand size is 5.). If any of the cards is a Water Rise! card, then this spells trouble for the characters, this affects the flood deck and more on this is explained below.
After every player turn, 'the game' has it's turn, which is done using the flood deck.
  • Waters Rise! Strictly speaking, Waters Rise! cards are resolved at the end of a player's turn, but since it affects the flood deck, I'm explaining it here.
    When the active player draws 2 treasure cards, if any of them are revealed to be a Waters Rise! card, then the following occurs.
    Increase flood level: Put the marker on the water level standee up a notch, this may or may not increase the number of cards that will be drawn.
    Shuffle drawn flood cards: All flood cards that have been drawn are shuffled together and placed on top of the flood deck.
    The Waters Rise! card is discarded into the treasure cards' discard pile.
  • Flooding: Reveal a number of cards from the flood deck equal to the value that the marker that the water level standee is pointing at, this will be 2-5 cards. Each corresponding tile will be affected as follows.
    Flood: If a tile is 'normal' when it's card comes up, then it is flipped to it's flooded side.
    Sink: If a tile is already flooded when its card comes up, then it sinks! The tile and its flood card are removed from play for the remainder of the game. This can potentially prove dangerous to characters on that tile. Furthermore, characters cannot cross 'gaps' created by sunken tiles, unless it is the diver character.
    After this discard all the revealed cards (That did not cause sinking.) into the discard pile.
That's it for the game's actions, play then progresses to the next player and alternates until the endgame is triggered.
If, during play either of the decks is depleted, simply shuffle the discard pile back into a deck.

Endgame
As a cooperative game, the players collectively win or lose. Forbidden Island has several ways to lose and 1 way to win!

There are 9 'critical' island tiles on the board.
Each figurine has 2 tiles which are used to acquire the it, if both tiles for a figurine sink before it is acquired, then it's game over as there's now no way to get that figurine.
Similarly, if the Fool's Landing island tile (Which contains the helipad sinks.), then there's no way to escape and it's also game over.
If a tile with a character on it sinks, the character must swim to an adjacent tile, if there are no adjacent tiles, then unless that character is the diver, they will meet their water end! If any character is lost then it's game over for all players!
Finally, if the marker on the water level reaches the skull & crossbones, then well.... you get the idea. Glub!
​
Winning; easier said than done!
Any single player must collect 4 identical treasure cards, then must reach one of the 2 island tiles associated with that treasure and spend an action to acquire that treasure's figurine. This must be done for all 4 figurines.
That's not the end though, now all the characters must reach the helipad and a Helicopter Lift card must be played by any player to escape to victory.

Picture
Game ends in victory, but it was close!
Picture
An even closer end to a game!

Overall
Like other cooperative games I've played, Forbidden Island injects a dose of luck into the gameplay in order to consistently challenge players and how players manage that luck is key to victory.

Broadly speaking the gameplay is; player shores up island - game tries to sink island - player shores up island and so on. Players have to keep the island a safe as possible long enough to survive and get the cards they need to win the game.
It's not as straightforward as it sounds though, the 3 actions points each player is given to do stuff never seems enough. Players have to choose between working towards objectives or saving the island and the clock is always, always ticking.

The way the flood deck works means that tiles which have already suffered a flood will be more prone to suffering further floods because when a Waters Rise! card appears and refreshes the flood deck, cards that were already revealed are put back on the top of the flood deck, meaning they will be the first to be revealed again.
Obviously protecting the critical island tiles is.... well critical but choosing to protect other tiles is a harder choice. Sure you can allow a unimportant tile at the edge of the board to sink and it won't immediately affect the game, however, when a tile sinks, its flood card is removed from the deck, slimming it down and meaning that flood cards for tiles you are trying to protect will appear more often. Keeping cards in the flood deck can act as a buffer against other parts of the islands sinking, provided you're willing to spend the action points of course....

A hand limit of 5 is also another area of the game which forces players to make decisions, just like action points, the hand limit never seems enough.
It takes 4 cards to gain a figurine, giving player's space for only 1 other card in their hand! Through gritted death, players will frequently have to discard useful cards because they're not useful right now.

To win Forbidden Island, the players will need to cooperate, coordinate and optimise the use of action points, they'll need to make every decisions count and use special cards appropriately and decisively.
Choosing when to let a tile sink or save it, or when and what card to give to another player are all vital decisions and most of the time player's will be forced to make compromises, rarely will their decisions be no-brainers.

I find Forbidden Island to be an enjoyable cooperative game and I'm happy to play it.

Sometimes the luck of the draw can go with and give you a slightly easier time or it screw you over (Nothing like drawing Fool's Landing in the starting 6 flooded tiles, drawing Waters Rise straightaway and watching Fool's Landing immediately sink....).
But if it was always easy or fair, what would be the fun it that?
0 Comments

Stone Age

3/4/2021

0 Comments

 
2nd April 2021

It was a Friday and I was logged into Board Game Arena on my PC.

As the name suggests, Stone Age is a game about the trials and tribulation faced by the inhabitants of prehistoric communities.

Caveat: The digital version of this game was played at this time, but we had played the physical version on previous occasions.

What's in a game?
Stone Age is a worker placement game and at its core takes place on a central game board which is divided into various different locations, into which workers can be placed to activate the associated action. Some locations may contain any amount of workers, others are limited by numbers.
  • Board: A stone age settlement in a wilderness vista is shown on the board, settlement locations are concerned with the advances and inventions and wilderness locations are used for gathering resources. As well as the obligatory scoring track, the board contains the following elements:
    Tool maker: There is only 1 space here for a single worker, using this location allows a player to gain or improve their tools.
    Field: There is also only 1 space herer, this allows a player to increase their tribes agriculture score on the agriculture track.
    Hut: There are 2 spaces here, to utilise the hut a player must place 2 workers on to the 2 spaces at the same time. This allows the player to acquire an additional worker.
    That's right, this is the nookie shed!
    Plains: This is where workers are placed to acquire food, presumably by gathering food or hunting animals. Any amount of workers can be placed here.
    Forest: Workers are placed here to acquire wood. Up to 7 workers can be placed here.
    Clay pit: Players can acquire clay here, also has a maximum of 7 worker spaces.
    Quarry: Used to gain stone, also has a maximum of 7 workers spaces.
    River: Players can place workers here to pan for gold, again, a maximum of 7 workers can be placed here.
    Agriculture track: Used to track the agriculture level of each time. This also represents the advancing knowledge of a tribe and ability to stave off hunger through farming.
  • Building tiles: There are 4 spaces on the board for building tiles. Tiles each have a space for a single worker which is used to buy the tile. The cost varies according to the tile, but is always in resources. Tiles score victory points.
  • Civilisation cards: As with building tiles, there are 4 spaces on the board for civilisation cards, the cost of civilisation cards is also paid in resources but unlike building tiles, the player can choose which resources to spend. Cost ranges from 1-4 resources and is dictated by which space the card is filling on the board, the leftmost space costs 4 and each space to the right decreases the cost by 1 down to a cost of 1 on the 4th and rightmost space.
    Like building tiles, each card has a single space for a worker, allowing the controlling player to purchase the card.
    Civilisation cards have a variety of benefits, most cards give a one-off bonus, typically resources and most cards can also contribute towards collecting a set for victory points.
  • Player board: Each player has their own board, used to store resources and workers. They are also used to display which building tiles and tools they have accumulated, face-down civilisation cards are also placed on the board.
  • Meeples: Each player has 10 workers in their colour and starts the game with 5, the remaining workers can be earned during the game.
  • Food tokens: Standard round card tokens that are used to represent food.
  • Resource tokens: All of the game's 4 resources (Wood, clay, stone & Gold.) are represented by wooden tokens.
  • Tool tokens: These double-sided square card tokens show either 1 & 2 or 3 & 4 on their sides.
  • Dice: There are 7 dice, used when gathering food or resources.
Components in Stone Age are what you'd expect, the cards, tiles and boards are solid if unremarkable, they do the job and look as if they'll last well, which is all you can ask for. The meeples and the 4 sets of resource tokens in are constructed of wood and are the nicest components.
The game board has a bright and colourful depiction of a stone age community on the edge of the wilderness that's quite eye-catching. The player boards have similar, if plainer artwork, again this is fine since most of the time they'll be covered in components.
The civilisation cards essentially all use the same piece of artwork with elaborate game iconography providing some variation and the same is true of the building tiles. It's nothing to write home about (Or blog about I suppose?) but is perfectly acceptable.
For the most part, the art is good. ​

How's it play?
Setup
  • Give each player 5 meeples and a player board, also give each player 12 food.
  • Put all the food and resources on to the game board in their allotted places, food goes on the plains, wood on to the forest and so on.
  • Shuffle the civilisation cards and place 4 of them on to their 4 allotted spaces face-up. The remainder of the cards should be placed as a face-down deck next to the board.
  • All 28 building tiles should be shuffled into 4 stacks of 7. The number of stacks available in a game should equal to the number of players participating. Each stack used should be placed face-up in one of the 4 allotted spaces for them.
  • Determine starting player.
That's more or less it, now the game's ready to go.
Gameplay is broken up into 3 phases, place workers, resolve workers and end of round.
  • Place workers: Starting with the 1st player and going clockwise, each player may put meeple(s) into a single location, there are some stipulations though:
    Worker limits: Most spaces limit to the number of workers that can be placed there, obviously this cannot be exceeded.
    No reinforcements: Once a player has placed any number of workers into a location, on a later turn they cannot add any more workers to that same location, regardless of how many open spaces might be available.
    No passing: Players cannot pass and must place all of their workers.
Once all players have placed their workers, it's time to resolve those actions.
Again starting with the first player, they must remove all of their workers from one location at a time from every location they've placed workers and immediately resolve the associated actions as they do so, returning the meeple to the player's board. Players are free to remove their meeples in whatever order they see fit (This can have significant impact on game play.). The following actions are available:
  • Tool maker: Allows the player to take a tool token or increase a tool token's level. A player may have up to 3 level 4 tools.
    Tools are beneficial when a player's tribe goes gathering food or resources (See below for more information.).
  • Hut: Allows the player to take one of their unused meeples and add it to their player board, ready to be deployed in the next round. Players can have a maximum of 10 workers at their disposal.
  • Field: Allows the player to increase their agriculture level, (This can be very important, see below.).
  • Gather food: The active player may gather food, they take a number of dice equal to the workers they placed on the plains location and roll them. Then divide the result by 2 and round-down, that's how much food they get. Thus with 2 dice, the average result is 7 which would net the player 3 food.
    Tool tokens may be used once per round to increase the value rolled by the value of the tool, which can be very useful.
  • Gather resources: Functionally, this is identical to gathering food except it gets harder because the number used to divide the dice roll gets higher.
    Gathering wood requires the player to divide the result of the dice roll by 3 instead, so 2 dice with an average result of 7 would net the player 2 wood. This incrementally increases for all the resources, culminating with gold which requires the dice roll to be divided by 6! 2 dice getting an average of 7 would net the player 1 gold and if they rolled 5 or less (Not that improbable.) then they'd get 0!
    Tools can also be used to increase the value of these rolls.
  • Buy building tile: The active player can buy the building tile they placed a worker on by paying its cost as indicated on the tile. This immediately increases the player's score as displayed.
  • Buy civilisation card: The active player can buy the civilisation tile they placed a worker on to, paying the 1 - 4 resources as required and placing the card face-down on their player board.
Once the first player has removed all their workers, play proceeds clockwise until all players have retrieved all their workers, then the game goes to the end of round.
  • Feeding: Firstly, each player acquires extra food equal to their level on the agriculture track and adds it to their player board.
    Then they must feed their tribe. Feeding a tribe requires spending an amount of food equal to the amount workers a player has available, since all players begin the game with 5 workers, this cost will always be at least 5.
    If a player have used all their food and still doesn't have enough, then they can substitute in resources on a 1-to-1 basis (Which can be pricey!), if a player is unwilling or unable to do this, then they immediately suffer a -10 point penalty! That is undoubtedly harsh.
  • Restock civilisation cards: If any civilisation cards were bought during the round, slide cards to right to fill the empty spaces, then deal cards from the deck into the spaces now on the left. This is a typical 'conveyor belt' mechanic.
The first player marker move clockwise and a new round begins.

Endgame
There are 2 conditions that can trigger the endgame.
If any of the building tile stacks have all 7 of their tiles purchased, it triggers the endgame, the current round is concluded and the game goes to the end game and then scoring.
At the end of a round, if there aren't enough civilisation cards to fill a 4 spots on the board, then the game immediately ends and goes to scoring.
In both instances, tribes must be fed for a final time.
Final scores are tallied by adding the score from the victory point track, points that come from sets of civilisation cards and 1 point for each (Non food) resource the player possesses.
Highest score wins.

Overall
If I have one criticism of Stone Age, it's that the first 3 opening moves in any given round are generally always no-brainers, that's because the tool maker, hut & field locations are such a high priority because they confer very good rewards that would usually be stupid for players to pass up. If you're the 4th player, you won't get a look in unless another player is really desperate for something else or doesn't know what they're doing.
I'm not sold on the resource gathering mechanic either, yes it's quite nice but it can leave you at the mercy of the dice rolls that makes low rolls feel frustrating but somehow high rolls not feel satisfying.

Otherwise Stone Age is a mid-to-light worker placement game that is fairly easy to learn but feels perhaps a little generic, however, it does provide a fair level of depth.
The game manages to generally provide a choice or two too many for players to cover with workers, forcing them to prioritise their actions and making meaningful decisions. An extra worker is good, so is the agriculture required to feed them, the tools can help with gathering resources which are useful to buy cards and tiles and so on.

So if you want to play a worker placement game that isn't too taxing on the grey matter, you could do a lot worse than Stone Age.
0 Comments

Tokaido

22/3/2021

0 Comments

 
21st March 2021

Sunday afternoon gaming continues; I'm logged on to Board Game Arena and Zoom, the second game of the day is Tokaido.

I know several people who have visited Japan but to my knowledge none of them had made the 500km trip along the Tokaido route.
If you like the idea of taking a hike to enjoy hot springs or staying at an inn or looking at beautiful scenery, then maybe this is the game for you.

Caveat: We played a digital version of this game, we have also played the physical version previously.

What's in a game?
  • Game board: A faint map of Japan is shown on this very wide game board, it also depicts The Tokaido Road as a line that threads its way east/west along the coast.
    From this line there are many branching lines that lead to symbols that represent what are essentially tourist traps that players can visit, each branching line also displays 1 or 2 dots. Dots determine how many players may stop at a particular location at any given time.
    Apart from the starting inn, there are a further 4 inns along the road that sort of divide the game up into 4 rounds.
    Finally the board has spaces for the 7 decks of cards used in Tokaido.
  • Cards: Tokaido uses a lot of cards, mostly for the sets that players will be collecting.
    Souvenir card: When a player stops at a village, they will have the option to buy souvenir cards. There are 4 different sets to collect and each set can have up to 4 cards in it.
    Encounter cards: Players may stop at random encounters along their journey, this means drawing an encounter card and following it instructions.
    Hot spring cards: Unsurprisingly, these cards are collected by visiting hot springs, each card is worth either 2 or 3 points.
    Meal cards: When a player reaches an inn, they will have the option of purchasing a meal which will be worth victory points.
    Sea, Mountain & Field panorama cards: These 3 sets of cards form 3 wide vistas of the relevant terrain type. As you collect the cards for a set in numeric sequence, the vistas widen until the set is completed. 3 cards for the fields, 4 for the mountains & 5 for the oceans.
    That's not all!
    Achievement cards: Players earn additional victory points for various achievements
  • Meeples: Your standard wooden player meeples that come in a variety of colours.
  • Coins: Standard quality card chits themed to look like Japanese coins.
  • Character tiles: Each player is randomly given a character tiles that grants them some unique benefit or bonus action.
All of the components are of a reasonable standard quality. Artwork and the art direction is suitably stylised with a Japanese theme, colourful and looks good. The panoramas in particular look very nice.
Art on the board looks quite minimalistic with white as the dominant colour, consequently the Tokaido route draws the eye's attention. However, the symbols used to represent the different destinations along the route are quite small and look samey despite being distinctly coloured from each other. It was something found to occur on both the physical and online version. This is only a minor gripe.

How's it play?
Setup
Each player is given a meeple and a randomly determined character tile, the 7 decks are prepared and placed on to their allotted spaces on the game board. The starting order is determined at the first inn, then money is then given to players according to the starting order.

On to play
Game play is very simple to understand, the purpose of Tokaido is to travel to the eastern end of the road, having the most pleasant journey, this is done by stopping at the various locations along the way.
  • Tokaido does not have a round order per se; instead the player at the 'back' (and the furthest from the end destination) is always the active player, if a player is several spaces behind the other players, it is possible that they can have several turns in a row. At the start of the game the fist player is actually at the back.
  • The active player decides how far they want to move their meeple along the Tokaido road, up to and including the next inn stop. They may choose to skip branches and other players.
    They can stop at any open available space along one of the branching routes, if a branch has all of its spots already taken, then the active player cannot stop there. 
  • Once the player stops, they carry out the action associated with the type of location they stopped at (See below for more info.).
  • Play then continues with the player in last place.
Now we know how to move across the board and stop at locations, but what do those locations do?
  • Encounters: When a player stops at a encounter location. they draw an encounter card, this will give the player some sort of benefit.
  • Farms: Stopping at a farm earns the active player 3 coins, I guess those farms are wealthier than they look!
  • Hot springs: Stopping at a hot spring allows the active player to draw a hot spring card, this immediately score them 2 or 3 points.
  • Panoramas: There are 3 types of panorama locations, field, mountain & sea. 
    Panorama cards are not randomly drawn. When the active player stops at a one, they take a panorama card of that particular type. All panorama cards are numbered and the player take the lowest numbered car that they do not already posses, thus, the first time they stop at a particular panorama they always take a '1' card, followed by a '2' and so on until they complete a panorama. Players immediately score points equal to the number on the card they just played.
  • Temples: A player who stops at a temple can donate 1-3 coins to the temple for an equivalent amount of victory points that are immediately scored.
  • Villages: Upon entering a village location, the active player draws a number of souvenir cards, then they can buy any number of them (Provided they have the funds.), remaining cards are put at the bottom of the souvenir deck. Souvenir cards are put into sets and are scored at end of the game.
  • Inns: Including the last inn, there are 4 inns that all players must stop at during their journey. The first player at an inn reveals a number of meal cards and can choose to buy one, the remaining are left available for following players to purchase. Thus the early players have the best choice.
    Meal cards cost 1-3 coins and always immediately score 6 points. You may be wondering why the cost of buying meal cards vary when the victory points they confer is always 6? This is explained below.
    When all the players have arrived at the inn and have purchased a meal card (Or not.), then the next leg of the journey can commence. The player who came in last is still considered behind the other players and goes first and so on.

Endgame
Play continues until all players have reached the last inn.
Souvenir sets are now scored.
Then achievements are scored. There are achievements for completing panoramas first, having the most encounters, donating the most money to temples and so on. One achievement earns victory points for spending the most on meals at inns - which explains the varying costs for meals.
Points are tallied, highest score wins.
Overall
Tokaido is a fairly straightforward game to play, on the surface the game gives players a simple decision to make - where to stop and what to collect? It's a little more involved though, the question is; how much do you want to visit a certain spot?
As the active player, someone can choose to move their meeple as far as they need to in order to reach a specific spot, however, moving too far means that a player will end up sitting around as other players get multiple turns. Conversely, moving too slowly risks locations being filled with other players. It feels like quite a balancing act.
Generally we found that there's a basic strategy of moving as little as possible in an attempt to maximise the number of turns that are available and just collect what you can.
The games other balancing act is money; knowing when to keep money and knowing when to spend it is important since spending money can earn victory points and it needs to be done as efficiently as possible.

There's minimal player interaction here and generally player's can't interfere with each other. A canny player can try and predict where other players are looking to go (All cards are kept face-up.) and try to get there first but it mostly it hardly seems worth it.

All of this makes Tokaido a gentle, laid back game to play, it sort of fits the theme of talking a walking holiday.
Players used to heavier games may find that they feel like nothing is happening during the game. This may be partially down to playing online.
The online version doesn't feel as good as the physical one. Being able to collect and build panoramas or complete souvenir sets with physical components feels a lot better than when they're collected in the online version. It's a small sense of achievement but a sense of achievement nonetheless.

If you want a light and chilled game to play though, you can do worse than Tokaido.
0 Comments
<<Previous

    Author

    I play, I paint.
    ​This is where I talk about what I play.

    Archives

    February 2022
    July 2021
    June 2021
    May 2021
    April 2021
    March 2021
    February 2021
    January 2021
    December 2020
    November 2020
    October 2020
    September 2020
    August 2020
    July 2020
    June 2020
    May 2020
    April 2020
    March 2020
    February 2020
    January 2020
    December 2019
    November 2019
    October 2019
    September 2019
    August 2019
    July 2019
    June 2019
    May 2019
    April 2019
    March 2019
    February 2019
    January 2019

    Categories

    All
    2 Player Only
    50 Fathoms
    Abstract
    Annual Quiz
    Area Control
    Asymmetrical Play
    Auctioning
    Black Hack
    Bluffing
    Board Game
    Campaign Play
    Card Game
    Clockwork & Chivalry
    Cooperative
    Cthulhu Hack
    Deck Builder
    Dice Game
    Drafting
    Engine Builder
    Hidden Role
    In Darkest Warrens
    Legacy
    Merry Outlaws
    Oubliette
    Player Placement
    Programming
    Push Your Luck
    Real Time
    Renaissance
    Resource Management
    Roll And Move
    Roll & Write
    Route Builder
    RPG
    Savage Worlds
    Set Collecting
    Storytelling
    Team Based
    The Year In Gaming
    Trading
    Trick Taking
    Wargame
    Wasted Hack
    WFRP
    Word Game
    Worker Placement

    RSS Feed

Powered by Create your own unique website with customizable templates.
  • Home
  • Special Effect
    • Special Effect
    • Bard's Tale Challenge
    • Fighting Fantasy Challenge
    • The Indiana Jones Charity Globe Trot
    • Mirkwood Charity Walk
    • Middle-earth Charity Walk
    • Dungeon Daze
  • Games
    • Beach Patrol
    • The Surrendered Lands
  • Game Blogs
    • RPG Blog
    • Gaming Blog
  • Painting Blog
  • Contact