|
13th March 2022 It's a Sunday evening and we're logged into Board Game Arena for some gaming fun. As the title implies, Stella - Dixit Universe is a offshoot of the game Dixit and while it is different, it does share some elements with its predecessor, mostly notably having artwork on cards which share the same almost abstract, dreamlike quality. In fact in the physical version, both games share the same backings for these cards, meaning they're interchangeable between the two. Caveat: We've only played Stella - Dixit Universe digitally. What's in a game?
There's minimal art elsewhere. The game's iconography is also minimal to the point of being almost non-existent. 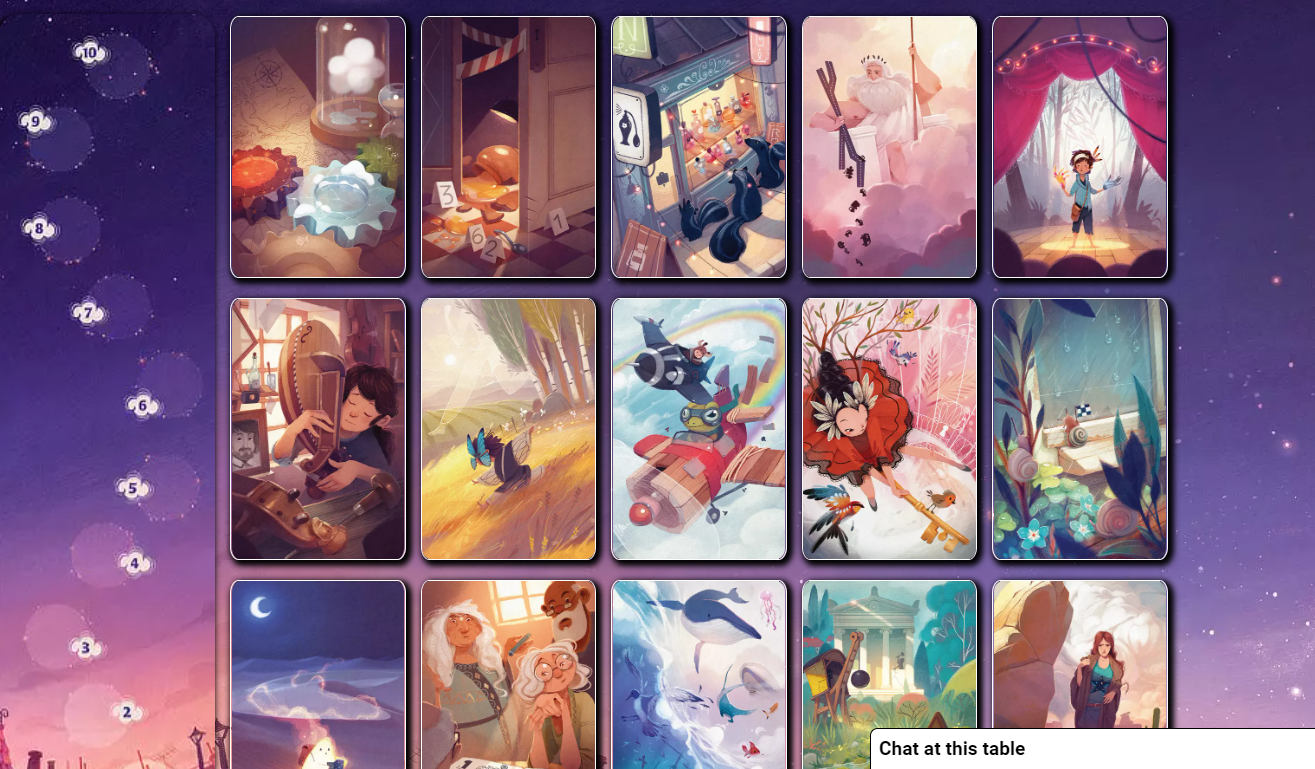 Some examples of Stella - Dixit Universe's distinctive Dixit cards. How's it play? Setup
On to play Similar to its predecessor, Stella Dixit Universe is word association game, but here, the word is chosen by the game. 4 rounds are played during the game and each round has 3 phases. The first 2 phases are essentially performed simultaneously, with the 3rd phases occurring in turn order.
Endgame Once the 4th round has been completed, players should total their scores from across all 4 rounds. Points are tallied, highest score wins. Overall
Like it's earlier iterations, Stella - Dixit Universe can be a divisive game, its core mechanic is acutely subjective in nature and it can be a real love/hate thing! Certain types of gamers; those who enjoy the heavier, analytically and mathematically driven games may well be frustrated with a game about trying to guess what other players might think of a particular word. Social skills are important here, it's more about playing the player than playing the game, understanding how they think and what they'll pick. As with its predecessor, Stella - Dixit Universe uses a mechanism to score more VPs when making a slightly more obscure choice which can trigger a super-spark. I feel the game has the same quirk with the rule as well; players who know each other well will be at a advantage here. Other than trying to predict what other players will do, there's also a balance between how many associations to make with a word. Too few and players risk scoring less, while too many could end up costing points, generally it's prudent to err slightly on the cautious side and avoid being the player In The Dark. It obvious why the rule exists, it's to stop players haphazardly selecting too many words but it's still a little frustrating and also a bit of a finicky rule. That brings me to the one real bugbear I have with the game and that's the rule with Falling. If a player Falls, they immediately stop scoring, so if a player falls at their 1st reveal, they score nothing for that round - and worse, other players can still score off them! Conversely, if they fall with their last choice, the damage is minimised. I know that choices on the order to reveal cards are part of the game and cards which are seen as less risky should be selected fist and the rule offers a genuinely meaningful decision but even so, I found it immensely irritating. Although perhaps I'm not the best judge, I can be ambivalent with this type of game, it generally doesn't suit my style of play and and maybe I'm a bit too harsh. When I remember to adopt a particular mindset to playing it, there's definitely fun to be had. Stella - Dixit Universe plays with 6 and veers into party game territory, it's a light crossover game that's pretty easy to pick up and play and will allow non-gamers to get stuck in and enjoy themselves Treat it as a fun diversion more than a serious game and Stella - Dixit Universe is an enjoyable experience.
0 Comments
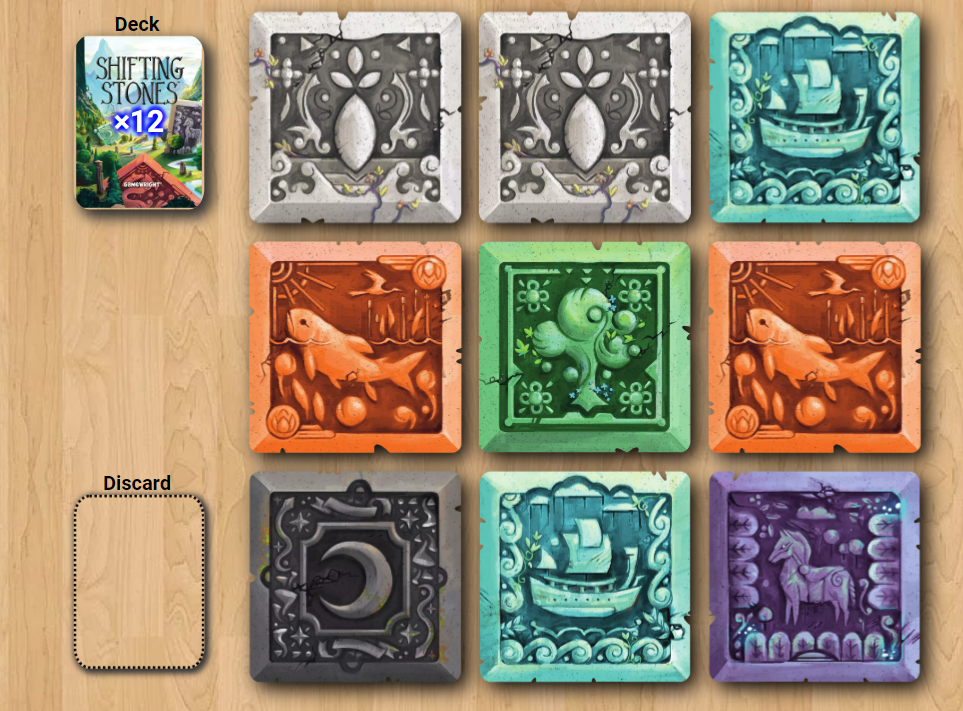
13th February 2022 It's Sunday night and we're logged into Board Game Arena for an evening of gaming. Shifting Stones is a light sort of puzzle-themed sliding tile game. Caveat: We've only ever played this game digitally. What's in a game?
There's not much to say about the components. The illustrations on the tiles are nicely detailed and distinctive. However, I found the colours somewhat muted in lower lighting and a little indistinguishable, particularly the orange/red combination. The same is true of the cards. The game has no iconography other than the tile illustrations. How's it play? Setup
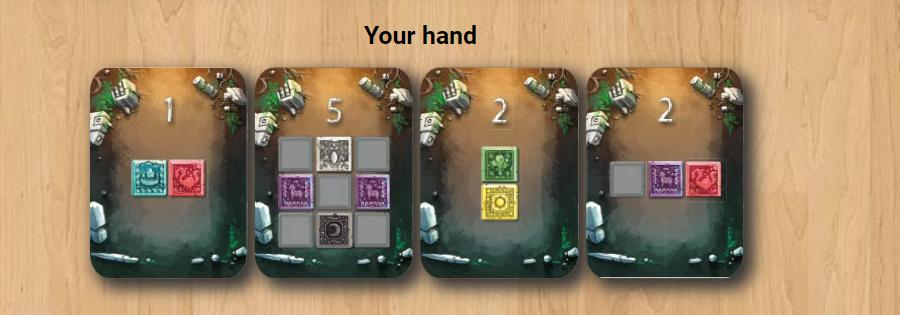
On to play Shifting Stones uses a traditional turn order, the active player has their turn and when it finishes, play progress clockwise to the next. During their turn, the active player perform any number of the score/swap/flips actions in any order so long as they have the cards to perform them. Alternatively, they may skip their turn.
Endgame Play continues until any player has scored (Dependant on player count.) 7-10 cards, after which the current round is completed. Players add up the VPs of all the cards they've scored during the game. Additionally, whoever played the most 1 value cards earns a bonus 3 VPs. Points are tallied, highest score wins. Overall
As you can see from the brief write-up, Shifting Stones is a fairly straightforward and accessible game, it could make a good introduction to new players or crossover game. Despite the straightforward rules, there is actually a bit of depth to be found in Shifting Stones. The game makes use of a hand-as-currency mechanic to pay for actions and getting rid of cards that might prove useful is always a meaningful decision. Players will want to minimise this and find the most efficient way to swap/flip tiles to where they need them to be and hope to score at least 1 card per turn. At the same time, hanging on to cards too long can earn nothing and trying to plan ahead is likely to be futile, it's too risky leaving things for another round as it players will invariably change the tile positionings, players will need to be decisive and exploit the opportunities that present themselves during their turn. There's not much more else to say really, there's no noteworthy interaction between players and it's hard to gauge what others are doing, especially since whenever they refill their hand - which is every turn, they'll be presented with newer options. Other than I found the game a little bit of a frustrating experience. Watching other players inadvertently wrecking the positioning I was try to set up between turns wasn't what I'd call much fun. I also found having to remember what was on the flip side of the tiles something of a chore, having to refer to the reference card wasn't much better. If perhaps. there was more engaging core gameplay, maybe I'd would make the effort to remember what's on the other side of the tiles. But there wasn't, so I didn't. Shifting Stones is straightforward and clearly skews towards the lighter end of the complexity scale, it would possibly make a good filler game. I'm not sure there's enough here to appeal to me though and coupled with the frustrating experience means that this is not one for me. 15th August 2021 Sunday evening is here again and I'm my living room logged into Board Game Arena on my PC for some gaming goodness. First up was 6 nimmit!. 6 nimmit! is 6 takes in German, it's quite an abstract game and the name will make sense when you seen the rules. What's in a game? 6 nimmit is a card game and comes with a deck of 104 cards number from 1 to... you guessed it... 104 and that's it for game components. Each card also displays one or more symbols which are endearingly known as bullheads. Bullheads are bad. The cards are normal quality as you'd expect. There's pretty much no artwork to speak off, other than the symbol for bullheads and colours used to mark out cards which have more than 1 bullhead symbol. The game has no iconography other than numbers and bullheads and being an abstract game, doesn't need anything else. How's it play? Setup
On to play 6 nimmit! is played over several rounds and the goal is for players to empty their hand of cards and avoid collecting other cards as much as possible each round, which is not as easy as you might think... How is this done, well read on.
Endgame Play continues through rounds until at the end of a round, in which at least one player has accumulated 66 or more bullheads.. Points are tallied, the player who has collected the lowest number of bullheads wins. Overall
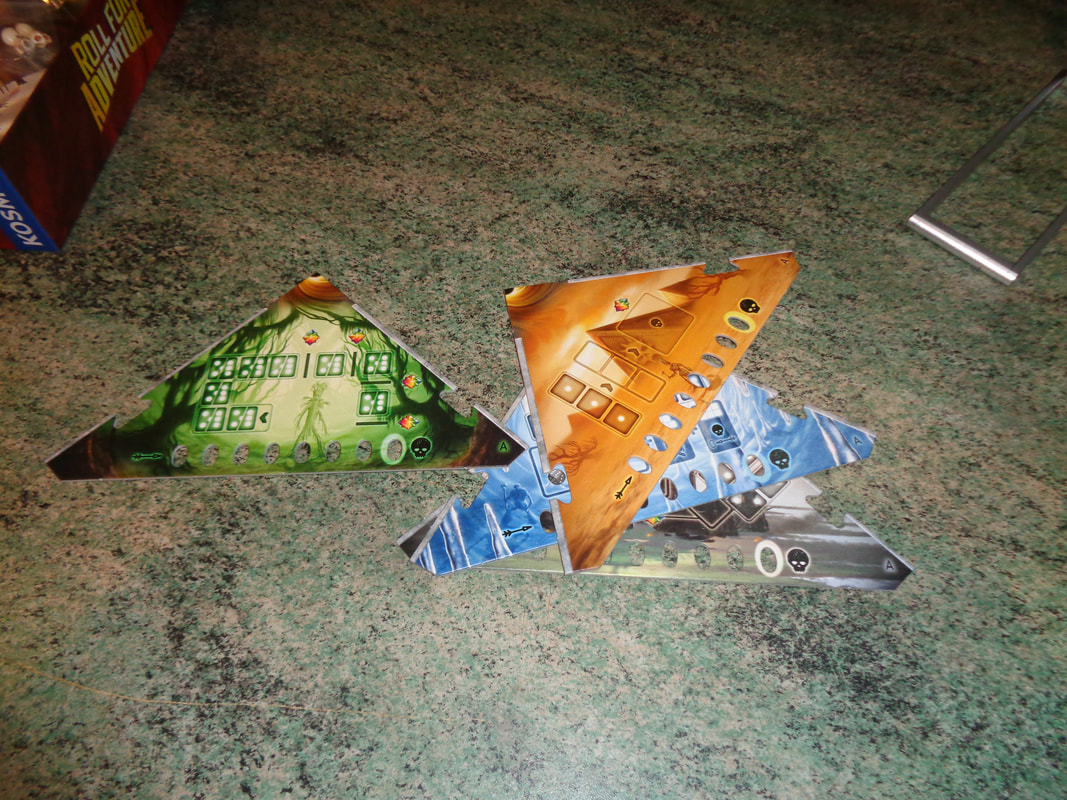
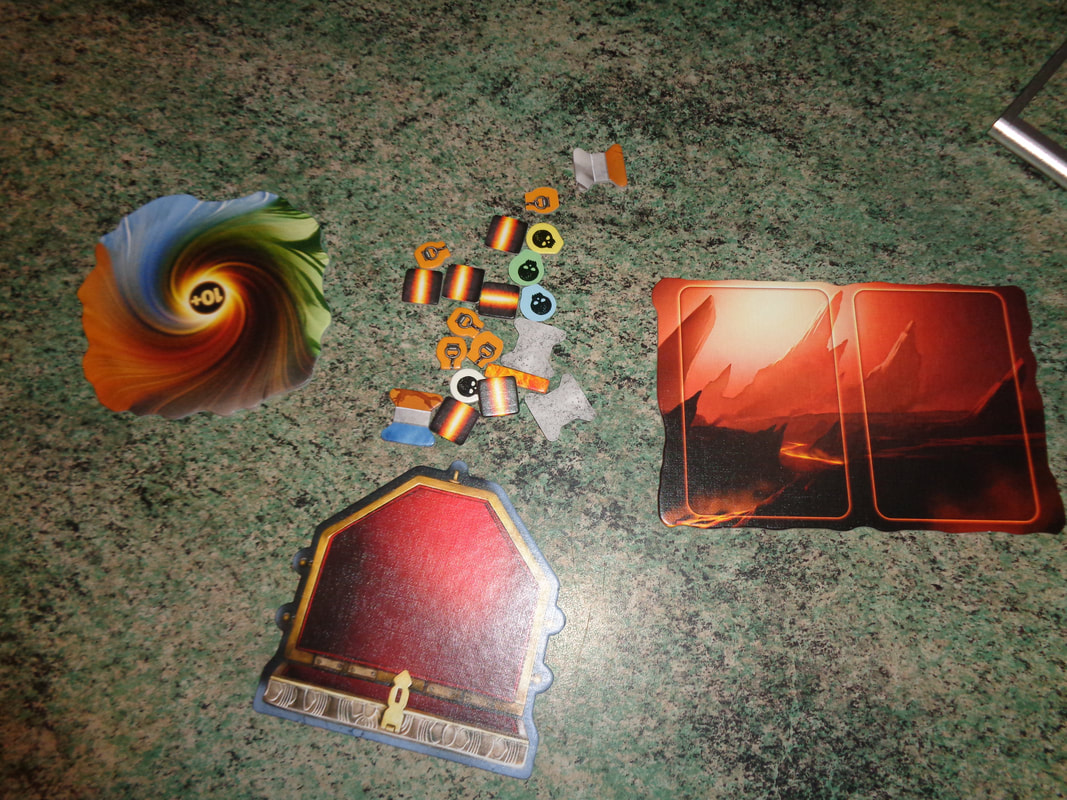
As per the brevity of this blog post, 6 nimmit! is a very simple game to learn, it's also a curious mix of strategy and unpredictability. The objective is obviously to try and not collect cards, they'll be times that a player will want to play lower value cards to 'get into' a row before it gets to 5 cards, conversely, they'll times they want to play higher cards to go later and hope someone plays the 6th card in a row to clear it out. Sometimes players will want to play very low and choose which row to take because it's the best of a bad set of choices, the bullheads a row may contain can vary greatly. Also choosing which row to take presents a player with the opportunity to mess with other players. Watching a row you planned to play a card into vanish and leave a much worse alternative is quite the surprise. And that's the thing, while some card plays can be much safer than others, it's almost always never 100% safe and it's other players bring that element of aforementioned of unpredictability to the game. Quick to pick-up-and-play, 6 nimmit! can be a lot of fun with its surprises and reversals -of-fortune, provided you don't find playing fairly randomised games frustrating and you're not too much of a serious gamer. 15th June 2021 It's a Tuesday evening at The Sovereigns in Woking and if memory serves me correctly, the first time that I've met up with the Woking Gaming Club have met Since October last year! The first game of the night was Roll For Adventure, a cooperative, dice roller where players must unite to foil the machinations of a Dark Lord wannabe and save the kingdom! What's in a game? In Roll for Adventure, our heroes must join forces to defeat The Dark Lord Saur-errr Master of Shadows; how is this done? By collecting the power stones to activate the magical artefact; how is this done? By making lots of dice rolls of course!
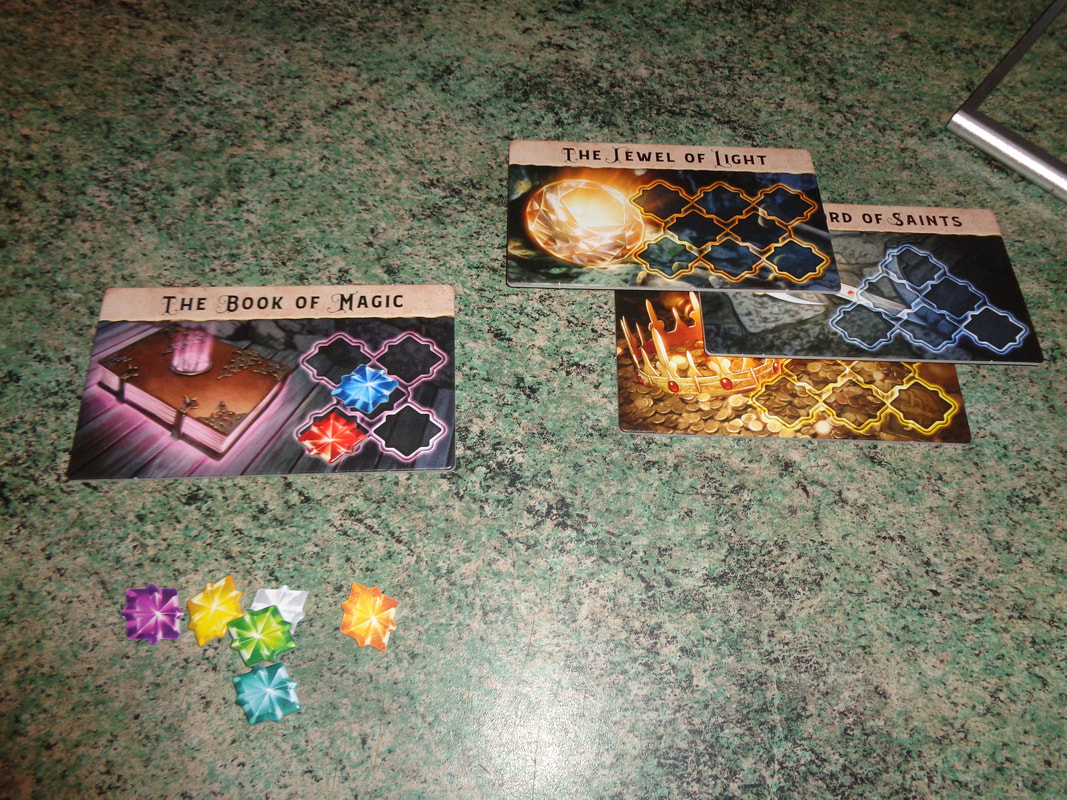
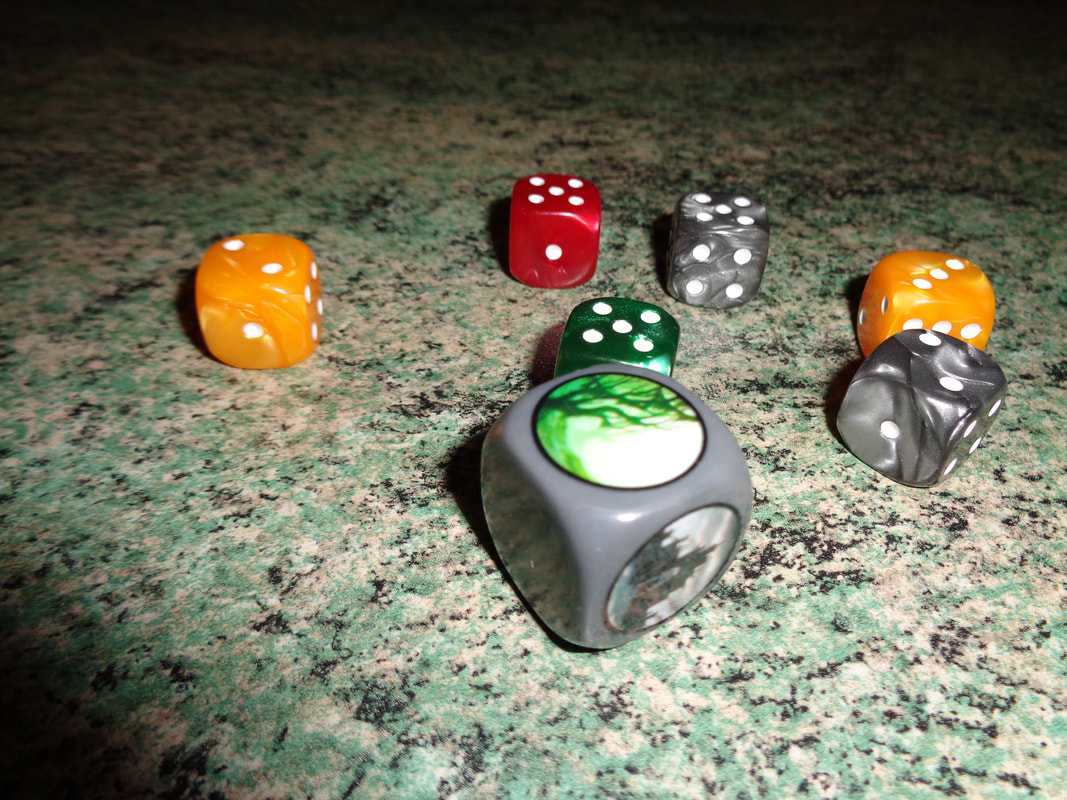
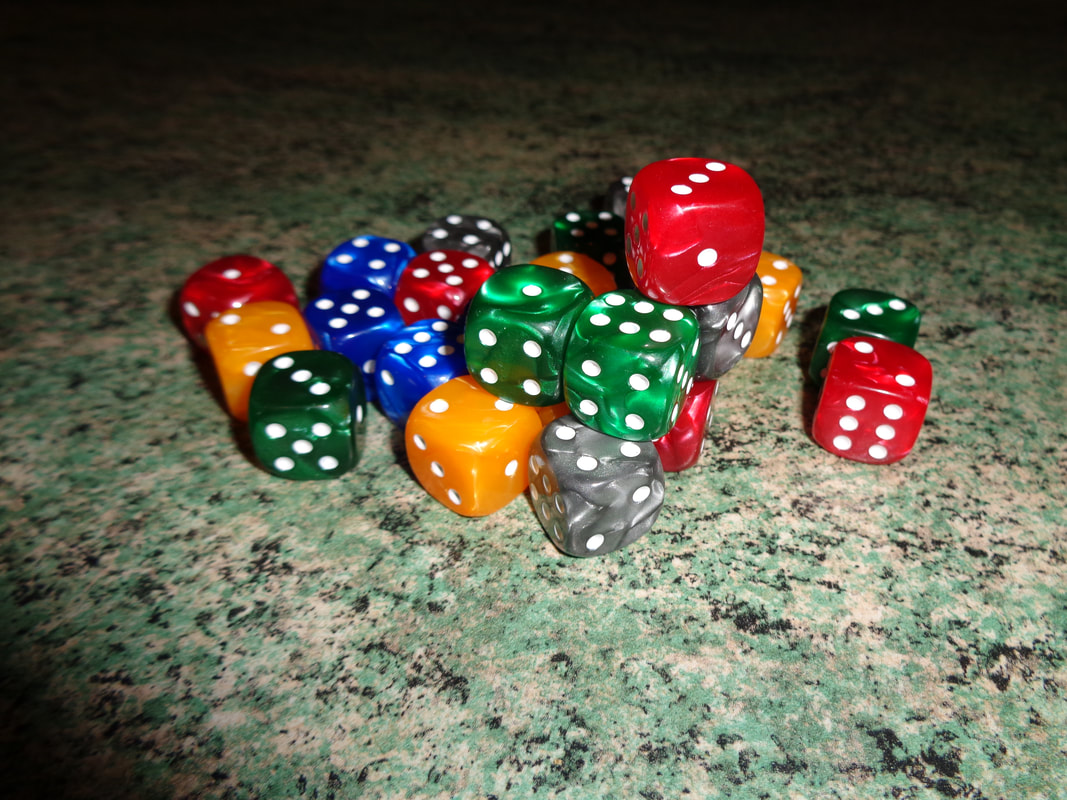
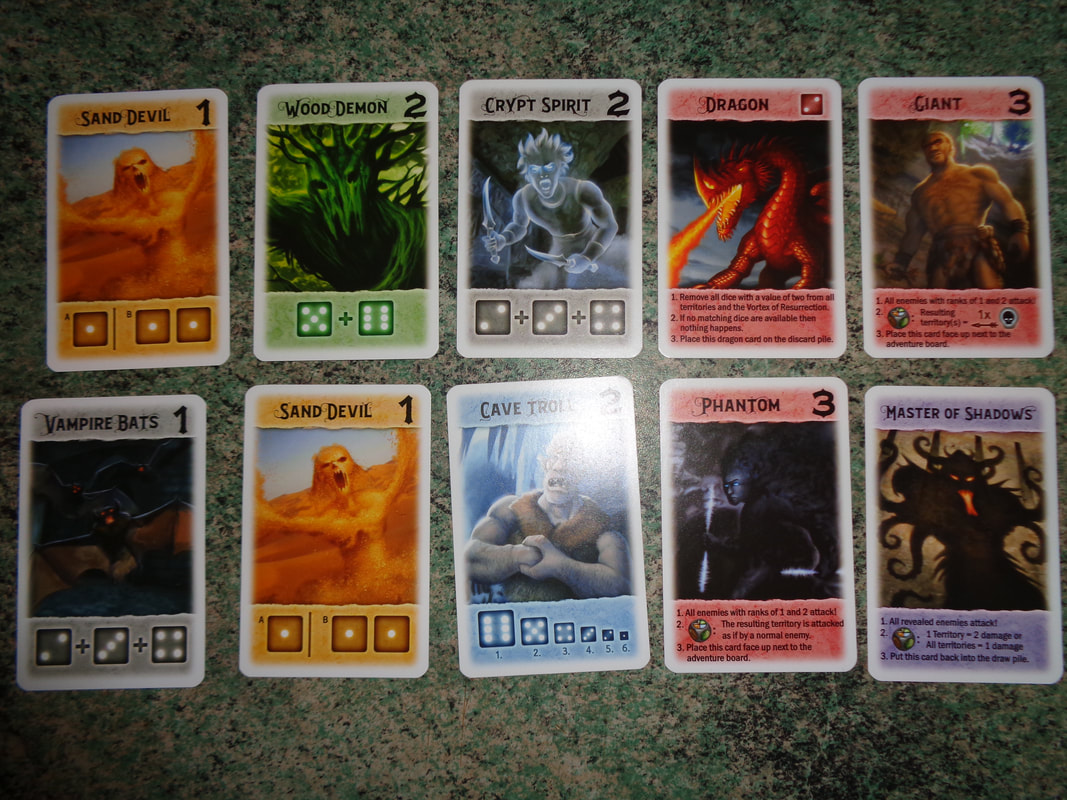
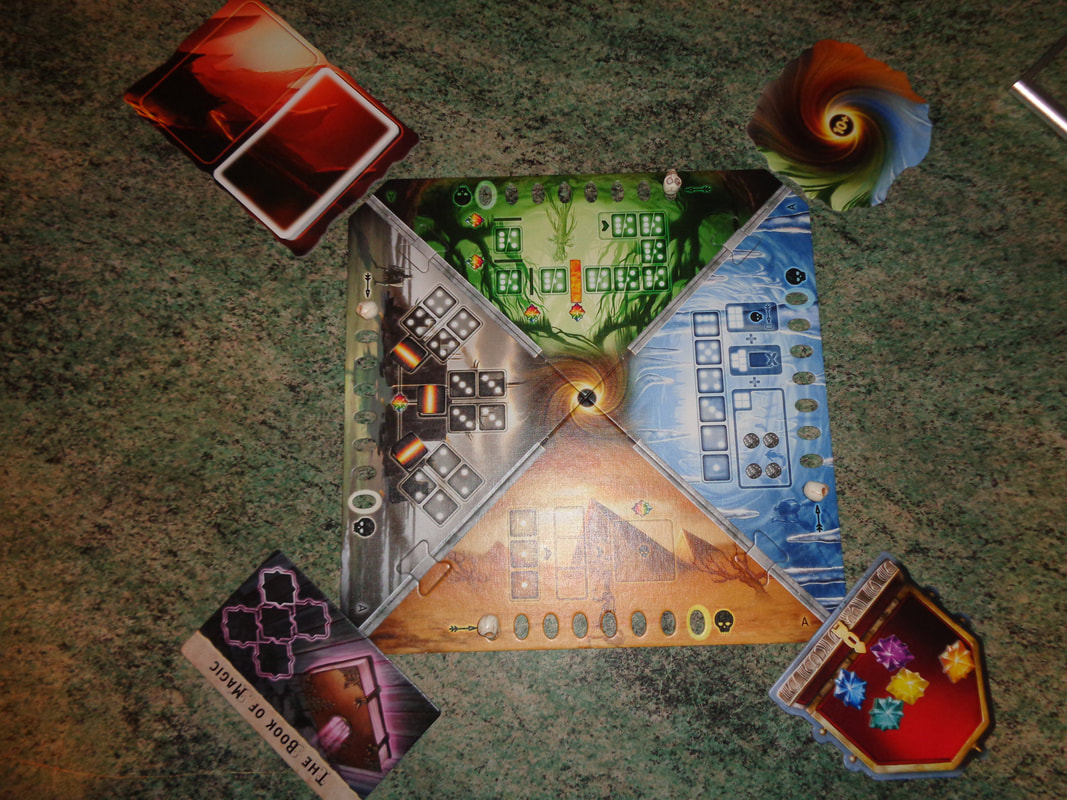
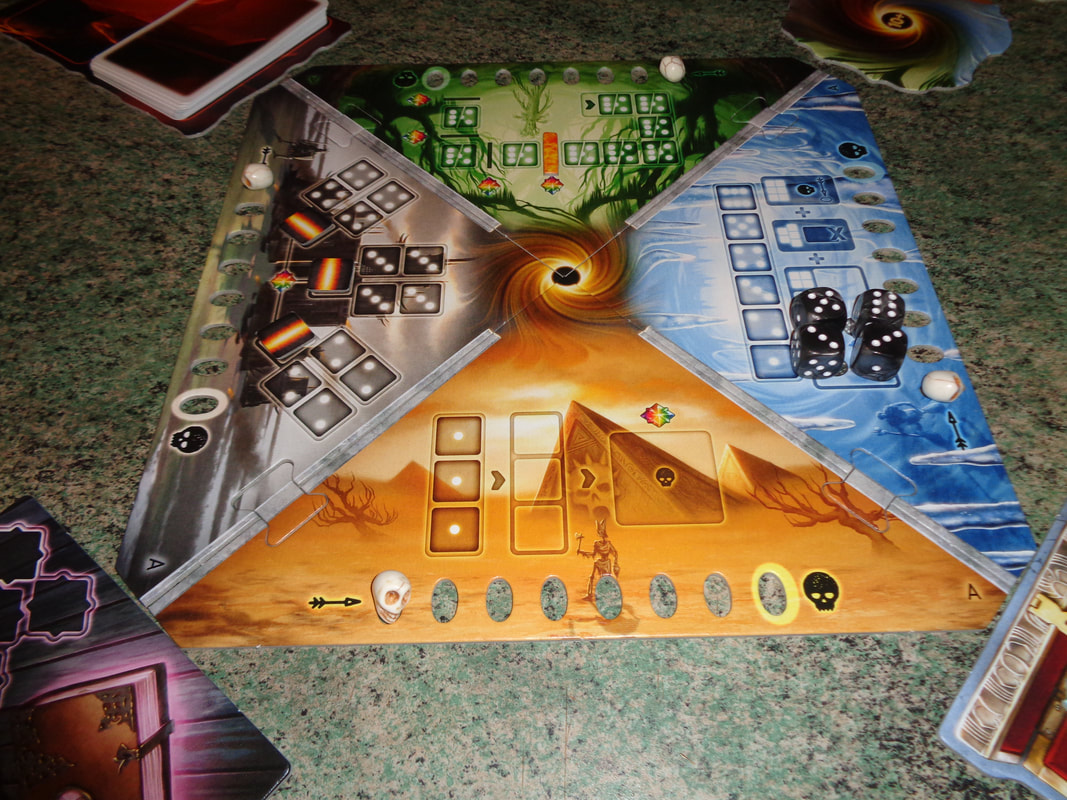
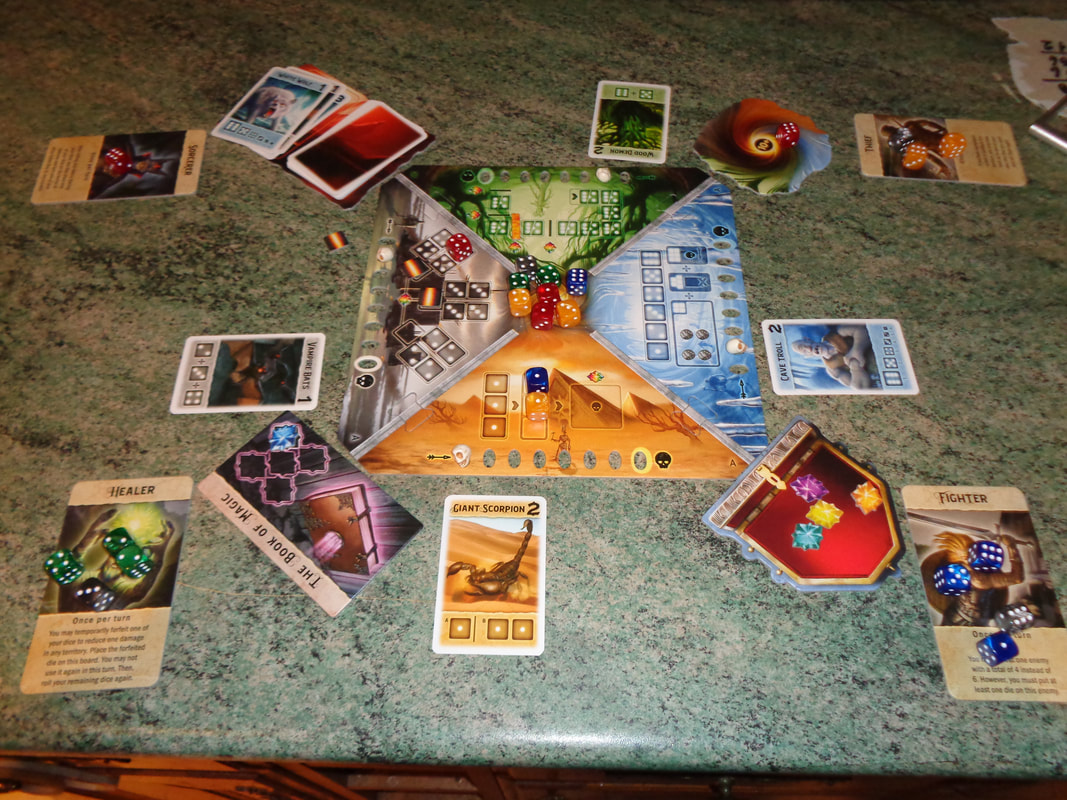
The dice are of the smaller variety, which is fine by me, they're made of plastic and finished in a 'marble' look, their edges are nicely rounded and their dots are indentations and not printed. Good quality dice overall. The territory die is a larger size and has rounded edges, it has artwork related to the territory boards printed on 5 of its 6 sides, the printing seems to be good quality and doesn't look like it'd rub off easily. The game's variety of boards and tiles are all printed on thick card, as are the components. The enemy cards are pretty standard quality cards. Finally; special mention goes to the completely unnecessary and therefore cool little 3d plastic skulls used to track damage on the 4 territories. Artwork used on the territory boards is fairly minimalist and functional by necessity as space is given over to holding dice. The palette used for the 4 territories extends to the enemy cards and some components. The quality of artwork used on the enemy cards, hero and adventure boards is all reasonably good. The bright colours scheme used to represent the power stone is pleasantly eye catching. All-in-all, the components in Roll for Adventure are all of a good quality.
How's it play? Setup
On to play Like a lot of cooperative games, Roll for Adventure alternates between a player's turn and then the board's actions before moving on to the next player's turn. The basic principle behind a turn in Roll for Adventure is simple: The active player rolls all their available dice and uses one or more of them of the same number, then rolls their remaining dice and so on, until they've used all their dice. What those dice are used for however, is the crux of the game.
Endgame If the damage token for any territory reaches its final spot, the players collectively lose the game. If at anytime all the players collectively have no dice to roll for whatever reason, then the players lose. If the players manage to collect the last power stone for their adventure board, then the players collectively win.
Overall
Roll for Adventure is an interesting combination of cooperative gameplay and some unusual dice rolling mechanics. A good example is the Vortex of Resurrection: Using the vortex ends a player's turn immediately. Early in their turn, it's possible a player have the double 5 or double 6 which will be high enough to trigger the vortex, but doing so is a waste of a turn (And dice rolls.), however, waiting until a player only has 1 or 2 dice left means that getting a good result for the vortex is tricky. Roll for Adventure has no 'set aside' rules or mechanics in Roll for Adventure here, after players use dice, the remaining ones are re-rolled and you can kiss those other useful results goodbye. It forces players to make decisive moves about what they have available now and collectively players need to really cooperate in these decisions too as spreading dice too thinly throughout the board can be a costly error, dice stuck on half completed tasks are a problem waiting to happen. Players need to concentrate on a couple of tasks only if possible and maintain the loop of using dice and then getting them back to use in the following turn. The same is true of enemy cards, if they're not dealt with quickly, they can linger and repeatedly attack the board, particularly lower rank enemy, which will be commanded to attack the most often. Balancing the need to get power stones and the need to defeat enemies is key, along with mitigating bad luck that tends to accompany cooperative games. The extra wrinkle here is the need to also manage your dwindling resources - dice! Actions (Or inactions.) will frequently have an impact on the game and that's a good thing. That's not to say the game is without some criticism. With 4 double-sided territory boards, Roll for Adventure has 8 subsystems, at least 4 of which must be learned to play the game. In my opinion, this makes the game feel a little overly complex for the experience it delivers, which a shortish, almost abstract experience. The game's theme doesn't gel entirely well with its mechanics for me. Do the dice represent various actions of the the player's hero? Or are they minions of the hero sent off on different missions? Whatever the answer, it felt a little unengaging, closer to an exercise in comprehending probability than going adventuring. Having said all that: The game's balancing kept the outcome in the air all the way throughout and the tension high at the end. If you like cooperative games, Roll for Adventure is worth a look. If you've spent a lot of time playing those coop games where you spend action points to run around a map to perform tasks, this could give you a fresh take on the cooperative playstyle. |
AuthorI play, I paint. Archives
March 2024
Categories
All
|

 RSS Feed
