|
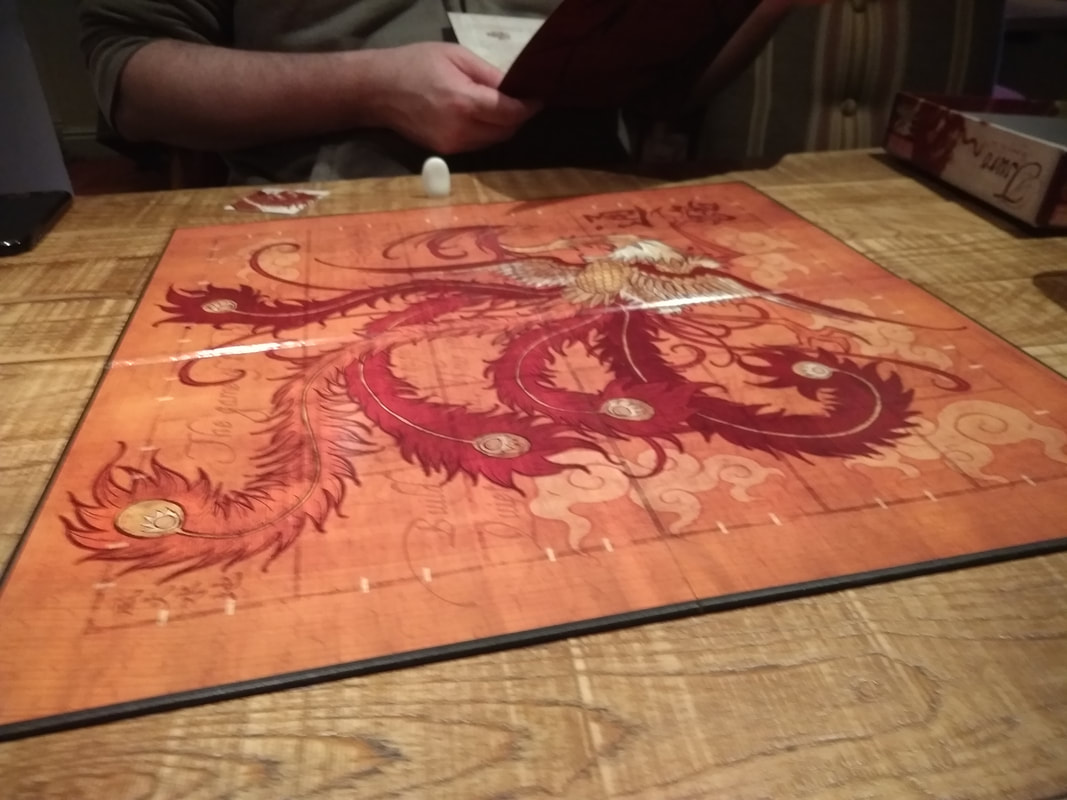
24th May 2022 It's a Tuesday and we're with the Woking Gaming Club in The Sovereigns. Fly as free as a err flying pirate? Libertalia: Winds of Galecrest is set in a world of fantastical aerial ships, anthropomorphic heroes and adventurous voyages to find loot and lost treasure. What's in a game?
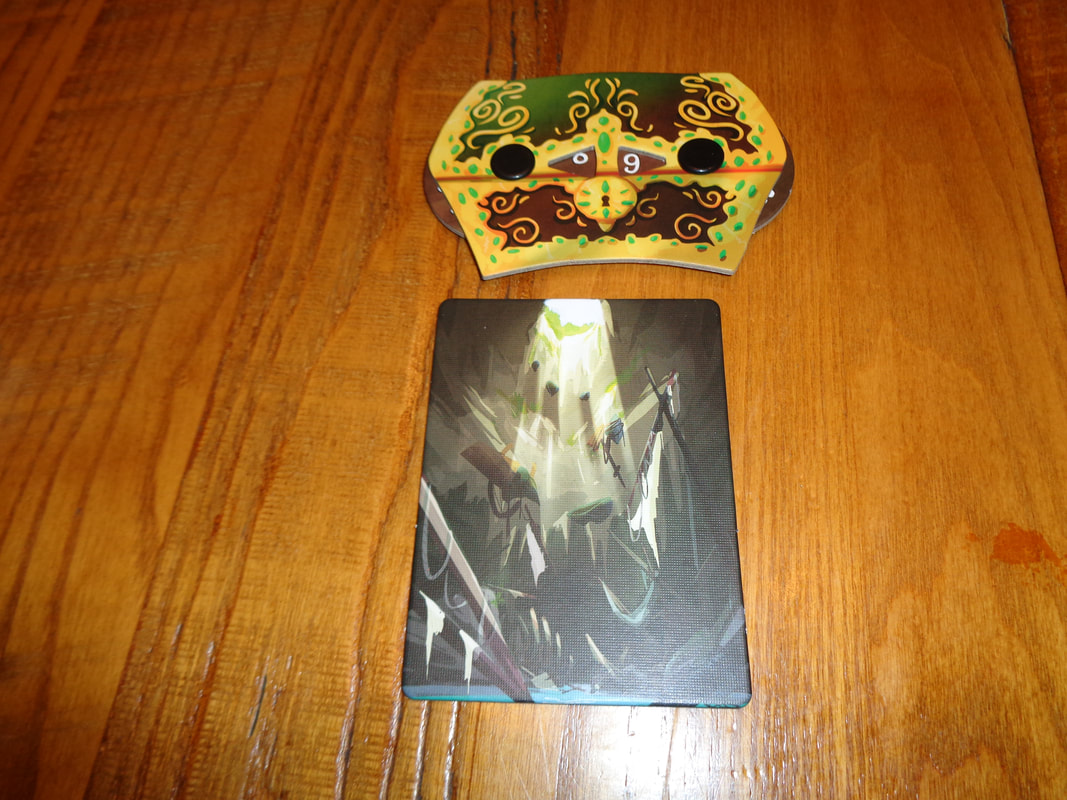
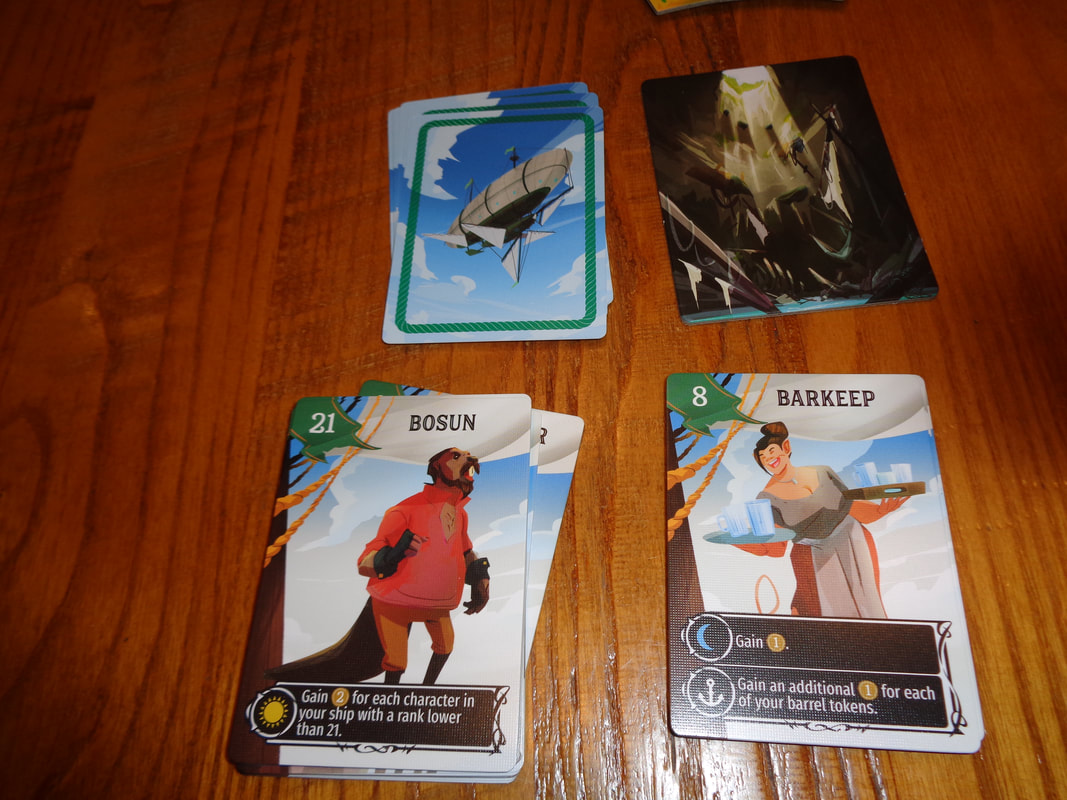
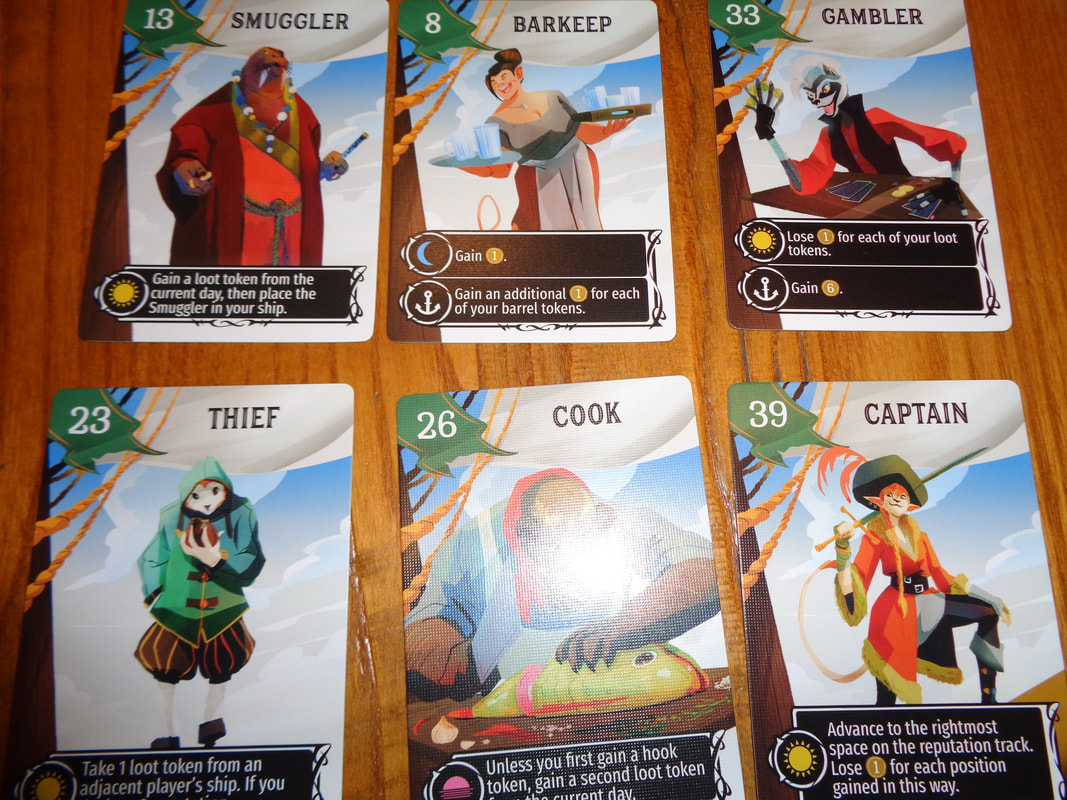
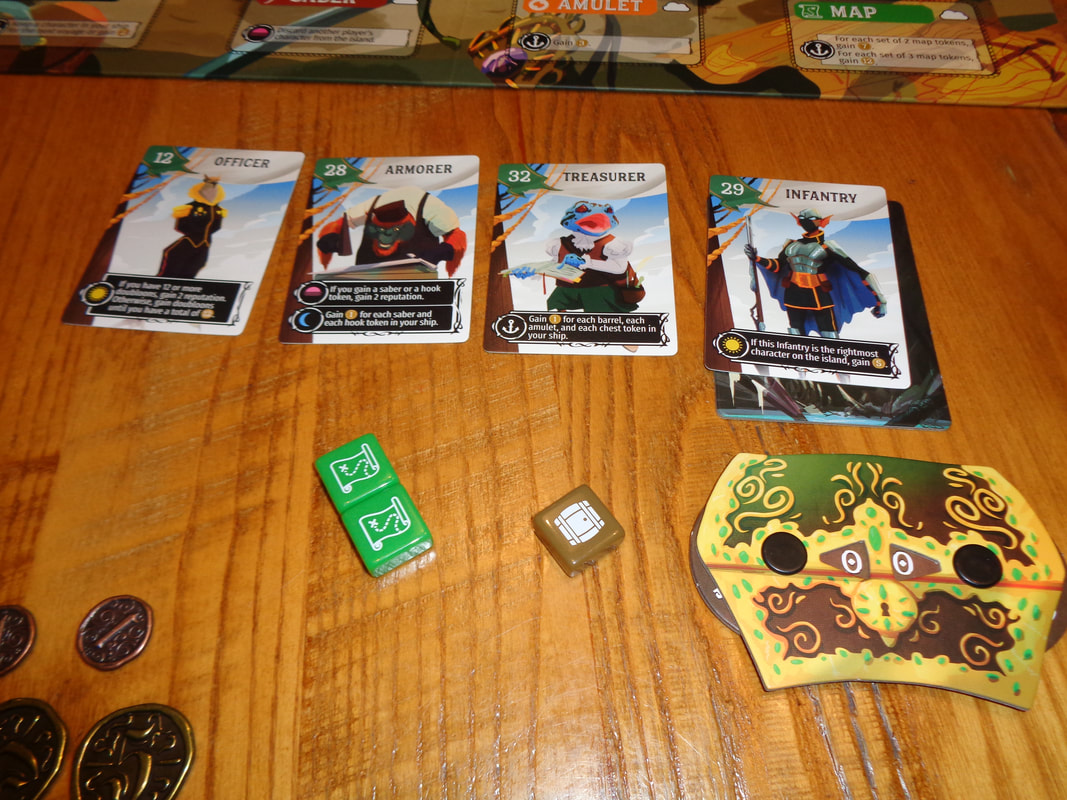
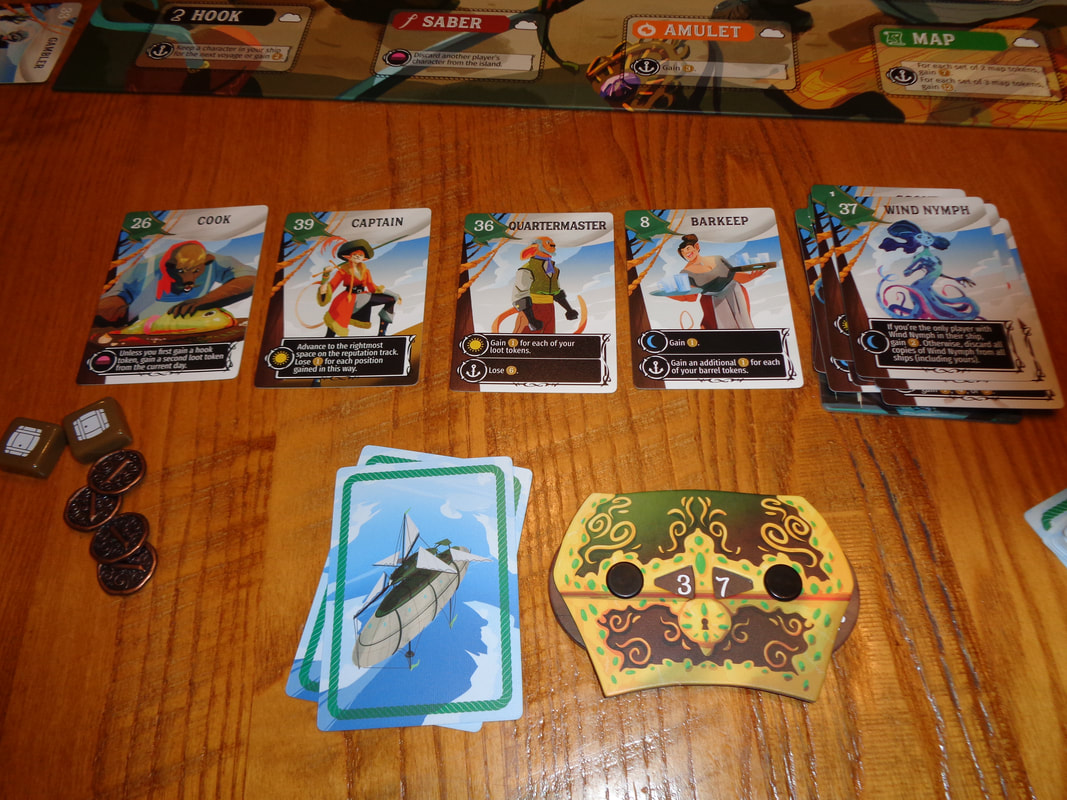
Component quality is solid throughout, cards, tokens and tiles are well constructed but the chunky loot tokens really stand out, even if I have to resist the urge to try and unwrap and eat them. Libertalia: Winds of Galecrest makes use of excellent use of bright, eye-catching, cartoony art presenting a larger than life setting and characters. About a dozen icons are used throughout the game, they are all fairly clear and easily understood. How's it play? Setup
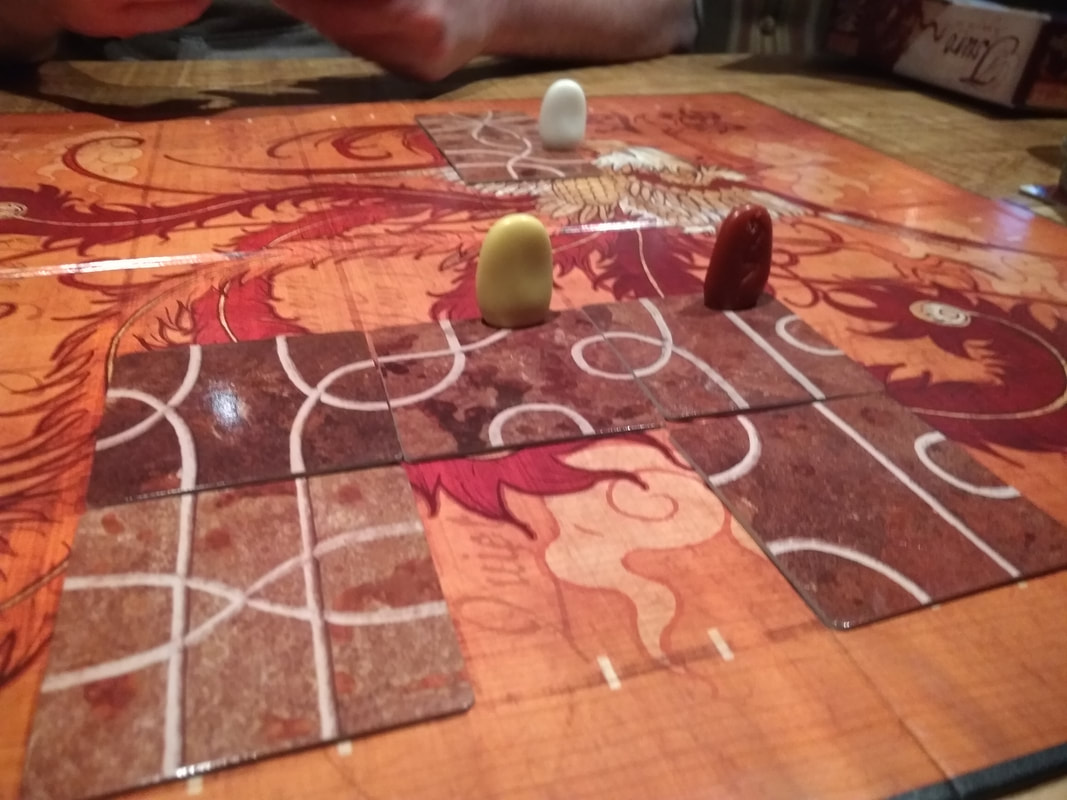
That's pretty much setup done. On to play Libertalia: Winds of Galecrest is played over 3 'voyages' which have a length of 4, 5 and 6 days. For each day, a player will put a character card into play and this is done secretly. Thus over all 3 voyages each player will use 15 character.
Endgame Play progress until the night actions for the 3rd and final voyage are resolved. Players compare their scoring dials. Points are tallied, highest score wins. Overall
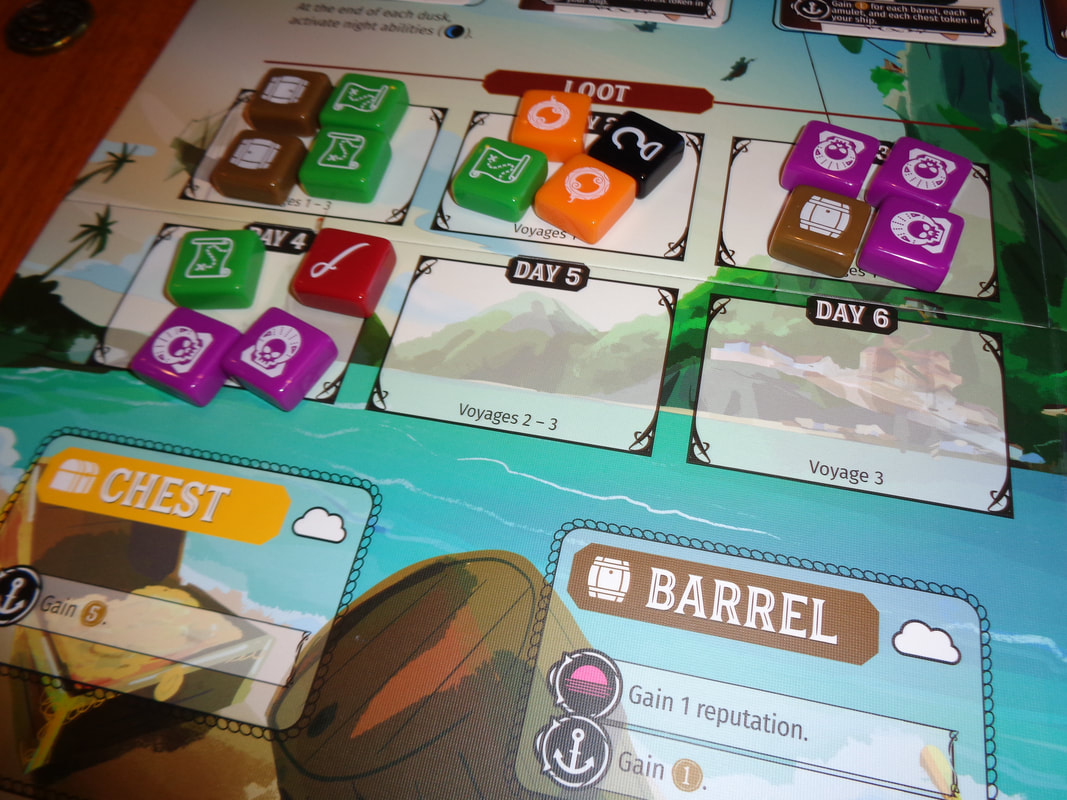
Libertalia: Winds of Galecrest feels like a complex game but in practice is quite straightforward. In essence, a character card is played and the resolved up to 3 times. Where the game's complexity comes from is how a character card played interacts with character cards played by other players. Everyone starts with the same hand of cards and will acquire a further identical 12 cards during the course of the game. It means that all players will be using the same 18 cards played over in total 15 actions. But since it's unlikely that all players will make use of the same cards at the same, it means the game encourages players to watch their opponents. Knowing when someone has or hasn't played a certain card can prove very useful. This contextual information can allow players to adapt their tactics and can change the flow of the game. Additionally; Libertalia: Winds of Galecrest injects a dose of 'take that' into the game, the 40 cards have a varied set of abilities that can be brought to play, including being able to eliminate other characters, pulling cards out of the graveyard, etc. It's also worth noting that while the 'calm' side of the game board has the potential for some friction between players the 'stormy' side increases this. The game also provides short and long term goals which require short, mid and long term strategies. Day abilities on cards give players immediate benefits, but dusk and night abilities can also provide desirable benefits. A player may choose to put a high value character card on to the initiative track so they go earlier in the dusk phase to secure a certain type of loot. Which brings me to long term strategy, loot is vital here. Loot typically provides benefits during the end of voyage phase and the loot for all days is openly shown on the board which players must take this into consideration during the whole journey. All of this means that Libertalia: Winds of Galecrest hits a sweet spot of accessible but tactical game play. Players are always given meaningful decisions to make using a degree of imperfect information. I found it an engaging game. Definitely one to try.
0 Comments
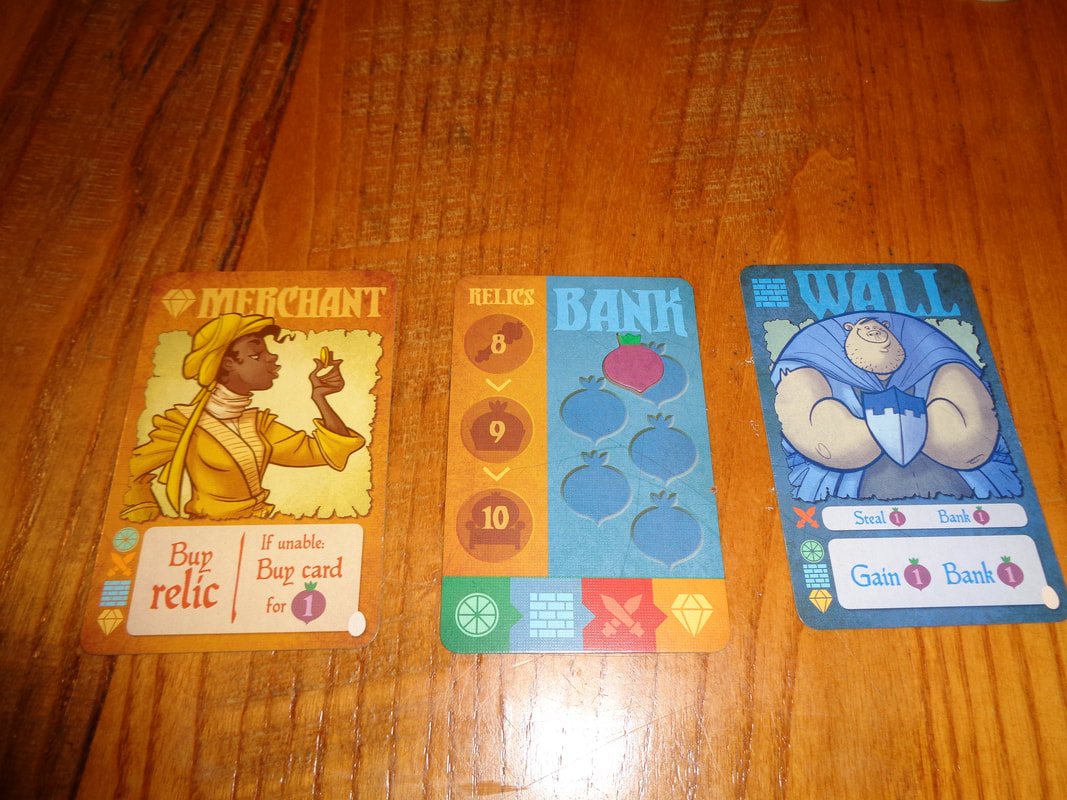
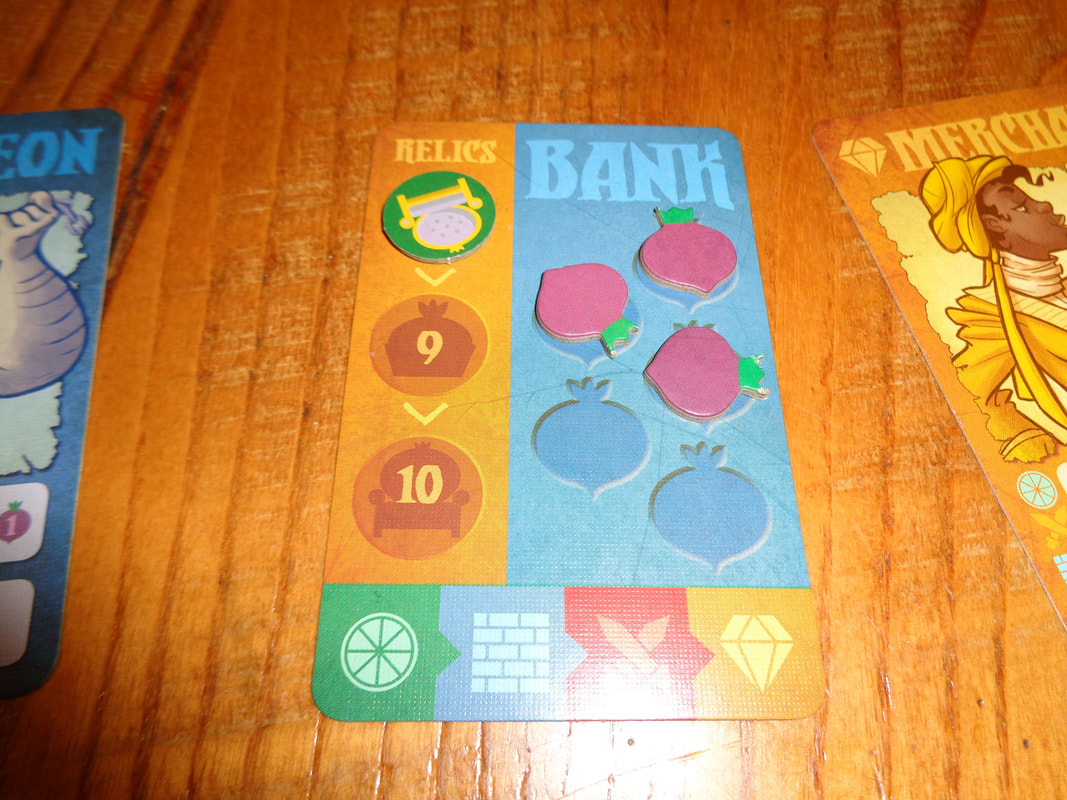
7th December 2021 The 2nd game of Tuesday night gaming with the Woking Gaming Club at The Sovereigns in Woking was Village Pillage. The life of a villager is full of strife and woe, mostly due to those other pesky neighbouring villages who covet your turnips and hide away their own! Village Pillage is about showing those nasty neighbours who's boss! What's in a game?
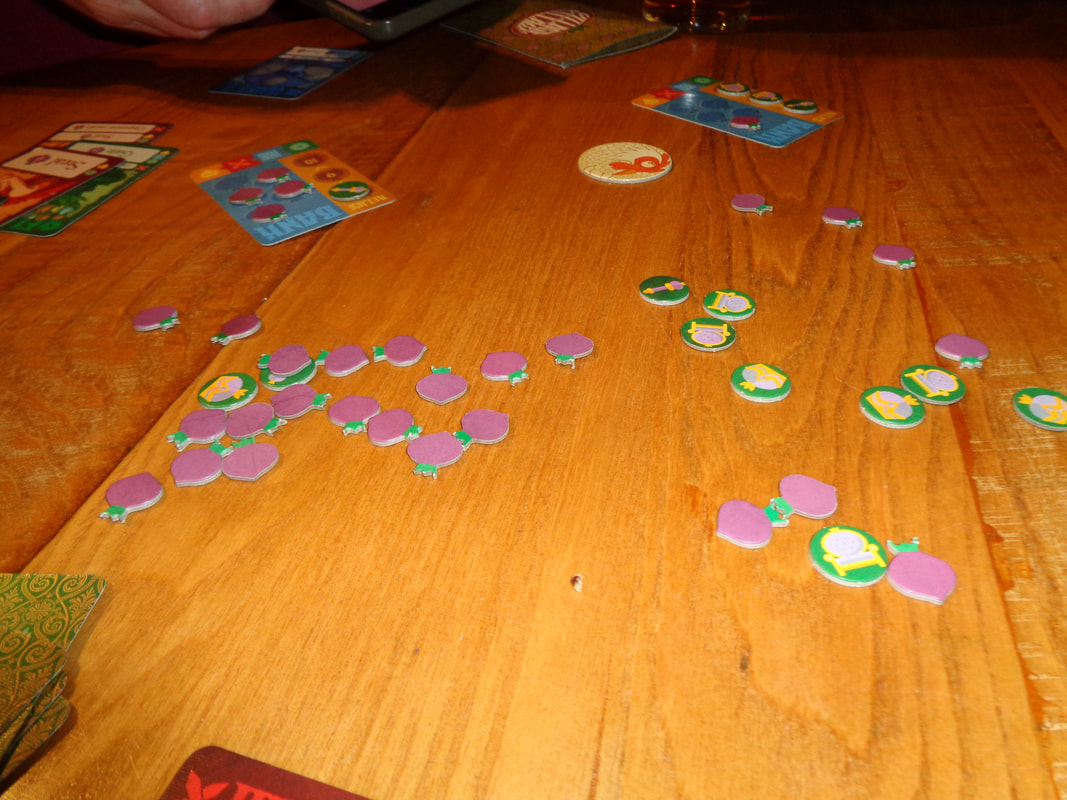
Village Pillage is a card game with some tokens, the build quality is standard for a modern game and what you'd expect it to be. The game utilises a strong palette of colours to distinguish the different card types. It also makes use of brash and colourful cartoony artwork throughout the game which suitability fits its not-so-serious theme. All of this makes Village Pillage pleasing on the eye. Village Pillage only makes use of 4 symbols for the 4 card types, there's also some wording rules as well. It's not particularly complex but for a light game, it's not immediately understandable. Having said that it's in no way any kind of game breaker. How's it play? Setup
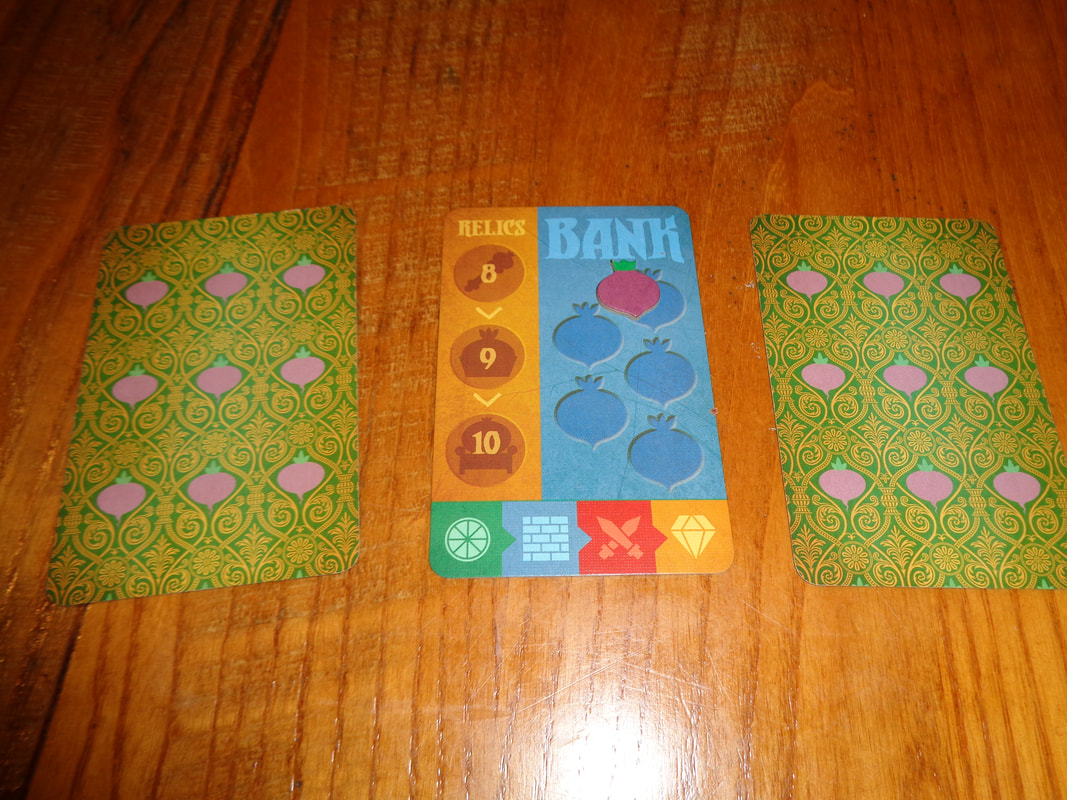
On to play In Village Pillage the objective is to acquire 3 relics before any other player does. However, each player is only directly competing with their 2 neighbours, that is the players directly to their left and right, this means that in a 4 or 5 player game, there will be 1 or 2 players that you might never interact with. A round in Village Pillage is played more or less simultaneously over 3 phases.
Endgame Play continues until a player buys their 3rd relic, in which case, they immediately win the game. Overall
There's no denying it, Village Pillage is essentially a glorified implementation of rock-paper-scissors with card, that's not a criticism of it, far from it in fact. Unlike rock-paper-scissors, which is a context-less exercise in determining a winner, in Village Pillage players will have motivations and objectives for their actions, which can and probably will change from round-to-round. Additionally, the outcome a player will get against a neighbour can be unexpected depending on the context of the resolution, sometimes there is no 'winner'. It's important to pay attention to what your neighbour is doing. If they have a lot of turnips, it may mean that they're looking to buy a market card or relic, which means that they may not try and interfere with you right now and it might be safe to grow some turnips of your own. Or it might be a good time to try and interfere with them. Provided, of course, that you have correctly anticipated their actions. Or if a neighbour has no turnips, they may be looking to steal yours and you'll need to prepare appropriately: It's no coincidence that growing turnips gets you 3 but stealing them gets you 4! It funnels players into interacting and conflicting with each other and that's what is at the core of Village Pillage. It seems deliberately quite hard to get accumulate turnips to purchase relics without trying to exploit your neighbour. All of this means that players always confronted with the possibility of having to make meaningful decisions and this is always a good thing. Whilst there are only 4 types of card, the variation within these categories in the market cards keeps the game fresh with just the right amount of unpredictability. While this sort of lightweight, chance driven conflict with other players can be a lot of fun, this kind of confrontational style won't be to everyone's taste. For a light game, I also found the rules a little fiddlier than I'd like; pretty much each card has it own rules for how it resolves against the 4 card times which can slow the game down. The timing rules are unavoidably also a little fiddly. None of this is any kind of deal-breaker and if you want a fairly straightforward, colourful, raucous filler game, then Village Pillage is worth a look. 21st November 2021 Sunday evening gaming Board Game Arena continued. The next game of the night was Chocolate Factory. Have you ever wanted to own your own chocolate factory? Since pretty much everyone's a fan of chocolate, why not? Unfortunately, there's no eating chocolate in Chocolate Factory, only a resource-management and light programming game instead. Caveat: we've only ever played Chocolate Factory digitally. What's in a game?
Since we've only played Chocolate Factory digitally, I can really comment on the qualty of the components. However, I can say what are there is, is quite nice and colourful, it has an early 20th century vibe to both the art style and subject of the art. The game uses a fair amount of iconography, luckily for the most part, it was pretty straightforward to comprehend. How's it play? Setup
On to play Chocolate Factory is played over 6 rounds - Monday to Saturday and each round has 2 phases, a drafting phase which goes twice in turn order and a factory phase which can be played out simultaneously. Drafting phase
Factory phase Each player will now have a factory part and a employee card. Factory parts are added to the player's board in one of the spaces above or below the conveyor belt spaces, a factory part can be used to replace an already existing factory part. Employee cards serve 2 purposes, firstly they grant the player some sort of bonus and secondly, they allow the controlling player to sell chocolate to the department store they work for. Unlike factory parts, employees only stay in play for 1 round. So how does the factory phase work? The factory phase has 3 shifts and in each shift players first take a bean and place it on the conveyor belt tile that's about to enter into the factory. Then each player must push their conveyor belt tiles along 1 space from the left to right so that the tile they placed a bean on goes into the factory, it's also possible that a tile will be slid out of the exit on the other side. Anything on that tile is placed into the respective player's storeroom. Once this is done, the factory parts can be used, each part costs mostly 1 but sometimes 2 coal to activate. A factory part can only be used on resources adjacent to it. For example the basic roaster factory party will turn a bean into coca, a upgrader factory part will change any resource into the next level of resource (E.g., coca into chocolate fingers.). Converters will turn chocolate into wrapped chocolate or boxed chocolate and so on. There are some limitation here, each factory part can only be activated once per shift. Once the 1st shift is finished, the 2nd begins, another tile is placed at the entrance to the factory with a bean on it and then the conveyor belt is pushed along another space and factory parts can be activated (Or reactivated.). Thus the conveyor belt will move 3 times a day. Selling When all 3 shifts have been run, players must sell chocolate, they can only keep 2 pieces in their storeroom between rounds, any excess is lost and players think ahead to avoid losses! Chocolate can be sold to corner shops and each one has their own demands. Like the factory phase, selling can be completed simultaneously. When selling to corner shops, they have 1-3 tiers of demand that must be met depending on their size and lower tiers must be completed before the higher ones. When a tier is completed it is immediately scored, when all tiers are scored the card is discarded and the player must draw a new corner shop card or any size they want. Selling to department stores is a little different. Firstly a player can only sell to a department store that matches the employee they drafted. Secondly, when fulfilling the demands of a department store, points are not immediately scored, instead a marker in the player's colour is moved along the 9 spaces. Once selling is concluded, a new round is set up, coal is distributed to players and new factory part and employee cards drawn, then the new round commences. Endgame Play continues until the 6th and round is completed, then the 5 department store scores are calculated. Whoever has completed the most corner shop cards earns a bonus Whoever has their marker the furthest along scores for 1st place, if the next player is at least half as far along as 1st place they score for 2nd place and if a 3rd player is half as far along as 2nd place, they score for 3rd place. Furthermore, players can earn a bonus for selling chocolate to 3, 4 or all 5 department stores. Finally, remaining chocolate and coal can earn points. Points are tallied, highest score wins. Overall
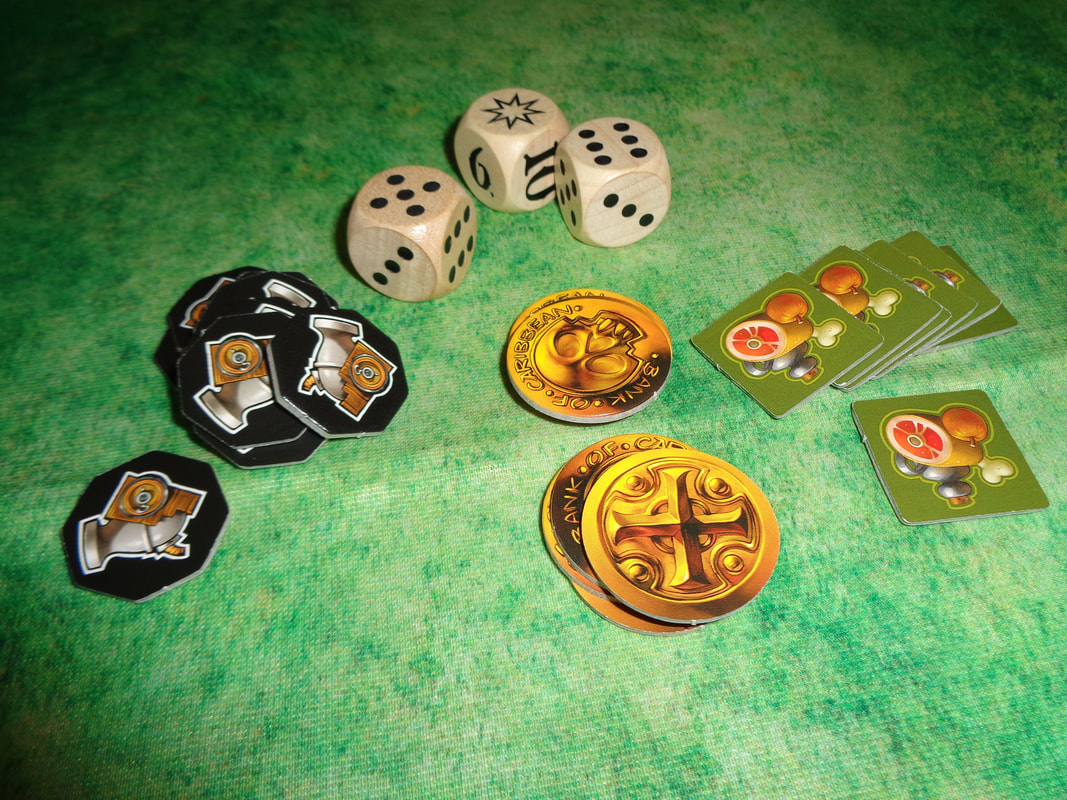
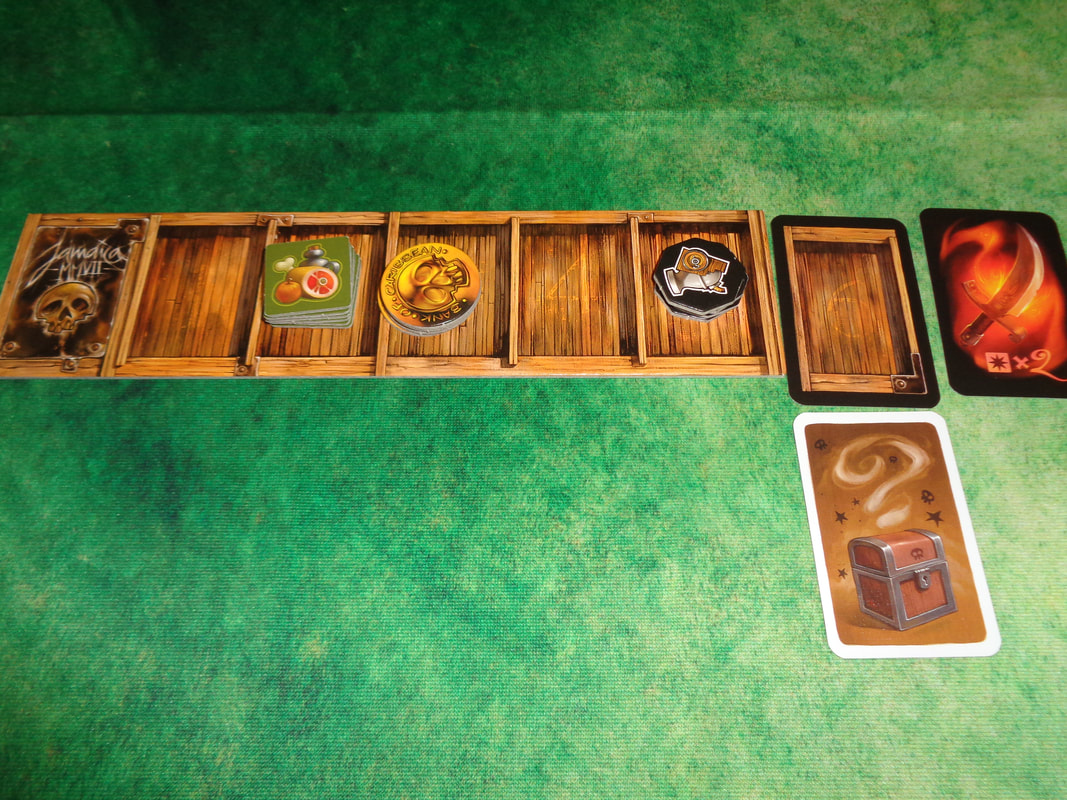
Chocolate Factory gives players several important factors to think about. Firstly, during the drafting phase, players must prioritise what they think is important to them, do they want a factory part more than an employee, they'll get both, but not necessarily in the ones they want if they wait to the 2nd drafting phase. Cards that players draft can dramatically change the situation for players. Most obviously are employee cards which determine which department store a player can sell chocolate to. If a player is geared to sell the kind of chocolate a particular department is demanding, then getting the employee that gives you access can be paramount. This is even before considering which benefit the employee card also confers on the controlling player. Factory parts will form the core of the player's ability to produce and sell chocolate, getting a part that wasn't wanted or needed will force player to reconsider their strategies for at least one round. Unlike employee cards, factory parts can stick around for the entire game, although they can be replaced and since players will acquire 6 factory parts and only have 5 spaces in their factory, it means something will have to go. Where these parts are placed can have a significant impact. Place them too far to the right and it'll take a while for resources on the conveyor belt to reach them. Put them too far to the left and players risk screwing up their engine. Putting factory parts in factory is an exercise in optimisation. Speaking of optimisation, the game has a fairly unforgiving action economy. It's obviously a deliberate design decision, but there's never enough coal. Players start with 5 coal in round 1, they'll have 3 factory parts to activate - and that's over 3 shifts! Even in round 6, when each player can have a full factory, they only get 10 coal each, they'll on average only be able to activate 3 or 4 of their parts per shift. If forces player to make meaningful decisions which is always good and also makes them think across 3 shifts instead of 1, but it also feels a little frustrating and uneventful when half of the engine you've been building isn't used in a shift and maybe isn't used in the entire round. Scoring also presents players with choices. Each round, every player will have the opportunity to score their 3 corner shops and work towards scoring 1 of the 5 department stores. Corner shops are pretty straightforward to manage, the only wrinkle being that their demands must be met in tier order. It means that players will sometimes need to adapt to changing demands that a corner shop might present. Department stores are a proposition that's a little more interesting though. Because scores are based on relative positions between players, it can lead to some interesting outcomes. E.g., if a player sells just 1 item to a department store and no one else does then they'll get the full reward for 1st place but conversely, if they sell 5 items to a department score and another player sells more, then they'll get less. This adds an extra option or strategy to the game and unlike some tableau-engine building games, it becomes beneficial to watch what other players are doing and what they're producing and who they're selling it to. And while I feel that the majority of player's victory points will come from corner shops, department stores can't be neglected. They exist in a sweet (sic) spot where they can tip the balance in a player's favour. I'm kind of conflicted about Chocolate Factory, it has some solid mechanics that present players with choices, I particularly like how players can chose where to sell their chocolate to maximise their profit. But parts of it are also a little unexciting, where the effort creating an engine feels greater than the rewards it provides. I would have no problem playing Chocolate Factory again, but not too often. I think occasionally, it would be a good change of pace 21st September 2021 It's a Tuesday and I'm at The Sovereigns in Woking with the Woking Gaming Club. In honour of Talk Like A Pirate Day, the first game of the evening was Jamaica, a game of pirate racing. However, before we move on: "My wife's gone to the West Indies." "Jamaica?" "No, she went of her own accord!" With that out of the way, let's continue. What's in a game?
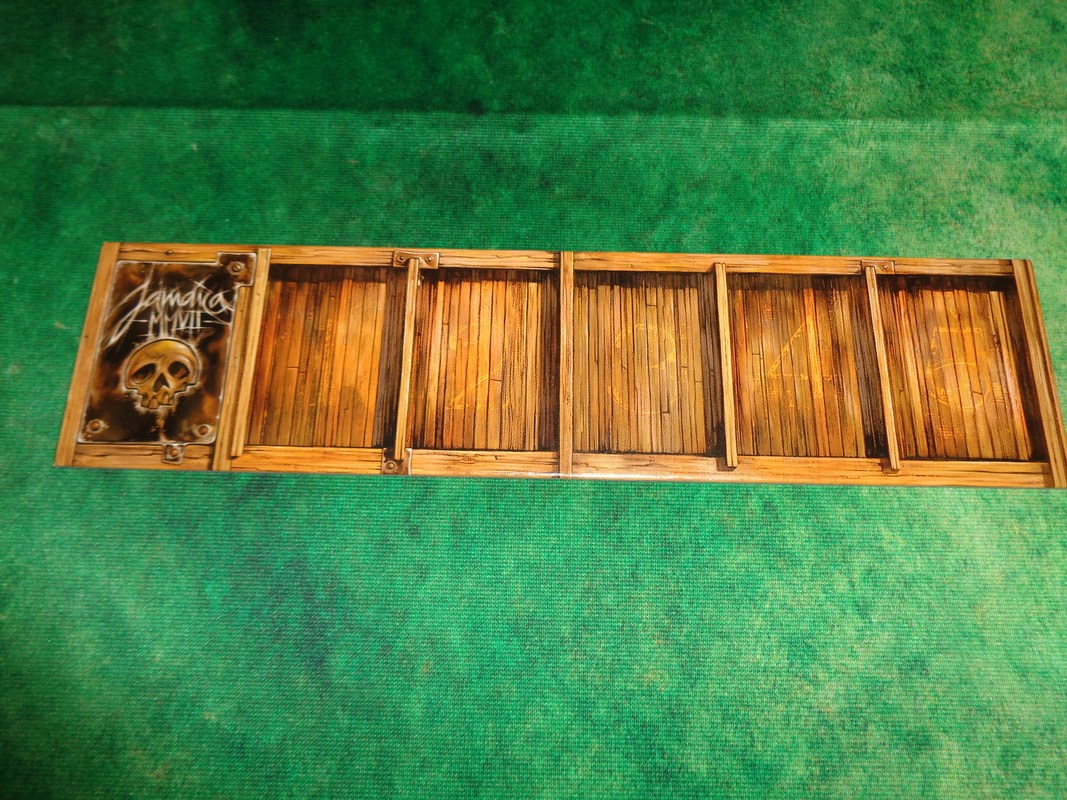
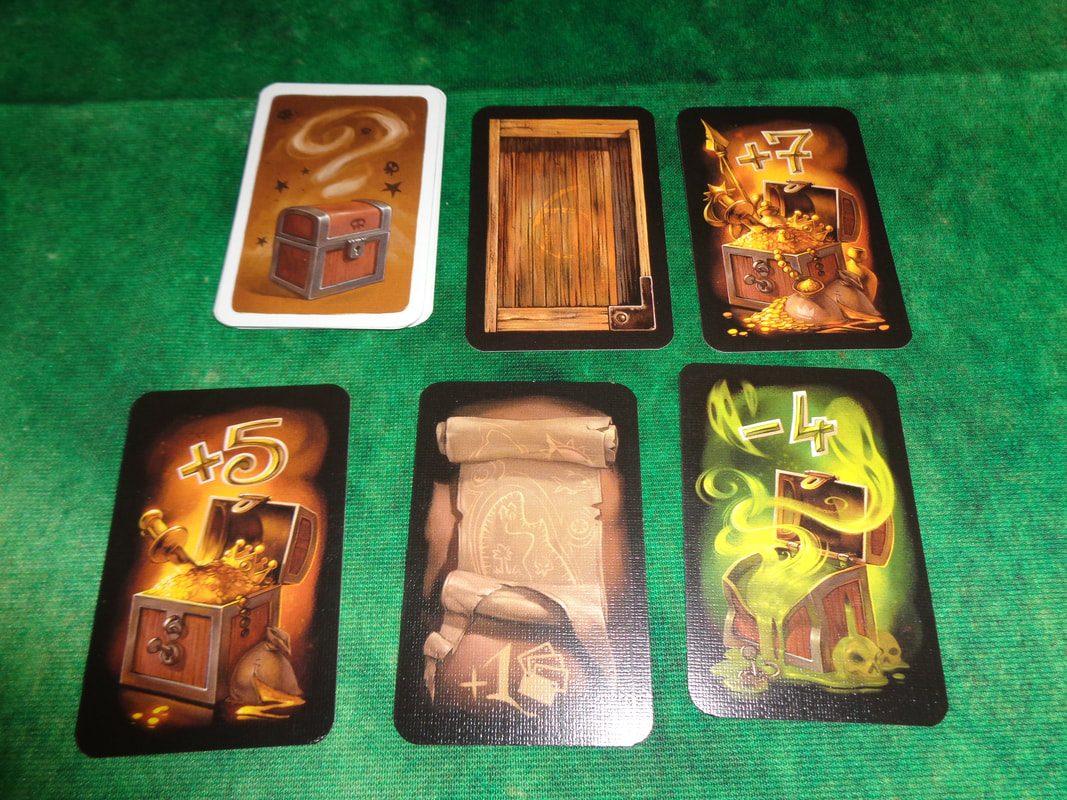
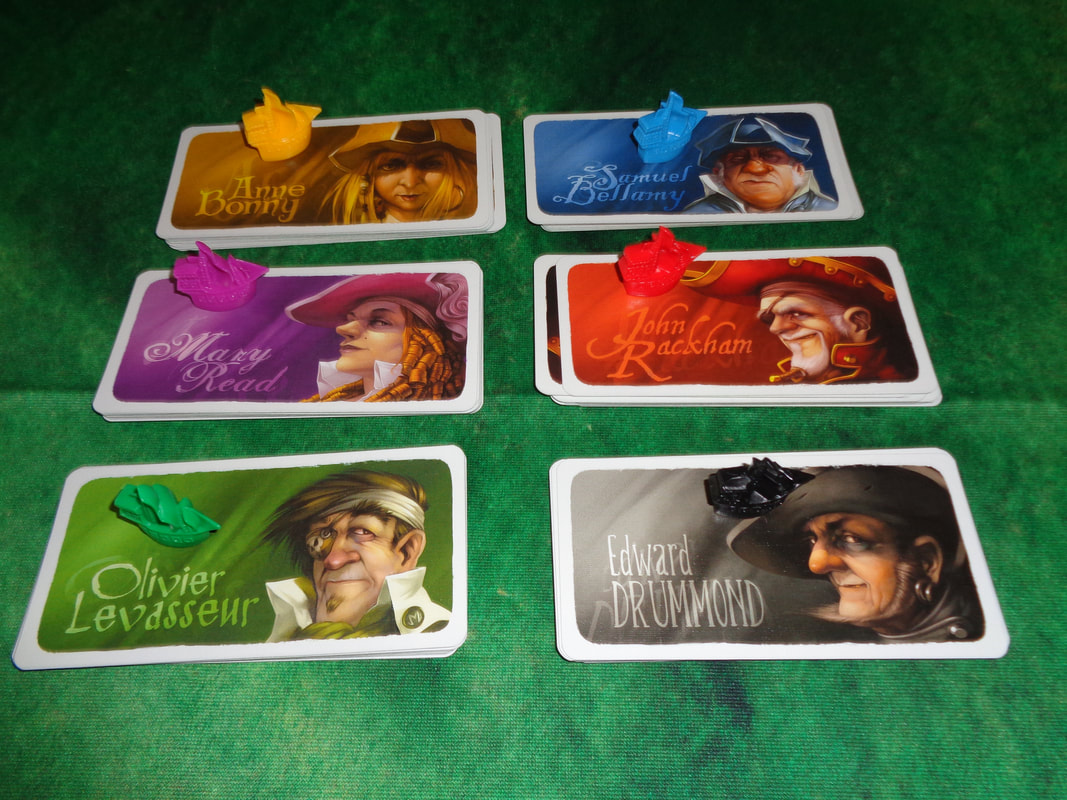
The overall art direction for Jamaica is colourful and makes use of a cartoonish style that suits the game's comical theme. The gameboard is brash with brightly coloured art but the standout are the player decks; not only do they share the board's style, they can be placed side-by-side to create a single long picture. The game doesn't use much iconography, what there is of it is easy to understand. How's it play? Setup
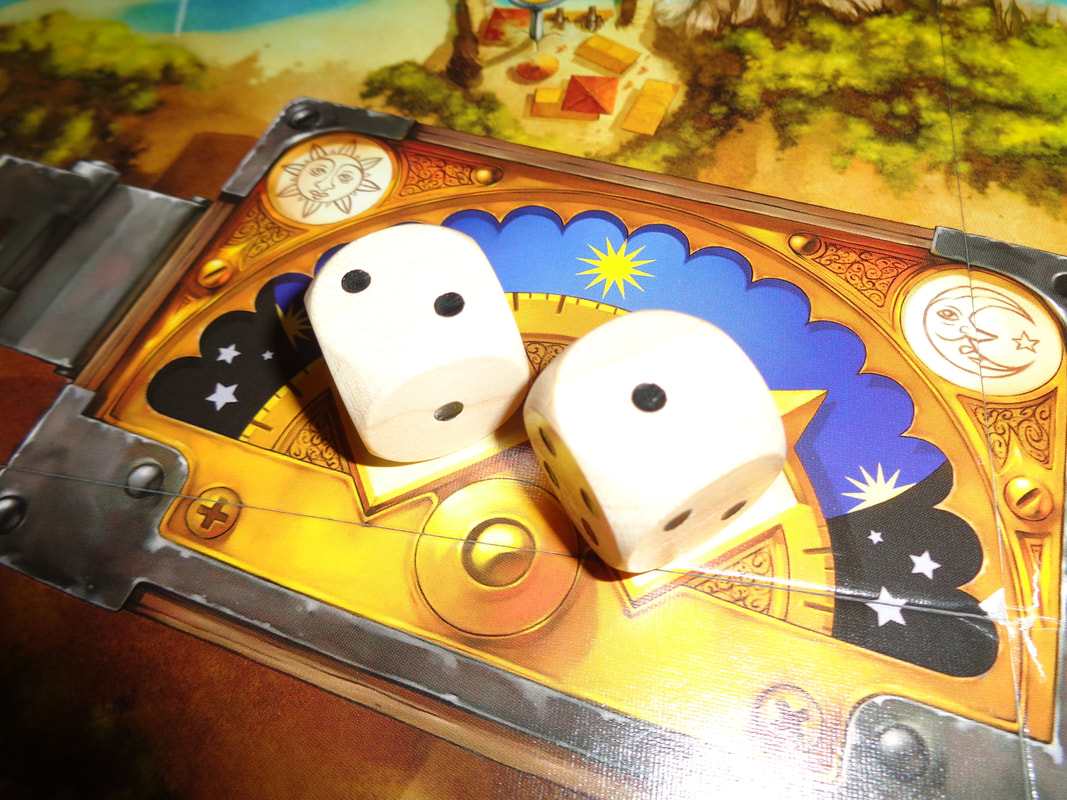
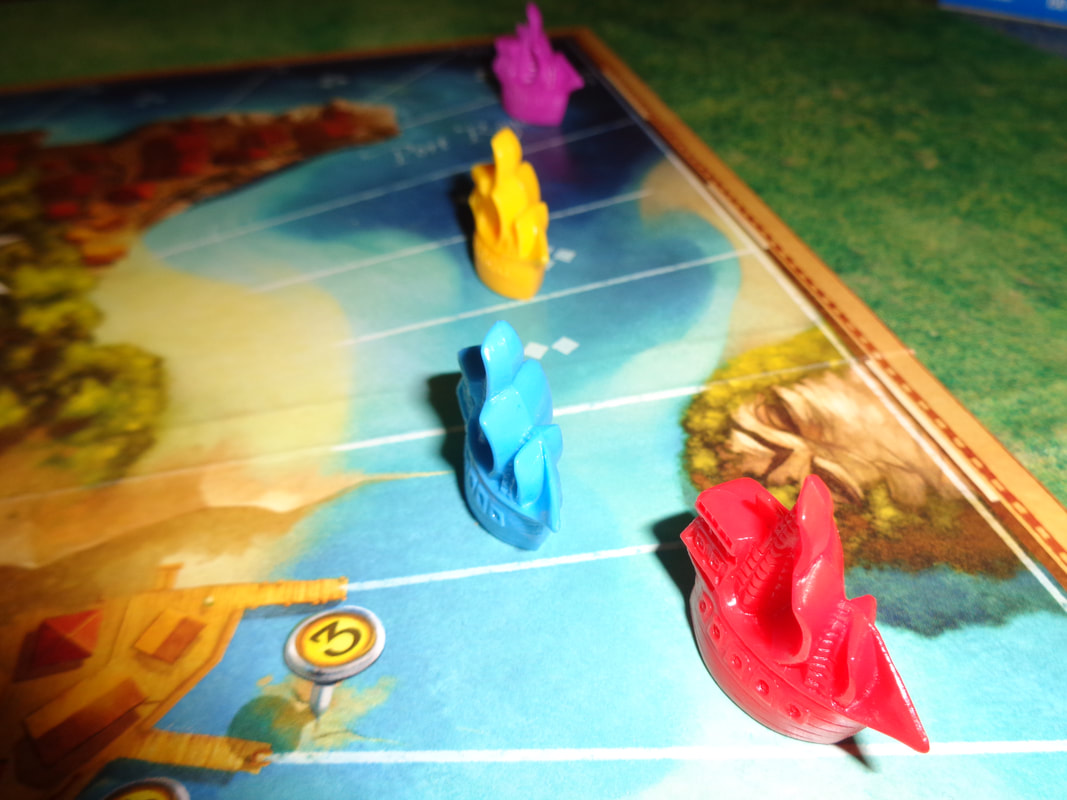
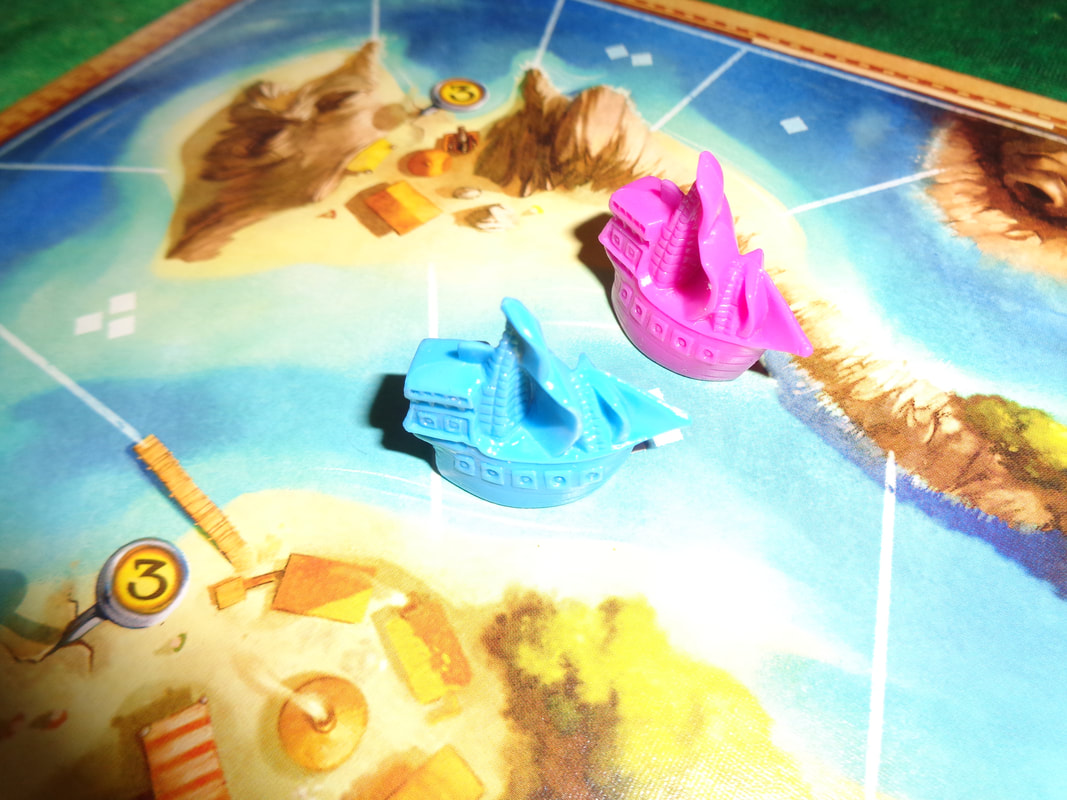
On to play In Jamaica, the Captain rolls the dice and assigns them to the game's 2 different phases per turn. Each player then chooses 1 of their 3 available cards to play and then performs the day and night actions on those cards. how effective those actions will be are determined by dice rolled and allocated to day and night.
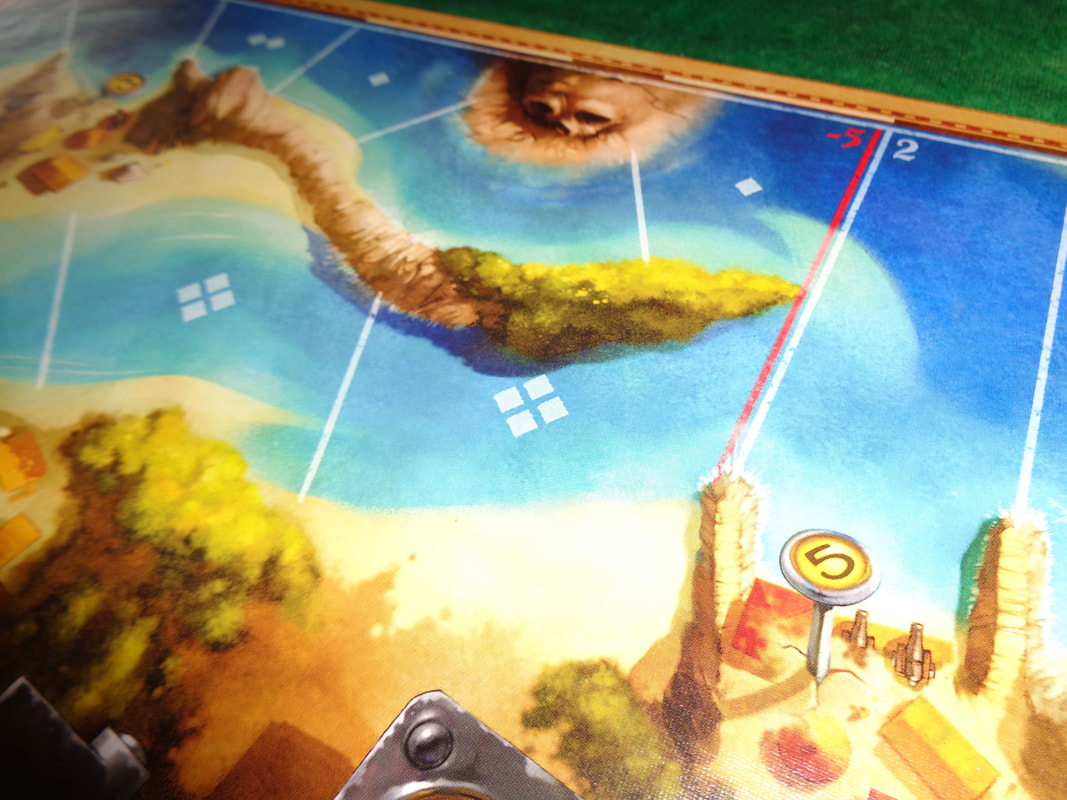
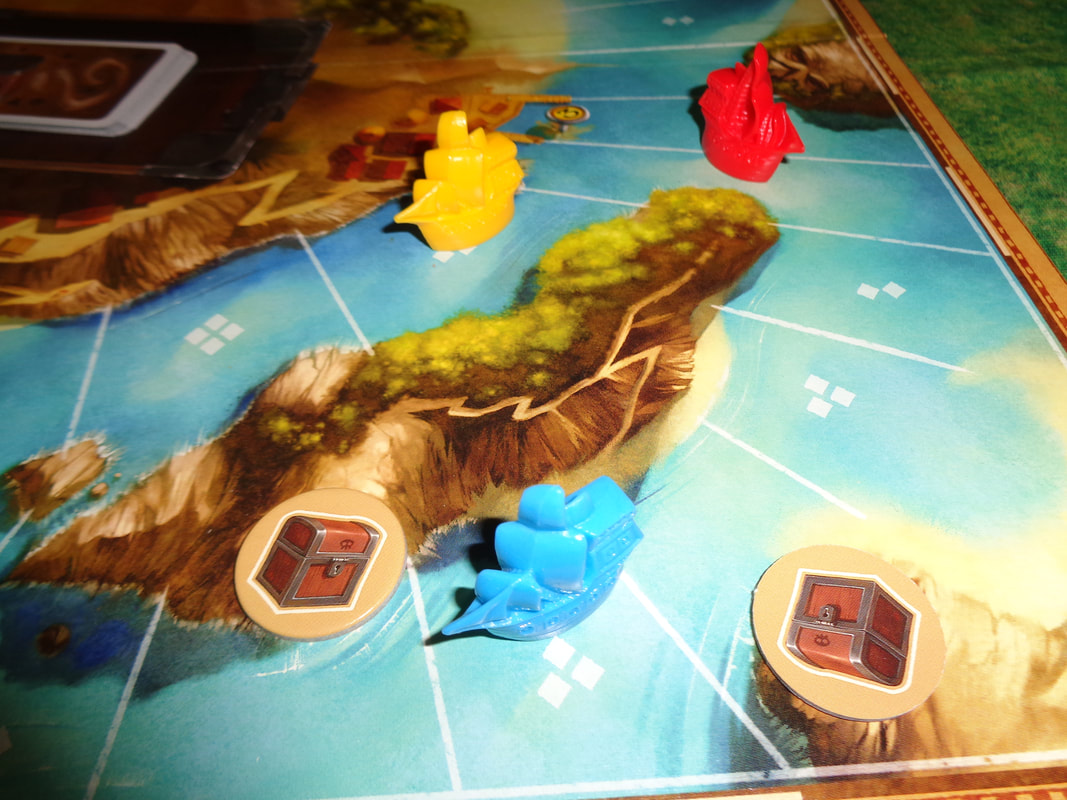
Endgame Play continues until a ship reaches the start/finish, upon which the current turn is completed and the game goes to scoring. There are 4 sources of scoring. Players score points according to where their ship finished, the start/finish scores 15 and points go downwards from there. If a ship failed to pass the -5 space, then they lose 5 points. Every gold token a player has on their player board scores a points. Treasure cards score their points and cursed treasure cards deducts from the player's score. Points are tallied, highest score wins. Overall
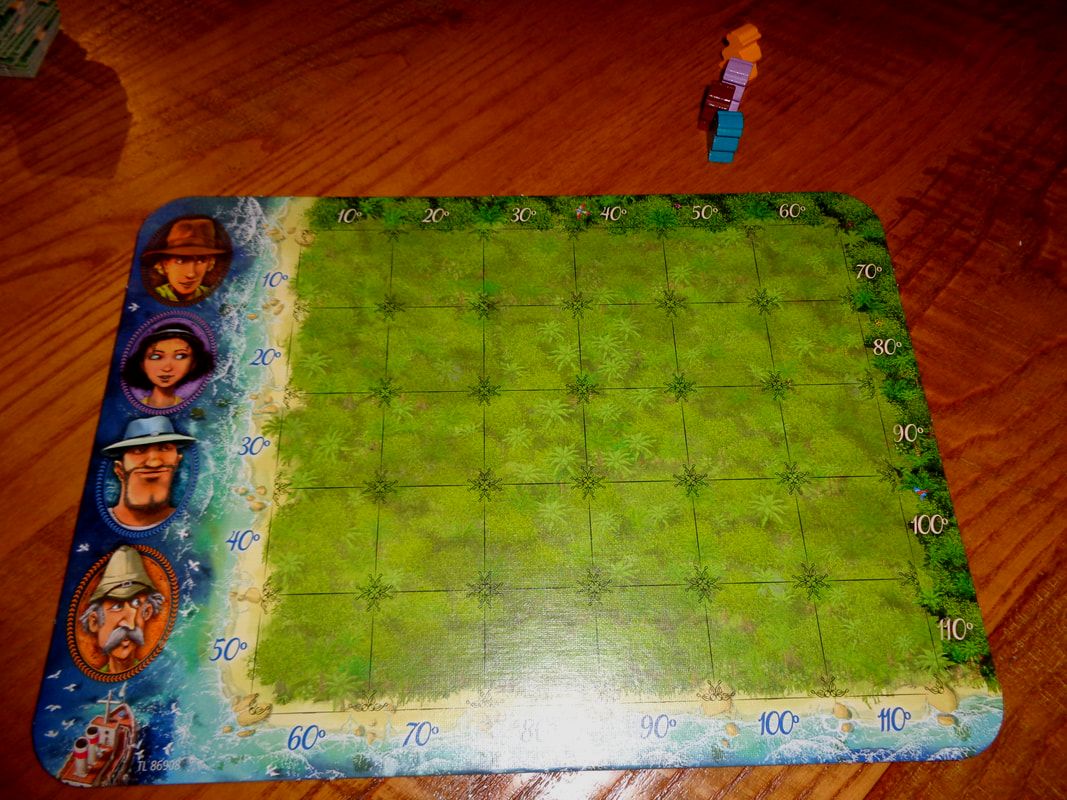
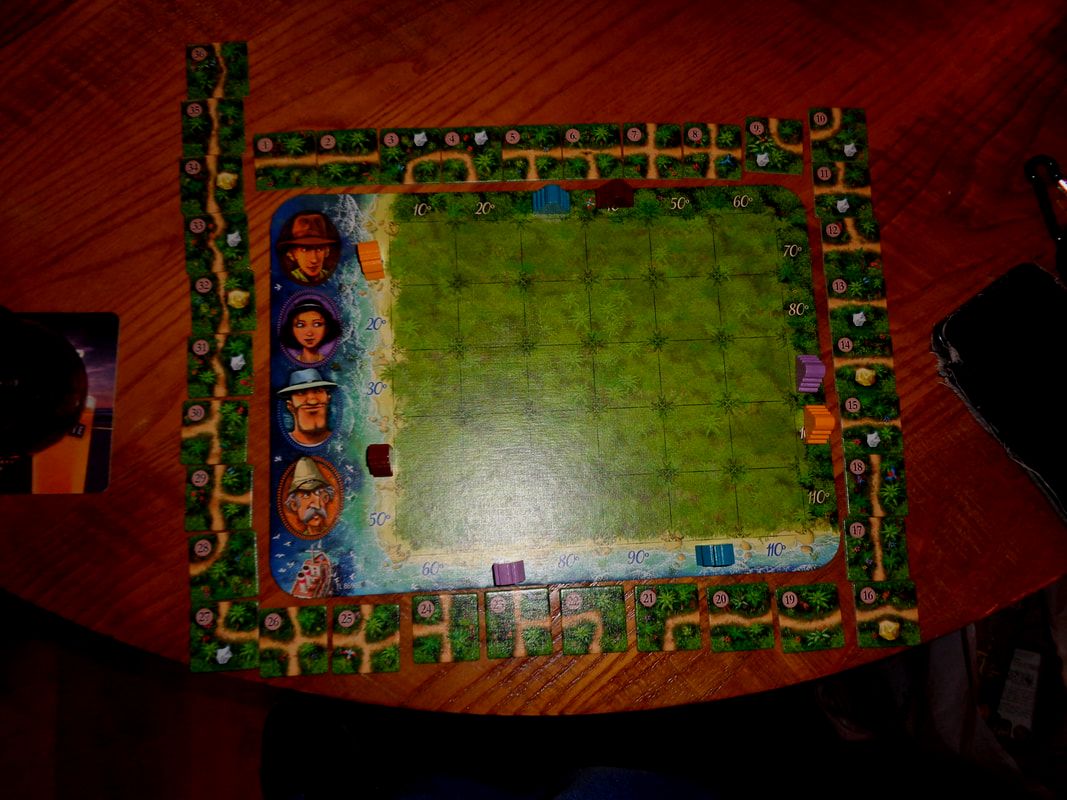
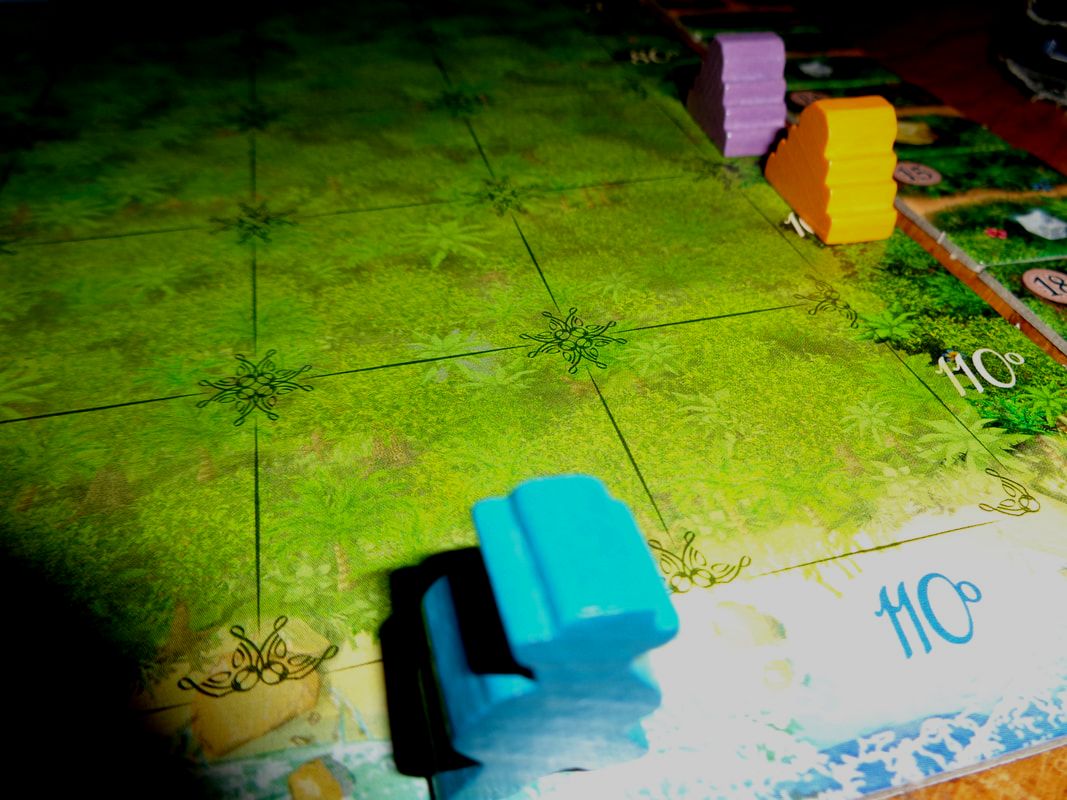
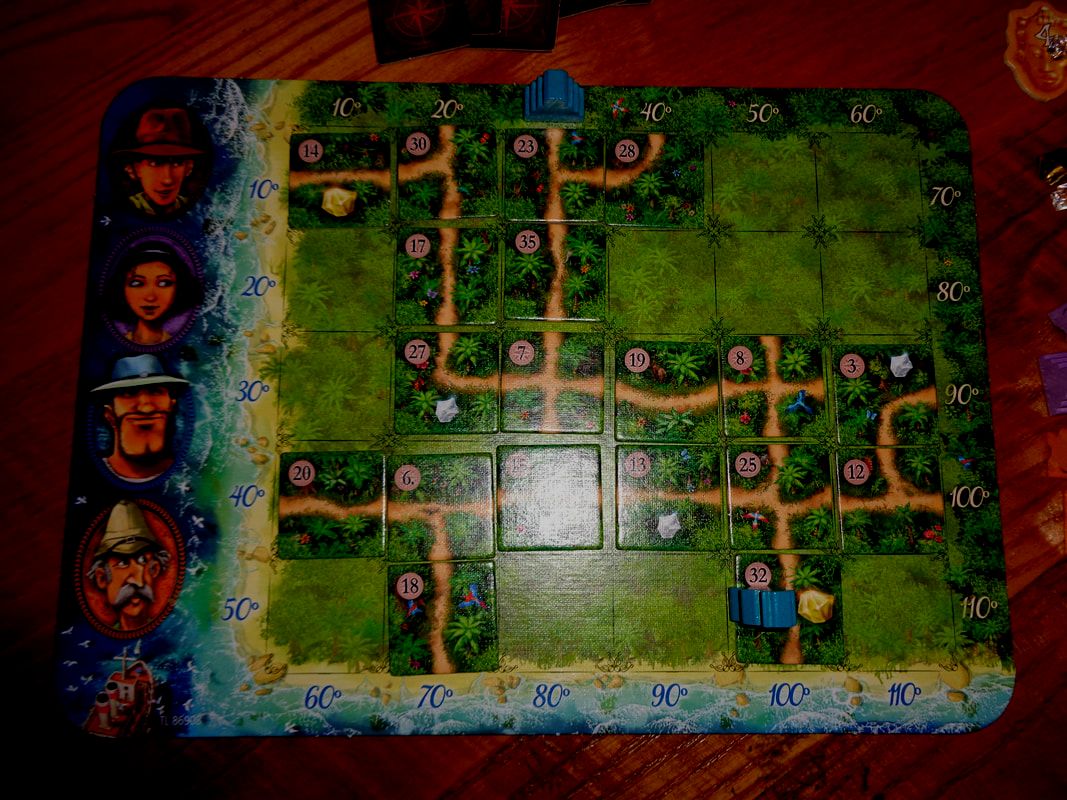
In Jamaica, players must balance the need to load resources with the need to move along the game track, doing too much of one or the other will probably be detrimental. They'll need to judge when it's the right time to move with the right amount of resources. The rules limiting how players fill their holds forces players to make decisions about what they carry on their ships. Players will also need to mitigate bad rolls and unfavourable cards, e.g., playing a red arrow backwards move when the die shows a 1. At the same time it's also a good idea to keep an eye out for other players. If another player is 3 spaces away and one of the dice rolled a 3, there's always the risk that opponent will end moving on to your space, provoking a fight, which could prove costly. Perhaps it might be a good time to load some gunpowder... Obviously, all of this is to some extent is influenced by the dice rolls, having all the gold in the world wont help if a player can't reach a port! It means players will need to adapt to this randomiser and change strategies when the dice - and sometimes the captain don't give player the results they need. Jamaica is a cheerfully colourful game with fairly light programming game where players 'only' have to think 2 moves ahead, with a theme that fits well with the mechanics. Jamaica also has elements of resource management and a touch of player interaction and conflict. It's an easy to learn programming game that is fun to play, particularly if you like a little bit of jostling between players and generally presents them with meaningful choices to make. 27th October 2020 Tuesday evening is here and I'm at 'The Sovereigns' in Woking with the Woking Gaming Club. Time for the first game of the evening; Karuba. Have you fancied yourself as an explorer just landed on some unmapped jungle island? Well in Karuba you control not just 1 explorer, but 4! All in a rush from beach to jungle in order to find temples, treasure and ultimately glory first before everybody. What's in a game?
How's it play? Set up The set up for Karuba very straightforward, if a tiny bit time consuming.
Gameplay for is very straightforward. Players are trying to move their explorers to the temple of the same colour. Unsurprisingly, this is done by laying tiles and moving the explores along the paths that are created. Karuba has no turns, everyone makes their choices at the same time.
Endgame Play continues until one player has moved all 4 of their explorers to the relevant temples, or as is more likely until the caller has depleted their entire stack. Players add the points of all the scoring tokens they've collected and the gold and diamond tokens, gold is worth 2 points and diamonds 1 point. Highest score wins.
Overall
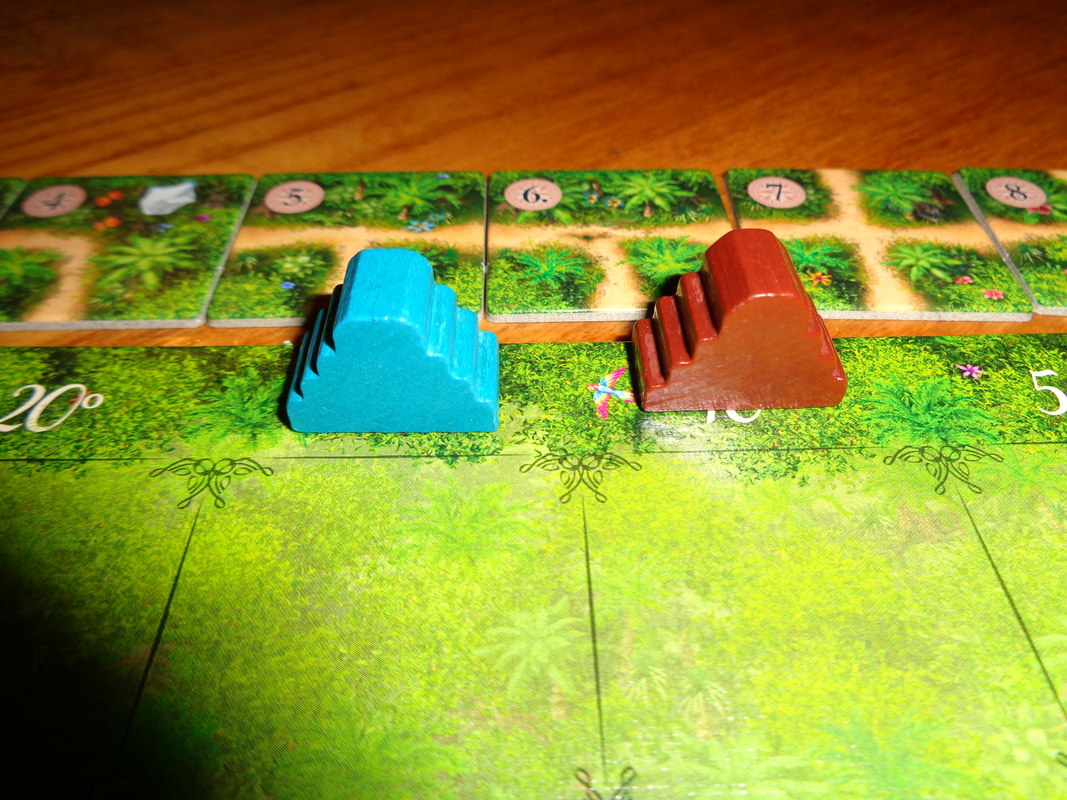
Despite the simplicity of the rules, Karuba gives players lots of decisions to make nearly all the time. The most common of these is whether to play a tile or discard it for movement. This is a very elegant mechanic, the best tile to build paths with is the crossroads, because it gives you the most options. But the crossroad is also the best tile to discard for movement, as it give you most movement. Early in the game, you'll obviously be wanting to play the tiles more often to build up your paths, but you can't afford to play them willy-nilly. A meandering path is something players will want to avoid. You may end up putting tiles in seemingly unconnected, random places, hoping to get the right tiles later on! Players have limited rounds in Karuba and will want to build their paths as efficiently as possible. The game has an absolute maximum of 36 rounds. If you look the photo of my gameboard from the end of the game. All 36 tiles were drawn. This means I played 19 tiles, which means I moved 17 times, whilst I managed to get 3 explorers to their destination, the blue explorer barely managed to leave their starting spot. Movement may also provide difficult decisions. For example; you may have an explorer who is just 1 step away from a treasure or a temple but have just drawn a crossroads tile which grants you 4 movement, using it on 1 movement can be a waster. Do you use it to move another explorer to maximise it's value, or do you use 1 movement to complete an objective and waste the rest of the movement? Also, when moving explorers, players will need think ahead a little, a badly placed explorer can block their colleagues, meaning it might require an entire round to clear the path. Only towards the end of the game, when I had connected everything up and reached 2 temples, did the decisions become no-brainers. But because the game is played simultaneously and other players were more or less in the same situation: There was little downtime between rounds, which passed very quickly. Karuba is a quick game to play anyway, if a player spends 1 minute deciding their move, the game has a play time of 36 minutes. The only small criticism I could level at Karuba is that there is no interaction with other players. Not a problem for me personally, but it can be for others. Otherwise I thought it was a good game. Quickly and easy to learn, quick and fun to play. Anybody can learn and play Karuba. It's such a visually driven game that players should quickly comprehend what they need to do. It's a game that's definitely going on my list. 24th November 2019 Sunday at 'The Sovereigns' in Woking. The 50 Fathoms hiatus continues, so it's board games instead. We began with 'Tsuro: The game of the Path'. And that's what Tsuro is, a game about paths, quite figuratively. It's also quite abstract and there's not much to say about the theme. What's in the game? The game comes in a small package.
How's it play? Set up is quick and simple.
Endgame Play continues until one of the following conditions are met:
Overall
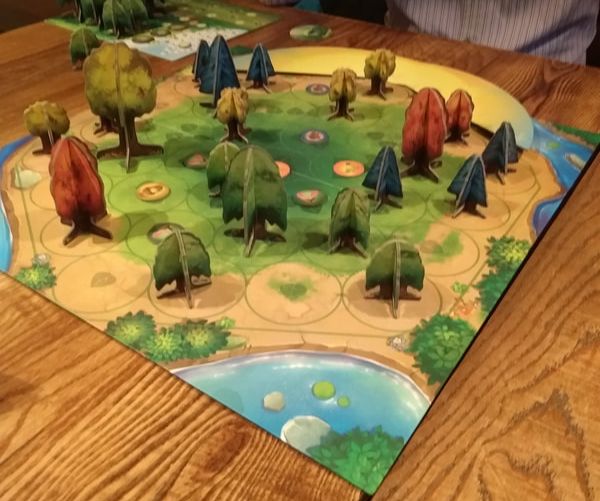
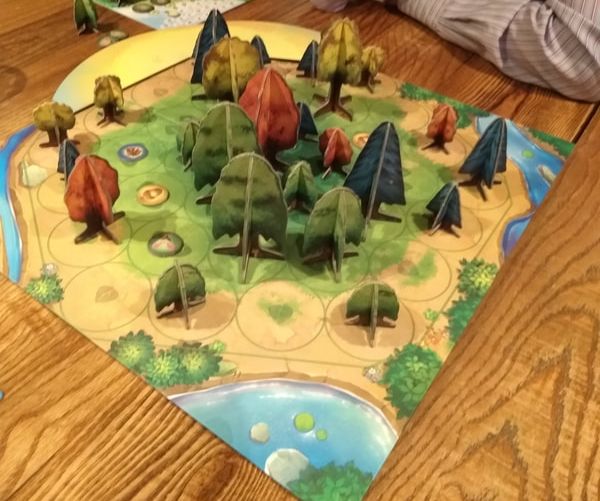
Tsuro is a small game, quick to setup, quick to learn and quick to play. It is essentially a light 'programming' game that requires a small amount of scrutiny and forethought to try and predict your moves. The real danger in the game however, comes from the other players, it's impossible to predict what tiles they will play and its impact on you. Essentially you can't rely on planning more than 1 move ahead and have to adapt to other player's moves as they occur, this is particularly true later in the game as the board becomes fuller and options become smaller. All this unpredictability makes Tsuro fun, as long as you don't try and think too much about what moves you can make. Additionally, Tsuro plays with up to 8 participants, combined with it's accessibility make it a good choice for party games and fillers. 4th June 2019 Tuesday night and it's game time at 'The Sovereigns' in Woking with the board game club. Does the idea of game about slowly growing trees excite you? If the answer is yes, then Photosynthesis is the game for you! What's in a game? All of the components of photosynthesis are made from card. All of the of the tokens, even the trees. There are no plastic meeples or soulless wooden cubes here. And even though this is the case, they are still good components. When a bunch of trees are all on the playing board. It looks impressive. In photosynthesis there is a main playing board and a sun marker to indicate the direction of the sunlight. Additionally, each player has their own board that contains most of the seeds and trees needed to play the game. Players also start with some seeds and trees that are not on the player board that are 'available' to use. There is an important difference between the two that will explained a little further down. 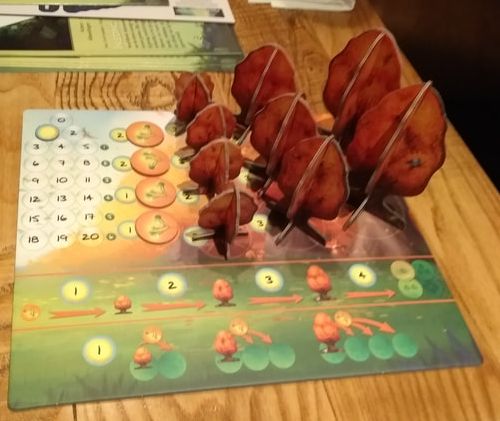 How's it play? The premise of Photosynthesis is to plant seeds, grow the seeds until they become the largest possible trees and then score points from those trees. In a normal game, play continues until the sun has completed 3 revolutions of the board. It takes 6 rounds to complete 1 revolution. Thus players each have a total of 18 turns to win the game. Each round consists of 2 phases. Phase one.
So now that all the players have calculated their light points, play proceeds to the next phase. Phase two.
That's it for the basic rules. There are, however a few other rules to remember which are very important.
All of these rules basically serve one purpose - to slow the game down. And that makes complete sense, this is a game about growing trees after all. It forces players to think a few turns ahead. It takes time to score points. A tree can only score points when it is a 'large' size. It takes 4 actions to plant a seed and then go to a small, medium and large tree. Then it takes a 5th action to score it. Furthermore it will take more actions and light points to 'buy' the seed and 3 different sized trees from the player board in order to do this.
Overall
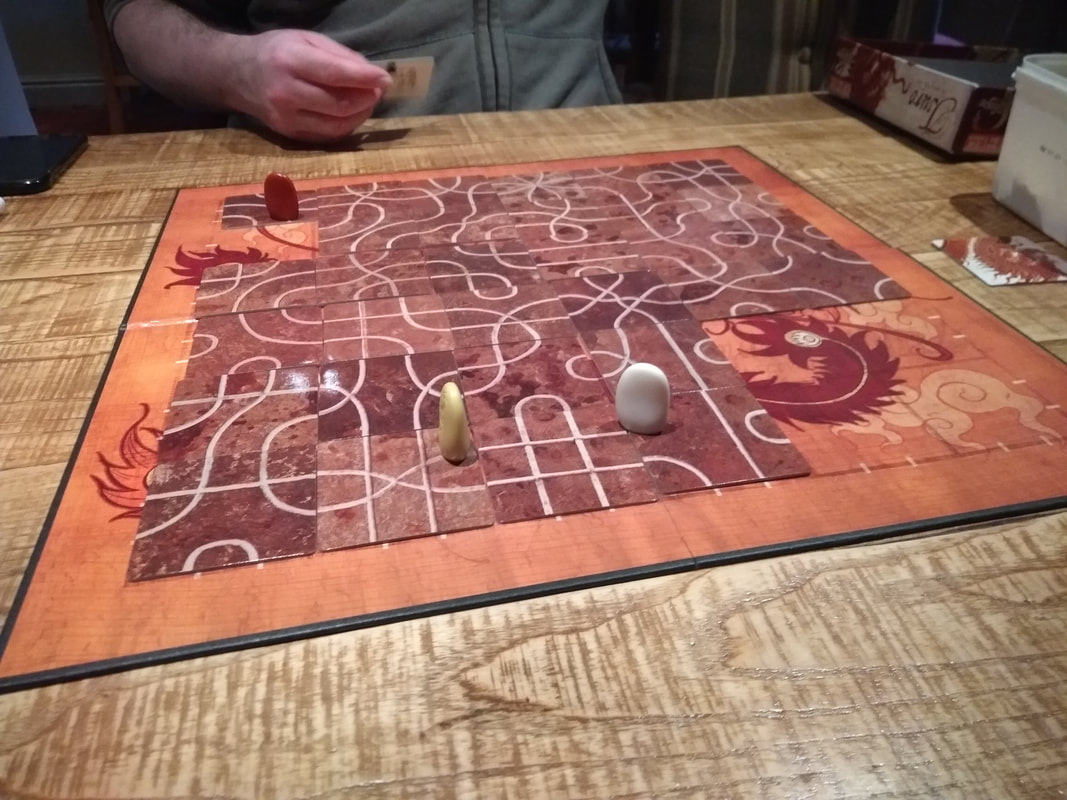
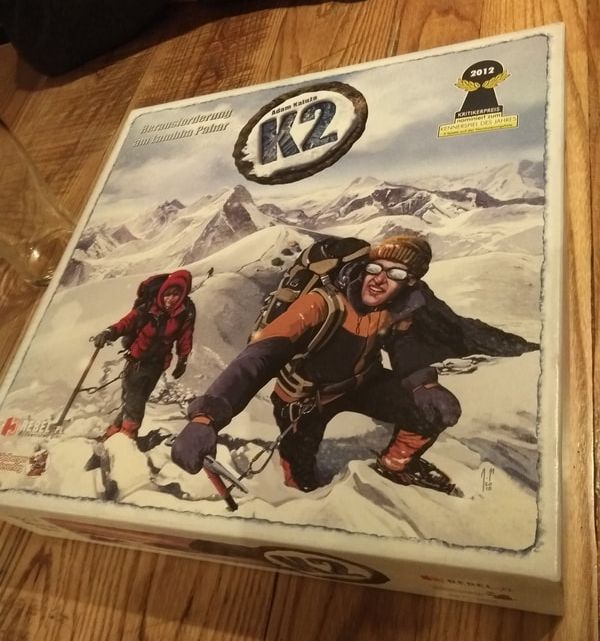
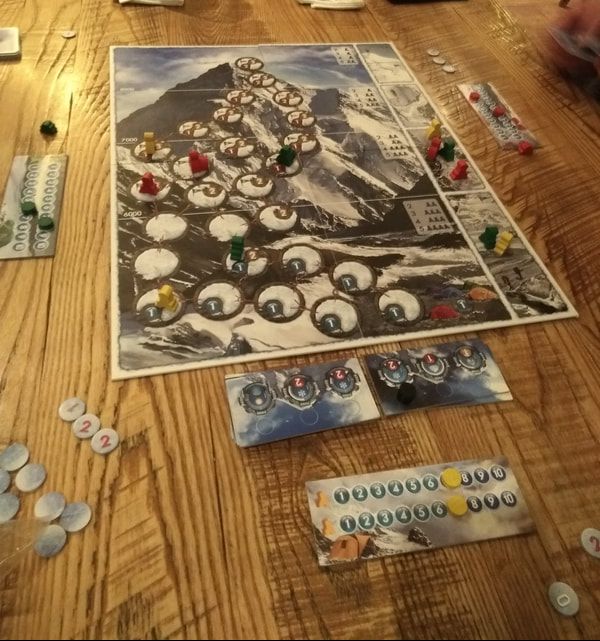
Photosynthesis is a peculiar beast: It's a little bit like a worker placement game with trees earning light points from their positioning and it's a little bit like an area control game, where larger trees will shut out surrounding smaller ones. It's simple to learn but forces players to adopt a 'ent-like' mentality towards the games varied choices, strategies and occasional hard decisions. It's slow place means players cannot burn light point to do one thing quickly. Sometimes it's possible to speed events by sacrificing seeds or trees, but this can be tricky choice as it's permanent. I'm sure there are ties when it is prudent to do so. But slow and steady, that's the way to go. I think all of this good and makes for a good game. I'm sure Treebeard would agree! 19th March 2019. Another Tuesday and another evening of gaming fun at 'The Sovereigns' in Woking. Tonight we played in a 3 player game of 'K2'. K2 obviously refers to the mountain K2. People on the internet who claim to know more about mountain climbing than me (and that's not hard, I know nothing about mountain climbing) state that K2 is harder to climb than Everest. With that in mind, it's best that I conquer K2 from the confines of a board game sitting in a semi-comfy chair. In K2, each player controls 2 climbers. The higher a climber goes, the more points they score at the end of the game (provided they're still alive at the end). Each climber scores, so your final score will be the combined score of both. Climbers only have 1 stat for you to worry about and manage. That stat is 'acclimatisation'. If this drops to 0, then the climber dies. The game rules are quite straightforward. Each player has their own personal deck to draw cards from to create a hand of cards. There are basically 2 types of card.
Climbing to the top is simple, when you move one of your climbers to a new space on the mountain, it will have movement and acclimatisation cost that the climber must pay. Thus; if you have played a 3-point movement card and you moved a climber to a space that costs 2 movement, you would still have 1 movement left. At the end of a turn, climbers may gain or (most likely) lose acclimatisation points dependent on their position on the board. There you go, rinse and repeat until you reach the top. Simple, right.
Except I've not mentioned 2 elements of the rules, which are what make K2 a good game.
The first is: The weather. You see, the weather can influence the movement costs of moving to another tile and also the acclimatisation costs that climbers must pay. Clear weather incurs no extra costs, but worse weather can affect, one, the other or both. Interestingly, the weather may only influence climbers at certain altitudes, it's possible to be above bad weather. The game uses tiles to depict the weather, each tile shows the weather for the next 3 days and there are always 2 tiles turned face up. When the end of the first weather tile is reached, a new tile is turned over. This means that players are able to see what the weather will be like for the next 3-6 days. Why does this make K2 a good game? It makes K2 a good game when combined with the other rule I was talking about, which is: The Hand of Cards Each player has 3 cards in their hand at the start of a turn. Players then draw 3 more cards from their decks. Giving them a hand size of 6. From this hand of 6, players must play any 3 cards. Leaving them with 3 cards remaining in their hand Why is this such a clever mechanic? Because it allows a player to plan their moves in for the future. Because you figuratively 'bank' 3 cards. When you play cards, the weather will influence how effective they are. This will influence which cards you play, but will also influence which cards you don't play. So when the weather forecast shows bad weather ahead, you don't want to be climbing much, because you'll be hindered and wasting movement. Any good movement cards should 'banked' and not played. Then, when eventually there's a stretch of good weather, hopefully you will have kept those good movement cards in your hand. So that regardless of what cards you draw, you'll have at least 3 good movement cards so that you can exploit the break in the bad weather to climb higher. That's why it's such a good mechanic, it emulates the feeling of sitting around in your tent enduring bad weather, waiting for a window of good weather to open up and then surging for the peak. There are some other rules about risk and turn order and like. But this is the gist of the game. And a good game it is. Tuesday 15th January.
Another evening in 'The Sovereigns' with Woking Board Game Club. On this evening we played 'Lords of Xidit', a game where you 'program' in your next 6 actions. The game is a fantasy themed 'pick-up-and-deliver' game, tasking you with recruiting heroes to fight against monsters as they appear on the board. Cities (used to recruit heroes) and monsters appear randomly on the game board. Although, you can always see what the next tile is going to be. So astute players can take advantage of this when programming their moves. What really makes this game stand out is the end-game scoring mechanic, which will influence how you play the game. Throughout the game you will accumulate three types of 'scoring'. These are; wealth, influence & reputation. Whenever you defeat a monster, there are rewards to be had in all 3 categories, but you can only choose to take 2 out of the 3 rewards. Why does this matter, because scoring is done by rounds of elimination. In the game we played: In round 1, the player with the lowest wealth was eliminated. In round 2, the player with the lowest reputation was eliminated. In round 3, the player with the highest influence won the game. But the order in which the elimination rounds occur is randomly determined at the start every game. So the rewards you need to choose will be determined this. Furthermore, each of the 3 types of scoring is accumulated differently. Wealth is kept hidden behind each player's personal screen and has no limit. Wealth is scored on a 1-to-1 basis. The higher, the better. Reputation scoring is done in areas of the board which can be contested by all players, only the top 2 players in an area score for its reputation. Each player is limited to 20 reputation markers. A player's reputation score is calculated by adding up from all the areas where they can score. Influence markers are placed on specific spots on the board, only one player can ever have influence in that spot. The most markers that a player can be placed in a single spot is 4. Players have 15 influence markers. Influence markers are scored in a 1-to-1 basis. So all of this means that your approach to the game will need to adapt to the random placements that occur. The only problem with this is that really you require at least 4 players to play the game properly, playing with 3 people requires you have a 'dummy' player that is added. And the game does not play for to at all. We played it with 4 players and I enjoyed it (not just because I won ;)), I think everyone did. The game was also enhanced by Andy B painting all the heroes prior to playing. I'm not a particular fan of programming game, but I do think this is a good game: It plays well and the turns don't seem too long or too complicated. Not only that. It's only a TENNER on Amazon at the time of writing. - my copy is waiting for me at the post office. I'm off to get it right NOW! |
AuthorI play, I paint. Archives
March 2024
Categories
All
|


 RSS Feed
