|
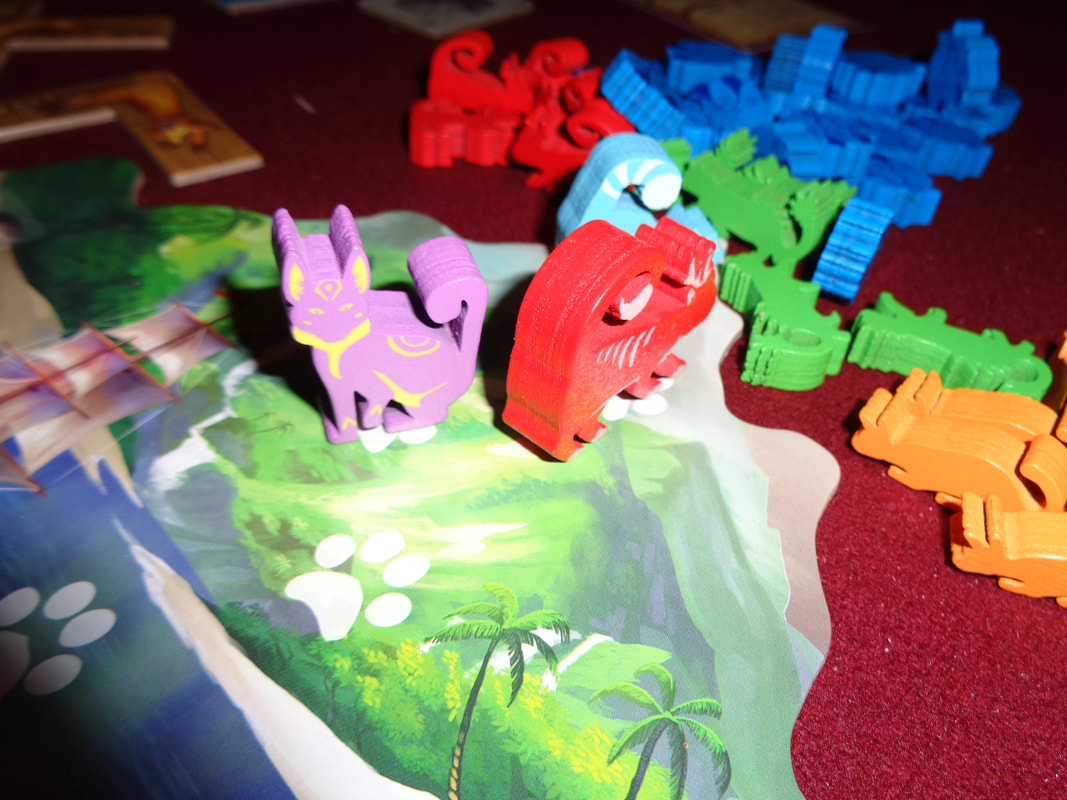
4th August 2022 It's a Thursday and we're round Simon's for a evening of gaming entertainment. Cascadia: 'A land of falling waters,' generally referring to a large wilderness area in the Pacific north-west of the USA. In Cascadia players vie to create a diverse landscape of habitats and wildlife in this tile placement game. What's in a game?
For the most part the components are all high quality. The tiles and tokens are sturdy and the wildlife tokens in particular are chunky and tactile. The pinecone tokens are average quality by modern standard - which means perfectly acceptable. The same is true of the cards, they feel a little flimsy but since they're only used to display information and won't really be handled much, they too are perfectly acceptable. The art used on cards is fantastic, having said that, each set of 4 only uses 2 images which are flipped and used a 2nd time, it's a minor quibble but it feels touch cheap. Art on the tiles is good too but is hard to appreciate since they are relatively small. Importantly, it's also uncluttered, differences between habitats is for the most part very easy to distinguish. Similarly, the wildlife icons are easy seen. As a minor aside: Prairies are depicted as yellow, which I guess represent dry grasslands. The yellow definitely does not represent desert! And yes; some of the yellow tiles have salmon icons on them, because, believe it or not, prairies can have water features. If you ever play the game and someone says, 'why are their fish in the desert', then let them know!! Anyway, back to talking about components. The iconography is easily understood in Cascadia. It's obvious what the wildlife icons represent and the icon for pinecones is equally as obvious. How's it play? Setup
On to play In Cascadia, players will draft tiles and wildlife tokens, using them to create a personal landscape by placing tiles adjacent to each other and putting tokens on top of them in order to create habitats and patterns of animals to score points. Cascadia follows a usual turn order with the active player resolving their action before play progresses to their left.
Endgame Play continues until all the face-down stacks of tiles have been depleted and only 3 tiles remain in the drafting area, which should also be a even number of player turns. VPs are scored from several sources.
Points are tallied, highest score wins. Overall
The rulebook for Cascadia talks about the real life habitats and biomes that inspired the game and it's obvious that this is one of those games where a bit of extra attention has been put into the details. On to the game itself: Cascadia has a nice mixture of quick to learn rules and depth of gameplay. This depth comes from forcing players to make tricky and meaningful decisions. This occurs because Cascadia has 3 axis' of play which will influence players' choices. The first comes from wanting tiles with specific habitats on them; players may want to expand their forests or rivers for example and will be looking for tiles that facilitate that. The second axis comes from also wanting tiles with specific wildlife icons. If a player needs a fox token in a certain spot, then they'll need a tile with a fox icon. The third and final axis comes from getting the actual wildlife tokens that are needed to score the wildlife cards. All of this means that it's unlikely that players will get all 3 that they want when picking a single pair which would be a no-brainer, they'll probably end getting 2 of they want and sometimes only 1. Players will need to adapt and re-strategize contextually, look to optimise their picks and finding other scoring opportunities. Players will probably have to gamble a little bit on getting what they need later in the game. Pinecone tokens can of course change things. Used at the right time they can really open up a player's choices, getting any pair can make a difference, as can clearing all wildlife tokens in the drafting area if a player is really looking for a certain token. Cascadia also has a fairly quick playtime, although it sort of occupies a game length that's way too long to be a filler but a little too short to fill an entire evening. I don't consider that a bad thing, you could just play twice! The randomness in setup and scoring gives it a lot of replayability. If I had a criticism of Cascadia, it would be that sometimes the card scoring can be a little unclear and finicky. The rulebook does offer elaborations on this, but it's a definite little niggle. Otherwise though, I think Cascadia is ab excellent tile-laying and set collectiing game. For me it ticks a lot of boxes that good games should; straightforward rules, some depth for decision making and a brisk playtime. It's one of those games I frequently like to carry in my board game bag when going to game events, so if I meet someone who's never met played Cascadia, they can try it. As should you!
0 Comments
31st July 2022 It's a Sunday night and we're logged into Board Game Arena for a evening of gaming entertainment. Chrome: A reference to colour (Not the browser!). Ino: The last syllable of 'domino'. Chromino: Colour domino! And that's exactly what Chromino is - dominos with colours instead of numbers. Caveat: We've only ever played Chromino digitally. What's in the game?
There's very little to be said about the components here. No artwork is used, only 5 colours: blue, green, purple, red and yellow. These are bright plain colours too with no symbology to help colour blind players distinguish between them, which seems like a bit of a omission by today's standards. Only 1 icon is used in Chrominos - which is the 'wild' symbol that always appears on a white background in the centre space. How's it play? Setup
On to play In Chromino, players take turns playing tiles from their hand with the intention of emptying their hand first and thus winning. On their turn, the active player will perform 1 of the following actions.
Endgame When a player has only 1 tile remaining in their hand, they must shout "Uno!", or more sensibly just announce this is their last tile to all other players and then turn that last tile face-up for all to see. Play then continues normally. A new rule is introduced when a player has a only 1 tile left; which is that the last tile a player puts down cannot be a wild tile. If this would be the case, they must draw a new one instead. Then, when a player places their final tile, the current round is concluded and any players who have placed all their tiles are declared winners. Overall
From the brevity of the rules description, it's apparent that Chromino is a light game, which is no bad thing, it makes the game easy to learn and accessible to non gamers. It is after all, dominoes. For me though, this level of simplicity makes the game unengaging. I know there's a touch of strategy to be found from watching other players, possibly seeing which colours they're having trouble matching and trying to put those colours out to stymy them. Also, when a player reveals their last tile, opponents will get an idea on how to block it but truth be told, it will also rely on luck to use these strategies. This brings me to my main issue with the game: It's just very heavily dependent on luck more than anything else. They'll be times when someone won't be able to play anything and will just have add a tile to their hand. This becomes even more frustrating when you watch an opponent then play a tile, this now means there's now a 2-tile difference between you and them - which in Chromino can be quite a lot. And this seemed borne out in play. Often there would be a player - who through no fault of their own would have 2 or 3 more tiles than their opponents. Usually it meant they would never be in the running to win. So unengaging and frustrating is how I would summarise Chromino. I'm not sure who would like it, fans of heavier games will shy away from this and more casual players will probably gravitate to more traditional games. However, if you want a lightweight game a bit like dominoes... well you could just play dominoes. 23rd June 2022 It's another Thursday evening and we're in Aldershot for another gaming night. Village Green - a local game for local people? It turns out that competitions between local villages to have the best village green can be serious business! What's in a game?
Well that's it for the components - a deck of cards. The card quality average and what you'd expect from games nowadays. Watercolour styled artwork is used throughout the game on the green and village cards. depicting various items that could be found on an English village green (SIC). It's a pleasant style and the artwork all looks appropriately good, fitting it's theme quite nicely. The iconography is not so well implemented though. I felt the symbols used for the different types of flower could have been a bit more distinct or individual, especially since the icons are quite small. I also felt the 3 different types of tree icon displayed on the bottom of the green cards and award cards could have had been more distinctive. Otherwise, the iconography is fine. How's it play? Set up
On to play The objective in Village Green is to construct a tableau of 3x3 green cards while on the 'outside' of this 3x3 grid create a row and column of award cards to score points off of the green cards. Thus creating an overall 4x4 grid - including the village card which will be in the top-left corner. Village Green uses the usual turn structure of having the active player complete their action then having play progress to the player on their left. The active player can take 1 of the following 2 actions.
Endgame There are 3 criteria which may end the game. If either the green card or award card deck is depleted, or a player has placed 9 green cards, then the end has been triggered. The current is completed and the game goes to scoring. Player score from the following sources: A face-up village card scored 1 VP Each visible pond scores 2 VPs. Award cards score all the (Up to 3.) cards in their respective row/column. Points are tallied, highest score wins. Overall
On a basic level, Village Green is a fair simple game - pick a card and play a card, which makes it straightforward and quick to understand. However, like all good games, it's easy to learn but hard to master and this is definitely the case with this game. What makes Village Green tricky is having to literally think 2 steps ahead. Players will need to pay attention to a green card's type and colour when playing it because it will influence what is played next to it. Not only is positioning important when playing a green card but the order in which they are played will matter too. E.g., putting a green card into the centre of the 3x3 grid means that all 4 orthogonally adjacent cards placed subsequently must match the flower type and colour for that card. If the centre card is played last, then it would have to match all 4 cards already played and that requires planning ahead. Matching 3 types and 3 colours might not seem difficult but remember, players will only have a hand of 3 green cards and a row of 3 cards to draft from. Sure, a player can keep drawing and discarding green cards to hopefully get what they need, but this can catch a player out. Once the deck is gone - it's game over. Additionally, while rinsing through green cards, other players may be completing their 3x3 grids, which is also game over. Ultimately, players will need to commit to taking some risks and play early cards with gaps between them for some wriggle room for placing later cards and also rely on a bit of luck to get what they need. Award cards are also tricky to manage but in a different way. Players start with three, which can be good as it gives each player a initial individual scoring target to aim for. However, as green cards get played and players may be forced to put them in certain positions thanks to type and colour, it may end up that a award card scores less, zero or even worse - negative VPs! Luckily, award cards can be nullified by covering them with other award cards later. This though raises another quandary for players to ponder. The later an award card is played in the game, the harder it will be to place in a way to maximise it's scoring potential. Finally, there's some potential for higher level play by watching what cards other players are putting down, trying to anticipate their actions and denying them what they need. Although, since some of the icons are so small, it can be physically tricky looking at other players' tableaus with leaning over them! All of these mechanics are good because they always provide players with meaningful decisions as they try and positions cards so that they match type and colour as well as scoring criteria. Having written all of that brings me to a drawback of the game, which is that it can be a harsh and unforgiving experience. Players will be frustrated when unable to play cards and are instead forced to discard. It's likely that some players will end up without all their possible green or award cards - I know I did on my first play. So despite being easy to learn, I'm not sure this is a game for more 'casual players'? If it 'groks' with them, they'll be fine. Otherwise it'll probably take a game or two to get handle on where to player cards. There's not denying it's a elegant, fairly engaging game. It plays quick enough and will provide players the challenge of being able to place all their cards and also optimise scoring opportunities. Definitely worth a try in my opinion. 12th June 2022 Sunday evening is here and we're logged into Board Game Arena for a night of gaming. Does a bear lay tiles in the woods, who knows? What I can tell you is that a bear definitely does lay tiles in the park thanks to Barenpark: A tile laying game about building a park for bears and bears only! Caveat: we've only ever played Barenpark digitally. What's in a game?
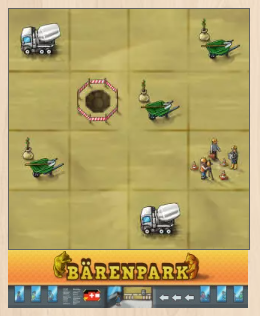
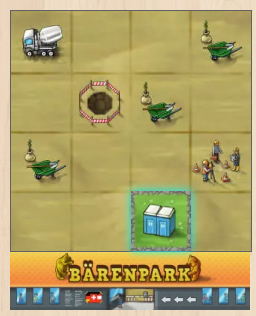
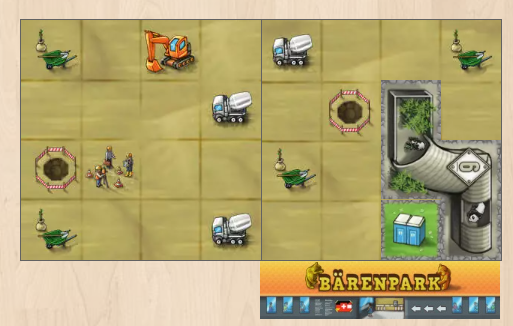
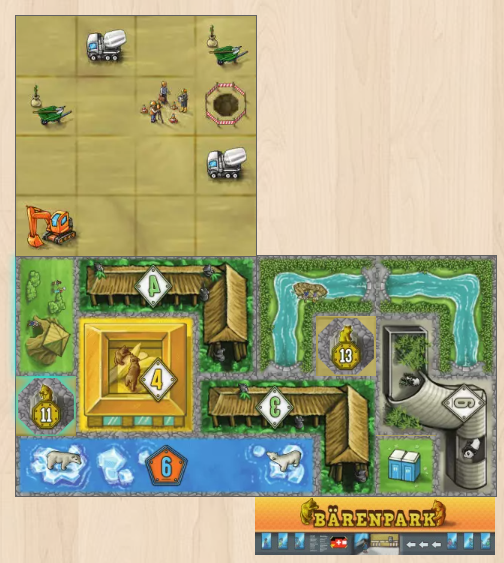
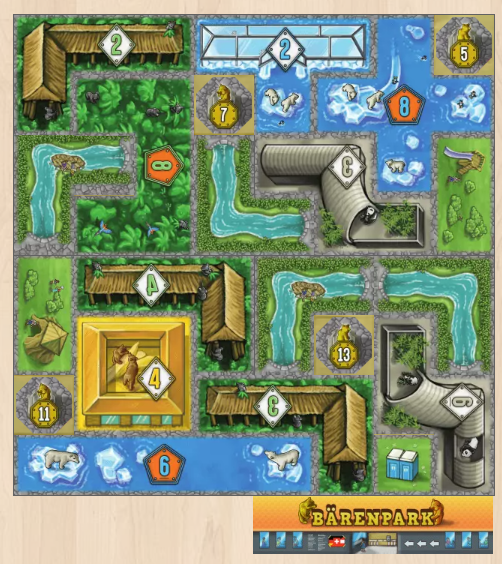
Barenpark's art is fairly minimal but effective. It's nothing to write home about but is perfectly functional. Tiles display artwork themed to their type, so the green tiles feature a portaloo for a toilet, a playground for a play ground and so on. The white and green tiles show buildings and habitats pertinent to the type of bear they represent. E.g., the polar tiles appear glacial. There are only a few icons in the game and they are easily learnt. They are also colour coded, thus the wheelbarrow icon - which is green - represents green tiles, thus white cement trucks are for white tiles and orange excavators are for orange. The work crew icon represents construction crews which is not related to tiles. One slight criticism here is that while there are green, white and orange tiles, some tiles which are coloured green will actually be white or orange tiles, there are also some glacial blue tiles which are actually orange. It's a minor quibble, but players will need to remember that a tile's colour is based on its scoring icon. This could have been improved by using unique colours. How's it play? Setup
On to play In Barenpark, players complete to create the best bear park ever. Players achieve this by placing tiles on to their boards which in turn allows them to draft more tiles and boards. Barenpark uses a traditional turn structure with the active player taking their turn before play progress to the player on their left. During the active player's turn, they must perform the following actions.
Endgame When any player completes their 4th game board, that is; collects their 4th bear statue, then the endgame is triggered. All other players now have one more turn of play and then the game goes to scoring. Players add together the value of all tiles played and bear statues placed on their game boards. Points are tallied, highest score wins. Overall
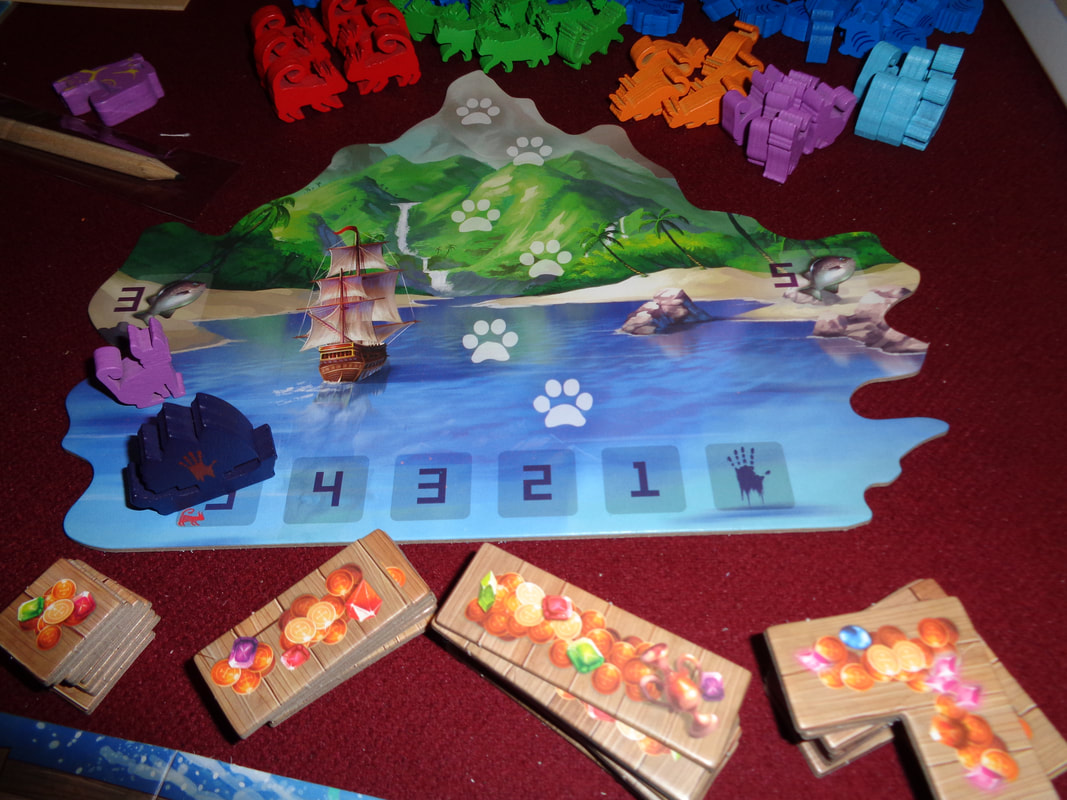
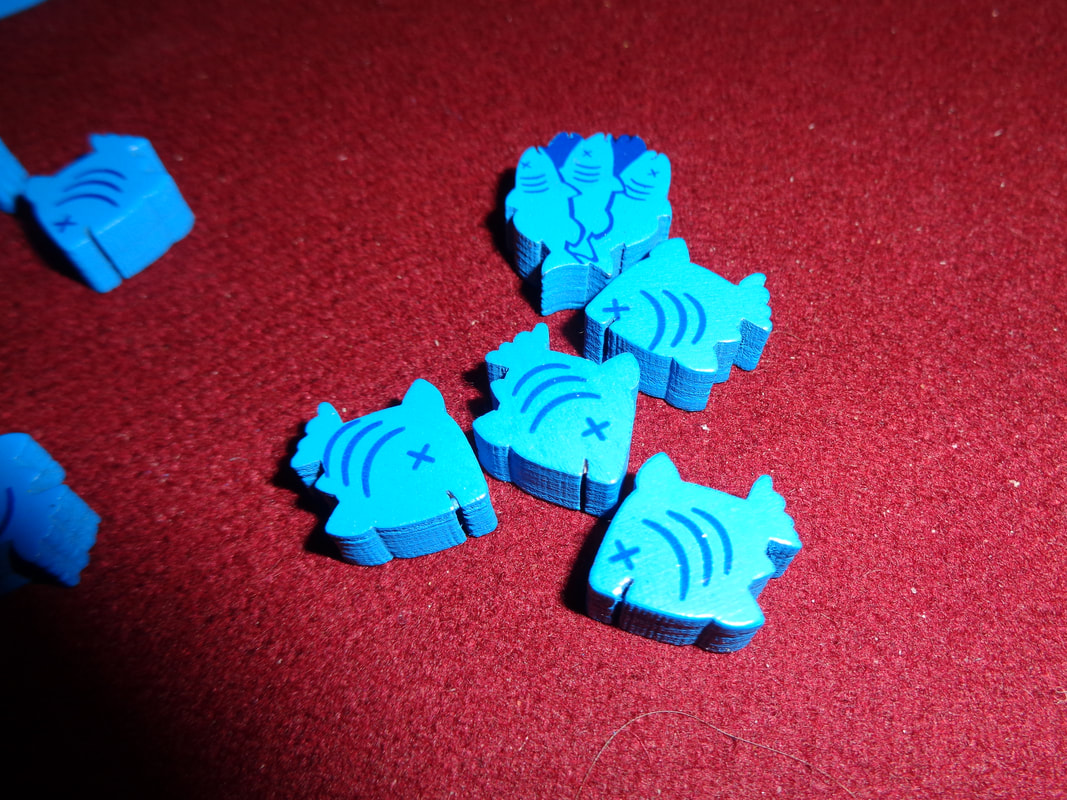
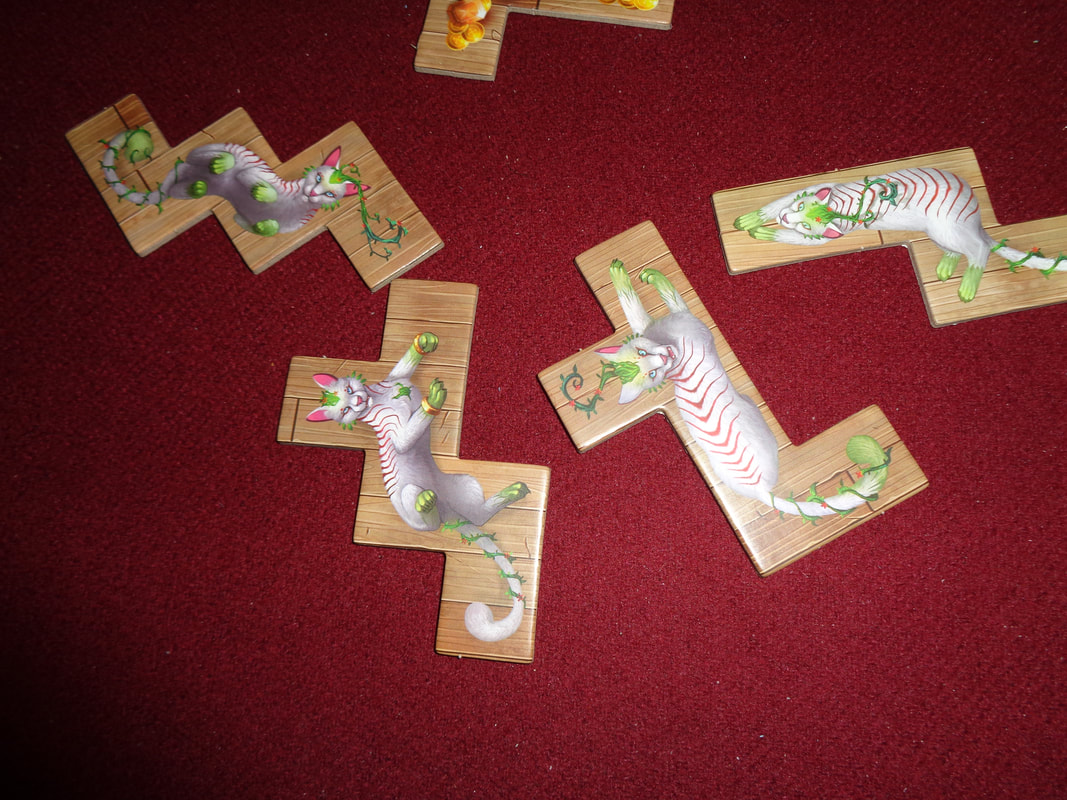
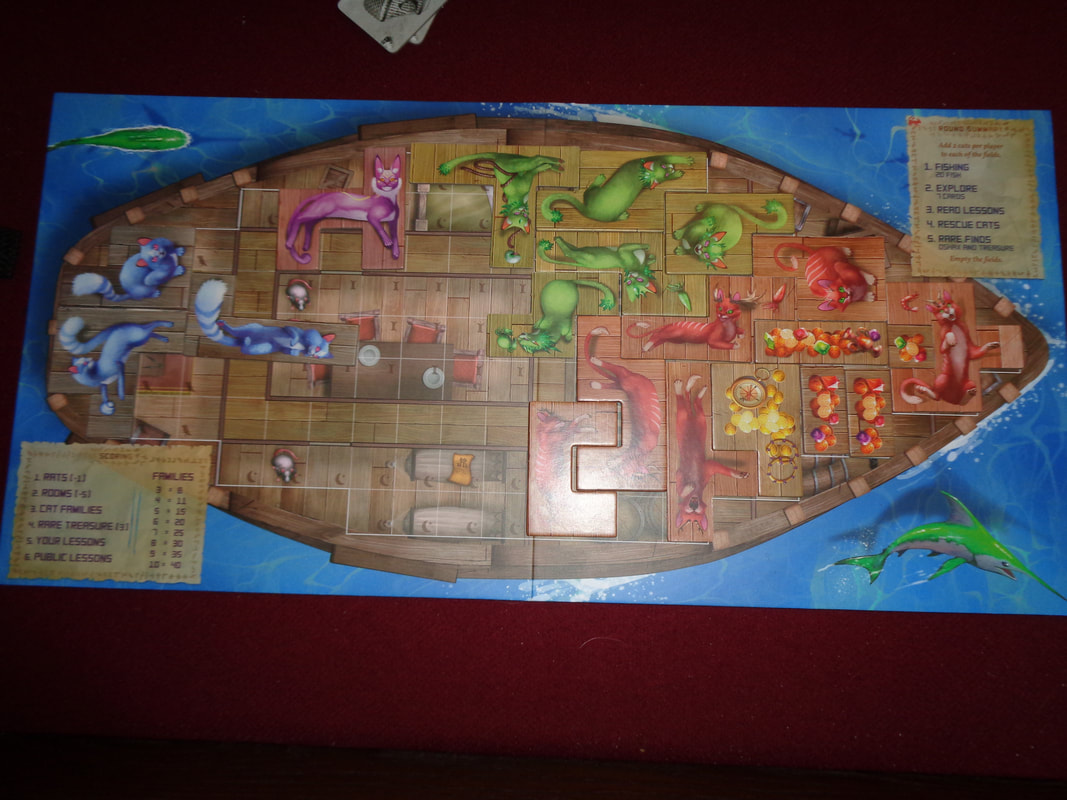
Barenpark is a smart blend between easily understood, accessible rules, meaningful decisions and optimising gameplay. The game is something of a race to get the highest scoring tiles and bear statue tokens first and this can put players in something of quandary. For the most part, players will want to draft white and orange tiles as often as possible because they score the points. They also cover more of the board and thus potentially draft more tiles. This is particularly true of orange tiles. It means that players should be looking to cover icons with their tiles placements as effectively as possible to gain more tiles. Using an entire turn just to gain a green tile is not particularly efficient. Having said that, greens are not bad tiles, sometimes getting green tiles is a useful move, those 1-space portaloos can fill in pesky gaps on a board, working towards getting bear statues. Talking of bear statue tokens. Sometimes it's worth taking a less efficient tile just to complete a board and gain a higher scoring token before another player. This is all of course contextual and dependant on the situation. There's definitely a small degree of higher level of play going on here that comes from watching other players turns and trying to anticipate their next moves. With limited numbers of white and orange tiles, knowing which tile another player might go for gives you the option of employing a denial strategy against them or beating them to the punch for a token. This brings me to the one criticism I have. When playing Barenpark in some circumstances it sometimes felt like that if one player got 'ahead' they tended to stay ahead. By ahead I mean managing to fill spaces on the board before other players. This is most apparent when drafting bear statue tokens. At times you can see that a player will complete one of their boards before you and claiming the better scoring token, then they'll also be ahead for the next board and claiming the token ahead of you again. Of course it's possible to re-prioritise and change which board you're trying to complete but since Barenpark has fairly linear gameplay (By which I mean you can only expand you tiles into areas where you already have tiles.), this can be tricky, although the endgame rules where players get an extra turn after whoever finished it probably goes some way to alleviating this. I think Barenpark is a good, if unremarkable game that feels a little 'bland' or functional and is a little on the light side of this style of tile-placement game but I don't see that bad thing. But quibbles aside, if you want a solid, tile-placing game that's not-too taxing but still engaging, Barenpark is a good choice. Barenpark's accessibility and 'lightness' means means it's a good choice for a gateway or entry game. 9th June 2022 We're in Aldershot for an evening of board gaming fun. So; in Isle of Cats, some evil bad guy is heading to the titular island (Which as the name might suggest, is filled with the felines.) to kill al the cats!!! Players have a limited number of rounds to save as many as possible. What's in a game?
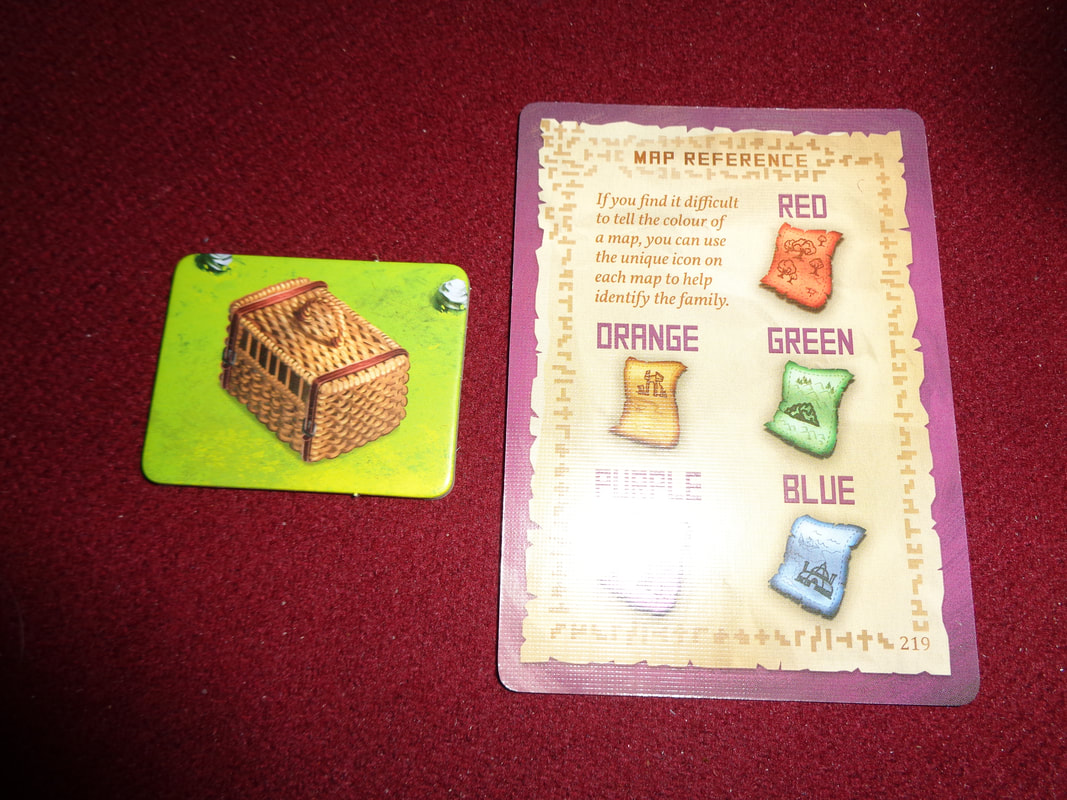
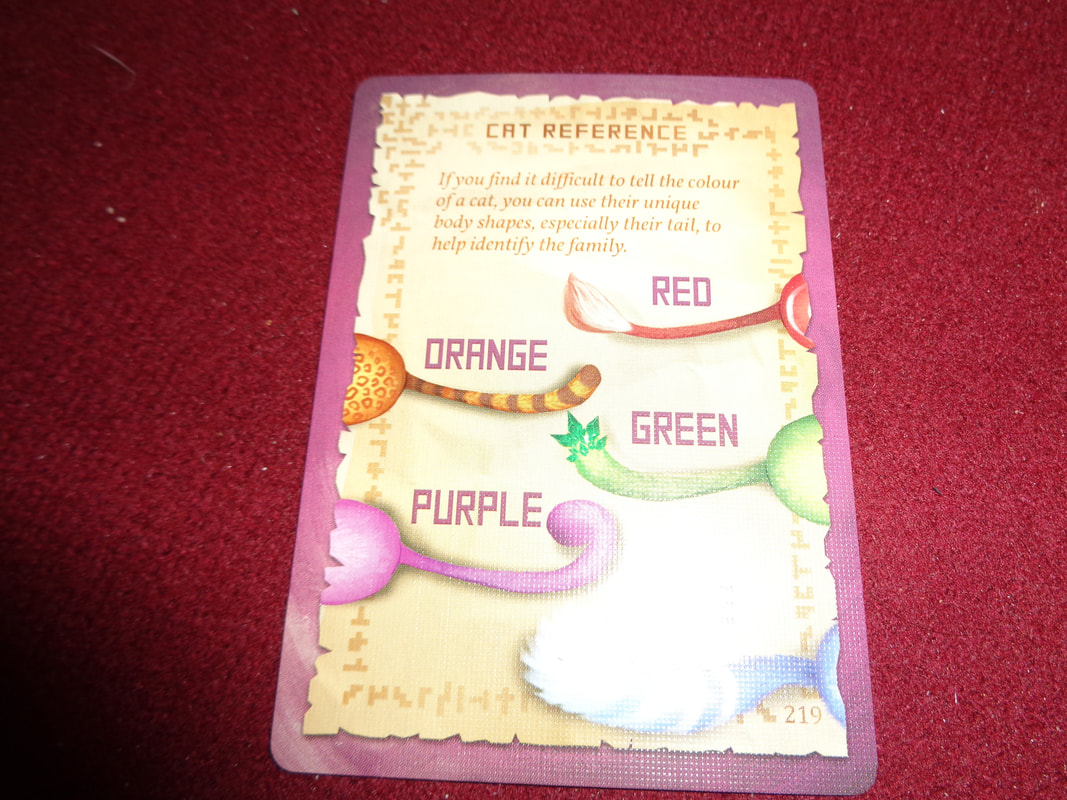
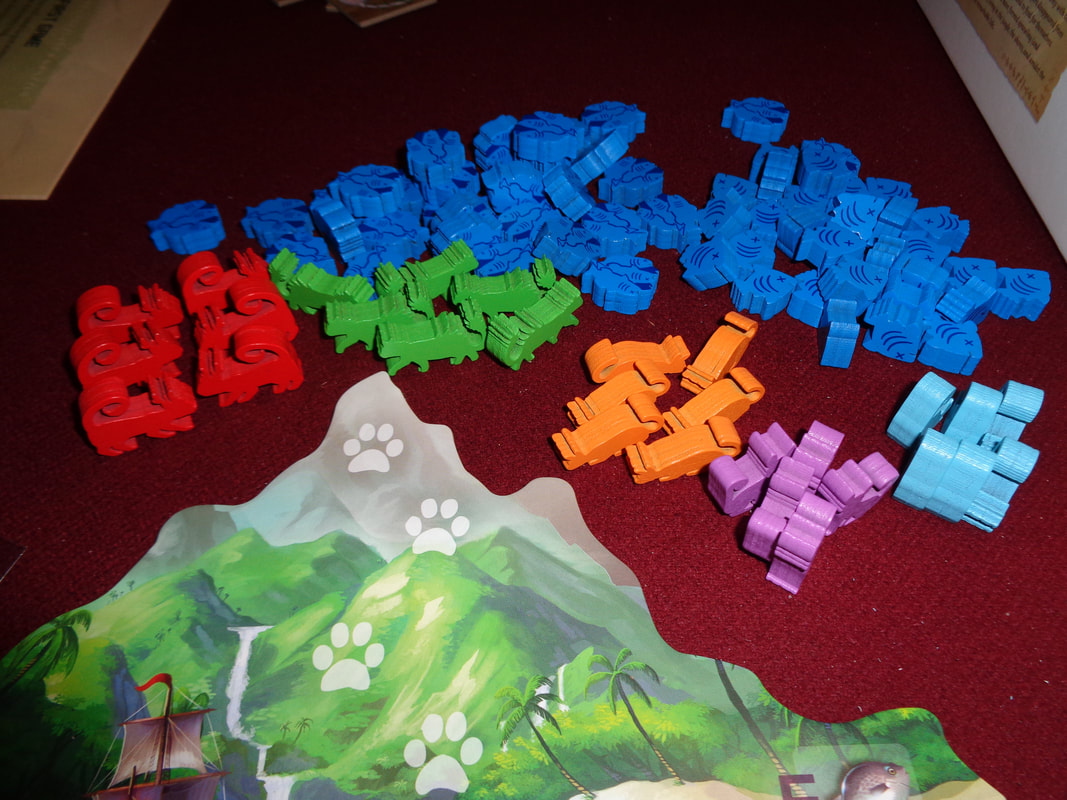
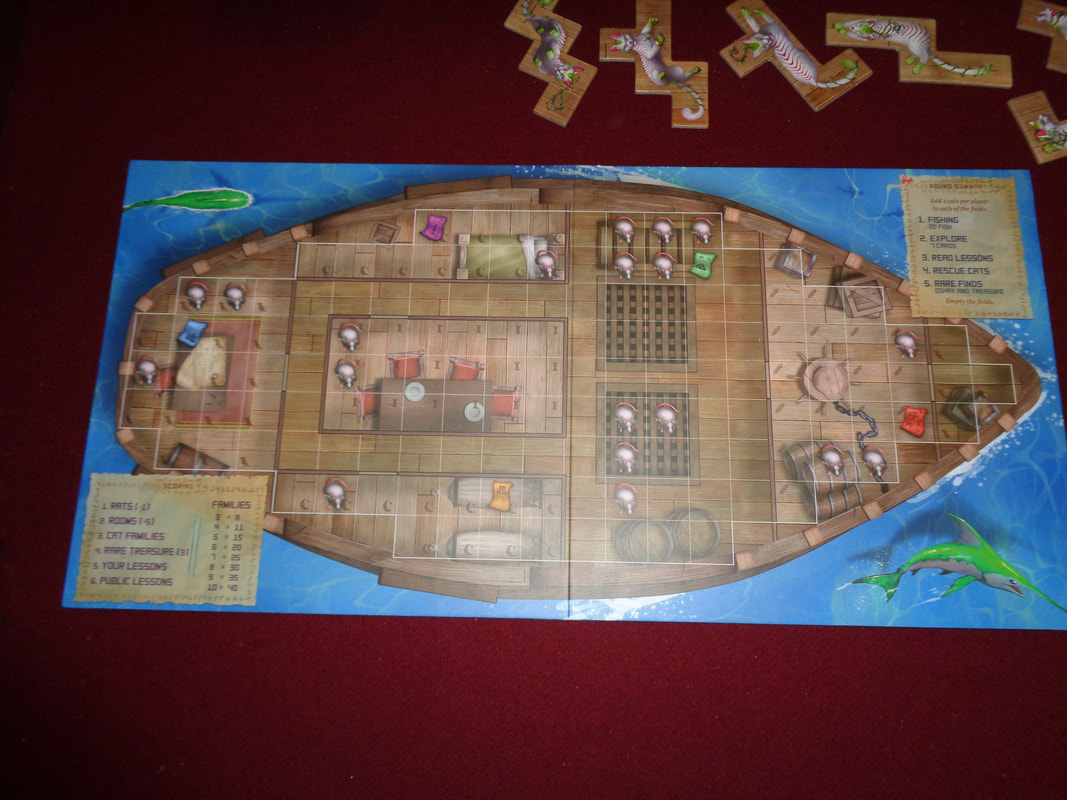
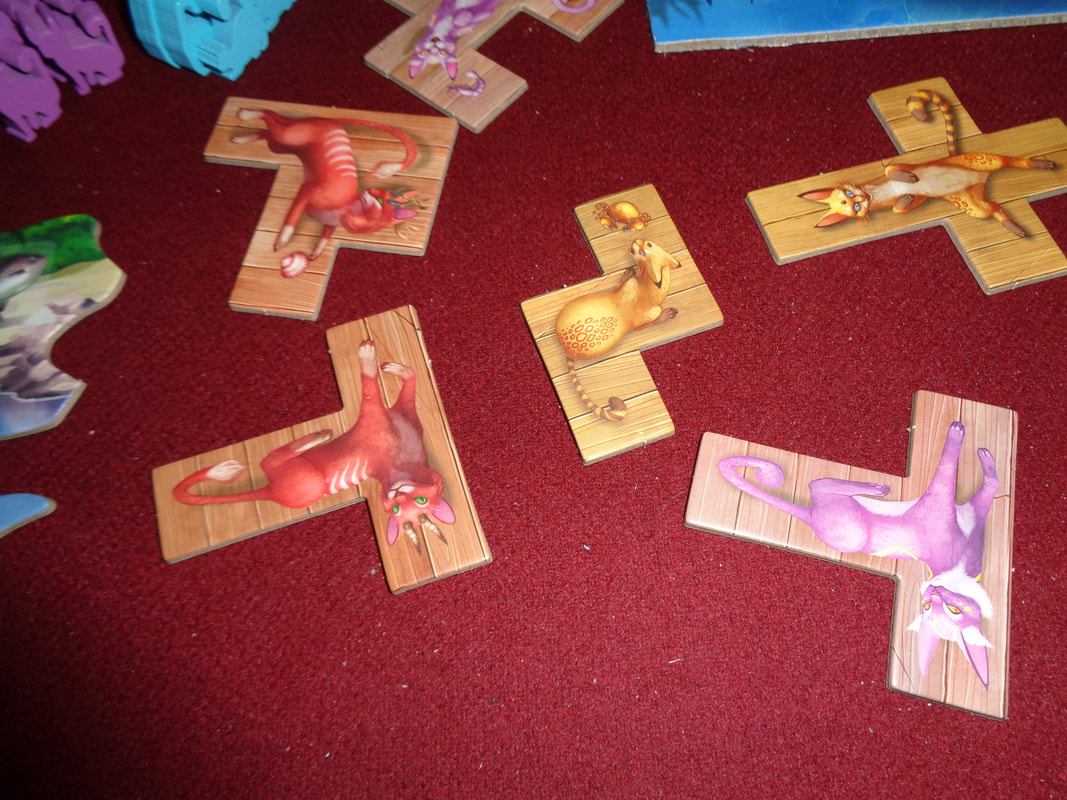
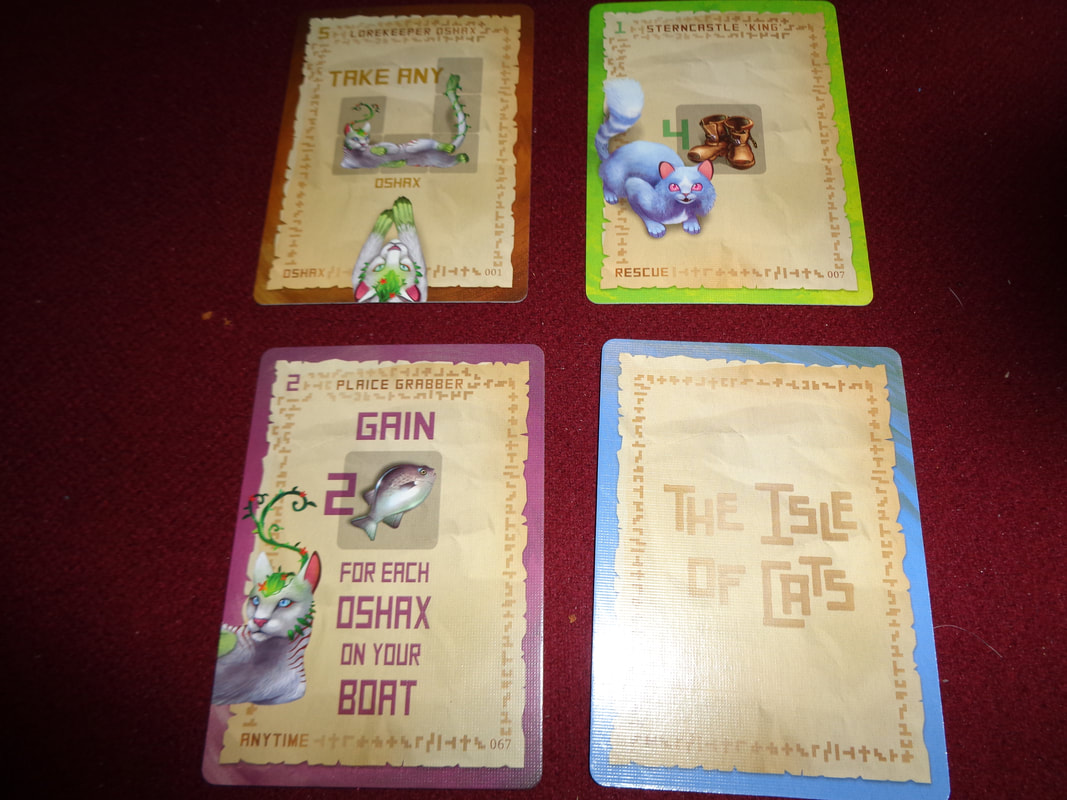
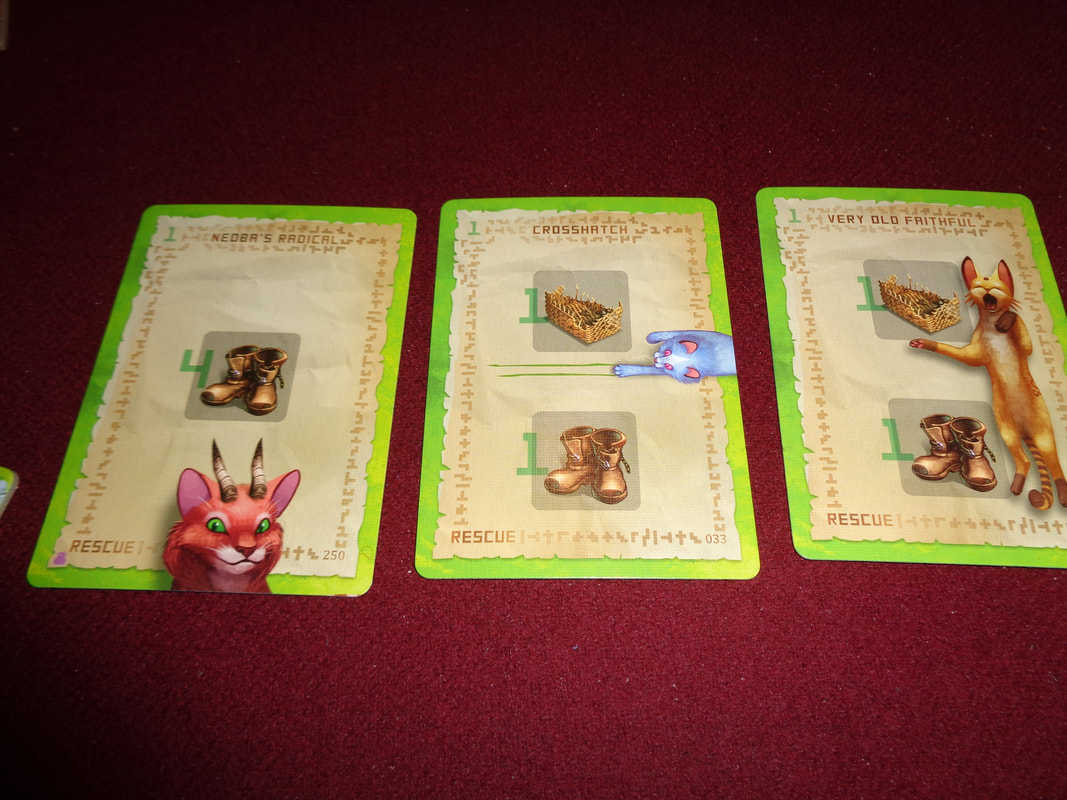
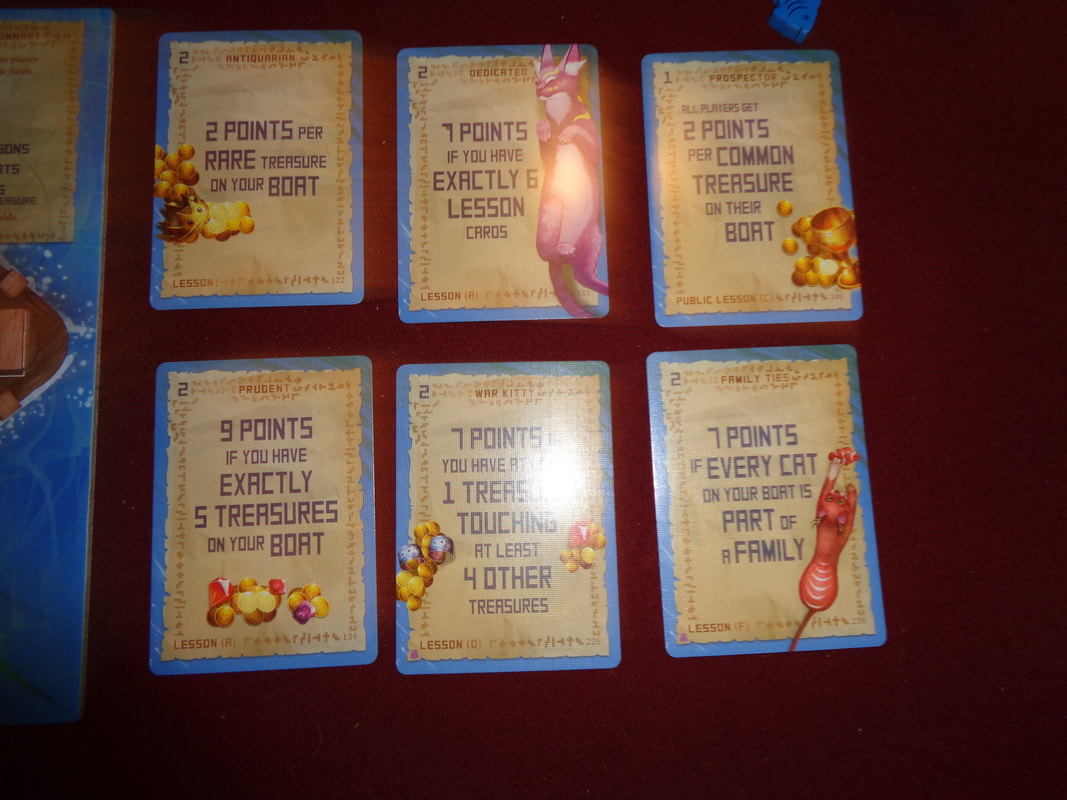
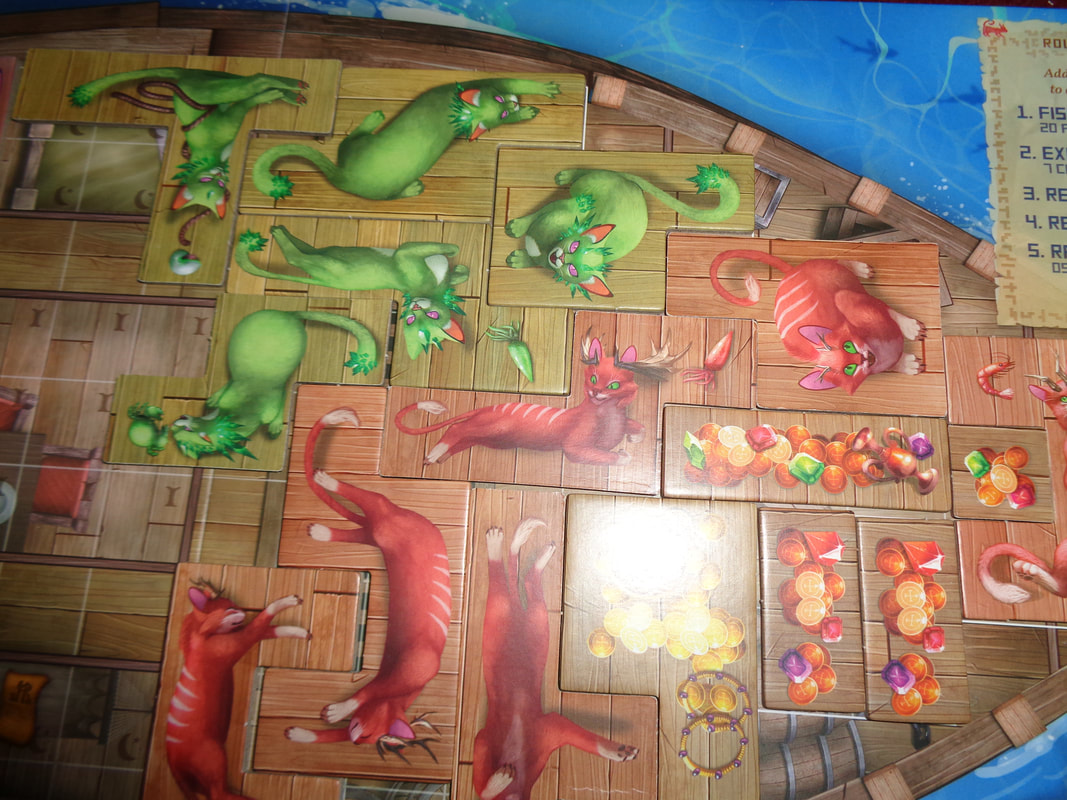
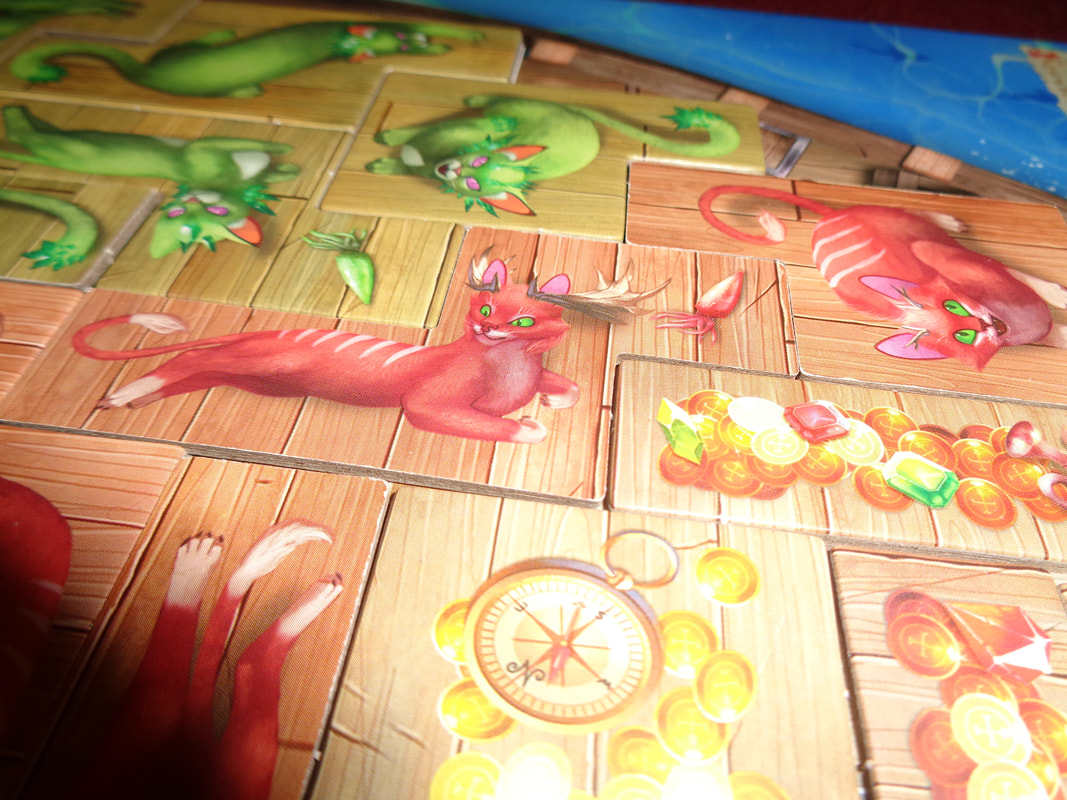
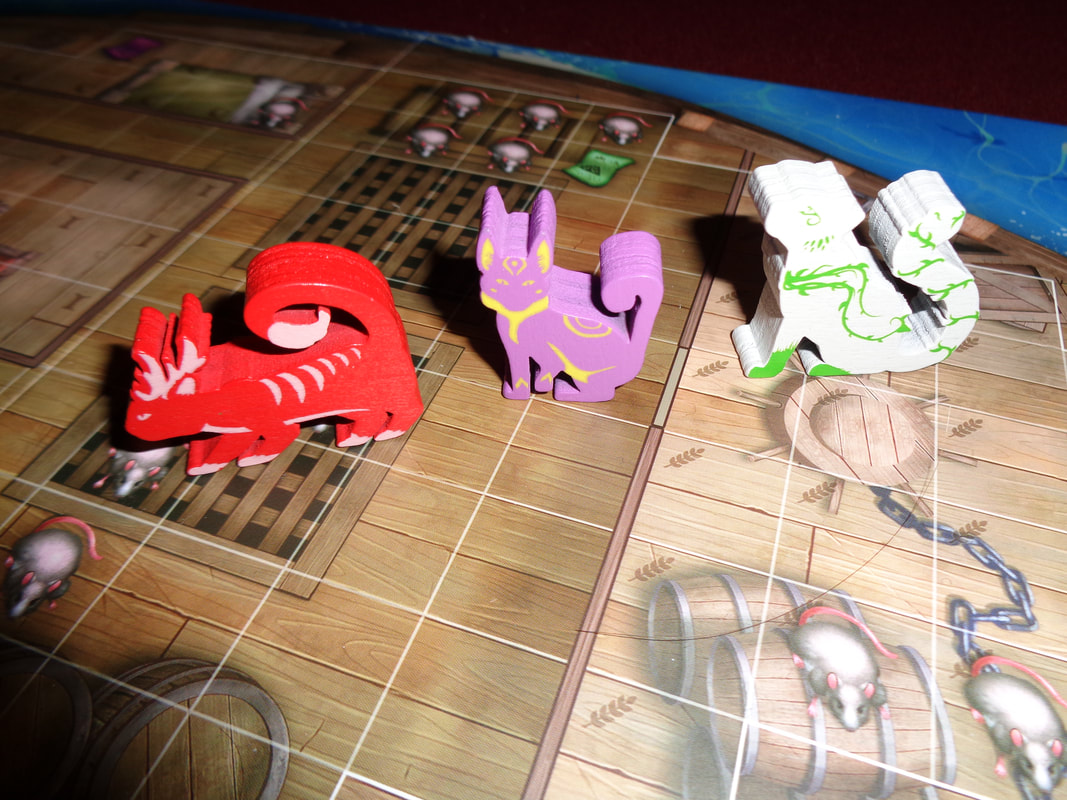
Component quality is for the most part very good. Tiles are suitably thick and chunky and all the wooden tokens. The game boards feel fine too. The only quibble I have is that the cards feel a little flimsy. The artwork in Isle of Cats is excellent throughout with plenty of illustrations of weird and wonderful looking cats on all the tetromino tiles and many of the cards. The boards and other cards also display nice colourful artwork. I do have a minor criticism here too: The colours for the common and rare treasures is a little too similar to each other, they could have done with being a bit more distinct. There are few icons used in the game and they're all clear, however, I do have a of minor grumble. Each personal game board is divided up into 7 'rooms'. It can be hard to see how the board is split up in this manner, particularly when scoring at the end with all the clutter of tiles. The publisher's were aware of this as they put distinct little icons in the square for each room to help but even so, it's tricky thing to comprehend. How's it play? Setup
On to play In Isle of Cats, players are competing to cover as much of the the grid that is shown on their personal board as possible. This is done by acquiring and placing cat and treasure tiles. Players will also be looking to group cats by colour (Or family.) as much as possible as well as fulfilling whatever objectives they gain during the course of the game. Isle of Cats is played over a number of phases, with players acting in turn order during each phase. Note that the turn order is different to player order in Isle of Cats and can and probably will change from turn-to-turn,
Endgame Once the 5th round has finished, the game is over and it's goes to scoring. There are several sources for scoring points and the lesson cards in particular provide many ways to score:
That's right, it possible to lose VPs!
Points are tallied, highest score wins. Overall
There's a few things to think about in Isle of Cats but it's all paced out fairly well and never feels too complex. That's not to say there's no strategising to be done - because there is. The chief concern for players should be the management of their fish! Fish are not only used to buy cats but also discovery cards and they're the route to not gaining more VPs but initiative or gain bonuses. E.g., if you really want a certain tile, playing rescue cards with high 'boots' is important, but you'll need to keep them during the drafting phase - and pay for them. Players will need to balance their spending with their priorities and recognise when and what is more important at what time. Acquiring cat tiles is very important, building families, filling rooms, covering rats and treasure maps are all significant but so are going first or getting lesson cards and so on. Despite players having their own player boards, there's also a higher level of play about watching the actions of other players. For example; if another player has a big family of a certain breed of cats, it might be a good idea to deny them a beneficial card during the drafting phase and so But since this is a drafting game, players will also have to adapt to circumstances as they occur, such as having to take a cat tile that isn't wanted and finding a way to place it to maximise it's potential - or minimise it's damage! Isle of Cats is a mid-weight game that's pretty easy to learn and combines several mechanics in to a engaging cat-themed game. Whether it's deciding which cards to keep and later which ones to play, as well as what tiles to take and where to place them, Isle of Cats All nearly always gives players meaningful decisions to make and that's the sign of a good game. 29th May 2022 It's a Sunday Evening and we're on Board Game Arena for some gaming entertainment. Copenhagen; largest city in and capital of Denmark. Few know though, of the cities secret history of builders having ties with errr.... tetromino shapes? At least that's what the game Copenhagen would have you believe... sort of! Caveat: we've only ever played Copenhagen digitally. What's in a game?
The components for Copenhagen are pretty colourful and bright, although there's barely any art to speak of. There's also barely any iconography to speak of. The symbols on the ability tiles aren't immediately obvious and will probably require looking up in the rules a couple of times. Other than that though, everything else is easily understood.
How's it play? Setup
On to play In Copenhagen, players take turns either gathering cards or playing them to gain tiles which they put on to their player board to score points. During their turn, the active player may perform exactly 1 of 2 possible actions.
Endgame Either one of two ways can trigger the game end. If the End Game card is drawn (Can only occur after shuffling the discard pile back into a draw deck.) then the game immediately ends. If a player scores a 12th point then the game immediately ends. In either case, points are tallied, highest score wins. Overall
Mechanically, Copenhagen is a fairly light, accessible game; players are either drafting cards or drafting tiles. It's the relationship between those 2 actions that's interesting. Firstly, there's not many tiles that go into the game, e.g., only 1 5-space tile is available in each colour and only 3 each of the other sizes in each colour, which is all quite deliberate. It takes more cards and thus more actions (And longer.) to get the bigger tiles which are the better tiles but there's the risk a player won't get the one they want. The bigger tiles are better because of the windows (Or lack of.) on them. Getting a lot of 2-space tiles will mean 50% of filled spaces on a player's board will be windowless, while getting a lot of 5-space tiles means only 20% of spaces are windowless. Completing a row or column with all windows essentially doubles the points that line is worth and the more windows a player can get on their board, the more likely they are to do this. This brings me to the next point, other than the 1-space tiles, every tile has a windowless space. This means it's very hard to create lines that all score windows. Players will want to position windowless spaces to minimise their effect and provides players with meaningful decisions to make. These two factors means that players are faced with a dilemma. Go for the quicker easier to get tiles and probably get a smaller score, or take the risk of losing our by going for bigger, better scoring tiles. There's definitely a higher level of play that involves watching what cards other players are drafting and trying to anticipate what colours they're going for. This kind of knowledge allows players to adapt to what they think their opponent is doing. I think Copenhagen is a fairly easy to learn game that has a streak of depth to it. Most people will pick it up fairly quickly. Having said that I personally found the game a little dull. There's nothing here that I haven't seen elsewhere, it's just packaged differently here. Copenhagen also played just a little too quickly for my liking (Normally something I'd never criticise a game for!); playing with just 3 people meant that frequently 6 cards were being drawn from the 70 card deck every round, this means the game would reach the end of the deck twice after 20-something cards drafts for each player. It felt like the game is mostly likely to deplete it's deck before a player gets to 12 points. To put that into perspective; if a player has 20-something card drafting actions, that in turn gives them the ability to draft around 50 spaces worth of tiles. The quickest way to reach 12 points is to have 6 filled rows, all with windows. That would require filling in 30 spaces at a minimum, this is provided they got the cards and tiles they wanted. I'm sure there are players out there that would find the challenge of getting to 12 points compelling but for me. It meant that I found the game unsatisfying and combined with it's blandness made it average and unremarkable. I can't really fault the game, it's just a little dull. 26th May 2022 It's a Thursday evening and I'm in Aldershot with friends for some gaming goodness that's been a long time coming! Is it tiny? Yeah pretty much. Is it in a dungeon? Definitely. Is it epic?... Well, you'll just have to see! Tiny Epic dungeons is a cooperative tile laying (Or card laying really.) dungeon crawler with players taking on the roles of various heroes who will spend much of their time managing a goblin epidemic before being chased around by the big bad before hopefully defeating it. What's in a game?
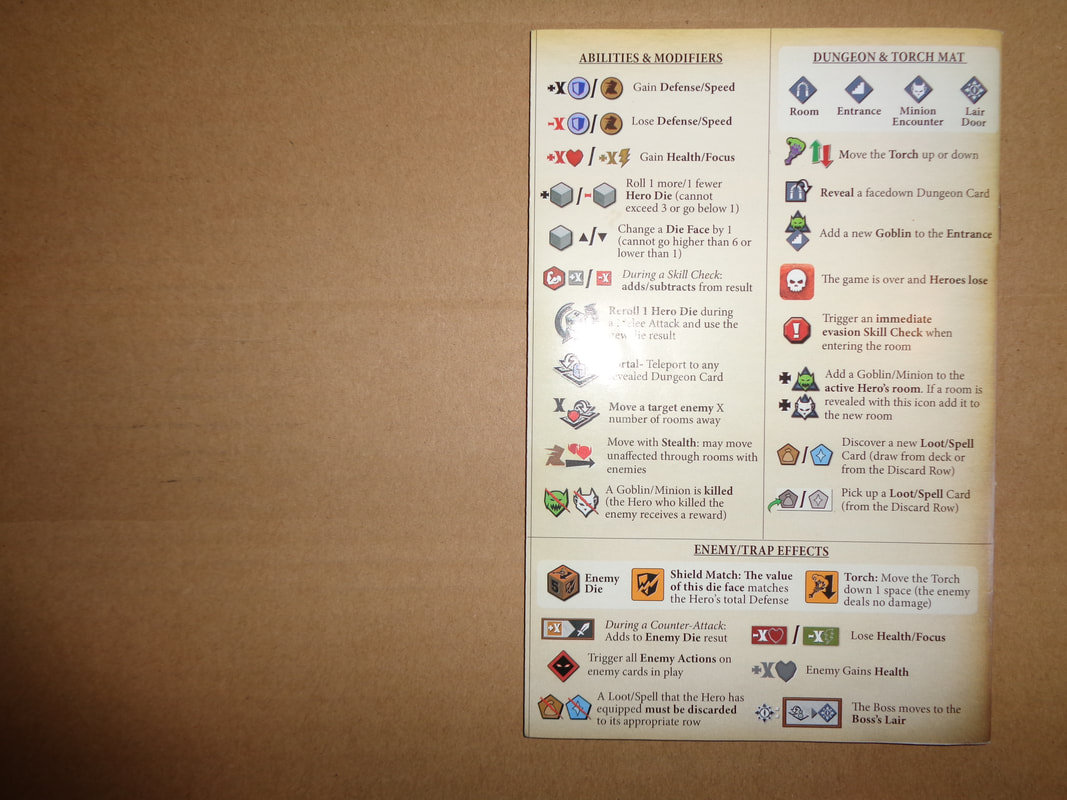
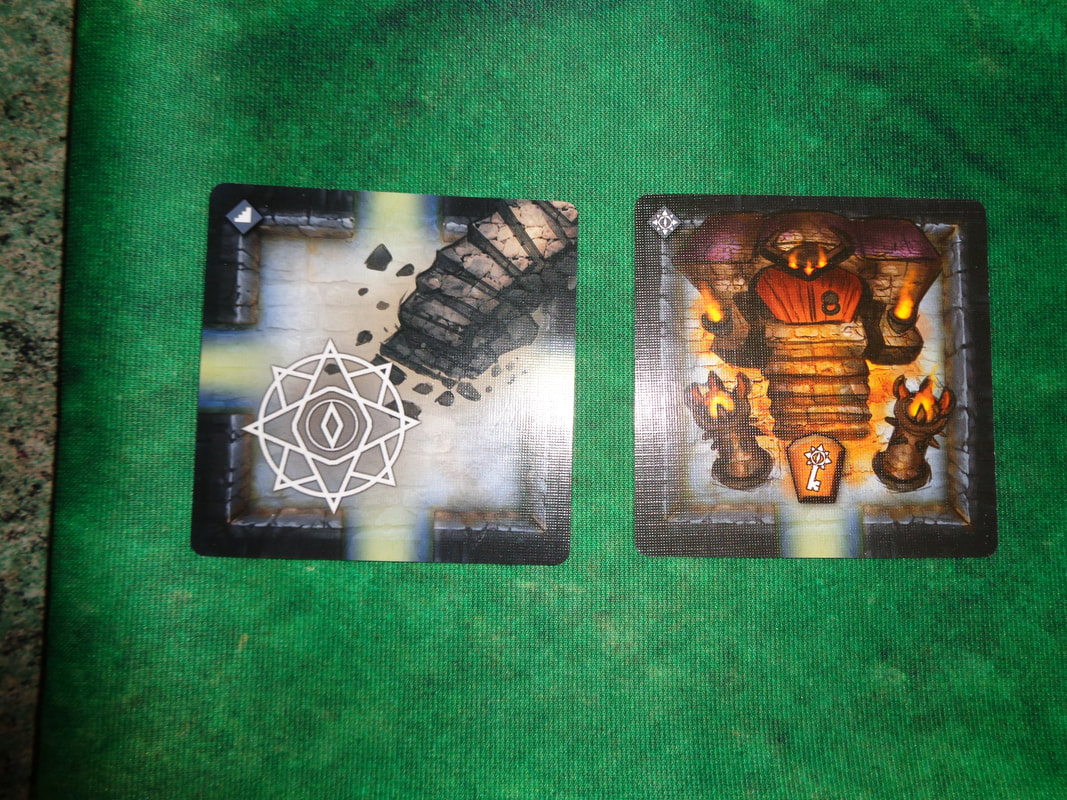
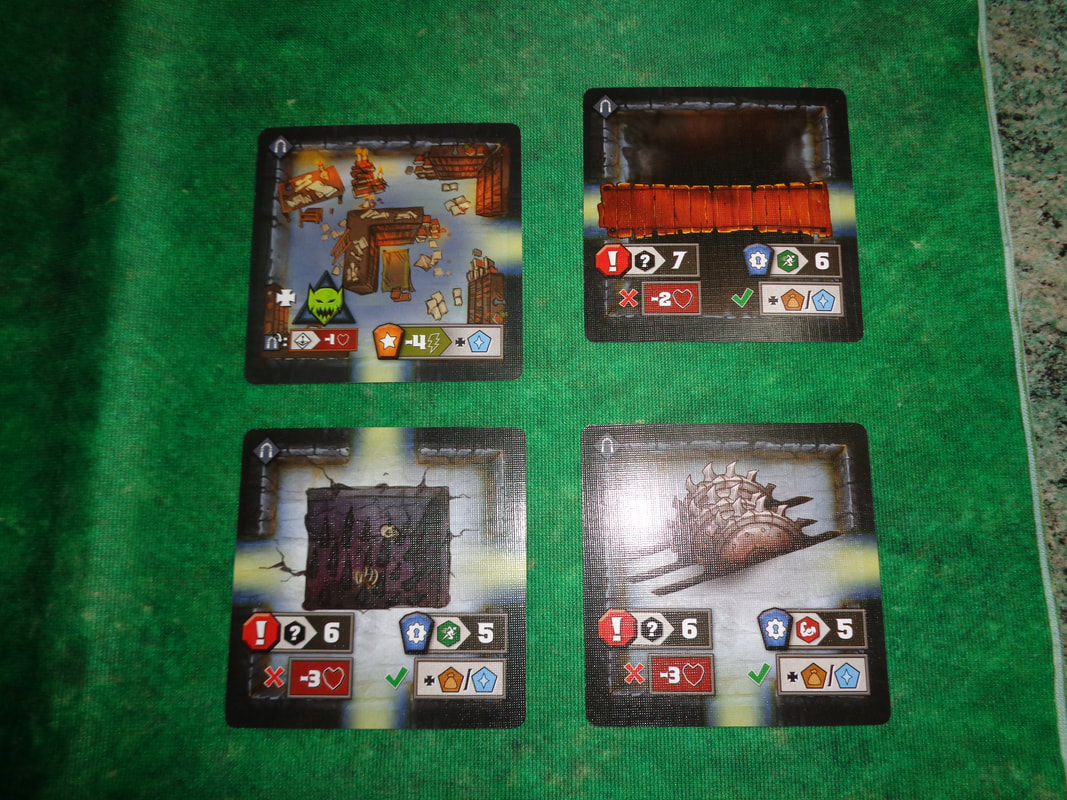
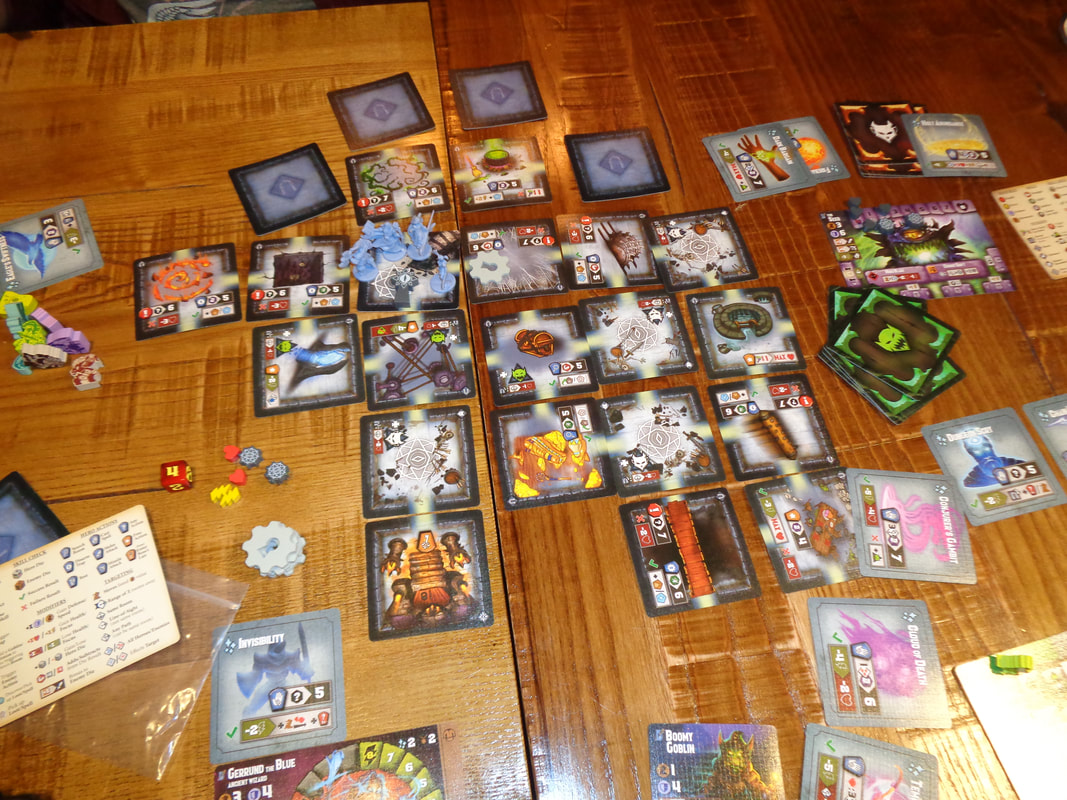
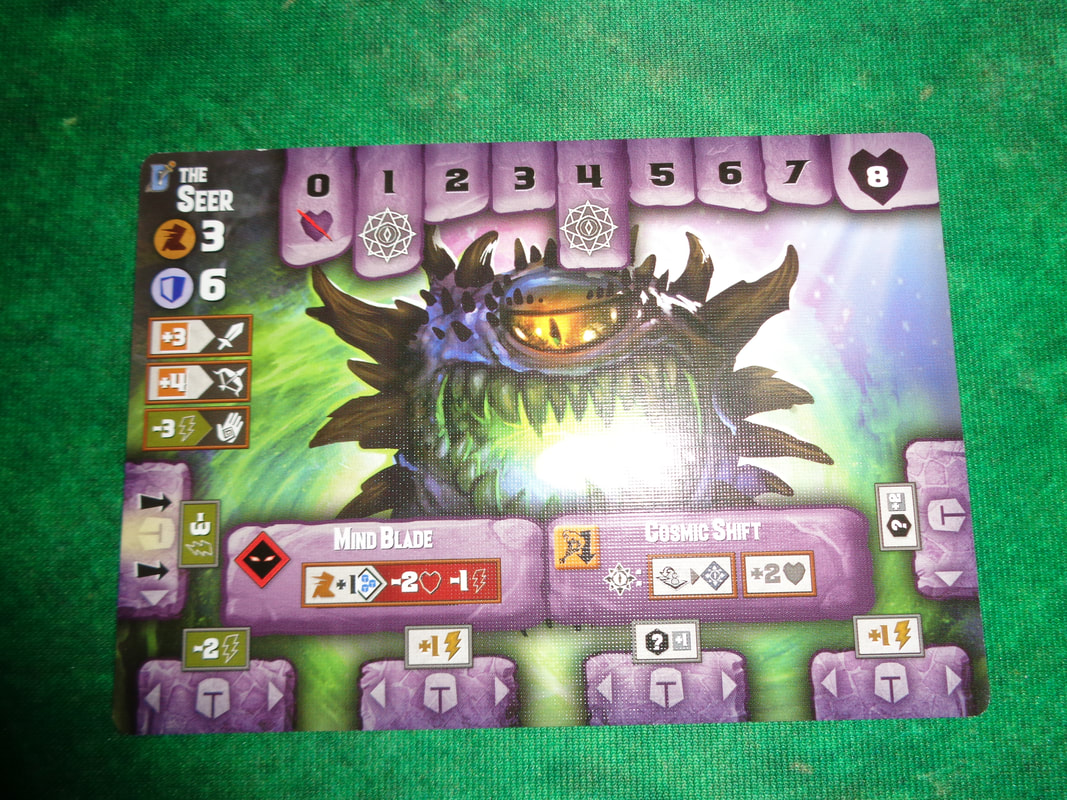
Tiny Epic Dungeons packs a lot into a small box. The cards feel a little flimsy and the dice are plastic and feel a bit average but other than that, the components are all good quality. The character figures are sizable and a pretty cool touch for a game of this proportion, while for the most part the tokens are small (Other than the disarm tokens.), they're still solid and well made. But for me, the standout components are the meeples, not only are they nicely shaped wooden tokens, they also illustrated. It shows some thought and care has gone into the production. The use of art is also good throughout the game, portraits of heroes, minions and bosses are all chunky and colourful, utilising a cartoony style that's used in a lot of modern fantasy games, it's a style I like Artwork used on the dungeons cards is also pretty good, there's a nice contrast between somewhat grey looking rooms and the colourful dressing and scenery that inhabit them and even the box lid features some evocative art. This brings me to iconography. It's rare that I'm critical of a game's iconography and this is one of those occasions. It's just that there's so much of it. A good proportion of it is instantly comprehensible, but a smaller proportion of it is not and a smaller proportion of a lot is still quite a lot!
I know that this is the result of game that is trying to emulate a D&D RPG style dungeon-crawl experience without a dungeon but even so: we played the game several times and I still did not recognised some icons. Between the fairly extensive rules and the extensive iconography, it gives the game a bit of steep learning curve. Additionally; not only are so many icons, some of them are quite small, icons in the corner of the dungeons cards and the first time we tried to play I didn't notice them! How's it play? Setup
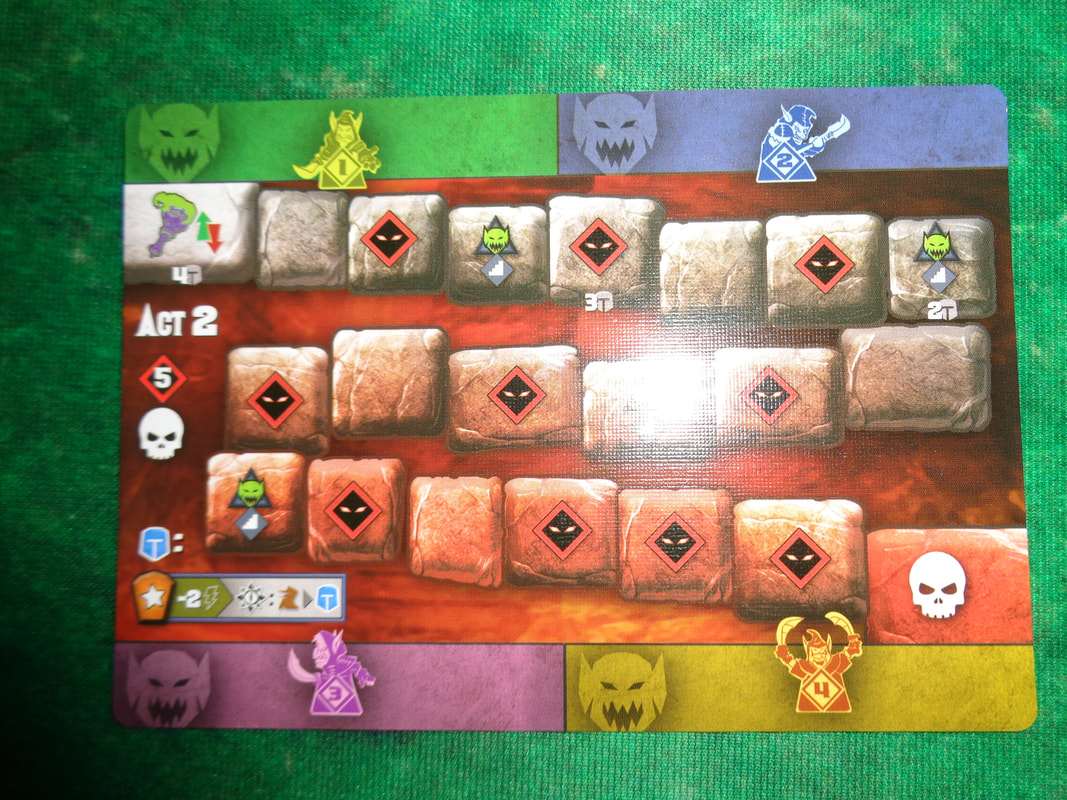
On to play In Tiny Epic Dungeons, the players must explore and reveal the dungeon, fighting goblins and acquiring loot and magic until they defeat enough minions in order get into the boss' lair and defeat them. The dungeon in Tiny Epic Dungeons is always a 7x7 grid in size, with the entrance always being the exact centre of the dungeon. When it comes to the active player's turn, they can broadly speaking: move, perform exactly 1 'heroic' action and any number of free actions.
There are also some other rules that need covering.
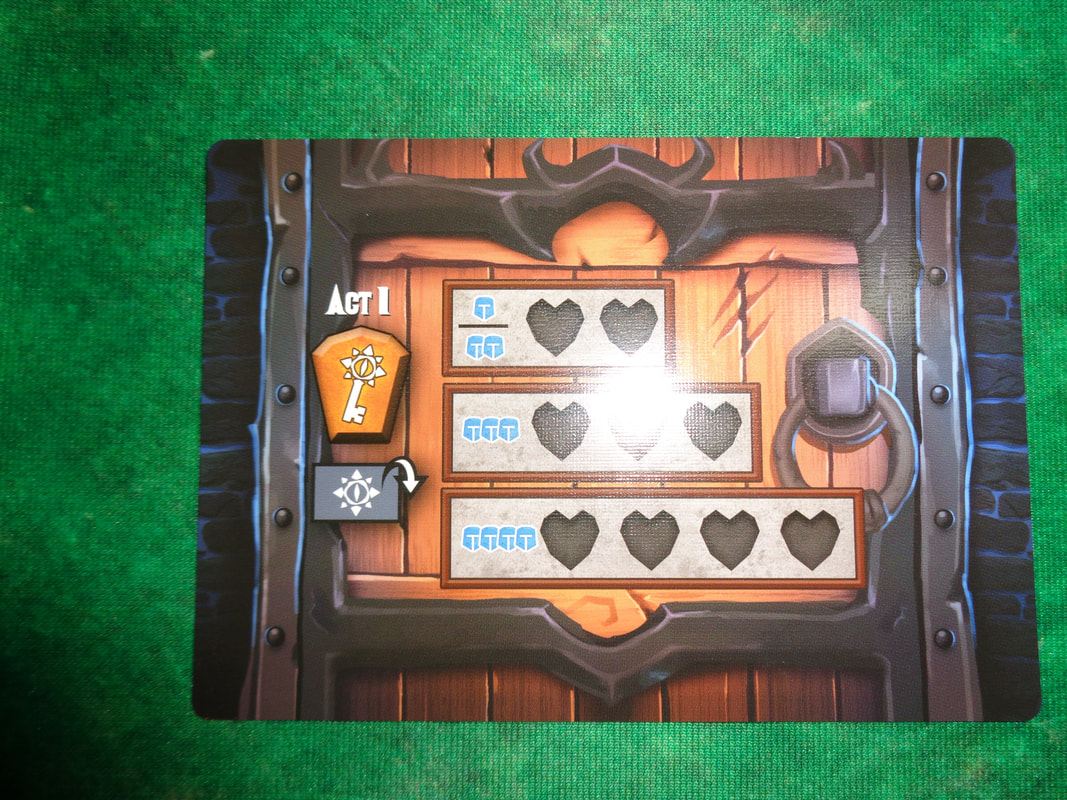
Endgame In the first act, if a 5th goblin comes into play before any of the 4 adjacent to the torch mat are defeated, then the players collectively lose. If at any time the torch token reaches the end of the track on either side of the torch mat, then the players lose. If the players get to act 2 and reduce all the boss's health tracks to 0, they collectively win! Overall
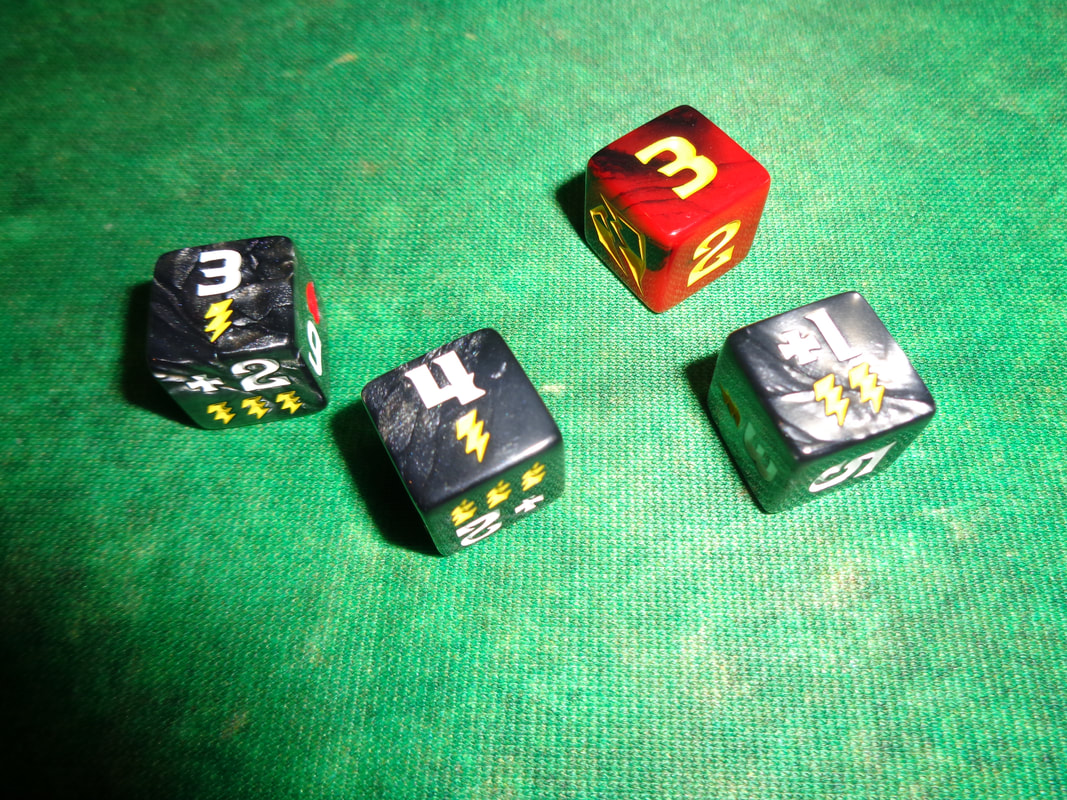
So, Tiny Epic Dungeons has quite a lot rules, I feel it's not particularly complicated but there's certainly a lot going on and that means that there's a lot to remember in this fairly ambitious attempt to recreate the D&D style dungeon-crawling experience. The question is, does it succeed? Well... sort of. The thing is, Tiny Epic Dungeons can't hide it's cooperative board game DNA. it utilises a commonplace cooperative mechanic of making the players choose between working towards their objectives (In this case exploring the dungeon, finding and defeating minions and finding the boss lair.) with managing an ongoing, constantly expanding threat (In this case preventing 5 goblins spawning in the game.). Players will be faced with choosing between the two. Furthermore, the constant ticking countdown of the torch track will encourage players not to dawdle and cooperate as much as possible. Another challenge facing players is placement of dungeon tiles all current passageways must be honoured and the game has a strict 7x7 size. If player don't think a step ahead, there's a risk that a pathway may lead to a dead-end too early, leaving a portion of the 7x7 grid inaccessible. Mechanically, these are all good, they put players in the position of having to make meaningful decisions. However, they do feel a little un-RPG-ish. During this early stage of the game we did encounter a noteworthy quirk; one character could not leave the entrance for about a quarter of the game! At the start of their turn, there was always a goblin on the entrance card thanks to spawning from the torch track. Once they defeated the goblin, they could no longer move and by the time of their next turn, there was another goblin on the entrance! One thing I like is how the game clearly differentiates between the early and late game. When the boss is revealed, everything changes and priorities shift somewhat. Exploration and goblin management become less important and dealing with the boss more so which thanks to the altar tokens requires more than just dealing damage to the big bad. All of this should serve to make Tiny Epic Dungeons a good game but truth be told - it's all a little unremarkable. Combat feels unexciting, particularly when dealing with goblins again and again, it felt repetitive and frustrating. They're not a threat because they're tough (They're not tough!), they're a threat because the rules say that you lose if you don't defeat them quick enough. The dice mechanic used is pretty cool though. I like that the unused dice can give a benefit, e.g., not using a 6 as the result of a skill check because as it provides a point of health gives players a meaningful decision to make when choosing which die to use for a skill check. The dungeon exploration experience it provides is pretty standard and OK but the lengthy rules and having to interpret fiddly icons mires the game in slowness and interfere with the pacing. Even after several play throughs, I look at the icons and think, 'Wait, what does that do?'. After more play throughs I'm sure that the rules will provide no obstacle but I feel little compulsion to play it again, which is a bit of shame as it looks really nice. While there's nothing wrong with Tiny Epic Dungeons and I can't find any fault with it, I also can't find a reason to like it. 1st May 2022 It's a Sunday and we're logged into Board Game Arena for an evening of gaming. Azul; not a game about a villainous god-entity from Ghostbusters but actually a game about creating mosaic, decorative wall patterns with multi coloured tiles. My friend's a plasterer, wonder if he'd be good at this! Caveat: We've only ever played Azul digitally. What's in a game?
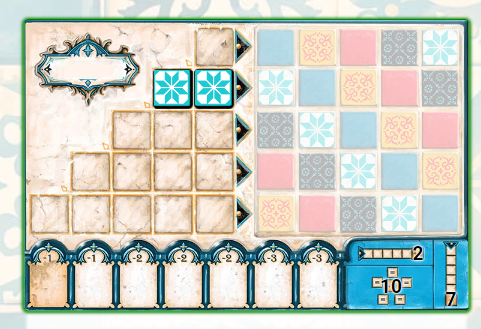
Azul doesn't make use of icons and the relationship between tokens and a player board is clear. How's it play? Setup
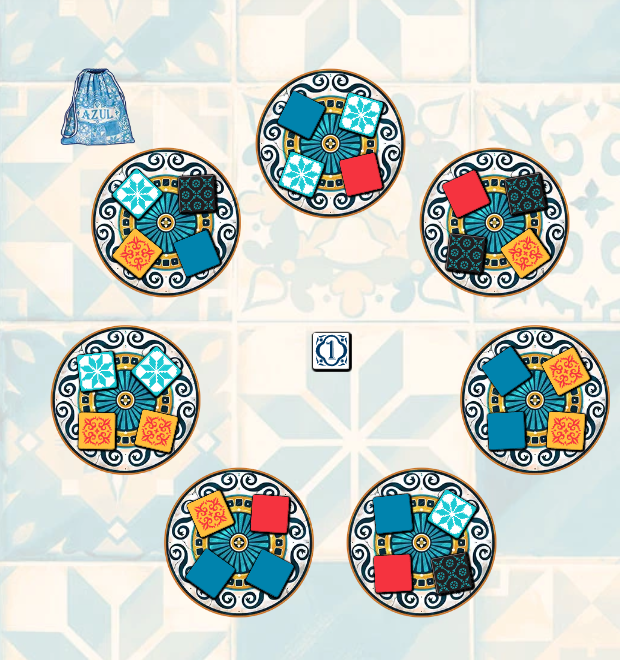
On to play In Azul, the player's objective is to place tokens on to their respective spots on the wall grid of their player board, which scores them VPs. This is done by filling in the horizontal lines in the pattern lines grid; players must collect tokens of the type they need and place them in the spaces on the respective horizontal line. Depending on the line, it will require 1-5 tokens to fill a line. When a line is filled, one of those tokens can be placed in the matching space on that line at the end of the round. All tokens will score 1 or more VPs when placed, tokens can also score again at the game end. Azul makes use of a traditional turn order, with the active player performing their action (Which will involve taking 1 or more tokens of the same type.) before play progresses to the player on the left.
Endgame When any horizontal line in the wall grid on any player's board has been filled, the endgame is triggered. The current end of round actions and scoring are completed and the game goes to final, bonus scoring. Bonus VPs can be scored scored by the following:
Points are tallied, highest score wins. Overall
On a rudimentary level, Azul's mechanics involve drafting handfuls of tokens and then placing them on to a board where their relative positioning scores varying amounts of VPs. It's a mechanic (Or a variation of that mechanic.) that have been employed in several other games and I'd say that Azul is a mid-weight iteration of it. As written the rules feel a little opaque and counter-intuitive but in application, they're pretty straightforward. Where Azul get its weightiness comes from two areas of the rules; how the drafting - particularly drafting from mats works and then where and when tiles should go on the grids. As a basic concept, collecting as many tokens as possible to fill out the pattern lines and consequently get tokens on the wall grid is the way to go. However, there's more to it than. For example, simply collecting too many tokens can sent the excess to the floor line and cost VPs, this is more important than it sounds, because as tokens are taken from the mats, it's inevitable that other tokens will build up in the centre and trying to predict this can be very important. Depending on circumstances, a lot of tokens of a particular type may well build up in the centre. A player may want 4 red tokens for example, should they try and take them in drips and drabs from several mats over several turns or wait for them to accumulate in the centre? Provided of that they do accumulate in the centre, what if too many go to the centre? There's definitely a higher level of play where watching what other players are doing is important. Quite often it's clear what they're prioritising, what they want or don't want in the next few turns. If they have a single token in the 5-space line on the left, it's likely they'll be looking to fill that out. Conversely, if they've already got 1 or more scoring tokens on the right side, they'll be unlikely or unable to use more of those tokens. Being able to predict other player's objectives will help when making decisions. It can also allow a player to try and deny tokens to other players and curiously, on some occasions force other players to take tokens they don't want. Players will also want to think about how and when to place their scoring tokens. Putting them down willy-nilly is a sure way to minimise points. Obviously in order to optimise points, tokens should ideally be put on to the wall adjacent to other tokens. Placing them vertically is a good way to go, since completed vertical lines earn an additional 7 VPs each, unless a player is looking to end the game, in which case they can go for the horizontal line! This brings me to an interesting facet in the mechanics, scoring the diagonal, i.e., putting all the tokens of 1 type on to the wall grid scores the biggest bonus; 10 VPs but as they are diagonal, they can't score off of each other! Additionally, once a diagonal of a type has been completed, the player can no longer score tokens of that type at all, collecting those tokens will now just incur penalty points in the floor line. Should a player hold off getting the diagonal until later which lowers the risk of sending tokens to the floor line or wait? Waiting will mean risking not completing it at all. I have to say I'm not fond of mechanics which lose players points especially if it can occur out of their control, it irritates like a unreachable itch and can be a little stress inducing. I find that's the case with Azul as well. However, having said that, the truth is; this is what makes Azul a good game and gives it depth. It means that collecting tokens either earns VPs (Or contributes towards acquiring VPs.) or loses VPs. It's always a meaningful decision. Other iterations of these mechanics are a little less stressful, brain-boiling and perhaps more accessible. But if depth is what you're looking along with a dollop indirect interaction between players, then Azul is worth a try. 19th April 2022 It's a Tuesday and we're at The Sovereigns with the Woking Gaming Club. Mesopotamia; source of much history, a birthplace of the world's early civilisations. Also the source of many board games, one of them being Babylonia. Take on the role of a merchant dynasty and attempt to create the most lucrative trade routes. What's in a game?
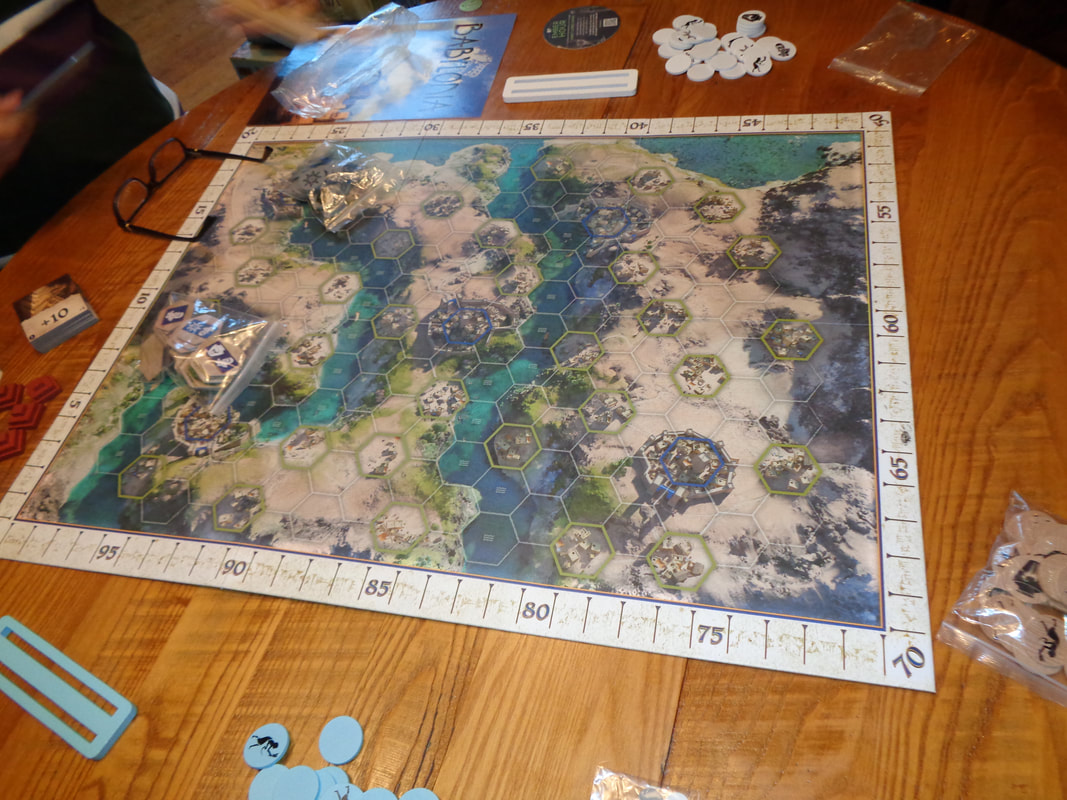
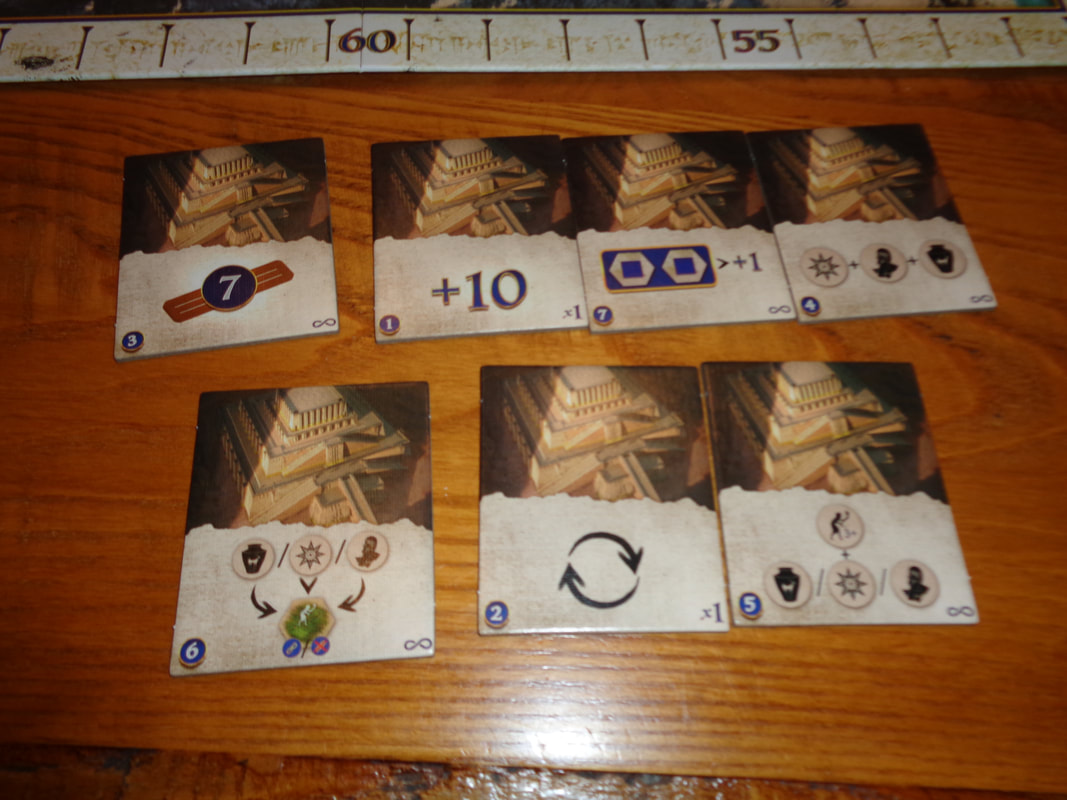
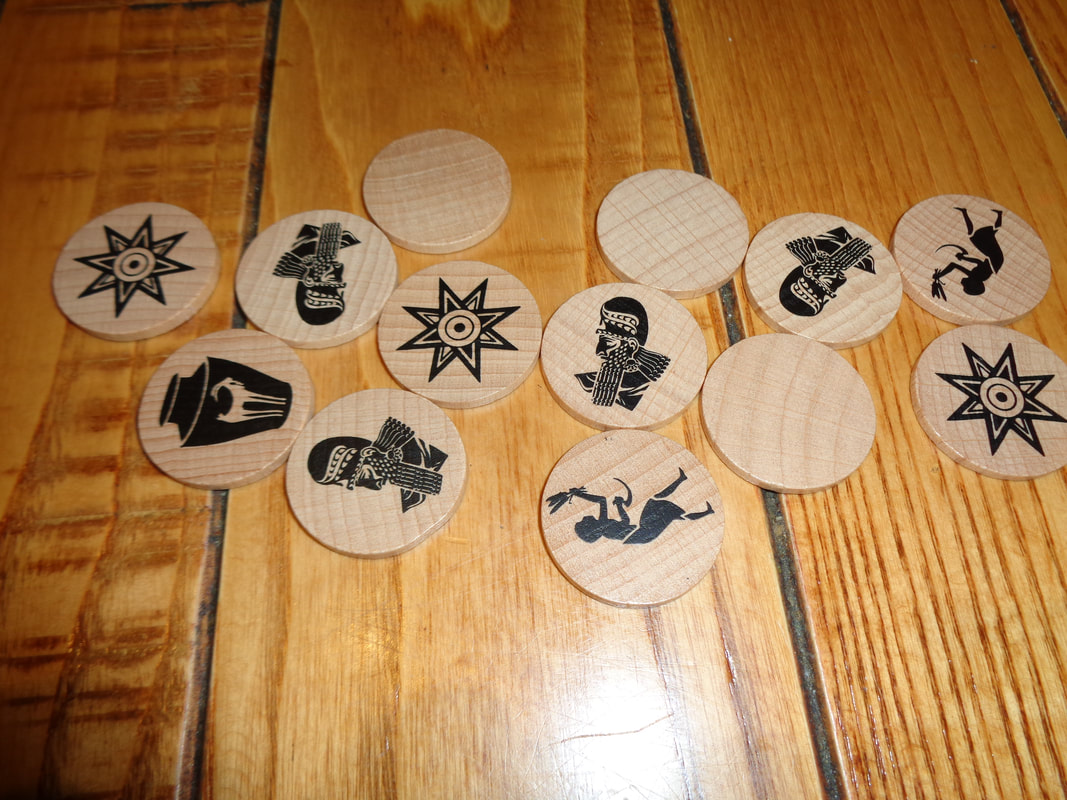
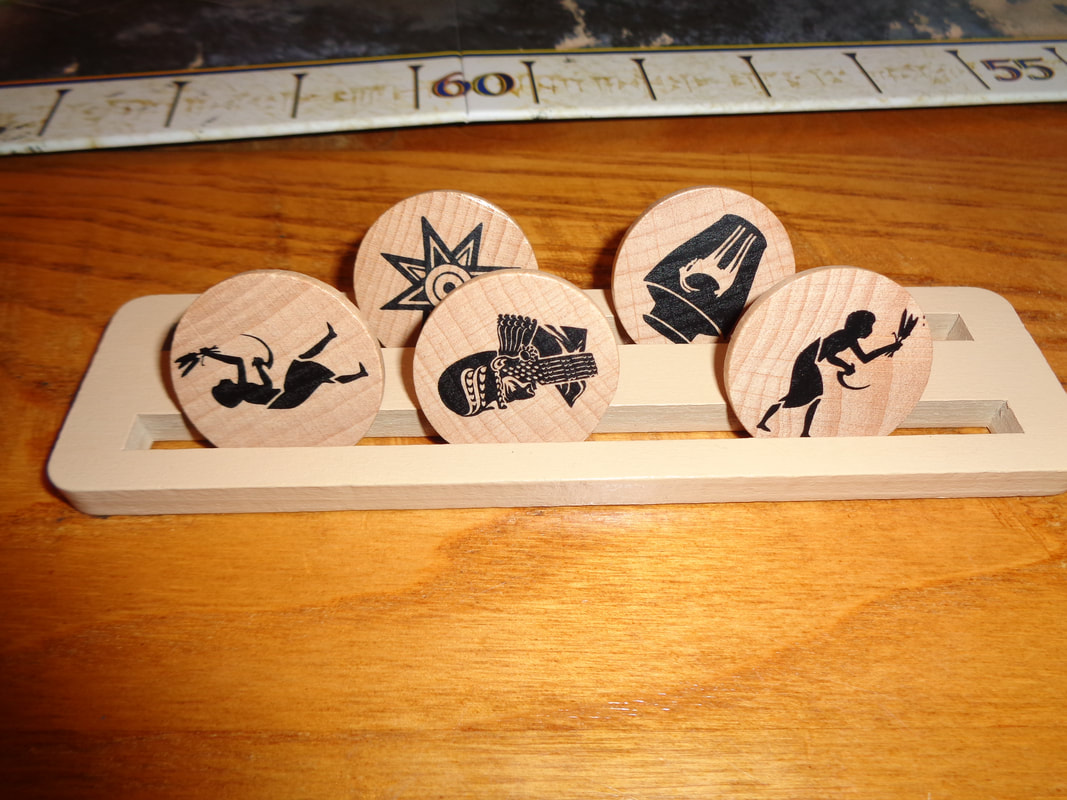
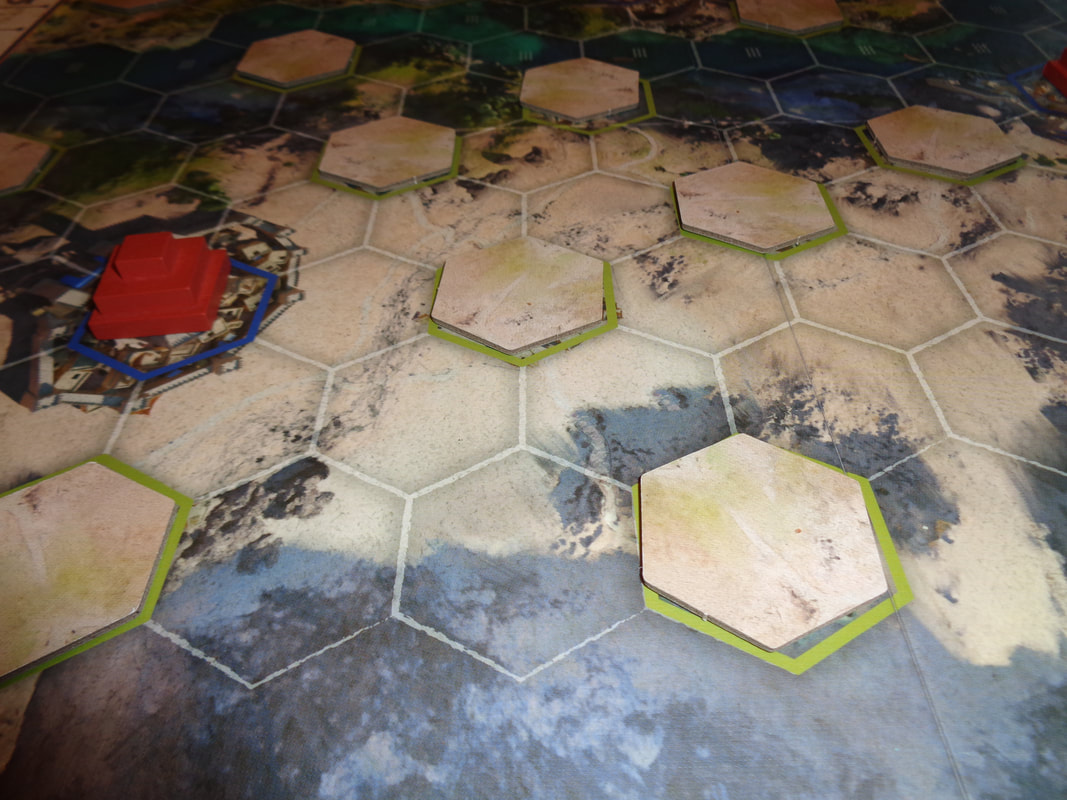
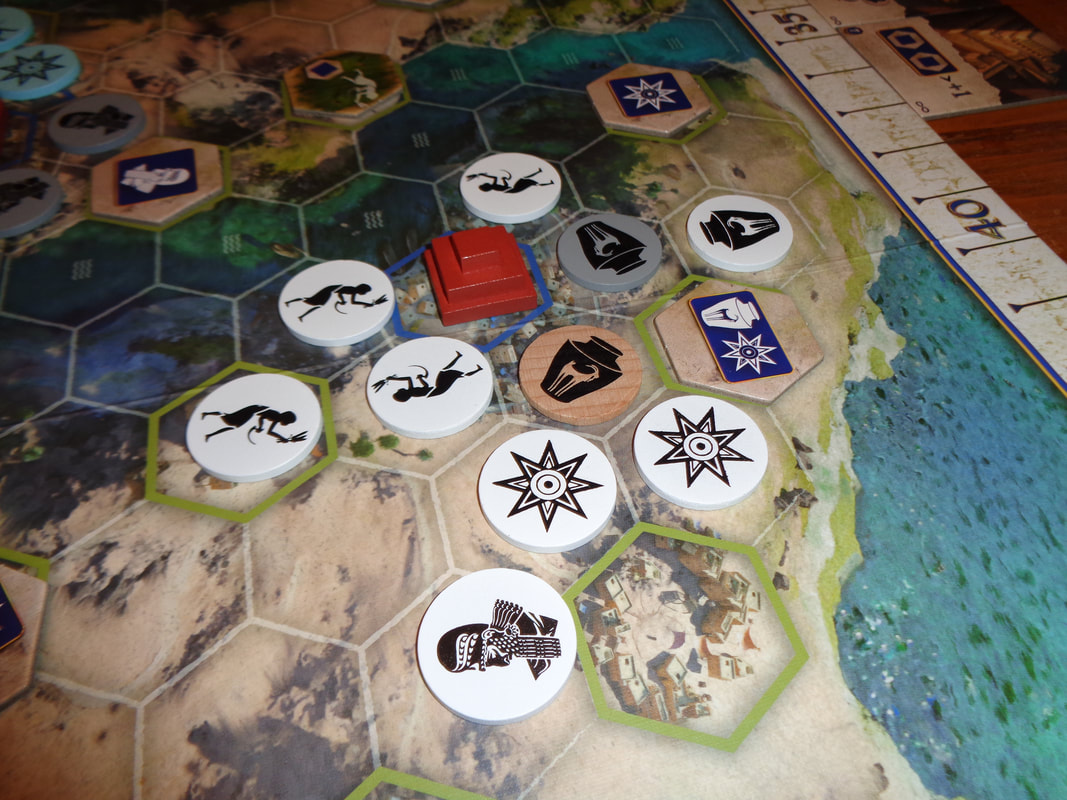
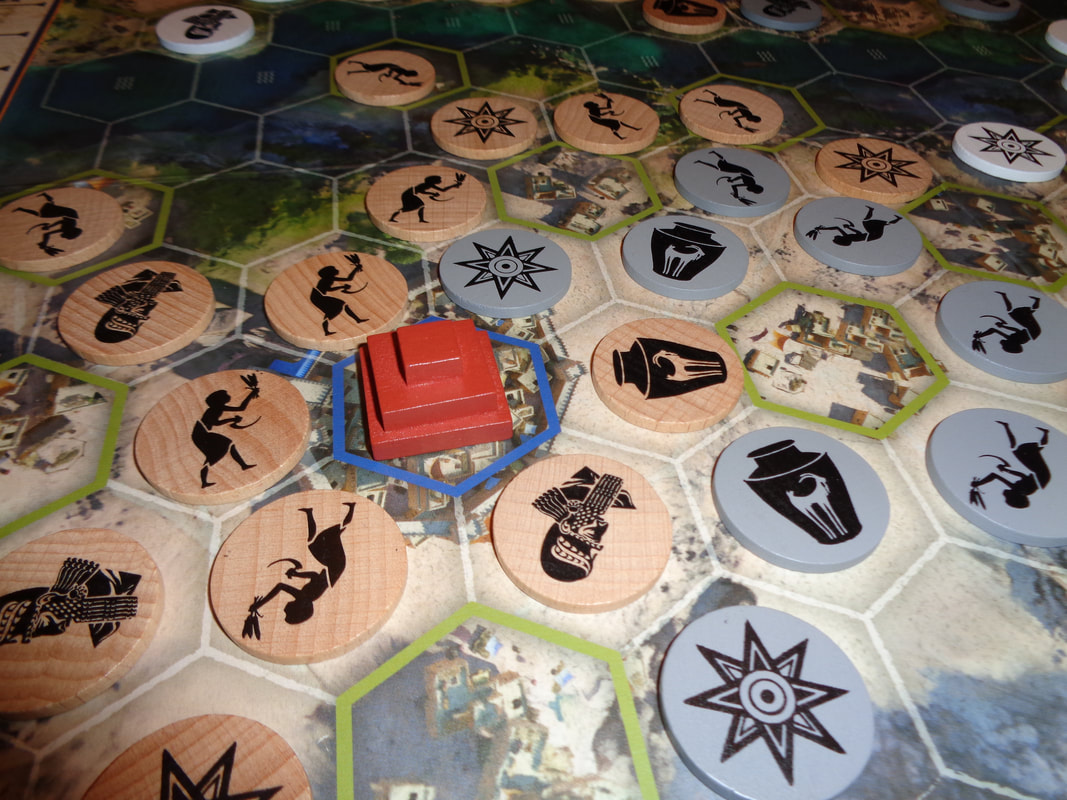
Babylonia's components are all good. the cards are actually as chunky as the tokens. The remaining components. the tokens and ziggurats are all constructed of wood and feel high quality. The stands are a nice touch. The artwork used on the board is good and portrays what I imagine to be a suitably middle-eastern landscape for Mesopotamia. It is perhaps a little too busy and distracts the eye, however, the hexes help to make the layout clear. The cards all use the same illustration which is a little bland. For the most part, iconography is easily understood. Only some of the ziggurat cards are not immediately clear and will require looking up in the rule book but that only applies when and if the card comes into play. Nothing that would be a problem or approaching a dealbreaker. How's it play? Setup
On to play Babylonia uses a standard turn structure with the active player taking their turn before play moves to the left. In their turn, there are 3 phases active player must complete.
Endgame Play continues until 1 of the following 2 criteria are met: A player has no tokens on their stand. Or There are only 1 or 0 city tiles left on the board. In either case, the game ends immediately! Points are tallied, highest score wins. Overall
If you were to look at a game of Babylonia in progress, you'd be forgiven for thinking that with all these tokens in play at the same time that it's a complicated game but it's not. From the rules write up above there's not too much to learn but like all good games, there's a lot to think about. Right from the start Babylonia provides players with meaningful decisions to make and several paths to scoring VPs which can be prioritised. Often these will vary in value contextually and in relation to other decisions. There will be short term and long term goals. Take ziggurats for example, a player may put tokens next a number of different ziggurats to score points as efficiently as possible but may also choose to concentrate on a single one in order to secure a card. However, taking too long to gain majority on a Ziggurat may lose you some actions. Cards themselves will change in importance, those with continuous ability will be most exploitable in the early game and those with once-only bonuses will be important in the late game - provided of course, that someone else hasn't beaten you to the punch. Farms and cities have an interesting relationship, getting cities quicker than other players can earn a lot of VPs when some farms are scored or more city tiles are acquired. But city tiles need to be surrounded to score - unlike farms which can score immediately. Sometimes It may also take more actions to surround a city; if it looks like a player is going to get majority in a city (Or ziggurat actually.) other players wont be incentivised to complete it early for another player's benefit. Finally, there's the network of tokens that players will create, their trade routes. Finding ways to connect nobles to matching city tiles on other parts of the board can be a good source of points. Especially if a noble can be connect to multiple cities, a city can only be scored once so getting another use out of already played token is useful. It's here small token plays can have big outcomes. Sometimes players will want to put specific nobles into player or sometimes use farmers for rapid expansion. All of this is dependant on what tokens get drawn though. It's likely that something will not go to plan thanks to other players. Adapting to circumstances can also be important. Paying attention to what other players are doing is also vital since - apart from what's on a player's stand - everything is open. It means that it's likely that getting majority will eventually become a race as players' objectives clash and anticipating those objectives can make a difference. With straightforward rules and a brisk playing time, Babylonia is fairly accessible but also provides players with meaningful decisions. I enjoyed it and would recommend it. 20th February 2022 It's a Sunday and we're logged into Board Game Arena for some gaming fun. I don't know what Loco Momo means but I kind of hope it means crazy fun with cute animals. Hmm, that didn't sound right, how about wholesome crazy fun with animals. Loco Momo is actually about (I kid you not!) organising the disarrayed wildlife population of the forest for a group photo! Caveat: We've only ever played Loco Momo digitally. What's in a game?
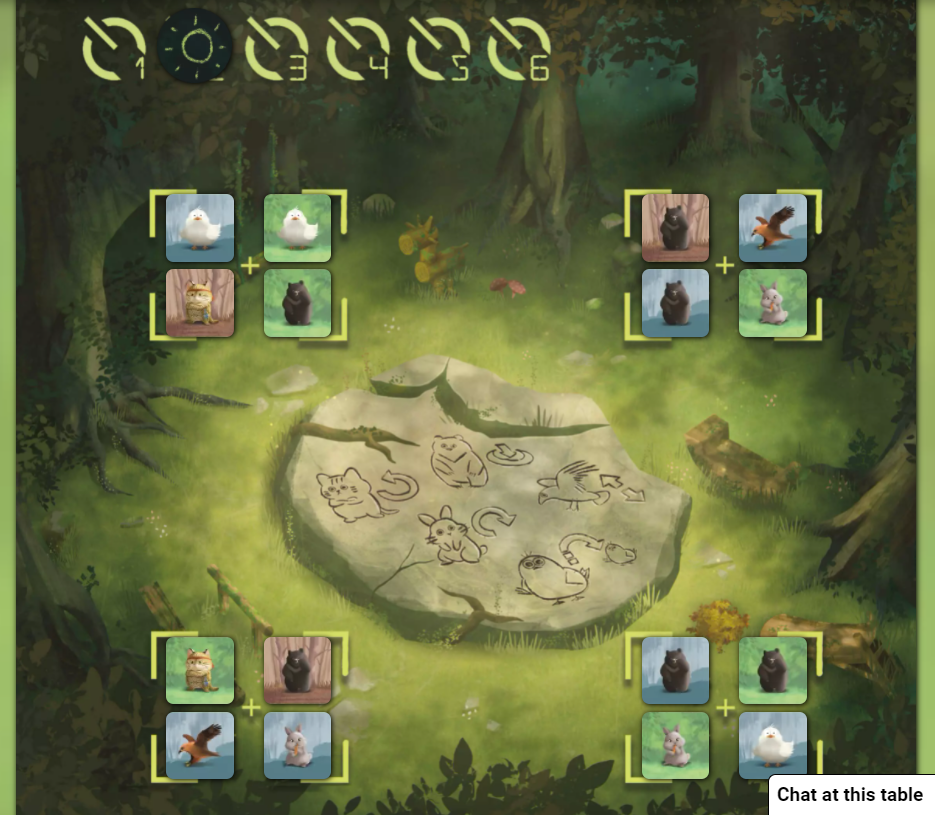
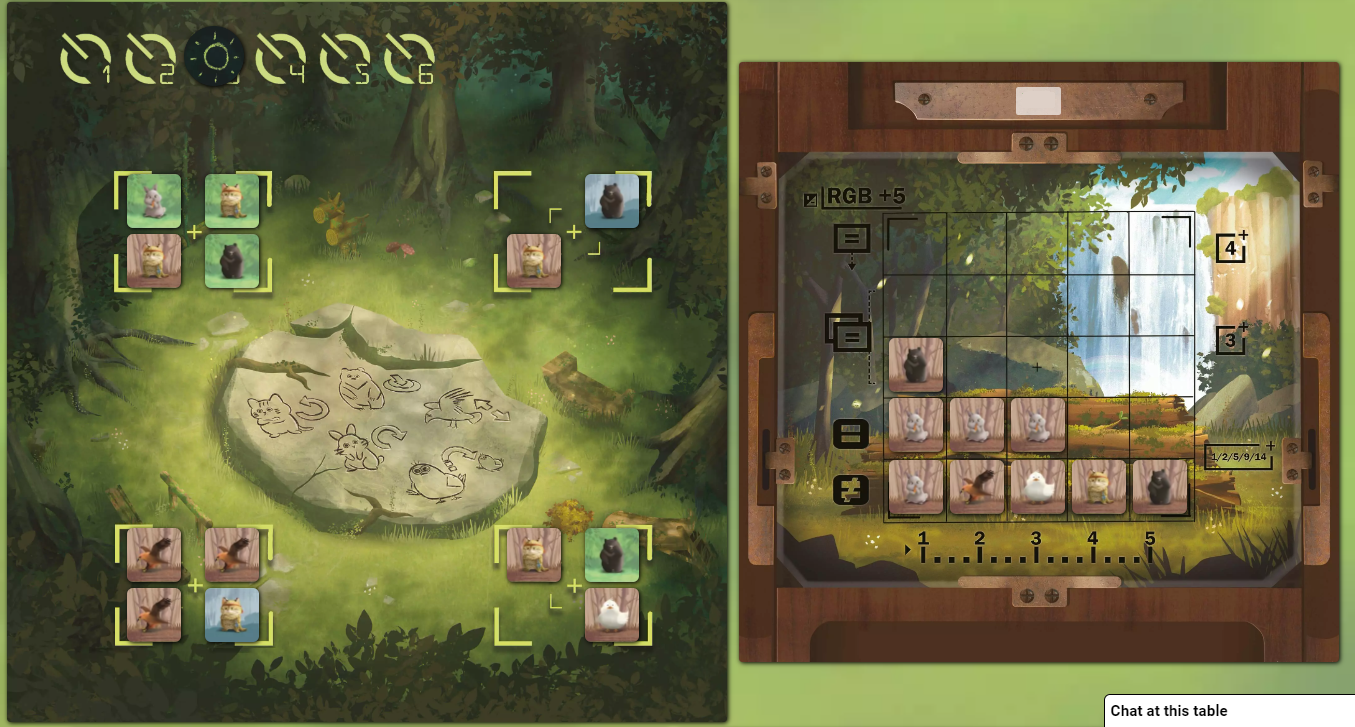
It's good quality artwork though, a bright palette and bold cartoony style suit the game's light-hearted theme well. The game's only iconography appears on the player boards. It's not immediately apparent what they mean but quick read of the rules makes them clear. How's it play? Setup
On to play The objective of Loco Momo is for players to fill their boards with tiles to score VPs and the game provides various approaches to achieve this. Although this mostly involves collecting various kinds of sets. Loco Momo uses the traditional structure with the active player taking their 2 actions - a drafting action and placing action with play then moving to the player on the left.
Endgame Play continues until the 6th round is completed, then scoring occurs.
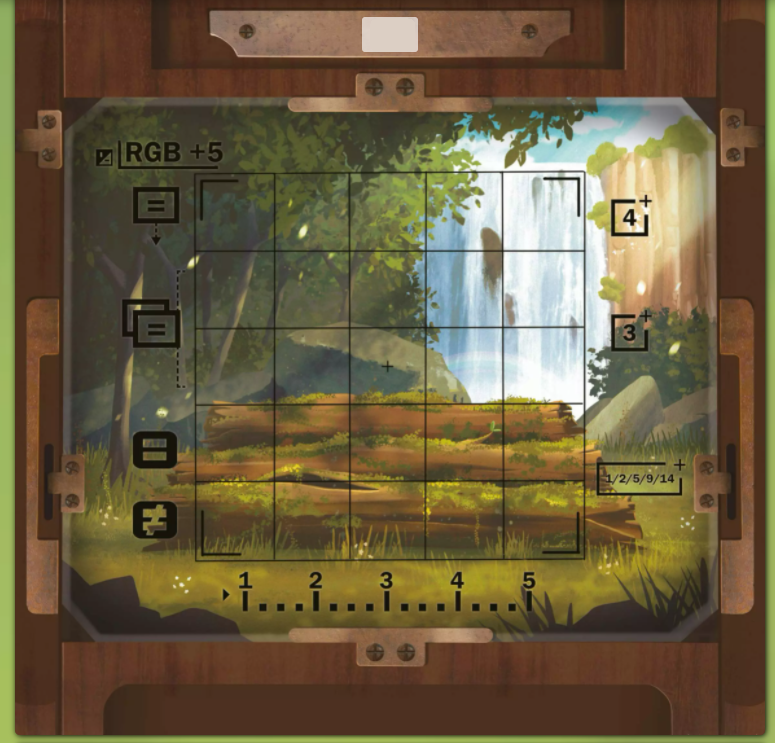
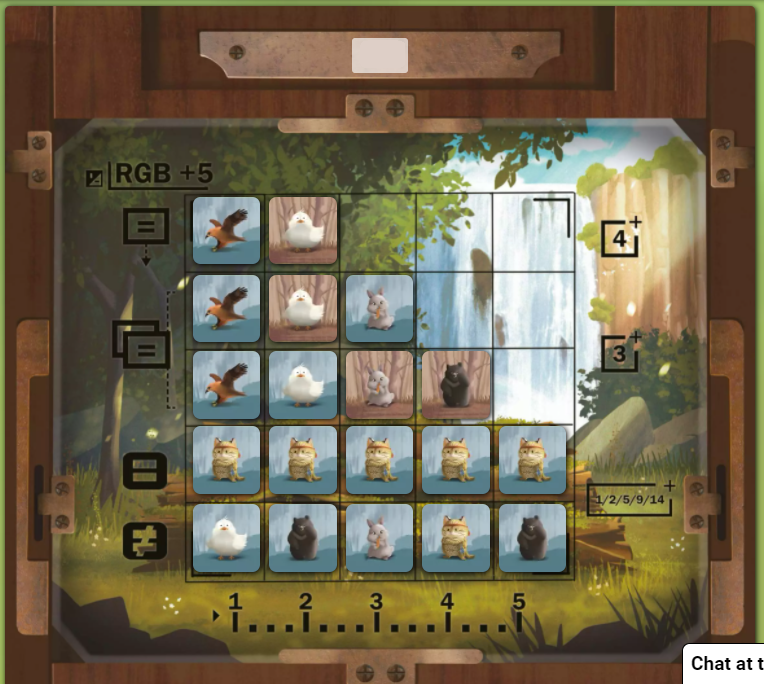 The bottom row has 5 different animals, scoring 14. Row 2 above has 5 identical animals, also scoring 14. The matching eagles in the 1st column for rows 3 & 4 score 3, plus the eagle in the top row above scores an additional 4. The ducks in column 2 also score 7. The 2 rabbits in column 3, rows 3 & 4 score 3. The bear scores nothing. Finally, 2 rows have the same colour as does 1 column, scoring 15 more. Total score: 60. Overall
Loco Momo is a fairly straightforward game, the gameplay strategies are more or less obvious and there's not much to say about it. During drafting players will look for the optimal method to acquire the most tiles possible or, as will occur on occasion if there's little they want, try to avoid taking tiles. Then, when placing tiles, players may need to make some meaningful choices. Sure, it's easy putting down tiles when a player has got the ones they wanted but frequently, this won't be the case and dealing with those wayward tiles is very important. Players will want to keep scoring opportunities for other tiles/sets open and minimise the damage caused by having to place unwanted tiles. There's also a higher level of play that involves looking at what's available on the central board and what other players are working towards, then trying to anticipate what tiles they'll be looking to gain from themselves. It might be prudent to try and deny other players certain tiles. Or if they're not interested in tile of a particular colour, it might be safe take that tile in a later turn. This brings me to the one niggle I have about Loco Momo, which are the colour scoring rules. We've only played Loco Momo 3 player and because there are 3 colours of tile, we tend to gravitate towards one colour each with little 'stealing' of other players' colours. Which is understandable as completing columns/rows with the same colours confers nice bonuses and during the late-game completing sets scoring the colour instead of the animal gets more VPs. Consequently it also makes decisions 'easier'. I imagine with 4 players, this status quo would be shaken up and the game would become more interesting. Despite the criticism, the game ultimately generally does provide players with meaningful decisions to make. Games about about drafting sets of tiles and placing them on to a player board are pretty commonplace today. So does Loco Momo do anything to stand out from the crowd? I think the answer is... sort of. Loco Momo is a bit unremarkable but at the same time it's an enjoyably light, easily learnt and accessible example of this kind of game with a reasonable playing time. A good introduction or crossover game If this ticks your boxes, Loco Momo might be worth a look. |
AuthorI play, I paint. Archives
March 2024
Categories
All
|


 RSS Feed
