3 Spellcasters and a Dwarf
  • Home
  • Special Effect
    • Special Effect
    • The Final Return of The Indiana Jones Charity Globe Trot
    • The Warlock of Firetop Mountain Challenge
    • Return of The Indiana Jones Charity Globe Trot
    • Bard's Tale Challenge
    • Fighting Fantasy Challenge
    • The Indiana Jones Charity Globe Trot
    • Mirkwood Charity Walk
    • Middle-earth Charity Walk
    • Dungeon Daze
  • RPGs
    • The One Ring
    • The Evils of Illmire
    • Beach Patrol
    • The Surrendered Lands
  • Game Blogs
    • RPG Blog
    • Gaming Blog
  • Painting Blog
  • Contact

Gaming Blog

Formula D - First Play!

4/2/2023

0 Comments

 
3rd February 2023

Friday is here! I'm at the office in Woking for some after work gaming.

As the name might suggest, Formula D is a game based on Formula 1 racing - but with dice! It's also the spiritual successor to the fantastic Formula Dé, a game I played 'back in the day'.
How does it hold up? Let's see.

What's in a game?
  • Game board: The base game of Formula D comes with a double-sided 2-piece map. One side recognisably shows the famous Monaco GP circuit while other shows a fictional racetrack in fictional 'Race City'.
Picture
Super; the Monaco GP track.
  • The road for each track has 3 'lanes' that have offset oblong spaces. Additionally, each track is broken up into 'straights' and 'corners'.
    Corners: All corners have distinct red lines to indicate where their entry and exit points are while alongside each corner is displayed certain information.
    • Stops: Each corner will be labelled with a 1, 2 or on occasion a 3. This is how many times a car must 'stop' in that corner. Thus corners are known as one-stop, two-stop  or three-stop corners.
    • Longest/shortest: The corner label will also display how many spaces the longest route through it will take as well as the shortest.
    • Arrows: Each space in a corner (And frequently spaces just before a corner.) will show some sort of arrow, these dictate which direction a car going through that corner may/must take.
Picture
This is a 1-stop corner, longest way through is 10 spaces, shortest is 5.
  • Weather: Finally, a box on the map will contain information on possible weather conditions for the race. Generally, weather conditions are used with the advanced rules.
Picture
Weather for Monaco.
  • Player board: This is a double-sided 'dashboard' that sits in a sort of plastic 'cradle' or 'holder'. It's filled with a grid of peg-holes and a sort of groove for the gearstick. 
    One side is the for the introductory game and shows a box of 18 generic wear points (WP).
    The other is for the standard side game and has 6 rows that represent WPs for the game's 6 resources; tyres, brake, gearbox, body, engine and handling.
    • Pegs & gearstick: Pegs are used to track resources using the holes in the dashboard. The gearstick slots into the grove and is used to track what gear the car is in.
Picture
  • Player tiles: Made of thick card , there are 10 of these tiles which are used with the standard version of the game. They have 'notches' along one edge that allow them to slide next to a dashboard.
    The player tiles are double-sided, each side has the 'stats' for a different driver, one side for the F1 driver and one for a racer in the 'street racing' version of the game. Each side also features a portrait of the racer in question.
Picture
Some faceless F1 drivers and street racing characters.
  • Cars: Formula D comes with 20 little plastic cars, 10 F1 cars and 10 sports cars. They have liveries which match the art on the player tiles.
Picture
We need cars... lots of cars!
  • Dice: There are a variety of polyhedral dice included with the game.
    • Gear dice: There are 6 gear dice which come in 6 different 'sizes' and each size corresponds to one of a car's 6 gears. Thus the higher the gear, the higher the result on the die used.
      It should be noted that none of the gear dice have normal numerical distribution as shown below. A couple of the lower gear dice are numerically weighted to the higher end of their number range. E.g., the 2nd gear die only has one 2 and three 4's.
      1st gear: Uses a 4-sided die that goes from 1-2.
      2nd gear: Uses a 6-sider that is numbered from 2-4.
      3rd gear: Uses a 8-sided die that is numbered 4-8
      4th gear: Uses a 12 sided die that goes from 7-12
      5th gear: Uses a 20-sided die that has numbers 11-20
      6th gear: Finally, the 30-sided die that is numbered 21-30.
    • Black die: This is a 20-sided die that is numbered 1-20 and thus is a 'normal' d20. It's used when a random outcome is required like potentially overrevving or damaging a car. 
Picture
Gear dice on the left, normal 20-sided die on the right.
  • Tokens: Formula D comes with a bunch of tiny tokens that fit on spaces on tracks and are used to track various conditions and hazards on the track.
Picture
Tiny tokens for hazards and weather conditions.
All of Formula D's components are good quality. The game board and player tiles feel sturdy, as does the player board.
While the cars are quite tiny, they are all well sculpted, colourful and overall look great.
I was a bit sceptical of having player boards with pegs and a groove for the gearstick but in practice works well enough and does away the need for pencils and erasers which were needed for the original Formula Dé.
Perhaps the only criticism would be for the tokens, which are a bit small and fiddly. However, there's no other way to fit them on the track so it's a bit of a necessary evil.

The player tiles feature some nice colourful art with F1 drivers on one side and street racers on the other side. The street racers have definite anime look to them.
But the standout artwork appears on the game boards which feature fantastic illustrations of their locales. A lot detail has been put into the art, you can even see crowds of people.

All the iconography on the track are numbers and arrows and are easily understood. The colours/shapes of the gears are also easy to understand.
However, the icons used on player tiles could be a little clearer, I think more stylised icons would have been more helpful.
Finally the positioning of the resource tracks on the player board could have been done differently to improve usability. Specifically, the gearbox, brake and engine tracks could have been put together, since these are spent when skipping gears - more on skipping gears below.


How's it play?
Setup

The setup and rules description here are for the standard version of the game using the F1 setup
  • Players: Give each player a player board, holder and associated pegs and gearstick. Put the standard side of the board into the holder.
    Then give each player a player tile and the F1 car with colours that correspond to their player tile. Position the tile alongside the holder. Place the pegs in their corresponding positions as dictated by their player.
  • Game board: Put out the game board with the F1 side-up.
  • First player: Determine the order on the starting grid and place each player's car in the relevant spot.
    This can be done by players rolling the black 20-sided die.
    Alternatively, the game has rules for getting qualifying times which involve each player doing a lap in the fewest number of moves and shortest time.

On to play
Formula D does not use a traditional turn order, instead a player's position on the track determines when they take their turn in the round. Whoever is in the lead goes first and becomes the active player, whoever is 2nd goes second and so on, until the last player has had their turn.
Then a new round begins and any changes in position will be carried over to the player turn order.
During a player's turn, they must perform the following.
  • Start: This actually only occurs for each player's first action of the game and determines if they get a good start or not.
    The player rolls the black die, a bad start means they only move 1 space, a flying start means they move 4 spaces, in either instance they end their turn in 1st gear. If they got an average start, they move into 1st gear and roll the 1st gear die.
  • Change gear: Other than the race start, at the beginning of every turn, the active player must decide whether to stay in the same gear or go up or down a gear. The gear they are in will determine which die they roll for movement.
    Change up: The active player may go up 1 gear.
    Change down: The active player may go down 1 gear, or possibly more.
    • Skipping gears: When going down gear, a player may choose to skip gears, i.e., go down more than one gear. E.g., skipping a gear allows a player to drop from 5th gear to 3rd by skipping 4th. A player may skip up to a maximum of 3 gears, allowing them to go from 6th to 2nd gear for example.
      However for each gear skipped a resource must be spent, they come from gearbox, brake and engine.
  • Roll and move: Once the active player has settled on their gear, they must roll the pertinent die and move their car as many spaces as the die rolls according to the following rules:
    Full move: The active player must use all the movement for their car.
    Traffic: The active player's car cannot move through other cars' spaces, they must go around them instead.
    Arrows: If the active player's car moves on to a space with an arrow, they must follow the direction(s) of that arrow when moving on.
    Straights: If the active player is moving their car along a straight, they cannot zigzag to use up movement. Furthermore, they can only do 2 lane changes and cannot go back into a lane they were already in during the current turn. Essentially players should move their car along the shortest route possible.
    Having said that, players can change lanes to avoid other cars or hazards.
    ​Corners: When a car enters a corner, it must end or 'stop' a number of turns in that corner as determined by the corner's details. Thus, a 2-stop corner requires the player's car to end 2 turns in that corner.
    • Overshooting a corner: If a car is in a 1-stop corner (Or only has 1 stop left in a 2 or 3 stop corner.), then they can go through the corner's exit and overshoot the it to some degree.
      For each space a car overshoots the corner, they must spend 1 tyre WP. Additionally, brake WPs can be spent to lessen movement and thus move less spaces.
      If a car needs to make 2 or more stops in a corner and it overshoots, then it is eliminated from play.
  • Additional rules: The description above covers the gist of the game but Formula D has numerous situational rules. Many of these are resolved by using the black 20-sided die.
    Contact: If a car ends its movement adjacent to one or more other cars, there is a chance they will make contact. This costs body WPs
    Overrevving: There's a chance that cars in 5th & 6th gears will lose a engine WP when any car in 5th or 6th gear gets a maximum result on their gear die.
    Debris: Certain events can leave debris on the track, if a car has to go over the debris, there's a chance they can loose a handling WP.
    Pits: In a race with more than 1 lap, there are rules to pitting, which allows a car to recover all their tyre WPs.
  • Advanced rules: There are a number of optional advanced rules that can be applied to the game. Mostly these are to do with 3 lap races and running a championship.
    ​Custom cars: Instead of having WPs assigned to a car as per a player tile. With these rules, players can assign WPs to the resources as they see fit.
    Tyres: With these rules, just F1, players can choose different types of tyres, such as hard, soft and wets. They can each have an effect on a car's performance, they are also effected by weather.
    Weather: There are rules for different weather conditions such as dry and rainy or changeable weather. Different weather conditions will effect cars differently. Furthermore different types of tyres will behave differently in differing weather conditions.
    I think that's pretty much it for the F1 rules.

Endgame
The first car to cross the start/finish line after completing the prescribed number of laps, wins! Second across the line finishes 2nd and so on.

Some additional info
​Basic rules

I'll briefly touch on the beginner rules for Formula D.
Fundamentally, the only difference is that players in the basic game only have one catch-all resource track called 'Wear Points' And all tyre, fuel, engine etc usage is taken from this track which starts with 18 WPs.
​
​
Street race rules: As someone who very much enjoyed Formula Dé in the past, I've not much attention to the 'street racing' aspect that has been introduced in this iteration of the game.
It features elements such as narrowing streets, jumps and even people shooting at the cars! Additionally, the characters on the player tiles are very unique and each feature a special move or ability  and seems a bit 'video-gamey'.
It feels very much like an attempt to jump on the bandwagon of a famous movie franchise and I have little interest in the street racing side of the game, of course, your mileage may vary.


Overall
I'll start by mentioning that while not part of the base game, there are 6 map packs for Formula D, each providing 2 additional tracks to the game. generally each pack features a street racing track as well as a real-world inspired circuit.
​It should also be noted that Formula D is almost identical to earlier iterations of the game, this means the game is fully compatible with all the racetracks from those previous games. This is fantastic, because if like me, you have a bunch of tracks from Formula Dé, it greatly increases the longevity of the game.
I'm sure it was deliberate on the part of the producers of Formula D and was a wise move.

I've seen Formula D criticised for being too luck based but without that element of luck, there's no 
risk and risk is at the heart of what makes Formula D so good.

You see, as a racing game, Formula D is not really a 'simulation', I mean how could it be? However, one thing it does emulate very well is the feel of having to 'push the envelope', how racers try to take it to the edge, how they take risks and how players in Formula D will also need to take risks, or more precisely, when to take risks
Unlike many games, playing too sensibly or prudently is a sure way to finish second in Formula D!

This all ties in with what Formula D is all about - which is managing corners, specifically the gear and consequently the speed of a car when it goes through corners.
This is not quite as simple as it sounds though: ​Ideally, players will want to be in as higher gear as possible for optimal movement at all times. However, players will need to be mindful of their resources, overshooting corners by too much or too often (Especially early in a race.) can have ramifications later. Sometimes overshooting will have an advantage, sometimes it won't it'll just be a waste of WPs.
This is all contextual of course, depending on a car's position relative to a corner, players will need to adapt their tactics to racing through that corner, even the position of opponent's cars can effect the players behind.
Players will also need to be wary of 2 or 3 stop corners and resist the temptation entering the corner in too higher a gear and too fast: In real racing, sometimes going into a corner slower means coming out faster, this can hold true in Formula D too.


Another time a player may take a big is when an opponent is ahead in a corner.
E.g., if that opponent ahead exits the corner in 3rd gear to avoid overshooting, the player behind may want to risk taking going up a gear and exiting in 4th. It's a real advantage to exit corners in a gear higher than your rivals. If you look at the distribution of numbers on the dice, the maximum speed on a gear die is generally the lowest speed on the next highest die.

In terms of negatives, player elimination is a thing here (I'm not a fan of player elimination.) and players can crash out and be sat twiddling their thumbs. Although this sort of thing generally only might occur when approaching the end of a race and back markers push hard to try and get on the podium.
Playing time can also potentially be an issue. Races can last 1-3 laps and you can expect a race to on average last 1 hour per lap. If you decide to play a full race, don't be surprised to lose an entire afternoon or morning to the race. Which is not necessarily a bad if that's what you want.
Also, with it's small components and 6 resources, Formula D can be a little fiddly.

Quibbles aside, Formula D is a fun, game and it's satisfying when you manage pull if risky manoeuvres and manage to fly from corner to corner. There's also a genuine, palpable surge of pleasure when you go into 6th gear, roll that 30-sided die and blasting down that straight.
Formula D is mid-weight game that fits it theme well and presents players with conundrum of when and how much risk to take. Who would have thought roll-and-move mechanics could be so well implemented.
Formula D is a game I have played a lot in its various iterations and I've always enjoyed it. If you want a racing game with a strong thread of push-you-luck running through it, then this is one to try. 
0 Comments

HeroQuest - First Play!

19/8/2022

0 Comments

 
18th August 2022

Broadsword! It's a Thursday and we're in Aldershot for some gaming fun!

According to Wikipedia, HeroQuest was originally published in 1989, which makes me feel very old.
The version that we are playing though, is the 21st iteration.

So grab your staff and pull on your loincloth as we set into vaguely generic fantasy world of HeroQuest in search of treasure.
Alternatively, take on the role of Zargon and oppose the heroes.

What's in a game?
  • ​Game board: The game board depicts was is essentially a underground dungeon. It displays rooms of varying size differentiated by colour which are boarded by a perimeter corridor, 4 more corridors go north, south, east, west and sort of divide the rooms into 4 areas along with a large central room.
  • Miniatures: HeroQuest is a miniatures heavy game and comes with several types of all plastic miniature.
    • Heroes: There is a miniature for each of the game's heroes; barbarian, elf, dwarf & wizard.
    • Monsters: Enemies abound in HeroQuest and include goblins, orcs, skeletons, zombies and more.
    • Furniture: As well as closed and open doors, there's dungeon dressing for tables, altars, bookcases and so forth.
  • Tiles: card tiles are used to represent hidden doors, traps and dead ends among other things.
  • Cards: There's also a variety of cards in the game.
    • Hero cards: Each hero has their own card that details their stats, which are
      Attack
      Defence
      Body
      Mind
      Also listed are their movement dice and starting equipment.
    • Monster cards: Each type of monster also has its own card. Monster basically have the same set of stats as the heroes.
    • Spell cards: There are 5 sets of spell cards, 1 set of 15 (Dread Spells) is for the Zargon player. The remaining 4 sets of 3 cards each (Based on fire, earth, water & air.) are for the wizard and elf players.
    • Treasure cards: This is a deck of cards that contain both treasure and booby traps such as wandering monster and the like.
    • Equipment cards: This deck contains various pieces of equipment that can be purchased with the cash the heroes acquire and will improve their abilities and stats.
    • Artefact cards: These cards represent items that are particularly powerful, they cannot be bought but only found in specific dungeons throughout the campaign.
  • Game master's screen: This is a 3-panel card panel of the kind that could be found for RPGs and is used by the Zargon player to hide their stuff.
  • Quest book: HeroQuest has a 14-part campaign that is detailed in the quest book. There's also space for industrious players to create their own quests.
  • Dice: 2 types of dice are used in HeroQuest.
    • Red dice: There are 2 red dice, these are typical six-siders.
    • Combat dice: These are not the usual six-siders. Instead 3 faces show a Skull, 2 faces show a White Shield and the remaining face shows a Black Shield.
  • Character pad: A pad of character sheets to be used by players to track the stats and wounds of their characters.

HeroQuest's components are all generally good.
The board, tiles and cards are of an acceptable quality.
The dice are also fine and in a move that pays homage to the original HeroQuest, there still aren't enough of them to split conveniently between the hero players and Zargon player! The game really could do with a few more combat dice!

Probably the biggest components are the miniatures. All the heroes and monsters miniatures come in single colour plastic according to type, heroes are red, goblinoids are green, undead are beige and so on.
I'm pretty certain the sculpts are all new as well, the games has undergone cosmetic changes due to licensing issues regarding the original.
Speaking of sculpts, I found their quality to be... OK. If I were assessing the miniatures exclusive of the game, they wouldn't be good but since they are meant to be part of a game; and in that context they're pretty cool. Especially since I feel that they're designed to hark back to the original style and design, which I think they do a good job of doing.

The scenery and dressing is also a bit of a mixed bag. The scenery in this version is all made of plastic and is much more durable than the original scenery which in part was made of cardboard.
However, that cardboard scenery with its printed artwork was a lot more colourful. The modern scenery in comparison is a just drab, monochrome, grey plastic.

HeroQuest's art is good wherever it appears, mostly on cards and has a brash, chunky cartoony aesthetic that suitably fits the style of the game.

There are a few icons in the game that are easily learned, the Zargon player has to learn a bit more due to having to comprehend the scenarios in the quest book but again, it's not an obstacle.


How's it play?
​Setup
Before any play can begin, one player must decide to take the role of Zargon who is essentially the 'Games Master' in RPG parlance and controls all the enemy forces that oppose the players. Whoever plays Zargon will probably be doing so for all 14 quests presented in the quest book.
Up to 4 other players will assume the role of heroes adventuring through the campaign. Generally, once players have chosen a hero, they will stick with that hero until the end of the campaign. Having said that, there's nothing to stop players swapping or switching around heroes if they so desire.
  • Zargon player: The Zargon player should familiarise themselves with whichever quest is being played from the quest book. It will tell them how many doors they need, how much scenery, what and how many monsters, which dread spells to use and so on.
    The Zargon player should gather all the required items and place them adjacent to the central playing area.
    Monster cards: Place these face-up adjacent to the central playing area so they are visible to all players.
    Treasure cards: These should be shuffled into a face-down deck adjacent to the central playing area.
    ​Screen: The Zargon player should keep the quest book hidden behind their screen.
  • Hero players: Players should decide which of the available heroes they are using between them.
    Copy stats: Each player should take a sheet from the character pad and copy the stats and information from the hero card for their chosen hero on to the sheet.
    Spells: Whoever is playing the wizard should take 3 sets of spell cards, that is a total of 9 spell cards. The elf player should take the final set of 3.
    The wizard and elf players are free to decide who gets what sets.
  • Game board: Place the game board in the central playing area. The Zargon player should place the stairs tile in its appropriate spot as dictated by the quest book. All players should put the miniature representing their hero on the stairs tile.
    Then the Zargon player should read out the quest's flavour text to the other players.

On to play
In HeroQuest, all the hero players will each take their individual turns and then the Zargon player will finally take their turn.
Generally this is done with the player to the left of the Zargon player going first with turns progressing to the left until eventually the Zargon player goes last.

The general flow of play will involve the heroes exploring the dungeon game board (Which is unpopulated at the game start.) and in response, Zargon revealing what the heroes encounter, be it doors, dead ends, traps or monsters and so on.
Once the heroes have had their turns, Zargon can act. This means they can move any visible monsters to attack the heroes. Thus if no monsters are visible on the board, Zargon basically does nothing.
  • Heroes: The hero players can move and perform one of the following actions.
    • Move: A hero can move before or after performing an action. They cannot split their movement.
      Roll dice: The active player rolls the 2 normal red dice and the result is how far they can choose to move in their turn. There are some limits though.
      Orthogonal movement: Heroes cannot move diagonally.
      Other heroes: A hero may move through a space containing another hero but cannot  end their movement there.
      Monsters: Heroes cannot move through spaces occupied by monsters.
      Trap: When a hero steps on to a space with a trap, their movement immediately end and the trap is triggered.
    • Actions: One of the following actions may be performed by a hero.
      • Attack: A hero may attack a monster, this can be melee or ranged.
        Melee: To engage a monster in melee, a hero must generally be orthogonally adjacent to it (No diagonals allowed!), there are some weapons such as staffs that allow heroes to attack to attack diagonally adjacent enemies.
        Ranged: A hero with a ranged weapon can pretty much attack any enemy they can see and is in line of sight. More on line of sight below.
        Roll the dice: The attacking player rolls a number of white combat dice equal to their attack score and each skull result deals 1 wound to a monster.
        Monster defends: When a monster takes 1 or more wounds, the Zargon player rolls combat dice equal to targeted monsters defence. Each black shield result blocks a wound! Any wounds which are not blocked by the defence roll are inflicted on the targeted monster and they lose an equivalent amount of body points.
        Weaker monsters tend to have only 1 body point and will be eliminated by any damage.
      • Cast spell: The wizard and elf may cast 1 spell. Depending on the spell, this can target themselves, an ally or a hostile monster. If cast on a ally or monster, line of sight rules apply.
        Each spell card will describe its effect and once it is resolved, it is discarded from player and cannot be used again in the current quest.
      • Search for treasure: When a hero is inside a room (Corridors cannot be searched for treasure.) and there are no monsters present in that room. The active player may search for treasure, this will have one of several results:
        Draw treasure card: The active player draws a card from the treasure deck. This may result in them receiving gold or potions. It may also result in encountering a wandering monster, which must be fought or triggering a trap.
        Quest treasure: As per the quest book, some rooms will contain a specific item or treasure, usually as part of the scenario.
        Artefact: Also as per the quest book, searching certain rooms will grant a specified artefact card to the active. Artefacts are generally better than mundane items.
      • Search for secret door: Provided there are no monsters in sight, the active player may search for hidden doors. This can be done when the hero is in a room or corridor and searches the entire room and in the case of a corridor all the corridor which is in line of sight.
        If there is a secret door in a room or corridor, the Zargon player must reveal it to the hero players and place a secret door tile on the relevant space on the board:
      • Search for traps: This is fundamentally identical to searching for secret doors except it reveals traps.
      • Disarm trap: If a hero has a tool kit they may attempt to disarm a trap that has been revealed by moving on to the trap space on the board.
        The dwarf hero as his special ability may disarm traps without a tool kit.
        Roll the die: A combat die is rolled, the result will determine if the trap is neutralised or trigged - in this case whoever was attempting to disarm the trap suffers whatever effect it deals out.
  • Zargon player: For a large part of the game, the Zargon player will be reacting to player actions in their turns. Revealing doors, traps, monsters and dead ends as they are encountered by the players.
    • Monsters: Monsters are only active during the Zargon player's turn and even then only revealed monsters become active.
      Movement: No dice are rolled to move monsters, instead they have a set number of squares they can move before or after acting. The fastest monsters move 10 spaces which will nearly always outpace heroes!
      Attack: Functionally, combat for monsters is identical to how it works for heroes except as far as I know, monsters do not get ranged attacks. When monsters are adjacent to heroes they can attack them. The Zargon player rolls a number of combat dice equal to the monsters attack value and each skull potentially inflicts a point of damage to a hero.
      Hero defends: Heroes can defend damage by rolling dice equal to their defence value and each white shield result blocks 1 point of damage. Any unblocked damage is dealt to the hero's body points.
      Dread spells: As per the quest book, some monsters may be equipped with dread spells which can be used against the heroes. As with all spells, the caster of a dread spell must have line of sight on their target. Once a dread spell is resolved, the card is discarded out of play.
  • Other rules: There are some other rules which also apply in HeroQuest.
    • Line of sight: Both heroes and monsters can see as far as a straight line could be drawn. Thus they can see all the way down a straight corridor but not round a corner.
      For the purpose of targeting ranged attacks, allies do not block each other's line of sight but opponents do block line of sight. Thus a hero cannot target the 2nd monster in a line of monsters and vice versa.
    • Looking: This is a free action and can be used at any time in their turn even in between moving spaces and as often as desired.
      When a hero player decides to look, the Zargon player must reveal any features, traps or monsters which are in line of sight.
    • Doors: Doors always closed when encountered and can be opened as a free action.
      Once opened, doors cannot be closed again
    • Treasure: When the heroes acquire any kind of treasure (Other than that found on a card.) it should be recorded on one player's character sheet.
      Gol coins can be collectively spent at the end of a quest,
    • Traps: Various types of traps are featured in HeroQuest, there are spike traps, pit traps and so on. Generally inflict 1 wound as well as a some other effect (Such as falling down a pit.). Triggering a trap generally ends a hero's movement.
    • Death: Monsters die when they reach 0 body points and the same is true of heroes. If a hero reaches 0 body points, they are killed and their controlling player is eliminated from the current quest.
      Fortunately, new heroes can be recruited in between quests.
    • Potions: Players can discard potion cards out of play to gain their benefits.
      Using a potion is a free action and can be done at any time. They can even be used in Zargon's turn and in fact can be used by a hero player after they reach 0 body points. Needless to say, potions can be lifesavers.

Endgame
Play continues until the hero players complete quest objective, in which case, they collectively win! Otherwise, if all the heroes are instead killed, then the Zargon player wins.
Additionally, if the hero players retreat (By returning to the stairs tile.) for whatever reason then they also lose.

That's not the end!
Once a quest has ended, players can spend their hard won loot and cash to buy equipment. Weapons can increase a hero's attack score and armour can increases defence scores, while daggers and crossbows offer ranged attacks and so on.
When buying equipment, the player who will use it takes possession of the card. Furthermore, once all copies of a certain item are bought from the equipment deck , then that item can no longer be bought. Conversely, consumable items such as potions and daggers are returned to the equipment deck when used.

End Endgame!
If the hero players manage to succeed at all 14 quests, they have won the campaign.


Overall
There's quite a lot to write about here and my thoughts will probably wander, so please indulge me - and let's get started!

HeroQuest was a pretty ground-breaking game in 1989. Published by a mainstream games producer, it offered people who had never played an RPG an accessible slice of the RPG experience and introduced some game concepts to people who had never encountered them before.
It's also a window into how games played 35 years ago and what player expectations were like back then.

For example, a modern game with similar themes to HeroQuest probably wouldn't employ a roll-and-move mechanic.
Another example are rewards and the game's equivalent of levelling up: As explained below, HeroQuest rarely rewards to players - which come in the form of equipment upgrades. These upgrades occur quite infrequently but are quite significant statistically, i.e., going from 2 combat dice to 3 is a big jump.
A modern game would try and find a way to do the opposite and drip-feed players constant but low-impact rewards in what would be called a gameplay loop or moment-to-moment engagement.

HeroQuest occasionally also trolls player, forcing them to deal with multiple traps and putting no reward on the other side.

Mechanically, HeroQuest is actually a fairly straightforward game.
While heroes have 6 actions they can perform, 3 of those are almost identical actions and 1 is very situational. Players will find themselves moving and searching, opening doors and defeating monsters behind them, searching, then moving on.
Rinse and repeat.
While there are definitely some tactics that players can adopt and repeatedly employ, the random placement of challenges - particularly monsters who form the majority of heroes' encounters - means that players will need to adapt to situations and respond effectively.
There's also some randomness to player actions - the roll-and-move mechanic means that heroes may not reach their opponent when they need to and also may not be able to escape enemies when they need to.

The combat system is also straightforward and runs smoothly enough, it does feel quite swingy and unpredictable though but that might just be me grumbling about dice rolls!
We found that the tougher monsters are very hard to wound. Once their defence is high enough, they're generally guaranteed being able to absorb 1 wound from an attack. This means the heroes will need to rely on luck to get 2 wounds in an attack or use at least 4 dice to attack and have a passable chance of getting 2 wounds.
How do the heroes get higher attack scores?

This brings me to equipment. Generally, we ended up equipping the 2 front line fighters (Primarily the barbarian but to a lesser extent also the dwarf.) with weapons above anyone else as well as providing the elf with a crossbow. Getting an attack stat up to 4  and gaining ranged attacks were real game changers.


Getting the right equipment or getting equipment and using it the right way can enhance or change tactics, improve the odds of surviving, winning fights and so on.
What's also interesting is that at the end of a quest, the hero players have the opportunity to buy equipment. However, because the cost is so high, in practice it means they will only get to buy something once after every 2 or 3 quests. It means that the heroes will get maybe 6 or 7 pieces of equipment throughout the entire campaign and will need to choose wisely. 

Some equipment such as consumables seem very expensive for what they provide. During our playthroughs, we never seriously considered buying things like throwing daggers or holy water.


Thematically, HeroQuest is a bit of a strange beast.

It has obvious elements derived from tabletop RPGs such as having a games master, combat screen, dungeons to explore, character classes and stats, scenarios, campaigns and narratives, rolling dice for combat etc but there are also some key differences.

There's no experience points or levelling, instead character improvements happen via buying better equipment.
Also, a key difference for me is the role the Zargon player has, they are part games master but also part antagonist and opponent to the heroes which is different to the majority of RPGs. Why is this significant? Let me explain.

The HeroQuest campaign has 14 quests, it took us a total of 15 attempts to complete all of them, in other words we only failed 1 of the quests, the other 13 were completed successfully at the first try.

I think that in part this is due to the fact that we're all experienced gamers and it feels the game is targeted at the early teenage market so we mostly breezed through it.
(A little more about this below.)
I also think this because the game utilises a 'one vs many' system and I've always felt that it's very hard to balance this type of game fairly, 3 or 4 human brains will always have the advantage over 1 human brain.

This is compounded by the fact that HeroQuest has a campaign.
It means that if the heroes fail a quest, they will invariably have to repeat it again, why is this significant? The purpose of a campaign is to advance through the multitude of quests until the final one can be completed and it can be tedious repeating failed quests, especially if more than once.
When the surprise of knowing what is behind a door is gone, the game can become an exercise in rolling dice over strategy.

Returning to difficulty: I read that it was originally envisioned that the hero players would behave competitively and cooperation between them would make the game too easy.
This of course contradicts the RPG nature of the game and it contradicts the rule book too, which states the players should cooperate and they will collectively win or lose.

Finally, it also contradicts player sensibilities; without cooperation, the wizard in particular for example, has a fairly low chance of surviving a dungeon.

All of this leads me to suspect that either deliberately or accidentally, the game is skewed in favour of the players.
It sort of makes sense because it gives the campaign momentum and keeps events moving forward.
The problem though, is that it can become a frustrating experience for the Zargon player, who in essence has to lose over and over.
It may have been better to do away with having a antagonistic games master role and have a more traditional games master. I get the feeling though that it was done that way to make HeroQuest seem a little more like a 'traditional' board game.
It would have been even better if the game master role could have been automated entirely. I imagine though, that it would've increased the game's difficulty significantly.

Ultimately, I found HeroQuest just about engaging enough to keep my attention, you could never afford to become complacent. Not paying attention was a sure-fire way to get your hero into trouble.
​The campaign does have a narrative, however it's fairly generic and also fairly forgettable.
For me, the pleasure I think, came from the opportunity to play a game cooperatively along with friends.

If you want a light and accessible RPG adjacent experience that's easy to manage without much prep time, you could do a lot worse than HeroQuest.

If you're a parent or adult looking for a way to introduce youngsters to some more elaborate game mechanics and concepts or introduce them to a beginner RPG, then HeroQuest is definitely worth a look in.
0 Comments

Chariot Race - First Play!

10/6/2022

0 Comments

 
9th June 2022

​Gaming night Aldershot continues with Chariot Race.

As you might have guessed from the title, this game about managing railway companies in the 19th Century on a hex-based map of North America. NO WAIT, THAT'S NOT RIGHT!

Chariot Race is about chariot racing in ancient Rome. That name is sure is confusing!

What's in a game?
  • Game board: This oblong board depicts a oval race track with 3 lanes in a sort of coliseum setting. Each of the corners also shows a 'safe speed' which differs for each lane, the outer one having highest safe speeds. The board also displays 6 starting spaces.
    The board is double-sided and on the 'B' side contains some obstacles to be avoided, providing some more challenge to the game
  • Player board: There are player boards in every player colour and each one has 3 columns.
    The left and right columns track damage and speed respectively, while the centre column is 'segmented' and each segment displays a differing number of dice, starting with 1 die at the top and going down to 5 dice at the bottom.
    Finally, at the top is a horizontal 'fate' track that goes from 0-6.
    Additionally, each board also comes with 3 'pointer clips' to track all of this.
  • Dice: The game uses non standard wooden six-siders with rounded corners and instead of numbers they depict symbols which represent the following.
    • Speed change: This result makes the player alter their speed by +1/-1/
    • Extreme speed change: This result makes the player alter their speed by +2/-2, however it also inflicts a point of damage on their chariot.
    • Change lane: Allows the player to move their chariot to a different lane. This symbol appears twice on each die.
    • Attack: Allows the player to drop caltrops or throw a spear at another player! Well this is Roman chariot racing.
    • Fortuna: Gives the player a point of fate.
  • Standees: The game's chariots are standees constructed from 2 thick card tokens which slot together.
  • Caltrops: These are little grey wooden cubes, they don't look much like caltrops but since they're little wooden cubes, I approve!
  • Lap tokens: These little double-sided tokens are used to indicated which lap a player is on.

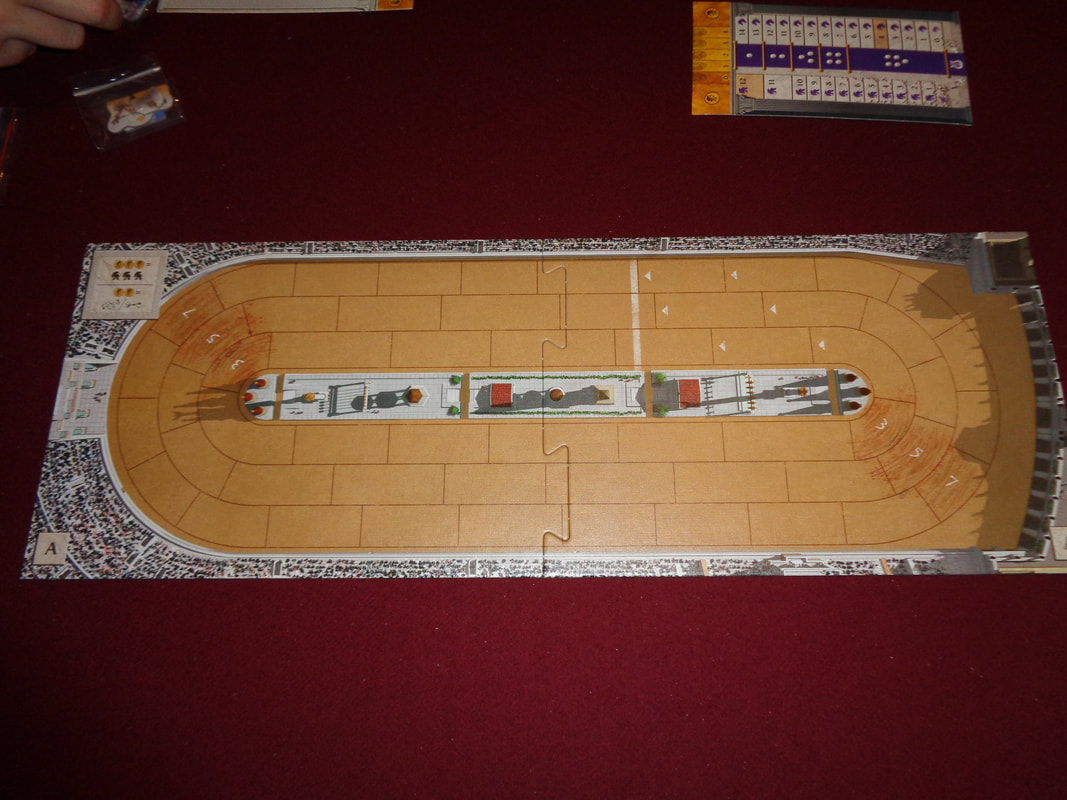
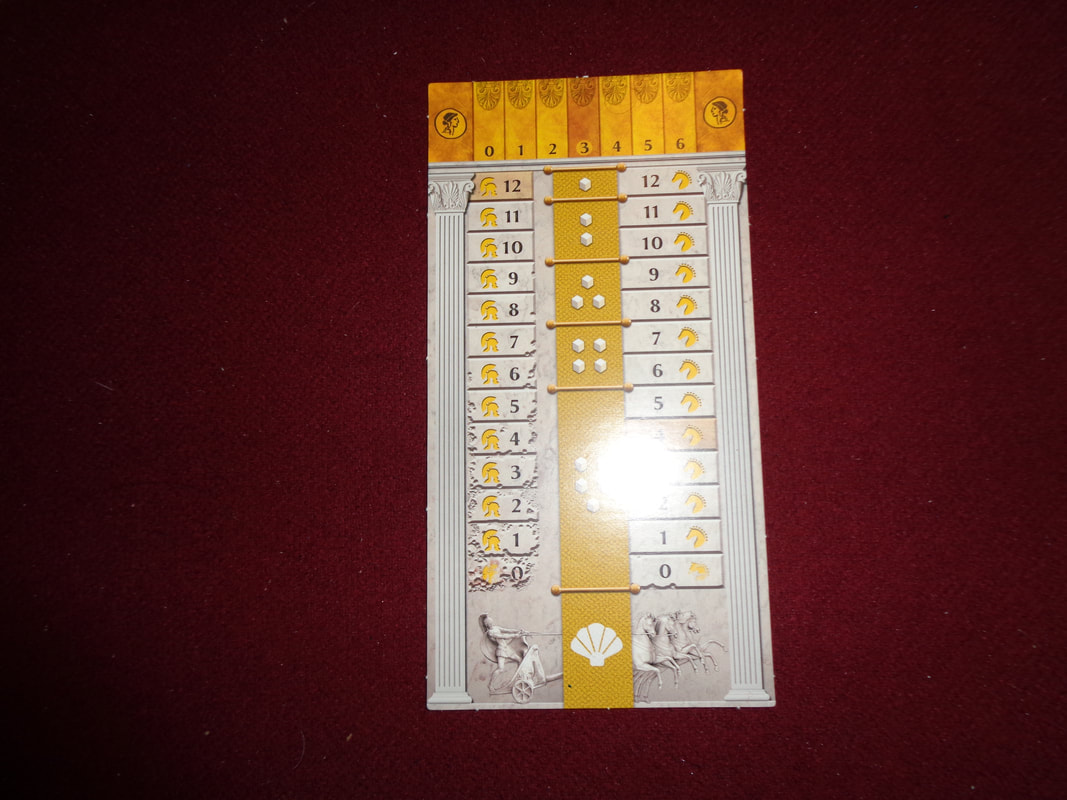
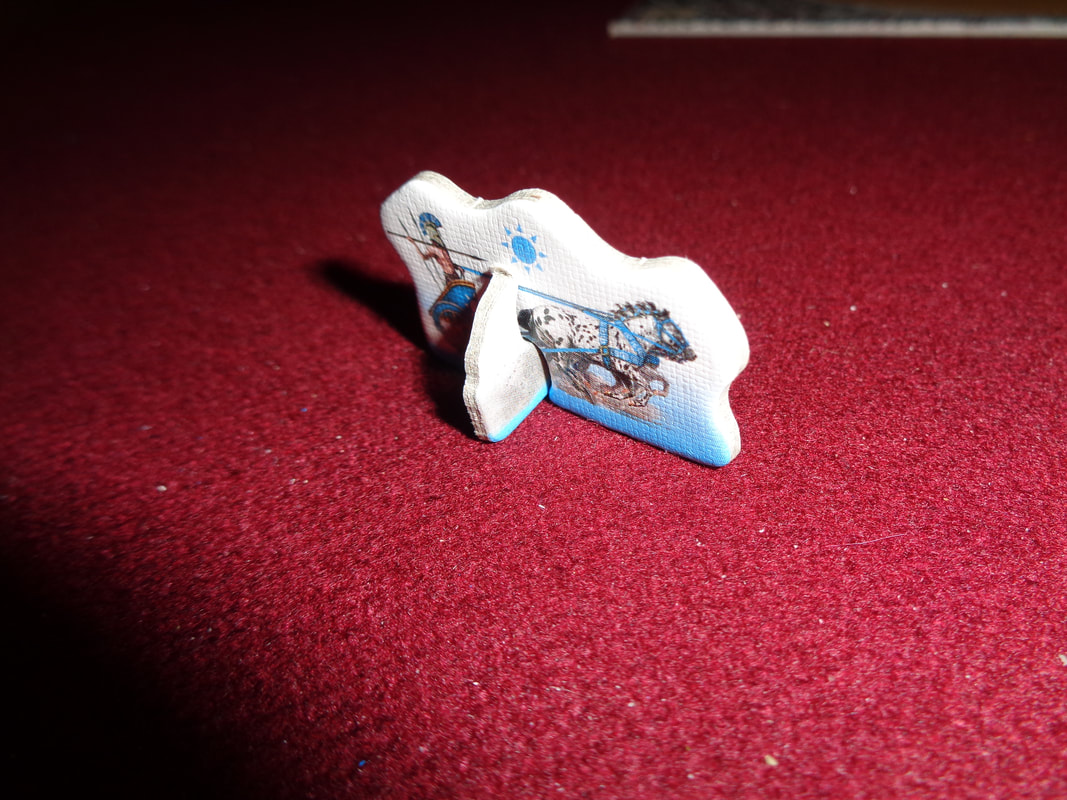
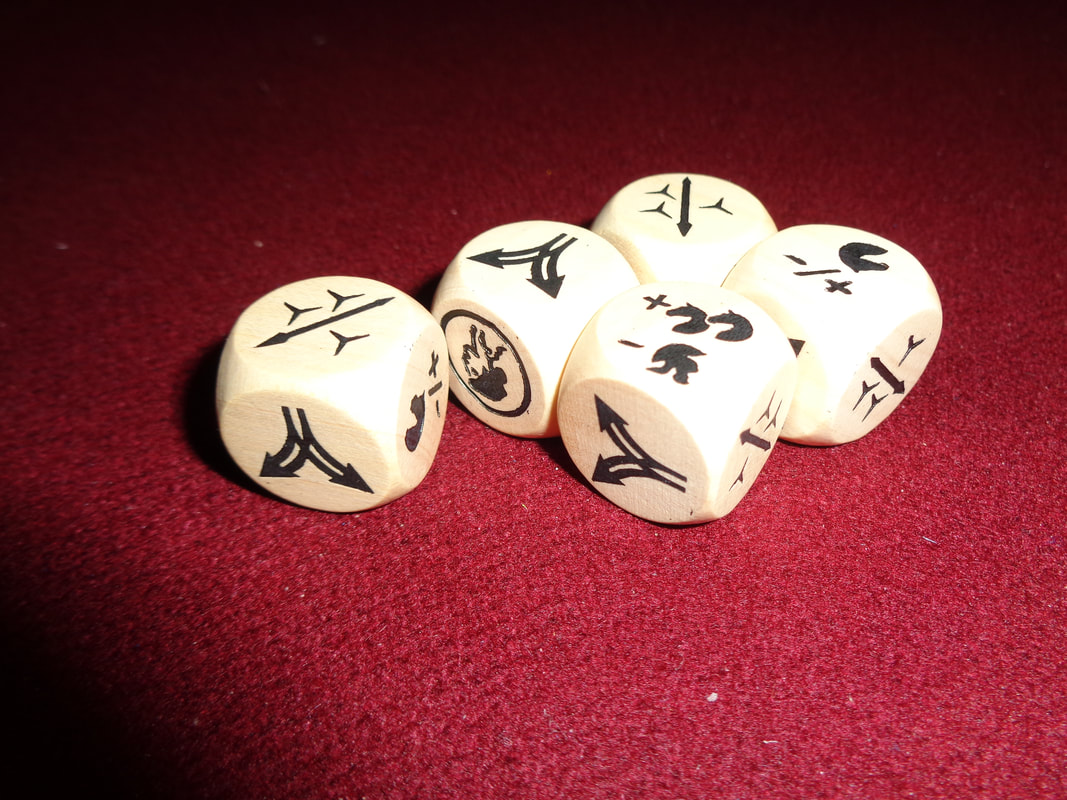
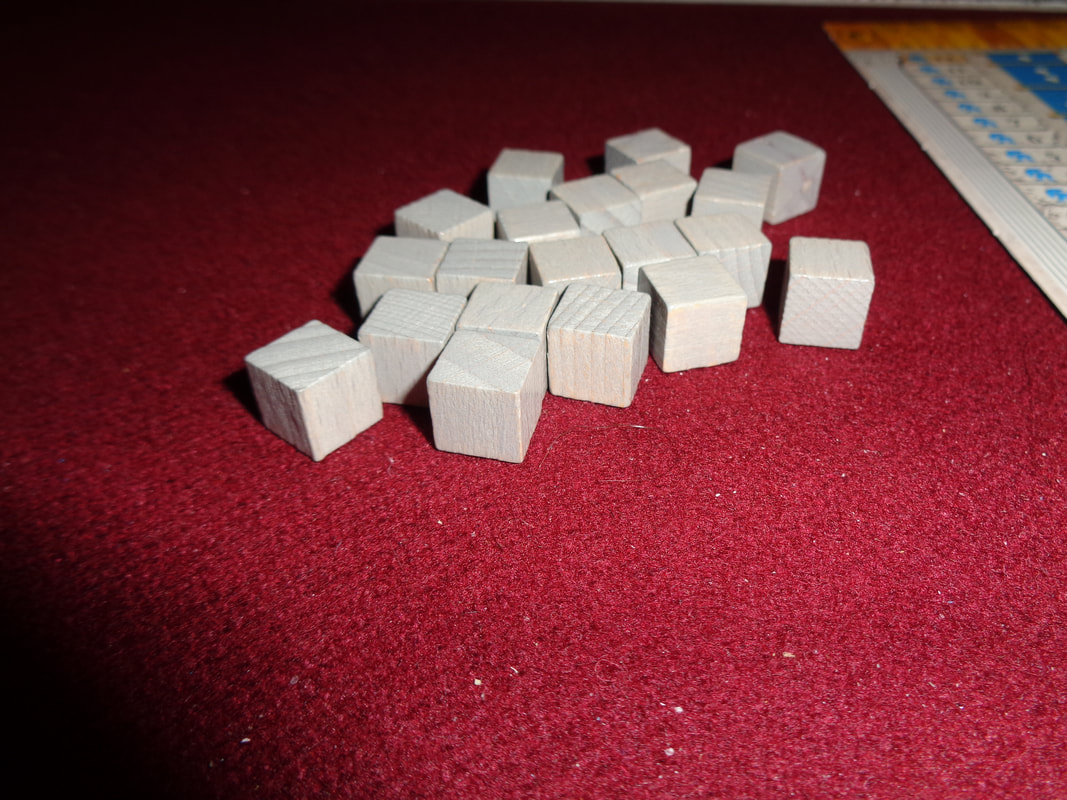
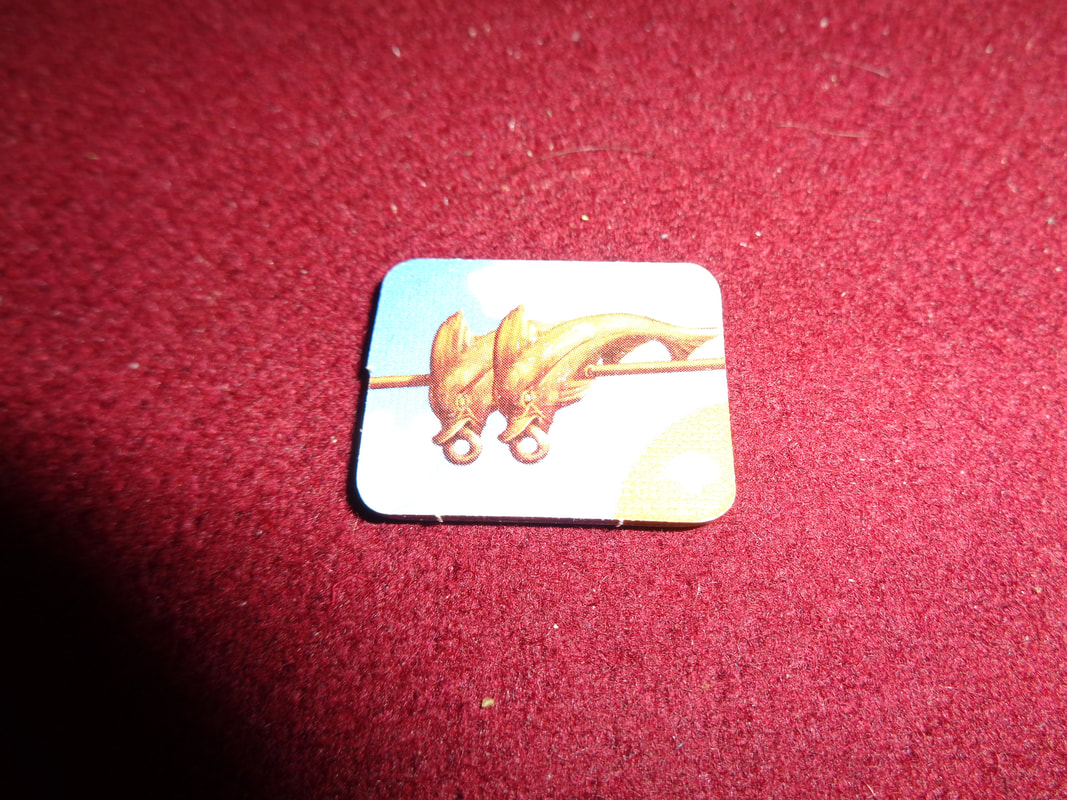
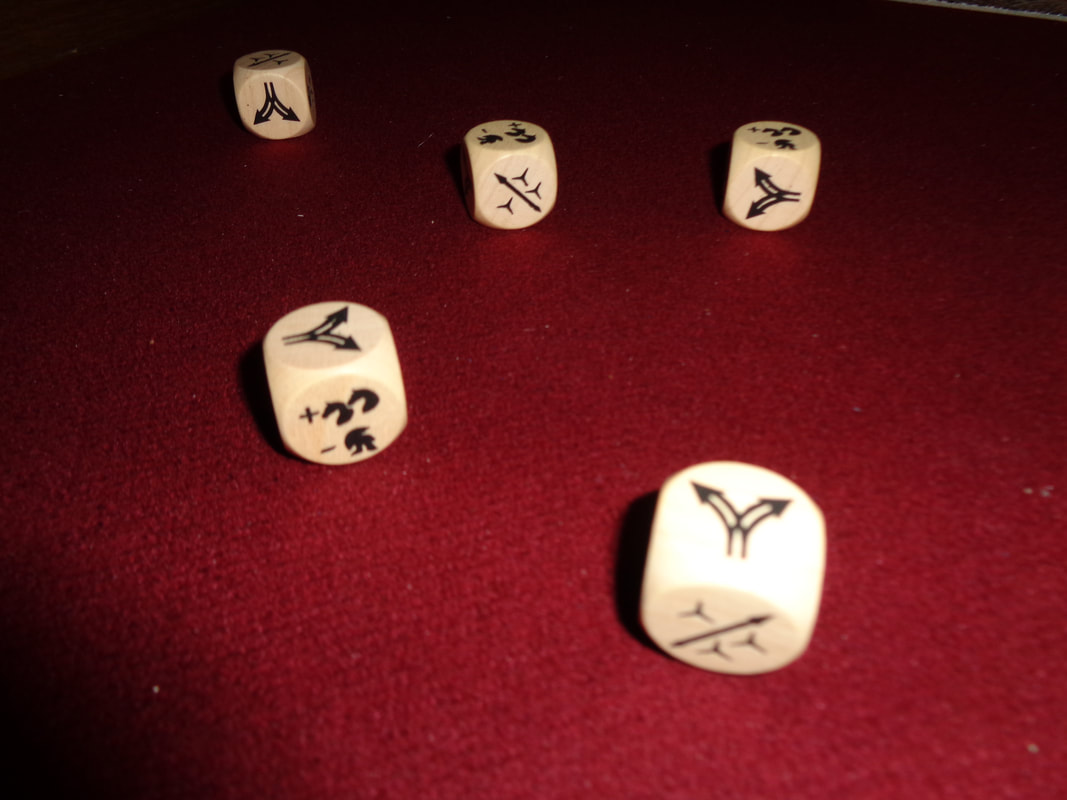
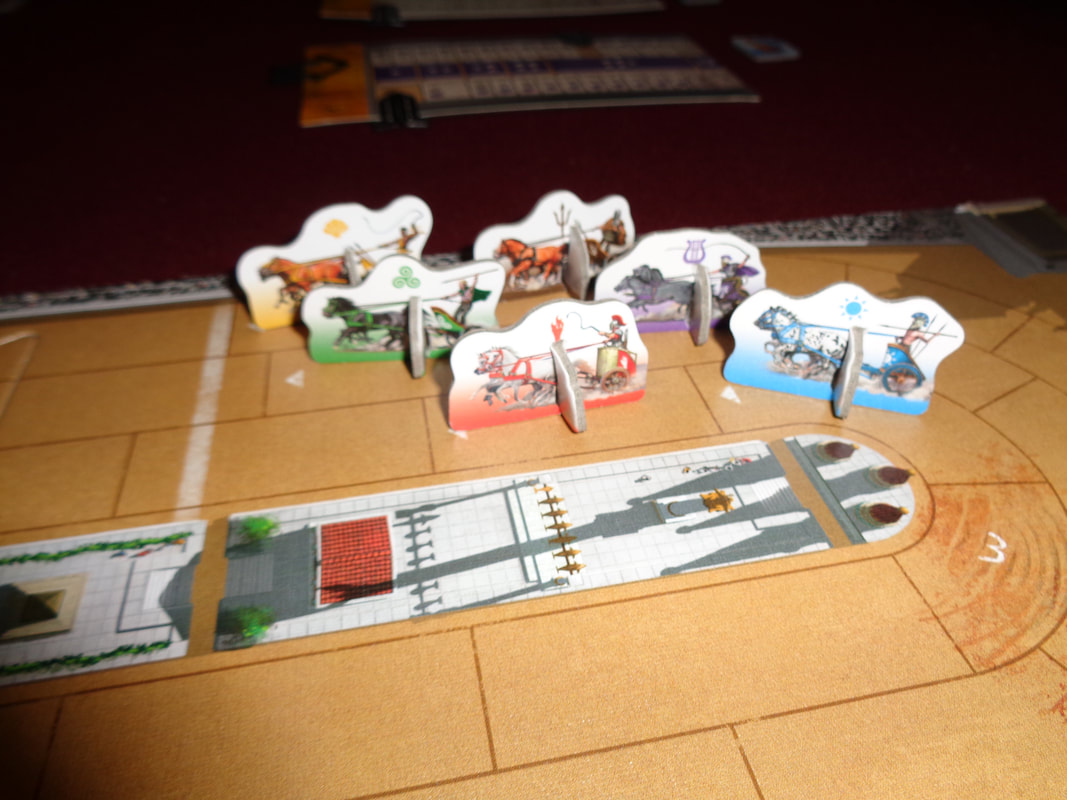
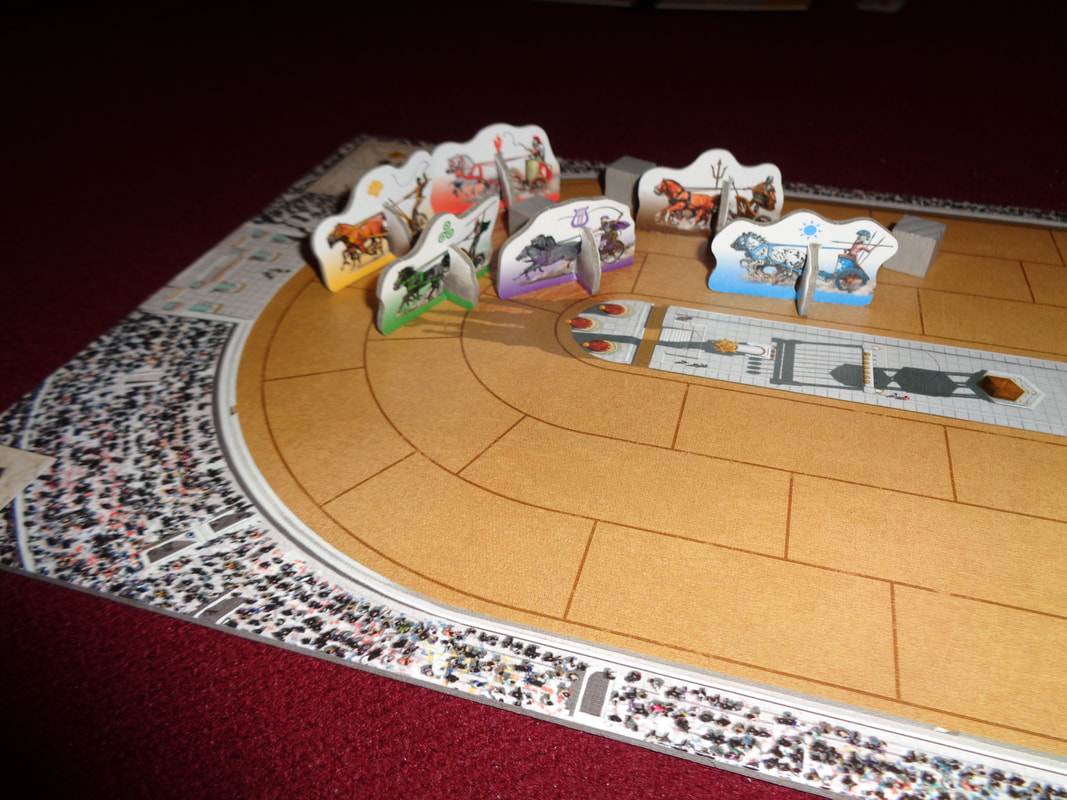
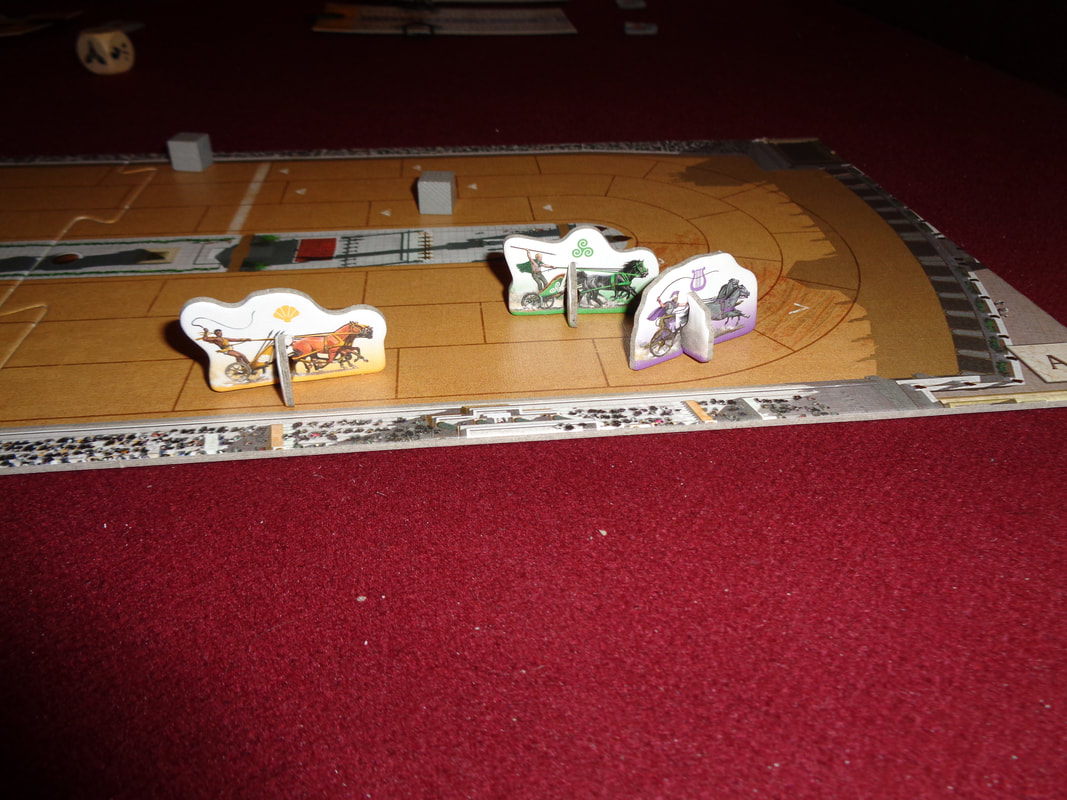
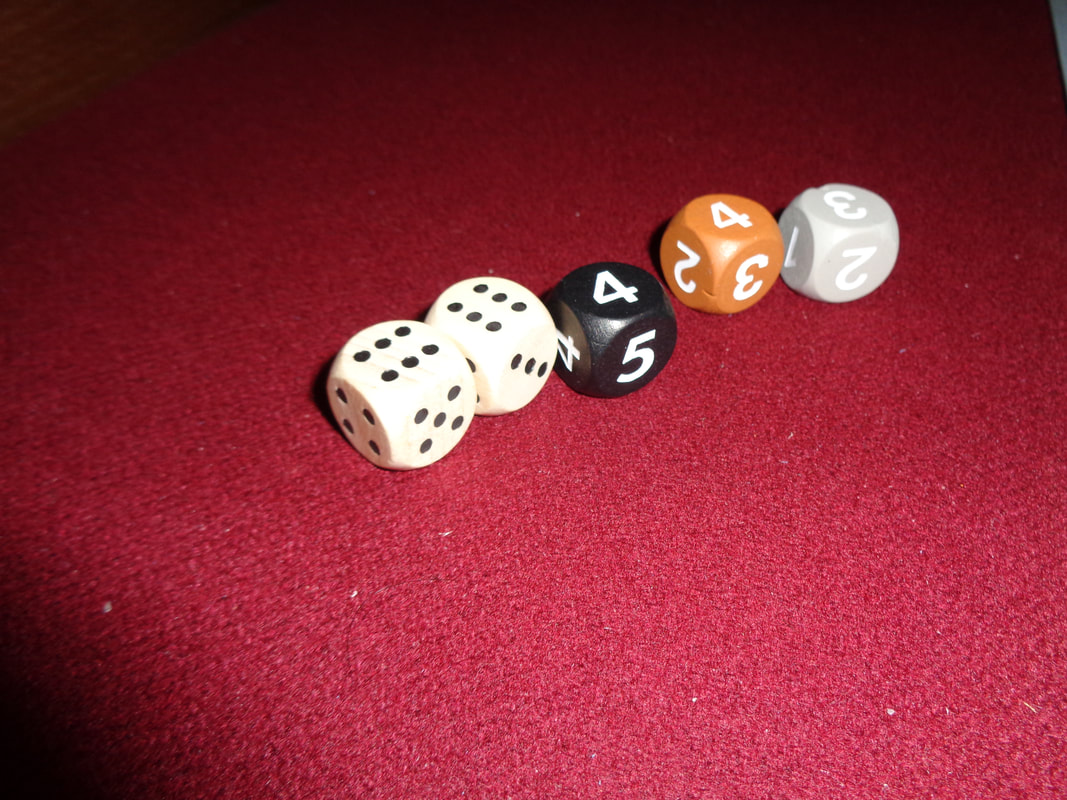
The components for Chariot Race are pretty good, the tokens and boards all feel suitably sturdy while the wooden dice are a nice touch.
Having chariots made of 2 pieces or card seems a little bit of a weird choice perhaps but it's not like it's a dealbreaker or anything and was probably done to keep the cost down.

There's very little artwork to write home about in Chariot Race which may be why I'm blogging about instead?
There are illustrations on the chariot standees but they'll hardly be noticed since they're quite small, especially when placed on the arena/game board.
There's some artwork on the game board as well and it's a fair depiction of a crowd watching the races. Otherwise Chariot Race looks fairly clean and minimalist in a unfussy kind of way, perfectly acceptable in my opinion.

The only iconography that can be found during the game is on the dice, those symbols are self-explanatory and I can't imagine they'd be an obstacle to any players.
Although, I will say that it feels a little odd and counterintuitive that the damage track is labelled 'damage' instead of something like 'health' since 12 on the damage track is completely undamaged and 0 is wrecked.


How's it play?
Setup
  • Player boards: Give each player the standee and player board in their colour, along with 3 pointers.
    All players should start with 12 damage, 4 speed and 3 fate.
  • Game board: Put out the game board on either the 'A' or 'B' side and determine starting order. Each player should then put their standee in the relevant starting spot.

On to play
In Chariot Race, players are attempting to complete 2 laps of the track, avoid being wrecked and of course, finish first.
This is done by each player in their turn rolling dice and resolving the results.
Chariot Race does not use the usual turn order. Instead it's determined by position on the track round-by-round, whoever is 1st on the track goes 1st, 2nd on the track goes 2nd and so forth.
When the player in last place has gone, the round is over and play returns to the player in the lead at the start of a new round. Of course it's likely the turn order will now have changed.

In their turn, the active player will have several phases they can act in.
  • Repair: The active player may spend 3 fate points to repair 3 damage.
    Get wrecked: If, at anytime a player's chariot reaches 0 damage, they are immediately wrecked and eliminated from the game.
  • Adjust speed: A chariot's speed score can never exceed its damage score.
    If a chariot took damage during other players' turns (Which is likely.) or overcooked a corner in the previous turn (Also likely!) and the damage drops below the chariot's speed, the speed is lowered to match the damage during this phase.
  • Roll dice: The active player now rolls dice, the number they roll is determined by what their speed is on the tracker on their player board in relation to the segments in the centre column. Thus at speed 5, they would roll 5 dice, at speed 8 they would roll 3 dice, all the way to speed 12 where they roll only 1 die!
    ​Re-roll: The player may set aside and/or re-roll any number of their dice once only.
    Spend fate: The active player may spend fate points to re-roll any number of dice - including ones already set aside or change a die to a side of their choice except for the fortuna side.
  • Fortuna: In this phase, any dice showing the fortuna icon increase the player's fate score respectively. This occurs after using re-rolls, which means fate points acquired this turn cannot be used to affect this turn's dice results.
  • Movement: In this phase, all dice showing the 3 movement icons are resolved and several events may occur.
    +/- speed: Dice showing the speed change icons must be resolved and the player must alter their speed either up or down (Their choice.) as dictated by the dice. As an aside, there's nothing to stop a player using a + result from 1 die and the - result from another to negate each other.
    Regardless of this, once the speed score has been adjusted accordingly, the active player must move their chariot that many spaces.
    Change lane: During movement, the active player may change their chariot's lane a number of times equal to the change lane results they got on the dice.
    Cornering: If the active player's chariot enters a cornering space, that is; a corner with a number, there's a chance the chariot can take damage.
    If the chariot's speed is equal to or less than they number, the chariot is unaffected.
    If the chariot's speed exceeds the corner's speed, then the chariot takes an amount of damage equal to how much they exceeded the corner by.
    Caltrops: If the active player's chariot passes through a space with a caltrop, then the chariot takes damage.
    Ramming: If during movement, the active player's chariot passes through a space with another chariot, then both chariots takes damage.
    The active player cannot end their movement in the same space as another chariot.
  • Attack: The active player may use a die with this result for 1 of 2 actions.
    Throw Javelin: Once the active player has finished their movement, they can throw a javelin at another chariot. Javelins have a range of 2 spaces and inflict 1 damage.
    Drop caltrop: The active player may drop a caltrop on to any empty space which their chariot has moved through in this turn.
    Caltrops inflict damage to any chariot that passes over them and are removed from the board when they do so.
This pretty much covers all the rules.

Endgame
Chariot Race is played over 2 laps and there are several criteria which can determine the winner.

If a player's chariot completes their 2nd lap and no other chariot crosses the finish lap, they win the race.
If 2 or more chariots finish the race in the same round, then the chariot that went the furthest past the finish line wins.
Finally, a wrecked chariot cannot win, even if it crossed the finish line first or got furthest past it.


Overall
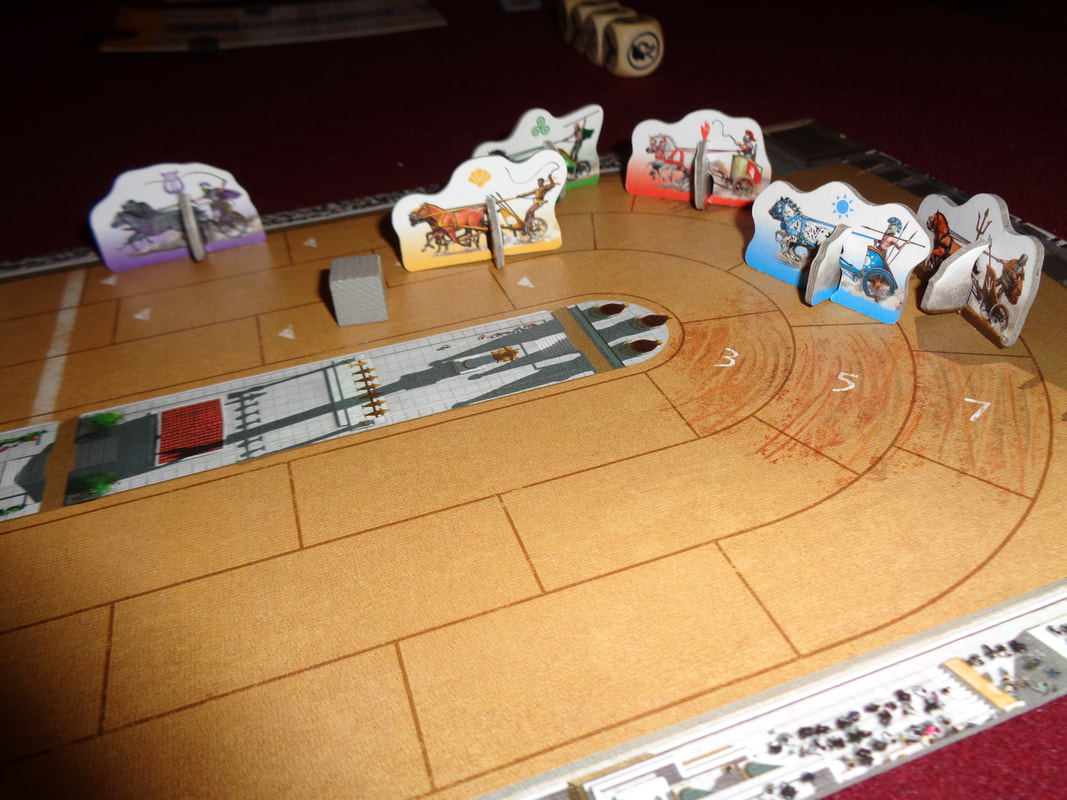
Chariot Race is a fast playing and mechanically speaking, actually a fairly straightforward game; roll the dice and carry out the resulting actions displayed.
The decisions that players get to make are also fairly straightforward, although their consequences can be significant - which is good. Meaningful decisions are always good.

Player decisions take the form of choosing which dice to keep and which to re-roll, players must choose what to try and prioritise, this will of course be contextual and change from round to round.
The other area where player's will probably be making the most is going to be about speeding up and slowing down. It's obvious that players will want to be fast in the straights but manage their speed through the race's 4 corners.
Managing speed is the game's best mechanic, I like that the faster a chariot goes, the less dice the player gets to roll and consequently, the less options they have.
It feels suitably thematic, not only does it represent having less thinking time at speed but also that this a horse race and players are never entirely in control of them.
Players can find themselves hurtling through corners and taking damage, the question is how fast for how much damage? There's only 4 corners,  so this means it's ok to take damage... right?

This brings me neatly to damage. There's definitely a combative edge to Chariot Race which makes it an usual racing game. Damaging opponents has its benefits.
Firstly; it lowers their maximum top speed, hindering them and secondly, it can lead to their elimination for the game.
It's vital to keep an eye on damage, in the early game players will probably be congenial, but in the late game, that will all change. Having low damage points can make a player a big target, especially if that player is ahead and which others will look to exploit this to put them out of the race.

It does mean that Chariot Race can have a lot of direct conflict and there may well be some 'pick-on-the-leader' tactics going on as well. If this isn't your cup of tea, it's one to probably avoid.
The game also has player elimination as a mechanic, which is something I have little fondness for but fortunately, this is a quick playing game so there isn't too much downtime.

In conclusion though; while it won't set the world alight, it is quick to learn and quick to play, Chariot Race is a fun light game If you like your racing theme with some extra competitive zing and a generous dollop of luck, then this might interest you.
0 Comments

Switch & Signal - First Play!

20/5/2022

0 Comments

 
19th May 2022

It's a Thursday and I'm enjoying an evening of gaming in Aldershot for the first time in actual years! Take that Covid-19!

Cho chooo! Switch & Signal is a cooperative board game about managing train schedules, that's right - you're playing the generously proportion controller and how do you control these schedules. With switches and signals of course!

What's in a game?
  • Board: This is a double-sided board, one side features a chunk of western Europe and the other is the continental United States. Mechanically speaking, the European side is the 'easier' to play.
    Railways: Both maps feature a brightly coloured landscape dotted with various cities (In 4 colours.) and the port Marseilles which are connected by criss-crossing railway lines. At the edge of the network are 'deployment points' numbered 2-12
    Switches: Where the railway lines intersect, there are 3 or 4 small circles on the junction, depending on whether it's a T-junction or a cross-road. These circles represent switches and are used to control the flow of rail traffic throughout the game.
    Signals: Along most lines are red-light symbols, there are also red-light symbols at every entrance to every city. These are the game's titular signals and must be managed to keep trains moving along swiftly.
    There are 9 supply spaces to place the game's 3 sets of 3 differently coloured trains.
    There are also spaces to place the game's 2 deck of cards and a 'clock' space for time tokens.
    There are also 3 portraits of 3 different characters, each of these characters are 'helpers' and has a special ability that can be made use of once per game.
    Finally, on the European side of the board there are 8 little spaces in the port of Marseille where little cubes will be delivered to. On the U.S. side, they are split over two different opposite edges of the railway network.
  • Trains: These are plastic models of trains and there are 3 each in black, brown and grey. In game terms, each type of train travels at a different speed.
    Each train also has a spot to place a little wooden cube.
  • Dice: Switch & Signal comes with 5 six-sided dice including a pair of normal six-siders. These are used during deployment.
    The 3 other dice are coloured black, brown and grey, which correspond with the 3 types of coloured train. These are not numbered normally and each on has a unique distribution of numbers to represent the different movements of the different types of train.
  • Switches: These smaller wooden black discs are used on the board and 2 are placed on the small circles on every junction to indicate which way a particular set of junction points are facing. They can be moved around to different circles on the junction change it's alignment.
  • Signals: These larger wooden green discs represent green 'go' signals and are placed on the red-light spots on the board to let trains past.
  • Cubes: These are the traditional little wooden cubes we all know and love. They represent goods that need delivering to their destination, there are 8 and there are 2 each in 4 colours which correspond to the 4 coloured cities on the board.
  • Cards: Switch & Signal makes use of 2 types of card.
    Departure cards: These cards feature pictures of the 3 types of train.
    If trains appear the top half of the card, they will always be 'multicoloured', it shows whether 0, 1 or 2 trains will be deployed on to the board.
    If it's in the lower half, it indicates the type of train that will move this turn.
    Frequently trains will appear on both halves of the card.
    One departure card is the starting departure card and always deploys first.
    Action cards: There are 3 types of this kind of card that allow players to perform their actions. There are switch setting, signal setting and train movement cards.
  • Tokens: There are 3 types of tokens in Switch & Signal, they are all the standard type of card token.
    Time tokens: These round tokens each feature a illustration of a old-school analogue clock face and as you may imagine, used to track time.
    Location tokens: There are 11 of these octagonal tokens, which are just numbered from 2-12. These are part of the optional rules to further randomise deployment
    Cover tokens: These rectangular tokens are marked with an 'x' and are used in conjunction with the characters on the board.

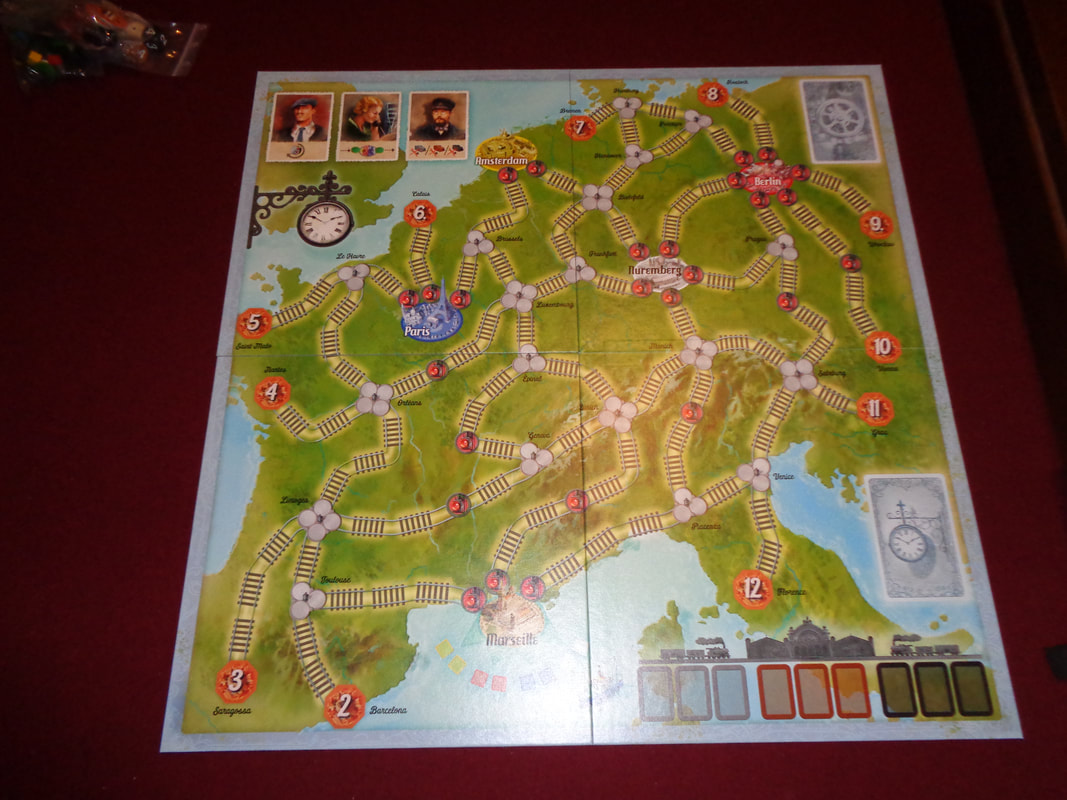
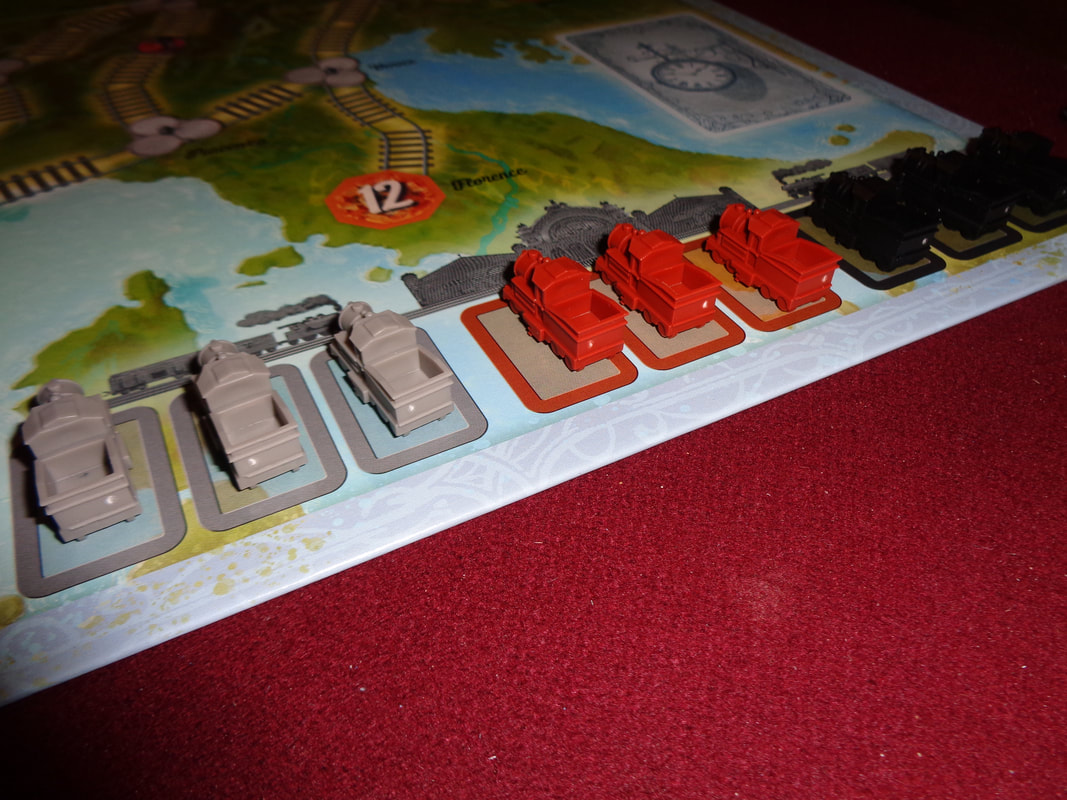
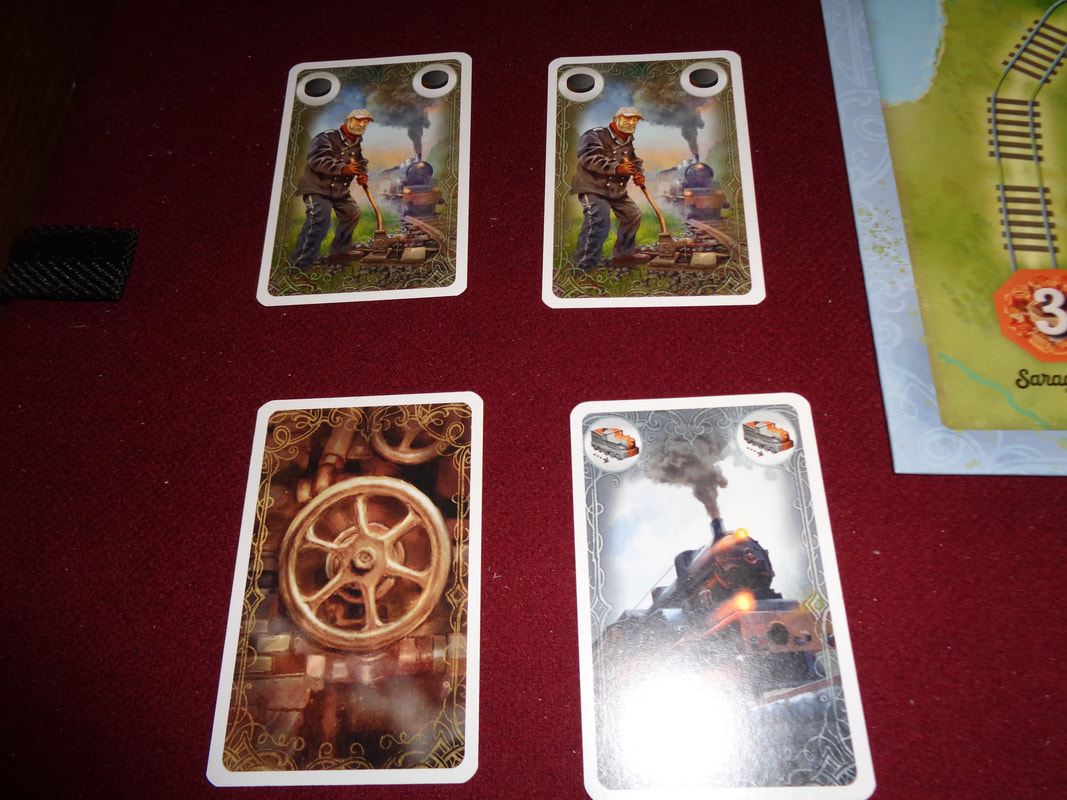
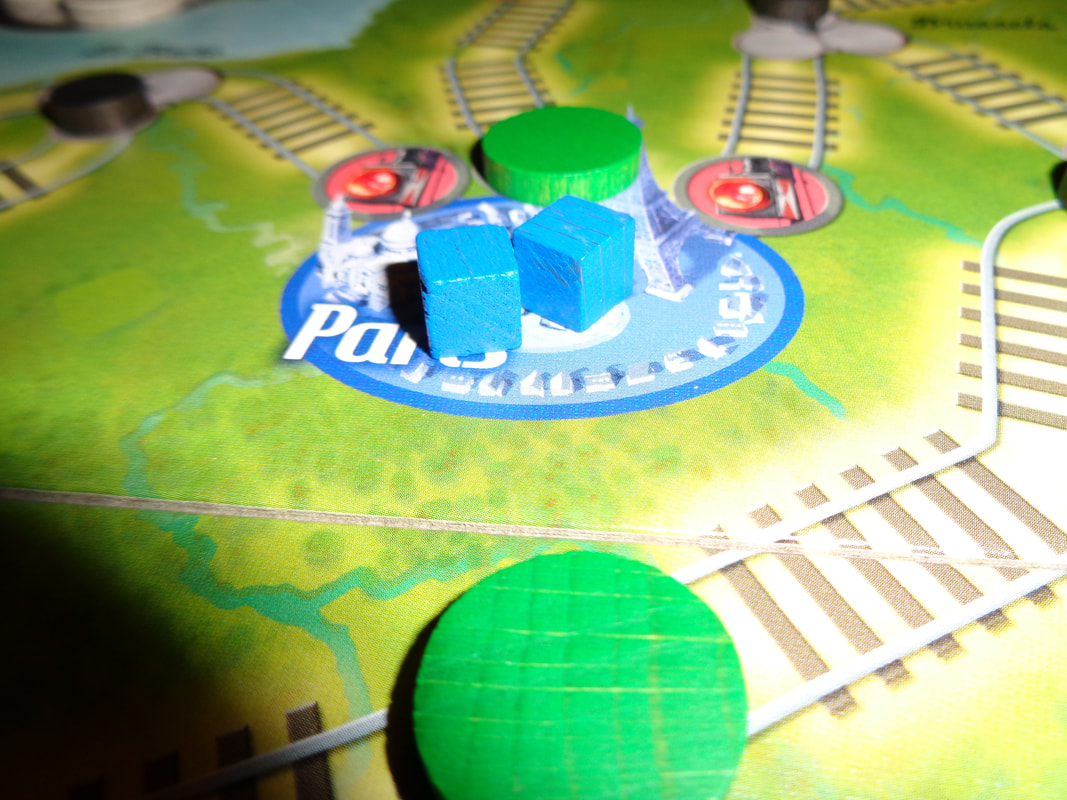
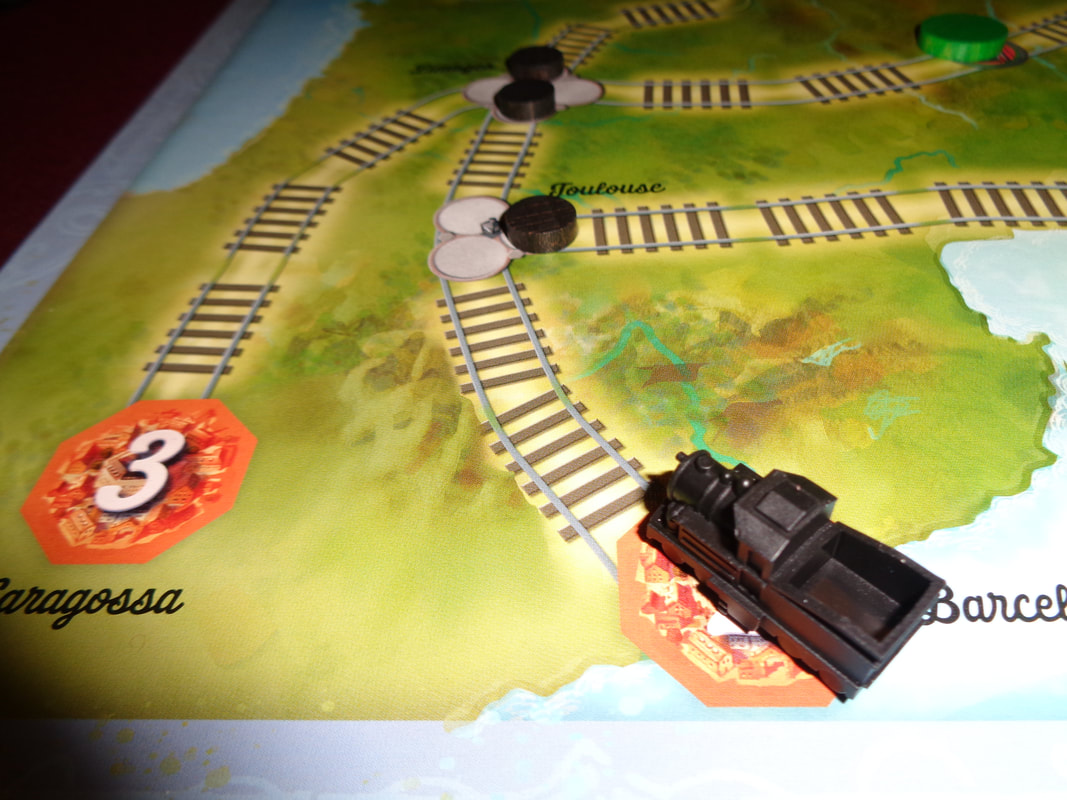
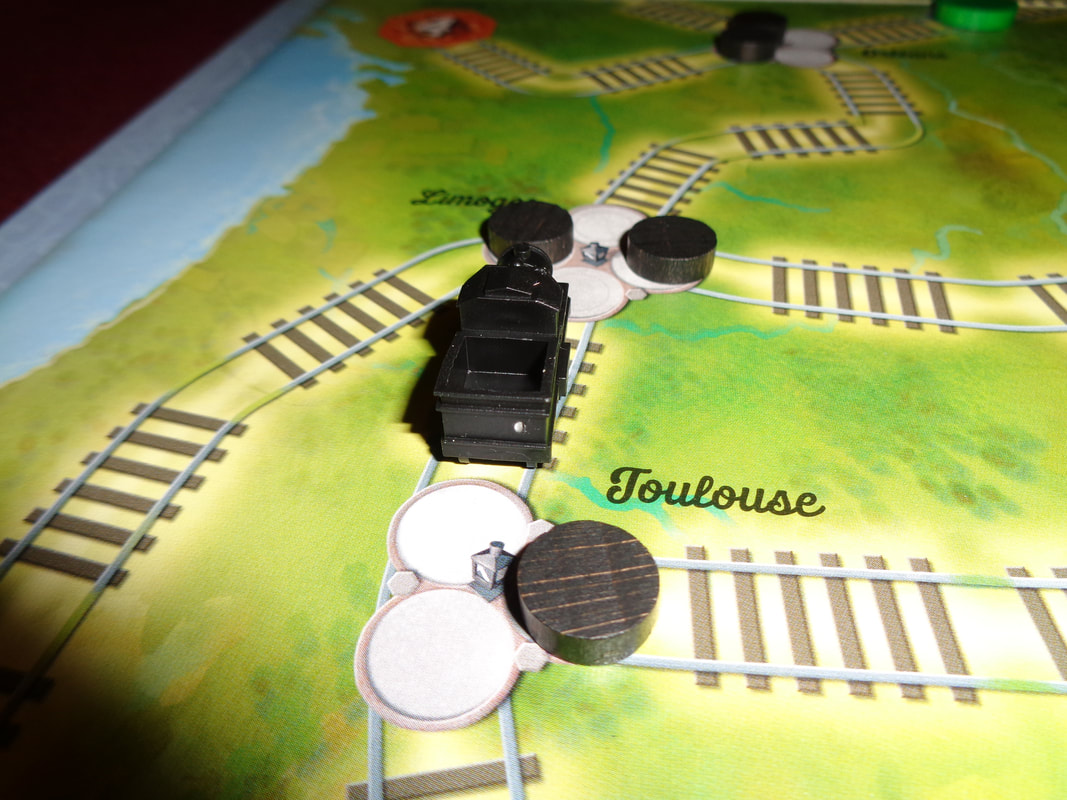
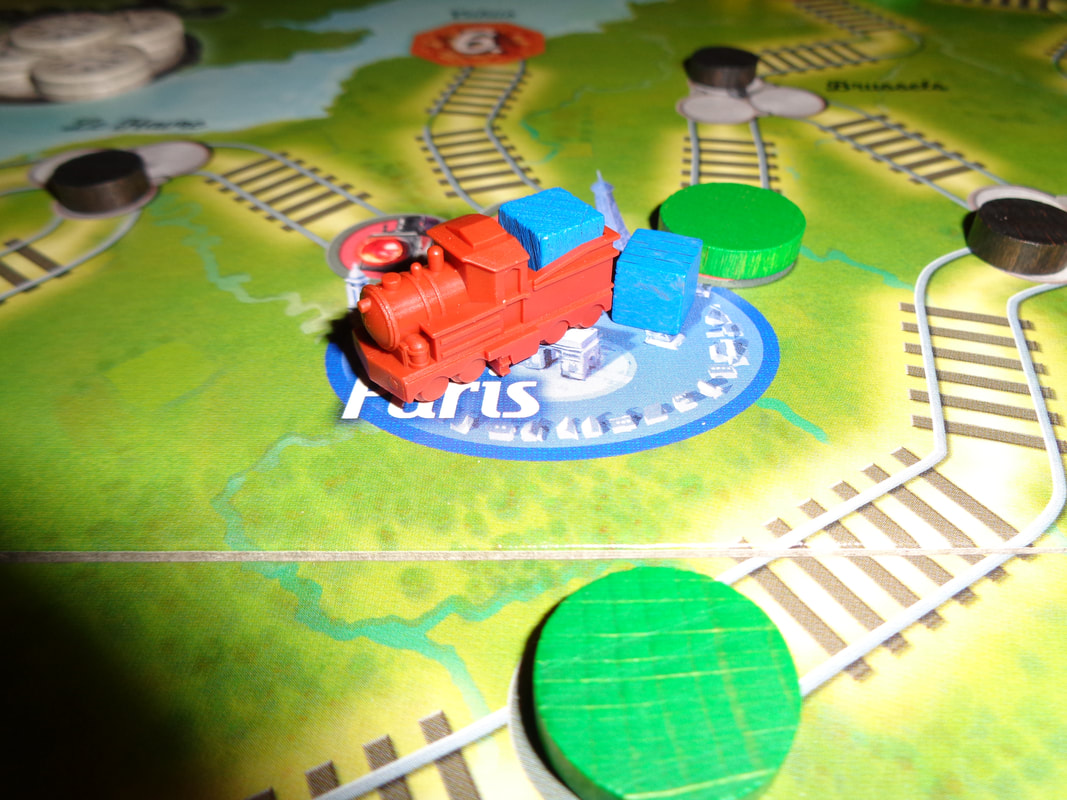
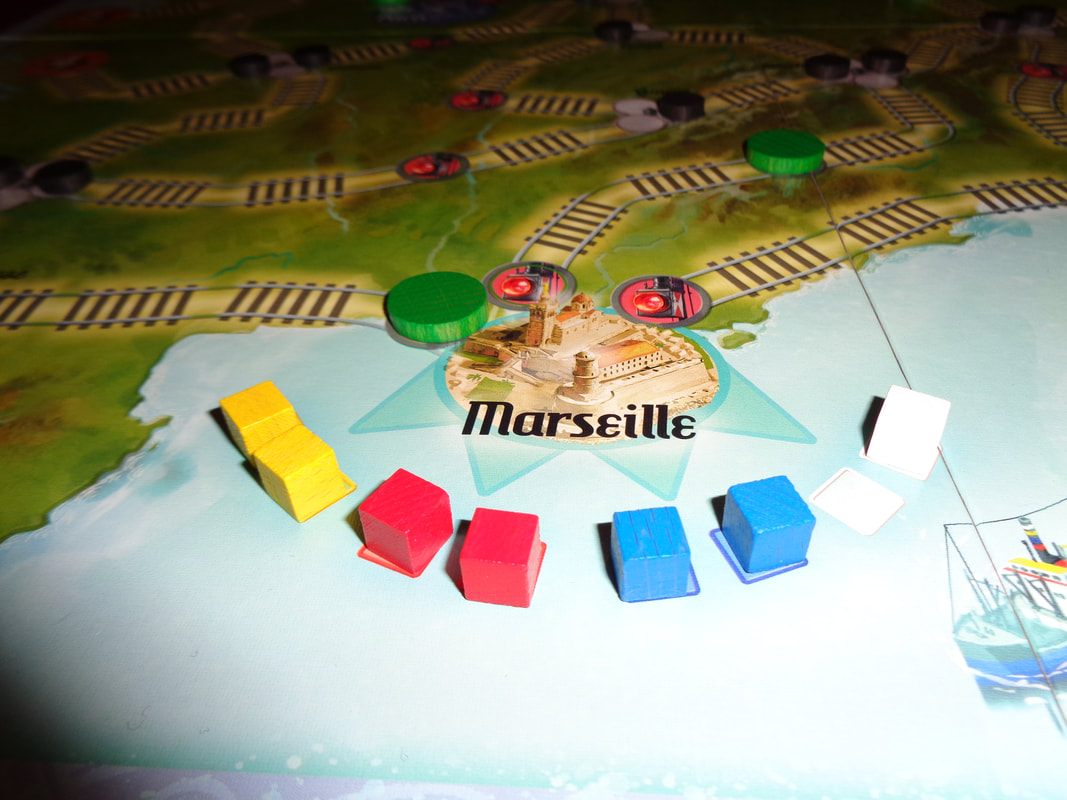
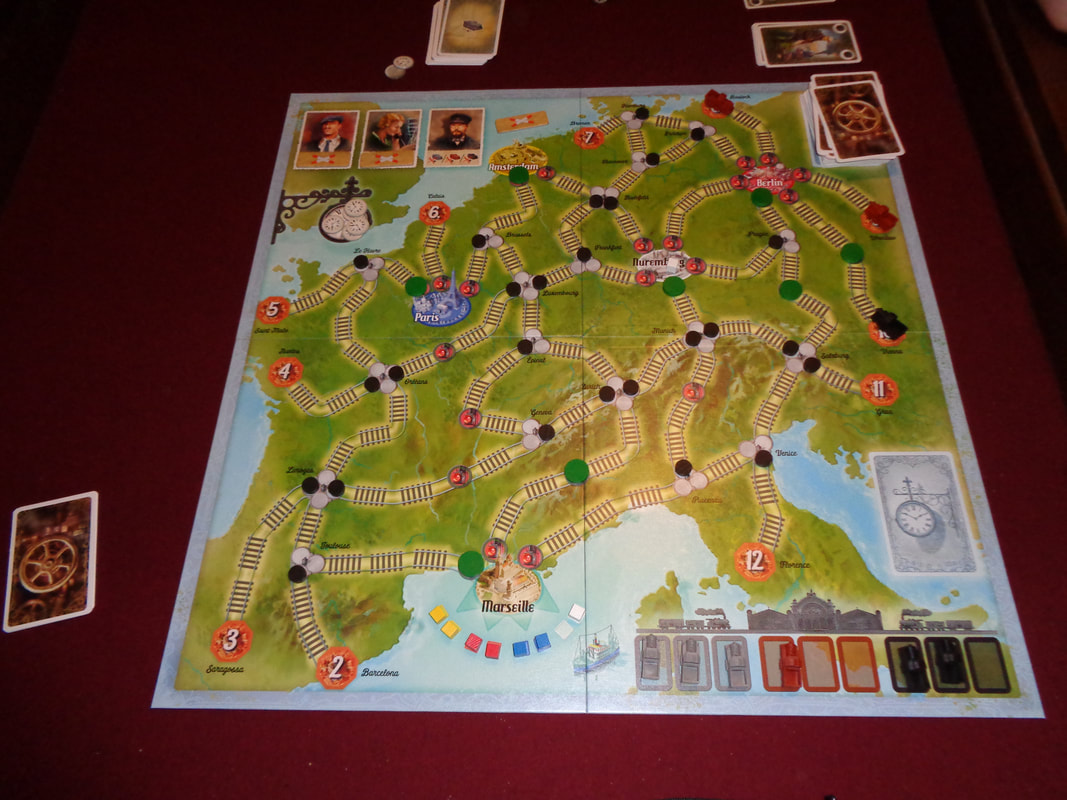
Quality-wise, all of Switch & Signal's components are made to the usual high standard we've come to expect from modern game and nothing feels particularly flimsy. The game makes good use of a wooden components, especially the dice that are nicely rounded and is something I always like.
​The notable components are the little plastic trains which each contain a space to put a wooden goods cube.

The art is good, the boards are colourful and uncluttered with some nice illustrations for various cities. The art on the cards is equally good.

The game's use of iconography is straightforward, easily understood and doesn't prove an obstacle.


On to Play
Setup
This set up is for the European beginning default game, the rules provide options to alter the game's challenge and the U.S. side has some different rules.
  • Board: Put out the board and put all the trains on their allotted spaces as per their colours.
    ​Cubes: Put the cubes on to their pertinent city, thus each city will have 2 cubes in its colour.
  • Time tokens: Put the 7 time tokens on their space. This number can be varied to make the game easier or more challenging.
  • Switch & signals:
    Switches: Switch tokens must be put on all the junctions as shown in the rulebook. In later games, players can choose how to align these junctions.
    Signals: The game uses 8 signal tokens, they too must be placed on the map as shown in the rulebook. 1 is placed on a spot on each city and the remaining 3 are placed on spots on the railway tracks.
    Again, the starting spots can be altered in later games and the number of signal tokens can also be varied.
  • Cover tokens: Place the 3 cover tokens adjacent to the 3 helpers.
  • Departure cards: Shuffle the departure cards cards into face-down deck, discard 2 and place the remaining 16 their space on the board.
  • Action cards: shuffle them into a face-down deck on their allotted space and deal 5 action cards to each player.
  • First player: Determine a starting a player.

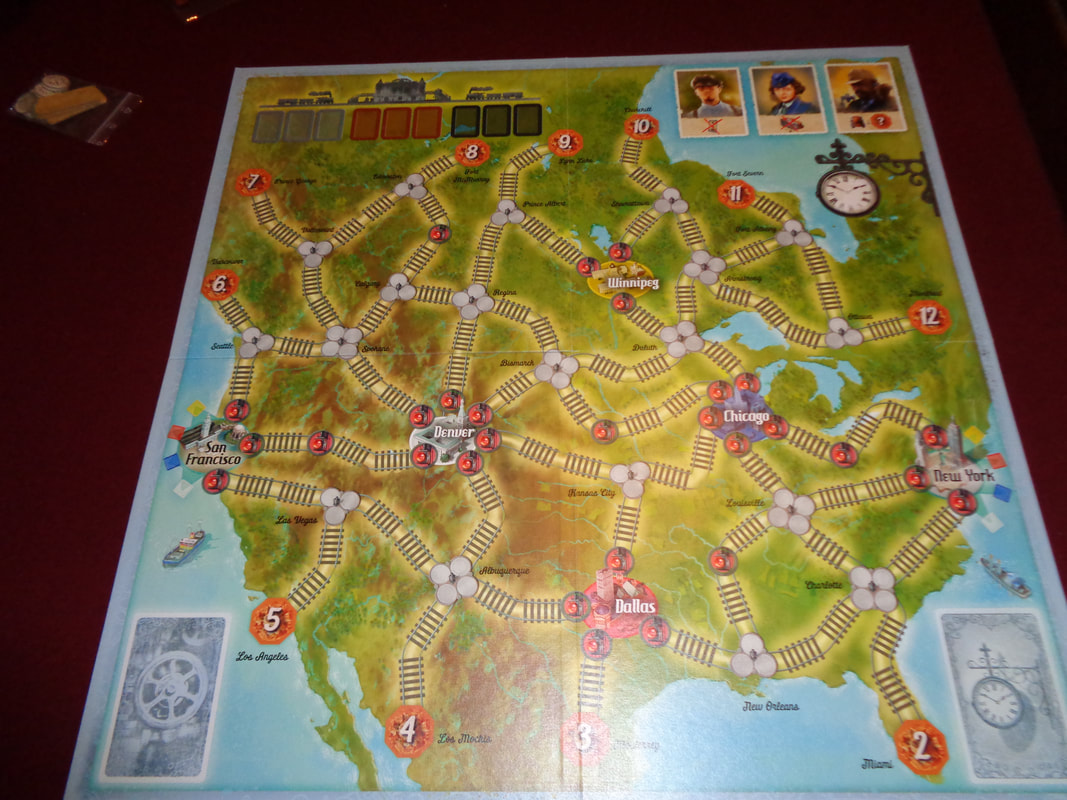
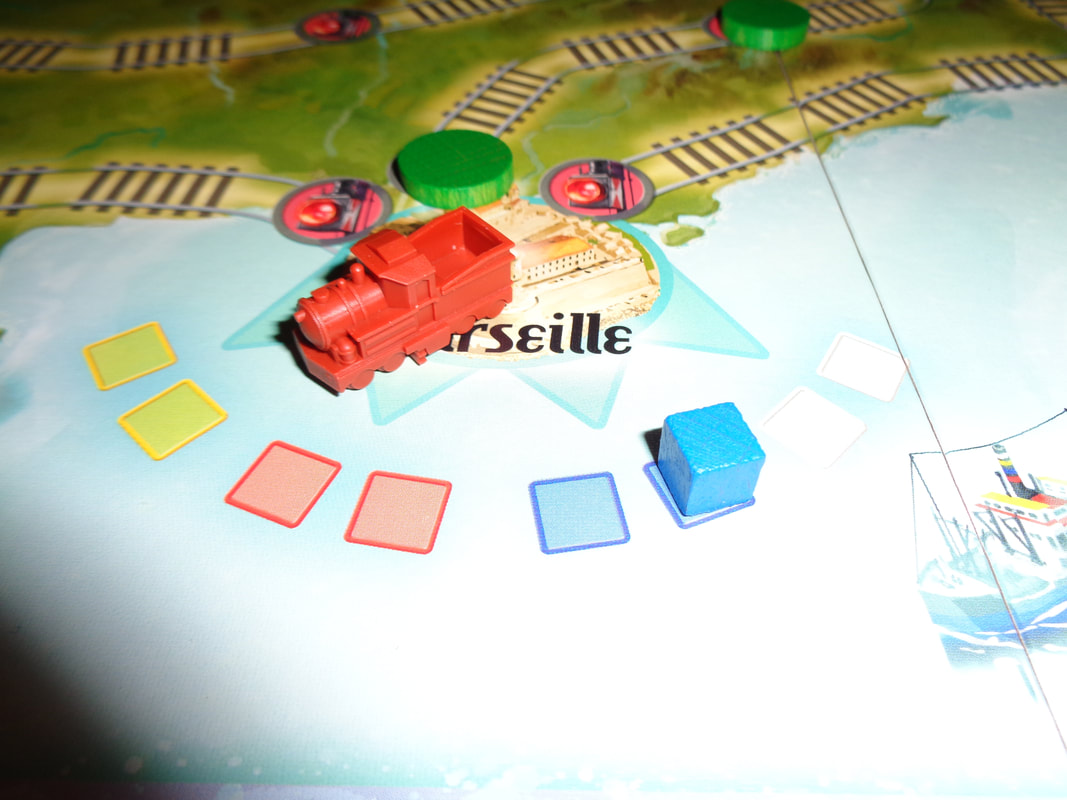
On to play
The objective in Switch & Signal is to collect all 8 cubes from the 4 cities using the trains and deliver them all to Marseille.
Switch & Signal functions much like a lot of cooperative games; that is the active player flips a card and resolves it's actions on the board. Then the active players takes their action(s).
  • ​Departure card: The first departure card in the game is always the same and instructs players to deploy 1 train of each colour.
    After this card, the first thing the active player does at the start of their turn is flip over and resolve a departure card. This will have 2 phases.
    ​Deployment: At the top of card it will show 0, 1 or 2 multicoloured trains. If it shows 1 or 2 trains, then the active player must take many trains from the supply on the board, they can choose any of the 3 colours if they're available.
    Roll the dice: Then for each train, they must roll the deployment dice, this gives a result of 2-12 and the train must be put on the corresponding entry spot on the game board.
    If the active player cannot deploy a train for any reason, the players collectively lose 2 time tokens.
    Movement: The bottom have of the departure card will display 1, 2 or 3 trains, they may have a specific colour or may be multicoloured.
    The active player must resolve the movement of these trains in the order they are shown on the card. Thus if a card shows a brown train, then a black train, the active player must resolve movement for all brown trains on the board then all black trains on the board. The active player may choose the order in which trains of a single colour are moved.
    Additionally, if a multicoloured train is showing, then the active player must move all the trains of a single colour of their choosing. Again, the active player chooses the order in which all the trains in a specific colour are moved.
    Roll the die: When the active player moves a train, they roll the die of the matching colour and must​ move the train that many spaces along the rail track and going through the junctions as they have been set up.
    The dice do not have equal numbers and the numbers are distributed as follows.
    Grey: 1, 1, 1, 2, 2 & 3.
    Brown: 1, 2, 2, 3, 3, & 4.
    Black: 2, 3, 3, 4, 4 & 5.
    You will see that black trains for example; move much quicker than grey ones and will nearly always move the same or more spaces. It's very important to remember this distinction between trains.
    When trains move they cannot pass a red signal (A green disc must be on a red-light in order to pass it.), nor can they pass any other train. If this occurs, then the train stops at the signal or behind the other train and the active player must discard time tokens equal to the movement that was not completed. The only exception is when a train enters a city, in this case, the train will always stop, regardless of its speed at no penalty.
    Additionally: If a train went head on into another train or goes off the board through an entry point, it incurs a loss of time tokens and the train is placed back on the supply.
  • Actions: Once the departure card has been resolved, the active player can take their actions, this is done by playing cards from their hand. They can play any number of cards from none to all.
    Cards have the following actions
    Switch setting: The player can play one of these cards to change the alignment of any one junction.
    Signal setting: This card allows the active player to move a signal token from any red-light to another, provided every city always has at least 1 token.
    ​Train movement: As you may have surmised, playing a train movement card allows the active player to move any single train - this is done by rolling its die.
    Wild action: By discarding any 2 action cards, the active player may carry out any one of the above 3 actions.
    Load train: When an unloaded train is in a city with an available cube, the active player may discard any action card to load the cube on to the train.
  • Other rules:
    Helpers: Each of the 3 helpers can be used once per game and provide a once-only benefit. When a helper has completed their action, use a cover token to cover their ability.
    Delivery: When a train the port city (in this case Marseilles.), if it carrying a goods cube it's automatically unloaded and the cube is put on its relevant delivery spot. The train is returned to the supply.
    Time tokens: You'll have noticed that when things go wrong, the players will be asked to discard 1 or more time tokens.
    What happens when they run out? Then the players must discard a departure card and then replenish the supply of time tokens. Losing a departure card might not sound so bad but believe me.. it is!
  • End of turn: Once the active player has used all the action cards they can or want to, they draw 5 move action cards with a maximum hand size of 10.
    Play then progresses to the player on their left.

Endgame
Play continues until one of the following conditions is met.
If the players run out of departure cards and they have to draw one, then they collectively lose.
If all 8 cubes are delivered, then the players immediately win.


Overall
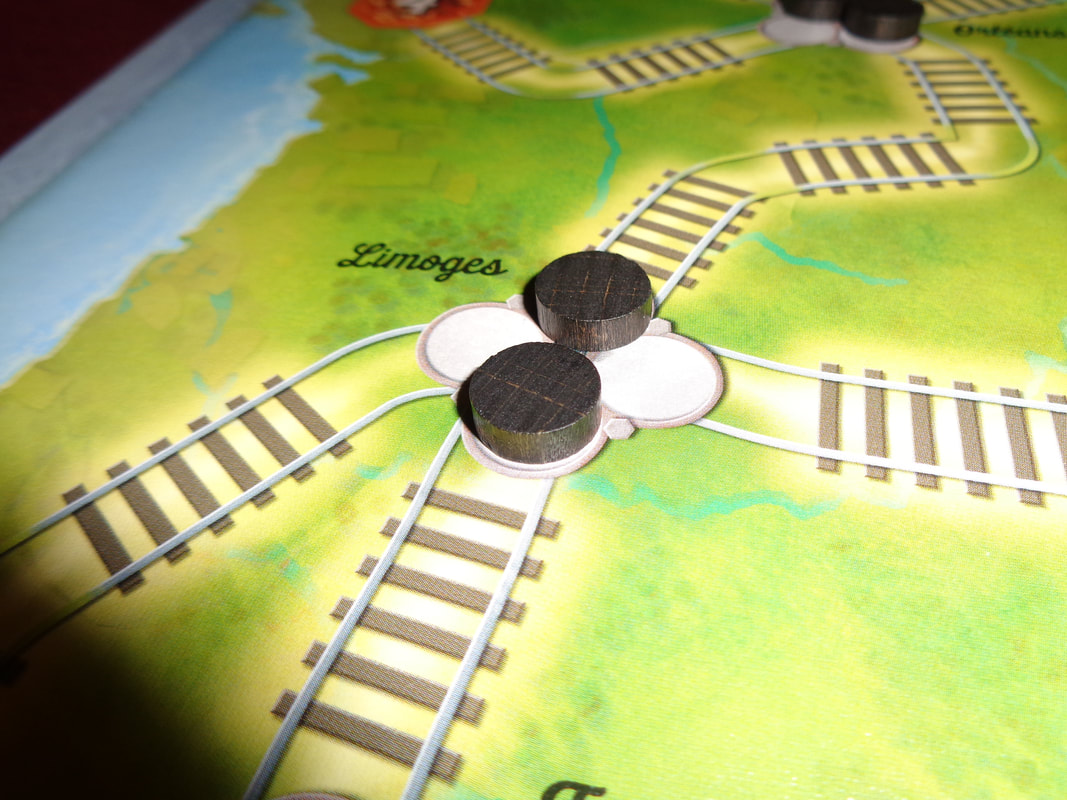
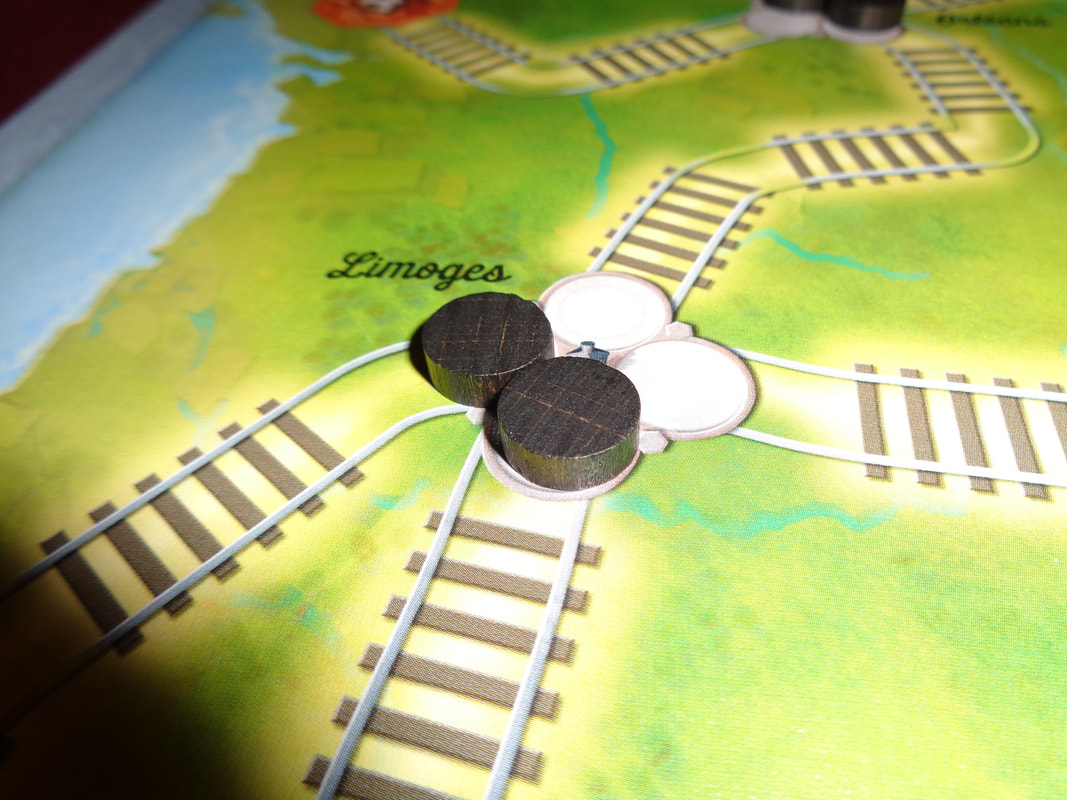
If you play a lot of cooperative games, the basic mechanics will be familiar here:
Turn over a card and resolve it's action which will create obstacles for the players, then have them perform some actions and choose between progressing the objective or mitigating the problems caused by the drawing of cards.
Rinse and repeat.

Something about Switch & Signal feels a little different though. Maybe its because the departure cards are so contextual.
The trains being moved by the departure cards are both the cause of problems for players and also the means to victory. On more than one occasion, we wanted to move a train but didn't want to spend a card to do so, instead we left it to the 'game' and departure cards to do the job for us.
​It's pretty rare for players to want the 'bad things happen' card to actually do something in a cooperative game.

How trains are moved is vital. Not only do players have to move them into cities to pick up goods, they'll need to manage the different speeds they move at. Getting a fast train behind a slower one is a disaster, no two ways about it.
This is exacerbated by the random nature in which trains are deployed on to the board by the dice.

Players will also to manage the titular switches and signals. They'll look to create clear routes with full green lights to the port and funnel trains down that route in the correct order.
It's a real balancing act though, it's hard to get the junction points where you want them and there's are never enough green lights.

I have to say, that when it works, it feels extremely satisfying.
I've never been a train controller but Switch & Signal genuinely makes me feel a little like one as I think about how to prioritise trains and set up routes with minimum card expenditure.

This brings me to a final point about the game. I said earlier that being forced to discard a departure card is not good and I meant it!
Switch & Signal is a well balanced game and it seemed every victory, every loss came down to the wire, came down to the last departure card or two and losing one felt very risky.
I found it a lot of fun.

If you like train-themed games, Switch & Signal is worth a look, how many cooperative trains games are there?
​If you like cooperative games, you really should give this a try. It's blend of familiar and unique mechanics makes it easy to get into yet different to other cooperative games. 
0 Comments

That's Life!

26/7/2021

0 Comments

 
25th July 2021

Sunday gaming on Board Game Arena continued with our next game.

If Esther Rantzen ever made board games, it probably wouldn't be this one, for starters, there's no dog that says 'sausages'!

Caveat: We have only ever played That's Life! digitally online.

What's in a game?
That's Life! is all about travelling along a route consisting of a series of randomly placed hexagonal tiles, where the bad ones outweigh the good ones, generally trying to manage those bad situations with a bit of luck and occasionally encountering generosity or greed. Maybe that really is what life is all about?
  • Start and end tiles: This pair of tiles mark the start and finish of the route.
  • Plus tiles: Plus tiles score points for players when acquired, there are 8 of them, ranging in value from 1 to 8.
  • Minus tiles: When minus tiles are acquired, they lose points for the capturing player. There are 18 minus tiles valued from -1 to -10.
  • Lucky tiles: These will turn minus values into plus ones, as they may be used to swing a large number of points they can be very powerful. There are 6 of them.
  • Action tiles: The 4 tiles are double-sided and are marked gift/steal.
  • Meeples: Up to 3 meeples per player.
  • Die: Every roll and move game needs dice and this is a standard six-sider.
There's a more complex version of the game we didn't play that involves 'guard' meeples.

How's it play?
Setup
  • Take all the plus, minus and lucky tiles, then shuffle them into a face-down stack of 32 tiles.
  • Put down the start tile.
  • Draw 8 tiles from the stack and place them in line starting at the start tile to form a path, the exact route of the path isn't important.
    Next, place an action tile (Gift side up.) at the end of the path and after the 8th tile.
    Repeat this with the 24 remaining tiles on the stack and 3 action cards to continue the path.
  • Place the end tile after the final action tile to complete the route.
  • Give each player 2 or 3 (Depending on player count.) meeples in their colour and place them all on the starting tile.
  • Determine the starting player.

On to play
The goal in That's Life! is to journey to the game's end, acquiring those scoring tiles as you go while trying to avoiding those minus tiles. How's this done?
  • Roll the dice: The active player rolls the die and moves one of their meeples by that rolled amount.
That's it, well OK, not exactly, there's a bit more.
  • Picking up tiles: When one of the active player's meeples leaves a tile and there are no other meeples on it, then they MUST pick up the tile (Unless it's an action tile - see below.).
    Tiles picked up by a player are placed into a single stack in the order they were acquired, thus the most recently collected tile will always go on top of the stack.
  • Action tiles: If the active player moves one of their meeples off an action tile and there are no other meeples on it, then the action card's gift/steal ability is activated, depending on which face is up.
    Gift side up: The active must give the tile on top of their stack to another player, who places it on top of theirs.
    Steal side up: The active player takes the topmost tile from someone else's stack and places it on top of theirs.
    Flip sides: Action tiles are not collected by players and always stay in the route, instead they are flipped over to their other side.

Endgame
Play continues until all players' meeples have crossed the finish line.
Each lucky tile acquired by a player can now used to convert the score from a minus tile into a plus, then all points are tallied, highest score wins.

Overall
There's no getting away from that fact that this is a roll and move game, it may give you 2 or 3 choices from that roll, but it still is what it is. 
That's not to say it's all bad, usually at least 1 of the 2 or 3 choices a player is given is meaningful.
Finding a way to linger on a plus tile until other players have to leave (Or getting off the tile before other players even arrive!) will earn victory points and players will obviously also want to avoid the minus tiles. However, minus tiles sort of reverses this, players will look to linger on a bad tile in the hope that another player will land it, allowing them to potentially escape. Furthermore, minus tiles outnumber plus ones 18-to-8; that's more than double, landing on them is inevitable, so is picking them up.
This is what makes the lucky tiles such gamechangers with their ability to mitigate negative penalties, if a player has a lucky tile in their stack, suddenly that big minus tile becomes an asset, provided of course someone doesn't steal the lucky tile in the meantime.
All of this is also largely dependant on what other players do, because they'll also be trying to linger on good tiles and escaping bad ones.

That's Life! is a very easy game to learn and comprehend. I feel that it will have crossover appeal to non-gamers but for us, it felt a little too light and a little too luck-based; because players invariably end up collecting more negative tiles than positive, it ends up lending the game a negative feel - even though generally it will affect all player equally (Maybe life is like that?). It meant we didn't find That's Life a satisfying experience or a compelling game.
0 Comments

Pit Crew

24/9/2019

0 Comments

 
12th July 2019

Friday gaming in lieu of WFRP continues with the 3rd game - 'Pit Crew'

We've all seen it, when a racing car pulls into the pits and the pit crew goes mental changing the tyres and refuelling the car.

Pit Crew is a 'team-based' card game that attempts to emulate this frenzied burst of activity by being a 'real-time' game.
How does this work? Well let's get to it.

What's in a game?
Pit Crew is a team based game and players will be in up to 3 teams of 1-3 people each. Thus the game supports 2-9 players. Components include:
  • Game board: Depicting a oval race track.
  • Wooden cars: To go on the race track.
  • Car sheets: These each depict a racing car, one is given to each team. Each car sheet has 5 numbers, one of each tyre and one for the roof (Which represents fuel in the game.).
  • A large deck of cards: Numbered 1-10 in black and white.
  • A smaller deck of cards with special abilities.
  • 2 Dice: normal six sided dice.
The components are fine, unremarkable and completely functional.

How's it play?
Firstly, all players are split up into teams of up to 3 each.
Each team is given a car sheet and each team is dealt a hand of numbered cards (Split between the team players.).

The objective of Pit Crew is to change the tyres and refuel your car as a team and then race it around the track on the game board. All of this is done in real time!

Changing tyres
To change tyres, the team must play 4 cards next to each tyre.
  • The value of the first card must be 1 high or lower than the number shown on the car sheet. Thus if the car sheet has a 7 next to a tyre, the value of the card played by the team must be 6 or 8.
  • The value of the second card must be 1 higher or lower than the first card played.
  • And so on, until all 4 cards have been played.
  • This must be done for all 4 tyres.
Refuelling
In order to refuel the car, multiple cards must be played on the refuelling number on the car sheet. The combined values of all of these cards must equal the value on the car sheet. Thus if the car sheet has a value of 23 for refuelling, then playing a  6, 4, 10 & 3 would equal 23.

Exiting the pits
Once all 4 tyres and refuelling has been completed, the car can exit the pits and enter the race.
However there's a little twist here. The better the pit change, the quicker the car comes out of the pits (The more spaces it moves.).
How is this calculated?
This is where the colours of the cards come in play.
If the cards used to change tyres are of a certain colour combination, then the car gets a bonus when leaving the pits.
The same is the case for refuelling.

Conversely; if the cards played on the tyres or fuel are the wrong numbers, then the car will suffer a penalty when leaving the pits.
If the penalty is bad enough, the car might crash out of the game!

Racing
Once a car exits the pit lane and begins racing, the team rolls a die to move. This rolling is real time and the quicker they roll the dice, the more they can move.
However once all cars have exited the pits, real time rolling ceases. From now on all rolling is done in turn order until the race is completed.

A game consists of several races. After a race is completed, each team is given a 'bonus' card.
Bonus cards confer random special abilities that can help a team or be used to hinder an opposing team.

Endgame
Once all the races have been run, the team that has won the most races wins.

​Overall
Pit Crew is a small, quick and easy game to learn. Which is good, because stopping to query the rules in the middle of a real time game could prove tricky.

This is the first real time tabletop game I've played and I've always been a bit suspicious of the concept. But Pit Crew was fun. I think this partially because each team plays separately and does not interfere with each other during the real time phase of the race. You have your teammates to consider!

Pit Crew is a cooperative game about completing tasks quickly, but accurately in a team. The Pit Crew theme fits it very well.

I think that Pit Crew is a game worth trying.
0 Comments

    Author

    I play, I paint.
    ​This is where I talk about what I play.

    Archives

    March 2024
    February 2023
    January 2023
    December 2022
    November 2022
    October 2022
    September 2022
    August 2022
    July 2022
    June 2022
    May 2022
    April 2022
    March 2022
    February 2022
    January 2022
    December 2021
    November 2021
    October 2021
    September 2021
    August 2021
    July 2021
    June 2021
    May 2021
    April 2021
    March 2021
    February 2021
    January 2021
    December 2020
    November 2020
    October 2020
    September 2020
    August 2020
    July 2020
    June 2020
    May 2020
    April 2020
    March 2020
    February 2020
    January 2020
    December 2019
    November 2019
    October 2019
    September 2019
    August 2019
    July 2019
    June 2019
    May 2019
    April 2019
    March 2019
    February 2019
    January 2019

    Categories

    All
    2 Player Only
    50 Fathoms
    Abstract
    Annual Quiz
    Area Control
    Asymmetrical Play
    Auctioning
    Black Hack
    Bluffing
    Board Game
    Campaign Play
    Card Game
    Clockwork & Chivalry
    Cooperative
    Cthulhu Hack
    Deck/Bag Builder
    Deduction
    Dice Game
    Drafting
    Engine Builder
    Hand Management
    Hidden Movement
    Hidden Role
    In Darkest Warrens
    Legacy
    Merry Outlaws
    One Vs Many
    Oubliette
    Party Game
    Programming
    Push Your Luck
    Real Time
    Renaissance
    Resource Management
    Roll And Move
    Roll And Write
    Route Builder
    RPG
    Sand Box
    Savage Worlds
    Set Collecting
    Storytelling
    Tableau Builder
    Team Based
    The Month In Gaming
    The Year In Gaming
    Tile Placement
    Trading
    Traitor
    Trick Taking
    Voting
    Wargame
    Wasted Hack
    WFRP
    Wogglecon
    Word Game
    Worker Placement

    RSS Feed

Powered by Create your own unique website with customizable templates.
  • Home
  • Special Effect
    • Special Effect
    • The Final Return of The Indiana Jones Charity Globe Trot
    • The Warlock of Firetop Mountain Challenge
    • Return of The Indiana Jones Charity Globe Trot
    • Bard's Tale Challenge
    • Fighting Fantasy Challenge
    • The Indiana Jones Charity Globe Trot
    • Mirkwood Charity Walk
    • Middle-earth Charity Walk
    • Dungeon Daze
  • RPGs
    • The One Ring
    • The Evils of Illmire
    • Beach Patrol
    • The Surrendered Lands
  • Game Blogs
    • RPG Blog
    • Gaming Blog
  • Painting Blog
  • Contact