|
5th July 2022 It's a Tuesday and we're at The Sovereigns with the Woking Board Gaming Club for an evening of gaming. The world of Victorian anthropomorphic railroad magnates is a cutthroat one in this game of acquiring train lines and towns. Buy low and sell high to become the... Raccoon Tycoon! What's in a game?
Raccoon Tycoon has excellent production values. Wooden tokens are used for commodities and first player token which is a good move, they always have a quality to them and also look cool. The cards (And paper money) have a sturdy feel to them while the tiles are satisfyingly thick. The game's art direction is also equally high. Anthropomorphic art is used throughout the game and I've found that it's a divisive style which most people do or don't like. Regardless of your view on this, it's undeniable that the quality of the art is high. The standouts are the railroad cards which use a oil painting style to display whimsical characterful animals in Victorian clothes. Curiously, the building tiles use a completely different style, instead displaying line illustrated buildings and subjects with mostly flat and barely shaded colours. It's a striking contrast that should theoretically be jarring but actually fits quite well. Icons used to represent commodities on cards are easily understood. Most other game information is relayed via text which is usually very clear. How's it play? Setup
On to play Players are trying to earn VPs in Raccoon Tycoon, this can be done by collecting sets of railroad cards, acquiring town cards to pair with railroad cards and gaining building tiles which are not only worth VPs but can provide avenues to scoring more VPs. All of this requires money and commodities, players will need to manipulate the commodities market to maximise the profit gained from selling their own commodities while trying limit the profit of other players. Racoon Tycoon follows a traditional turn order with the active player resolving their action before play moves on to the player on their left.
Endgame Play continues until one of the following 2 criteria is met.
VPs come from a variety of sources. Sets of railroad cards. Town cards paired with railroad cards. Building tiles earn 1 VP each. Bonuses from building cards may also provide additional VPS. Points are tallied, highest score wins. Overall
Even without the anthropomorphic artwork, Raccoon Tycoon would be something or a quirky game. It packs quite a lot of mechanical systems into a single game albeit to a fairly simple level. A little bit of stock market manipulation, a touch of set collecting, a dash of auctioning and a sprinkling of engine building. It could be a recipe for disaster but in the case of Raccoon Tycoon; the whole is greater than the sum of the parts. A large part of this I feel is due to the building tiles. Their unique bonuses both provide some asymmetrical gameplay elements and can also give players a bit of strategic direction. Raccoon Tycoon is a bit of a balancing act between acquiring cash for railroad cards/building tiles and commodities for town cards. It's hard to work towards both at the same time. Adaptation is important here, as is planning ahead. Players could look to finding ways to raise commodity values to increase profit when selling them later This brings me to commodity manipulation. There isn't too much interaction between players other than auctioning and commodity manipulation, Watching what opponents are doing can prove useful and is something of a higher level of play. I.e., if 2 players are accumulating the same commodity, there's a possibility that one of them will sell it, causing that market to crash. Beating a opponent to the punch so to speak, can cost them lots of cash! Raccoon Tycoon is fairly rules light and I think seasoned gamers won't have any problems grasping all the systems at work here. For less experienced gamers, the curve will be steeper, I don't feel it's a gamebreaker but I imagine it could be off putting. While there's enough gameplay to give players thoughtful and meaningful decisions to make and a fun experience, I also found the game to be a little unengaging and uncompelling, I never felt like I was building railroads or towns and despite the unique art style, it didn't feel like it stood out from the crowd. here's nothing wrong with Raccoon Tycoon but it wouldn't be my first pick for a game, although I'd have no problem playing it if someone else wanted to.
0 Comments
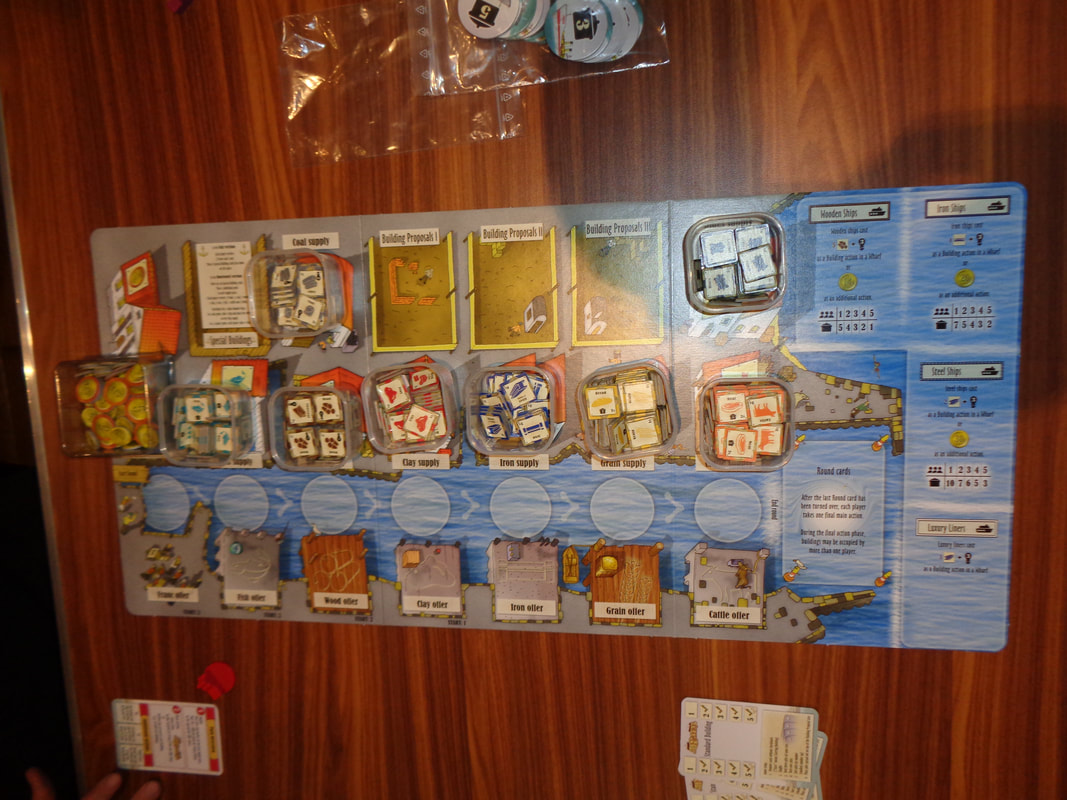
30th April 2022 It's a Saturday afternoon and Wogglecon 3 with the Woking Gaming Club is in full swing. The next game of the day was Machi Koro 2 which is the follow up to the most excellent original Mach Koro and which you can read about here. Like its predecessor, Machi Koro 2 is a tableau and engine building card game all about constructing a city, What's in a game?
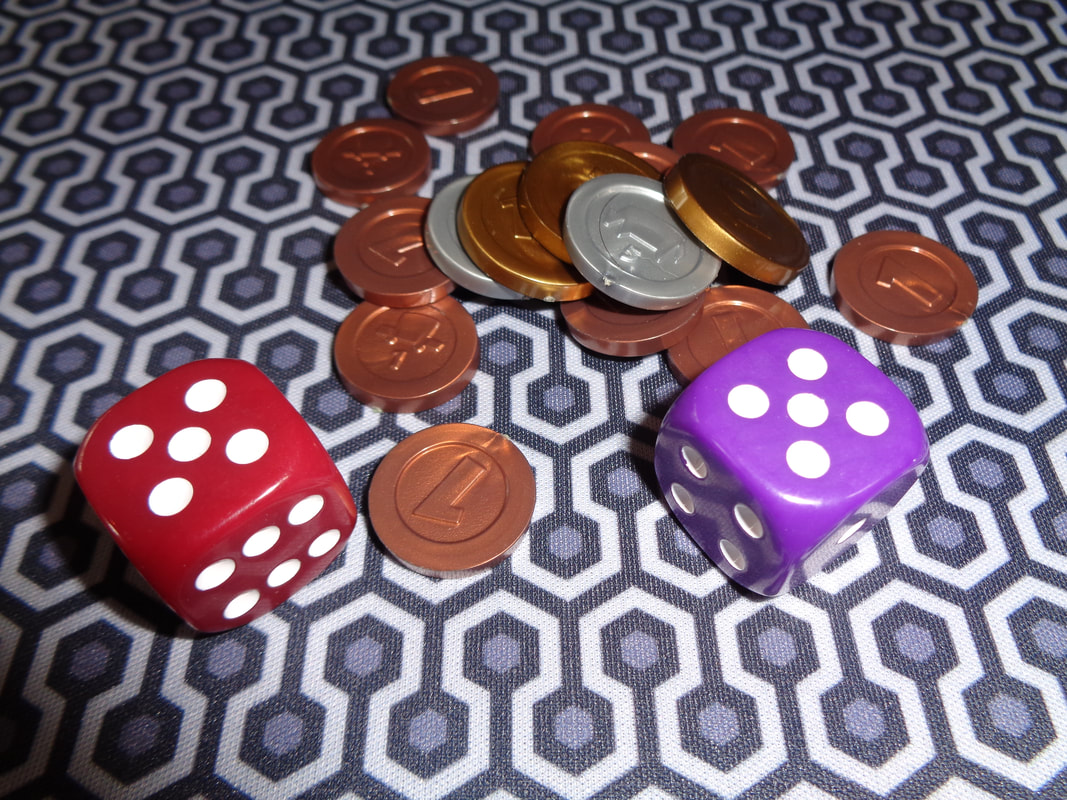
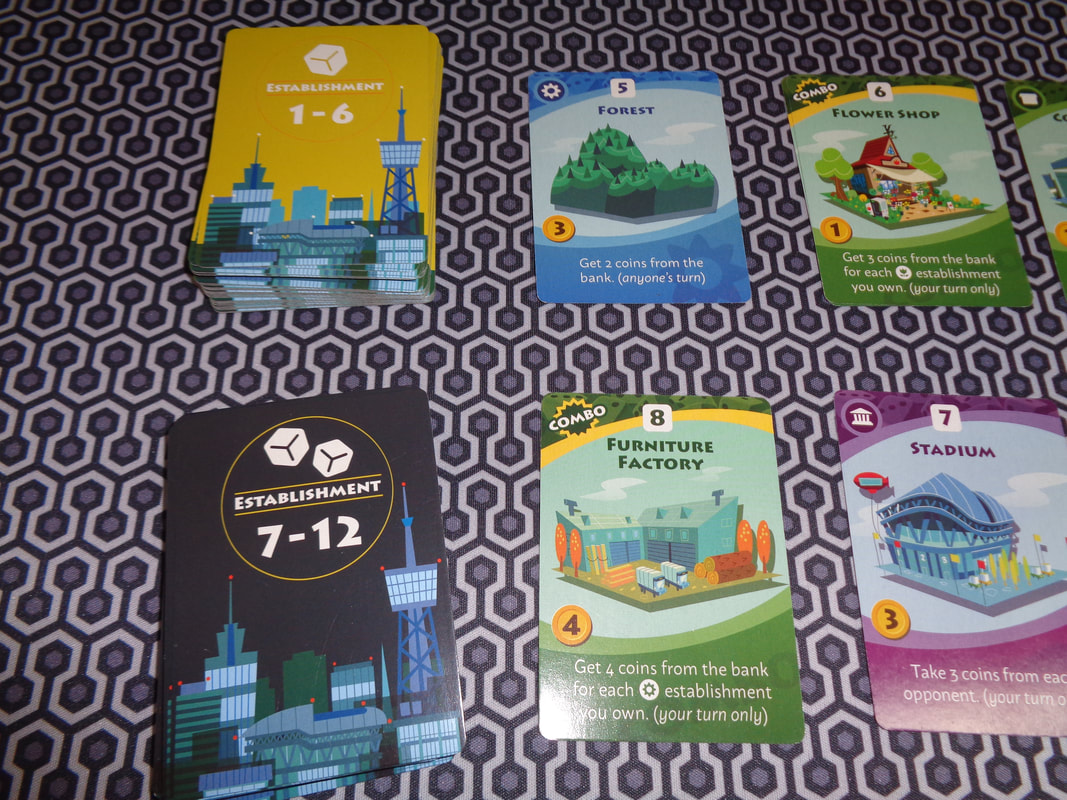
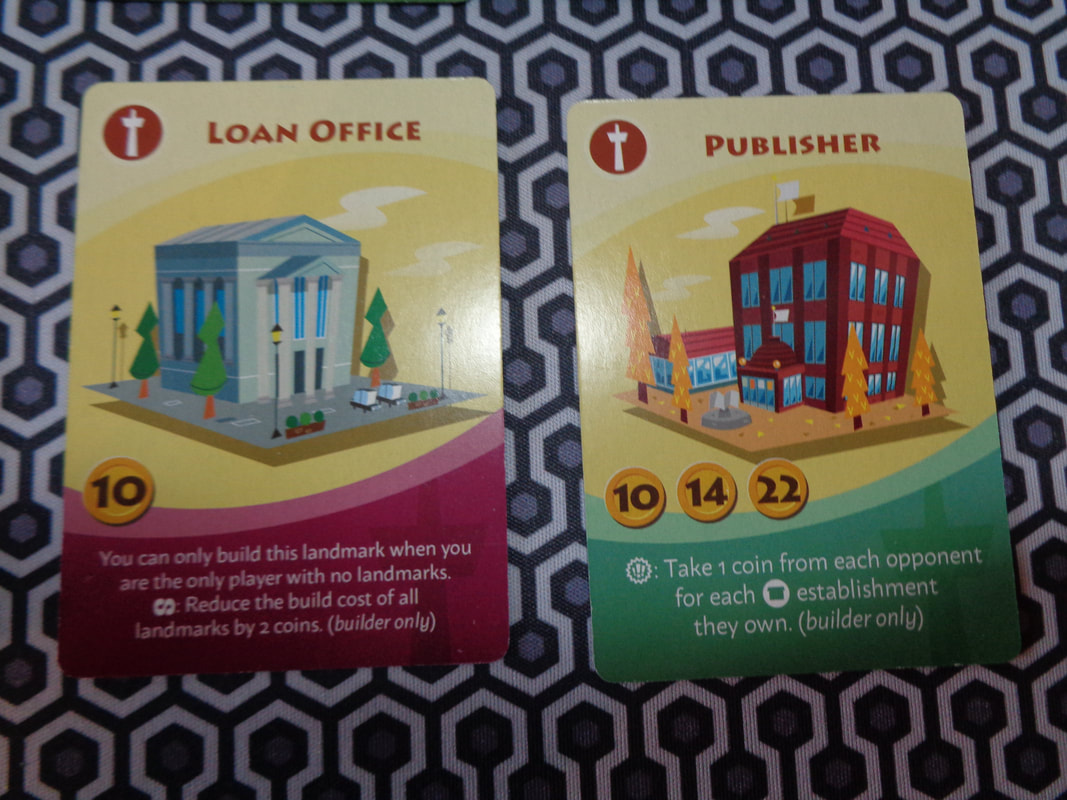
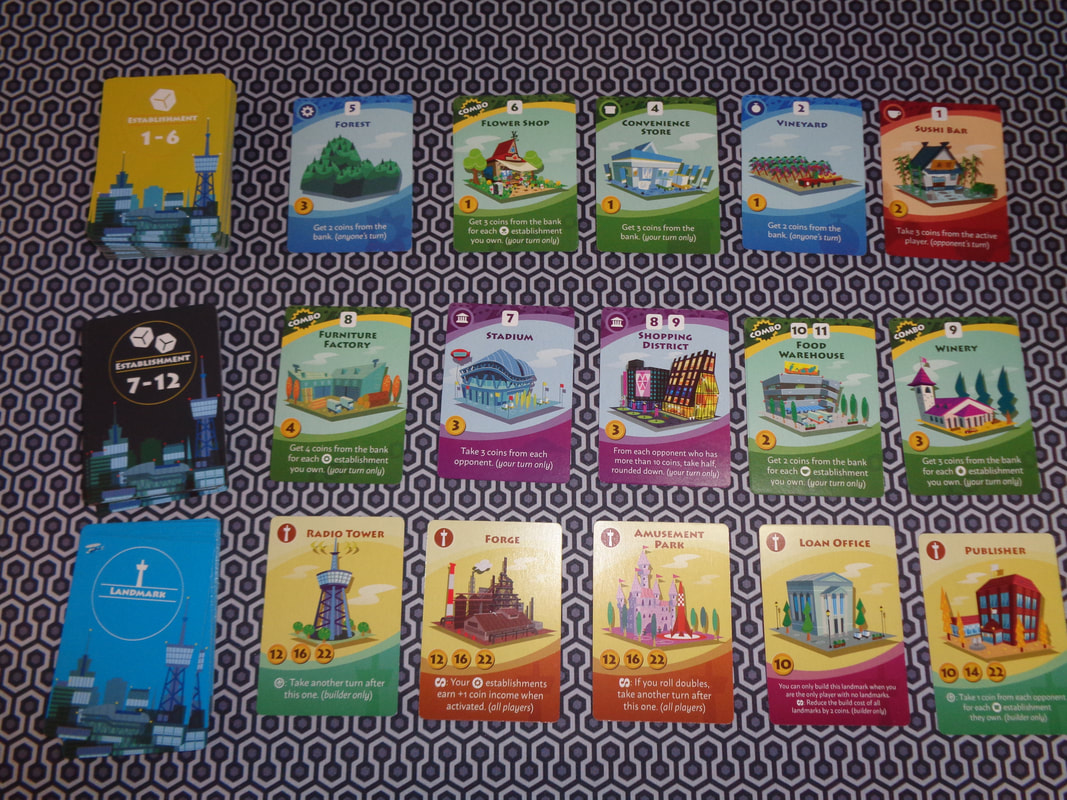
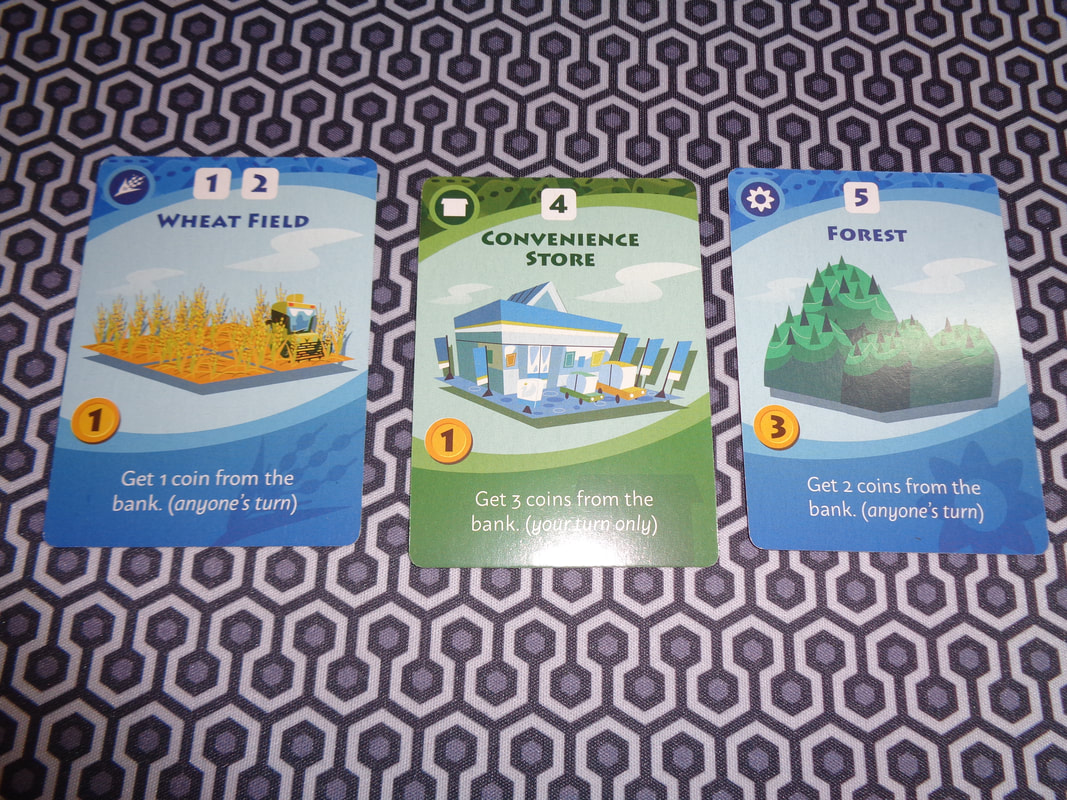
Components in Machi Koro 2 are all good. The cards are pretty standard cards as you'd expect. The coins feel solid and the dice are slightly larger than usual dice, they're plastic but also rounded, chunky and have a bit of heft to them. Machi Koro 2 uses an art style that's identical to the original. Brightly coloured stylised almost cartoony illustrations of establishments and landmarks. The colours are very distinct, which is good because colour plays an important part in the game. There are a few icons in Machi Koro 2, for the different types of establishment and types of effects on landmarks. It's all pretty clear what they mean and it won't provide an problems for players. How's it play? Setup
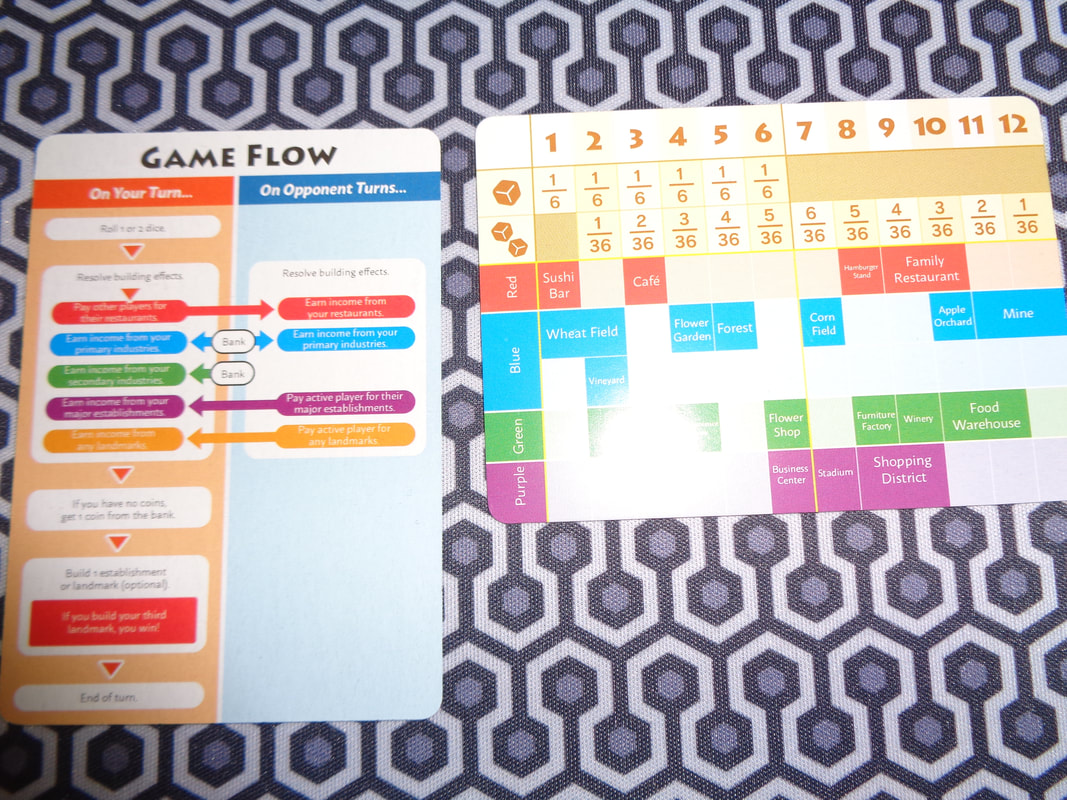
On to play Machi Koro 2 uses the traditional turn order with the active player playing their turn before the the player to their left becomes the active player. During their turn, the active player has 3 phases to play through.
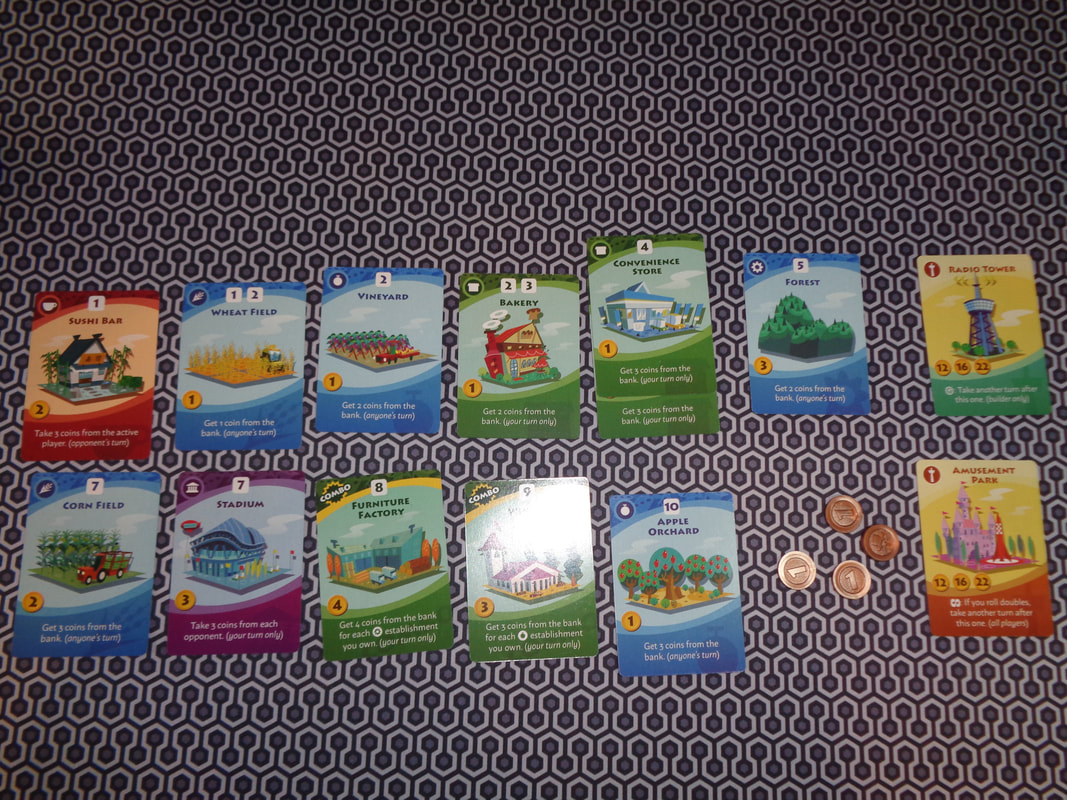
Endgame When any player purchases their 3rd landmark, they immediately win the game. Overall
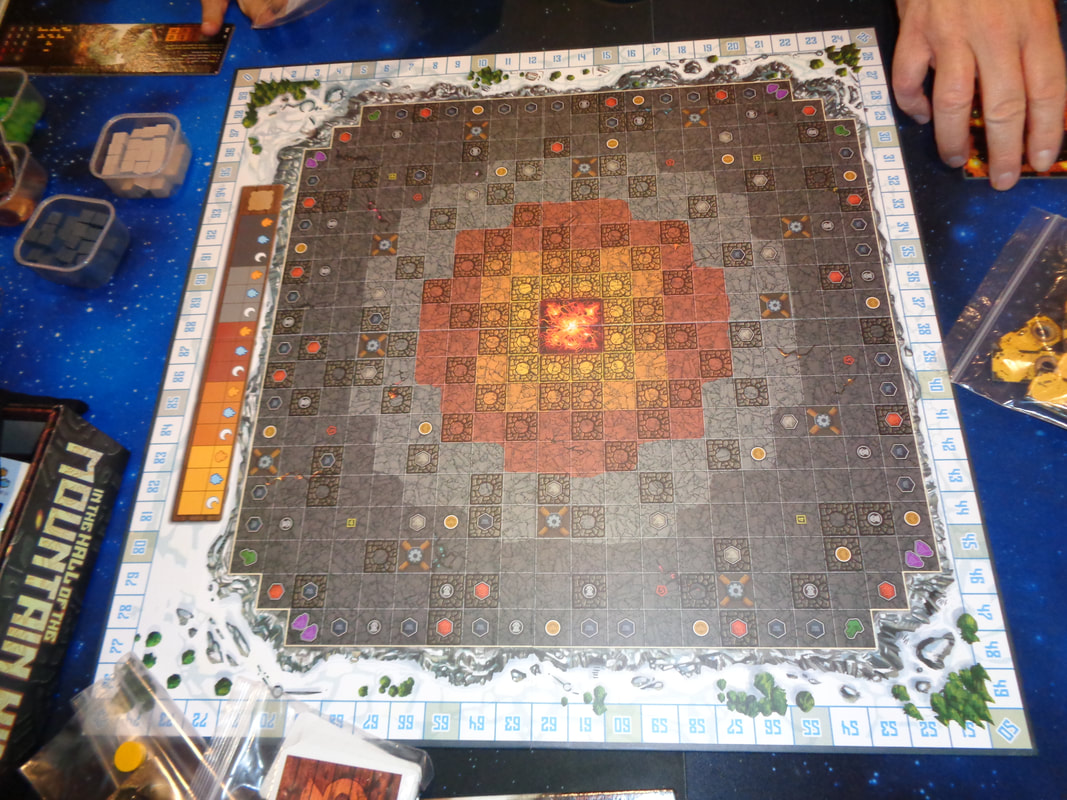
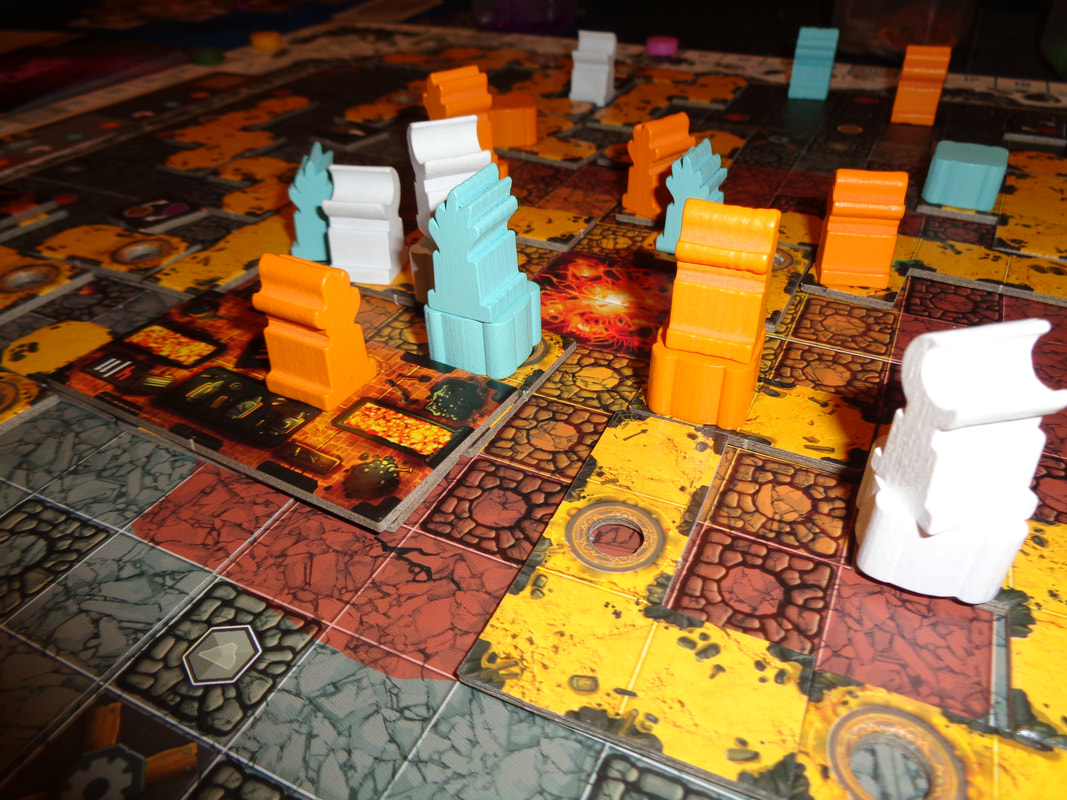
Machi Koro 2 is a that's fairly easy to pick up and play light-to-mid weight game that has a quick playtime. The game generally presents players mostly straightforward but meaningful decisions about buying cards. Should a player spread their cards over a range of numbers to get better coverage, or concentrate on fewer numbers but getter pay outs when the numbers come up. Players will also need to consider what those numbers are. e.g., 6-8 will come up most often - provided players are rolling 2 dice have a good chance of being activated. Speaking of rolling dice, in Machi Koro 2 players are able to choose to roll 1 or 2 right from the start. This is another decision that players can make, sometimes they'll want to roll certain numbers or avoiding rolling them and using 1 or 2 dice can alter odds of doing this. Much of this ties in with how the activation numbers are distributed across the cards. A lot of the 1-6 cards will immediately generate cash but the cards that combo off of them tend to be in the 7-12 range. Going to 2 dice was described by a player as 'going up a gear'. It can be pretty hard to slowly build up cash over rounds to get landmarks because other players can essentially 'nickel and dime' it away, gearing up makes it easier to get big cash in a single roll to avoid this. And talking of nickel and diming, another strategy to consider is the red card strategy. Using red cards to fleece other players of their coins is a pretty effective strategy, it denies them coins and earns them at the same time - but you won't make any friends that way! The downside of this approach is that canny players will try their best to spend all their coins, the game's timing explicitly states that red activations occur before any other, thus if opponents have no coins, you can't collect them with a red since their blues/greens/purples activate after red. It means that in a quirky reflection of real cities, players will want to be as close to bankruptcy as possible! Unlike blue/green cards, reds are not guaranteed to generate income. Machi Koro 2 is a little on the light side (Not that I consider that an issue.) and perhaps a little too quick to end, which may not be to everyone's taste. One other thing to mention is that there's definitely a dollop of luck to the game, I'm fine with it and actually think it's an important part of the Machi Koro experience but some players will find this off putting. I do have a couple of relatively minor issues with Machi Koro 2. In the original Machi Koro, the card variety in the base game was fairly low, when 'The Harbour' expansion was added to the base game, Machi Koro went from being a 'nice' game to a 'great' game. I feel the same is true of Machi Koro 2 as well. There are only 20 different types of establishment and 10 will be visible right from the start. After playing a few games, players will have more or less seen everything the game has to offer at a basic level and and will habitually fall into familiar patterns or strategies depending how establishments emerge. An expansion would shake that up, I would love to see extra cards for Machi Koro 2. Finally, the rules for landmarks having actions that all players can activate in their turn is a little inelegant, requiring players to remember what landmarks other players have acquired or be reminded of them by those other players. Otherwise, I think Machi Koro 2 an un-taxing (Sic.) fun and breezy game to play that's worth trying if lighter games are your thing. How does it compare to Machi Koro? I've heard Machi Koro 2 described as Machi Koro 1.5 and there's definitely a sliver of truth to that. Anyone who's played the original will be familiar with nearly everything in Machi Koro 2. If it's not broken... So apparently there was also some criticism of the original where it was stated that there was a lot 'whiff' in the early game - where players would roll the dice and nothing would be activated. There was further criticism that the original had too long a play time. It's clear that Machi Koro has tried to address these issues. The 3 rounds of buying will allow players to have a better spread of numbers at the start. Having to only buy 3 landmarks will also make play quicker (Although the cheaper landmarks are way more expensive than the cheapest landmarks from the original.). Landmarks with ongoing effects that activate in any player's turn also make the game quicker and can add an extra layer of interaction between players, although I've frequently seen players avoid these cards, instead optioning for once-only landmarks and I sort of feel that way myself. This is the only thing I see as a possible misstep. Changes to the game have made the red cards a bit more powerful, there's little opportunity to punish players who buy red cards in Machi Koro 2, other than one of the landmarks (Machi Koro had the publisher card to do this.). I don't think this is too much of change though and YMMV. So anyway, all of this makes the game clearly quicker to play but I feel that perhaps it's a little too quick. Sometimes (Especially when someone gets a good roll or two.) a game can be over before players can adopt an emergent strategy. I never found that the original was overlong. Don't let this put you off playing Machi Koro 2, it's of a similar quality as they original. Even though I own the first game, I was happy to buy and play the second and would recommend it to players of the original as well as to people who have never played it. 9th February 2022 It's Wednesday night and we're round Simon's for some gaming fun. The evening's game was In the hall of the Mountain King. Ask yourself: What is it that trolls like to do? Live under bridges perhaps; no. Chase goats maybe; no. What about make trouble on the internet; no. What trolls really like to do is dig tunnels (The fancier the better.) and move statues! What's in a game?
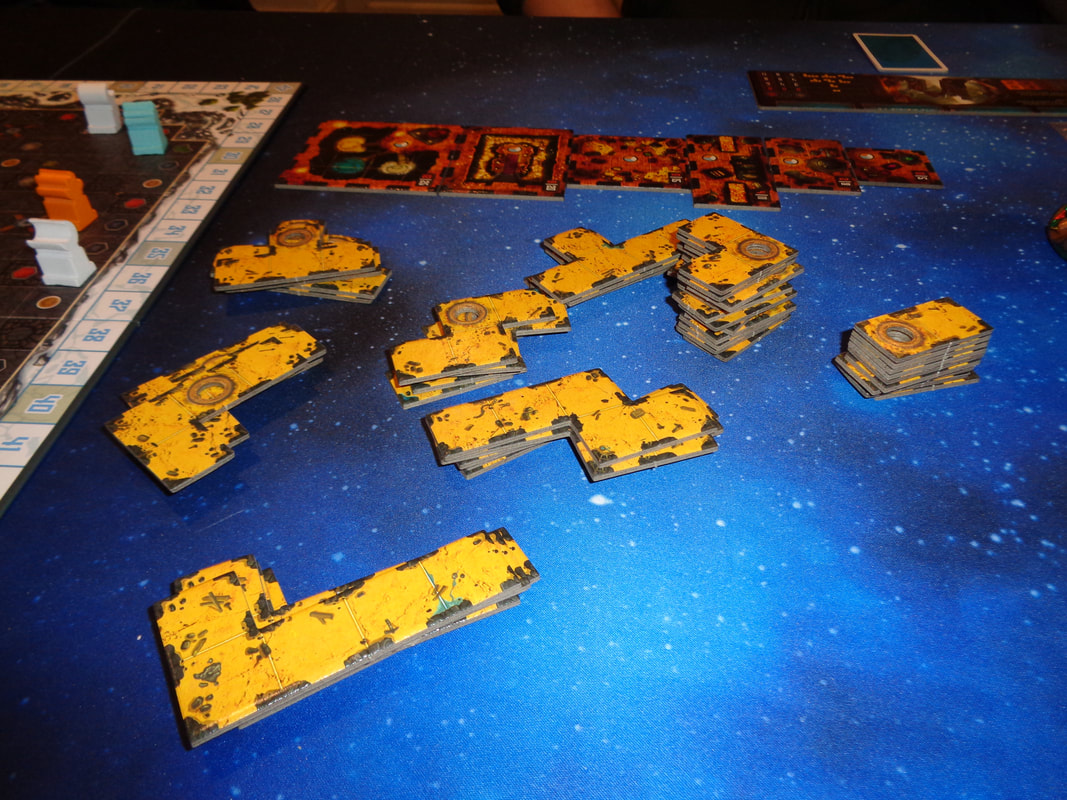
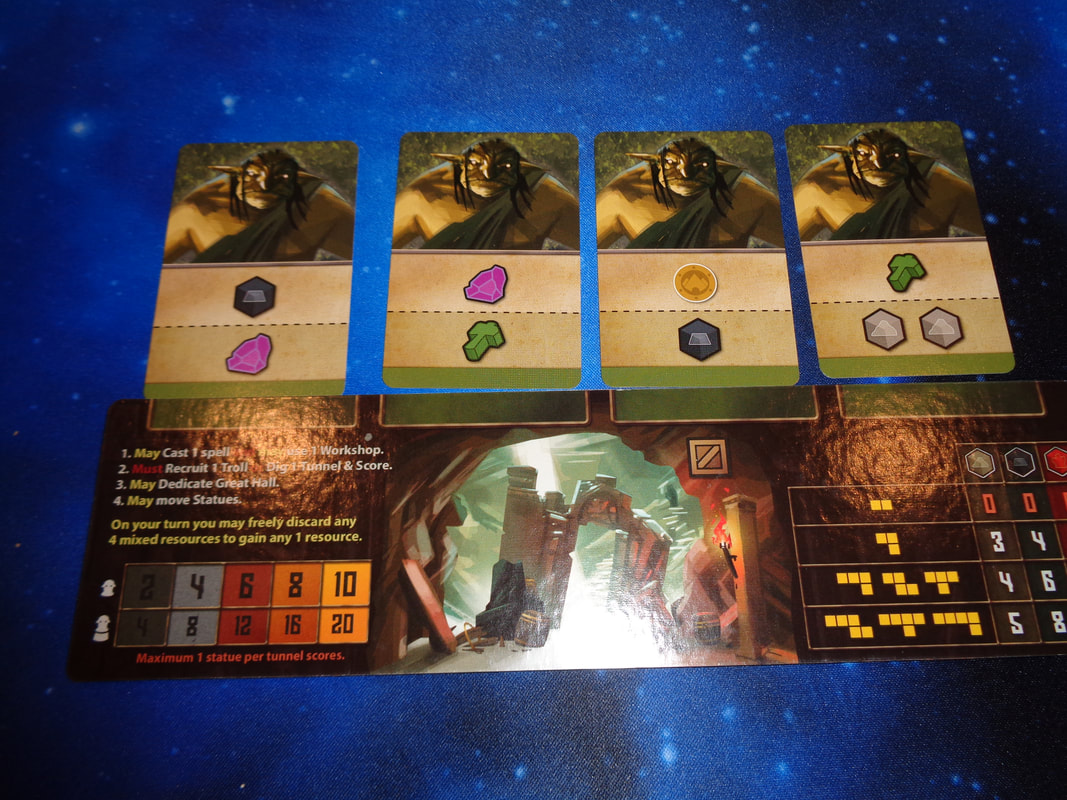
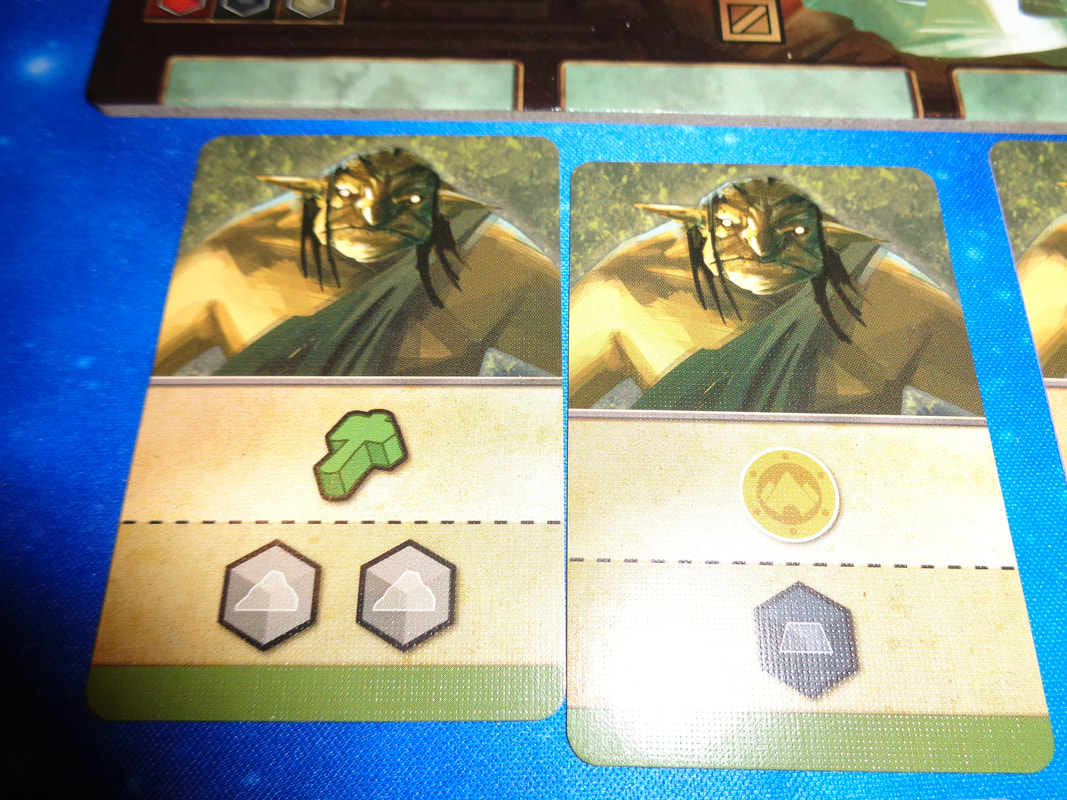
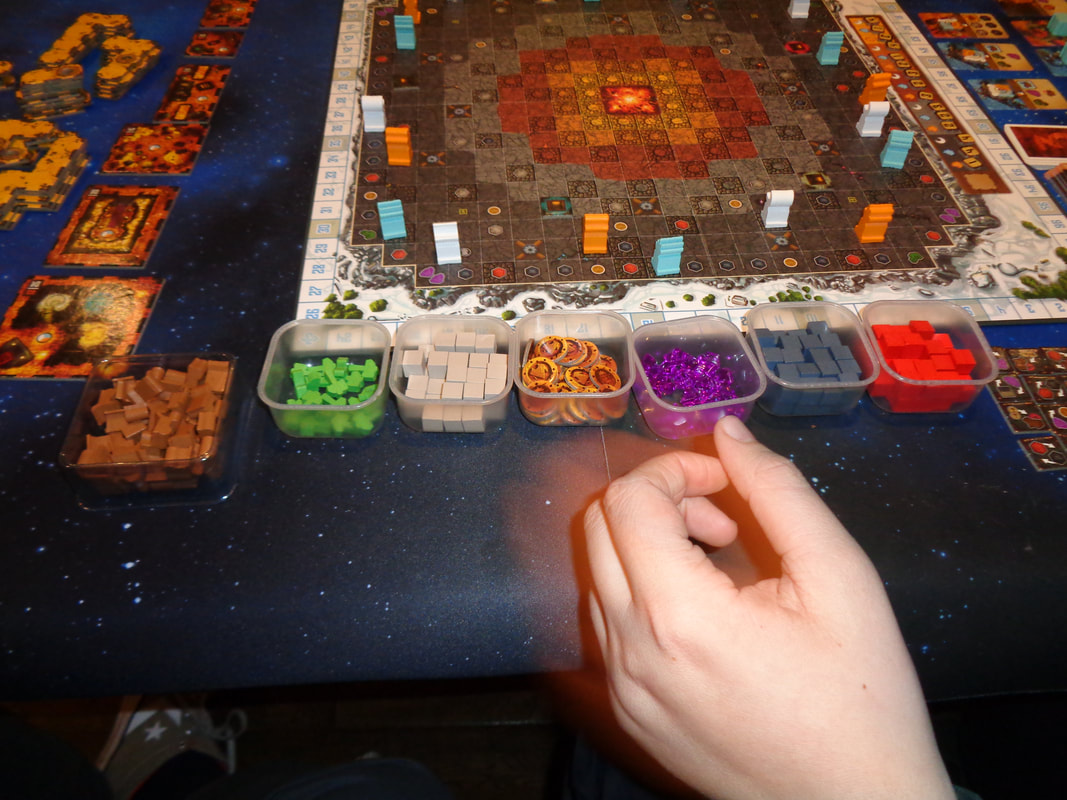
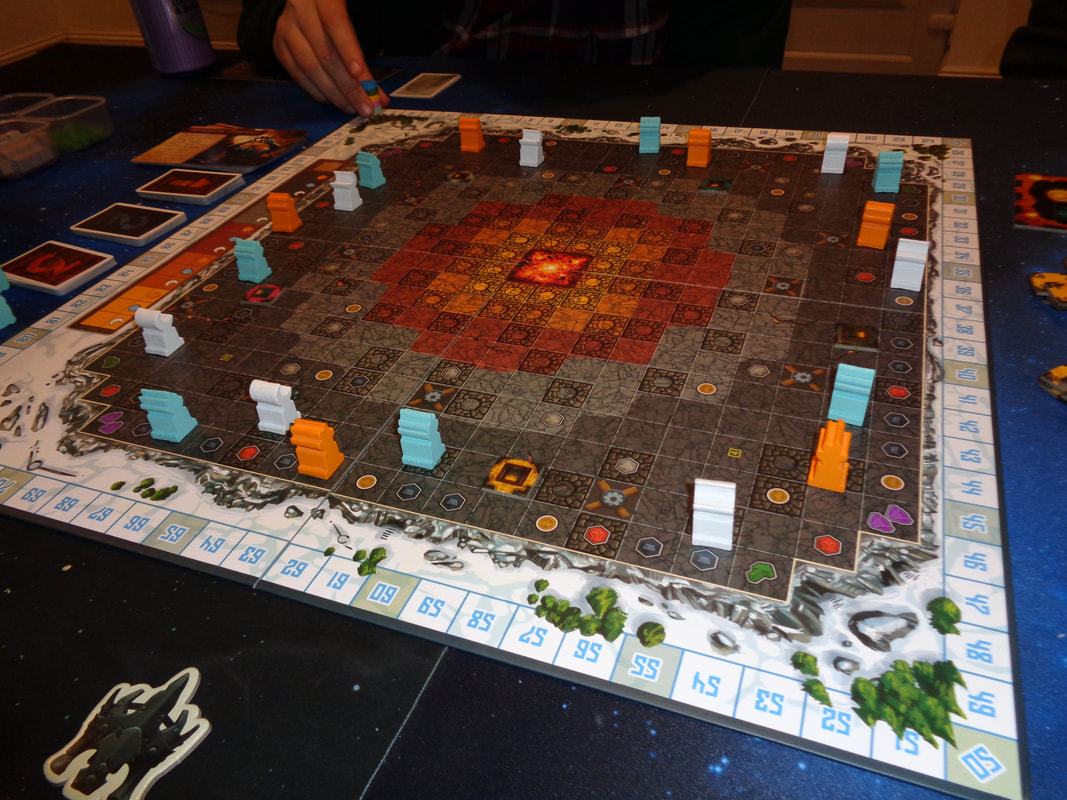
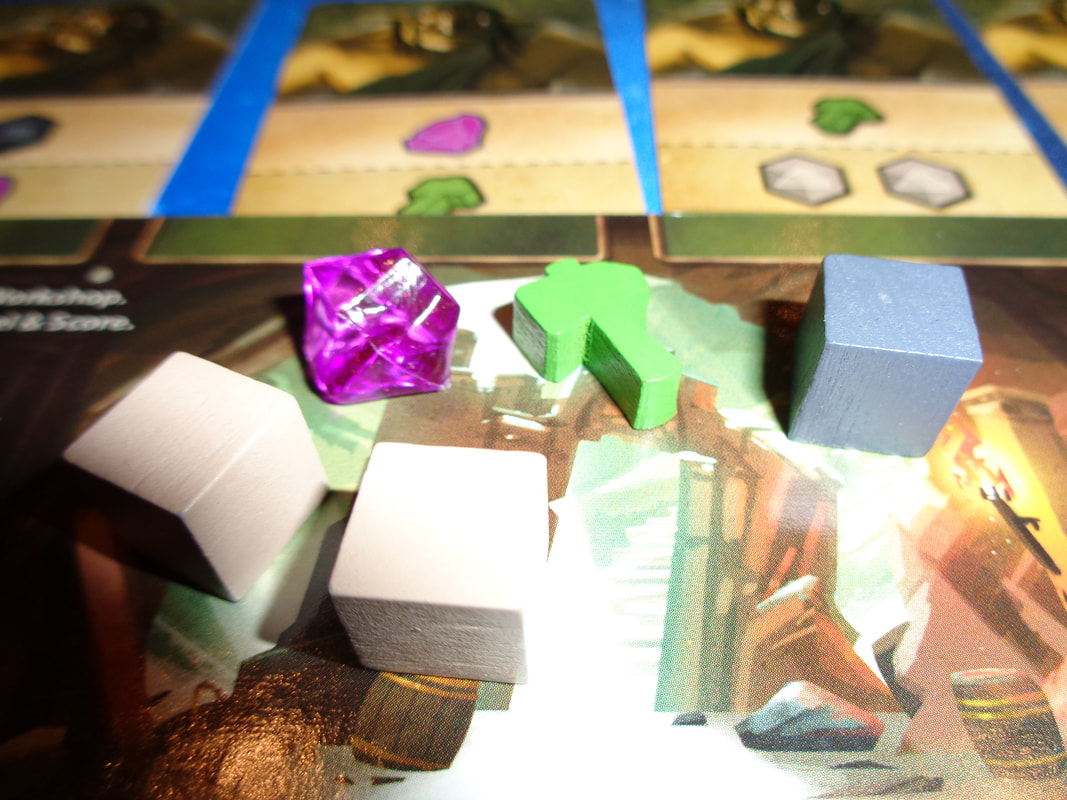
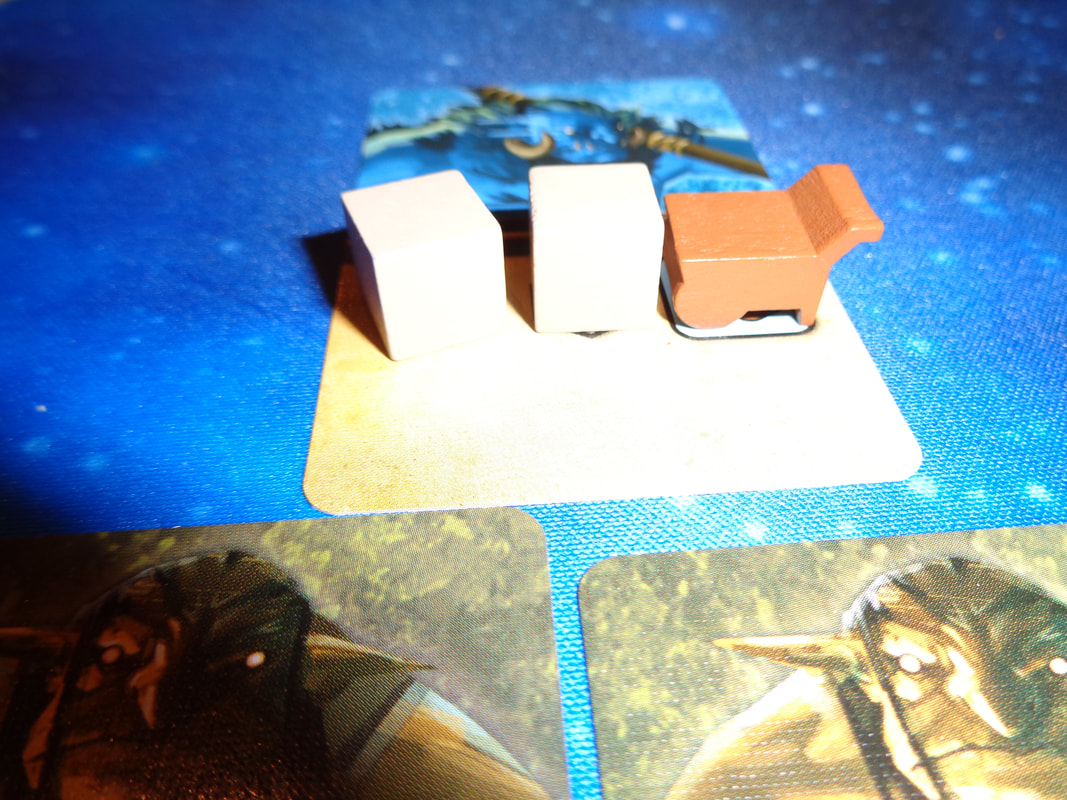
There's certainly a good amount of wooden tokens and meeples here, the acrylic crystals are also a nice addition. None of the other components struck me as being poor quality and they're typical of what is expected in a modern game. There are a couple of minor quibbles though. The pedestal points tokens are a bit small and fiddly to handle The second is a bit of personal grumble - which is that all the carts are brown but depending on where the carts are acquired from will represent different colours. Carts in a player's central area can be used for any colour of statue. But carts from icons on troll cards can only be used to move statutes of a certain colour - which is indicated by the colour of the icon used to acquire the cart! Makes sense... right? Maybe not? Surely it would have been useful to include some carts of the relevant colours? There isn't a great deal of art in the game, mostly on on the spell and troll cards but it's all well illustrated with bold colours and and is fairly varied. There are 4 types (Or clans.) of troll cards and 3 types correspond to the blue/orange/white colour motif that runs through the game and I quite like how those trolls cards have a colour pallet to match it their types. Having said that; the starter cards all feature the same piece of artwork that has been coloured matched to each player colour which is a little disappointing. For the most, the game's iconography is actually straightforward and easily understood. Only the aforementioned issue with carts being a small problem. If the cart icon has a coloured background then a cart that is sourced from that icon can only be used for that colour of statue. Luckily it's not a gamebreaker although it's finicky rule to remember. How's it play? Setup
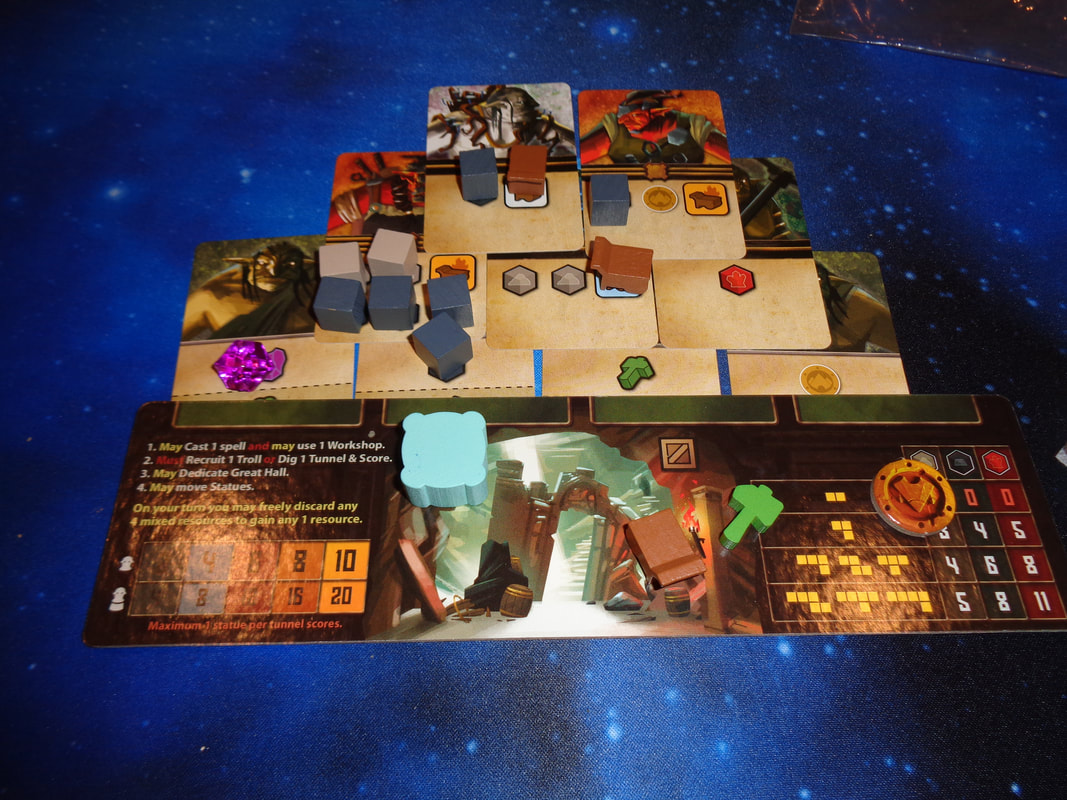
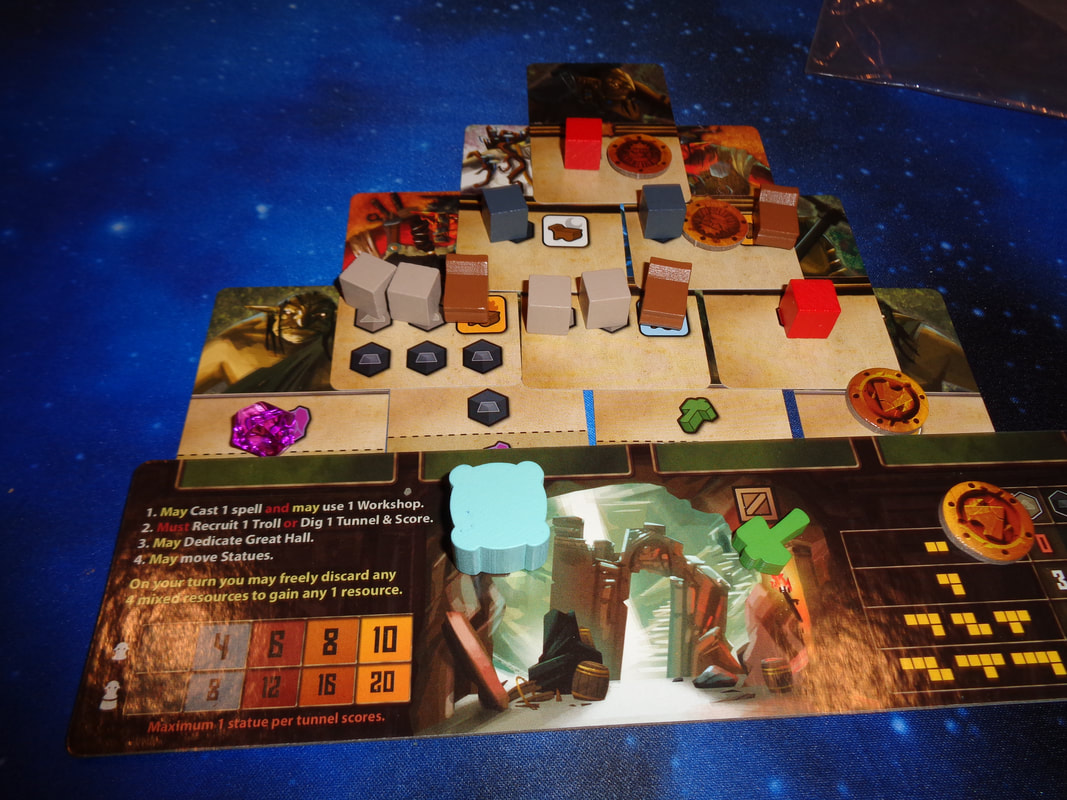
On to play Play during In the Hall of the Mountain King will have active player performing 4 actions before play moves clockwise to the next player.
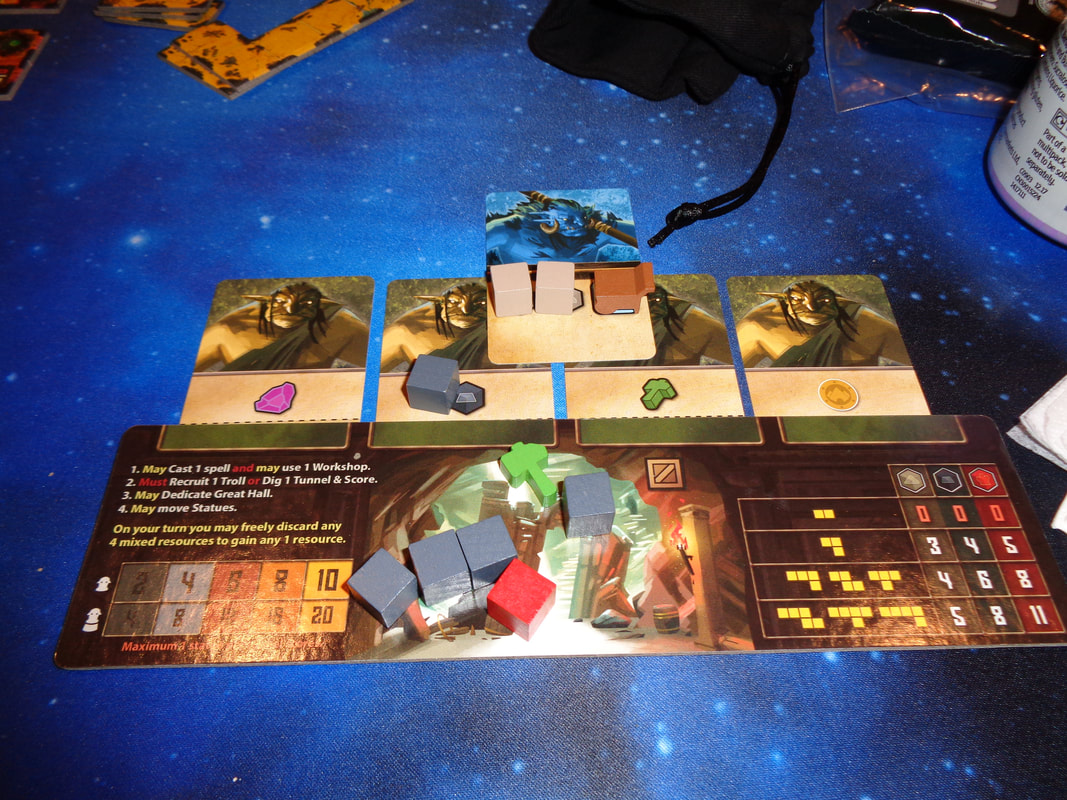
Endgame The endgame is triggered when there no coronation tokens left to acquire. The current round is completed and 2 more rounds are played. Players then calculate VPs, a player's VPs may come from the following sources. Score tracker. Statues - depending on their position in the 5 zones and doubled if the player managed to place them on a pedestal. Great hall tokens in a player's network - with or without statues. Pedestal points for placing pedestals. Coronation tokens. Unspent resources; these can earn points. Every 3-of-a-kind scores an extra VP. Points are tallied, highest score wins. Overall
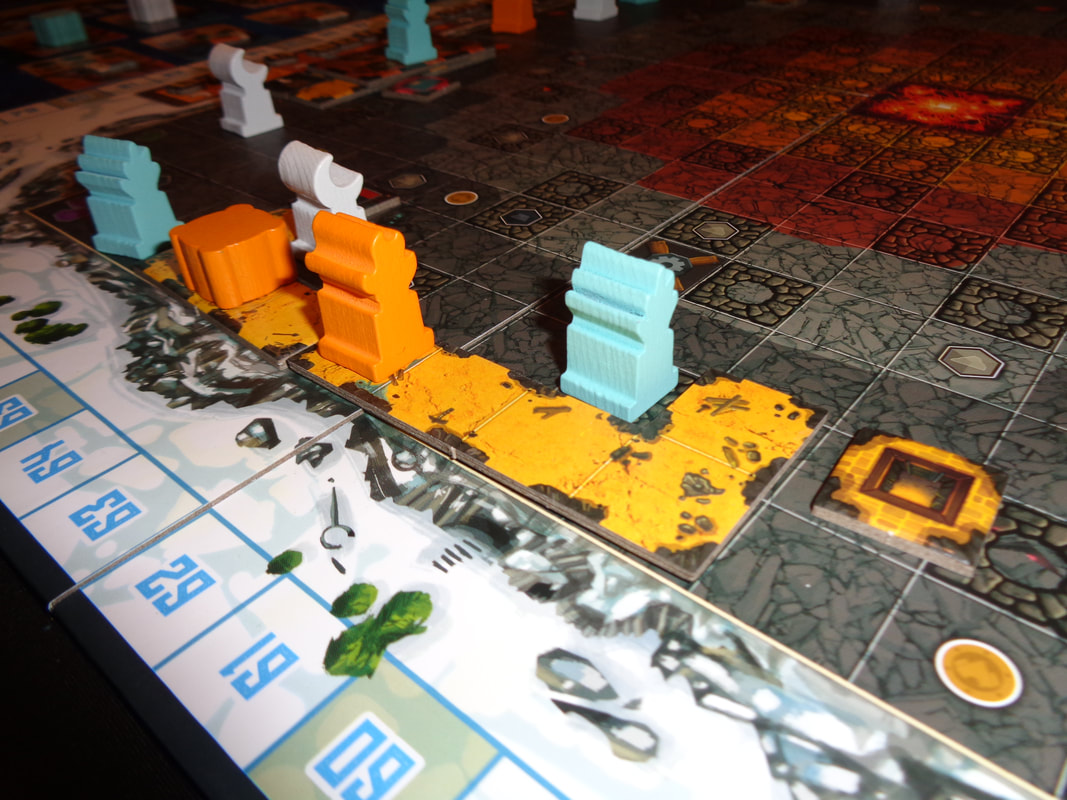
Despite having quite a few rule to remember and sounding quite complicated, In the Hall of the Mountain King is actually pretty straightforward in practice and many of the rules are obvious when in action. There's definitely a couple of finicky rules though, and again - it's to do with the carts and pedestals. It feels like an unnecessary complication to have these differently coloured carts to move statues. The rule that restrict pedestals to 1 per colour in each zone also feels a but cumbersome. I know why the rule is there: It encourages competition in a game that otherwise has little interaction between players. Players will want to be the first to get a pedestal as close to the Heart of the Mountain as possible. It locks out completing players and offers a big scoring opportunity. It means that players are put into a balancing act of needing build their tunnel network but also acquire resources to make this expansion happen. Clever placement of tiles will earn players some resources but recruiting trolls is the best way to get them and you'll note that digging and recruiting are pretty much the only 2 mutually exclusive actions in a turn. There's more to tunnel tile placement too, pedestals and thus statues have to go on anchor spots and it's these need to be as close to the centre of the board as possible, sometimes it'll be tricky to get it right, or it'll require not getting something else. Being able to avoid rubble spaces helps as well. Resource management also has more to it. Spending resources from troll cards first is prudent, as is using workshops to change them into other resources - because they go back on to the storage space and not the troll card. It does involve trying to think ahead about what resources can be acquired and what will be needed. This brings me neatly to the Trollmoot/Horde elements of the game, with their overlapping and cascading mechanics for both buying cards and acquiring resources they almost feel like a different game to the tile placement taking place on the game board. I have to say that I like the cascading mechanic, it's simple but provides some interesting decisions for players to make. Building up a Trollmoot, like much of In the Hall of the Mountain King requires a little forethought. If my calculations are correct, the cards in the centre columns will be activated the most. Players will want to identify and prioritise what resources they'll need in their Trollmoot setup. Additionally, deciding where to place a troll card will determine what resources the player immediately. I do also have some concerns about the game, I found using the tunnel tiles, creating pedestals and moving statues more of a chore than satisfying and the game it didn't quite gel with me. I'm also not sure how much value there is in replaying the game. The player and statue starting positions and workshops may vary but mostly the board's resources stay unchanged. And while the card mechanics are good, the cards themselves only vary in which resources they provide. In the Hall of the Mountain King is another one of these games that does nothing really wrong and I've got nothing against the game. If someone else wanted to play it I would happily join in but somehow it's missing that special something that makes me want to play it again. 8th February 2022 Tuesday night games with the Woking Gaming Club at The Sovereigns continued with Fantastic Factories. I don't know if factories are fantastic but I guess we're going to find out. What's in a game?
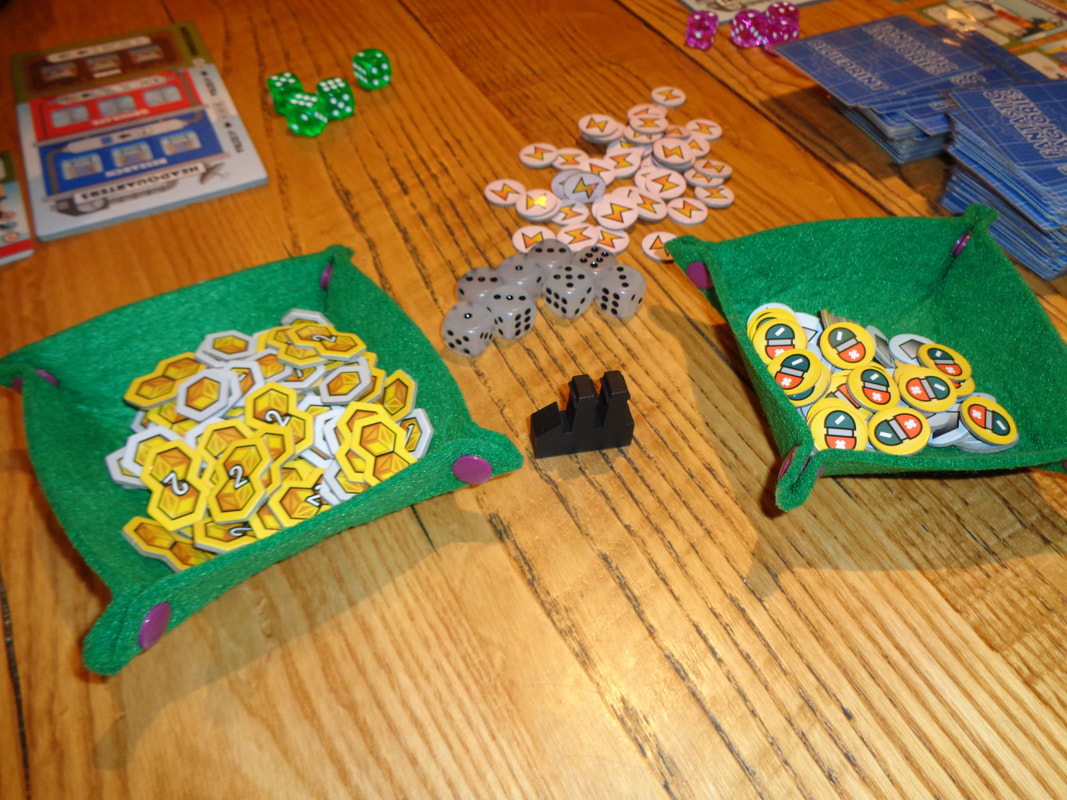
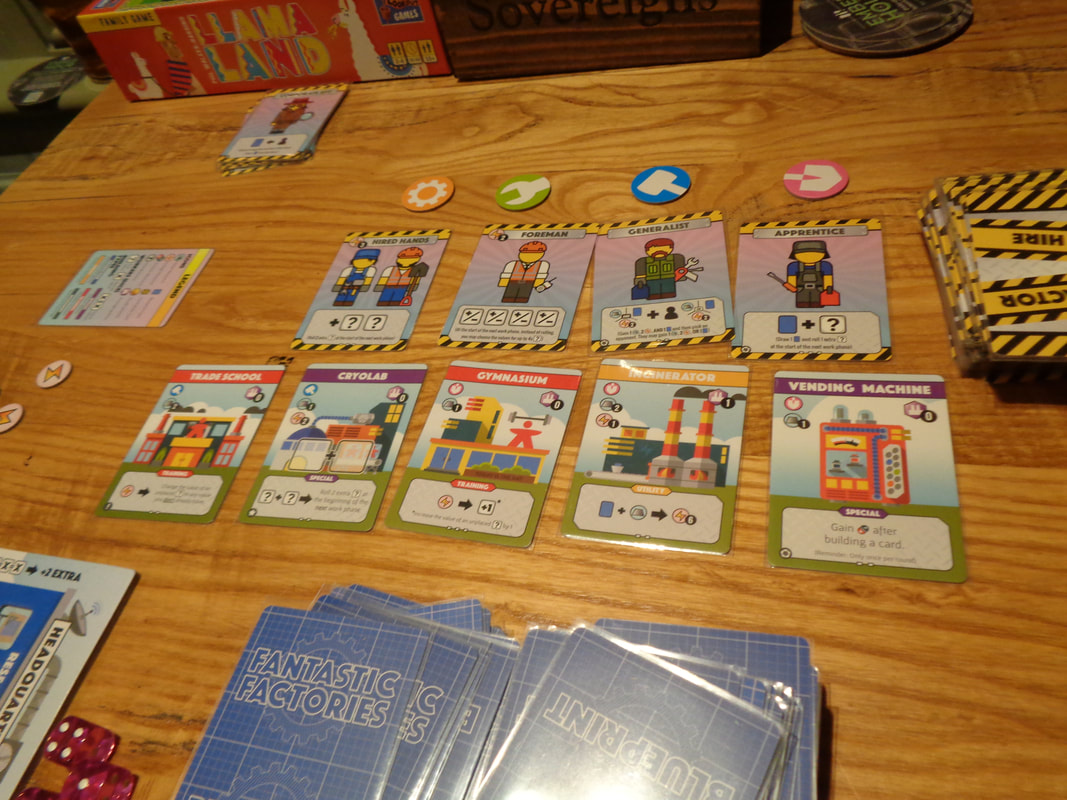
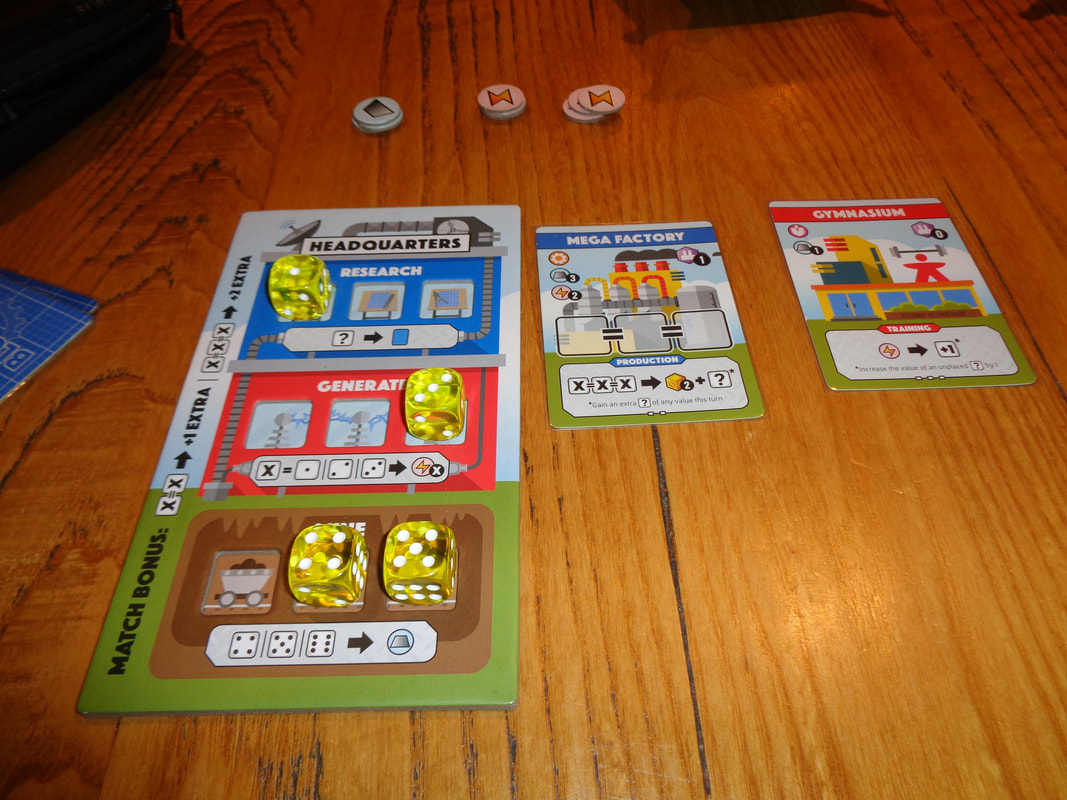
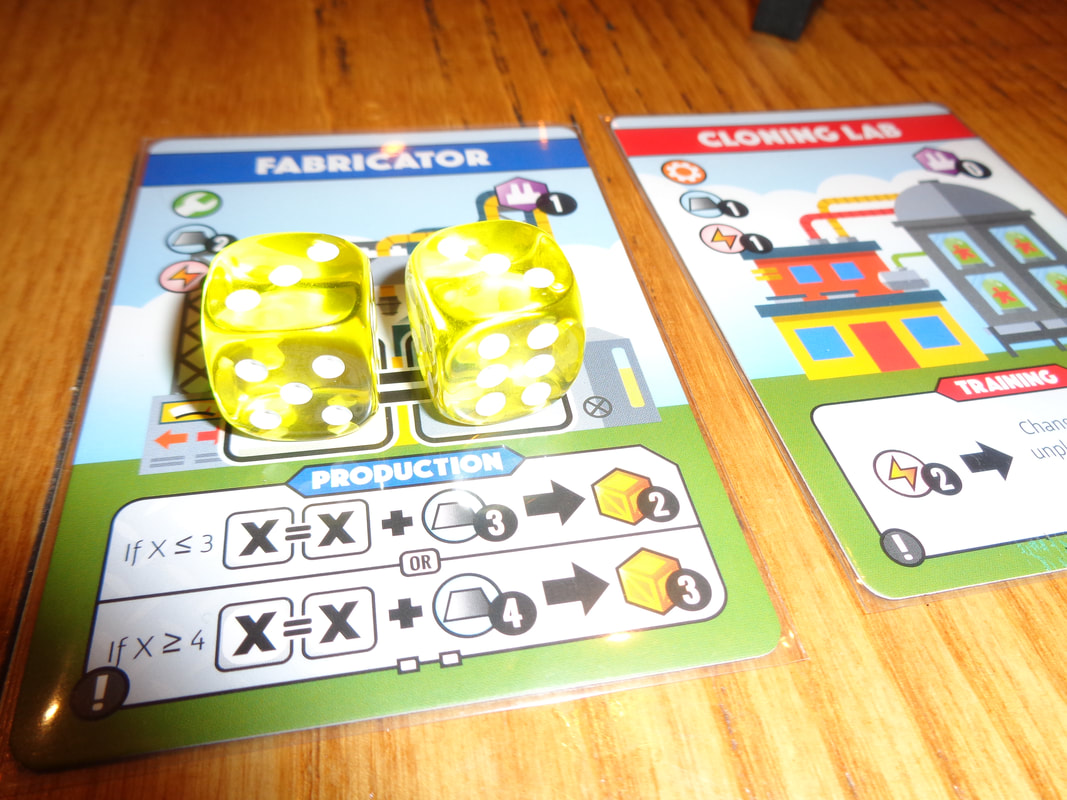
From an art perspective, the game makes good use of cheerfully bright colours. The art itself uses heavily stylised illustrations of both factories and contractors which is fine and suits the game's slightly light-hearted theme. When built, factories provide a varied amount of special actions, consequently the game makes use of quite a varied amount of iconography. For the most part it's straightforward, however, on occasion 2 cards may seem similar but they'll be a small difference between denominated by a single small icon or sometimes they'll just be something I wouldn't say it's any kind of a gamebreaker or that there's too much iconography but for a few turns players will probably end up referring to the rules. How's it play? Setup
On to play Broadly speaking, a round is broken into 2 phases; a market phase which occurs in turn order and a work phase, which can be performed simultaneously by all players.
Endgame Play continues until either a player has built their 10th card or acquired their 12th good. In either case, the current round ends and 1 more round is played. Players then total the VPs from their buildings and the goods they gained. Points are tallied, highest score wins. Overall
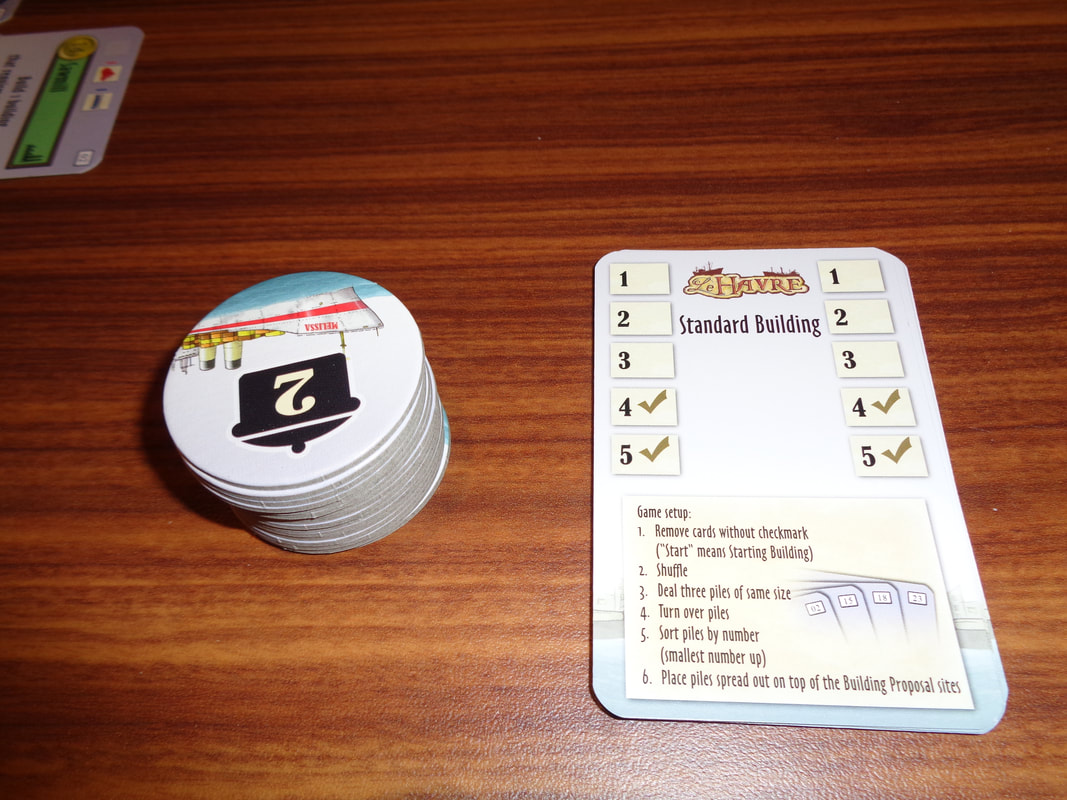
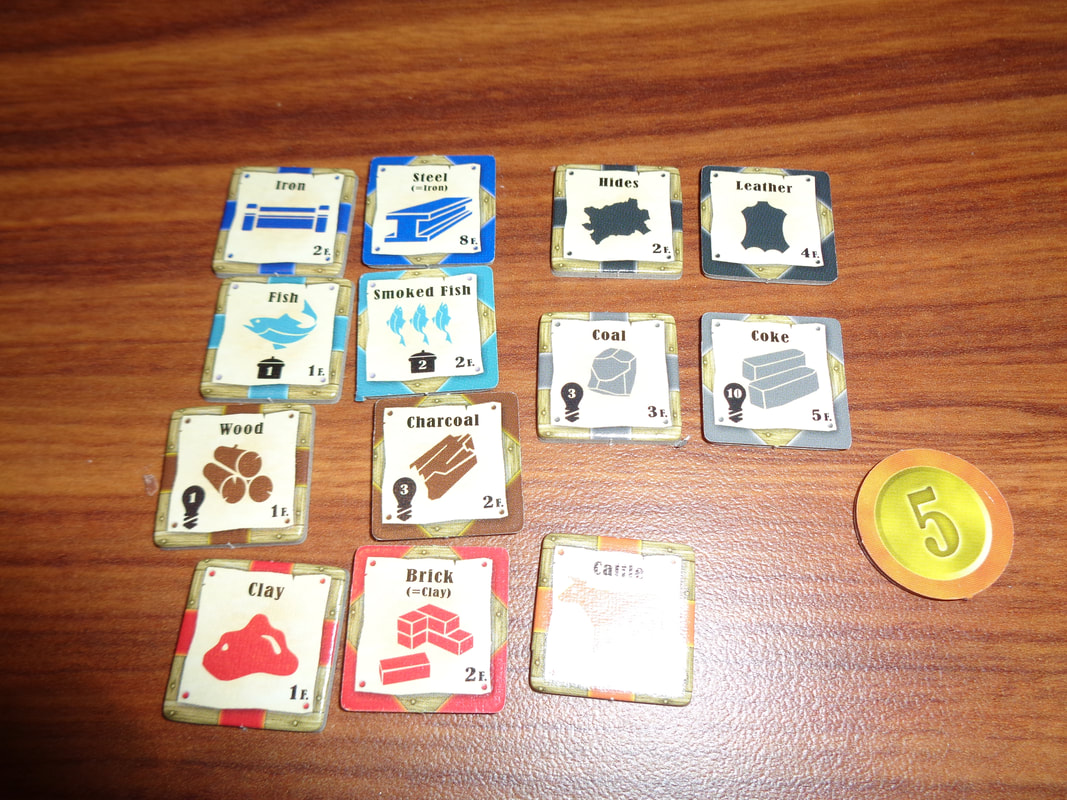
On a basic level, Fantastic Factories is mechanically pretty straightforward; acquire blueprints, acquire resources to build factories, use factories to acquire resources. It's a mid-weight engine building game that provides players with strong card synergy and offers a good selection of choices and avenues to follow for building that engine. I feel for the most part that players will want to focus on blueprints and building them, which is natural as this is what gets resources and VPs. Players shouldn't neglect the contractors who provide instant if transitory benefits for a relatively low cost. Applied at the right time, they can be game changers - provided they're available at the right time! Once again, it's a case of reacting to opportunities as they are revealed. There are a couple of there elements that make Fantastic Factories interesting. Firstly; dice rolling. Players will never be guaranteed getting the results and thus the resources they want. It means that players may not be able to build the card they originally wanted to and will need to adapt and react to the situation as it arises for optimal play. Of course it's always possible to play it safe and have all the required resources before getting a card, it's safer but it's also slower. Secondly; Fantastic Factories makes use of a hand-as currency mechanic. This forces players to think ahead, players may need to get blueprint cards just to discard for another building, or may be forced to discard a blueprint they still want in order to build another, it can be a tough decision. There's also some high level play, where it pays to watch what other players are working towards then wipe the marketplace to deny another a player a card they want. Fantastic Factories is a well balanced game, it's rules aren't particularly complicated and are easy to learn but also have depth that comes from recognising how to exploit the available cards that appear during the game to build their engine optimally and to maximum efficiency. The gameplay is solid and will appeal to fans of engine building games, which I am. so I guess factories can be fantastic! 16th December 2021 It's a Thursday and we're round Simon's for some gaming. The game of the night was Le Harve; have you ever had the urge to run a business on the French coast, construct buildings and ships, manage goods, feed your ever expanding workforce and avoid going into debt? If the answer is yes, then maybe, just maybe, Le Havre is the game you're lookng for. What's in a game? Le Havre uses a lot of components, I mean it, A LOT!
 The game board... so many resources!
The art in Le Havre is a bit of a mixed bag. The game board uses fairly simplistic and colourful illustrations that I personally found clear, distinct and looked quite evocative, the same is true of illustrations on the cards. However, the tokens used monochromic artwork which is a little old school. Having said that, it was always clear what they represented. Which brings me to iconography. Between all the different actions on all the building cards in particular, Le Havre uses a fair amount of iconography. Much of it is straightforward and apparent but some of it will require looking up in the rules. none of it game-breaking though. How's it play? Setup
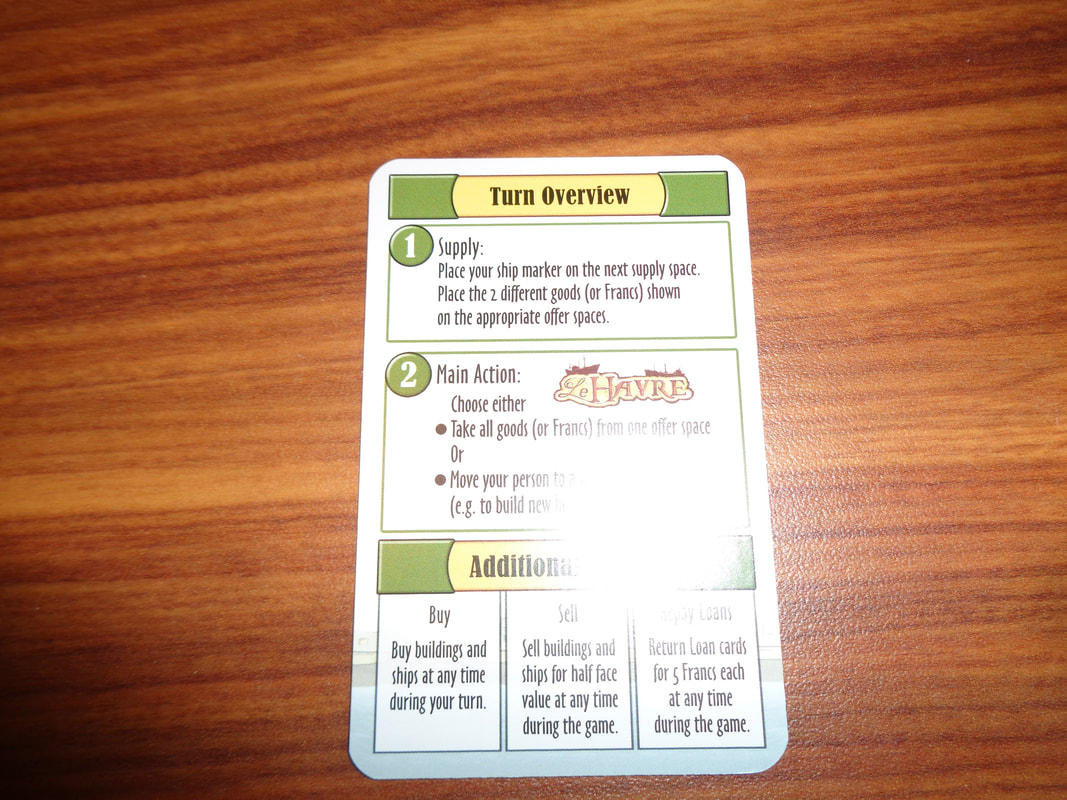
On to play Acquisition of wealth is goal in Le Havre and money becomes victory points at the game end. The game is played over a number rounds dependant on the number of players. In each round there are 7 turns, you will note that this means that players will not have an equal number of turns and this is by design. In their turn each player must perform the supply action and has a single main action they can also perform, in addition the active player can also perform buy/sell actions. When all 7 turns have been completed, there are some end of round actions to resolve before moving on to the next round. Free actions: These can be performed by the active player at any time.
Endgame When the final round is completed, all players have 1 final main action they can perform, after this, the game goes to scoring. Now each player calculates their wealth which are victory points. This is done by totting up the following: Value of all building and ships a player owns. Cash they possess. Every loan card a player still possess at the game end deducts from the total. Scores are tallied, highest score wins. Overall
When playing Le Havre players will need to pay attention to several areas of the game. Buildings are very important and players will probably spent a significant number of actions on them, not only do they have to think about to what they've built, what the town owns and what it available to build but what other players have built. Being able to make use of other player's building adds an interesting spin on the game. Players will need to adapt their strategy to the buildings that become available and while there is a ordering number for buildings, it's still no guarantee of the actual order they become available. That doesn't mean you can risk ignoring ships or acquiring resources of course, food is vital, probably the single most important thing in the game, you'll constantly need food otherwise you'll eventually be plunged into spiralling debt. Managing all the resources is also key and the game deliberately forces players to make the hard choice between using a building or taking a resource from an offer space. Resources tend to be relatively scarce at the start of the game and player's will want to optimise their strategies. Generally money can be used in place of some resources but it's essentially sucking up victory points and getting players closer to having to take a loan, something to avoid if you can. Players will need to also pay attention to the supply track and their position on it and when their turns will come up, as well as when resources will be moved into the offer spaces. Even though there were some more rules which I skipped over describing, I wouldn't call La Havre a very heavy game. I did find it a little fiddly with the occasional little rule popping up here or there and at the start I did find the game a little obtuse. Once you get over that hump Le Havre becomes a mostly straightforward game and proves a challenging game with meaningful decisions to make. I do have a criticism of Le Havre though - and that's the playtime, it's just too long! This is a known issue too as the rules contain a 'shortened' variant of the game! A 5-player game is expected to take 210 minutes over 20 rounds, that's 3 ½ hours and quite frankly, that's an underestimation. Think about it; 210 minutes over 20 rounds is 10 minutes 30 seconds per round and each round has 7 turns, that works out at 90 seconds per turn. Do you think that the kind of players that like this type of game spend just 90 seconds per turn? If every player spends 2 minutes taking their turn instead of 90 seconds, it would add 70 minutes to the playtime. 😭 It meant that the down time between turns felt like it lasted forever and at times was just more frustrating than fun or compelling, which was what I ultimately took away from it. If you like resource-management games that are slightly on the heavy side, then Le Havre might be worth a look, provided you can commit the time. To be honest, it's a game that rainy, chilled Sunday afternoons are perfect for. 21st November 2021 Sunday evening gaming Board Game Arena continued. The next game of the night was Chocolate Factory. Have you ever wanted to own your own chocolate factory? Since pretty much everyone's a fan of chocolate, why not? Unfortunately, there's no eating chocolate in Chocolate Factory, only a resource-management and light programming game instead. Caveat: we've only ever played Chocolate Factory digitally. What's in a game?
Since we've only played Chocolate Factory digitally, I can really comment on the qualty of the components. However, I can say what are there is, is quite nice and colourful, it has an early 20th century vibe to both the art style and subject of the art. The game uses a fair amount of iconography, luckily for the most part, it was pretty straightforward to comprehend. How's it play? Setup
On to play Chocolate Factory is played over 6 rounds - Monday to Saturday and each round has 2 phases, a drafting phase which goes twice in turn order and a factory phase which can be played out simultaneously. Drafting phase
Factory phase Each player will now have a factory part and a employee card. Factory parts are added to the player's board in one of the spaces above or below the conveyor belt spaces, a factory part can be used to replace an already existing factory part. Employee cards serve 2 purposes, firstly they grant the player some sort of bonus and secondly, they allow the controlling player to sell chocolate to the department store they work for. Unlike factory parts, employees only stay in play for 1 round. So how does the factory phase work? The factory phase has 3 shifts and in each shift players first take a bean and place it on the conveyor belt tile that's about to enter into the factory. Then each player must push their conveyor belt tiles along 1 space from the left to right so that the tile they placed a bean on goes into the factory, it's also possible that a tile will be slid out of the exit on the other side. Anything on that tile is placed into the respective player's storeroom. Once this is done, the factory parts can be used, each part costs mostly 1 but sometimes 2 coal to activate. A factory part can only be used on resources adjacent to it. For example the basic roaster factory party will turn a bean into coca, a upgrader factory part will change any resource into the next level of resource (E.g., coca into chocolate fingers.). Converters will turn chocolate into wrapped chocolate or boxed chocolate and so on. There are some limitation here, each factory part can only be activated once per shift. Once the 1st shift is finished, the 2nd begins, another tile is placed at the entrance to the factory with a bean on it and then the conveyor belt is pushed along another space and factory parts can be activated (Or reactivated.). Thus the conveyor belt will move 3 times a day. Selling When all 3 shifts have been run, players must sell chocolate, they can only keep 2 pieces in their storeroom between rounds, any excess is lost and players think ahead to avoid losses! Chocolate can be sold to corner shops and each one has their own demands. Like the factory phase, selling can be completed simultaneously. When selling to corner shops, they have 1-3 tiers of demand that must be met depending on their size and lower tiers must be completed before the higher ones. When a tier is completed it is immediately scored, when all tiers are scored the card is discarded and the player must draw a new corner shop card or any size they want. Selling to department stores is a little different. Firstly a player can only sell to a department store that matches the employee they drafted. Secondly, when fulfilling the demands of a department store, points are not immediately scored, instead a marker in the player's colour is moved along the 9 spaces. Once selling is concluded, a new round is set up, coal is distributed to players and new factory part and employee cards drawn, then the new round commences. Endgame Play continues until the 6th and round is completed, then the 5 department store scores are calculated. Whoever has completed the most corner shop cards earns a bonus Whoever has their marker the furthest along scores for 1st place, if the next player is at least half as far along as 1st place they score for 2nd place and if a 3rd player is half as far along as 2nd place, they score for 3rd place. Furthermore, players can earn a bonus for selling chocolate to 3, 4 or all 5 department stores. Finally, remaining chocolate and coal can earn points. Points are tallied, highest score wins. Overall
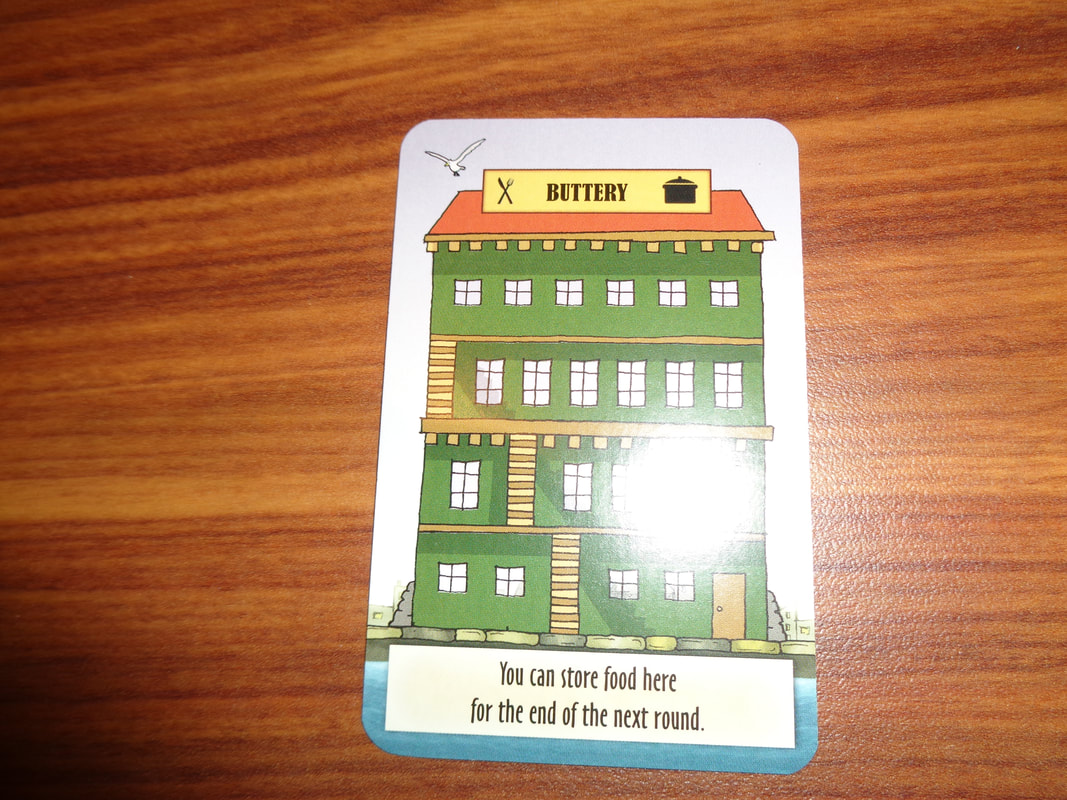
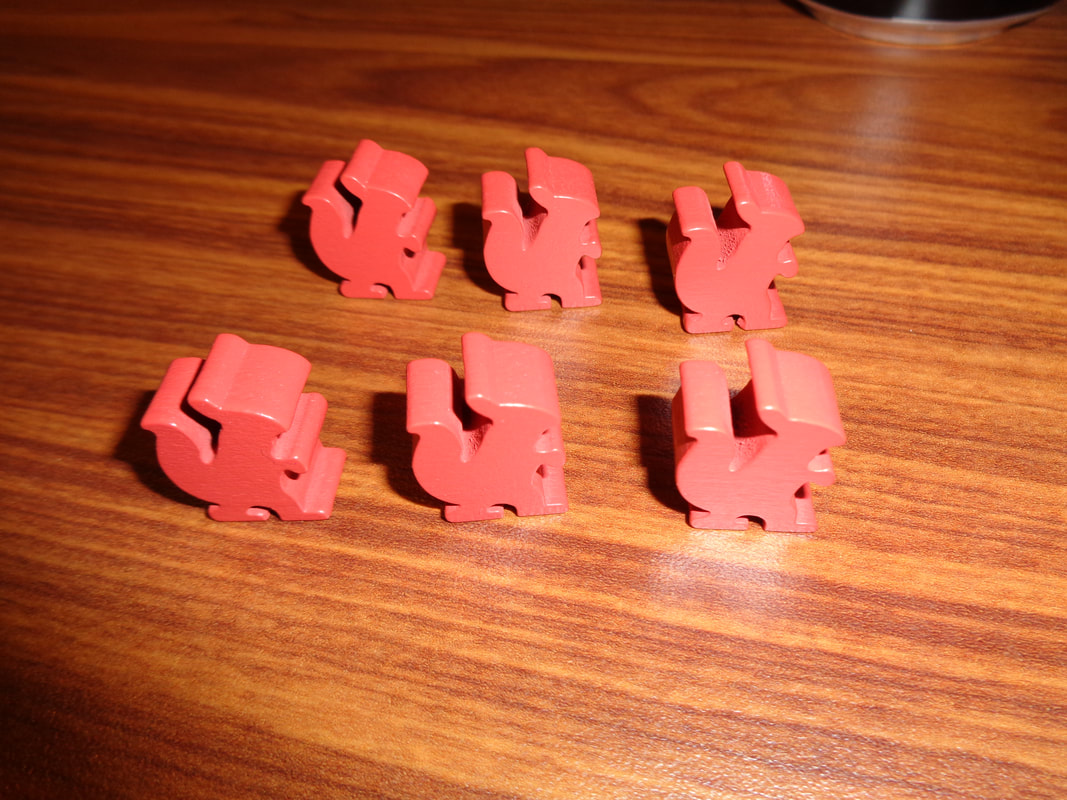
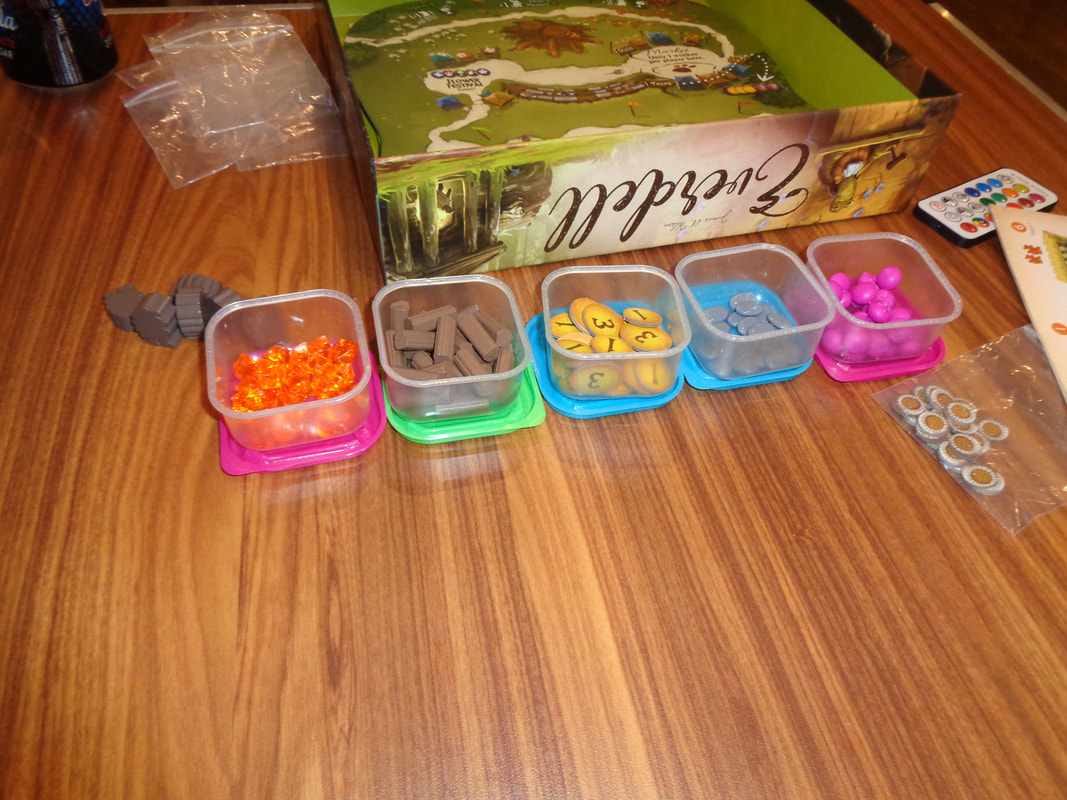
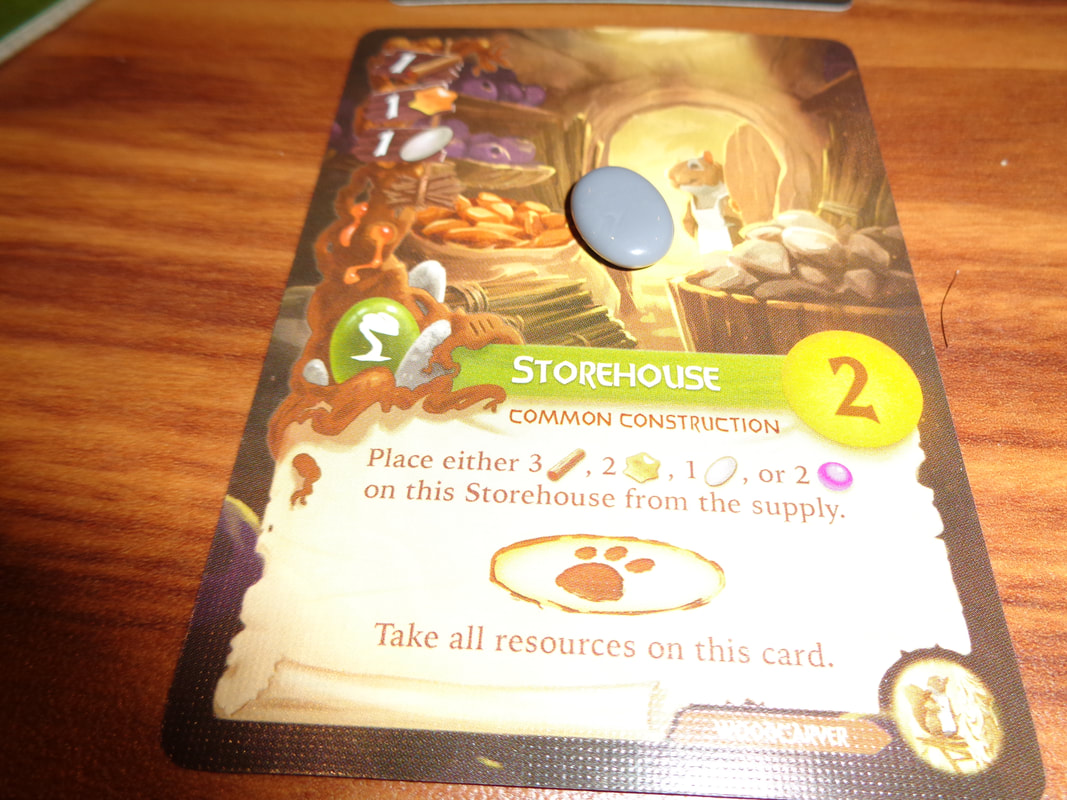
Chocolate Factory gives players several important factors to think about. Firstly, during the drafting phase, players must prioritise what they think is important to them, do they want a factory part more than an employee, they'll get both, but not necessarily in the ones they want if they wait to the 2nd drafting phase. Cards that players draft can dramatically change the situation for players. Most obviously are employee cards which determine which department store a player can sell chocolate to. If a player is geared to sell the kind of chocolate a particular department is demanding, then getting the employee that gives you access can be paramount. This is even before considering which benefit the employee card also confers on the controlling player. Factory parts will form the core of the player's ability to produce and sell chocolate, getting a part that wasn't wanted or needed will force player to reconsider their strategies for at least one round. Unlike employee cards, factory parts can stick around for the entire game, although they can be replaced and since players will acquire 6 factory parts and only have 5 spaces in their factory, it means something will have to go. Where these parts are placed can have a significant impact. Place them too far to the right and it'll take a while for resources on the conveyor belt to reach them. Put them too far to the left and players risk screwing up their engine. Putting factory parts in factory is an exercise in optimisation. Speaking of optimisation, the game has a fairly unforgiving action economy. It's obviously a deliberate design decision, but there's never enough coal. Players start with 5 coal in round 1, they'll have 3 factory parts to activate - and that's over 3 shifts! Even in round 6, when each player can have a full factory, they only get 10 coal each, they'll on average only be able to activate 3 or 4 of their parts per shift. If forces player to make meaningful decisions which is always good and also makes them think across 3 shifts instead of 1, but it also feels a little frustrating and uneventful when half of the engine you've been building isn't used in a shift and maybe isn't used in the entire round. Scoring also presents players with choices. Each round, every player will have the opportunity to score their 3 corner shops and work towards scoring 1 of the 5 department stores. Corner shops are pretty straightforward to manage, the only wrinkle being that their demands must be met in tier order. It means that players will sometimes need to adapt to changing demands that a corner shop might present. Department stores are a proposition that's a little more interesting though. Because scores are based on relative positions between players, it can lead to some interesting outcomes. E.g., if a player sells just 1 item to a department store and no one else does then they'll get the full reward for 1st place but conversely, if they sell 5 items to a department score and another player sells more, then they'll get less. This adds an extra option or strategy to the game and unlike some tableau-engine building games, it becomes beneficial to watch what other players are doing and what they're producing and who they're selling it to. And while I feel that the majority of player's victory points will come from corner shops, department stores can't be neglected. They exist in a sweet (sic) spot where they can tip the balance in a player's favour. I'm kind of conflicted about Chocolate Factory, it has some solid mechanics that present players with choices, I particularly like how players can chose where to sell their chocolate to maximise their profit. But parts of it are also a little unexciting, where the effort creating an engine feels greater than the rewards it provides. I would have no problem playing Chocolate Factory again, but not too often. I think occasionally, it would be a good change of pace 12th November 2021 It's a Friday night and we're round Simon's for some impromptu evening gaming. “I beg your pardon,” said the Mole, pulling himself together with an effort. “You must think me very rude; but all this is so new to me." Well, Everdell is new to me, mixing various game mechanics and lush anthropomorphic artwork. What's in a game? Everdell is a game that has a big footprint and a lot components.
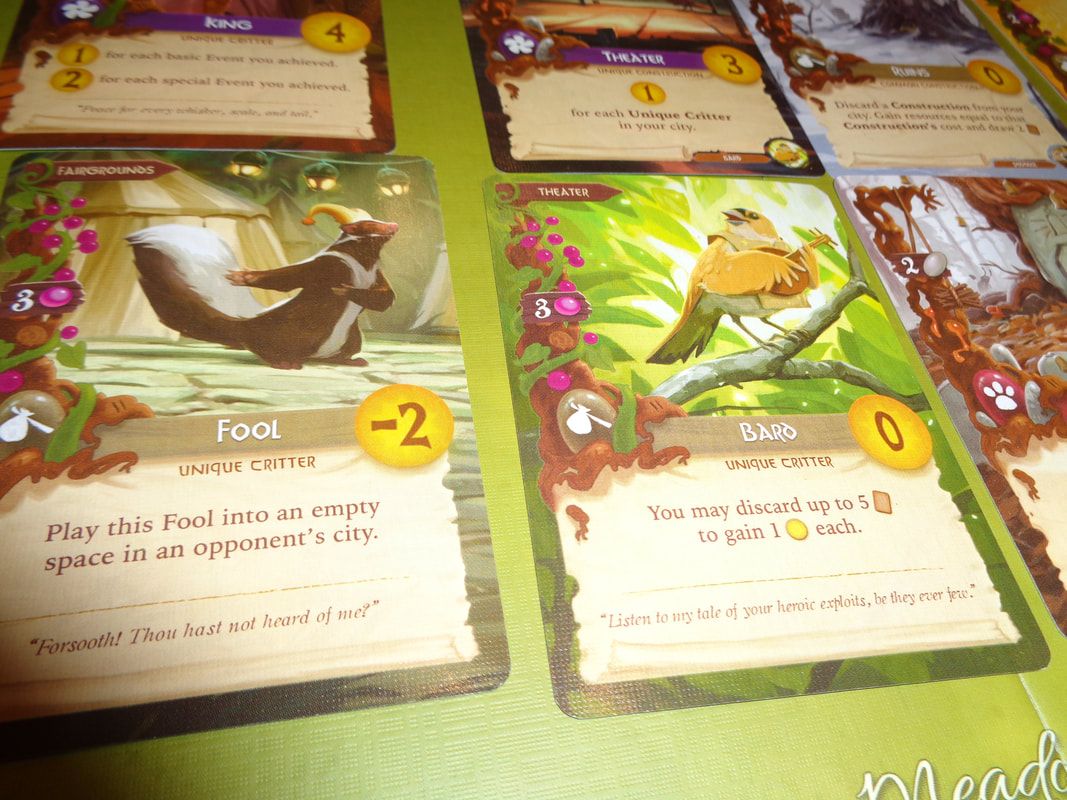
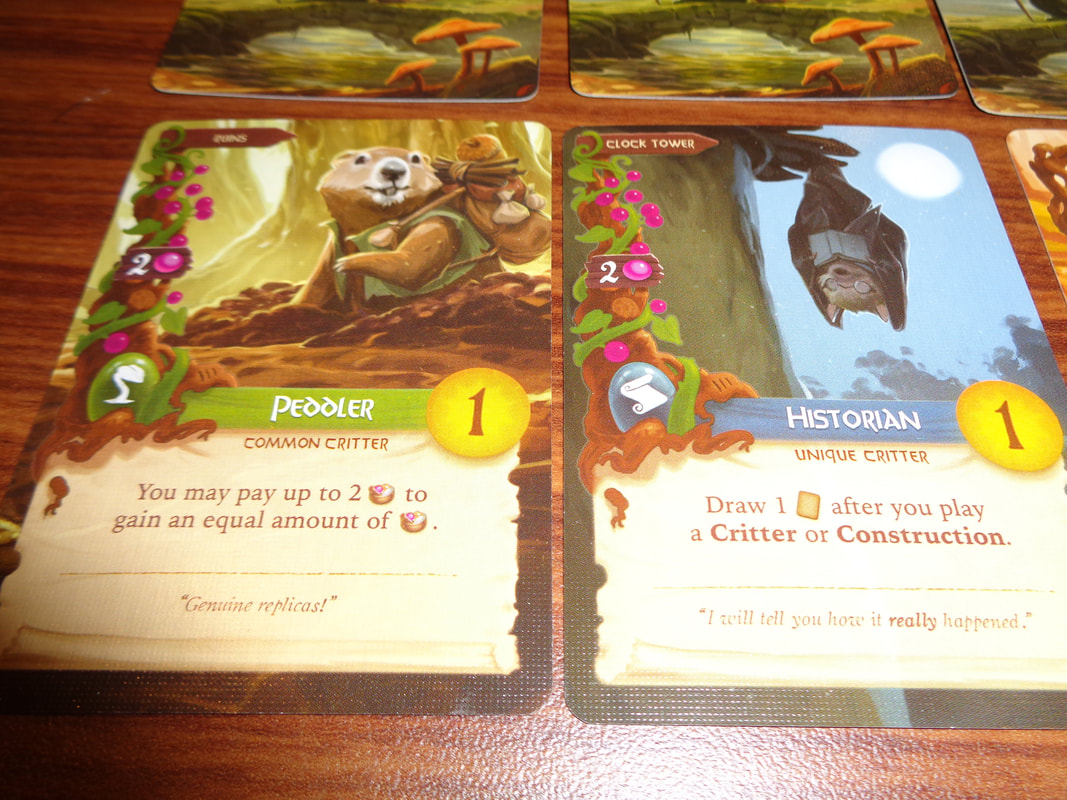
The components are well made and the attention to detail for the most part is excellent. In particular, the resources look great as do the individualised meeples. We didn't use the tree but it's a nice touch Even if the anthropomorphised artwork is not to your taste, it's hard to fault the quality of the artwork and rich, warm colour palettes used throughout on the board and all the cards. Iconography is where the game could be improved though. Sometimes, the text used on the critter and construction cards is perhaps a little too small as are the symbols and sometimes, to maintain the game's aesthetic, you'll encounter a small around of tiny writing surrounded by a lot of unused space. Having said that, it's a quibble, not a gamebreaker and doesn't really detract from the game's quality How's it play? Setup
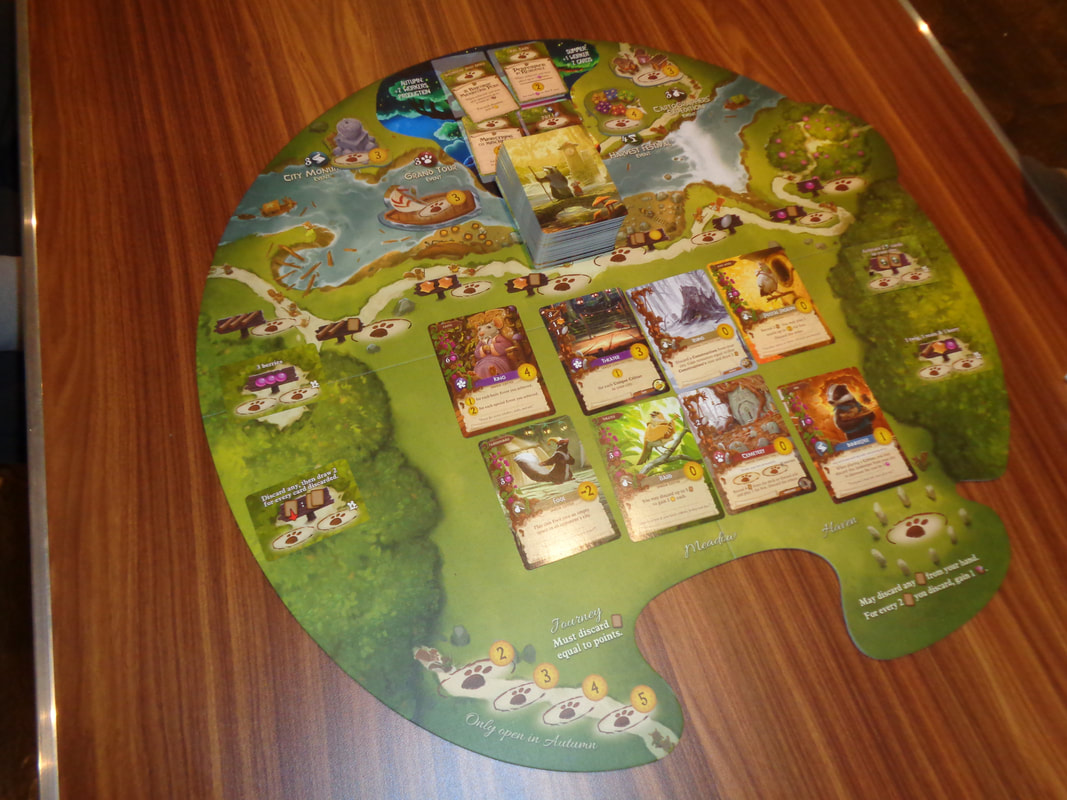
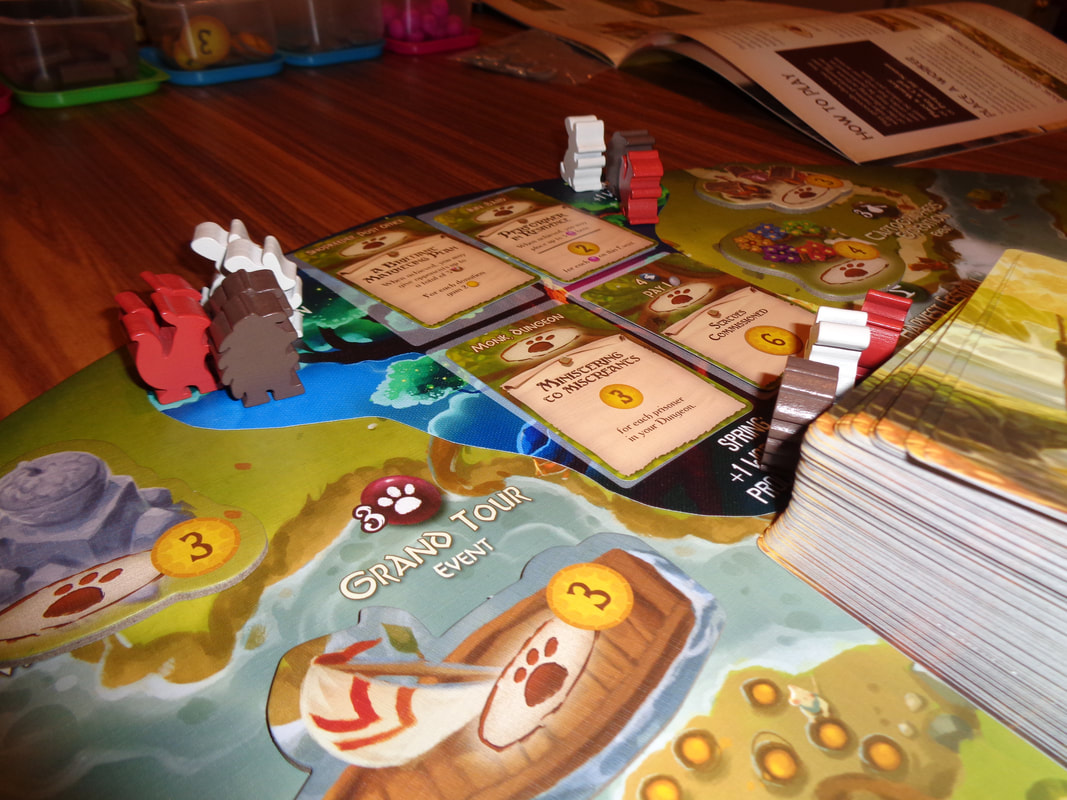
On to play The objective in Everdell is to construct the best city, that is the city that scores the most victory points. Players achieve this by playing critters and constructions into their tableau. When somebody becomes the active player, they can perform 1 action from a choice of 3 and then player progresses to the player to the left. Players continue performing actions until they have to or choose to stop; in which case the season has ended for them. Everdell is played over 4 seasons.
Endgame When the 4th season is completed, then the game is over. Victory points can be scored from a variety or sources, including cards, tokens and events. Points are tallied, highest score wins. Overall
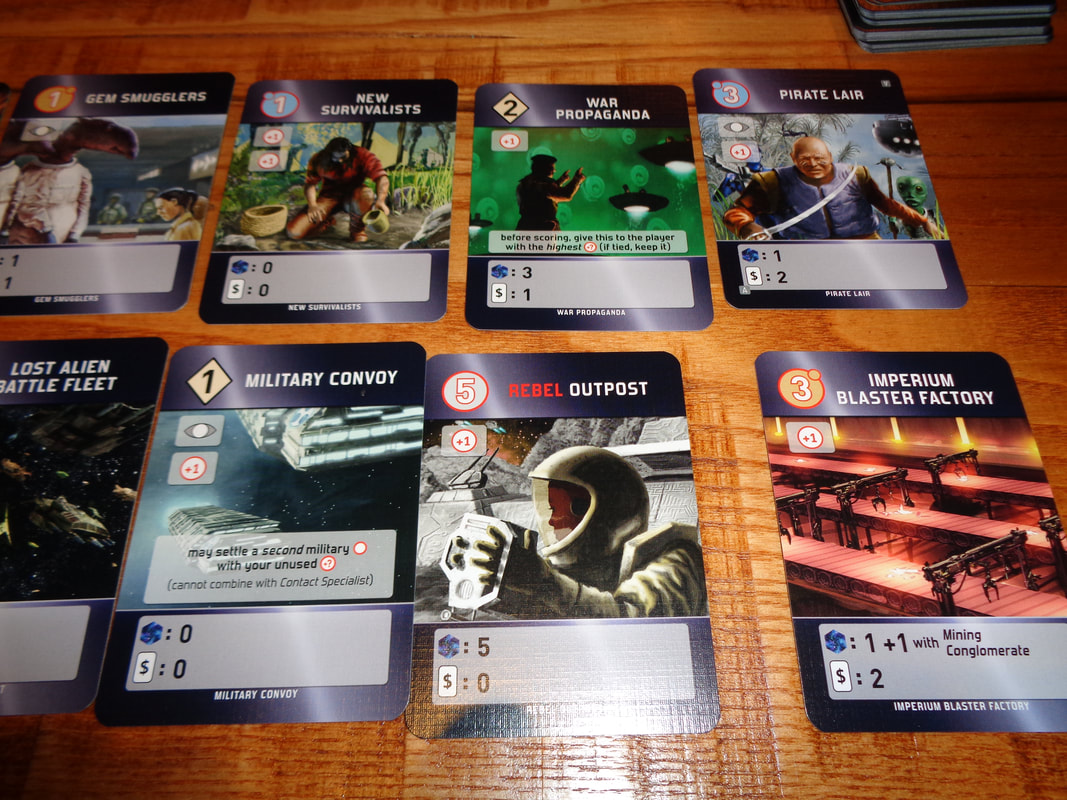
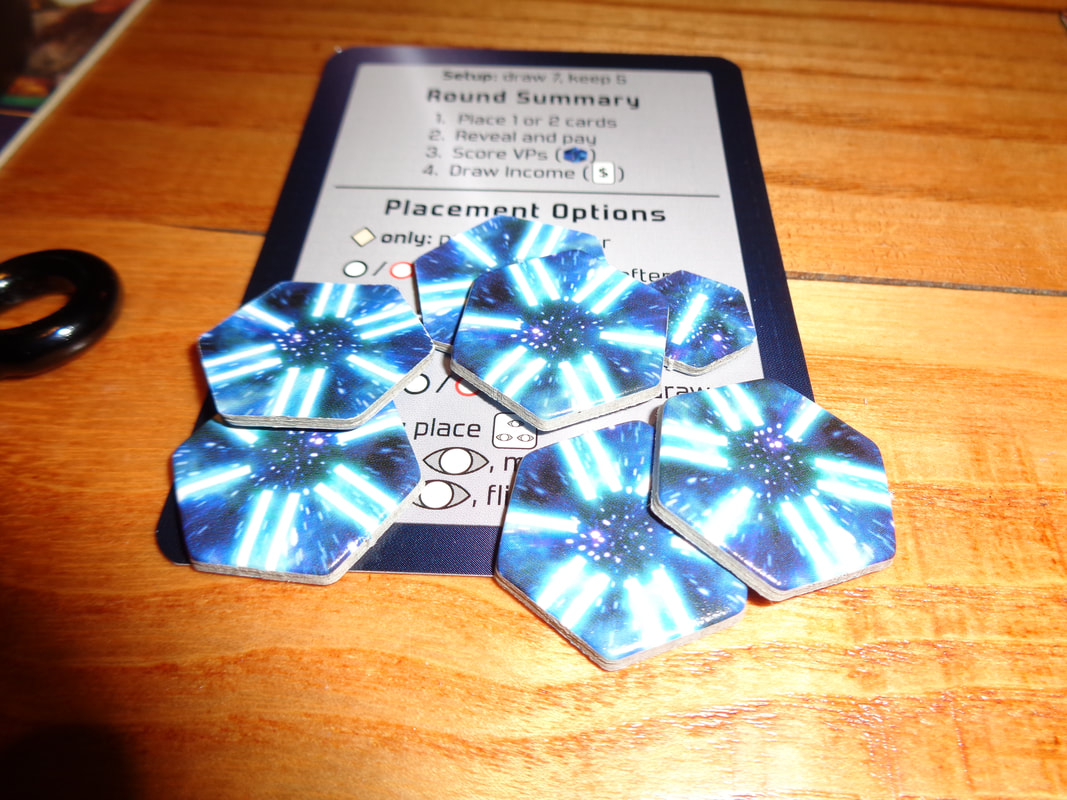
It's obvious that a lot of thought and care has gone into the game's presentation and charm. It's one of the best looking games I've seen in a while and I always appreciate the extra effort committed to a game. Hmmm, what else to say about Everdell; for the most part, it's initially a pretty solid, straightforward game, although it feels a like a bit of a slow burner. While the game's cards provide players with a variety of approaches choices and plays to make. Having said that, the game's action-economy is actually quite tight, almost too harsh. E.g, in the 1st season, players will only have 2 workers to gain resources in order to play cards, it means players will have to pay close attention to optimising their plays and actions. card synergy can make a big difference. It gave me the feeling that players will need to know what they're doing from their first action in order to play Everdell competitively. Additionally, in comparison to other tableau building games, it feels like the tableau in Everdell provides much more limited benefits that lacks the satisfaction putting together a good tableau. At best, production cards are reactivated once every other season - or round - but because players have multiple actions in a single season, it means a lengthy gap before those reactivations. This is something players will need to consider when playing cards. All of this makes the choices in Everdell important - which is the sign of a good game. Ultimately though, I just found it a little unexciting and unengaging and while it wouldn't be my first choice, I'd have no qualms about playing Everdell again. 5th October 2021 Tuesday night is here and the Woking Gaming Club is at The Sovereigns in Woking. The first game of the evening was Jump Drive, whisk through the Galaxy instead of racing through it! Jump Drive is a streamlined version of the great Race for the Galaxy and like it, shares a setting with games New Frontiers and Roll for the Galaxy. What's in a game? Jump Drive uses 2 different types of cards which will be familiar to players of Race for the Galaxy. All cards have a cost and may also have icons for exploring, genetics or military, they may also powers, victory points or income.
Jump Drive's art style matches that of the other games in the series and at least some of the artwork is recycled and as I've said before, it's not a bad thing as it lends them all a consistent look. The game's iconography is for the most part straightforward and certainly less intimidating than Race for the Galaxy. How's it play Setup
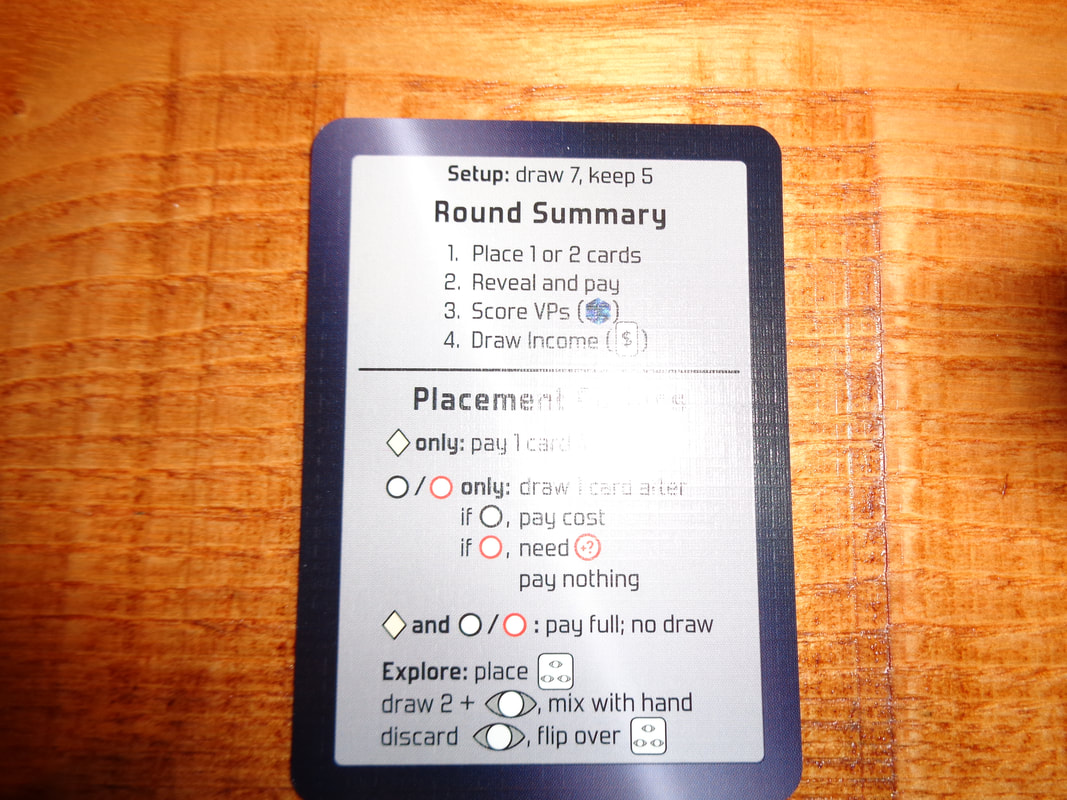
On to play Rounds in Jump Drive are played out simultaneously over 3 phases and players have choice from 3 actions, 2 of which can be completed in 1 turn.
Endgame When any player's score reaches 50+ VPs, then the game will end with the current round. All players should calculate their VP total. Points are tallied, highest score wins.  My tableau at game end. Overall
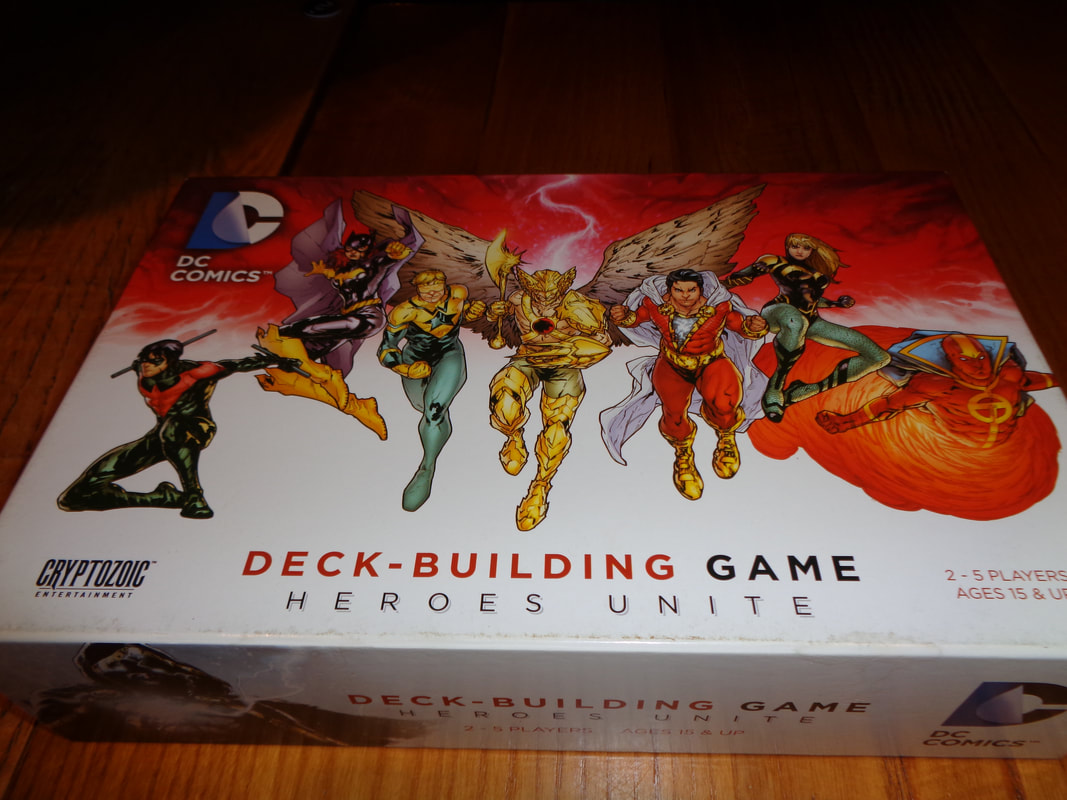
Jump Drive plays very quickly and the game can be over in a handful of turns; at the start 50 victory points may seem like a lot but thanks to the exponentially increasing scores, players will suddenly find themselves hitting the endgame. They cannot afford the luxury of meandering in their decisions or make frivolous choices. Players must learn to be ruthless with spending their hand of cards, keeping more than 1 or 2 cards back will really slow them down, this is even more true in Jump Drive than Race for the Galaxy as Jump Drive provides players the choice to put down 2 cards a time and that double cost can easily empty a players hand. Sure, it's fine and prudent to play one card at a time but if opponents are putting down 2 at a time instead, they risk streaking ahead and it may be necessary to keep up with them! Jump Drive is not only about engine building, it's about optimisation, players have try an exploit the opportunities given to them instead of searching too hard for them. It's also impressive how Jump Drive manages to distil so much of Race for the Galaxy into a streamlined, more accessible and quicker iteration. Pretty much everything that makes Race for the Galaxy a good game is is present here: The hand of cards as currency, hidden choices, engine building and synergy and so on. Jump Drive is an enjoyable experience, reasonably easy to learn with a quick set up and play time that provides players with meaningful choices, a game well worth trying: If you like Race for the Galaxy, you'll find a lot to like here. 21st September 2021 The final game of Tuesday gaming with the Woking Gaming Club in The Sovereigns in Woking was DC Deck Building Game: Heroes Unite, which is both quite a mouthful and not pirate themed game, unless of course there's a Pyscho-Pirate card in there somewhere or something? So apparently there are several differently themed DC Deck Building Games out there and Heroes Unite is one of them, it is both an expansion to the core game and a standalone game. All these deck-builders make use of a game-engine called the Cerberus System. What's in a game?
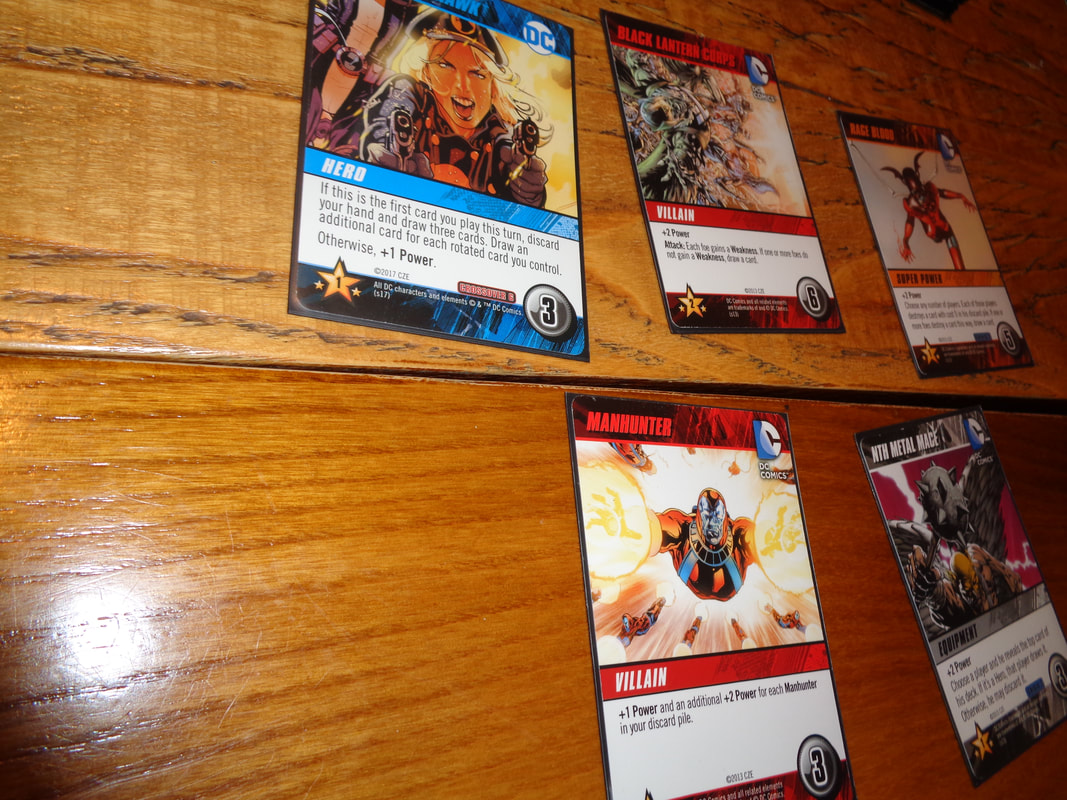
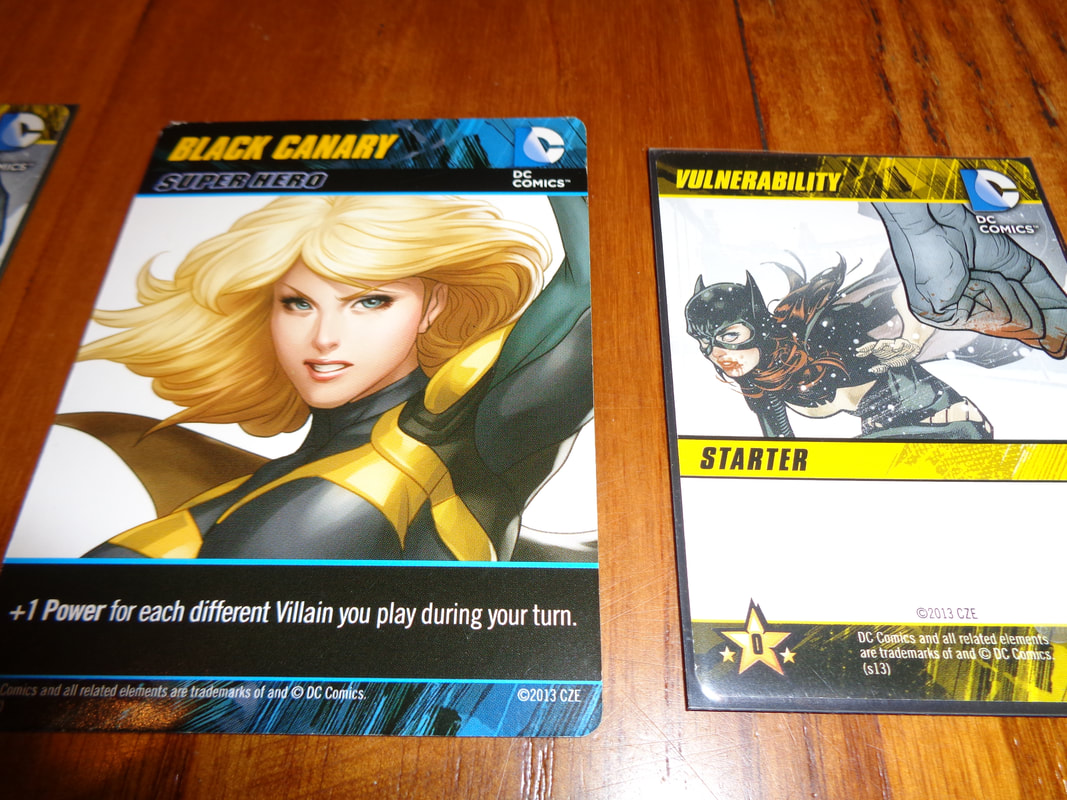
The cards are standard quality playing cards as you'd expect. It's also no surprise that they're all decorated with fairly high quality colourful comic book styled artwork, although I'm uncertain if it's been sourced from actual comic books. There's little iconography, most of the game's information is provided via text on cards which is mostly quite clear. How's it play? Setup
On to play
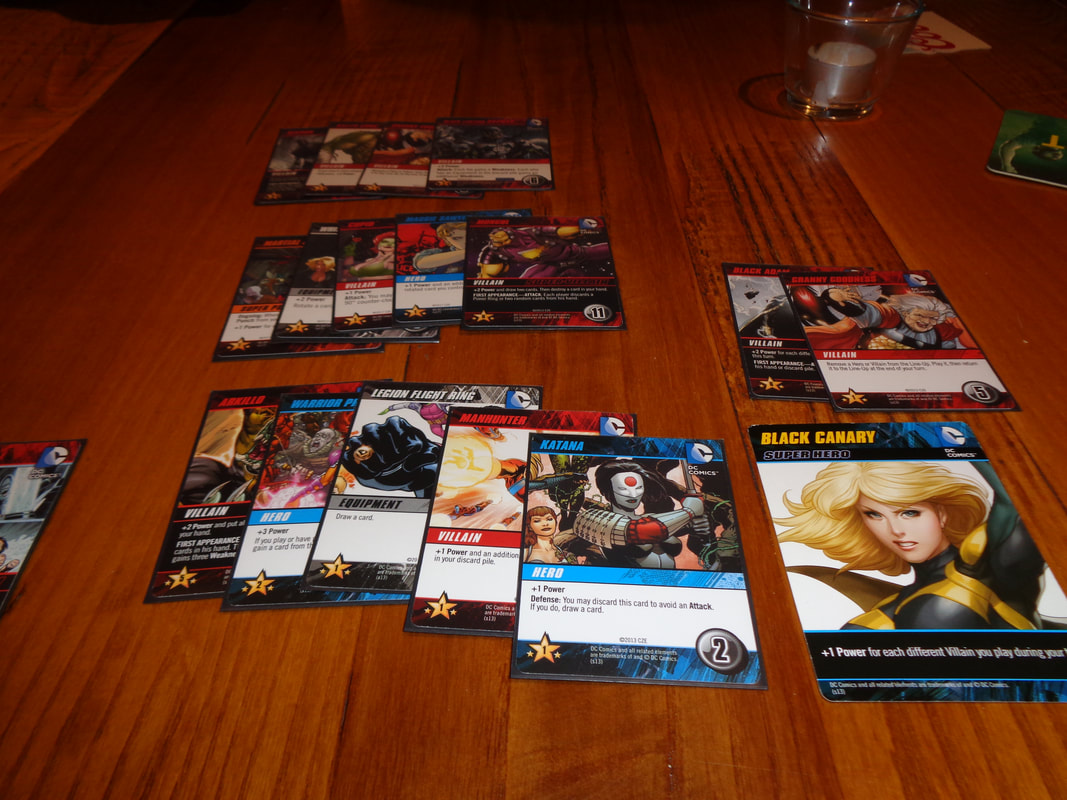
Endgame Play continues until 1 of the following conditions is met. There are no more supervillain cards to flip over, i.e., there are no more supervillain cards. Or. There are not enough cards to fill the line-up with 5 cards, i.e., the deck has run out. When one of these conditions have been, all players put all their cards into their discard stack. Players then total the victory points they get from cards and deduct 1 point for each weakness card they have. Points are tallied, highest score wins. Overall
Hmm, what to say about DC Deck Building Game: Heroes Unite. Players will look to use their cards to generate currency that allows them to buy more cards that generate even more currency, eventually acquiring the most powerful cards confer extra abilities and grant victory points. It's pretty standard deck-building fare which contains mechanics and elements that will be familiar ground if you've played other deck-builders, which is to say the core mechanic is pretty solid, enjoyable fun and generally always provides players with meaningful choices to ponder. However, the game adds a few new elements to the traditional formula. The addition of a line-up mechanic is a definite positive, it forces players to adapt to whatever cards become available instead of falling back on tried and tested strategies. Even so. it's still quite easy to quickly create combos and it can be very satisfying to do so; but perhaps it's too easy I was told Ant, the game's owner that sometimes a player gets to build up momentum much quicker than other players and they end up creating more and more combos, allowing them to (In Ant's words.) 'steamroller' their opponents. Heroes Unite also provides a slightly greater focus on targeting players and attacking, both by players and supervillains! It lends the game a slightly different, more antagonistic feel and offers a extra avenue to strategy to pursue. It's hard to fault Heroes Unite but at the same time and apart from the theme, it doesn't really stand out from the crowd. If you don't own a deck building game and fancy getting one, you could worse then getting Heroes Unite, it's a good a place to start as anywhere. If you want a superhero themed deck builder, then this is worth a look. If you want a DC Comics superhero themed deck builder, then it's definitely worth a harder look. If you want a DC Comics superhero themed deck builder where you play as side-kicks and 'B-listers', then this really is the game for you! 5th September 2021 Sunday night gaming on Board Game Arena continued with New Frontiers. Galaxies: The New Frontier, these are the games of the website of 3 Spellcaster and a Dwarf. Dodgy puns aside, New Frontiers is a sibling-game to Race for the Galaxy and Roll for the Galaxy and shares the same universe. Players will find many similarities between the 3. Caveat: We have only ever played the digital version of New Frontiers What's in a game? Unlike the previously mentioned games, while New Frontiers is a board game, players of the other games will recognise many elements here.
Like its siblings, New Frontiers uses an abundance of symbols and icons which can be daunting for new or inexperienced players. How's it play? Setup
In New Frontiers, turns are carried out according to the turn order as shown on the priority board. Actions are not simultaneous. On their turn, the active player chooses a single action tile and performs the action on it, all other players may follow, in other words also perform that action. However, there is a bonus that only the active player gets for triggering a tile. Each tile can only be used once per round, thus only 1 player benefits from the bonus a tile may confer. Furthermore, actions are actually performed in the order they are selected, there are no numbered phases in New Frontiers. There are 7 actions that can be chosen, most of these will be familiar to players of Race for the Galaxy or Roll for the Galaxy.
Now a new round begins, possibly with a new player order and all the action tiles are now selectable again. Rounds continue until the endgame conditions are met. Endgame Once the endgame is triggered, the current round ends and points are scored. There are 4 ways to trigger the game end. Settlements: A player adds a 7th settled worlds to the game board. Developments: When the 11th or 12th development space on a player's board has been filled with a development. Victory points: When the supply of victory points is depleted. Colonists: When the supply of colonist meeples drops lower than 5. Points come from settled planets and developments bought, some developments offer additional routes to earn point and finally, victory points are counted. Points are tallied, highest score wins! Overall
Players of the previous 2 games will find a lot here instantly familiar. New Frontiers contains the same mix of intricate and mechanical interdependencies between planets and developments that feature in the other two games which allow players to create varied combinations of engine building and combinations. There are a couple of mechanics New Frontiers does differently, particularly the action mechanic, firstly there's no set action order for actions to occur and more importantly, only 1 player can benefit from an action's bonus per round. If a player really needs a bonus action, it can make turn order very important. The existence of a turn order is new as well. When playing New Frontiers, there are a couple of approaches always available to players, building their tableau or acquiring victory point tokens, or maybe getting one of the 9-point developments and working towards exploiting for points in the endgame. However, players will need to adapt to which planets become available to the, as unlike developments which use a drafting mechanic, planet acquisition will be to some degree, random. But here's the thing; the additions New Frontiers brings to the table don't add anything to the game other than extra complexity, there's no extra depth or strategy, just extra resources to manage in place of the hand-as-money mechanic that makes Race for the Galaxy such a good game. Yet somehow, it even seems to have a shorter, less engaging play time? You see, in Race for the Galaxy and Roll for the Galaxy, there are 2 ways to end a game; a player can complete their tableau or deplete the supply of victory tokens, both of which require players to play well or at least fast/better than other players. But in New Frontiers, it's possible to end the game by simply triggering the Settle action multiple times. It felt hugely unsatisfying way for the game to end. Ultimately, New Frontiers is a good game, it has the pedigree of its predecessors, but it's also too familiar and too similar to Race for the Galaxy, which is in my opinion, hands down the better game. I would choose it over New Frontiers every time. |
AuthorI play, I paint. Archives
March 2024
Categories
All
|


 RSS Feed
