3 Spellcasters and a Dwarf
  • Home
  • Special Effect
    • Special Effect
    • Return of The Indiana Jones Charity Globe Trot
    • Bard's Tale Challenge
    • Fighting Fantasy Challenge
    • The Indiana Jones Charity Globe Trot
    • Mirkwood Charity Walk
    • Middle-earth Charity Walk
    • Dungeon Daze
  • RPGs
    • The One Ring
    • The Evils of Illmire
    • Beach Patrol
    • The Surrendered Lands
  • Game Blogs
    • RPG Blog
    • Gaming Blog
  • Painting Blog
  • Contact

Gaming Blog

Azul - First Play!

1/5/2022

0 Comments

 
1st May 2022

It's a Sunday and we're logged into Board Game Arena for an evening of gaming.

Azul; not a game about a villainous god-entity from Ghostbusters but actually a game about creating mosaic, decorative wall patterns with multi coloured tiles.
My friend's a plasterer, wonder if he'd be good at this!

Caveat: We've only ever played Azul digitally.

What's in a game?
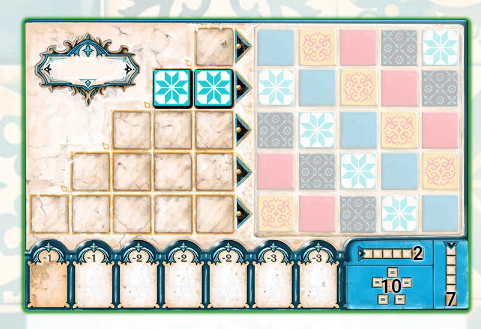
  • Player board: The player boards are double-sided with different shapes on both sides. Most of each player board is taken up by two sets of grids.
    Pattern lines: The left hand grid is a sort of triangular shape composed of rows of squares. The top row has 1 square and each row below increases the count of squares by 1. Thus the 5th and final row consists of 5 squares. These lines are known as the pattern lines
    Wall: The right hand grid is a 5x5 size with coloured/patterned squares. There are 5 types of square and each row has one of each type. Additionally, going downwards, each row has those types of square in a slightly offset position so they appear to 'descend' diagonally. The relationship between the 2 types of grid is key to the game. The wall is where players score VPs.
    Floor line: Along the bottom of the player board is a row of spaces labelled with minus values, e.g., -1, -2 and up to -3.
    Score tracker: Finally, along top of each board is an individual scoring tracker for each player.
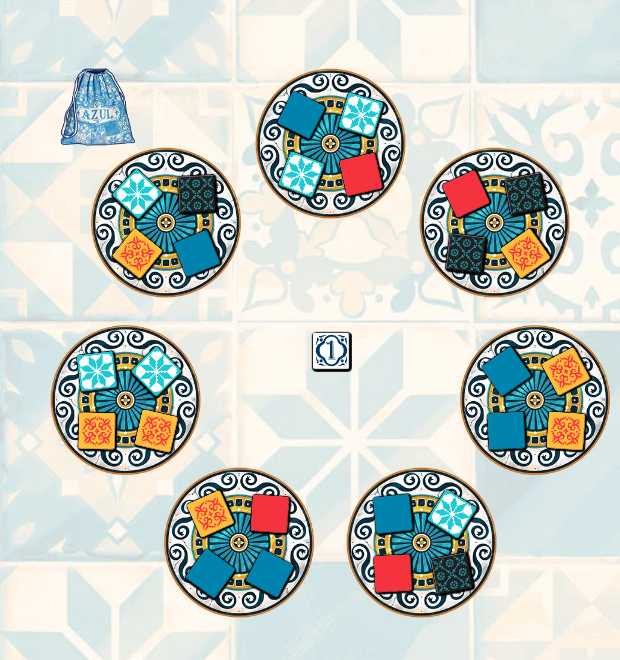
  • Token mats: There are 9 of these mats and they are each decorated in elaborate swirling patterns.
  • Token/tiles: There are 100 tokens which represent the game's wall tiles, 20 each in 5 types with patterns that match the patterns on the square grid on player boards.
    First player token: There is also a first player token, it has no intrinsic value and will actually cost players VPs!
  • Bag: The physical game comes with a bag which is used to blindly draw tokens.
The game's only artwork are the patterns which appear on the tokens. It does it's job though, between bright colours and unique images, the 5 sets of tokens look distinctive from one another.

Azul doesn't make use of icons and the relationship between tokens and a player board is clear.

How's it play?
Setup
  • Board: Give each player a board.
  • Mats: Put out 5-9 mats in a circular shape according to player count. Then place the first player token in the central area between the mats. All of this constitutes the game's drafting area.
  • Tokens: Put all of the tokens into the bag and give it a good shake.
  • First player: Determine a starting player.

On to play
In Azul, the player's objective is to place tokens on to their respective spots on the wall grid of their player board, which scores them VPs.
This is done by filling in the horizontal lines in the pattern lines grid; players must collect tokens of the type they need and place them in the spaces on the respective horizontal line. Depending on the line, it will require 1-5 tokens to fill a line. When a line is filled, one of those tokens can be placed in the matching space on that line at the end of the round.
All tokens will score 1 or more VPs when placed, tokens can also score again at the game end.

Azul makes use of a traditional turn order, with the active player performing their action (Which will involve taking 1 or more tokens of the same type.) before play progresses to the player on the left.
  • Round start: The first player should blindly draw tokens from the bag and place them on the mats until each mat has 4 tokens on it. With 5-9 mats there will be 20-36 tokens used.
  • Collect tokens: The active player must draft tokens from one of the mats or the central area (At the game start there won't be anything in the central area to draft.).
    The player chooses which type of token to draft and must take all the tokens of that type from the chosen mat or central area.
    From mat: If the tokens are drafted from a matt, the any tokens remaining on that matt are moved into the central area.
    From centre: If tokens are drafted from the central area and the first player token is also there, then that is taken as well.
    The first player token cannot be played into the lines and instead goes into the floor line. It means that the player will go first in the next round but will lose a point as a consequence.
  • Place tokens: Now the active player must place their tokens into the pattern lines grid on their player board. There are several restrictions here.
    • Tokens can only be placed into a single line.
    • Tokens may be placed into any empty line or a line which already contains matching tokens.
      Any excess tokens remaining after filling a line are sent to the floor line.
    • Tokens cannot be placed in a line already containing different tokens.
    • Tokens cannot be placed in a line where the matching token has already been added to the wall grid. I.e., if a line had been previously filled and emptied of a particular type of token, in essence a line can only be used once for each type of tokens and it cannot be repeated.
    • Finally, the active player may choose to put the tokens into the floor line.
  • Next player: Once the active player has placed their tokens, play progresses to the player on the left.
  • Round end: Play continues until all the tiles from the drafting area have been placed on to player boards, then the  round is over and the following end of round actions occur for each player:
    • Resolve tokens: A line in the pattern lines which has been filled is considered resolved. This means that one of the tokens from that line is placed on it's corresponding spot on the same row in the wall grid, any remaining tokens are returned to the bag.
    • Scoring tokens: When a token is moved to the wall grid, it is immediately scored. How much it scores will depend on it's position relative to other tokens on the wall grid.
      If the token is not adjacent to any other tokens (The very first token placed on the wall grid for example.), then it scores 1 VP.
      If the token has been placed adjacent to 1 or more other tokens, it forms a link with them and scores more. For each horizontal token it is adjacent to in a link, an additional VP is scored. The same is true for a vertical link.
      If multiple rows were completed in the same round, then multiple tokens can be scored.
    • Floor line: Each token that has been placed in a box in the floor ​line costs the VPs listed, this is cumulative. E.g., the first 4 boxes are 1-, -1, -2, -2, if they are filled, this would total -6 VP. Once penalty points have been calculated, return the first player token to the centre and the other tokens to the bag.
  • Next round: Whoever had the first player token is now the first player for the next round which they begin by blindly drawing tokens to populate the mats in preparation for the next round.
    Any uncompleted pattern lines carry over into the following round.
​
Endgame
When any horizontal line in the wall grid on any player's board has been filled, the endgame is triggered. The current end of round actions and scoring are completed and the game goes to final, bonus scoring.

Bonus VPs can be scored scored by the following:
  • Every filled out vertical line is worth 7 VPs.
  • Every filled out horizontal line is worth 2 VPs.
  • Every completed set of 5 matching tokens (In other words; each filled out diagonal line.) is worth 10 VPs.

Points are tallied, highest score wins.

Overall
On a rudimentary level, Azul's mechanics involve drafting handfuls of tokens and then placing them on to a board where their relative positioning scores varying amounts of VPs. It's a mechanic (Or a variation of that mechanic.) that have been employed in several other games and I'd say that Azul is a mid-weight iteration of it. As written the rules feel a little opaque and counter-intuitive but in application, they're pretty straightforward.
Where Azul get its weightiness comes from two areas of the rules; how the drafting - particularly drafting from mats works and then where and when tiles should go on the grids.

​As a basic concept, collecting as many tokens as possible to fill out the pattern lines and consequently get tokens on the wall grid is the way to go. However, there's more to it than.
For example, simply collecting too many tokens can sent the excess to the floor ​line and cost VPs, this is more important than it sounds, because as tokens are taken from the mats, it's inevitable that other tokens will build up in the centre and trying to predict this can be very important. Depending on circumstances, a lot of tokens of a particular type may well build up in the centre.
A player may want 4 red tokens for example, should they try and take them in drips and drabs from several mats over several turns or wait for them to accumulate in the centre? Provided of that they do accumulate in the centre, what if too many go to the centre?
There's definitely a higher level of play where watching what other players are doing is important. Quite often it's clear what they're prioritising, what they want or don't want in the next few turns.
​If they have a single token in the 5-space line on the left, it's likely they'll be looking to fill that out. Conversely, if they've already got 1 or more scoring tokens on the right side, they'll be unlikely or unable to use more of those tokens.
Being able to predict other player's objectives will help when making decisions. It can also allow a player to try and deny tokens to other players and curiously, on some occasions force other players to take tokens they don't want.

Players will also want to think about how and when to place their scoring tokens. Putting them down willy-nilly is a sure way to minimise points.
Obviously in order to optimise points, tokens should ideally be put on to the wall adjacent to other tokens. Placing them vertically is a good way to go, since completed vertical lines earn an additional 7 VPs each, unless a player is looking to end the game, in which case they can go for the horizontal line!

This brings me to an interesting facet in the mechanics, scoring the diagonal, i.e., putting all the tokens of 1 type on to the wall grid scores the biggest bonus; 10 VPs but as they are diagonal, they can't score off of each other! Additionally, once a diagonal of a type has been completed, the player can no longer score tokens of that type at all, collecting those tokens will now just incur penalty points in the floor line. Should a player hold off getting the diagonal until later which lowers the risk of sending tokens to the floor line or wait? Waiting will mean risking not completing it at all.

I have to say I'm not fond of mechanics which lose players points especially if it can occur out of their control, it irritates like a unreachable itch and can be a little stress inducing. I find that's the case with Azul as well. 
However, having said that, the truth is; this is what makes Azul a good game and gives it depth. It means that collecting tokens either earns VPs (Or contributes towards acquiring VPs.) or loses VPs. It's always a meaningful decision.

​Other iterations of these mechanics are a little less stressful, brain-boiling and perhaps more accessible. But if depth is what you're looking along with a dollop indirect interaction between players, then Azul is worth a try.
0 Comments

Boomerang: USA - First Play!

15/4/2022

0 Comments

 
15th April 2022

It's a Friday and we're logged into Board Game Arena for some afternoon gaming.

​Take a road trip across America, visit the landmarks, go wildlife spotting, play some sports, end where you started? Send a postcard (Or write a letter from America.), walk 500 miles, maybe walk 500 more...
OK, enough of the tenuous references. 
​Boomerang: USA combines set collecting and roll and write mechanics into a point salad of a scoring game.

Caveat: We've only ever played Boomerang: USA digitally.

What's in a game?
  • Score sheet: This shows a map of the continental United States and a network of connections between 28 different cities or tourist location from coast-to-coast and which are labelled A-Z (With @ and # making up the last 2.). The locations are divided into 7 regions of 4 cities each.
    The sheet also features various boxes for scoring, mostly on the right side.
  • Cards: There are 28 cards in Boomerang: USA which as you would imagine is 1 for each location on the score sheet. Each card also features some artwork representing that city or landmark.
    Throw number: In the top left of each card is it's 'throw number' which ranges from 1-7. More on throw numbers below.
    Sets: Each card will have 2 icons pertinent to 2 of the game's sets.
    Landmark: This will be a letter/symbol that represents that city/landmark and matches it's location on the score sheet.

The only artwork in the game appears on the 28 cards and is obviously referencing the locations the cards represent. It's pretty artwork too, with blue skies and bright colours.

Using letters/symbols for cities is a smart move and easily understood. Boomerang: USA makes use of 4 types of sets to collect and each set will feature its own range of icons, it means that the game has a fairly large array of icons. Luckily, it's clear which icons belong to which set and players don't need to reference a rulebook to know what they mean since the game is about matching icons in their respective sets.

How's it play?
Boomerang: USA is played over 4 rounds and uses a drafting mechanic where players pick a card from their hand and then passes the remaining cards to their left, then all chosen cards are revealed (Or not for the first card.) simultaneously. This continues until all cards have been selected and players have acquired 7 cards.
  • Setup: Shuffle the cards into a face-down deck and deal 7 to each player. Each player should also have a scoring sheet.
  • Drafting: Player's should pick 1 card from their available hand and put it face-down in their playing area, then pass the remaining cards to the player on their left.
    Throw card: The very first card a player selects will be their throw card and is kept face-down until scoring at the end of the round.
    Throw cards are scored as normal but also feature own scoring (Using the throw number no less.).
    Reveal card: The remainder of cards picked during the round are placed face-up. Cards are not actioned until all cards have been picked by players.
    Catch card: The last card a player gets (The one they have no choice about.) is their catch card. As the name implies, this relates to their throw card.
    Once all cards have been played, the game goes to scoring.
  • Scoring: Boomerang: USA is a set collecting game with a variety of scoring methods which differ from set to set.
    • Boomerang!: Each player reveals their throw card.
      Then the throw value on their throw card is compared with the throw value on their catch card.
      If the catch card has a equal or higher value than the throw card, they score VPs equal to their throw card.
      Throw, catch, boomerang, geddit!
    • Cities/locations: Players score 1 VP for each location they visit and should mark it off on their score sheet. Players only ever get 1 VP per location.
      There is also additional scoring for locations as follows:
      • Coast-to-coast: When a player visits adjacent locations as per the connections depicted on the score sheet, they should draw a line between the adjacent locations.
        The first player to connect the east coast to the west coast scores 7 VPs, other players can also score coast-to-coast but with diminishing VPs.
      • Regions: On the score sheet, each of the 7 regions contains 4 locations. The first player to visit all 4 in a region scores a bonus 3 VP. Only 1 player can score per region.
    • Americana: Players score for sets of Americana symbols here with slices of American life such as baseball, American football and mom's apple pie, OK, there's no apple pie but you get the idea.
      Scoring Americana is initially easy, each Americana icon is worth a certain number of points, they are all combined to get a score for that round.
      Next Round: The catch with scoring Americana points is that in the following round, the Americana score must be higher than the previous round, otherwise the score is set to 0!
    • Wildlife: There are various types of wildlife worth differing amounts of VPs and players score for each pair of matching animal icons they collect.
    • Activities: There are 4 different types of activity, such as hiking or dining. Players choose any one type only to score in a round, the more cards they've collected of the chosen type, the more they score. So 3 hiking symbols would score 4 VPs but 4 dining symbols would score 7 VPs.
      Once per game: The catch with scoring activities is that each activity can only be scored once per game, so it's one and done and since there's 4 rounds, there will be opportunity to score all 4 activities.
  • Next round: Once all cards have been scored, play progresses to the next round: All cards are put back into a deck, shuffled and dealt out again in preparation for drafting again.

Endgame
Once the 4th round is completed and scored, players then total their final score from across all 4 rounds.

Points are tallied, highest score wins.

Overall
​On a basic level, Boomerang: USA is a straightforward drafting game. It's point salad of scoring mechanics makes the game complex, most of the blog above talks about the 7 ways to score VPs.
Some of the scoring methods have pretty standard elements, collecting matching pairs or 1 kind of set are common, however, restrictions on how these are scored, particularly for Americana activities add an unusual twist.
The throw and catch mechanic is the standout here, presenting players with a clear risk and reward choice right at the start of a round especially when this is when they'll have all 7 cards to choose from.
Play a 1 as the throw card and it's guaranteed to score but is only worth 1 VP.  Playing a 7 as the throw card earns 7 VPS but requires a 7 as the catch card; since player have no control over what their last card will be it's a risky proposition. 

Typical for a game of this type, it's more or less impossible to score well in all categories at the same and the dilemma of what a player should prioritise is what drives the gameplay.
Should a player concentrate on getting locations and regions (Which are another type of set really.) over other sets?
Is it a good idea to have a steadily increasing Americana score over round, or go high then score 0 to score high again?
When is a good time to try and get a good score in a particular activity?
A lot of this will be contextual or unpredictable, it's the nature of this kind of drafting game. Players will probably start a round with no clear direction and will need to adapt to a strategy and recognise what to prioritise as it emerges from whatever cards they pick.

There's also a higher level of play where players can watch their opponents to try and gauge what they're concentrating on and deny it to them: If it looks like an opponent is trying to complete coast-to-coast, a player might chose and play a card with the location needed themselves in order to deny that other player.
Although I'm not sure that denial tactics are that effective though, it's entirely possible blocking a opponent will involve blocking yourself as well.

I felt like the travelling, roll and write element was a bit out of place here, adding extra layers of what seem like unnecessary complexity the game. So while the game has depth thanks to all these scoring opportunities, it actually felt like it was perhaps a little detrimental to the experience, increasing thinking time and inducing some analysis-paralysis as a consequence.

Otherwise I can't really find fault with Boomerang: USA, it's not a bad game by any stretch, it just somehow didn't appeal and seemed a little unengaging. Maybe the theme of being a tourist did quite gel with me?
I feel that there are other mechanically similar games that are a little more accessible and quicker to play.
Obviously, YMMV, a fan of card drafting games who plays them often might find the roll and write part of Boomerang: USA a fresh take in the category.
0 Comments

Four Gardens - First Play!

15/3/2022

0 Comments

 
15th March 2022

We're with the Woking Gaming Club at The Sovereigns for some Tuesday evening entertainment.

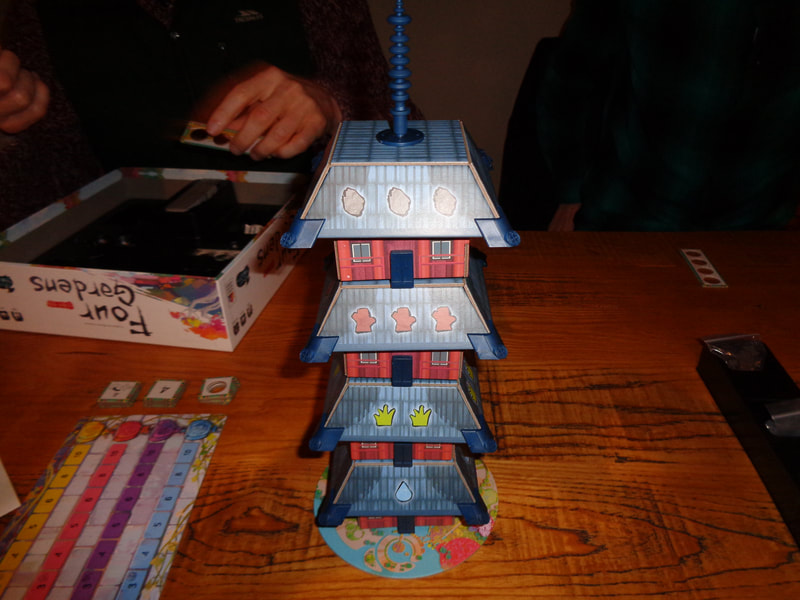
Four Gardens is a game about you guessed it... four gardens, it's also about spinning a pagoda! I'm not sure if Spinning Pagodas would be a better name or not?
Why are players spinning a pagoda? Apparently, the pagoda contains some gods! Who... I guess... like... being spun?

What's in a game?
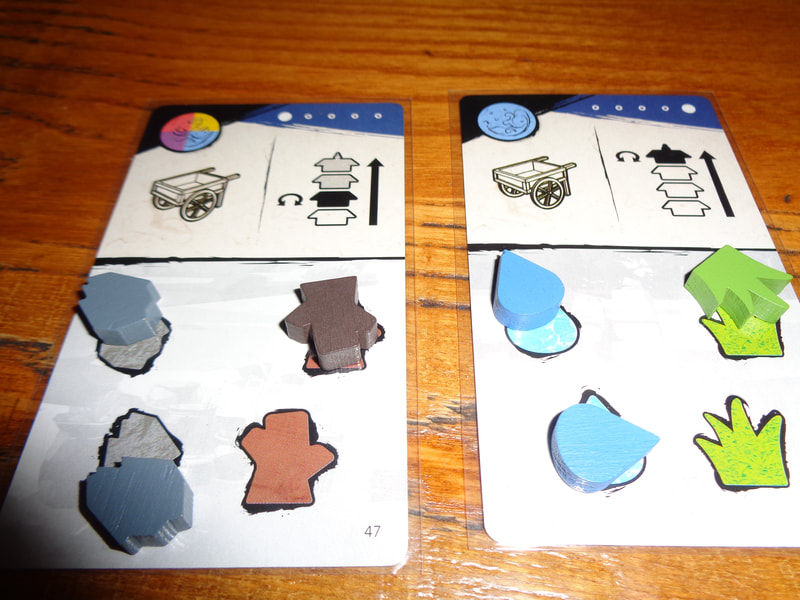
  • Pagoda: Although it has to be constructed, the game comes with a 4-level pagoda that spins, that is each floor spins independently - spinning is very important in this game!
    Each roof on the pagoda displays 0-3 of the resource icons. There are 4 sides to each roof and 4 roofs, thus 16 sets of icons.
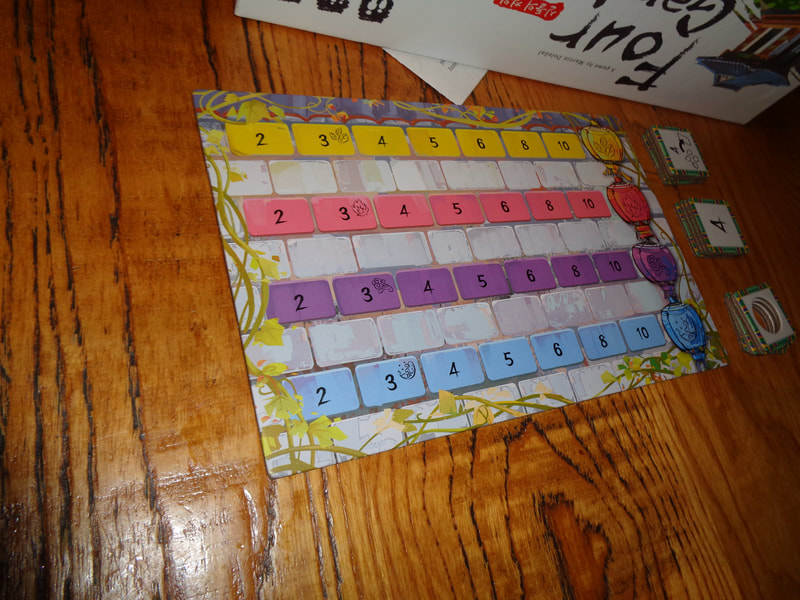
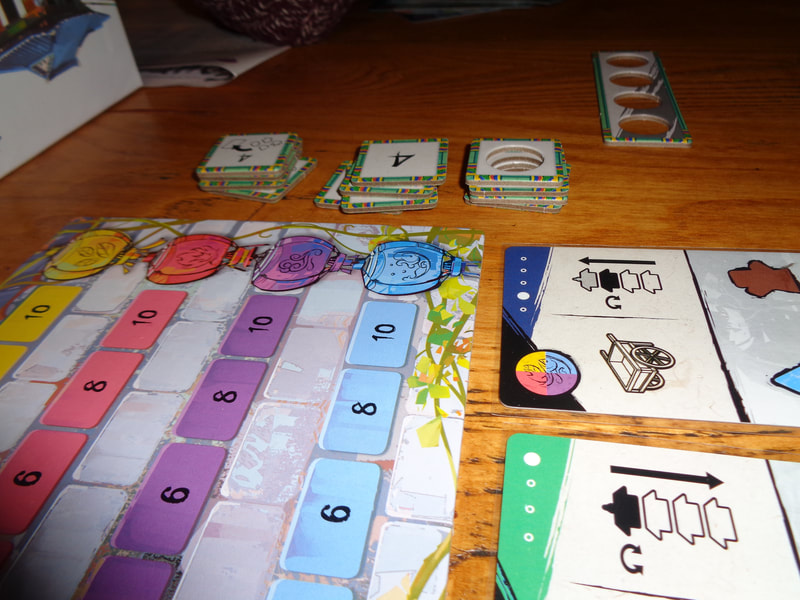
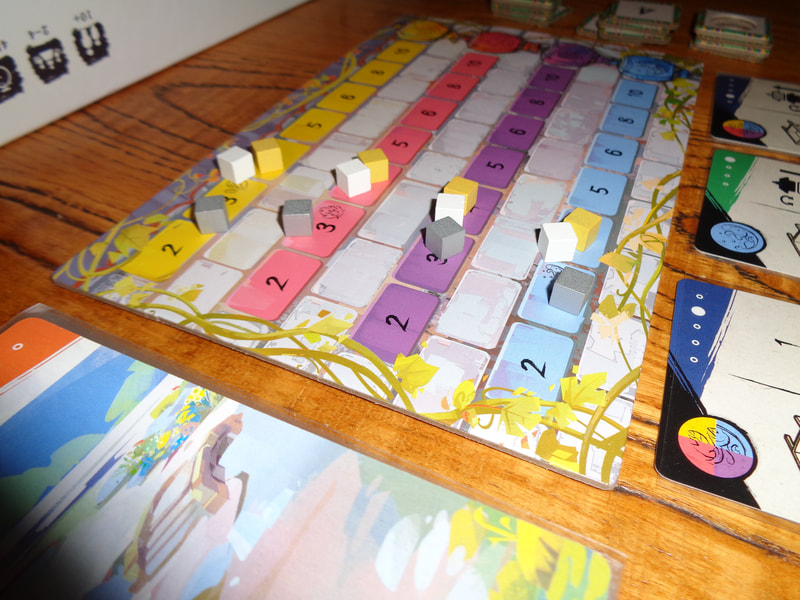
  • Scoring board: There are 4 scoring tracks in different colours on this board, one for each of the game's 4 'gods'.
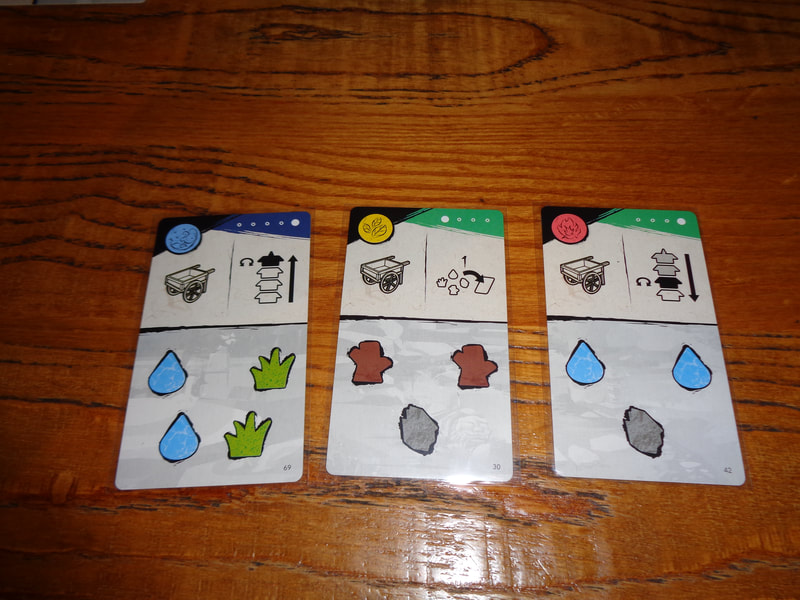
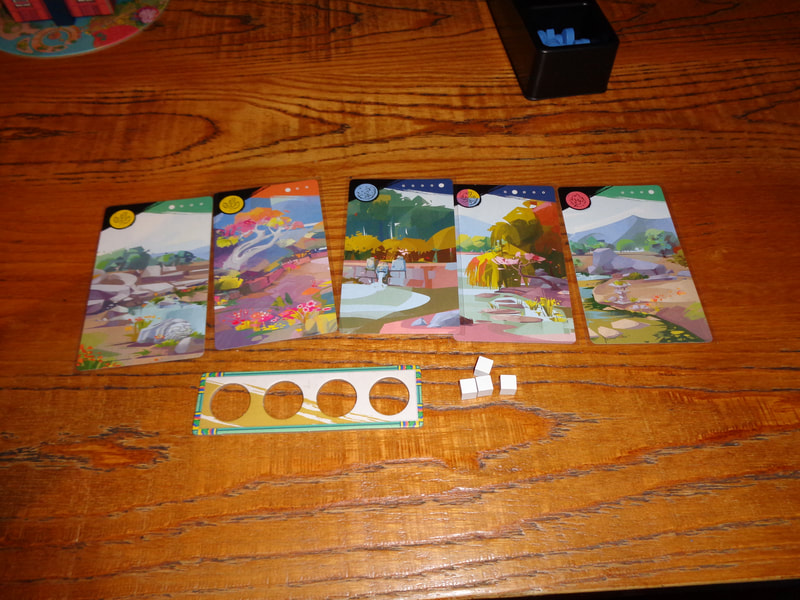
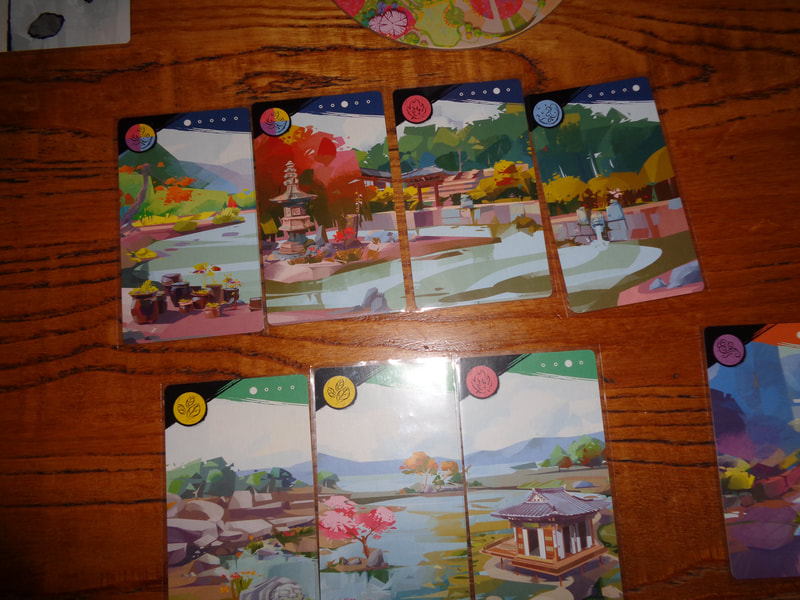
  • Cards: Four Gardens comes with 70 double-sided cards. The front of each card (Called the groundwork side.) displays various symbols and information while the back of each card shows one part of a panoramic illustration.
    Groundwork side: There symbols in the top corners, top half and bottom half. They are:

    God: In the top left corner of each card is the symbol for which god it is associated with and also which track it scores on when completed.
    Dots: The top right corner displays a number of dots, which is info on how the card's position in a panorama, it shows the type of panorama it is and both the number of cards in that particular panorama and where this card goes in that panorama.
    There are 4 'types' of colour coded panorama ranging from 2-5 cards in size.
    Actions: In the top half of each card there will be displayed 2 actions. One action is always a handcart action and the other will be a 'wild' or 'rotate' action. Using  one of the available actions requires the card be discarded.
    Cost: Finally, the cost to construct this card will be shown at the bottom.
    Panorama side: The backs of these cards each display part of a garden landscape, and certain cards can be placed together to form panoramic illustrations of varying size. The top 2 corners also display the same information as the top corners on the other side.
  • Tiles: The game makes use of a several types of small tiles.
    Planning tiles: These rectangular tiles each have 4 spaces to hold resources during the game.
    Bonus planning tiles: These square tiles have a single space and can hold a single resource alongside the owning player's planning tile.
    VP tiles: These tiles earn extra VPs.
    Wild resource tiles: This allows the player to acquire more resources as described below.
  • Tokens: There are 2 types of tokens in Four Gardens.
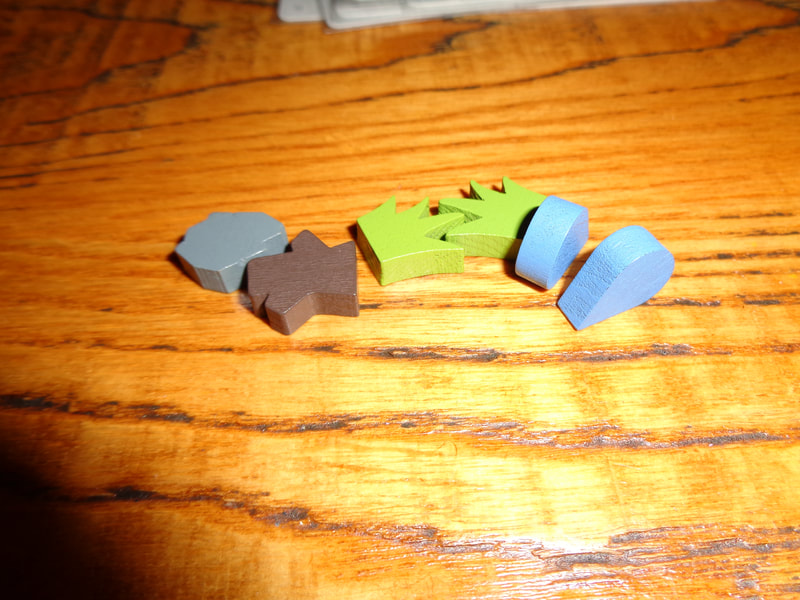
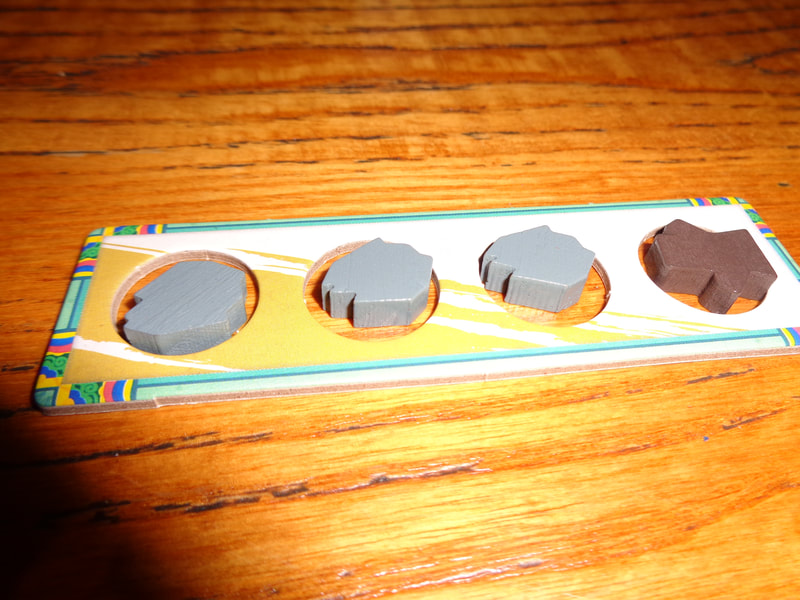
    Resources: There are 4 types of resource in the game, each one is delineated by both colour and shape. There are blue water drop, grey stone, brown wood/tree and green plant tokens.
    Score markers: There are 4 scoring trackers in each player colour, these are classic eurogame little wooden cubes.
The pagoda is constructed of fairly sturdy feeling card, each floor can be individually rotated and it felt a little precarious when doing so, having said that, it never felt like it would cause a problem. The pagoda comes in several pieces, has 4 'floors' and has to be constructed. Since I played someone else's copy, I cannot comment on how hard or easy that was. It's definitely the game's standout component though.
The resource tokens felt like they were wooden and the wooden cubes were pretty standard wooden cube components, which is something I like.
The tiles were standard quality card tile and fine, I thought having tiles with little hole to hold resource tokens was a pretty smart move.
The card were also pretty standard quality from what I could tell.

From the large, eye-catching and rotating pagoda to the tactile resource tokens shaped and coloured identically to their icons in the game; Four Gardens has excellent presentation.
The backs of the cards which, when placed together form the panoramic views of the titular feature excellent, colourful and interesting art.

Four Gardens features a fair amount of iconography, from the 4 scoring tracks and types of gardens to symbols for resources and different actions available on cards. F
or the most part, it's instantly understandable and there should be few problems with the iconography.


How's it play?
Setup
  • ​Pagoda: Randomly put together the 4 floors of the pagoda.
  • Tiles: Put out the 3 sets of tiles face-up in their 3 stacks. The bonus VPs and 'take wild resource' tiles should have the highest value at the top and be in descending order.
  • Cards: Shuffle the cards into a face-down deck(With the garden picture side up.).
    Draw 3 cards and place them 'face-up' in a drafting area.
  • Players: The players should organise themselves at about 90' around the pagoda, so they each have a side of it facing them.
    Deal 5 cards to each player and give them a planning tile in their colour.
     Each player should also place their score trackers on the 4 scoring tracks.
  • First player: Determine a first player.

On to play
As the name suggests, the objective is to create 4 garden panoramas using the backs of the cards.
​Four Gardens uses the traditional turn, with the active player acting with play then progressing to the player on the left.
During their turn, the active must perform exactly 3 actions. Each action also requires the player to play or discard one of the cards in their hand. There are 4 actions that can be performed, these can be performed in any order the player sees fit. The actions are:
  • Groundwork: With this action, the active player takes a card from their hand and places it in front of them, it is now ready to be 'constructed'.
    There are only 2 restrictions when laying a groundwork card. Firstly, 2 identical cards cannot be both played. Only 1 of each position in any of the panoramas can be played. Players are also restricted to a maximum of 3 groundwork cards under construction at any time.
    It's worth noting that when putting a groundwork card down, it does not have to be the first in a panorama.
  • Move resources: The active player must discard a card with the pertinent symbol (Which is all of them to be honest.) to move resources, this allows them to rearrange resources between groundwork cards or from their planning tile. Finally, the active player may discard resources from their planning tile and in fact, this is the only way to do to.
    Scoring: If, once resources have been moved around a card's cost is completed, it is then flipped over, becomes a panorama card and scored. Thus if the card had a blue symbol, the active player's score marker is moved 1 space along the blue track.
    Further scoring: That's not the end of scoring though. When a new card is added to a current panorama, all cards in that panorama are scored again. So if another card was added to the card with the blue symbol, then the active player would score in the blue track again. So it means that the 1st card played in a 5-card panorama would be scored 5 times!
    Completed set: If a panorama is completed, as well as scoring, the active player immediately acquires one of the bonus tiles and if necessary, resolves it.
    Knock back!: Each scoring track only reaches the '10' spot, if scoring would take the active player's marker above 10 on a track, they cannot go any higher. Instead, the scoring markers of all other players are pushed back 1 space instead!
    If a player's marker is then knocked back off the first spot on a track, then they cannot put the marker back on the track and will score 0 for that track!
  • Rotate pagoda/collect resources: This is the most complicated action in the game. It allows the player to rotate the pagoda and collect resources if they discard a card with the relevant icon. That icon will also determine which 'floor' of the pagoda is rotated and how resources.
    When a floor is rotated, all the floors above it are also rotated in a similar fashion and it is rotated 90'.
    After this, the active player collects all the resources for the side of the pagoda that are facing them. The icon will determine the order in which the resources are collected. Either from the top going downwards, or bottom going up. This is very important because when resources are collected, they are placed in the active player's planning tile spaces in the order they are collected. If there no spaces available in the player's planning tile, then unplaced resources are discarded. As you can see, the order in which resources are collected is very important.
  • Take a wild resource: If the active player discards a card with the wild resource icon, they can take a resource of their choice and place it either on a groundwork card or planning tile space.
    The wild resource tokens functions identically but allows the player to acquire multiple resources.
  • End turn: Once the active player has completed their 3 actions they draw cards from either the displayed cards or blindly from the deck until they have 5 in their hand, play then progresses to the player on the left.

​Endgame
Depending on the player count, once 8-10 panorama cards have been constructed by any player, play goes into the endgame and the current round is completed.
Players calculated VPs earned from the 4 scoring tracks and points they may have gotten from a bonus VP track.

Points are tallied, highest score wins.


Overall
I'll start by discussing the pagoda - the game's most obvious feature.
Is it a gimmick mechanic? Maybe. Does it work well? Definitely.
It's also quite a unique mechanic and not something I've seen anywhere else.

When used in conjunction with the rule limiting how many resources can be collected on the planning tile, it forces players to really think about how they have to manipulate the pagoda to get the resources they need:
It takes an action to empty a planning tile that's been filled unnecessarily and that's an action that could be used elsewhere.
I think it's a set of mechanics that works very well.

Talking about the pagoda does lead me to one gripe: Which is the rule where all players should sit around the pagoda at 90' angles. Players don't always have the right gaming space to accommodate this and while strictly speaking, it's not necessary as players can remember what side of the pagoda is meant to be facing them, it's inconvenient and finicky. 

The card-synergy, or more accurately score-synergy is a pretty clever rule, providing players a reason to work towards completing panoramas.
The 4 scoring tracks seem a little unnecessary but in practice they work fine.

This brings me to the knock-back mechanic. It feels a little harsh that, if a player gets their scoring marker knocked off the board, it can't come back into scoring. On the other hand if a player has reached maximum on a track and other players are lingering at the bottom, it's probably not a priority for those other players, so not that much of a loss. 
So yes, it feels a bit harsh but it's not game breaking.
All of this means players will look to optimise the order in which they play cards to optimise how they increase their scores. Concentrating on increasing scores in 1 or 2 tracks can potentially knock-back other players. Conversely, working towards completing panoramas can earn bonuses which may prove useful elsewhere; sometimes you'll be able to do both but sometimes not and looking for opportunities to exploit these times is vital.

The also makes use of a variation of the hand-as-currency mechanic, except here it's used to trigger actions and not to actually pay for something. Despite this difference, it places that same conundrum on players; which is how to choose which card to discard? Obviously, they'll be times when it has to be a card with the action they need but otherwise, it's another meaningful decision to make.

In conclusion; Four Gardens is a fairly easy to learn set-collecting game that provides players with enough decisions to be engaging, fun and provides unusual resource gathering and scoring mechanics which makes it feel unique.
I enjoyed it and think it's worth a try.
0 Comments

Loco Momo

20/2/2022

0 Comments

 
20th February 2022

It's a Sunday and we're logged into Board Game Arena for some gaming fun.

I don't know what Loco Momo means but I kind of hope it means crazy fun with cute animals. Hmm, that didn't sound right, how about wholesome crazy fun with animals.
Loco Momo is actually about (I kid you not!) organising the disarrayed wildlife population of the forest for a group photo! 

Caveat: We've only ever played Loco Momo digitally.

What's in a game?
  • ​Game board: The central game board displays 4 sets of 4 tile spaces, 16 tile spaces in total.
    A large part of the board is given over to the artwork which depicts a remote looking vaguely mysterious forest backdrop.
  • Player boards: Each of these boards has a 5x5 grid of tile spaces, along with some iconography explaining scoring rules. Again the background depicts a forest environment, only this time with a peculiar set of overgrown open-air stands (Or bleachers if you will.) against the vista of a waterfall.
  • Tiles: Loco Momo makes use of 105 square tiles that depict 5 wildlife species; bears, ducks, eagles, leopards and rabbits across 3 colours; blue, brown and green.
    It means there are 21 of each animal type and 7 in each colour.
  • Bag: Given that we played Loco Momo digitally, there's no bag. But in the physical copy it would be used to blindly draw tiles.
There isn't too much artwork to Loco Momo, just the 2 backgrounds on the 2 types of board and 5 wildlife illustrations.
It's good quality artwork though, a bright palette and bold cartoony style suit the game's light-hearted theme well.

The game's only iconography appears on the player boards. It's not immediately apparent what they mean but quick read of the rules makes them clear.


How's it play?
Setup
  • Central board: Put out the central board and randomly populate all 16 spaces on the board with wildlife tiles.
  • Player board: Give each player a personal board.
  • First player: Determine a first player.
That's it for setup.

On to play
The objective of Loco Momo is for players to fill their boards with tiles to score VPs and the game provides various approaches to achieve this. Although this mostly involves collecting various kinds of sets.
Loco Momo uses the traditional structure with the active player taking their 2 actions -  a drafting action and placing action with play then moving to the player on the left.
  • Drafting: The active player chooses to take 1 of the 16 tiles, what happens next will depend on the type of wildlife on the tile that was picked and its colour.
    Bear: If a bear tile was chosen, then all wildlife tiles of the same colour as the bear from the same area as the bear are drafted by the active player along with the bear tile.
    Duck: Starting clockwise from the area where the duck tile was chosen, the active player looks at the other areas until they encounter another duck. Then all the wildlife tiles with the same colour as the duck are taken, along with the duck. If there are no other ducks, then tiles of matching colour are taken from the same area as the duck.
    Eagle: All wildlife tiles matching the colour of the eagle tile are taken from the diagonally opposite area to where the eagle tile was initially taken.
    Leopard: The active player should look at the next area going anticlockwise from where they took the leopard tile and take all the tiles with the matching colour.
    Rabbit: The active player should look one area clockwise form where they took the rabbit tile and take all the tiles with the matching colour.
  • Place tiles: The active player will now have 1-5 tiles of the same colour which must be played on to their board.
    The active player may put these tiles into any row on their personal board, however, tiles must always be placed on the leftmost available space. Thus tokens go from left-to-right.
  • Repopulate: Spaces that were created on the central board after drafting are now randomly repopulated with more wildlife tiles.
  • Next player: The player to the left of the active player now becomes active.

Endgame
Play continues until the 6th round is completed, then scoring occurs.
  • The bottom row: (Which I'll call row 1.) scores for each different type of animal in that horizontal row. Scoring goes from 1-14 VPs.
  • Row 2: Above the bottom row is row 2, this is scored for the biggest single set of any identical animal in that horizontal row, again scoring from 1-14 VPs.
  • Rows 3 & 4: Unlike rows 1 and 2, these 2 rows score vertically. Each vertical matching pair of animals in the same column score 3 VPs.
  • Row 5: Tiles in the top row will score by also matching the 2 identical tiles in the same column from the 2 rows below. This scores 4 VPs.
    Thus if all 3 animals in a column match types for rows 3-5, it scores 7 VPs in total.
  • Colours: Each row and column that has been filled with tiles of the same colour score an additional 5 VPs each.
Points are tallied, highest score wins.

Picture
The bottom row has 5 different animals, scoring 14. Row 2 above has 5 identical animals, also scoring 14. The matching eagles in the 1st column for rows 3 & 4 score 3, plus the eagle in the top row above scores an additional 4. The ducks in column 2 also score 7. The 2 rabbits in column 3, rows 3 & 4 score 3. The bear scores nothing. Finally, 2 rows have the same colour as does 1 column, scoring 15 more. Total score: 60.

Overall
​Loco Momo is a fairly straightforward game, the gameplay strategies are more or less obvious and there's not much to say about it.

During drafting players will look for the optimal method to acquire the most tiles possible or, as will occur on occasion if there's little they want, try to avoid taking tiles.

Then, when placing tiles, players may need to make some meaningful choices.
Sure, it's easy putting down tiles when a player has got the ones they wanted but frequently, this won't be the case and dealing with those wayward tiles is very important.
Players will want to keep scoring opportunities for other tiles/sets open and minimise the damage caused by having to place unwanted tiles.

There's also a higher level of play that involves looking at what's available on the central board and what other players are working towards, then trying to anticipate what tiles they'll be looking to gain from themselves. It might be prudent to try and deny other players certain tiles.
Or if they're not interested in tile of a particular colour, it might be safe take that tile in a later turn.

This brings me to the one niggle I have about Loco Momo, which are the colour scoring rules.
We've only played Loco Momo 3 player and because there are 3 colours of tile, we tend to gravitate towards one colour each with little 'stealing' of other players' colours. Which is understandable as completing columns/rows with the same colours confers nice bonuses and during the late-game completing sets scoring the colour instead of the animal gets more VPs. Consequently it also makes decisions 'easier'.
I imagine with 4 players, this status quo would be shaken up and the game would become more interesting.
Despite the criticism, the game ultimately generally does provide players with meaningful decisions to make.

Games about about drafting sets of tiles and placing them on to a player board are pretty commonplace today.
So does Loco Momo do anything to stand out from the crowd?

I think the answer is... sort of.
Loco Momo is a bit unremarkable but at the same time it's an enjoyably light, easily learnt and accessible example of this kind of game with a reasonable playing time. A good introduction or crossover game
If this ticks your boxes, Loco Momo might be worth a look.
0 Comments

In the Hall of the Mountain King

10/2/2022

0 Comments

 
9th February 2022

It's Wednesday night and we're round Simon's for some gaming fun. The evening's game was In the hall of the Mountain King.

Ask yourself: What is it that trolls like to do? Live under bridges perhaps; no. Chase goats maybe; no. What about make trouble on the internet; no. What trolls really like to do is dig tunnels (The fancier the better.) and move statues!

What's in a game?
  • Board: In the Hall of the Mountain King comes with a double-sided board and the player count determines which side is used. Regardless of this; both sides depicts a mountain surrounded by wilderness and features a square grid that contains a large number of icons and is divided into 5 zones.
    Heart of the Mountain: This fiery spot sits at the centre of the board and is surrounded by 5 bands of colour which form the game's 5 zones. The furthest zone away is dark grey, the next is light grey, then red, orange and finally yellow which is the closest band.
    Buried resources: Across the board are a number of these icons on spaces.
    Rubble spaces: These spaces will hinder players as they expand through the mountain.
    Start spots: There are player starting spots throughout the dark grey band.
    Statue spots: There are also starting spots for statues littered throughout the dark grey band.
    Workshop spaces: These are empty spaces upon which players can build workshop if they get the opportunity.
    Pedestal track: Outside of the grid is this track which keeps tally of which type of pedestal have been built in each zone. There 3 types of pedestal and thus 15 spaces.
    Score tracker: Finally a score tracker runs the perimeter of the board.
  • Player board: There are one of these long rectangular for each player in their colour and every board contains information on the pricing structure/scoring for tunnel tiles as well as listing turn actions and the scoring for statues/pedestals.
    Along the top row are 4 indicators for card positioning and finally, the central area has a storage space to place resources.
  • Tiles: The game makes uses of numerous types of tiles.
    Gate Tiles: These are small tiles that fit on a single space on the board, there are 4 of them in player colours and they represent the starting spaces for players.
    Great Hall tiles: These square and rectangular tiles of varying size display artwork for different types of rooms, they go from 2x2 up to 4x4.
    Each tile has an altar space which is a blue/orange/white circle. Each tile also displays two different VP scores - more on this later.
    Tunnel tiles: These are sort of like tetramino shaped tiles except they come with a varied number of blocks ranging from 2-5, some of which have holes in them called anchors. They allow players to see the colour of the square and thus the zone beneath the anchor.
    Workshop tiles: These single space tiles will be placed by players on the workshop spaces during the course of play. Workshop tiles have special abilities which can be utilised by players.
  • Cards: There are various types of cards that In the Hall of the Mountain King makes use of.
    Spell cards: Each of these cards contains a spell that will benefit the player who uses it in some way.
    Troll cards: These cards are subdivided into even more types! The top half of each card features a picture of a troll and the bottom half will display resources.
    Starter troll cards: There are 4 sets of the 6 starter cards in each player colour. The starter cards feature 2 rows of resources delineated by a dotted line
    Troll card: The subdividing continues! The standard troll cards are further divided into type 1, 2 and 3. The higher the type, the more resource symbols the card will contain and therefore produce.
  • Tokens: In the Hall of the Mountain King also makes use of various tokens.
    Coronation tokens: There are 2 of these round card tokens, valued at 5 and 3 VPs respectively. As well as scoring for players, they trigger the game end.
    Pedestal point tokens: These small square tokens are used in conjunction with the pedestal track on the board, consequently there are 15 of them, valued from 1-4 VPs each.
    Pedestal reminder tokens: That's right, the game has tokens to remind players to do something and that something is to do with pedestals! These tokens are each coloured blue/orange/white.
    Resource tokens : Yep, In the Hall if the Mountain King also makes use of lots of different types of resources, 7 to be exact.
    Stone: Little grey wooden cubes are used to represent this resource.
    Iron: These are little black wooden cubes.
    Heartstone: These little wooden cubes are red.
    Carts: These brown wooden tokens are actually shaped a little like carts.
    Hammers: Green wooden tokens shaped like... hammers!
    Runes: These are actually translucent acrylic purple gem shaped tokens.
    Coins: Standard round card currency tokens.
  • Draw bag: A bag used to blindly draw pedestal tokens.
  • Meeples: There are 2 types of meeple the game makes use of.
    Statues: There are 3 types of statue in the game, they are coloured blue/orange/white. Blue statues represent ice and at the top, are shaped a little like an ice crystal I guess. Orange represents fire and has a flame shaped top, while the white statues are shaped like a crescent moon.
    Pedestals: Pedestals are identically shaped and come in the same three colours as statues.
That's it for components and In the Hall of the Mountain King uses a lot of them!

There's certainly a good amount of wooden tokens and meeples here, the acrylic crystals are also a nice addition.
None of the other components struck me as being poor quality and they're typical of what is expected in a modern game.
There are a couple of minor quibbles though.
The pedestal points tokens are a bit small and fiddly to handle
The second is a bit of personal grumble - which is that all the carts are brown but depending on where the carts are acquired from will represent different colours. Carts in a player's central area can be used for any colour of statue. But carts from icons on troll cards can only be used to move statutes of a certain colour - which is indicated by the colour of the icon used to acquire the cart! Makes sense... right? Maybe not? Surely it would have been useful to include some carts of the relevant colours?

There isn't a great deal of art in the game, mostly on on the spell and troll cards but it's all well illustrated with bold colours and and is fairly varied. There are 4 types (Or clans.) of troll cards and 3 types correspond to the blue/orange/white colour motif that runs through the game and I quite like how those trolls cards have a colour pallet to match it their types.
Having said that; the starter cards all feature the same piece of artwork that has been coloured matched to each player colour which is a little disappointing.

For the most, the game's iconography is actually straightforward and easily understood. Only the aforementioned issue with carts being a small problem. If the cart icon has a coloured background then a cart that is sourced from that icon can only be used for that colour of statue.
Luckily it's not a gamebreaker although it's finicky rule to remember.


How's it play?
Setup
  • Board: Which side of the game board that is used will be dictated by player count.
    Statues: The board must be populated with statues. Randomly choose the colour of the first statue and put a statue meeple of that colour it in any statue space, then randomly select a statue from the remaining 2 colours and place it in the next statue space going clockwise. Finally place the final colour of statue clockwise after the second statue.
    Now that there's a pattern of 3 colours, repeat the pattern going clockwise until all statue spaces are occupied
    Pedestal point tokens: Randomize the tokens face-down and place them in the 15 spaces on the pedestal track. Then flip them face-up
  • Workshop tiles: Shuffle the workshop tiles into a face-down and stack and draw 2 per player plus 1 more and place them out face-up. The remaining tiles have no use in the game.
  • Tunnel tiles: Sort the tunnel tiles by type.
  • Spell cards: Shuffle the spell cards into a face-down deck and deal 3 face-up. These 3 cards are called the spell book.
  • Bag: Put all the pedestal meeples into the draw bag and give it a vigorous shake.
  • Troll cards: Sort the troll cards by type and shuffle them into respective 3 face-down decks, then deal cards from the deck according to their type. When they are all placed, they should form a sort of ziggurat shape so they don't line up in columns, they are known charmingly as the Horde.
    Type 1: Deal 5 type 1 cards and place them in a row at the 'bottom' of the ziggurat.
    Type 2: Deal 4 of these cards and place them in a row directly above the type 1 cards but vertically positioned between the cards from the row below.
    Type 3: Deal 3 type 3 cards and also place them in a row above the type 2 cards, again vertically positioned between the cards from the row below.
    Pedestal meeples: Randomly draw 4 pedestal meeples from the bag and place them on the row of type 2 cards.
    Pedestal reminder tokens: Place 1 of these on each card in the type 3 row.
  • Coronation tokens: Depending on the player count put out 1 or both of these tokens.
  • 1st player: determine a start player.
  • Player boards: Give each player the player board, gate tile and starter troll cards in their player colour
    Gate tile: In turn order, each player should put their gate tile on to one of the starting spots on the board.
    Starting trolls: Each player should shuffle their 6 starter cards into a face-down deck, draw 2 and then should put 1 of the 2 cards into any of the 4 allotted spaces above their player board.
    Now draw another card and again put 1 of them into the 3 remaining spaces. Repeat this until all 4 spaces are filled in a row. This is the beginning of each players Trollmoot and as further cards are added will eventually resemble a pyramid.
    Each player should now have 1 card in their hand and 1 card left face-down.
    Resources: Each player gains the resources listed on the bottom row of the 4 cards they put into their playing area. Once the resources have been gathered, partially slide the cards under the player board so that the bottom row of resources are hidden.
    Bonus resources: The first player does not gain any bonus resources! However, all other player do. They will gain resources from the bottom row of 1 or 2 of the cards they didn't put into their play area depending on their position in the turn order.
    Regardless of whether players gain bonus resources or not, the 2 un-played starter troll cards are discarded out of play.
Phew! We're ready to go now.


On to play
Play during In the Hall of the Mountain King will have active player performing 4 actions before play moves clockwise to the next player.
  • Spells and workshop: The active player may perform one or both of these actions.
    Spells: The active player may spend a rune token to use the ability of any one of the 3 revealed spell cards by placing it on the pertinent spell card.
    Once a spell has accumulated 3 runes, it's discarded and new spell is drawn from the deck.
    Workshop: The active player may make use of one workshop's abilities which is connected to their tunnel network. It can be used as many times as it is connected to any tunnel network - even that of another player.
    Typically workshops allow players to swap around resources, any gained this way are placed into the storage on the active player's board.
  • Dig or recruit: The active player must perform only 1 of the 2 following actions.
    Dig: This involves spending resources to acquire a tunnel tile and place it on the board, there are obviously some restrictions and quite a few rules here.
    ​The cost of purchasing a tunnel tile is equal to the spaces it occupies, i.e., a 4 space tile costs 4 resources. This can be paid in only stone or only iron or only heartstone and not any mix if the 3. Players can trade any 4 resources for 1 of their choice at any time. When a tunnel tile is bought, it immediately scores VPs depending on it's size (Except the 2 space tunnel which scores nothing.) and the type of material used to construct the tunnel. Stone scores the least and heartstone scores the most as indicated in the bottom right corner of the player board.
    Next, the active player must put the tunnel tile on to the board; all positioning of and measuring of these tiles is done orthogonally. A tunnel tile can be rotated or flipped anyway the player chooses but must go adjacent to the active player's gate tile or a tunnel tile connected to the active player's tunnel network. Furthermore, there must always be at least 1 space between the networks of all players - no 2 networks can connect.
    If the tile covers any rubble spaces, the active player must spend hammer tokens equal to the rubble spaces being covered.
    If the tile covers any buried resources icon(s) or a statue meeple, the player gains them. Resources are placed into the storage space on their player board and statues are placed back on the same space on the game board but now on the tunnel tile.
    If the tile has been placed adjacent to an empty workshop space, the active player may place one of the available workshop there.
    If the tile that has been place has an anchor point on it and the active player has a pedestal in their storage then they may put the pedestal on the anchor spot, this can only ever be done just after the tile has been placed. There's a further restriction, each zone can only ever contain 1 pedestal of any colour. Since there are 5 zones, there can only be 5 pedestals of one colour in the game at any time and only 3 (One of each colour.) in each zone. There can be a maximum of 15 pedestals in the game which matches the 15 spaces on the pedestal track. Speaking of which, when a player puts a pedestal on the board, they immediately gain the pedestal point token from the space that matches the zone where the statue was placed and the statue's colour. This should be kept face-down in the players storage and revealed during scoring.
    Recruit: The active player may recruit one of the trolls from the Horde and depending on which level the troll is recruited from, it may cost 2 or 5 coins.
    If a type 1 troll is recruited, it costs nothing, if a type 2 troll from the middle row is recruited, the 2 troll cards beneath it must be bribed​ with 1 coin each, thus 2 coins. If a type 3 troll is recruited, then the 2 trolls beneath them must be bribed and then the 3 trolls beneath the the 2 must also be bribed for a total cost of 5 coins. all bribes are placed on the troll card itself. If a troll card acquires 4 coins, it's removed from play and replaced.
    When the active player takes a troll card, they also get anything on the card, including coins. So for a type 2 troll that would be the pedestal on it and on a type 3 the pedestal reminder token means they can take the pedestal of their choice from the bag.
    After a troll card has been taken, it is immediately replaced from it's relevant deck. For type 2 trolls, new pedestals are randomly drawn from the bag and for type 3, the reminder tokens are placed on them.
    Now the player must put the troll card into their Trollmoot. When doing this, it must go position above 2 other troll cards and overlap their top corners. Thus the 2nd row of a Trollmoot will contain 3 cards, the 3rd 2 troll cards and the top row will contain a single troll card, who become the chieftain of the Trollmoot. When the active player gains their chieftain, they can take one of the coronation tokens if there is one available.
    Additionally, when a card is added to the Trollmoot, it is activated, this means that the player acquires the resources listed on the card. Not only that, the 2 cards beneath the card are also activated and then the 3 cards beneath the 2 are activated and so forth in a cascading effect. This means that when the chieftain card is placed, it will activate all cards in the Trollmoot.
    When resources are acquired this way, they are placed on the troll card that generated them and not on the storage space on the player board. This is important to remember because if a troll card is already contains a resource it produces, then the player does not acquire it.
    This means it's a good idea to use resources on troll cards before those on the storage or to use workshops to cycle resources off of troll cards.
  • Great Hall: The active player may place 1 great hall tile per turn into their network by placing it on top of their tunnel tiles. However, the player's tunnel network must contain an area at least as large the great hall tile to accommodate it. E.g., a tunnel network must contain an area at least 3x3 in to to accommodate the 3x3 great hall tile.
    Every great hall tile has an altar space and 2 differing VP values. The 2nd value is what the tile is worth if a statue of any colour is placed on the altar space
  • Move Statues: The active player spend cart tokens to move statues.
    Cart tokens that come from the players storage on their player board can be used to move statues of any colour.
    Cart tokens that come from troll cards can only move statues that match the colour of the cart icon on that troll card. I.e., the cart token on a troll card with a white cart icon can only be used to move a white statue - even though the cart token itself is brown!
    Each cart token spent allows the active player to move a statue to anywhere on another tunnel tile (Or another space on the same tile - only 1 statue can ever occupy a single space.).
    This can involve putting the statue on a pedestal of matching colour which doubles the statue's VP value.
  • Next player: when the active player has completed all 4 phases, play progresses clockwise to the next player.
Okay, that's it for the main rules.

Endgame
The endgame is triggered when there no coronation tokens left to acquire.
The current round is completed and 2 more rounds are played.
Players then calculate VPs, a player's VPs may come from the following sources.

Score tracker.
Statues - depending on their position in the 5 zones and doubled if the player managed to place them on a pedestal.
Great hall tokens in a player's network - with or without statues.
​Pedestal points for placing pedestals.
Coronation tokens.
Unspent resources; these can earn points. Every 3-of-a-kind scores an extra VP.

Points are tallied, highest score wins.


Overall
Despite having quite a few rule to remember and sounding quite complicated, In the Hall of the Mountain King is actually pretty straightforward in practice and many of the rules are obvious when in action.

​There's definitely a couple of finicky rules though, and again - it's to do with the carts and pedestals. It feels like an unnecessary complication to have these differently coloured carts to move statues.
The rule that restrict pedestals to 1 per colour in each zone also feels a but cumbersome. I know why the rule is there: It encourages competition in a game that otherwise has little interaction between players.
​Players will want to be the first to get a pedestal as close to the Heart of the Mountain as possible. It locks out completing players and offers a big scoring opportunity.

It means that players are put into a balancing act of needing build their tunnel network but also acquire resources to make this expansion happen. Clever placement of tiles will earn players some resources but recruiting trolls is the best way to get them and you'll note that digging and recruiting are pretty much the only 2 mutually exclusive actions in a turn.

There's more to tunnel tile placement too, pedestals and thus statues have to go on anchor spots and it's these need to be as close to the centre of the board as possible, sometimes it'll be tricky to get it right, or it'll require not getting something else. Being able to avoid rubble spaces helps as well.
Resource management also has more to it. Spending resources from troll cards first is prudent, as is using workshops to change them into other resources - because they go back on to the storage space and not the troll card. It does involve trying to think ahead about what resources can be acquired and what will be needed.

This brings me neatly to the Trollmoot/Horde elements of the game, with their overlapping and cascading mechanics for both buying cards and acquiring resources they almost feel like a different game to the tile placement taking place on the game board.
I have to say that I like the cascading mechanic, it's simple but provides some interesting decisions for players to make. Building up a Trollmoot, like much of In the Hall of the Mountain King requires a little forethought.
If my calculations are correct, the cards in the centre columns will be activated the most. Players will want to identify and prioritise what resources they'll need in their Trollmoot setup. Additionally, deciding where to place a troll card will determine what resources the player immediately.

I do also have some concerns about the game, I found using the tunnel tiles, creating pedestals and moving statues more of a chore than satisfying and the game it didn't quite gel with me.
I'm also not sure how much value there is in replaying the game. The player and statue starting positions and workshops may vary but mostly the board's resources stay unchanged. And while the card mechanics are good, the cards themselves only vary in which resources they provide.

In the Hall of the Mountain King is another one of these games that does nothing really wrong and I've got nothing against the game. If someone else wanted to play it I would happily join in but somehow it's missing that 
special something that makes me want to play it again.
0 Comments

Llamaland

9/2/2022

0 Comments

 
8th February 2022

Tuesday evening is here and we're at The Sovereigns with the Woking Gaming Club for some gaming goodness.

The 1st game of the night was Llamaland.
A whole land full of llamas, they get everywhere, all over the fields, hills and mountains!

What's in a game?
  • Player tiles: One of these starter tiles is given to each player and represents the beginnings of the player's estate. They're double sided and feature a grassy landscape overlaid with 4x4 grid which in part contains various icons for coins, villages, cacao, corn and potato.
  • Land tiles: There are 12 each of these 5 types of tetramino shaped tiles. Similarly to the player tiles, they are double sided and feature a grid with icons and grassy land.
  • Foundation tiles: These are small square tiles and depict brickwork, their use is explained below.
  • Cards: Llamaland makes use of various types of card.
    Llama cards: You can't have a game called Llamaland without llama cards!
    These come in three types; cacao, corn and potato which are displayed at the top in a row 4 of the relevant icon. There are 16 of each and they are numbered from 5-12 VPs and feature illustrations of moody llamas!
    Objective cards: There are blue and purple objective cards which feature objectives for players to achieve. Each objective card also has 3 numbered rows with spaces for players to place their markers.
    Character cards: These cards represent villagers and when acquired by players,  can be used to acquire bonuses of some sort. Each card has a stylised, cartoony picture of a fairly generic looking South American native.
  • Tokens: Llamaland also makes use of various types of tokens.
    Player markers: There are 4 of these small, square-like card tokens in each player colour.
    Coins: Grey coloured round card tokens are used for money.
    Crops: There are 3 types of crop token, potato, corn and cacao which correspond to their llama cards and are essentially other forms of currency. Not only does each have it's illustration, they are also differently shaped.
    Shepard's crook: This staff shaped token is the first player marker.
  • Meeples: Perhaps unsurprisingly, the game's wooden meeples are llama shaped, I guess they're lleemples?

Most of Llamaland's components are good quality, the cards feel a little flimsy but unless they're abused, they should be fine. Otherwise it's all good, the tiles all feel suitability solid and chunky. The tokens are fine, I like how they're the different shaped.
​
The most noteworthy component though, are the cute little llama meeples.

The art in Llamaland is nice and colourful, all the tiles are bright and eye catching, the art for the character cards is heavily stylised but I like it.
The illustrations used for the llama cards depict them as llama meeples. If you look carefully at several cards, you can see that some of them have slightly different expressions! It's a nice touch and I wonder how often these kinds of detail get noticed?

Much of the game's iconography is easily comprehended, however, some of the icons on the character cards can be unclear, this generally applies to cards that confer bonuses for covering other icons because they show the relevant icons being covered and those icons are a little obscure.
The blue objective cards will probably require referring to the rulebook to understand.
None of this is a gamebreaker though. It's unlikely that players will need to look up anything more than once or twice.

How's it play?
Setup
  • Land tiles: Sort the land tiles into their 5 types and shuffle them into individual stacks.
  • Llama cards: Sort the llama cards into their 3 types, give each deck a shuffle and then according to the player count draw cards from each deck. Turn these cards face-up and then sort them by value, with the highest at the top and lowest at the bottom
    The remaining llama cards are not used the game.
  • Character cards: Shuffle the character cards into a face-down deck, then deal a row of 5 cards face-up next to the deck.
  • Objective cards:
    Blue objectives: Shuffle the blue objective cards and deal 4 face-up into the central playing area.
    Purple objectives: Shuffle the purple objective cards and deal 3 face-up into the central playing area.
    Remaining objective cards are not used in the game.
  • Players: Give all players a starter board, each can choose which side to start the game with.
    Then give each player the 4 markers in their player colour and 3 foundation tiles.
  • First player: determine a first player and give them the Shepard's crook. All other players gain 1 or more coins depending on their position in the turn order.

On to play
LLamaland is played using a traditional turn structure, with the active player taking a turn adding tiles to their estate. Once that's concluded, play moves to the player on the left.
  • Take tile: The active player takes a land tile and places next or on to their estate, there are 2 ways to do this and each has a different 'bonus' action. When a land tile is placed, it can be freely rotated or flipped as desired.
    • Extending: When a tile is placed orthogonally adjacent to the estate on the 'ground level' it is considered to be extending. 
      Free action: The active player may place a marker when extending, more on markers below.
    • Building: Land tiles can also be placed on top of the estate but there are some requirements.
      A land tile cannot be placed exactly on a identical tile and cannot cover a space containing a llama meeples. Additionally, there can be no 'gaps' underneath the tile being played. The active player can use any number of their 3 foundation tiles to fill in gaps.
      Free action: The active player may 'collect benefits' for covering icons.
  • Place marker: When the active player has this action available, they can take 1 of their markers and put it on a empty row on an objective card - or if their markers are all already on cards, they can move a marker. A row can only contain 1 marker at a time.
    There is no immediate effect for doing this and it only comes into play at the game end. Whereupon the marker will score VPs for whoever placed it provided they met the objective.
    Blue objectives: These tend to be objectives about the placing of llama meeples (See below about placing llamas.) such placing 4 llama meeples in a row.
    Purple objectives: These objectives are concerned with acquiring llama cards.
  • Collect benefits: When building upwards, land tiles will be placed on top of the estate. If this land tile covers any icons, then the active player gains those resources. Thus covering coin, cacao, corn or potato icons will gain those tokens, covering a village icon allows the player to take a character card of their choice from the row, or draw one blindly from the deck.
  • Feed a llama: Once the active player has extended or built upwards and completed the associated action, they can choose to feed exactly 1 llama in their turn by spending 4 of the required crop, players may choose to spend coins in place of crops by spending 2 coins per crop, then the active player performs the following 2 actions.
    Take llama card: The active player takes the topmost llama card form the stack associated with the crops they spent and puts it into their play area.
    Take llama meeple: The active player must also take a llama meeple and put it on to their estate. The meeple must go on to a empty green space. Furthermore, going forwards, land tiles can now no longer be placed on top of a meeple.
    10 crops: if the active player has 10 or more resources during this stage, they must feed a llama in this turn.
  • Character cards: These cards can be used once per turn each. Some cards which allow one resource to be swapped for another have double ended arrows, these means the swap can go either way.
  • Next player: Once the active player has finished, play move to the person on the left.

Endgame
Play continues until one of the following criteria is met.
There are 4 or less land tiles less, regardless of type.
There is only 1 type of llama card left.
In either instance the game goes into the endgame and play continues until all players have had an equal number of turns, then it goes to scoring.

Every llama card acquired earns its listed VPs.
A player marker on a objective card that the player has successfully completed earns that player its listed VPs.
Unused crop tokens earn 1 VP each.
Every 2 unused coins earns 1 VP.


Points are tallied, highest score wins.


Overall
Broadly speaking, Llamaland's gameplay is divided into 3 areas.

I'd say that primarily the game is concerned with tile placing mechanics. Much of the gameplay here will be familiar ground. Players cannot predict exactly what tiles will be available when drafting tiles will be available in their turn and will need to adapt to circumstances and look for opportunities. Pretty standard stuff.
The unusual element here is building upwards, it adds an extra axis (sic) to the gameplay. It's vital to build upwards efficiently, there's no other way to get resources and players will want cluster desired resources in such a way that it makes covering them quick and easy.

The second element is acquiring and placing llama meeples. When placing them, players will not only have to think about completing blue objectives but also trying to not hinder the placement of later tiles.
Chances are that players will have more than one objective for placing llama meeples and they'll want to maximise the placing and there's definitely some synergy going on between objectives. Many purple objectives require 4 of a kind llamas and some blue ones require placing 4 llama meeples on the estate in a certain, thus it's possible to work to both objectives together.

The third mechanic and one I find interesting is placing markers on objectives.
Placing markers later in the game is safer as players will have better idea on what they can achieve, or might already have achieved however, they end up having to put their markers lower value rows. Placing markers earlier though, means players can go for the bigger VP rewards - provided they can complete the objective. When a player puts one of their marker on an objective, they're essentially making a bet that they'll complete the objective.
It's a classic risk and reward mechanic.
It also makes individual objectives pretty apparent to all players, if someone's just put their marker on the collect 4 potato llamas objective card, it's safe to assume what they'll be going for and others can respond as they see appropriate.

Llamaland is a cheerfully colourful game that manages to always provides players with meaningful choices to make and strategies to utilise which I found it an engaging and fun.
0 Comments

Ginkgopolis

15/1/2022

0 Comments

 
15th January 2022

It's Wogglecon and the final game of the day was Ginkgopolis.
What's a Ginkgopolis? Good question, I guess it means Ginkgo city but what does Ginkgo mean? It's a type of tree, so Ginkgopolis must mean tree-city.

In Ginkgopolis, players take on the role city planners in tree-city and attempt to manage it's expansion, both outwards and upwards.

What's in a game?
  • ​Cards: Gingkopolis makes use of several different types of cards.
    Urbanisation cards: These 12 cards are labelled A-L and are used when expanding the city outwards.
    ​Character cards: These 27 cards provide players starting resources and they depict a personality, they may also confer bonuses when performing certain actions.
    Building cards: These cards come in 3 colours, red, yellow and blue and each relates to 1 of the game's key currencies, resources, building tiles and VPs respectively, (VPs can be spent as a currency in Ginkgopolis.).
    ​​Each set is also is numbered 1-20, thus there are 60 in total.
    At the bottom of each kind is a bonus it can confer on the owning player.
  • Building tiles: There are also 60 building tile, also in the same 3 colours and each numbered 1-20. Buildings tiles are tied directly to their card counterparts.
  • Tokens: The game uses several different types of token.
    Urbanisation tokens: These round tokens tie directly with the the urbanisation cards and thus are also labelled A-L.
    New hand tokens: The small round tokens show a hand of tokens and can be traded in by players to gain a new hand of cards during the game.
    Success tokens: VPs by any other name. These green tokens are stylistically shaped like the crown of a Ginkgo Biloba tree, a theme continued across the game.
  • Screens: Each player will have a screen to hide their resources from other players. These are pretty standard three-fold card screens and on the outside, a futuristic undeveloped landscape is depicted, inside an iconographic guide displays the basic game rules.
  • Resources: There are 25 wooden resources in each player colour and they are shaped like octagonal tubes, while they're not little cubes, octagonal tubes will do in a pinch.
  • Meeples: The game makes use of pretty unique wooden crane or construction (The industrial sort, not the bird!) shaped meeples (Creeples?). These meeples are used to track construction over a round.
That's it for most components.

Ginkgopolis has solid components, the tiles and tokens are constructed from suitability thick, chunky card as are the screens, while the meeples and resources are wooden which is always appreciated.

The game makes good use of colour, effectively mixing primary colours with green and emphasising the ginkgo tree motif employed throughout.
Ginkgopolis' artwork is high quality, character cards are well illustrated with slightly cartoonish, colourful individuals that follow the game's red-yellow-blue and green theme, the same is true of the building cards/tiles which depict various different types of structures.

The iconography in Ginkgopolis is a bit strange, there's not too much of it and it's fairly simple to understand. However, due to Ginkgopolis' almost counter-intuitive rules, getting to grips with it took a little time. Nothing too bad though.

How's it play?
Setup
  • Starting tiles: Take the 9 building tiles numbered 1-3 in each colour and randomly put them into a face-up 3x3 grid.
    This is essentially represents what buildings there are at the beginning of the city.
  • Building tiles: Shuffle the remaining build tiles into  any number of face-down stacks.
  • Urbanisation tokens: Take the 12 urbanisation tokens and place them around the perimeter of the 3x3 board in alphabetical order.
  • Starting deck: Take the 9 building cards numbered 1-3 in each colour (Identical to the building tiles setup in the 1st step.), then take the 12 urbanisation cards and shuffle them all into a face-down deck.
  • Building cards: Take the remaining building cards, sort them by colour and put them into ascending order by their numbers.
  • Players: Give each player the screen in their player colour and 2 new hand tokens, which should go behind the screen. Players do not initially get any resources, instead these are put into the central playing area.
  • Character cards: Shuffle the character cards and deal 4 face-down to each player. All players choose 1 character card to keep face-down and pass the remaining cards leftwards.
    Continue until all players have 3 character cards, unselected cards are discarded out of the game.
    Players now reveal their 3 character cards which should be placed in front of their screen. Once these cards have been revealed, players gain starting items as indicated on the card. These could be resources, VP tokens or building tiles are all kept behind each player's screen.
  • First player: Determine a first player. After this deal 4 cards from the building deck to each player face-down.
  • New Hand: When a player is dealt cards, they may discard a new hand token to draw a new hand.
On to play

In the basic flow of actions in Ginkgopolis, players simultaneously put down cards and then resolve them in turn order.
  • Play card: Each player puts a face-down card in front of their screen, they may also choose to play a face-down tile on top of that card. When all players have done that, play progresses to resolution.
    It's not quite as simple as that however.
  • Resolution: ​Players now all reveal their cards which are then resolved in turn order.
    The action a card performs changes depending on whether a tile has been played with it or not.
  • Playing a card without a tile: This action basically allows the player to gain one of the game's currencies.
    Urbanisation card: When this card is played without a tile, the player can gain a single resource token or building tile from the supply and place it behind their screen.
    The urbanisation card is then put into the discard pile.
    Building tile: If one of these is played without a tile, then the building on the card (Which will be on the grid of tiles.) is 'activated' and the player gains the related resource, be it resources, building tiles or resources. Furthermore, the 'taller' the building, the more resources the player acquires. More on building upwards below.
    The building card is then put into the discard pile
  • Playing a card with a tile: This allows players to build outwards or upwards, depending on the card played.
    Urbanisation card: Playing a building tile along with a urbanisation card allows the player to build outwards. The tile is placed on the space with the urbanisation token that matches the letter on the urbanisation card that was played. Thus, if the D urbanisation card is played, the tile is played on the D token.
    The token is then moved further outwards, the city must always be ringed by the urbanisation tokens.
    Finally, any tiles orthogonally connected to the tile just played are immediately activated and the player acquires the related resources.
    The urbanisation card is then put into the discard pile.
    Building card: If a tile is played with a building card, then this allows the player to build upwards on a already existing building tile. There are some rules that govern this.
    The tile that was chosen must be played on top the building tile that corresponds to the building card that was played. If there are any resources on the tile about to be covered, the are returned to the owner's personal supply.
    The player must put resources of their own on the tile they are playing equal to the new level. If a building is going up to level 3, then the player must put 3 of their resources on top of it. If the tile being played is a different colour​ from the current tile, then the player must discard 1 resource to the central supply.
    Additionally; If the value of the tile being played is lower than the current tile, then the player must spent VPs equal to the difference. If a level 8 tile is played on a level 10 builds, the player would need to spend 2 VPs.
    Finally, it's very important that a construction meeple is placed on the newly built building tile and the building card is played in front of the player's screen and not put into the discard pile.
    Districts: When 2 or more buildings of the same colour are orthogonally connected, they form a district. Districts are very important for the end game scoring.
  • Bonuses: Once a card's action has been resolved, the player should apply any bonuses they gain from the cards in front of their screen.
  • Continue: Once all players have completed the actions on their cards, play progresses on.
    All players pass the 3 cards they did not play to their left, the first player card should be passed on.
    1 card is dealt from the building deck to all players, so everybody now has 4 cards again.
  • Next round: Turns continue being played out until the building deck is depleted, in this case the following immediately occurs.
    ​All construction meeples are removed from the tiles they' were placed on and the card that corresponds to the tile is added to the building card. If a meeple was removed from the red 8 building tile, the red 8 building card is added to the building deck discard pile.
    All the building cards are then shuffled into a new building card deck, cards are dealt out as required and play progresses.
  • Depleted building tiles: When the supply of building tiles becomes depleted for the first time, the following action occurs once only.
    ​Each player can donate building tiles to a new supply and receive a VP for each tile they donate.
Endgame
There are 2 ways in which Ginkgopolis can end.
If the building tile supply is depleted a second time or if a player has put all resource tokens on to the city.
In either case, the current round is resolved and the game goes to scoring.

VPs come from various sources in Ginkgopolis.
  • VP tokens straight-up score their value.
  • Cards with end game bonuses on cards may also score VPS.
  • Each unused new hand token is worth 2 VPs.
  • Finally, each districts is scored, that is areas where 2 or more buildings of the same colour are connected. This can be slightly complicated.
    All players with resources in a single districts count them up. The player with the most resources scores VPs equal to all the resources in that district. 2nd place gains VPs equal to the resources in that district of their colour only.
    If a district only has resources of 1 colour (I.e., from 1 player only.), then that player scores VPs for both 1st and second place, which means scoring 2 VPs per resource!

Points are tallied, highest score wins.


Overall
​Firstly, one small fascinating thing about Ginkgopolis is how the game almost operates like a machine! Cards played to build something must not be put into the discard pile, otherwise they'll end up going back into circulation and later, players will end with cards in their hands that can't be used to either get currencies or build upwards.
Further to this, new buildings must be given a meeple so that players can track which new cards must be added to the building deck as again, it would leave players without cards to gain currencies or build.
Get this wrong and like a machine losing cogs, the game will begin grinding to a halt!
I don't know what kind of fevered imagination dreamt up this mechanic but it's both convoluted and brilliant!

​Ginkgopolis' rules are definitely a little counter-intuitive.
For example; when you play a card, that's not what you're building but what you're building on top of. Or after building something, getting to keep the card you used to build something.
Additionally; it took a little bit for me to wrap my head around the game. Remember:
Playing a card without a tile earns currencies.
Playing a card with a tile allows a player to build a tile.
I would also say Ginkgopolis is little fiddly for beginning player but none of this a dealbreaker, it's more an indicator of how Ginkgopolis feels a little unusual compared to other games I've played and I don't consider this a bad thing.

While there are various avenues to follow for scoring, I feel that the biggest source of VPs would come from controlling districts because it's possible to not only score your own resources but those of other players' too!
It can be quite hard to plan ahead though due to the card drafting and they'll be times when you'll want to play more than 1 card from your hand. It pushes you to make hard decisions (And hope the other cards come back around.), it means you have to adapt and spot situations you can exploit. It also means watching your neighbours and trying to gauge their objectives. There's quite a lot of player interaction that goes on and putting the right tile into play at the right time can dramatically alter the landscape. 

There's also an interesting strategy when deciding which tiles to put in the city. Putting a 20-value tile down makes it harder for other players to build over it, they'd have to pay VPs to build a lowered valued tile, or an extra resource to play a 20-value tile in a different colour.
On the other hand, keeping a 20-value tile back can give a player the opportunity to build over other higher value tiles later in the game.

The building outwards or upwards mechanics provide plenty of scope here. Expanding outwards can be easier (Provided a player gets the right urbanisation cards.) because a player need less resources and will also earn currencies when doing so. The downside is that it's easier for other players to build over your tiles.
The opposite is also sort of true, building upwards tends to be costly, but it's also more costly for other players to build over them.
Building tiles also puts the related card (And it's bonus action.) in to play in the player's personal area, creating the opportunity to combo actions into bonuses.

Players will need to balance the need to acquire currencies with the need to build tiles. However, as the city landscape and a player hand changes, so can the options to do either of these. Adaptation is vital and every decision can be critical

This made my choices feel meaningful when playing Ginkgopolis, which is always good. I'd say that Ginkgopolis is a mid-weight tile laying game with some fairly interactive area-control gameplay that gives players interesting and changing options.
It took a little time to warm to Ginkgopolis but I enjoyed the game and think it's worth giving a try.
0 Comments

Parks

15/1/2022

0 Comments

 
15th January 2022

It's a Saturday and we're at the Bisley Scout Hall with the Woking Gaming Club for Wogglecon,  for a day of gaming and hanging with with friends.

There are a lot of national parks in the USA and you're about to hike a bunch of them in the first game of the day; Parks.   

What's in a game?
  • Board: This small board is not a game board in the traditional sense and is instead used to manage the game's numerous decks of cards.
  • Tiles: Parks uses some unusually shaped tiles to construct it's main playing area.
    Trailhead & trail end: These are the start and end tiles for each hike and have a sort of chevron shape to one edge each. The trail end card has 3 options for players; visit a park (Which is another way of saying buy the card.), buy gear or reserve a park card.
    Trail sites: These are the trails that hikers will travel along during the game and provide players with the resources they need. They are unusually chevron shaped tiles and come in 2 types; basic and advanced. Basic tiles are used right from the start of the game, while the advanced ones are introduced one at a time at the start of every season.
    Camera tile: This large token is obviously shaped like a camera and makes it 'cheaper' for the owning player to take photographs, it's likely that the camera token will change hands frequently.
    Campfire tiles: There is one of these in every player colour and they're double-sided. One side shows a crackling and roaring fire, while the flip side shows an extinguished and smoking campfire site.
  • Tokens: Parks makes use of numerous tokens to track the game's resources.
    Resource tokens: The game uses 4 types of resources; water, sunshine, mountain and forest, the wooden tokens are suitability shaped and coloured to represent this.
    Wildlife tokens: These brown wooden tokens are 'wild' (SIC) resources and can be used as any of the 4 resources mentioned above. Interestingly, each wildlife token is a depicted as different animal, no two are the same.
    Photograph tokens: When players take photographs, they acquire one of these uniquely illustrated square card tokens. Photograph tokens score VPs at the game end.
  • First hiker token: Unlike all all the other components, this first player triangular token is made of metal! It depicts a stylised image of the wind gusting past a snowy-topped mountain.
  • Cards: Parks also makes use of several sets of cards.
    Park cards: These oversized cards each depict a different national park in the USA and can be bought by players. Along the bottom it shows the cost in resources and VP value. Additionally, each card also contains a small amount of text that provides titbit of information that park. It even names the artist who created the picture.
    Gear cards: Players will have opportunity to buy gear cards using sunshine tokens, these provide bonuses or benefits such as making something cheaper or being able to acquire more of a certain resource, etc. Gear cards feature heavily stylised illustrations.
    Canteen cards: After canteen cans are acquired by players, they are activated by placing a water token on them and confer some bonus, typically acquiring other resources.
    Season cards: Parks is played over 4 seasons and a card is revealed at the start of each one which will alter or add a rule for that season as well as determine the weather for the season - how sunny or wet it will be which in turn determines if bonus sunshine and/or water tokens appear along the.
    Year cards: If a game is played over 4 seasons, you've got to have a year card! These are basically secret objective cards. Quite often this involves visiting specific parks in some way or other.
  • Meeples: There are 2 hiker meeples (Heeples?) in each player colour.
​
​The quality of Park's components is universally high and it's obvious that a lot of care and attention has been put into the game, this extends even to the packaging and token trays.
The cards are fine and the tiles are appropriately thick. The tokens are all wooden, well made and colourful, the individually shaped wildlife tokens are the standout here. Finally, the inclusion of a metal first player marker is pretty unusual but it has a satisfyingly weighty feel to it and is a cool addition.

For nearly all of it's artwork, the game sources The Fifty Nine Parks Print Series which as the name suggests, is a project which consists of a picture of each American national park created by a different artist. Perhaps it could be argued that doing this saves on the art budget but honestly, it feels like a great collaboration.
As a result the game features excellent and varied artwork throughout, all the park cards and photography tokens are uniquely illustrated, the art also features on all the card backs and even the inside of the box lid! Fantastic!

Parks makes use of a fairly wide variety of iconography but for the most part it was easy to comprehend and presented no obstacle to the game.


How's it play?
​Setup
  • Board: Put out the board.
  • Park cards: Shuffle the park cards into a face-down deck and place it on it's spot on the board. Deal 3 cards face-up on to their allotted spaces.
  • Gear cards: As with the park cards, shuffle the gear cards into a face-down deal and deal 3 face-up.
  • Canteen cards: Shuffle the canteen cards into a face down deck on its spot on the board and deal 1 face-up to each player.
  • Year cards: Shuffle the year cards into a face-down deck and deal 2 to each player.
    Each player should keep 1 and discard the other out of the game. This card will become the players' secret objective for the game.
  • Trail: Separate the basic and advanced trail site tiles, then take the player-dependant number basic trail sites and randomly add 1 advanced tile.
    Next, shuffle all these tiles and lay them out from left to right, add the trailhead to the 'start' on the left and trail end to the right. They should all 'slot' together and you have the trail for the first season.
  • Season cards: Shuffle the season cards into a face-down deck, place it on it's spot on the board, then draw and reveal the card for the first season.
    This will determine the special rule for the season and will also dictate the weather conditions and where bonus sunshine and water tokens appear on the trail.
  • Hikers: Give each player the 2 meeples and campfire tile in their colour. Players should place their meeples on the trailhead tile and put the campfire tile to the 'fire' side in their personal playing area.
  • First player: Determine the first player.

On to play
Parks is played over 4 seasons during in which each the players' hikers travels along that season's trail from left to right.
  • Hike: The active player must move one of their hikers, a hiker can be moved as far as the owning player wishes but only moves towards the right and can never go 'backwards'. Furthermore, when a hiker stops on a tile, the player must perform that tile's action, if they are unable to do so, then the hiker cannot stop on that tile. Additionally, if a hiker stops on a tile that already contains 1 or more hikers, then they must flip their campfire token over to the 'used' side. If the campfire has already been used, then again, the hiker cannot stop on that tile.
    Actions: On the basic tiles, the actions mostly involve collecting various resources from the supply, one tile allows the active player to take a photograph or acquire a canteen card.
    The 4 advanced tiles allow players to swap out their personal resources, an extra opportunity to use the 'buy' actions or to potentially copy another tile's action.
  • Resource limit: Each player is limited to having 12 resources of any kind in their personal supply, including wildlife tokens.
  • Canteens: Each player starts with a canteen and can acquire more. When a player collects a water token, instead of putting in their own supply, they can put it on an available canteen card to activate its ability. Frequently it allows the active player to collect a different resource. This might not seem like much, but water is one of the more abundant tokens in the game and using it to acquire rarer resources can prove beneficial.
  • Photographs: If a player chooses to take a photograph, it costs them any 2 resources to do so and they put a photograph into their personal supply, after this they take the camera token into their ownership.
    If a player already has the camera token when they take a photograph, it only costs them 1 resource.
  • Trail end: When a hiker reaches the trail end, the active player has a choice of 3 actions.
    Visit park: This actually means buy a park card with their resources. A park card can be bought by the active player from the 3 available from the board or park card they have previously reserved (See below for information on reserving.). If a card is taken from the board, it is immediately replaced from the deck
    Buy gear: The active must buy one of the 3 available gear cards. As with park cards on the board, if a gear card is bought, it is immediately replaced.
    Reserve park card: When selecting this action, the active player must reserve a park card. They can pick one of the 3 available cards or draw blindly from the deck, in either case, they're put into the player's area but they have not been bought yet and do not score VPs until they are.
    The first player to reserve a park also takes the first player marker for the next season.
    Flip campfire: This is not an action per se; if a hiker reaches the trail end and the player's campfire token has been flipped to the used side, it is flipped back to the fire side. Thus a campfire can be used twice in a season.
  • Last hiker: When there is only 1 hiker left on the trail, on their turn, they must go directly to the trail end.
  • Season's end: When all hikers from all players have reached the trail end, the season is over and several actions occur.
    Photograph: Whoever have the camera token and take an additional photograph for the discounted cost.
    Canteen: All water tokens on all canteen cards are removed and they become available to be used in the next season.
    Trailhead: Move all the hikers on to the trailhead in preparation for a next hike.
    New trail: Pick up all the tiles in the trail and randomly add another advanced tile to the stack and shuffle them. Then deal out the tiles to create a new, slightly longer trail for the next season.
    Season change: A new season card is drawn with a new special rule and a new weather pattern to apply to the trail tiles.
    First player: Play now begins for the new season, starting with the current first player.

​Endgame
Once the 4th season has been completed, the game ends.
Players score points from the parks they've visited (Bought.), they also score a point for each photo they took and whoever has the first player token at the game end scores 1 point for it.
Finally; players reveal their year cards, completing the objective on these usually scores 2-3 points.
Points are tallied, highest score wins.


Overall
Parks is essentially a light worker placement game added where your 2 workers only ever head right combined with resource management.
It's a game all about planning trips that means that it's about acquiring resources to buy park cards which generally provide the majority of VPs required to win the game. However, it is impossible to fully plan things out. Going from season to season, players will have a good idea what resources and tiles will be available but not where they will appear. It requires adaption and some creative thinking when faced with a different tile layout.

Limiting the resources a player can own to 12 is an solid rule, it prevents players hording too much and splurging out big at once. It also makes players think about optimising their strategies.
The initial urge in Parks is to travel as slowly as possible to collect as many resources as possible and in the early-game that's not a bad idea but sooner or later, players will need to use them up and that means visiting parks.
Remember, players have only 2 hikers and that means they can only use the visit park action on the trail end twice per season (Provided they don't use any other actions on the tile.), this means that players have 8 opportunities to visit parks, yes; there's an advanced trail tile that allows extra buy actions but there's no guarantee where and when it'll appear.

This brings me to the worker placement element of Parks. Each player can use their campfire a maximum of 2 times in a season, it means thinking carefully before moving on to a occupied tile, it also means trying to anticipate how other players will move and if necessary, getting there first! Or perhaps moving the other hiker so that whoever is occupying the tile you need may have moved by the following turn.

Ultimately it means that players should look to optimise their moves, balance resource acquisition with card acquisition, players might well be competing for the same park card and watching a card you want being taken by another player because you tarried to collect an extra resource can be galling.
Players will have the double-obstacle of reacting to both seasonal changes and the choices made by the other players.

The game's rules are not over-complex but also provide a fair amount of depth. There's enough interaction between players to force you to pay attention to their choices . Decisions that players face are always meaningful and getting wrong could lose you out.
Add to this the game's top notch thematically appropriate production values and you have a small package that delivers a big game.


Having said that, it's not without a couple of drawbacks.
Most significantly; the game experience can change notably with player count. A 3-player game will feel quite different to 5-player. The hiker count goes from 6 to 10, the tiles become a lot more crowded and it becomes more challenging to do what you want. While in games with 4 or more players an extra basic tile is added into the mix, it doesn't quite alleviate the increased clutter on the trail.
Secondly, a 5-player game seems to last around 2 hours and that perhaps feels a little overlong. Parks doesn't outstay its welcome and it's not a game-breaker but it can feel a little long for what it is.

Other than that, Parks is well presented, accessible and satisfying to play (At least when you get the park card you want!).
It's definitely one that's worth trying.

0 Comments

Dice Hospital

30/12/2021

0 Comments

 
30th December 2021

Thursday afternoon gaming on Board Game Arena continued with Dice Hospital.

Doctor, doctor, please
Oh, the mess I'm in
Doctor, doctor, please
Oh, the mess I'm in

Mismanaging your hospital in Dice Hospital will definitely lead to a big mess!

What's in a game?
  • Player board: Dice Hospital's player boards are curiously hexagonally shaped and each contains a number of hexes which represent different departments
    Coloured hexes: There are 3 hexes which are red, yellow and green, they represent critical care, oncology and pharmacy.
    Numbered hexes: There are 3 hexes numbered 1-2, 3-4 and 5-6, they are intensive care, imaging and clinic.
    Wards: There are 4 ward hexes and each has room for 3 patients (dice.), thus 12 patients in total. Each hex also has spaces to place 'treated' patients.
    Nurse's station: This hex is where general nurses are placed at the start of each round.
    Discharge: This is where patients go when things go well.
    Mortuary: And this where patients go when things go bad!
  • Department tiles: Players can expand their hospitals by acquiring these hexagonal tiles. Departments improve a hospital's abilities to heal patients. Departments may be colour-specific (Red, yellow or green.) or 'neutral' (Blue.) which is generally number based.
  • Specialist cards: Players may also recruit extra workers into their hospitals in the form of specialist and these cards list their specialities. Like departments, specialists may be colour-specific or neutral.
  • Administrator cards: Each player will get one of these and they confer some unique benefit or scoring bonus to the owning player.
  • Meeples: These nurse shaped meeples (Neeples?) come in 5 colours, white and blue, as well as red, yellow and green which relate to the identically coloured departments. The white and blue are essentially general staff.
  • Dice: You won't be surprised to learn that Dice Hospital uses six-sided dice, a lot of them. They are used to represent patients and come in red, yellow and green which indicate the type of treatment they need; critical care, oncology or pharmacy. There are 21 in each colour and 63 in total.
  • Bag: Goes with the dice.
  • Ambulance tiles: There are 5 of these and they're numbered as such. Ambulances are used to deliver patients to hospitals, each ambulance has room for 3 dice.
    NOTE: The ambulance models seen in the photos here DO NOT come with the base game.
  • Blood bag tokens: Provide players with some special actions when used or VPs at the game end.
  • Fatality tokens: I'm sure get the idea...
There are some other tokens, but they're not significant to gameplay.

The component quality in Dice Hospital is all round good. The tiles are study and cards are of the expected quality. The game's 60 or so dice are plastic but with well rounded corners and satisfying to roll. Finally, all the meeples are stylised after medical staff, it's a nice touch and appreciated, they're made of wood too! Good stuff.

All of the art for the different departments on the hex tiles is quite small but also well detailed and depicts a variety of different medical equipment and hospital furniture, I quite like it.
The specialist cards have headshots of doctors, it's sort of average artwork but on the hand, they look like medical staff, what more could you want? Besides, how much more exciting could you make the portrait of a urologist look!

We found the game's iconography initially a little confusing but after a couple of references to the rulebook, it was always sorted out.
​None if it's a dealbreaker.


How's it play?
Setup
  • Dice: Put the allotted number of dice into the dice bag and give it a good shake.
  • Department tiles: Shuffle the tiles into a face-down stack and deal the allotted amount face-up, (This'll be equal to 1 less than the number of players.).
  • Specialist cards: The same as the department tiles:
  • Ambulance tiles: Use a number of tiles equal to 1 higher than the number of players. Start with the number 1 ambulance and put them out in sequential order.
  • Player board: Give each player a board and 3 white meeples, the meeples should go into the nurse's station
  • Administrator: Shuffle the administrator card and deal 2 face-down to each player. Players should which one to keep and discard the other out of the game.
  • Patients: Each player should draw 3 dice blindly from the bag and set the faces to 3, 4 and 5 how they see fit, then place them into 3 spaces on one of their ward hexes.
  • First player: Determine the 1st player.
That's pretty much it for set up. You'll notice that there's always never quite enough departments and specialists for players to take all of one or the other. Additionally, there's always enough ambulances to give every player a choice between at least 2.

On to play
​Dice Hospital is played over 6 phases, some of these phases are completed in turn order and some can be completed simultaneously.
  • Patients: The 1st player blindly draws a number of dice equal to the number of dice spaces on all the available ambulance tiles.
    The 1st player then rolls all these dice, any 1s or 6s are rerolled until all dice are showing 2-5.
    The dice are then placed on to the ambulance tiles, placing the lowest numbered dice on to the lowest numbered ambulance and go upwards so that the highest numbered dice end up on the highest numbered ambulance tile. The player to the right of the 1st player (The last player essentially.) may then have the opportunity to rearrange some of them.
    After this and in turn order, each player takes an ambulance tile and adds the dice to their wards. The only restriction here is that the 1st player cannot take the 1 ambulance, which prevents them constantly going first.
    If there's no space for new patients on the wards, then some patients will need to be sent to the morgue!
    ​Finally, a new turn order based specifically on the ambulance numbers is established and a new 1st player is determined, this player also gains a blood bag token.
  • Improvements: In this phase, players draft improvements into their hospital and this is where the new turn order becomes significant. In this new turn order, each player takes either a department hex or a specialist card (And appropriate meeple.) and adds it to their player board or play area.
    Furthermore; each player may discard exactly 1 improvement to gain a blood bag.
  • Hospital phase: This where arguably, the bulk of the game takes place, this can be played in order or simultaneously.
    Here players take their meeples and puts them into departments to heal patients. how is this done?
    If a meeple is put into the green hex for example, then a green die may be healed. Healing does 2 things, it increases a die's value by 1 (E.G., from 3 to 4.) and moves it to a 'treated' space in the ward. A die may be healed multiple times from multiple sources and if it's value would be taken to 7+, it is then sent to the discharge hex. More on discharging below.
    Improved departments generally allow more than 1 patient to be healed, althohg some allow lesser number of patients to be healed by more.
    There can be restrictions however.
    For example a red department may allow 3 red dice of equal value to be healed by 1 each, but it would have to exactly 3 not less. A neutral department may allow 2 dice with values of 1-3 to be healed regardless of colour.
    Specialists also provide more healing but may be limited. A yellow specialist used to heal a yellow die may also heal a 2nd yellow die.
    The abilities of departments and specialists may be combined. If a green specialist is placed on a neutral department and one of the dice healed is green, then the green specialist's ability would be activated.
    Each department and meeple can only be used once per round.
    Blood bags: These tokens can be spent for 2 effects, firstly, any die can be healed by 1 point, secondly, the colour of a die can changed to either of the 2 other colours. This is pretty useful when used with consideration, especially if activates a a department that could not be otherwise activated.
  • Neglect: Now we get to the bad part!
    Any die that were not treated, i.e. not moved to a treated space, has its value lowered by 1. If this would take a die's value down to 0, then that patient dies and the die (sic) is sent to the morgue.
    Every die sent to the morgue by a player earns them a fatality token. Then that die is returned to the bag.
  • Discharge patients: During this phase all patients are discharged and score VPs for the player. The discharged dice are returned to the bag.
    Scoring in Dice Hospital is a little unusual and exponentially increases if more patients are discharged at the same time.
    What this means is if 1 patient is discharged, then 1 VP is earned. If 2 patients are discharged at the same time, 3 VPS are earned and so on. If a player manages to discharge all 12 patients at the same time, they'd earn 35 VPs.!
    ​Additionally, if a player's wards are all empty during this phase, they earn a bonus 5 VPs.
  • End of round: This is the final phase of the round.
    Players' return all their meeples to their starting spots.
    All patients who were treated are moved back to their untreated spots.
    Any departments or specialists who were not drafted during the improvement phase are discarded to the bottom of their relevant stacks and new departments and specialists are drawn in preparation for the following round.
Play now progresses to the next round, with the 1st player drawing and rolling dice and the dice drafting phase and so on.

Endgame
Play continues until 8 rounds have been completed. Upon reaching the end, players calculate their final scores, this includes:
VPs for discharging patients over the 8 rounds.
+1 per unspent blood bag.
-2 per fatality token acquired. 
Scores are tallied, highest score wins.


Overall
As well as randomly determining which improvements appear, I like how the game makes use of dice as both a randomiser and a resource to be managed. Using dice value to gauge health levels and colours to represent different types of malady is innovative and great.

There's a lot of good gameplay in Dice Hospital and a lot to like. Figuring out how to strike balance the hospital's different needs, requirements and aspects is a satisfying challenge.

In this regard, the game's 2-tier drafting mechanics work well, drafting patients that are easier to heal means going later when drafting hospital improvements, that's a good balancing mechanic with meaningful decisions. There's also a higher level of play at work here, if you can anticipate which patients/improvements other players are looking to acquire, you can either try and either deny them what they want or make it easier to get what you want. For example, if no one else wants a red doctor, then going last in the improvement drafting phase is not a problem.

Knowing what and when to draft is probably the single most important aspect of the game, using those combinations of special abilities to heal multiple patients at a time is vital. It's also contextual, depending on the colour of patients and improvements appear and what a player already has in their hospital. Players may find themselves having to reappraise their strategy from turn to turn. Willingness to trash an improvement for a blood bag can also be a powerful play, used right, blood bags can provide much more than a single VP.
Luckily, the game provides fairly good opportunities to combo departments and specialists off each other, especially toward the latter half.
However, getting that balance wrong leads to sub-optimal play, having to many departments leaves them unused and too many specialists means they just do nothing.

Even though it's an abstract dice game, it genuinely feels a bit like you're running a hospital, having to try and find ways to treat and discharge patients before the next influx of unending patient.
This is not a coincidence. Players start the game with 3 patients and acquire 3 more every round, this means by the end of the 3rd round, they'll have filled all their wards (Provided they haven't already discharged any patients.), as a consequence, players will need to discharge 3 patients a round just to avoid sending some to the morgue.
Thanks to the scoring though, there's a wrinkle here. Discharging patients in drips and drabs doesn't score many VPs. Players will actually want their patient numbers to build up a bit and discharge as many of them at once as possible to optimise scoring.
It's a another balancing act and it all combines to make Dice Hospital a good game.

If you like worker placement mechanics, blended with a bit mid-complexity, light randomness, meaningful choices and almost engine building elements; then Dice Hospital is worth a try. One I found an enjoyable experience.
0 Comments

Village Pillage

9/12/2021

0 Comments

 
7th December 2021

The 2nd game of Tuesday night gaming with the Woking Gaming Club at The Sovereigns in Woking was Village Pillage.

The life of a villager is full of strife and woe, mostly due to those other pesky neighbouring villages who covet your turnips and hide away their own!
Village Pillage is about showing those nasty neighbours who's boss!

What's in a game?
  • Bank cards: Each player will get 1 of these identical cards, each one has space for 3 relics and 5 turnips.
  • Starting cards: Each player begins with the same set of identical 4 cards (Marked with an egg symbol?).
    Broadly speaking their are 4 types of card Farmers, Walls, Raiders & Merchants.
    These cards have their name along the top and to the left of the name will be a symbol, this symbol determines what type of card it is.
    At the bottom of the each card it shows how to resolve its effects against the 4 card types.
  • Market cards: This small deck of cards represents other cards that can be recruited to your cause. They fit into the same 4 types of as the starter cards but may possess different abilities at the bottom.
  • Relic tokens: These are standard round card tokens are illustrated with 1 of 3 kind of relic.
  • Turnip tokens: These card tokens are shaped like turnips, at least what pass turnips in the world of Village Pillage!
  • Chicken token: Because every game needs a large round card chicken token!

Village Pillage is a card game with some tokens, the build quality is standard for a modern game and what you'd expect it to be.
The game utilises a strong palette of colours to distinguish the different card types. It also makes use of brash and colourful cartoony artwork throughout the game which suitability fits its not-so-serious theme. All of this makes Village Pillage pleasing on the eye.
Village Pillage only makes use of 4 symbols for the 4 card types, there's also some wording rules as well. It's not particularly complex but for a light game, it's not immediately understandable. Having said that it's in no way any kind of game breaker.


How's it play?
Setup
  • Starters: give every player a bank card and the same 4 starter cards. Each player should also get 2 turnips, 1 goes in their bank and the other in their 'stockpile'.
  • Market: Shuffle the market cards into a face-down deck and deal 4 face-up, this is the game's market.
Now we're ready to go.

On to play
​In Village Pillage the objective is to acquire 3 relics before any other player does.  However, each player is only directly competing with their 2 neighbours, that is the players directly to their left and right, this means that in a 4 or 5 player game, there will be 1 or 2 players that you might never interact with.
A round ​in Village Pillage is played more or less simultaneously over 3 phases.
  • Planning: During this phase, each player decides which 2 of their cards to put  face-down, 1 allotted to the neighbour to their left and 1 allotted to to the neighbour to their right.
    Once all players have done this, all cards are revealed and play moves on to the next phase
  • Resolution: Once cards have been revealed, they must be compared to the neighbouring cards that were played by other players and resolved.
    Each card lists how it resolves against the 4 different types of cards.
    For instance, the Farmers card allows the owner who played it to gain 3 turnips against all types of card.
    The Raiders card allows the controlling player to steal 4 turnips from their neighbour if the neighbour played either  Farmers or Merchants. But if raider was played against a Walls card or against other Raiders, then the controlling player gains nothing.
    This is done for all cards.
    Village Pillage also has specific rules about timing and when cards are triggered which are very important about how cards are resolved.
    As well as gaining or stealing turnips, cards will allow players to bank turnips (Which makes them safe from stealing.) or buy either another card from the market or a relic token.
    ​Refresh: Players collect their cards and prepare for the following round.

Endgame
Play continues until a player buys their 3rd relic, in which case, they immediately win the game.


Overall
There's no denying it, Village Pillage is essentially a glorified implementation of rock-paper-scissors with card, that's not a criticism of it, far from it in fact.
​Unlike rock-paper-scissors, which is a context-less exercise in determining a winner, in Village Pillage players will have motivations and objectives for their actions, which can and probably will change from round-to-round. Additionally, the outcome a player will get against a neighbour can be unexpected depending on the context of the resolution, sometimes there is no 'winner'.

It's important to pay attention to what your neighbour is doing. If they have a lot of turnips, it may mean that they're looking to buy a market card or relic, which means that they may not try and interfere with you right now and it might be safe to grow some turnips of your own. Or it might be a good time to try and interfere with them. Provided, of course, that you have correctly anticipated their actions.

Or if a neighbour has no turnips, they may be looking to steal yours and you'll need to prepare appropriately: It's no coincidence that growing turnips gets you 3 but stealing them gets you 4!
It funnels players into interacting and conflicting with each other and that's what is at the core of Village Pillage.
It seems deliberately quite hard to get accumulate turnips to purchase relics without trying to exploit your neighbour.
​
All of this means that players always confronted with the possibility of having to make meaningful decisions and this is always a good thing.
Whilst there are only 4 types of card, the variation within these categories in the market cards keeps the game fresh with just the right amount of unpredictability. 

While this sort of lightweight, chance driven conflict with other players can be a lot of fun, this kind of confrontational style won't be to everyone's taste. For a light game, I also found the rules a little fiddlier than I'd like; pretty much each card has it own rules for how it resolves against the 4 card times which can slow the game down. The timing rules are unavoidably also a little fiddly.

None of this is any kind of deal-breaker and if you want a fairly straightforward, colourful, raucous filler game, then Village Pillage is worth a look.
0 Comments
<<Previous

    Author

    I play, I paint.
    ​This is where I talk about what I play.

    Archives

    February 2023
    May 2022
    April 2022
    March 2022
    February 2022
    January 2022
    December 2021
    November 2021
    October 2021
    September 2021
    August 2021
    July 2021
    June 2021
    May 2021
    April 2021
    March 2021
    February 2021
    January 2021
    December 2020
    November 2020
    October 2020
    September 2020
    August 2020
    July 2020
    June 2020
    May 2020
    April 2020
    March 2020
    February 2020
    January 2020
    December 2019
    November 2019
    October 2019
    September 2019
    August 2019
    July 2019
    June 2019
    May 2019
    April 2019
    March 2019
    February 2019
    January 2019

    Categories

    All
    2 Player Only
    50 Fathoms
    Abstract
    Annual Quiz
    Area Control
    Asymmetrical Play
    Auctioning
    Black Hack
    Bluffing
    Board Game
    Campaign Play
    Card Game
    Clockwork & Chivalry
    Cooperative
    Cthulhu Hack
    Deck Builder
    Deduction
    Dice Game
    Drafting
    Engine Builder
    Hand Management
    Hidden Role
    In Darkest Warrens
    Legacy
    Merry Outlaws
    One Vs Many
    Oubliette
    Party Game
    Programming
    Push Your Luck
    Real Time
    Renaissance
    Resource Management
    Roll And Move
    Roll And Write
    Roll-and-Write
    Route Builder
    RPG
    Sand Box
    Savage Worlds
    Set Collecting
    Storytelling
    Team Based
    The Month In Gaming
    The Year In Gaming
    Tile Placement
    Trading
    Traitor
    Trick Taking
    Voting
    Wargame
    Wasted Hack
    WFRP
    Wogglecon
    Word Game
    Worker Placement

    RSS Feed

Powered by Create your own unique website with customizable templates.
  • Home
  • Special Effect
    • Special Effect
    • Return of The Indiana Jones Charity Globe Trot
    • Bard's Tale Challenge
    • Fighting Fantasy Challenge
    • The Indiana Jones Charity Globe Trot
    • Mirkwood Charity Walk
    • Middle-earth Charity Walk
    • Dungeon Daze
  • RPGs
    • The One Ring
    • The Evils of Illmire
    • Beach Patrol
    • The Surrendered Lands
  • Game Blogs
    • RPG Blog
    • Gaming Blog
  • Painting Blog
  • Contact