3 Spellcasters and a Dwarf
  • Home
  • Special Effect
    • Special Effect
    • The Final Return of The Indiana Jones Charity Globe Trot
    • The Warlock of Firetop Mountain Challenge
    • Return of The Indiana Jones Charity Globe Trot
    • Bard's Tale Challenge
    • Fighting Fantasy Challenge
    • The Indiana Jones Charity Globe Trot
    • Mirkwood Charity Walk
    • Middle-earth Charity Walk
    • Dungeon Daze
  • RPGs
    • The One Ring
    • The Evils of Illmire
    • Beach Patrol
    • The Surrendered Lands
  • Game Blogs
    • RPG Blog
    • Gaming Blog
  • Painting Blog
  • Contact

Gaming Blog

Burger Boss - First Play!

30/6/2022

0 Comments

 
30th June 2022

It's a Thursday and we're at Aldershot for some gaming goodness.

Burger Boss! What's better than being a king? Being a boss of course!
​Be a boss of those burgers in this game of resource management and worker placement or if you want to be specific; dice-placement.

What's in game?
  • Cards: Burger Boss is not a card game per se but uses cards as a sort of proxy board and uses them for a variety of functions.
    • Restaurant cards: These come in every player colour and each has a differing humourous restaurant theme.
    • Kitchen cards: Can't have a burger joint without kitchen. Kitchen cards come in each player colour and have spaces for a worker, cold storage (A fridge basically.) and a grill track. Each colour also has a couple of expansion kitchen cards that when unlocked add more fridge spaces and additional grill tracks.
    • Game cards: Each of the game's main 8 actions are managed by a card. Each will have an amount of numbered worker spaces that can be used. Many of these spaces also require dice of specific value.
      More on game cards below.
    • Secret mission cards: Each of these provides players with a secret bonus scoring opportunity only revealed during the game end.
    • Manager's Special Cards: These can be acquired during play and provide players with bonus or special actions including some 'take that!' actions.
    • Meal Size Cards: The longer customers have to wait, the hungrier they get and the more food they'll buy! I'm sure that's how it works in real life?
      These 3 cards give a bonus of $1-$3 per customer respectively and speaking of customers...
    • Customer Cards: There are 30 customers, they're all very fussy and have specific food requirements for their burgers as displayed on their cards. Each card also lists how much they pay for their burger.
    • Turn Order Card: Burger Boss does not use a traditional turn order and it is tracked on this card.
  • Dice: There are 4 dice in each player colour. These are typical six-siders.
  • Cubes: Burger Boss has little wooden cubes, although there's only 1 in each player colour and they're used in conjunction with the turn order card.
  • Ingredients: Ah yes - the meat of the game! (SIC). Ingredients are represented by these sort of tiny - but chunky wooden discs. They come in 5 colours which correspond to the types of 5 ingredients; buns, burger patties, cheese slices, lettuce and tomato.
  • Money: Cash is represented by the standard round card tokens.

All the game's cards are finished in vinyl/plastic and as such feel quite sturdy.
The dice plastic, although they have nicely rounded corners.
Wooden components are always a plus in my book. The discs used to represent burgers and ingredients are obviously wrongly proportioned but if they were correctly sized, they'd have to be much bigger, otherwise they'd make the handling ingredients even more fiddly than it already is - which is quite fiddly and is my one criticism of the components.

Presentation wise, Burger Boss uses a cheerfully brash palette along with cartoonish illustrations. It's a bright, colourful art style that suits the game's light-hearted approach perfectly.

There's little iconography used in the game and it's easily understood, mostly consisting of symbol ingredients and and dice values.
The manager's special cards use text to provide information, which is a little sparse and will probably have players referring to the rules. It's not something that will occur too often though.


Packaging
I don't usually talk about a game's packaging - because usually it's just a box.
Burger Boss however, comes in a giant burger! Inside are several layers to hold all of the game's components.
Yes I know that it won't stack with other games and the manual doesn't fit in the burger and it'll just have to be put all back into it's normal, typical box anyway which technically defeats the  purpose of the burger packing - but it gives the game a unique, eye-catching presentation and I like that.
Yes, I also know it's just a gimmick but I like gimmicks!


How's it play?
Setup
  • Starting cards: Give each player the restaurant card, kitchen card and 2 dice in their player colour.
  • Cash: Give each player their starting $3.
  • Secret mission cards: Shuffle the cards and deal 1 face-down to each player. These should be kept hidden until the game end.
  • Game cards: Put out the 8 game cards.
  • Manager's special cards: Shuffle these cards into a face-down deck.
  • Meal size cards: Arrange the 3 cards in a row sequentially with the lowest on the left and highest on the right. Thus going $1, $2 and $3.
    During the game, customer cards will be added in columns beneath the meal size cards and slide rightwards throughout the game.
  • Customer cards: Shuffle the customer cards into a face-down deck. 

On to play
The objective in Burger Boss is to fulfil customer orders to earn money, this is done by gaining and cooking the required ingredients. All of these actions are achieved by putting dice on cards, many of these cards will require dice of specific values.
The game does not have a traditional turn order and instead uses a mechanic that mixes randomness and player choice to determine player order. Once player order is established, whenever someone becomes the active player, they can take an action by using a die.
Each round consists of the following phases.
  • New customers: Deal 2 customer cards in a column beneath the $1 bonus card.
    There will be no customer cards at the game start but in subsequent rounds any unfulfilled 
    customer cards will be slid 1 space to the right and more customers will be introduced using a sort of conveyor belt mechanic. Thus there can be up to 6 customer cards available at any one time.
    If a customer card has reached the 3rd space and must be slid across, it is instead discarded out of the game. Now that's an unsatisfied customer!
  • ​Turn order: Every round, dice are rolled to determine turn order.
    For the first round, the turn order is dictated by players openly rolling their 2 dice, whoever gets the lowest roll goes 1st, 2nd lowest goes 2nd and so on.
    However, in all subsequent rounds, every player rolls their dice in secret and can choose how many and which of their dice they want to use and declares them to the other players.
    This decision will apply to both turn order and to having dice to use as workers and their values during the round.
    It means for example; a player can use 1 die to go earlier in the turn order but will only get 1 worker.
    This becomes more important when players get 3 or 4 dice to use. Generally, having more workers is beneficial, but they'll be times a player will want to go first.
  • Actions: Once turn order has been determined, the game goes to actions and players get to each place 1 die at a time in that order.
    Spaces on game cards are limited, furthermore, the actions on many game cards will require a die of a specific number, additionally a couple of actions will require 2 dice.
    Once a the active player has placed a die (Provided it meets the required conditions.) it is immediately resolved. There a numerous actions potentially available to players.
    • Bakery: There are 5 spaces here numbered from 1-5 and they allow the active player to gain 1 or 2 burger buns depending on the value of the die used.
    • Butcher: There also 5 spaces on this card but numbered 2-6, again they allow the player to acquire 1 or 2 burger patties.
    • Cheese shop: There are 4 unnumbered spaces in a row here and they work a little differently. Dice are placed left to right and the 1st die placed here can be of any value but all subsequent dice must have a value equal to or higher than the preceding die.
      This means if the 1st die placed is a 6, then all subsequent dice must be 6's.
    • Fruit & veg: There are 6 spaces here, numbered 1-6. Spaces numbered 1-3 allow the active player to gain lettuce while spaces numbered 4-6 gives them a tomato ingredient.
    • Kitchen expansion: This card can be used exactly twice by all players to gain their kitchen expansion cards.
      The first expansion requires a pair of doubles or a single die of any value and cost of $5.
      The final expansion requires a pair of doubles and $5 or a single die and $10.
    • Manager's specials: There are 8 unnumbered spaces here. The active player may place a die of any value here to draw a manager's special card.
      These will provide players with some sort of bonus of some kind. Manager's special cards can be played at anytime in the active players turn.
    • Supermarket: This card allows players to gain any ingredients of their choice by paying for them.
      There are 3 unnumbered spaces here that allow a player to buy 1, 2 or 3 ingredients of their choice for a respective cost of $2, $4, or $6.
    • Workers: As with the kitchen expansion, this card can be used only twice by each player and allows them to gain more dice for use in later rounds.
      The first worker dice requires a pair of doubles or a single die of any value and cost of $5.
      The final worker requires a pair of doubles and $5 or a single die and $10.
    • Kitchen: The kitchen is where customers' burgers are created. Players must create stacks of ingredients that exactly match the requirements on customer cards. There are a number of rules regarding the kitchen and cooking.
      Gaining ingredients: Whenever a player gains ingredients from the above actions, they go into the storage space on their kitchen card(s), any excess ingredients are discarded. Also: ingredients acquired cannot be used for cooking in the round they were acquired.
      Cooking: To cook food, a die of any value must be placed on to the kitchen card, only 1 die ever required to cook, regardless of the number of kitchen cards a player has. This allows the player to move ingredients from the storage onto the grill, these ingredients cannot be removed, however, in later rounds more ingredients can be added. It's also possible to have multiple food orders cooking at the same time on the grill's 3 spaces.
  • Next player: Once the active player has resolved their action, play progresses to the next player in the turn order. If the new active player does not have any dice left to place, they simply pass. Once all workers have used, the game goes to the next phase.
  • Sales: This phase only occurs once all players have placed all workers. Then, in turn order players can fulfil customers orders, allowing them to remove the required ingredient stake from their grill, take the customer card and earn the money listed on the card plus the size bonus of the column it was in.
  • End of round: Several events occur at the end of a round.
    Ingredients on grills: All ingredients on all grills move 1 space to the right on the grill track. If a stack of ingredients comes off the 3rd and final grill space, they are discarded and the player receives a kingly​ $1 for their troubles!
    ​Dice: All players retrieve their dice from all cards and play returns to the new customers phase.

Endgame
The endgame is triggered when the customer card deck is depleted - although there will be customer cards in play. There is then 1 final round of playing then the game goes to scoring.

Players total money from the following:
Money earned from selling food to customers.
Money earned from their secret objective card.
Anything still on the grill earns $1 apiece; food in storage earns nothing.

Cash is tallied, highest amount wins.


Overall
Burger Boss is a light-to-midweight game, as written above, the rules seem a bit complex but in practice they're fairly straightforward. That's not say it's a good game for beginners - because it's not!

There are several mechanics and concepts in Burger Boss that that require thinking ahead and someone nuanced decisionmaking.
Quite often, it'll be impossible to complete a customer's order in a single round and generally there isn't enough cold storage to hold the required ingredients. This means that players will probably have to put ingredients on to their grill and hope to complete them in a later round. Mistake's can be costly and $1 is scant compensation for losing food.
Which brings me to customers. There's a balance to be found between completing a customer order as quickly as possible and waiting for a later turn to earn more money but risking another player getting that customer first!

While there is no direct interaction between players in Burger Boss, the game has a lot of open information and it definitely pays to watch what other players are doing; what they've got on their grills, where they're putting their workers and responding to this.

This ties in with the turn order mechanic, sometimes players will want to use less workers to go earlier.
​Worker spaces to gain ingredients are limited and turn order can play a vital role when fulfilling customer orders, in both cases, going later and being stymied by other players' actions (Whether accidentally or deliberately.) can be infuriating.

Burger Boss also has a a bit of the unexpected, manager's special card can also throw spanners into the works with unexpected special actions, especially when used judiciously.

Despite this, the game provides options to gaining other benefits - or benefits other ways, if the baker or butcher is inaccessible for any reason, there's always the supermarket. There's a pretty generous number of worker spaces on the card for the aforementioned manager's cards.
All of these means that rarely is a player presented with meaningless decisions which is always a good thing in games.

I found Burger Boss to be a colourful, visually appealing game of making burger (OK, they stacks of ingredients, but still it looks good.) and fun worker placement and resource management game with a reasonable play time and gameplay that's tricky enough to tax the brain enough to be engaging, along with a side order (SIC) of competitiveness.
0 Comments

Village Green - First Play!

25/6/2022

0 Comments

 
23rd June 2022

It's another Thursday evening and we're in Aldershot for another gaming night.

​Village Green - a local game for local people?
It turns out that competitions between local villages to have the best village green can be serious business!

What's in a game?
  • Green cards: These cards each depict some garden feature such as trees, a fountain or a gazebo.
    In the top-left of most cards is a symbol which dictates the card's flower type and colour.
    At the bottom of the card may be one or more of various icons, such as types of trees, lawns etc. These are mainly used to meet scoring criteria, although some symbols have special actions associated with them.
  • Award cards: These cards all contain scoring criteria, that is, ways to score points from green cards. There's a pretty diverse selection of scoring methods here. Some of the cards include ways to lose VPs which player will obviously want to avoid.
  • Village cards: There are 5 of these double sided cards. The 'front' of each card depicts a individual village in full colour (Along with 1 VP.), while the flip side show's the same village but monotone and missing the VP.

​Well that's it for the components - a deck of cards.
The card quality average and what you'd expect from games nowadays.

Watercolour styled artwork is used throughout the game on the green and village cards. depicting various items that could be found on an English village green (SIC). It's a pleasant style and the artwork all looks appropriately good, fitting it's theme quite nicely.

The iconography is not so well implemented though. I felt the symbols used for the different types of flower could have been a bit more distinct or individual, especially since the icons are quite small.
I also felt the 3 different types of tree icon displayed on the bottom of the green cards and award cards could have had been more distinctive.
Otherwise, the iconography is fine.


How's it play?
Set up
  • Village cards: Randomly deal a village cards to each player. Each should put it down face-up with the side showing 1 VPS.
    This will constitute the top-left of their 'tableau' in their personal playing area.
  • Green cards: Take the allotted number of green cards (As determined by player count.) and shuffle them into a face-down deck.
    Next; deal 3 green cards face-down to each player.
    Finally, draw 3 cards from the deck and place in them face-up in a row next to the deck.
  • Award cards: Shuffle the award cards into a face-down deck. Unlike the starting green cards, 3 award cards are dealt FACE-UP to each and placed in a row next each player's respective village card and are considered already in play.
    Then, as with the green cards, draw 3 award cards and place them face-up in a row next to the award card deck.
  • First player: Determine a starting player.

On to play
The objective in Village Green is to construct a tableau of 3x3 green cards while on the 'outside' of this 3x3 grid create a row and column of award cards to score points off of the green cards. Thus creating an overall 4x4 grid - including the village card which will be in the top-left corner.
Village Green uses the usual turn structure of having the active player complete their action then having play progress to the player on their left.
The active player can take 1 of the following 2 actions.
  • Bonus action: OK, this is not 1 of the usual 2 actions a player can take, before their action, the active player may perform 1 of the 2 following action once per game by flipping their village card over (And losing the VP it provides.).
    • Wipe all 3 cards from either the green card or award row and replace them.
    • Place a green card on top of another green card (This is not permitted otherwise.), however, the criteria for matching symbols/colours must still be met - see below for more on this.
  • Draw and play a green card: The active player must take one of the 3 green cards (Or draw blindly from the green card deck) from the central area and add it to their hand. Then they must play or discard any card from their hand.
    Play green card: A green card may be played face up in any part of the green card 3x3 grid, however there is a restriction; the flower type and colour must match at least 1 of the those elements with all orthogonally adjacent green cards.
    E.g., if a player wants to put down a card with a blue rose symbol, all the orthogonally adjacent cards must have either a rose type and/or blue colour.
    If there are no matching types, then a card cannot be played.
    Finally, green cards cannot be played on top of other green cards - unless the card has a lawn symbol.
    Green cards also have the following rules, depending on the symbols  at the bottom of the card.
    Lawn: If a green card has a lawn, that means it may be covered by another green card later in the game, although the usual rules about type and colour still apply. Covered cards do not score at the game end.
    Pond: Every visible pond symbol scores VPs at the game end.
    Structure: When a green cards with a structure symbol is played, the active player must immediately draw and place an award card following the usual rules for award cards.
    Trees: There are 3 types of trees and they can appear in various combinations on cards. Typically, trees are used for scoring.
  • Draw and play an award card: The active player must take a award card from the display of 3 (Or draw blindly from the award deck.). Then they must play it face-up into the column or row outside the 3x3 grid. An award card can be played anywhere in a row or column and unlike green cards, may be placed on top of other award cards. This means the award card beneath is no longer scored and may be something that a player wants to do if a award card will score negative or low VPs.
  • End of turn: Whenever a card is taken from either the green or award card rows, it is immediately replaced. Once the active player has concluded their action, play progress to the player on their left.

Endgame
There are 3 criteria which may end the game.
If either the green card or award card deck is depleted, or a player has placed 9 green cards, then the end has been triggered. The current is completed and the game goes to scoring.

Player score from the following sources:
A face-up village card scored 1 VP
Each visible pond scores 2 VPs.
Award cards score all the (Up to 3.) cards in their respective row/column.

Points are tallied, highest score wins.


Overall
On a basic level, Village Green is a fair simple game - pick a card and play a card, which makes it straightforward and quick to understand.
However, like all good games, it's easy to learn but hard to master and this is definitely the case with this game.

What makes Village Green tricky is having to literally think 2 steps ahead. Players will need to pay attention to a green card's type and colour when playing it because it will influence what is played next to it.
Not only is positioning important when playing a green card but the order in which they are played will matter too.
E.g., putting a green card into the centre of the 3x3 grid means that all 4 orthogonally adjacent cards placed subsequently must match the flower type and colour for that card. If the centre card is played last, then it would have to match all 4 cards already played and that requires planning ahead.
Matching 3 types and 3 colours might not seem difficult but remember, players will only have a hand of 3 green cards and a row of 3 cards to draft from.
Sure, a player can keep drawing and discarding green cards to hopefully get what they need, but this can catch a player out. Once the deck is gone - it's game over. Additionally, while rinsing through green cards, other players may be completing their 3x3 grids, which is also game over.
Ultimately, players will need to commit to taking some risks and play early cards with gaps between them for some wriggle room for placing later cards and also rely on a bit of luck to get what they need.

Award cards are also tricky to manage but in a different way.
Players start with three, which can be good as it gives each player a initial individual scoring target to aim for. However, as green cards get played and players may be forced to put them in certain positions thanks to type and colour, it may end up that a award card scores less, zero or even worse - negative VPs!
Luckily, award cards can be nullified by covering them with other award cards later. This though raises another quandary for players to ponder.
The later an award card is played in the game, the harder it will be to place in a way to maximise it's scoring potential.

Finally, there's some potential for higher level play by watching what cards other players are putting down, trying to anticipate their actions and denying them what they need.
Although, since some of the icons are so small, it can be physically tricky looking at other players' tableaus with leaning over them!

All of these mechanics are good because they always provide players with meaningful decisions as they try and positions cards so that they match type and colour as well as scoring criteria.

Having written all of that brings me to a drawback of the game, which is that it can be a harsh and unforgiving experience.
Players will be frustrated when unable to play cards and are instead forced to discard. It's likely that some players will end up without all their possible green or award cards - I know I did on my first play.

So despite being easy to learn, I'm not sure this is a game for more 'casual players'? If it 'groks' with them, they'll be fine. Otherwise it'll probably take a game or two to get handle on where to player cards.

There's not denying it's a elegant, fairly engaging game. It plays quick enough and will provide players the challenge of being able to place all their cards and also optimise scoring opportunities.
Definitely worth a try in my opinion.
0 Comments

Welcome To... - First Play!

25/6/2022

0 Comments

 
23rd June 2022

It's a Thursday evening and we're in Aldershot for some gaming goodness!

Welcome to the jungle, we got fun and games
We got everything you want, honey, we know the names
We are the people that can find whatever you may need
If you got the money, honey, we got your disease


OK, Welcome To... isn't a game about Guns N' Roses or in fact jungles. It's full name is 'Welcome to... your perfect home' and it's about suburban planning - and that's just as equally as glamorous!

What's in a game?
  • ​Player sheets: The top half of these sheets depicts a pleasant looking leafy suburb with 3 rows of residential streets of slightly varying length. Along these streets are fencing markers between properties while some of the homes have pools. Additionally, alongside each row is a tracker for 'parks'.
    The bottom half of the sheet is filled with trackers for the various different ways of scoring VPs,, importantly, it also tracks building permit refusals.
  • Construction cards: These are double sided cards, one side shows a house porch along with their street number ranging from 1-15, these numbers are not evenly distributed and the extreme numbers, e.g., 1, 2, 14 & 15 occur less often on the cards.
    ​The other side of each card shows an icon related to one of the game's actions or effects.
  • City plan cards: These provide additional scoring objectives for the game and are further subdivided into 3 types. They are based on creating housing estates of the specified size.

​The player sheets come in a pad of 100 pages and thus are used up over games, although they will probably last a long time. Now, this is only a personal gripe of mine but I'd rather have a handful of dry erase sheets instead. There's something unsettling about having your game slowly but inevitably eroded. Would dry erase sheets cost so much more?
The cards are the average quality you'd expect from a modern game.
Finally, I will add that the game does not come with any pencils or pens which feels a bit like an omission to me

The game has a subtle 50's Americana aesthetic to it's art direction, since there isn't a great variety of art used throughout the game, it's not immediately apparent (Other than on the cover!). Artwork on the construction cards are essentially a variation on a theme.
Having said that, the art that is used is attractive enough and looks good to me.

The game uses iconography for its 6 effects and also to convey information on the city plan cards. None of it is hard to learn and won't pose an obstacle.


How's it play?
Setup
  • Players: give each player a blank sheet.
  • City plans: Sort the city plans into their relevant types, then shuffle each type and draw 1 card from each. This gives players a variety of 3 extra scoring opportunities or goals.
  • Construction cards: Shuffle all the construction cards, then deal them into 3 decks in a line with the house number side face-up.

On to play
In Welcome To... players are attempting to create the best neighbourhood with their urban planning skills by creating houses and housing estates.
Welcome To.. does not use a traditional turn order, since players do not influence each other, all players' actions are resolved simultaneously.
In each turn, the following actions are performed.
  • Flip construction cards: 1 card from each of the 3 decks is flipped over and placed adjacent to the deck it came from.
    Thus, there will be 6 cards showing - 2 lines of 3 cards. One line shows house numbers and its adjacent line shows effects.
  • Choose combination: Now each player chooses 1 pair of cards from the 3 available pairs, that is 1 house number card and its adjacent effect card. Players cannot choose 2 house numbers or 2 effects cards, nor can they take from different pairs.
    Once a pair has been chosen, the player must write down the house number and resolve the effect.
  • Write house number: The player must write down the house number they chose in one of their available empty houses with the following restrictions.
    • Sequential: Numbers can be written anywhere along a street, however the numbers must always be sequential. E.g., numbers must go from left-to-right and increase in value.
      Gaps: It's perfectly acceptable to leave 1 or more spaces between houses. A player can put a '1' in the first house in a street, leave the on house on the right empty and place a '5' in the third house.
      Skipping numbers: It's also acceptable to skip numbers, using the numbers above it would be fine to put the '5' in the 2nd house on the right directly to the '1' in the first house.
      So long as the numbers always remain sequential it is acceptable. Obviously there are some risks inherent with some of the choices players will have to make but more on this below.
      Can't use a house number: If a player cannot use any 3 of the currently available house numbers, they cross off a box on their building permit refusal tracker.
    • Effects: Now players may resolve the effects that they've chosen. There are 6 effects. When used, most effects will result in something being crossed off in the score tracker in the lower half of the player sheet.
      • Bis: This effect allows the player duplicate a house's number on a empty space house directly adjacent, furthermore this can be done with a house multiple times. However, use of this effect will cost VPs at the game end.
      • Landscaper: This effect allows the player to create parks in the same street where they placed their house number, allowing them to cross off boxes on that street's park tracker.
      • Pool Manufacturer: If the player puts their house number into a house with a pool, that house will gain a pool, allowing the player to cross of a box on the pools scoring tracker and earning VPs at the game end.
      • Real estate agent: This effect allows players to cross off spaces in the housing estate tracker and increases the VP value of each completed housing estate (See below for more on housing estates.).
      • Surveyor: With this effect, the player may put fences between 2 houses. 
        Estates: When 2 fences have been put into a row AND all the houses between those 2 fences have been numbered, it is considered a completed housing estate, housing estates can contain 1-6 houses.
      • Temp Agency: This effect allows the player to alter the house number they are about to use by 1 or 2, thus increasing the range of numbers to 0-17.
    • City plans: If a player creates all the necessary housing estates to fulfil a city plan, then it is scored on their player sheet. The first player to fulfil a city plan earns the larger VP score, all subsequent players score the lesser VP value.
    • End of turn: Once all players have resolved their house number and associated effect, the turn is over. The 3 construction cards showing house numbers are flipped over on to the effects cards, thus revealing 2 new house numbers while their other sides now show 3 new effects.
      Then a new turn begins.

Endgame
There 3 criteria by which the game can end.
  • Once the 3rd box on any player's building permit refusal tracker is crossed off.
  • If any player completes all 3 city plan objectives.
  • If any player has numbered all house in all 3 rows on their player sheet.
Following this, the game goes into scoring.
There are a large number of scoring methods in Welcome To... and may come from:
generally, the first un-crossed off value is the score for that particular tracker.
  • City plans: The combined VP of any city plans a player completed are scored.
  • ​Parks: The combined score from all 3 park trackers.
  • Pools: The score from the pools tracker
  • Temp agency: This is a little different. Whoever has ticked off the most temp agency boxes will score 7 VPs, the player with the 2nd highest amount earns 4 VPs and 3rd place earns 1 VP.
  • Housing estates: Ok, this is a little complex.
    At the basic level a housing estate has a VP value equal to it's size, so will range from 1-6 VPs each.
    However, crossing off spaces in columns in the housing estate tracker will increase the value of those sized estates.
    Thus, crossing off a box in the 'size 1 estates' column increases the value of each  size 1 estate from 1 to 3. Crossing off all the boxes in the size 6 estates column increases the value of each 6 point estate to 12.
Additional, they are 2 trackers which deduct VPs.
  • Bis: Each time a bis effect is used, it will cost VPs.
  • Building permit refusal: Each box crossed off will cost VPs.

Points are tallied, highest score wins.


Overall
Welcome To... is a fairly easy to learn game that has a brisk playtime that does not outstay it's welcome (SIC), having said that though, it can end very quickly if the wrong numbers come up at the wrong time!

The game provides players some meaningful, interesting decisions to make, this is because there are '2' axis of decision making at work here - house numbers and effects.
If the game only utilised house numbers, then it would be too straightforward but by pairing them with effects, it provides intriguing propositions.
Players will frequently find themselves in situations where they will want to use a certain effect but don't want the associated house number or possibly, having to think about choosing an effect that won't benefit them in order to a house number they want. 

Players will need to adapt and make use of what they're given to work with, find ways to exploit the effects they've had to use and make them work.

In the case of house numbers, quite often this will mean taking house numbers that are not immediately useful and putting them into one of the streets.
This can present various problems for players.
Leaving too small a numerical gap between houses can be risky because only specific numbers can go there. E.g., having a 7, then a gap, then a 9 means only a 8 will fit in the gap later on.
Conversely, leaving too big a gap will mean wasting numbers. Having a 7, then a gap and then a 12 means that most of the numbers in the 8-11 range will be locked out and cannot be used elsewhere in that street anymore.

This is the classic dilemma players face in a lot of roll and write style games: Having to try and plan ahead, hoping what you need will come up at some point later on the game. It's essentially a bit of gamble. 
In this regard, it's something Welcome Too.. does very well and is a solid entry in the roll and write (Or flip and write if you really want to be pedantic.) genre.

It means that if this style of game is not your thing, you probably won't like Welcome To.. but if roll and write games are you thing, Welcome To... is definitely worth a try.
0 Comments

Terminator: Dark Fate The Card Game - First Play!

21/6/2022

0 Comments

 
21st June 2022

Tuesday is here and we're at The Sovereigns with the Woking Board Gaming Club.

Terminator: Dark Fate The Card Game is a cooperative deck-builder based on the film of the same name. In this game, players try to avoid or engage a pursuing terminator in a battle... to the death!
First apologies in advance; this is a card game about Arnie and terminators, therefore must have the requisite Arnie quotes.
​
Does this game make you want to 'come with me if you want to play?'
'I'll be back?' No, not likely, more like 'hasta la vista'​!

What's in a game?
  • Cards: Lots of cards!
    • Hero cards: There is one each of these 4 oversized squares cards for each of the heroes. It has a photo of the relevant character and displays each character's special ability. It also lists their unique card which only appears in their deck.
    • Starter cards: These come in 3 types,
      Resource cards: Each grants 1 resources.
      Unique hero cards: There is 1 unique card per hero and is also a starter card.
      Setback cards: Recognisable to people who have played pretty much any deck builder. These are trash cards do nothing - other than clutter a player's hand.
    • Fate cards: Yes, since this called Terminator: Dark Fate, 'Fate' is the fancy way of saying; the main ​deck of cards in the game. There are several types of fate cards. Many cards will have a associated cost shown in the bottom right corner and all cards will have keywords displayed on them which are related to their abilities such as action, draw, discard, defence, etc.
      Resource cards: No surprise here, these cards provides supply points which can be used to buy more cards.
      Munition cards: These provide combat points which can be used to damage the Rev-9 (What they call the Terminator.).
      Action cards: Allow players to perform a special action or confers a bonus of some kind.
      Location cards: Like action cards, location cards allow players to perform special actions except they are err... location based! These locations will be recognisable to fans of the film.
      Skill cards: These cards also give players bonuses or special actions, unlike other cards however, skill cards are NOT discarded at the end of a turn and remain in play, providing ongoing effects.
      Hostile cards: These cards can actually harm players as per their instructions, they can't be bought and have no cost but they do have a Resistance value. Hostile cards are activated when a terminator is running around. Speaking of which...
      Rev-9 cards: There are 4 Rev-9 cards of varying toughness which can fine-tune a game's difficulty. Each also has their own special ability. They lurk in the deck and pop out to cause trouble.
      Rev-9 cards have a Hunt value and a Stagger value as well as some special rules or ability.
  • Wound cards: These do not go into the deck and are used to track how many wounds a player takes. When characters are wounded, these cards go into their discard pile and when drawn clutter the player's hand.
    If a player has too many wounds at the wrong time... Game over man! (Wait that's the wrong movie!)
  • Damage tokens: There are 2 types of these acrylic tokens, representing 1 or 5 damage, they are used to track damage the terminator has taken.

It's a minor quibble but the acrylic tokens used to track damage are a little strange and seem a bit like some generic components cobbled together and sourced elsewhere for the game, I guess the 5 point damage tokens could interpreted as being mangled steel? Not so sure about the red gems though.
The cards are a pretty standard quality and what you'd expect from a modern game.

In terms of presentation, the game mixes a little original artwork with for the most part photos from the film.
I've said this before and I'll say it again, using photos that may well have been taken from a press or promotional pack provided by the distributor always looks cheap. This is no different.
The small amount of artwork used is fine and does its job.

Most of the game's information is relayed via text, there are only a couple of easily learned icons in the game which won't provide any obstacles.


How's it play?
Setup
  • Starter deck: Randomly deal or choose a character card for each player and also give them the relevant unique starter card. Give each player 5 prep cards and 4 setback cards.
    Each player should shuffle all 10 cards into a face-down deck.
  • Wound cards: Put all the wound cards into a separate face-up deck of their own, they are NOT put into the 'fate' deck.
  • Fate deck: Shuffle all the fate cards into a face-down deck.
    Reserve: Deal five cards into a face-up row next to the deck. This is the reserve, often called the market in other deck builders.
    Terminator: Randomly pick or choose a Rev-9 card, different cards provide different difficulty.
    Next; draw 5 cards from the fate deck and shuffle the Rev-9 card into them face-down, then keeping them face-down put the 6 cards on top of the fate deck. Thus the Rev-9 will be one of those 6 cards.
  • Starting hand: Each player should draw 5 cards as their starting hand.
  • First player: Determine a starting player.

On to play
Terminator: Dark Fate follows the typical turn structure for a deck-builder. The active player plays as many cards as they are able to and resolves them, then all cards (Except skill cards.), including un-played cards are discard. The active player then draws 5 new cards.
There are 3 phases to each player's turn.
  • Play Phase: This is the phase where the bulk of play takes place. At the start of this phase, the active player must choose to either Rest or Play Cards.
    Rest: If the active player rests, they may Destroy a card in their hand. Destroying a card removes it from the game entirely, useful for getting rid of setback cards or wound cards (More on wound cards below.).
    If the active player rests, the play phase ends after they've destroyed a card.
    Play cards: Obviously, most of the time, the active player will play cards.
    The active player will use as many of their cards as possible, since there's no cost to playing cards, they should be able to play all of them.
    Generally, played cards do 1 of 3 things, trigger a special ability or generate supply or combat points.
    Special abilities may allow players to draw extra cards or discard them, etc.
    Currency Pool: All cards that generate currency, contribute them to a pool, which can be used to purchase a card from the reserve, which is placed in that player's discard pile.
    All unspent currency is lost between turns.
    Combat pool: As with currency, all cards that generate combat points, contribute them to a combat pool. This can be used to apply damage to a Rev-9 card (If one is in play.) or hostile cards in the reserve by putting damage tokens on them respectively.
    If the damage on a Rev-9 equals or exceeds it's stagger value, it is considered Staggered, more on this below.
    If the damage on a hostile card equals or exceeds its resistance value, then the cards taken out of the reserve and placed at the bottom of the fate deck.
    Unlike currency, damage persists between turns.
    End of playing cards: Once played cards are resolved, all cards are put into the player's discard pile and 5 new cards are drawn.
    Exception: Skill cards stay in play, face-up in the controlling player's play area and persist between turns.
  • Reserve phase: There are 2 actions to resolve in the reserve phase, carried out in the following order:
    Refill reserve: if there are fewer than 4 cards in the reserve, add cards to the reserve until there are 4 cards there.
    Add to reserve: The active player must add a card to the reserve, taking it up to 5 cards. After this, provided the Rev-9 card is not in play, the active player may choose to add as many cards to reserve as they want. However, there's just one little drawback...
    Terminator: If and when the Rev-9 card is revealed at any time in either of the 2 reserve actions, then the reserve phase immediately ends.
    The Rev-9 card is not put into the reserve and is considered separate from it.
  • Hunt phase: If no Rev-9 has been revealed, then this phase is skipped. Otherwise the active player has potentially 2 following options to chose from.
    Flee: IF the Rev-9 has any damage counters on it, then the active player may chose to flee.
    When fleeing, draw a number of cards equal to the amount of damage on the Rev-9, remove all damage from the Rev-9 card and shuffle it into those cards and put them face-down back on top of the fate deck.
    The rest of the hunt phase is skipped.
    The hunt: If the active player does not want to or cannot flee, then the terminator goes on the hunt. They will have a number of actions equal to their hunt value.
    First; any hostile cards in the reserve are resolved (And costs a hunt point.) and then placed at the bottom of the fate deck.
    Then for each hunt point remaining draw a card from the fate. Any hostile cards are resolved and put at the bottom of the fate deck. Any location cards are also put at the bottom of the deck, all other cards are destroyed.
  • End of turn: Once the terminator has finished it's hunt, play proceeds to the player to the left of the active player.
  • Other Rules:  The game has some situational rules and rules exceptions mostly based on keywords.
    Leadership: These cards can be played at anytime.
    ​Location: When a location card is bought, it does not go into a player's discard pile but is immediately activated and placed at the bottom of the fate deck.
    Staggered: When a Rev-9 reaches an amount of damage as specified on their card, they become staggered, this means they are vulnerable to attacks that target staggered terminators.
    Wounds: When a character would take a wound, they take a wound card from the wound deck and adds it to their discard pile. If at any point in the game, a player has 3 or more wound cards in their hand, they are killed and the player's lose.
    Additionally, if the wound deck is depleted and any player needs to draw a wound card, the player's lose.
​
Endgame
Play continues until the Rev-9 is destroyed, in which case the players collectively win or until the any of the players are defeated by the Rev-9, in which case they collectively lose.
​Alternatively, if the wound deck is depleted and a player needs to draw a wound card, the players lose.


Overall
There's definitely some things to like about Terminator: Dark Fate.
I like that it's a cooperative deck-builder, which is pretty rare.
I also like how the game's mechanics captures the theme of being chased - something that occurs throughout the terminator films. A lot of the cards that appear in the game do a good job of reinforcing this.
How the terminator lurks in the in the fate deck until it appears and starts causing trouble and how the players can then can damage and push the terminator back into the deck to get some breathing space until it reappears.

I like how the Rev-9 hunts, activating hostile cards and also trashing the deck, it adds a natural countdown to the game.

Often players will need to make the choice between buying cards and damaging the terminator, it's quite hard to do both.
Players will also need to judge if it's beneficial to flee or sometimes rest - getting wound cards out of your hand/deck can be vital

Having said all of that, it brings me to a couple of issues with the game.
​
Firstly, is the game's currencies. There are essentially 2 currencies to manage, supply to buy cards and combat to damage the terminator.  It felt rare to have what you need in your hand when you need it.

There were frequent times that players would have a lot of combat orientated card in their hands but no Rev-9 card to fight as it was somewhere in the deck. - This probably also meant that since they had combat cards, they had little to no supply cards to buy more cards.

Conversely, they were times players were sitting there with supply cards and no way of fighting or fleeing the terminator.

Secondly and by far my biggest gripe is reserved for the errr, reserve rules: To put bluntly, I feel the reserve is too small.
Most deck-builders give players a choice of 10 cards to acquire, in Terminator: Dark Fate players will generally have a choice of 5, this will be worsened by the presence of hostile cards which will further reduce the choices. This can be bad in the early game if expensive cards appear, players may frequently find themselves unable to buy any and just passing or resting.
Yes players can choose to add more cards but quite often this felt too risky. Increasing the risk of drawing hostile cards or revealing the terminator if it's not out.
I'm not sure there's an easy to fix it though, a bigger reserve would risk more hostile cards appearing, this would be bad in the early game as players would have less ways to manage those cards.
Perhaps there needs to be a way of wiping and refilling the reserve? Or having a separate supply of cheap low value cards that are always available to purchase - as found in some other deck-builders.

We also found the game a bit harder than we liked. I know that luck always plays a role in any cooperative game but when you get a choice of 4 cards that you can't afford, it feels pretty futile.
I think perhaps, in earlier games that we didn't use the flee or rest actions quite enough, but honestly they felt a little counterintuitive; scrubbing all the damage on a Rev-9 to flee didn't seem to sit well with people, neither did resting.

It didn't help that the 'easy' starting Rev-9 card forces players to flee if they stagger it, meaning that to destroy it they will need to do a minimum of 11-15 damage in a single turn to defeat it, or to do 5 damage and and then have a card which defeats staggered Rev-9s.

The best strategy it seems, is to damage and constantly flee the Rev-9 until enough resources can be gathered to defeat it. It feels appropriate for a terminator game but also perhaps felt like it made the game a little too overlong. 

The game all felt a little frustrating and futile, especially with frequent turns where players had nothing to do.
It's a shame really, because there's the DNA of a good deck-building game somewhere in there that could really do with some balancing.
0 Comments

Hidden Leaders - First Play!

15/6/2022

0 Comments

 
14th June 2022

It's a Tuesday and we're with the Woking Board Gaming Club at The Sovereigns for some gaming entertainment.

​I always thought a good leader leads by example and doesn't hide? On the other hand most leaders don't have to contend with 4 feuding factions and the undead!
Hidden leaders is a fantasy themed sort of hidden role (Leader!) game with a dash of social deduction.

What's in a game?
  • Cards: Hidden Leaders uses 2 types of cards.
    • Leader cards: In a game called 'Hidden Leaders' there should definitely be cards called leader cards. The leader cards we played with were oversized, I'm not sure if that's a Kickstarter exclusive or standard in the game, either way they look pretty good.
      There are 6 unique, illustrated leader cards and each depicts icons from 2 of the game's 4 factions, these are 2 factions that the leader aligned to.
      More on factions below.
    • Hero cards: There are 70-odd hero cards in the game, while each is individual, they also share some common elements. Each hero card has a faction they are allied with, each also have a special ability as displayed on the bottom half of the card. These abilities perform a wide variety of actions, mostly to do with manipulating the game's 2 meeples.
    • Buried emperor: This is a special unique card in that is aligned with all 4 factions and begins the game - well buried in the graveyard.
  • Game board: This small board that colourfully depicts a fantasy landscape along with the game's 4 factions one each side of the board.
    A 12-spot track conveniently numbered 1-12 is also displayed on the board. The final 4 spaces of the track are 'dark', this is important at the game end.
    Finally around the board's edges are icons for:
    Harbour/draw deck: Next to the sea!
    Tavern/drafting area: There are 3 tavern spots for 3 cards.
    Graveyard/discard pile: Pretty explanatory.
    Wilderness/
    other discard pile: OK, this will require some explaining, more on this below.
  • Meeples: The game comes with two differently coloured solid looking stylised wooden meeples which represent 2 of the game's factions; a red crown for the empire and green mountain for the tribes.

There aren't too many components to Hidden Leaders but they're all of a good quality as you'd expect from any modern game. The cards are OK, the board is fine and the meeples are of a satisfyingly chunky quality.

Art-wise, Hidden Leaders is fantastic, each character is unique and has their own name and illustration, all of which are cartoony, brash and colourful, it's a style that appealing and perfectly fits the game's slightly humorous and not too serious theme.

There are icons for the 4 factions which are easily understood as well as a handful of other icons. It doesn't take long to comprehend all of this and it won't prove an obstacle.


How's it play?
  • ​Hidden Leaders: Shuffle the leader cards and deal 1 face-down to each player, these should be kept secret until the game end.
  • Game board: Put out the following and carry out the following.
    • Buried Emperor: Put the 'Buried Emperor' face-up in the graveyard spot adjacent it's symbol.
      All other cards placed in the graveyard must be face-up.
    • Hero cards: Shuffle the hero cards into a face down deck and place it adjacent to the harbour icon.
      Draw one card for each of the 3 tavern spaces and place them face-up adjacent to the tavern icons.
    • Meeples: Put the meeples on to their starting spot - the '4' space.
    • Players: Now deal 5 hero cards to each player. Each player must then play a hero card 'face-down' into their personal playing area.
    • Wilderness: Now each player must discard 1 card to the wilderness spot. This means each player has a hand of 3 cards.
      All cards discarded into the wilderness spot are always discarded face-down.
    • First player: Determine a starting player.

On to play
Hidden leaders is a game primarily about manipulating the 2 meeples on the board because their relative positioning at the game end will determine which faction wins the game and by extension which player wins.
This done by recruiting i.e. playing hero cards into your personal playing to create your own band of heroes.

There are 4 factions.
Black: Undead.
Blue: The Water Folk.

Green: The Hill Tribe.
​Red: The Imperial Army.

The game uses usual a traditional turn structure with the active player completing their action before play progresses to the player to their left.
During the active player's turn, the following must occur.
  • Play or discard: The active player must choose 1 of the 2 following actions.
    Play card: The active plays a card from their hand into their personal playing where it will stay (Unless another actions changes this.) and resolves the action on the bottom of the card which typically involves moving the 1 or 2 meeples around. There a great variety of actions that involve moving meeples, taking or putting cards into the graveyard etc and sometimes card will both a bit of both.
    Usually, cards played this way are played face-up.
    Discard hand: If a player does not want to play any card, they must discard their entire hand and thus will have 0 cards in hand!
  • Draw cards: The active player now draws cards to get their hand size up to 4. Thus if they played a hero card, they will draw 2 new hero cards. If they discarded their hand, they will draw 4 cards.
    Cards can be drawn from the tavern spots or blindly from the harbour deck as the active player sees fit.
  • Discard: Now that the active player has 4 card, they must discard 1 to the wilderness discard pile. Thus, players should always have 3 cards in their hand at the end of their turn.
  • Next player: The player to the left now becomes the active player.

Endgame
The game continues until any player has put 5-8 face-up hero cards into play (Dependant upon player count.), face-down heroes do not count for the purpose of triggering the game end. When this occurs, the current turn is the last turn and we go to declaring a winner.

First, the victorious faction must be determined, each one has their own winning criteria based on the positioning of the 2 meeples on the track.
Black (Undead.) wins if both meeples are in the black area of the track, that is on spaces 9-12. This is regardless of the positioning of the meeples relative to each other.
Blue (Water folk.) win if both meeples are on the same or an adjacent space on the track - provided of course they are both not in the black spaces.
Red (Empire.) wins if the red meeple is 2+ spaces further along the track than the green meeple, ​so long as both meeples are not in the black area.
Green (Tribe.) wins conversely, if the green meeples is 2+ spaces further along the track than the red meeple, again, 

Next; players reveal their hidden leader cards and face-down hero cards.
The player whose leader is aligned to the winning faction, wins!

It's quite likely that more than player will have a leader aligned to the winning faction. If this is the case, then the player with the most hero cards aligned to the winning faction wins.


Overall
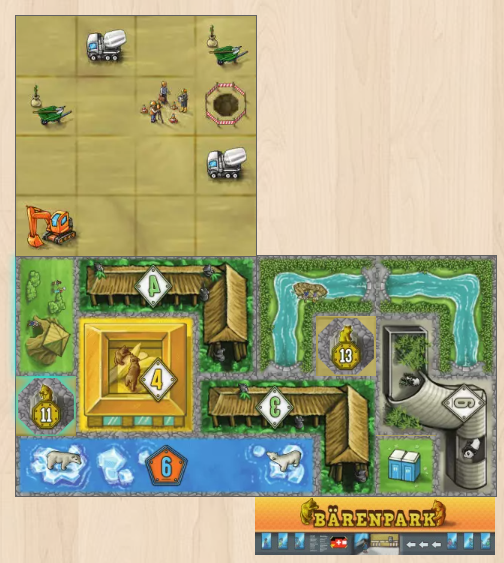
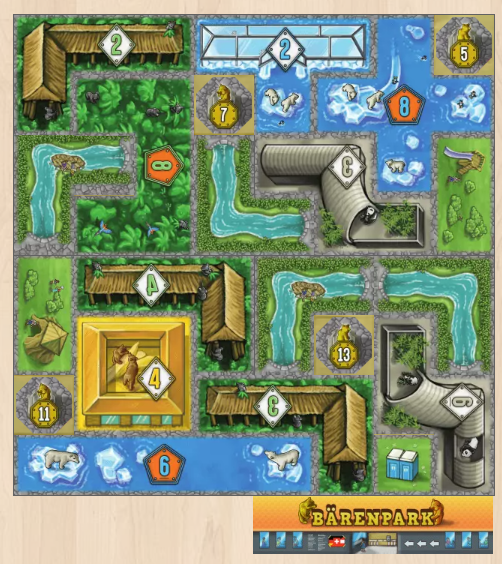
The first thing to mention is the game's asymmetrical winning criteria, it's something I've not seen elsewhere and is key to Hidden Leaders' appeal and informs all of the gameplay and tactics mentioned below.

The objective is pretty straightforward in Hidden Leaders. Players will not only be trying to manipulate the meeples to their own advantage but also trying to deduce the  motives of their opponents from their actions. This will allow players to try and anticipate their opponent's actions to their own advantage.

E.g., a player moves the red meeple up closer to green one which is ahead, is it because they want to bring them together to want the red meeple to overtake the green or do they want to put the meeple in the black area.
In this example, one single move can work towards the winning conditions of 3 factions.


Interestingly, when cards are discarded to the wilderness, it's face-down so others can't try and see which cards are essentially worthless to the discarding player. Further more, players will at least 1 face-down hero.
All of this is compounded by each leader being aligned to 2 factions so it can be hard to try and guess which faction they're supporting.
It's a great use of 'imperfect knowledge' mechanics that will keep players on their toes.

Hidden Leaders is a fairly easy to learn rules-light game, it mixes this accessibility with a higher level of play and depth of complexity that comes from trying to anticipate the actions of opponents that will make players think.
So, while theoretically the game has a reasonably quick play time, some players will spend a lot of time analysing their options and next move. In short; the analysis paralysis can be strong with this one and it seemed to take longer than expected. But that can be down to the players.
It should also be noted that whilst Hidden Leaders doesn't really have direct interaction between players, it definitely has a bit 'take that' mechanics. It's not too harsh to be fair but it's there and I for some players this is a no-no.
Having said all of that, I found the gameplay a little slow, it felt like 1 card-play/actions wasn't quite satisfying enough and it felt like there was a bit too much downtime between turns, although we did play with a player count at the higher end.

Otherwise I can't fault Hidden Leaders. If card games fairly heavy on deductive reasoning and trying to gauge the motives of other players are something you like, you'll probably find this engaging and enjoyable. 
0 Comments

Barenpark - First Play!

12/6/2022

0 Comments

 
12th June 2022

Sunday evening is here and we're logged into Board Game Arena​ for a night of gaming.
​
Does a bear lay tiles in the woods, who knows? What I can tell you is that a bear definitely does lay tiles in the park thanks to Barenpark: A tile laying game about building a park for bears and bears only!
Caveat: we've only ever played Barenpark digitally.

What's in a game?
  • Game boards: All boards feature a 4x4 grid, 6 of these 16 spaces will contain 6 icons taken from a combination of 4 different type of icons and finally, one other space will contain a 'pit' space. The remaining 9 spaces are blank.
    Boards come in 2 flavours; starting and standard.
  • Tiles: Barenpark uses a number of tetromino style tiles, although many tiles are much bigger or smaller than standard 4-space tertromino tiles. Barenpark has 3 types of tile.
    Green tiles: These tiles display different facilities that would be found at a park such as toilets, playgrounds etc. Green tiles score no points.
    White tiles: A white scoring icon indicates which tiles are white tiles. White tiles represent housing for game's 4 different types of bears.
    Each of the types will have 7 tiles of varying VP value from 1-7.
    Orange tiles: Like white tiles, orange scoring icons indicate which tiles are orange tiles and these represent enclosures for the 4 different types of bears.
    Unlike white tiles, there are only 3 of each type of orange tile, they also have a varying VP value, only from 6-8 instead.
  • Bear statue tokens: There are 16 of these are round tokens and are numbered 1-16 which is also their VP value.

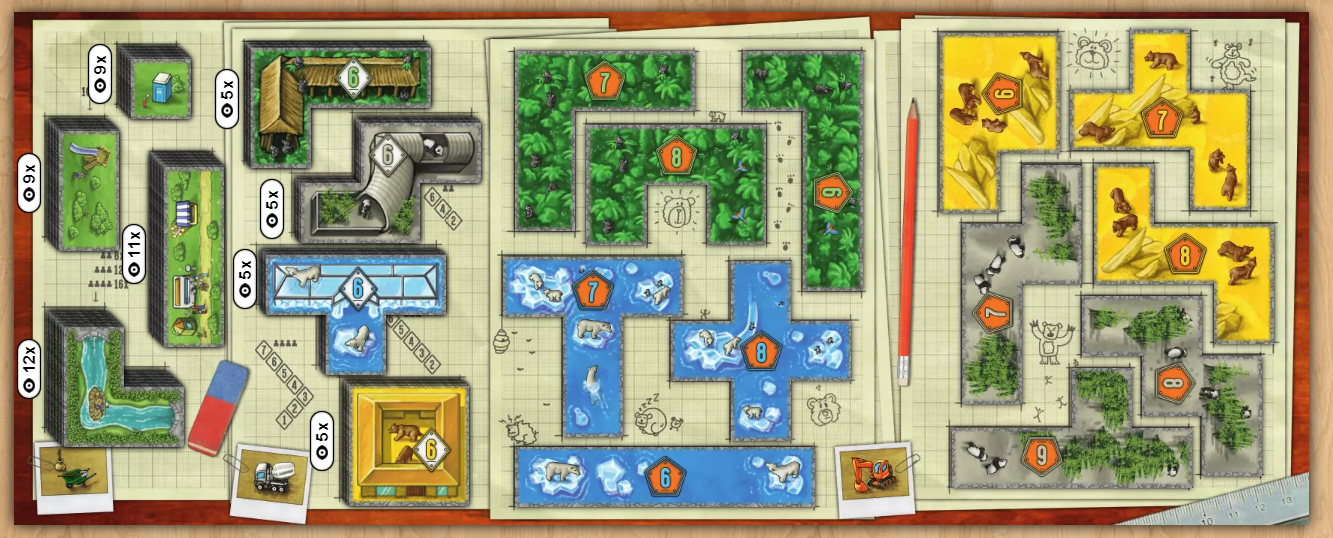
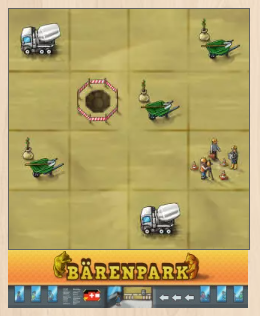
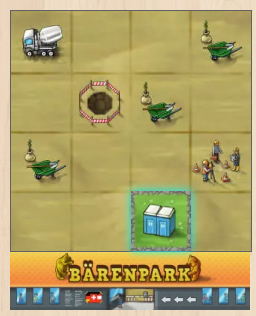
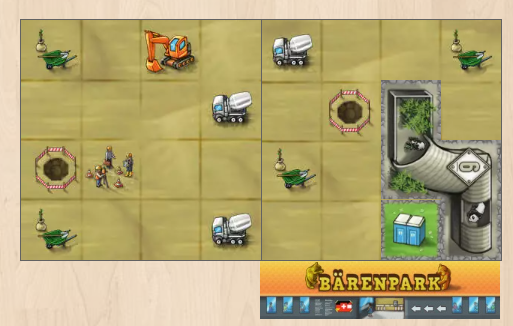
Barenpark's art is fairly minimal but effective. It's nothing to write home about but is perfectly functional.
Tiles display artwork themed to their type, so the green tiles feature a portaloo for a toilet, a playground for a play ground and so on.
The white and green tiles show buildings and habitats pertinent to the type of bear they represent. E.g., the polar tiles appear glacial.

There are only a few icons in the game and they are easily learnt. They are also colour coded, thus the wheelbarrow icon - which is green - represents green tiles, thus white cement trucks are for white tiles and orange excavators are for orange.
The work crew icon represents construction crews which is not related to tiles.

One slight criticism here is that while there are green, white and orange tiles, some tiles which are coloured green will actually be white or orange tiles, there are also some glacial blue tiles which are actually orange.
It's a minor quibble, but players will need to remember that a tile's colour is based on its scoring icon. This could have been improved by using unique colours.


How's it play?
Setup
  • Game boards: Randomly give each player a starting board.
    Take all the standard gaming boards and shuffle them into 2 equal face-up stacks in the central playing area.
  • Tiles: Sort the tiles by type and put them out in the central playing area face-up as per the player count.
    White and orange tiles should be arranged with the highest value tile being placed at the top and descending in value. This means as more and more tiles get taken, the remaining point scoring tiles decrease in value.
  • Bear statue tokens: Put out these tokens, again, the player count will determine which tokens are used. They should put out in numerical order.
  • Determine a starting player: The starting player should take a 1-space green tile from the supply (In other words take a portaloo tile!) and place it in their playing area, NOT on the board. All other player should take 2 or 3 space tiles as per the player count rules.

On to play
In Barenpark, players complete to create the best bear park ever. Players achieve this by placing tiles on to their boards which in turn allows them to draft more tiles and boards.
​
Barenpark uses a traditional turn structure with the active player taking their turn before play progress to the player on their left.
During the active player's turn, they must perform the following actions.
  • Play tile: The active player must play one tile from their personal playing area if they can. Tiles can be placed anywhere except on a pit space and can go across multiple boards provided there are enough spaces, tiles may be rotated and flipped as desired. Obviously tiles must fully fit on the available board spaces and cannot go over other tiles.
    First tile: The first tile a player puts down can be anywhere on their player board. Subsequent tile placements must adjacent to a tile already on the board.
    Passing: If the active player does not have a tile available or cannot place a tile because it doesn't fit in any current space; they then must take a green tile (Of their choice.), this immediately ends their turn.
  • Draft: After the active player has placed a tile on their board, if they covered any icons, then they draft tiles and/or board as pertinent. If multiple icons are covered by a single tile placement, then all icons are resolved.
    Green wheelbarrow: Every one of these icons covered allows the active to draft a green tile.
    White cement truck: A white tile may be drafted.
    ​Orange excavator: A orange tile may be drafted.
    Construction crew: Covering this icon allows the active to draft a new game board by taking a board from one of the two available stacks and adding to their existing player board.
    The new board must be placed adjacent to a board already in play in the same orientation. A player is limited to a total of 4 boards for their park but may create a park of any shape within that limit, they can be placed in a line or a 2x2 grid or a t-shape or whatever.
  • Take bear statue: Now the active player checks to see if all of the 15 spaces on any of their game boards have been completely filled with tiles - except of course, for the pit space.
    If any board has been filled, then the active player takes the highest value bear statue token and places it on the empty pit space on that board, thus finally completing it.
  • Next Player: Play now proceeds to the player on the left.

Endgame
When any player completes their 4th game board, that is; collects their 4th bear statue, then the endgame is triggered.
​All other players now have one more turn of play and then the game  goes to scoring.
Players add together the value of all tiles played and bear statues placed on their game boards.

Points are tallied, highest score wins.


Overall
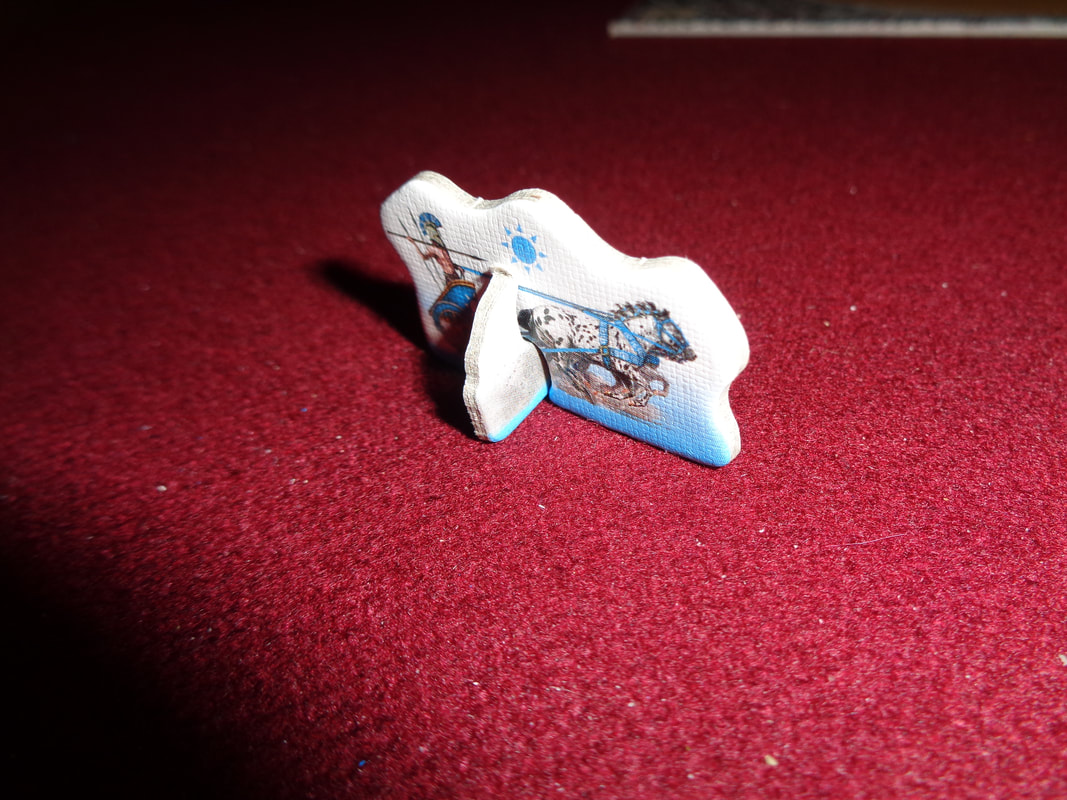
Barenpark is a smart blend between easily understood, accessible rules, meaningful decisions and optimising gameplay. The game is something of a race to get the highest scoring tiles and bear statue tokens first and this can put players in something of quandary.

For the most part, players will want to draft white and orange tiles as often as possible because they score the points. They also cover more of the board and thus potentially draft more tiles. This is particularly true of orange tiles.
It means that players should be looking to cover icons with their tiles placements as effectively as possible to gain more tiles. Using an entire turn just to gain a green tile is not particularly efficient.
Having said that, greens are not bad tiles, sometimes getting green tiles is a useful move, those 1-space portaloos can fill in pesky gaps on a board, working towards getting bear statues.

Talking of bear statue tokens.
Sometimes it's worth taking a less efficient tile just to complete a board and gain a higher scoring token before another player. This is all of course contextual and dependant on the situation.

There's definitely a small degree of higher level of play going on here that comes from watching other players turns and trying to anticipate their next moves. With limited numbers of white and orange tiles, knowing which tile another player might go for gives you the option of employing a denial strategy against them or beating them to the punch for a token.

This brings me to the one criticism I have. When playing Barenpark in some circumstances it sometimes felt like that if one player got 'ahead' they tended to stay ahead.
By ahead I mean managing to fill spaces on the board before other players. This is most apparent when drafting bear statue tokens. At times you can see that a player will complete one of their boards before you and claiming the better scoring token, then they'll also be ahead for the next board and claiming the token ahead of you again.
Of course it's possible to re-prioritise and change which board you're trying to complete but since Barenpark has fairly linear gameplay (By which I mean you can only expand you tiles into areas where you already have tiles.), this can be tricky, although the endgame rules where players get an extra turn after whoever finished it probably goes some way to alleviating this.

I think Barenpark is a good, if unremarkable game that feels a little 'bland' or functional and is a little on the light side of this style of tile-placement game but I don't see that bad thing.

But quibbles aside, if you want a solid, tile-placing game that's not-too taxing but still engaging, Barenpark is a good choice.
Barenpark's accessibility and 'lightness' means means it's a good choice for a gateway or entry game.
0 Comments

Chariot Race - First Play!

10/6/2022

0 Comments

 
9th June 2022

​Gaming night Aldershot continues with Chariot Race.

As you might have guessed from the title, this game about managing railway companies in the 19th Century on a hex-based map of North America. NO WAIT, THAT'S NOT RIGHT!

Chariot Race is about chariot racing in ancient Rome. That name is sure is confusing!

What's in a game?
  • Game board: This oblong board depicts a oval race track with 3 lanes in a sort of coliseum setting. Each of the corners also shows a 'safe speed' which differs for each lane, the outer one having highest safe speeds. The board also displays 6 starting spaces.
    The board is double-sided and on the 'B' side contains some obstacles to be avoided, providing some more challenge to the game
  • Player board: There are player boards in every player colour and each one has 3 columns.
    The left and right columns track damage and speed respectively, while the centre column is 'segmented' and each segment displays a differing number of dice, starting with 1 die at the top and going down to 5 dice at the bottom.
    Finally, at the top is a horizontal 'fate' track that goes from 0-6.
    Additionally, each board also comes with 3 'pointer clips' to track all of this.
  • Dice: The game uses non standard wooden six-siders with rounded corners and instead of numbers they depict symbols which represent the following.
    • Speed change: This result makes the player alter their speed by +1/-1/
    • Extreme speed change: This result makes the player alter their speed by +2/-2, however it also inflicts a point of damage on their chariot.
    • Change lane: Allows the player to move their chariot to a different lane. This symbol appears twice on each die.
    • Attack: Allows the player to drop caltrops or throw a spear at another player! Well this is Roman chariot racing.
    • Fortuna: Gives the player a point of fate.
  • Standees: The game's chariots are standees constructed from 2 thick card tokens which slot together.
  • Caltrops: These are little grey wooden cubes, they don't look much like caltrops but since they're little wooden cubes, I approve!
  • Lap tokens: These little double-sided tokens are used to indicated which lap a player is on.

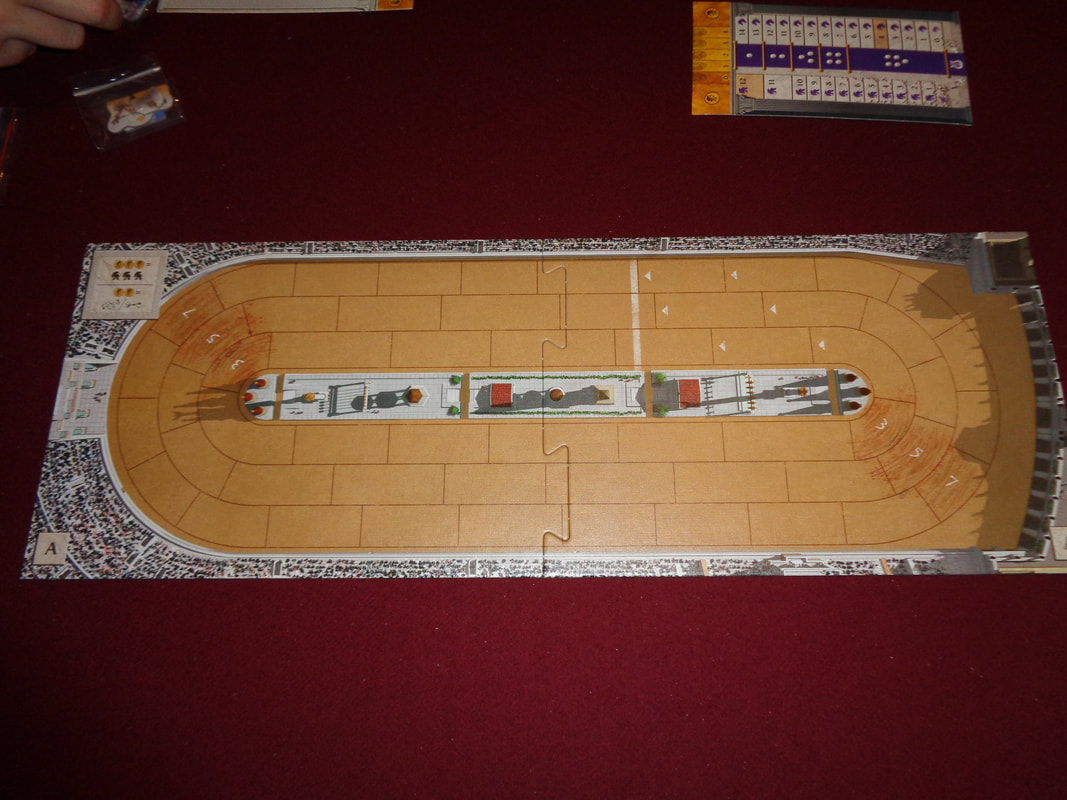
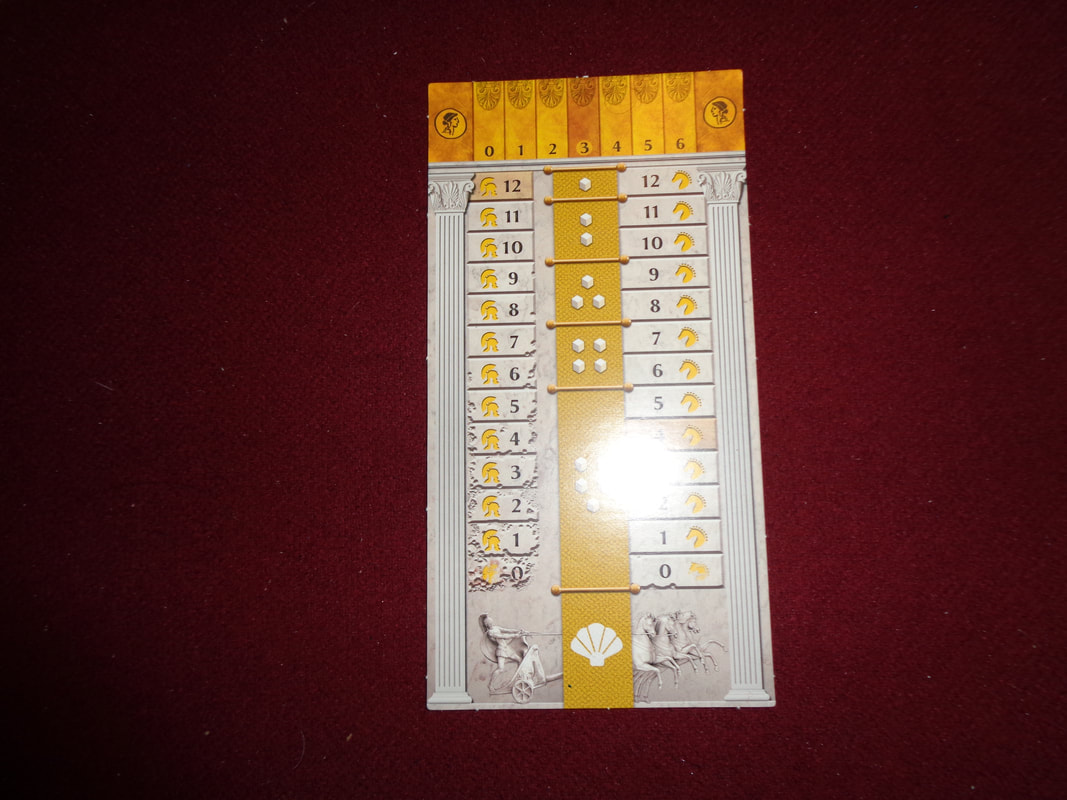
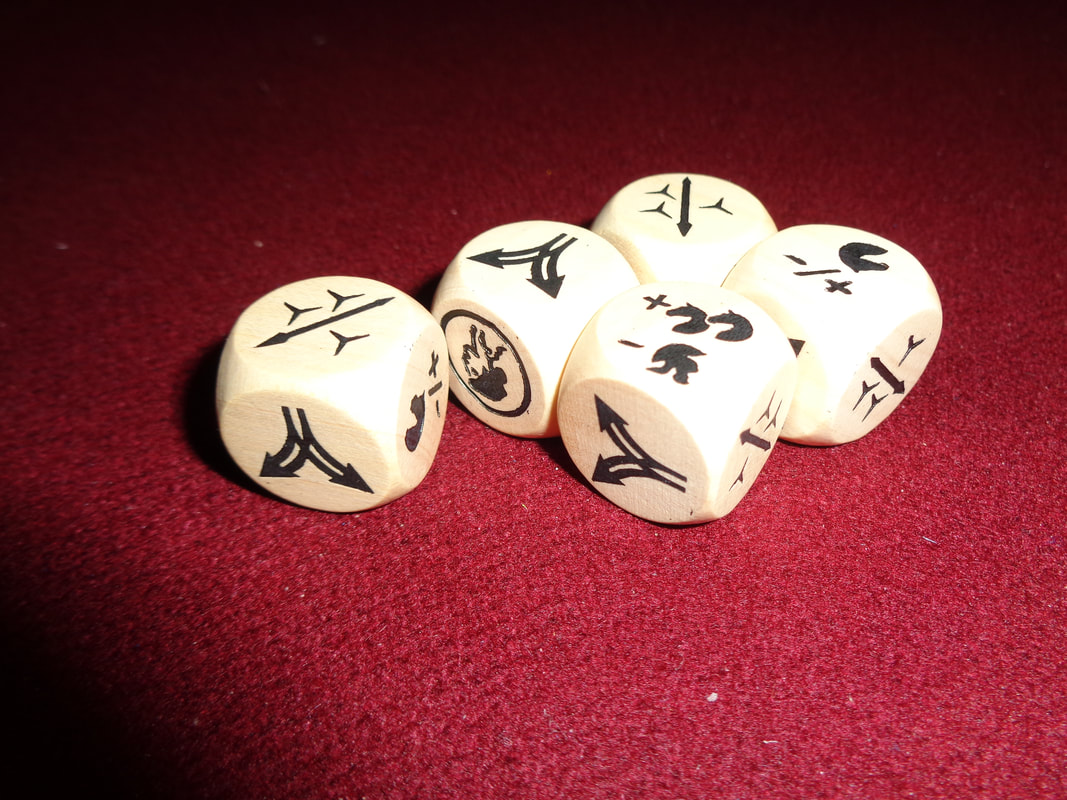
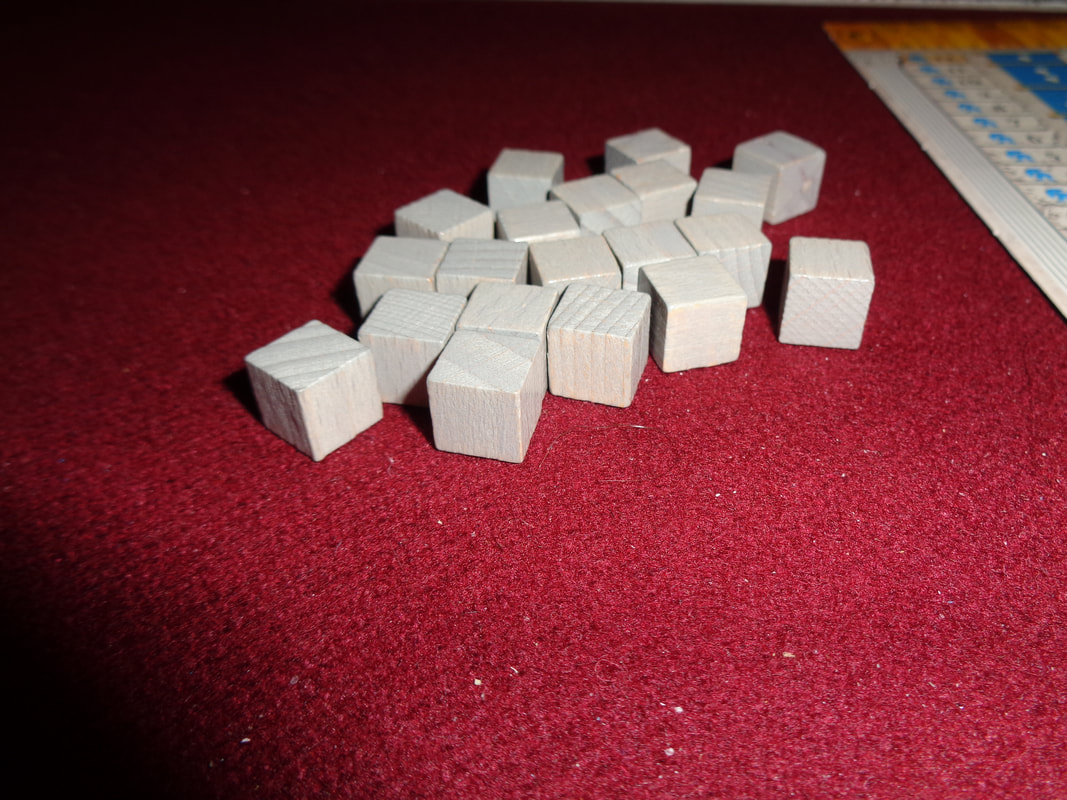
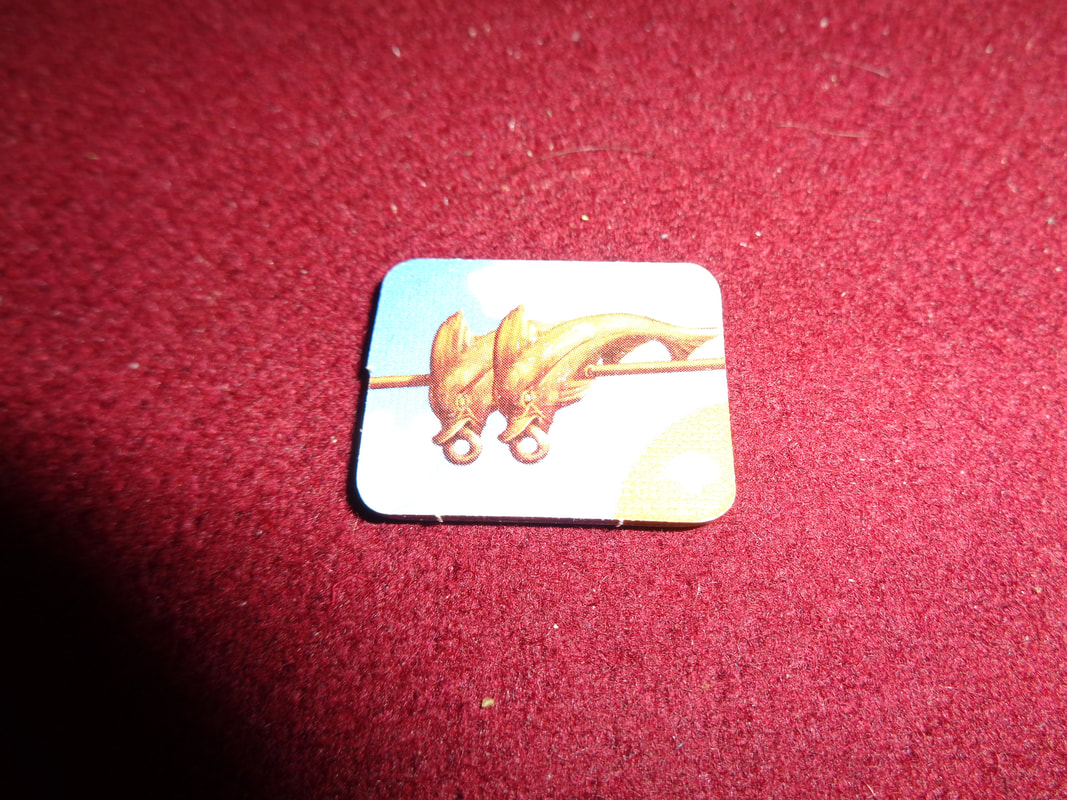
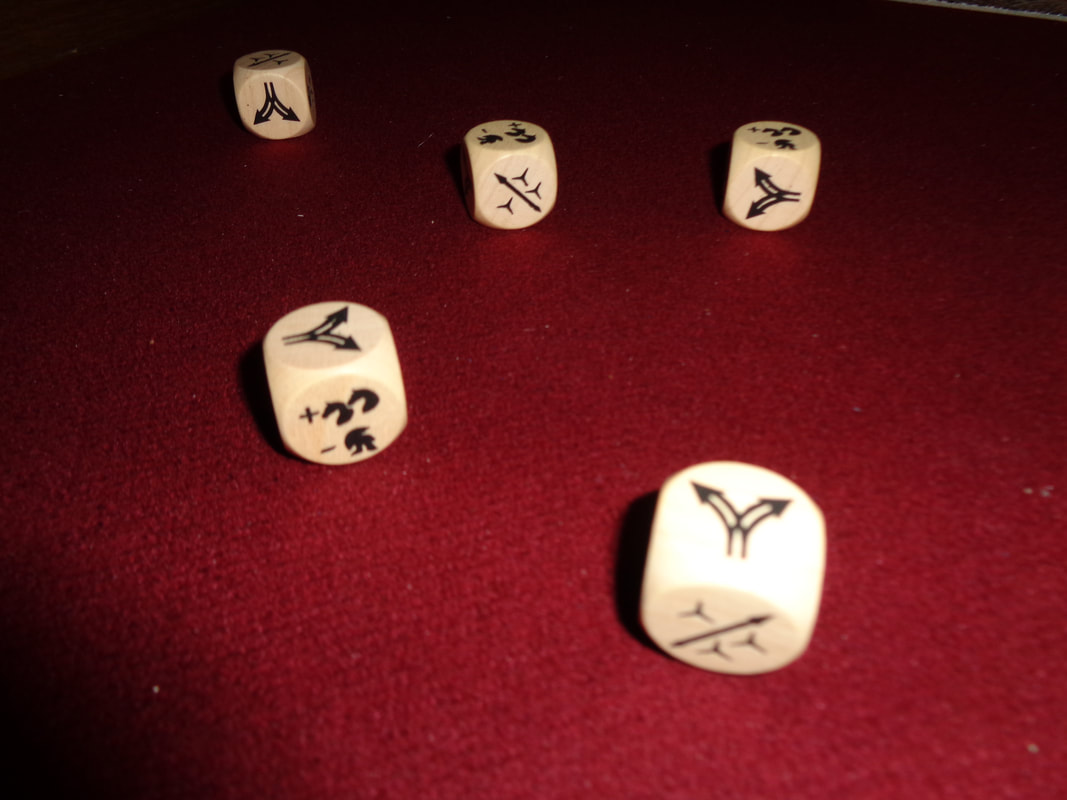
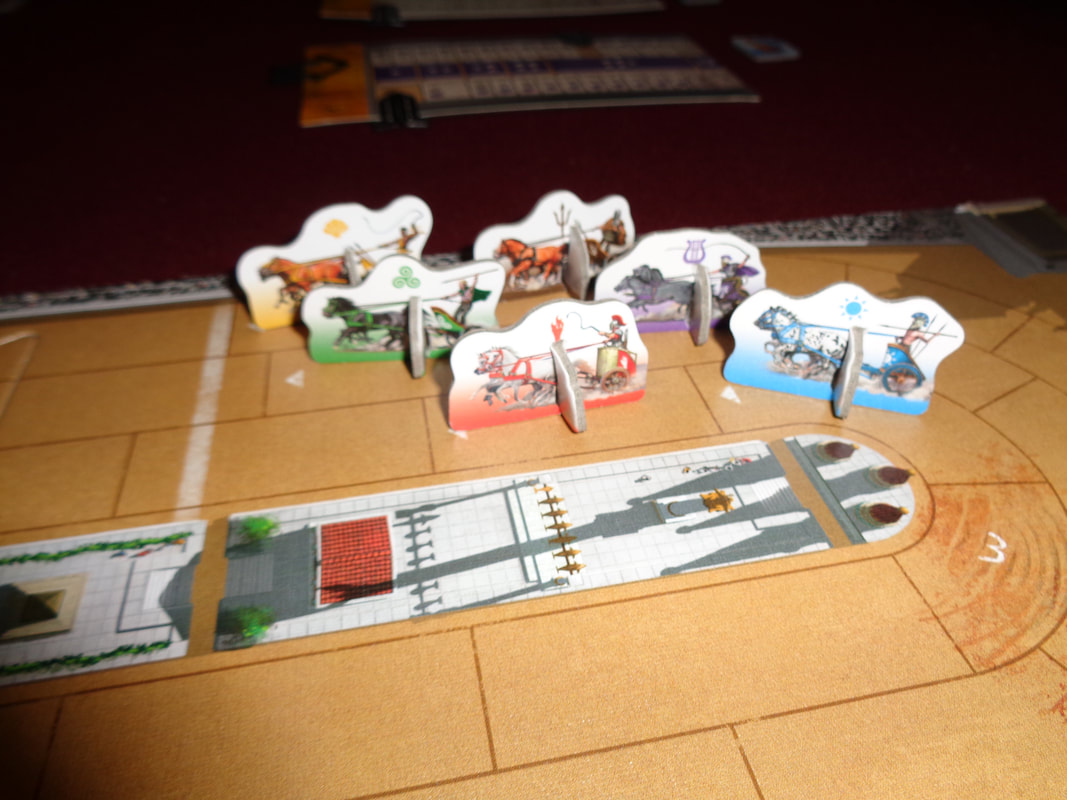
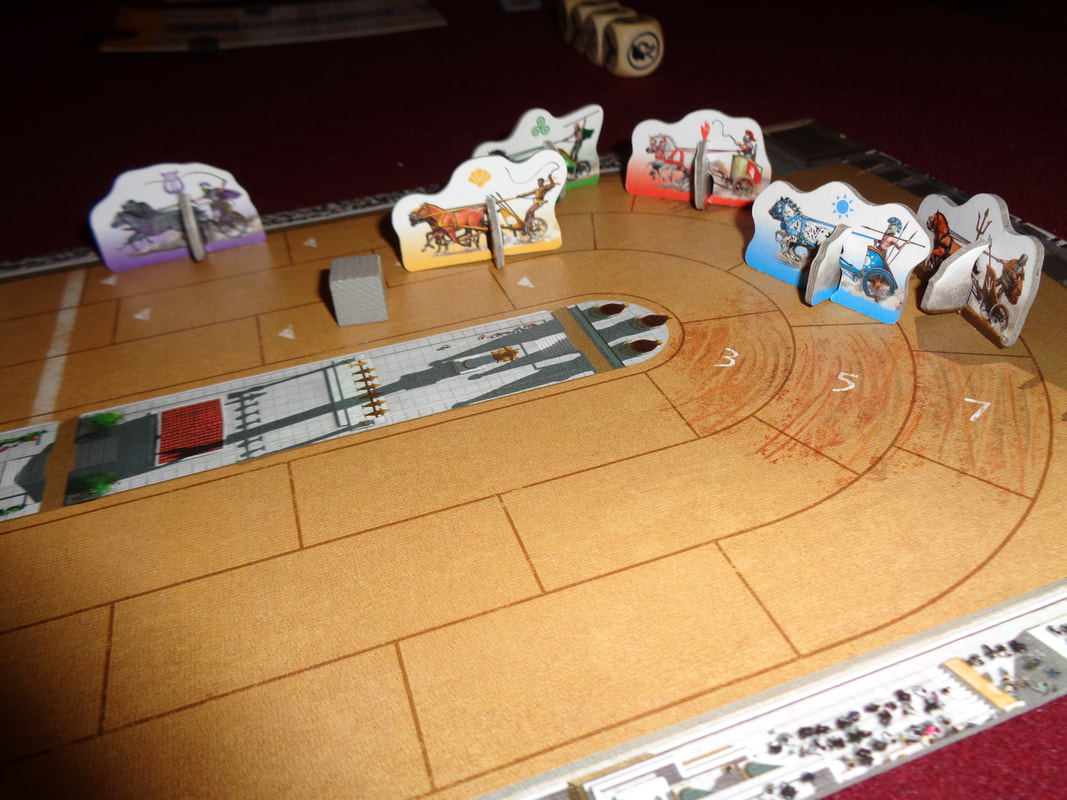
The components for Chariot Race are pretty good, the tokens and boards all feel suitably sturdy while the wooden dice are a nice touch.
Having chariots made of 2 pieces or card seems a little bit of a weird choice perhaps but it's not like it's a dealbreaker or anything and was probably done to keep the cost down.

There's very little artwork to write home about in Chariot Race which may be why I'm blogging about instead?
There are illustrations on the chariot standees but they'll hardly be noticed since they're quite small, especially when placed on the arena/game board.
There's some artwork on the game board as well and it's a fair depiction of a crowd watching the races. Otherwise Chariot Race looks fairly clean and minimalist in a unfussy kind of way, perfectly acceptable in my opinion.

The only iconography that can be found during the game is on the dice, those symbols are self-explanatory and I can't imagine they'd be an obstacle to any players.
Although, I will say that it feels a little odd and counterintuitive that the damage track is labelled 'damage' instead of something like 'health' since 12 on the damage track is completely undamaged and 0 is wrecked.


How's it play?
Setup
  • Player boards: Give each player the standee and player board in their colour, along with 3 pointers.
    All players should start with 12 damage, 4 speed and 3 fate.
  • Game board: Put out the game board on either the 'A' or 'B' side and determine starting order. Each player should then put their standee in the relevant starting spot.

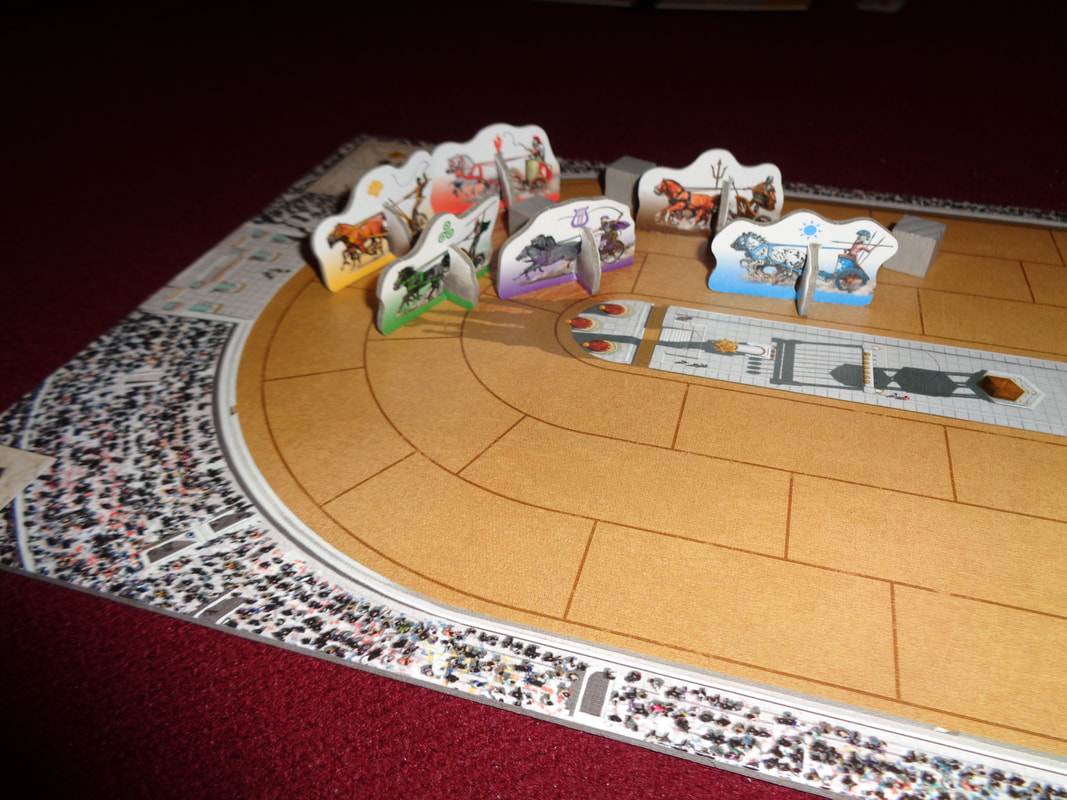
On to play
In Chariot Race, players are attempting to complete 2 laps of the track, avoid being wrecked and of course, finish first.
This is done by each player in their turn rolling dice and resolving the results.
Chariot Race does not use the usual turn order. Instead it's determined by position on the track round-by-round, whoever is 1st on the track goes 1st, 2nd on the track goes 2nd and so forth.
When the player in last place has gone, the round is over and play returns to the player in the lead at the start of a new round. Of course it's likely the turn order will now have changed.

In their turn, the active player will have several phases they can act in.
  • Repair: The active player may spend 3 fate points to repair 3 damage.
    Get wrecked: If, at anytime a player's chariot reaches 0 damage, they are immediately wrecked and eliminated from the game.
  • Adjust speed: A chariot's speed score can never exceed its damage score.
    If a chariot took damage during other players' turns (Which is likely.) or overcooked a corner in the previous turn (Also likely!) and the damage drops below the chariot's speed, the speed is lowered to match the damage during this phase.
  • Roll dice: The active player now rolls dice, the number they roll is determined by what their speed is on the tracker on their player board in relation to the segments in the centre column. Thus at speed 5, they would roll 5 dice, at speed 8 they would roll 3 dice, all the way to speed 12 where they roll only 1 die!
    ​Re-roll: The player may set aside and/or re-roll any number of their dice once only.
    Spend fate: The active player may spend fate points to re-roll any number of dice - including ones already set aside or change a die to a side of their choice except for the fortuna side.
  • Fortuna: In this phase, any dice showing the fortuna icon increase the player's fate score respectively. This occurs after using re-rolls, which means fate points acquired this turn cannot be used to affect this turn's dice results.
  • Movement: In this phase, all dice showing the 3 movement icons are resolved and several events may occur.
    +/- speed: Dice showing the speed change icons must be resolved and the player must alter their speed either up or down (Their choice.) as dictated by the dice. As an aside, there's nothing to stop a player using a + result from 1 die and the - result from another to negate each other.
    Regardless of this, once the speed score has been adjusted accordingly, the active player must move their chariot that many spaces.
    Change lane: During movement, the active player may change their chariot's lane a number of times equal to the change lane results they got on the dice.
    Cornering: If the active player's chariot enters a cornering space, that is; a corner with a number, there's a chance the chariot can take damage.
    If the chariot's speed is equal to or less than they number, the chariot is unaffected.
    If the chariot's speed exceeds the corner's speed, then the chariot takes an amount of damage equal to how much they exceeded the corner by.
    Caltrops: If the active player's chariot passes through a space with a caltrop, then the chariot takes damage.
    Ramming: If during movement, the active player's chariot passes through a space with another chariot, then both chariots takes damage.
    The active player cannot end their movement in the same space as another chariot.
  • Attack: The active player may use a die with this result for 1 of 2 actions.
    Throw Javelin: Once the active player has finished their movement, they can throw a javelin at another chariot. Javelins have a range of 2 spaces and inflict 1 damage.
    Drop caltrop: The active player may drop a caltrop on to any empty space which their chariot has moved through in this turn.
    Caltrops inflict damage to any chariot that passes over them and are removed from the board when they do so.
This pretty much covers all the rules.

Endgame
Chariot Race is played over 2 laps and there are several criteria which can determine the winner.

If a player's chariot completes their 2nd lap and no other chariot crosses the finish lap, they win the race.
If 2 or more chariots finish the race in the same round, then the chariot that went the furthest past the finish line wins.
Finally, a wrecked chariot cannot win, even if it crossed the finish line first or got furthest past it.


Overall
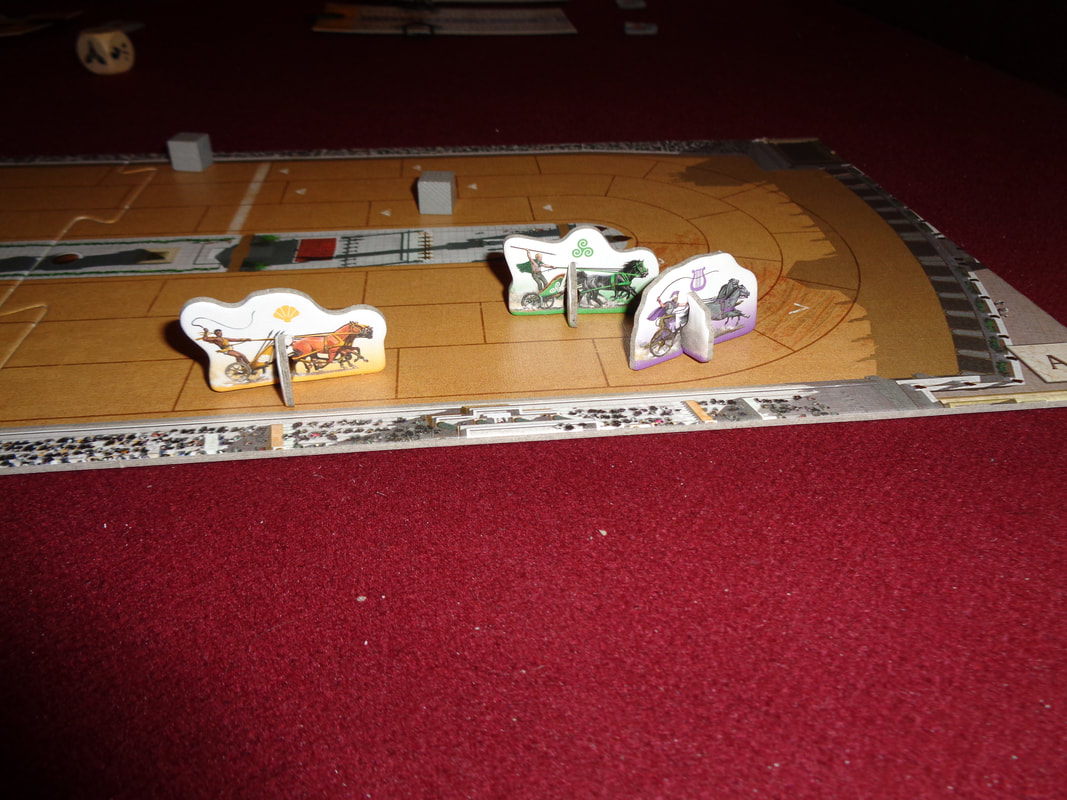
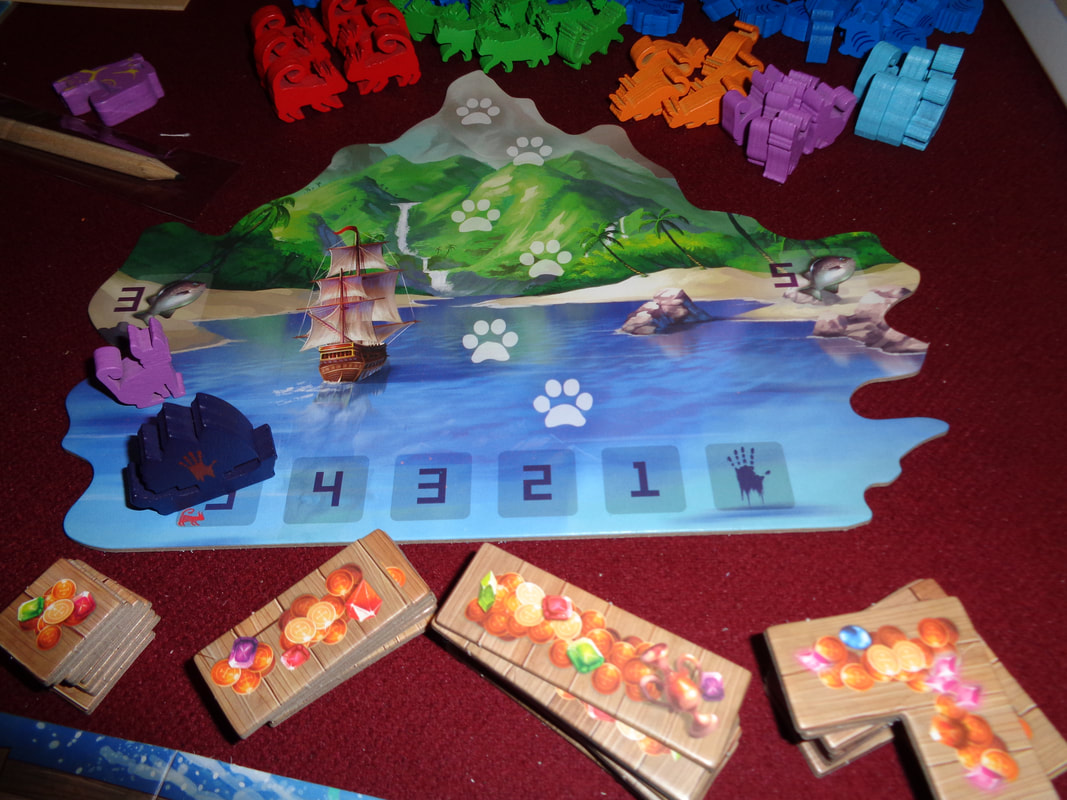
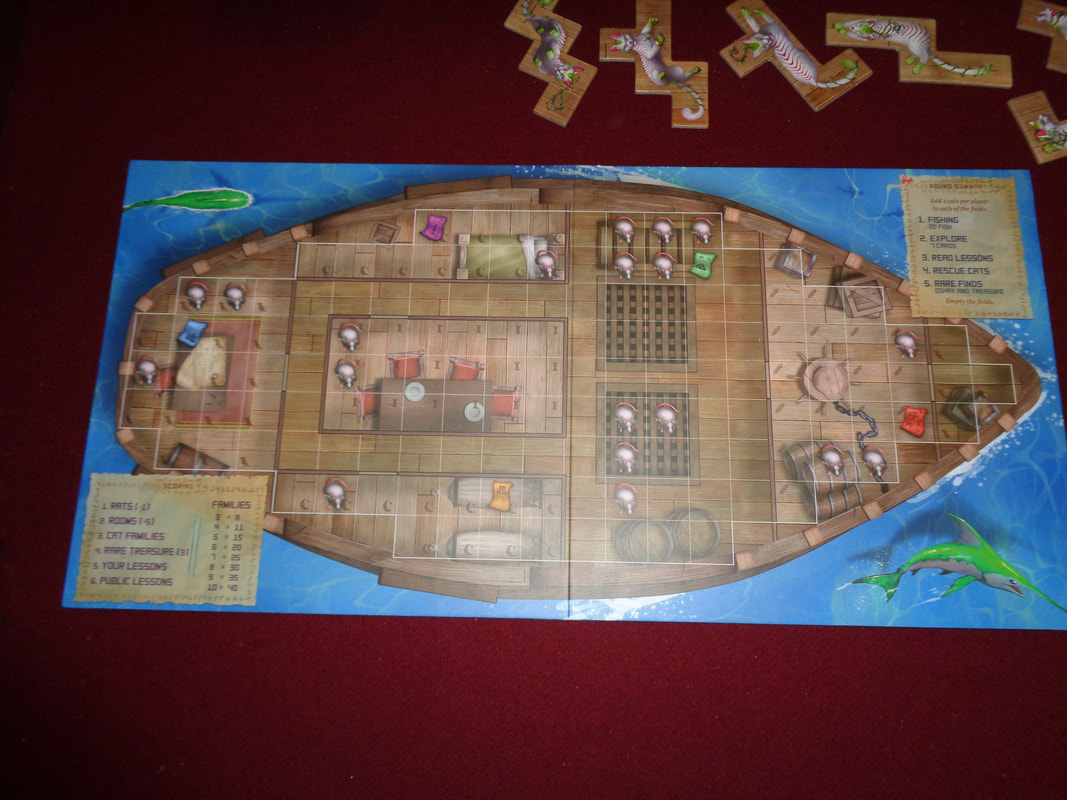
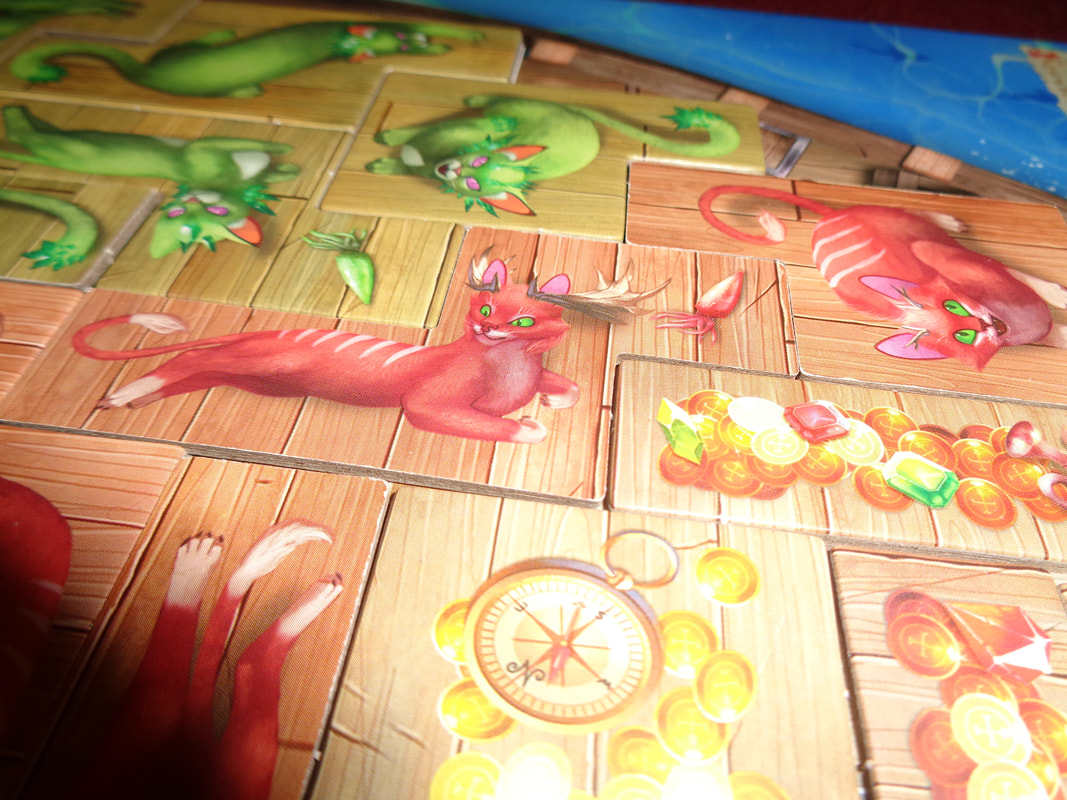
Chariot Race is a fast playing and mechanically speaking, actually a fairly straightforward game; roll the dice and carry out the resulting actions displayed.
The decisions that players get to make are also fairly straightforward, although their consequences can be significant - which is good. Meaningful decisions are always good.

Player decisions take the form of choosing which dice to keep and which to re-roll, players must choose what to try and prioritise, this will of course be contextual and change from round to round.
The other area where player's will probably be making the most is going to be about speeding up and slowing down. It's obvious that players will want to be fast in the straights but manage their speed through the race's 4 corners.
Managing speed is the game's best mechanic, I like that the faster a chariot goes, the less dice the player gets to roll and consequently, the less options they have.
It feels suitably thematic, not only does it represent having less thinking time at speed but also that this a horse race and players are never entirely in control of them.
Players can find themselves hurtling through corners and taking damage, the question is how fast for how much damage? There's only 4 corners,  so this means it's ok to take damage... right?

This brings me neatly to damage. There's definitely a combative edge to Chariot Race which makes it an usual racing game. Damaging opponents has its benefits.
Firstly; it lowers their maximum top speed, hindering them and secondly, it can lead to their elimination for the game.
It's vital to keep an eye on damage, in the early game players will probably be congenial, but in the late game, that will all change. Having low damage points can make a player a big target, especially if that player is ahead and which others will look to exploit this to put them out of the race.

It does mean that Chariot Race can have a lot of direct conflict and there may well be some 'pick-on-the-leader' tactics going on as well. If this isn't your cup of tea, it's one to probably avoid.
The game also has player elimination as a mechanic, which is something I have little fondness for but fortunately, this is a quick playing game so there isn't too much downtime.

In conclusion though; while it won't set the world alight, it is quick to learn and quick to play, Chariot Race is a fun light game If you like your racing theme with some extra competitive zing and a generous dollop of luck, then this might interest you.
0 Comments

Isle of Cats - First Play!

10/6/2022

0 Comments

 
9th June 2022

We're in Aldershot for an evening of board gaming fun.

So; in Isle of Cats, some evil bad guy is heading to the titular island (Which as the name might suggest, is filled with the felines.) to kill al the cats!!!
Players have a limited number of rounds to save as many as possible.

What's in a game?
  • Island board: A idyllic beach scene leading a mountain is depicted on this board.
    There's a track for turn count and and a paw track (SIC) for player order.
    The island board has a '3' on the left side and a '5' on the right. These represent the game's left and right 'fields'. More on fields below.
  • Player boards: Each player board is fashioned to look like a boat (The boat you'll be using to rescue cats.) which has several rooms, which are all marked out with a grid and some small icons, there are also icons for rats and treasure maps - there's got to be treasure maps - right? It is a boat after all!
    Each board is also double-sided and the other side features a more family-friendly layout.
  • Tetrominos: Isle of Cats makes use of numerous different types of sort of 'not-quite' tetromino shaped tiles.
    • Cats: There are 5 breeds or types (Colours.) of cats shown on the tiles. As well as having a different colours, they also have distinctive tales.
    • Oshax: They are the 6th breed of cat found in Isle of Cats and have special rules that apply to them.
    • Common treasures: There are 4 types of 'common' treasure, the art on the tile show the treasures as having a reddish hue.
    • Rare treasures: If there's common treasures, stands to reason there's got to be rare treasures too! Artwork for these depict them with a yellowish colour.
  • Cards: There are a 150 cards in 5 types of cards in Isle of Cats that have different functions and which are delineated by colour. Most cards have a cost which is displayed in the top left corner.
    Collectively they are known as 'discovery' cards.
    • Lesson cards: The blue cards are lesson cards, what do people learn from lesson cards? How to earn points obviously.
      Essentially, these are objective cards that earn players additional points.
      There normal and public lessons, the main difference being that all players can benefit from a public lesson card.
    • Rescue cards: These are green cards and they may depict a number of 'boots' and/or baskets/broken baskets. As the name suggests, these cards are used to rescue cats.
      Boots determine turn order for the round and baskets determine how many cats can be rescued.
    • Oshax cards: These brown cards are used to acquire oshax tiles.
    • Treasure cards: These are yellow and allow the player to... you guessed it, acquire treasure tiles, common or rare.
    • Anytime cards: As the name suggests, these cards can be played at anytime during the any of the phases. Anytime cards are purple and tend to give players bonuses which might be an extra permanent basket or some fish, etc.
  • Tokens: Isle of Cats also makes use of several types of token.
    • Basket tokens: These tokens are used to represent 'permanent' baskets that players have acquired, they're also double sided. Both sides feature a illustration of a basket but one side is greyed out, meaning the basket has been 'used' for the round.
    • Fish tokens: These blue wooded fish shaped tokens come in a 1-fish and 5-fish denomination. Fish is the game's currency.
    • Cat tokens: There coloured wooden meeples for each of the game's 5 breed's of cat. Players don't actually gain or use cat meeples in the game but they are used when a specific colour must be displayed to players.
    • Black ship: This wooden token depicts the ominous black ship of Vesh, the evil bad guy coming to the Isle of Cats.
  • Bag: Used to blindly draw tiles.
  • Box lid: What, what, the box lid? Yep, the box lid is designated as a special spot for cats to sit!
​
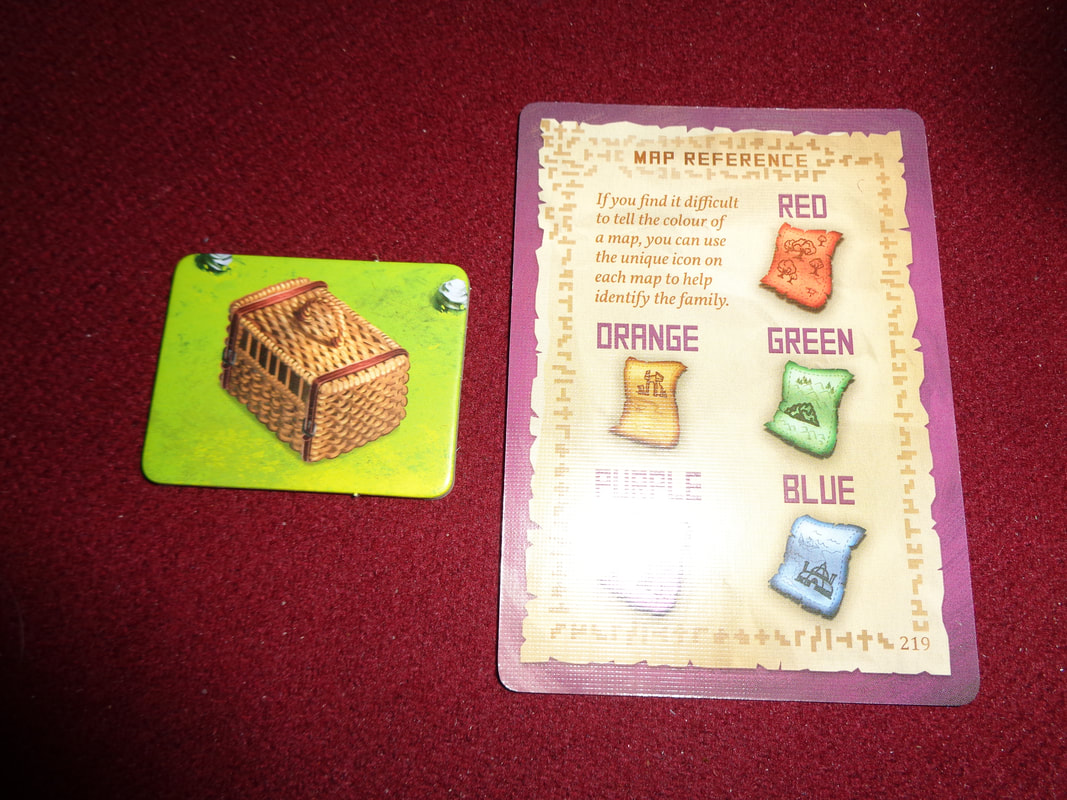
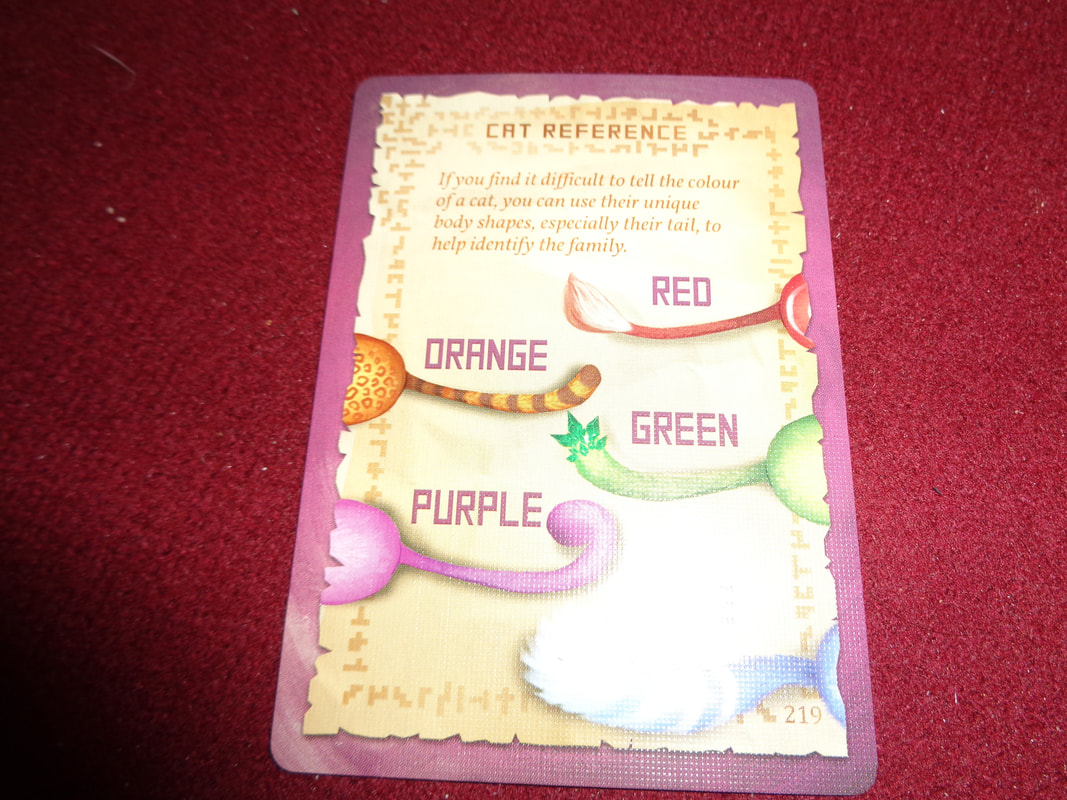
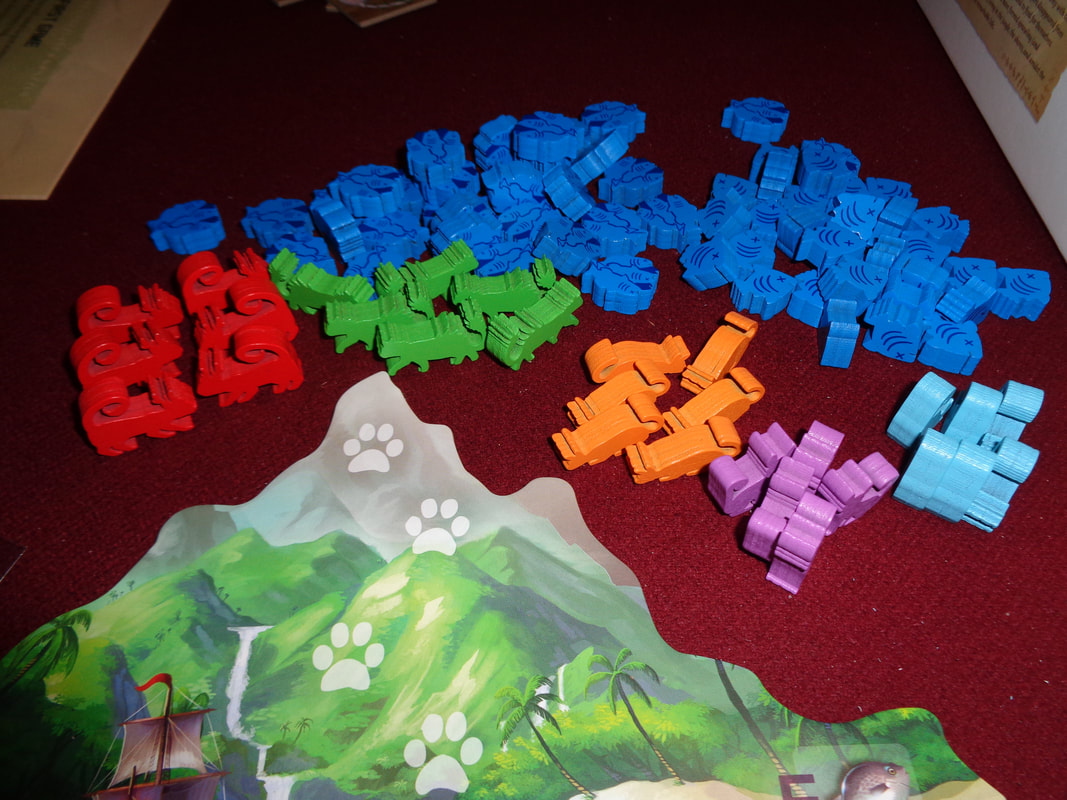
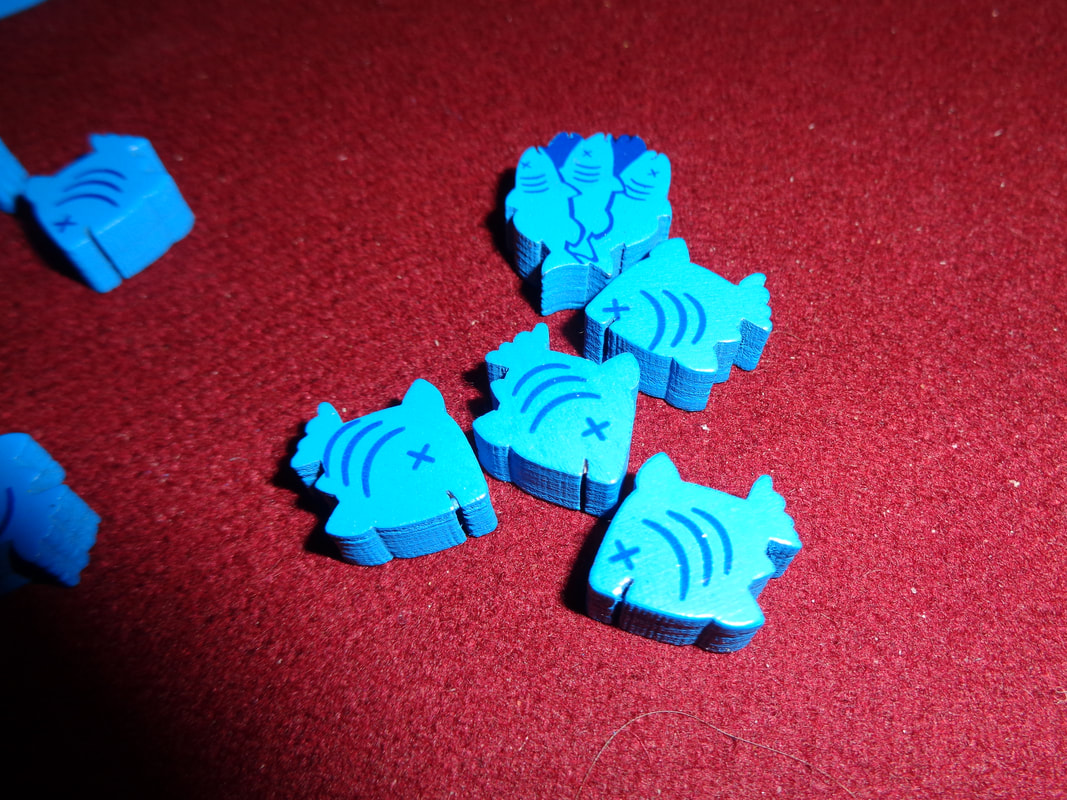
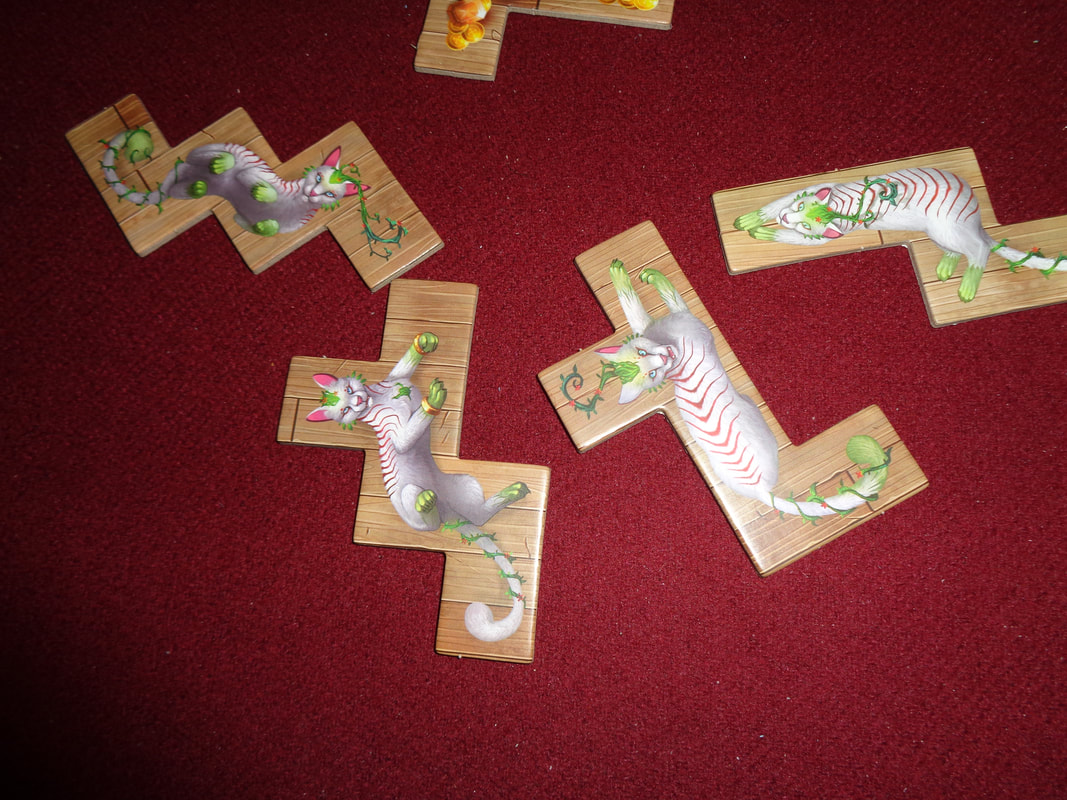
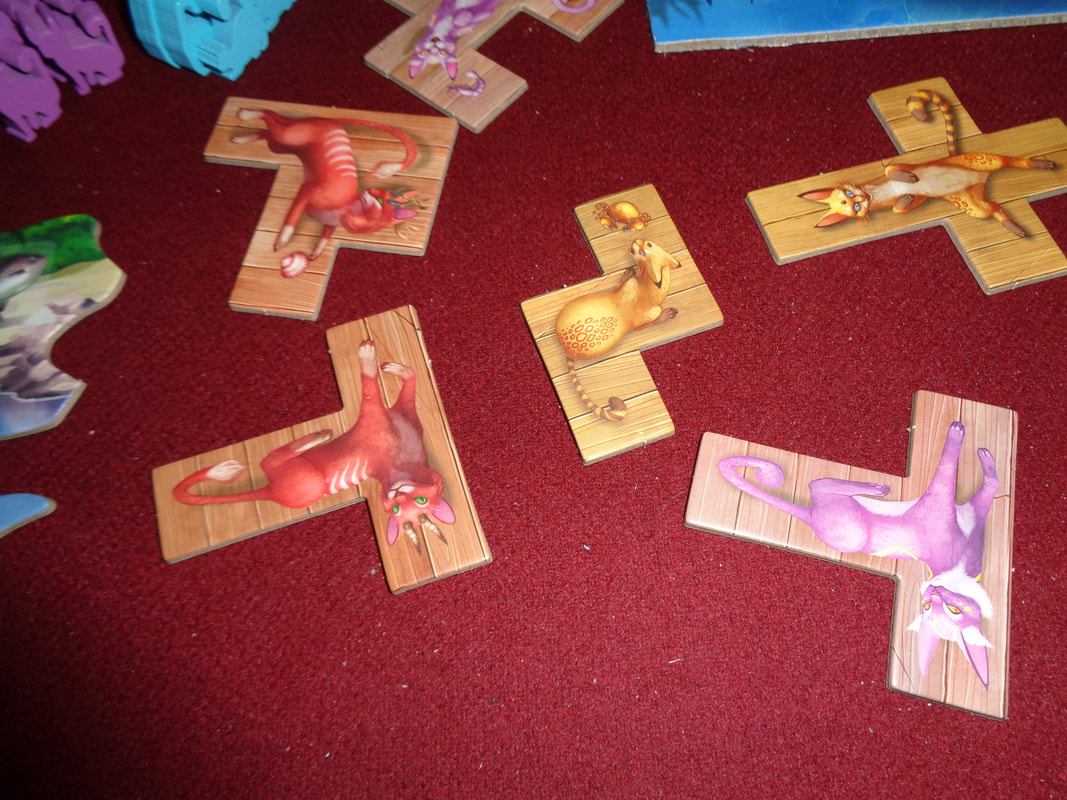
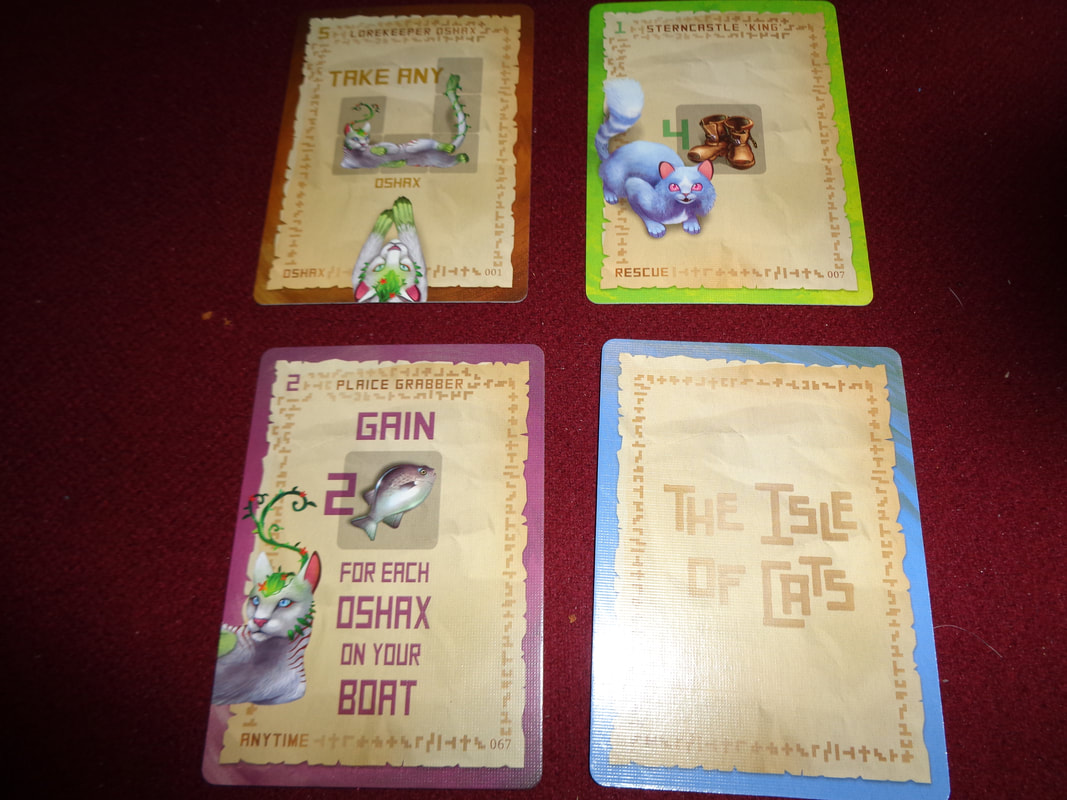
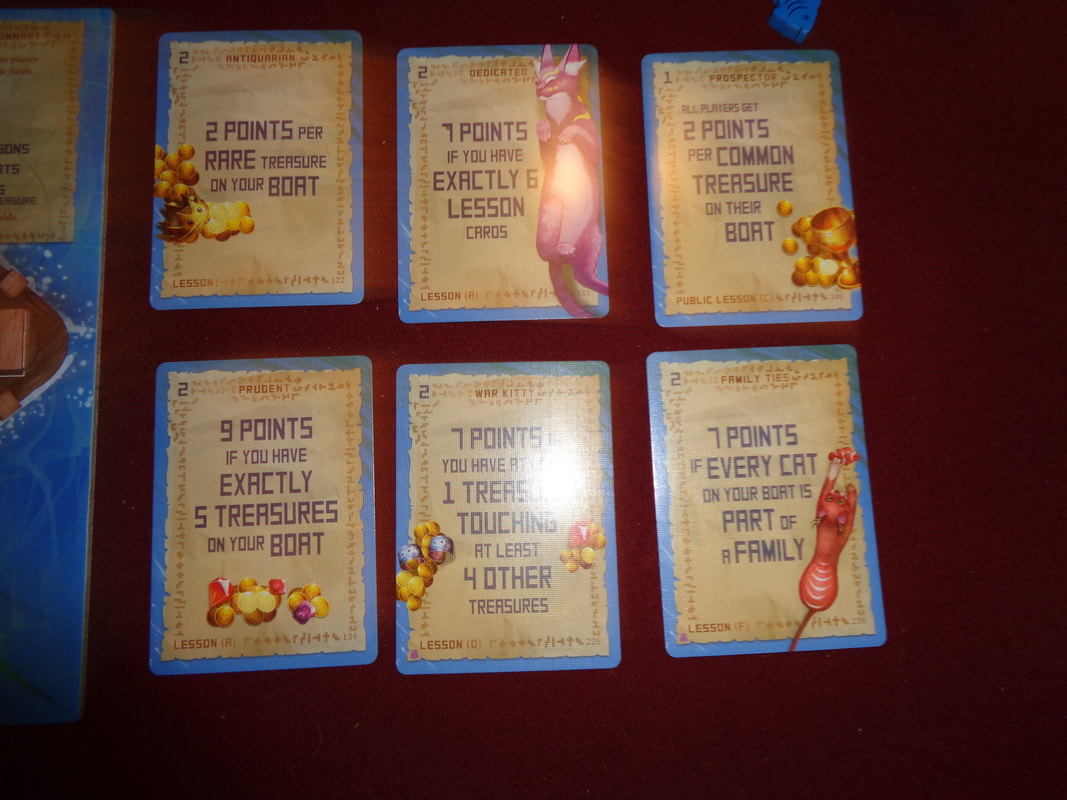
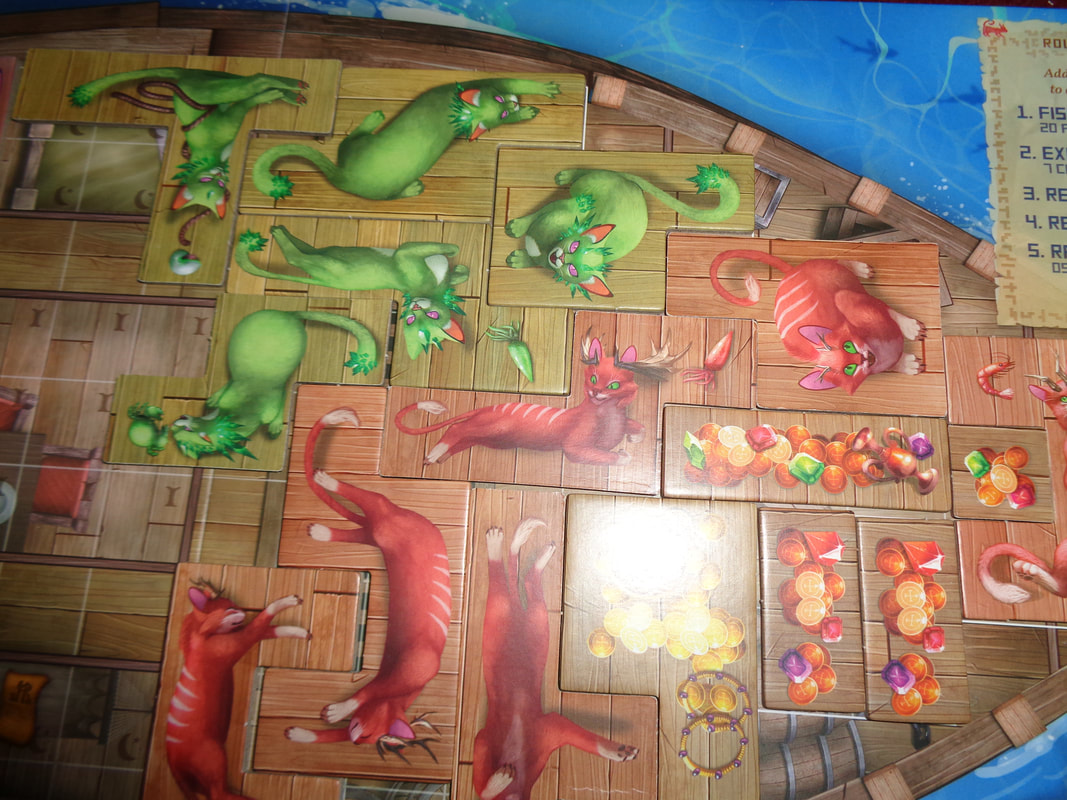
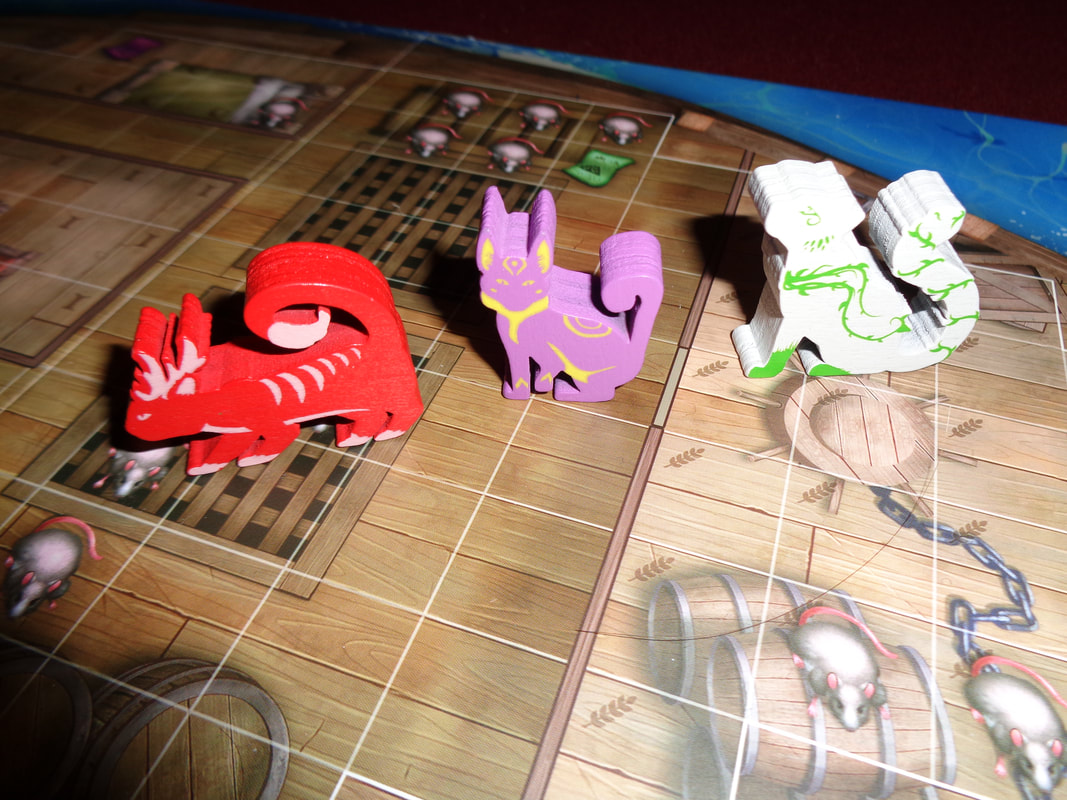
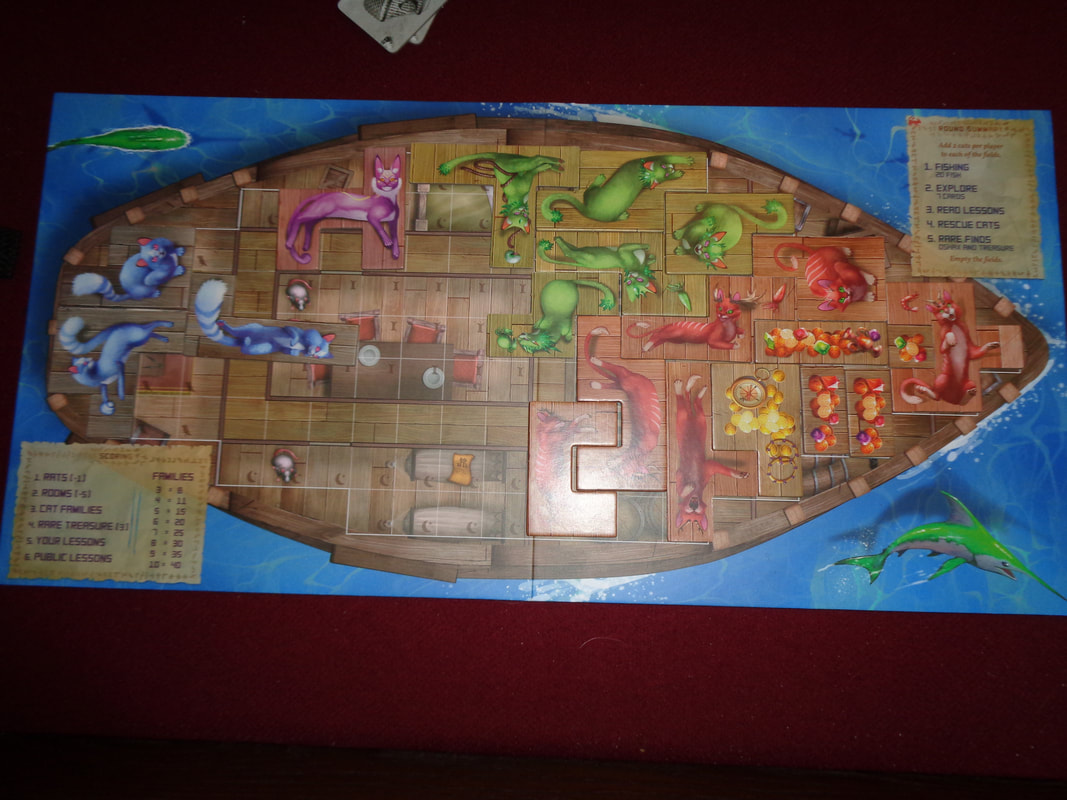
Component quality is for the most part very good. Tiles are suitably thick and chunky and all the wooden tokens. The game boards feel fine too. The only quibble I have is that the cards feel a little flimsy.

The artwork in Isle of Cats is excellent throughout with plenty of illustrations of weird and wonderful looking cats on all the tetromino tiles and many of the cards. The boards and other cards also display nice colourful artwork.
I do have a minor criticism here too: The colours for the common and rare treasures is a little too similar to each other, they could have done with being a bit more distinct.

There are few icons used in the game and they're all clear, however, I do have a of minor grumble.
Each personal game board is divided up into 7 'rooms'. It can be hard to see how the board is split up in this manner, particularly when scoring at the end with all the clutter of tiles. The publisher's were aware of this as they put distinct little icons in the square for each room to help but even so, it's tricky thing to comprehend.


How's it play?
Setup
  • Players: Give each player a player board and a basket tile.
  • Starting turn order: Determine a first player.
    The first player should take a cat meeple of their chosen colour and put it at the top of the player order track. Then going left, all players should do the same with a different coloured cat meeple to determine order for the start of the first round.
  • Island board: Put out the island board and put the black ship on '5' on the turn counter.
    Sort the cat meeples by colour and place them above the board.
    Next sort the common treasures by type and put out a number of each type as per player count, place them beneath the board.
    Then put out the Oshax tiles, also beneath the island board.
  • Cat tiles: Put all the other cat tiles into the bag.
  • Rare treasure tiles: Put the rare treasure tiles into the bag.
  • Blind draw: give the bag a good shake then blindly draw out tiles.
    Draw out an amount of cat tiles equal to the number of players multiplied by four. Half should go in the left field and the other half in the right field.
    Thus; in a 3-player game, 6 cat tiles will be put in the left field and 6 in the right.
    If any rare treasures are drawn, place them adjacent to the common treasures, they do not count as 'drawn tiles' then draw more tiles until you reach the allotted amount of cat tiles.
  • Discovery cards: Shuffle the discovery cards into a face-down pile.

On to play
In Isle of Cats, players are competing to cover as much of the the grid that is shown on their personal board as possible. This is done by acquiring and placing cat and treasure tiles. Players will also be looking to group cats by colour (Or family.) as much as possible as well as fulfilling whatever objectives they gain during the course of the game.
Isle of Cats is played over a number of phases, with players acting in turn order during each phase. Note that the turn order is different to player order in Isle of Cats and can and probably will change from turn-to-turn,
  • Fishing phase: Each player acquires 20 fish from the supply.
  • Drafting phase: Deal 7 discovery cards face-down to each player. Players then look at their cards and decide which 2 cards to keep in their playing area, they should pay special attention to the cost in the top-left corner of each card.
    The remaining cards should be passed to the player on their left. Keep repeating this until each player receives 1 card form the player on their right, this card must kept.
    • Payment: Now that each player has 7 cards, they may decide which ones to keep and must pay for them with their fish. If they do not want to pay for 1 or more card (Or cannot afford to do so.), then those cards must be discarded.
  • Lesson cards phase: Blue lesson cards are played in this phase. All players must play all lesson cards in their hand. Public lesson cards are played face-up while normal lesson cards are played face-down.
  • Rescue cats: Now it's time to rescue some cats. This is done by playing 1 or more green cards.
    • Turn order: Before any rescuing occurs, a new turn order must established. All players must place any and all rescue cards they want to use in this round face-down in their playing area. When this is done, all cards are simultaneously revealed.
      Whichever player has played card(s) with the highest total 'boot's score moves to 1st in the turn order. 2nd highest to 2nd in the turn order and so on.
    • Turns: Now, in the new turn order, players take turns rescuing cats or acquiring cat tiles.
      ​Players can only rescue 1 cat in a turn and must pay the cost to do so (Either 3 or 5 fish depending on the field the tile is in.). A basket must also be used to acquire a cat tile, all players start with 1 permanent basket (Which gets flipped when used.). Rescue cards may also provide temporary baskets and 2 broken baskets count as a single basket. Players can take multiple turns to gain multiple cat tiles but must have a basket available to use for each tile they acquire.
    • Tile placement: When a player gains a tile, it must be immediately placed on their personal board.
      A tile can be rotated and flipped in any way prior to placement. The first tile placed in the game can be put anywhere inside the board's grid but further tiles must be placed orthogonally adjacent to another tile already on the game board. While the board has 7 'rooms', it's OK for tiles to cross between them.​
    • Treasure map: Each player board will have 5 treasure map icons in the same 5 colours as the cat tiles. If a treasure map is covered by a cat tile which matches it's colour, then the active player may immediately take and place a common treasure tile. While common treasure tiles are quite small relatively, they can be useful for filling awkward gaps.
  • Rare cards phase: This is when Oshax and treasure cards are played.  Only 1 rare card can be played per turn but again, players may have multiple turns provided they have multiple rare cards they want to play.
    • Oshax cards: Playing one of these cards allows the active player to claim a Oshax tile and add it to their player board. Oshax cats do not have a colour, instead, when placing an Oshax, the player assigns the Oshax cat a colour by putting a cat meeple of the chosen colour on the Oshax tile. - This colour is independent of the player's own player colour.
    • Treasure cards: These cards can be played to acquire rare treasures - provided they've been drawn from the bag of course.
      As with all tiles, they must be immediately placed into the active player's board. As well as filling gaps, rare treasures score VPs at the game end.
  • Anytime cards: Anytime cards can be played at anytime during any of the above 5 phases.
  • End of round: Once the rare card phase has ended, the end of the round has been reached, the following occurs
    • Clear fields: Any cat tiles which were not claimed during the round are discard out of play.
    • More cats: More cat tiles are drawn blindly to repopulate the fields as per the rules for setup.
    • Carry over: Players carry their hand of cards and fish tokens over to the start of the next round (There's no hand limit or fish token limit.).
    • Move Ship: Move the black ship 1 space along the turn count track.
    • Next round: The next round begins with the first phase by giving 20 fish to each player.

Endgame
Once the 5th round has finished, the game is over and it's goes to scoring.
There are several sources for scoring points and the lesson cards in particular provide many ways to score:
  • Families: A family of cats consists of at 3+ cat tiles of the same colour which are orthogonally liked in a group. Each family of cats score VPs according to its size. The bigger the more VPs.
  • Public lessons: All players can score VPs from public lessons.
  • Lessons: Players now reveal their lesson cards and score them appropriately.
  • Rare treasures: Each rare treasure that a player has in their playing area scores VPs.
Negative VPs
That's right, it possible to lose VPs!
  • Rats!: Each rat icon left visible on a player's board will lose them 1 VP.
  • Unfilled rooms: Any room that has at least 1 unfilled space will cost the player 5 VPs, that means potentially if a player has just 7 empty spots (1 in each room), they could lose a lot of VPs!

Points are tallied, highest score wins.


Overall
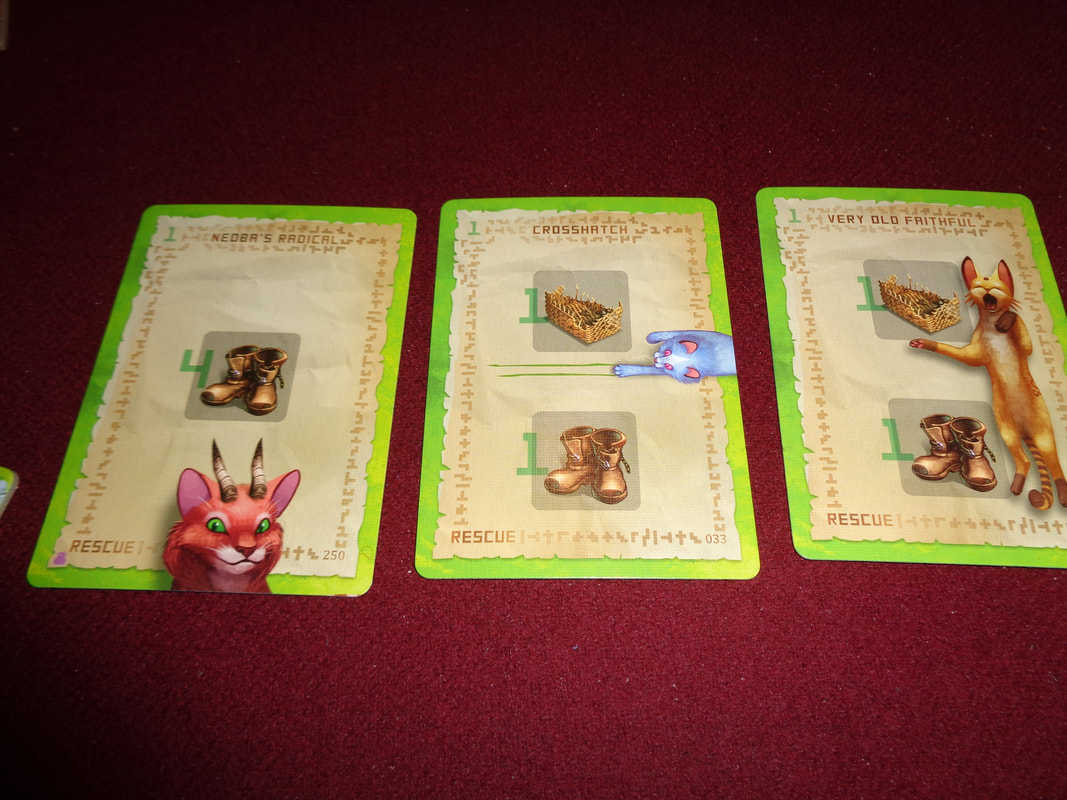
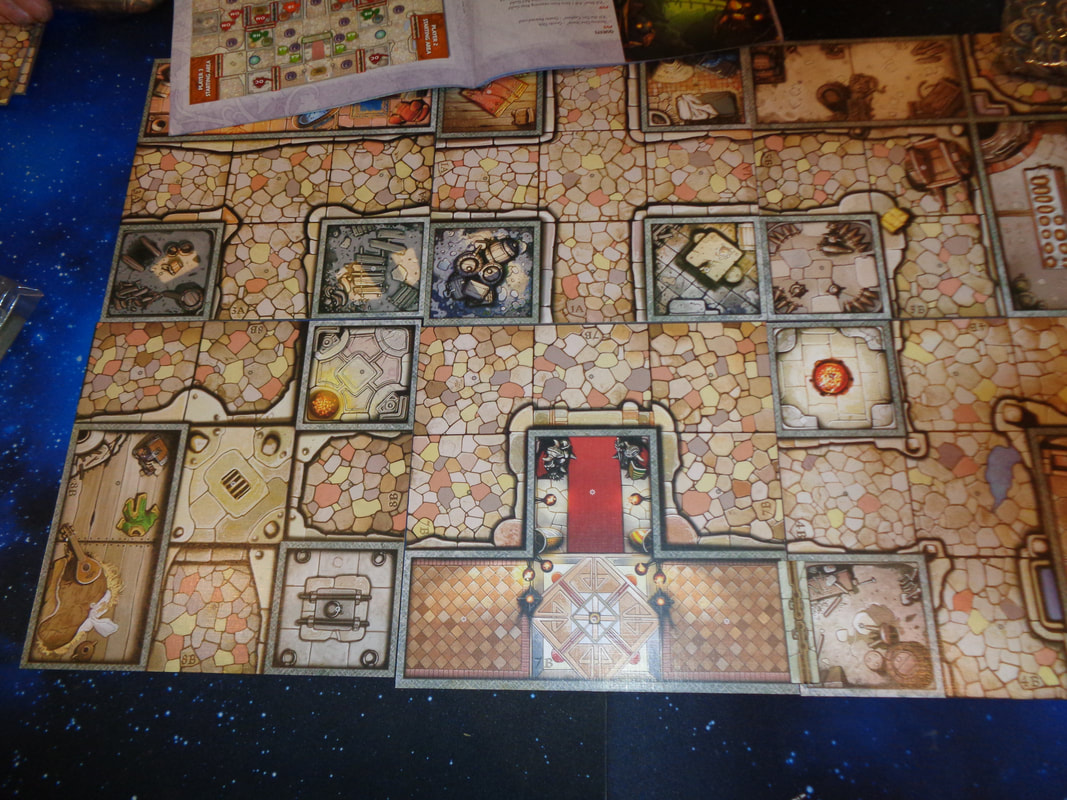
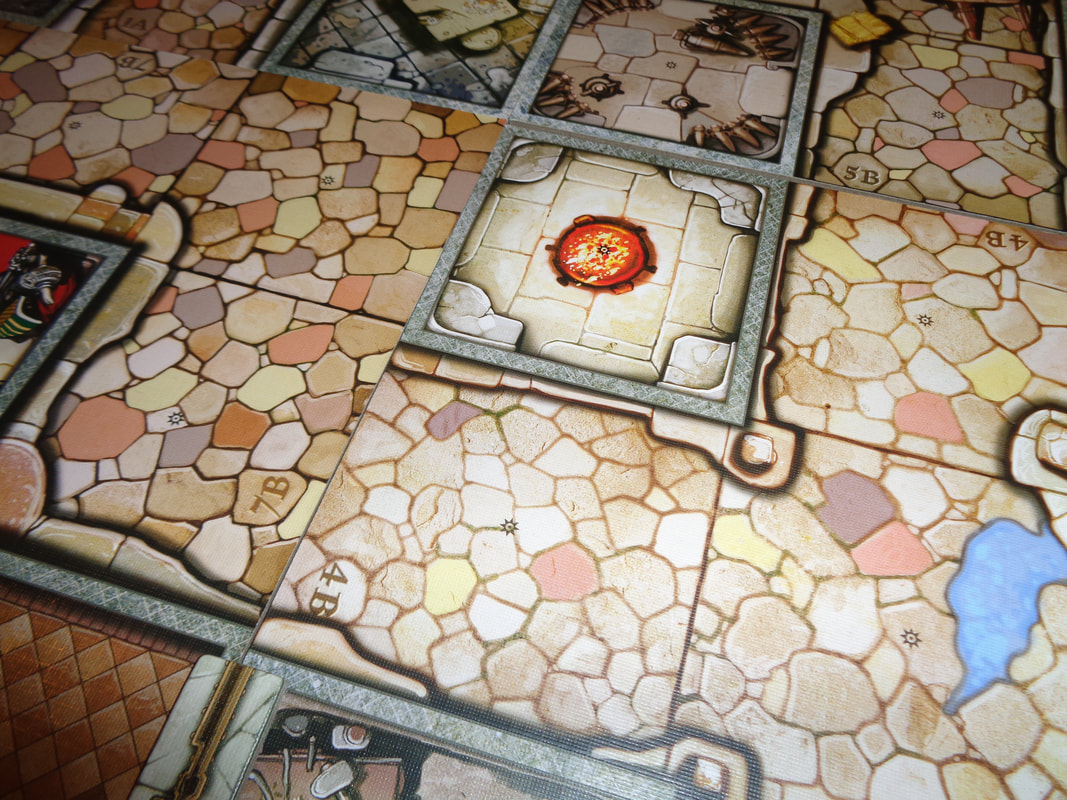
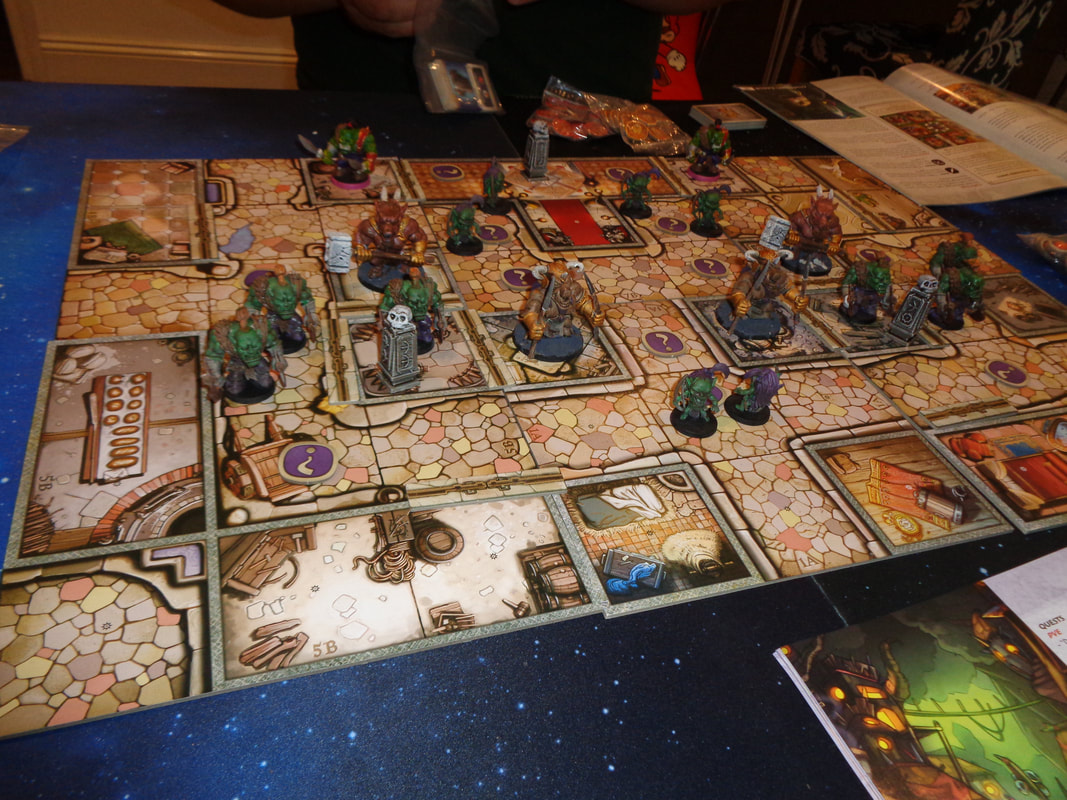
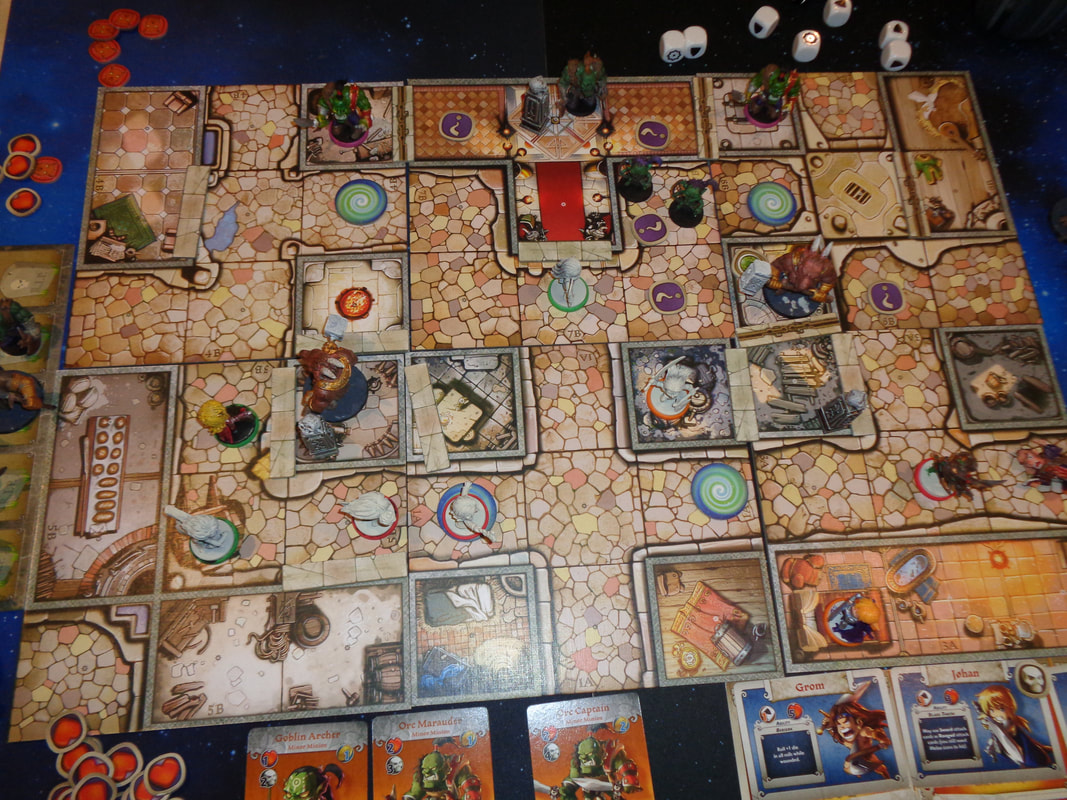
​There's a few things to think about in Isle of Cats but it's all paced out fairly well and never feels too complex.
That's not to say there's no strategising to be done - because there is.

The chief concern for players should be the management of their fish! Fish are not only used to buy cats but also discovery cards and they're the route to not gaining more VPs but initiative or gain bonuses.
E.g., if you really want a certain tile, playing rescue cards with high 'boots' is important, but you'll need to keep them during the drafting phase - and pay for them.

Players will need to balance their spending with their priorities and recognise when and what is more important at what time.
Acquiring cat tiles is very important, building families, filling rooms, covering rats and treasure maps are all significant but so are going first or getting lesson cards and so on.

Despite players having their own player boards, there's also a higher level of play about watching the actions of other players.
For example; if another player has a big family of a certain breed of cats, it might be a good idea to deny them a beneficial card during the drafting phase and so

But since this is a drafting game, players will also have to adapt to circumstances as they occur, such as having to take a cat tile that isn't wanted and finding a way to place it to maximise it's potential - or minimise it's damage!

Isle of Cats is a mid-weight game that's pretty easy to learn and combines several mechanics in to a engaging cat-themed game.
Whether it's deciding which cards to keep and later which ones to play, as well as what tiles to take and where to place them, Isle of Cats All nearly always gives players meaningful decisions to make and that's the sign of a good game.
0 Comments

Arcadia Quest - First Play!

5/6/2022

0 Comments

 
3rd June 2022

We're round Simon's for some Friday night fun.

Apparently, delving into dangerous dungeons in adventuring parties is a hazardous vocation, but in Arcadia Quest, there's loads of them wandering the dungeons!

What's in a game?
  • ​Game tiles: There are 9 of these double-sided game tiles. Each one features a 3x3 grid which displays open areas, corridors, rooms and doors etc. Some of the tiles also feature player starting areas.
    They are put together in certain configurations to create playing areas for each mission in the game' campaign.
  • Spawn tile: This tile is 5 spaces long and is used to manage monsters and monster respawns.
  • Player boards: These come in player colours and each has 3 spaces for Hero cards and beneath each of those 3 spaces are 4 more spaces for that hero's gear.
  • Cards: Arcardia Quest makes use of a lot of cards and I do mean that.
    • Hero cards: These oversized landscape cards depict the game's 12 heroes,  listing their names with a portrait and stats (Defence and hit points.) as well as each hero's individual special ability.
    • Quest cards: Every mission in the Arcadia Quest card will have a number of quest cards associated with it. They form the objectives that players must complete in order to win the game.
      There are numerous types of quest, including PvE and PvP, additionally, some provide bonuses for completing them first.
    • Upgrade cards: These represent equipment that heroes may acquire during the campaign. Upgrade cards actually also include starter cards.
      Finally, upgrade cards are divided into several types such as a attack cards, special effects, permanent effect, etc.
    • Monster cards: Monsters are a staple of fantasy themed games and Arcadia Quest is no different!
      You'll find goblins, orcs, trolls and all the typical foes here. Each card lists quite a bit of info about its pertinent monster. Including level, life/over kill value, type and strength of attack and defence, any special abilities and reward for defeating.
    • Death curse cards: Unsurprisingly, these can be bad news for players. They only come into play during campaign play though.
  • Tokens: As with cards, Arcadia Quest makes use of a lot of types of token. These are typically made of card.
    • Guild tokens: These small, round cornered tokens come in the colours of the game's 4 player guilds. They are used to track exhaustion.
    • Wound tokens: Illustrated with red hearts and used to track wounds and damage.
    • Death tokens: For when things get worse than wounds!
    • Door tokens: These oblong double sided tokens are used to mark whether doors are open or closed!
    • Exploration tokens: Used in quests, these usually contain rewards for whoever finds them by errr... exploring, although there can be a surprise in these tokens.
    • Spawn tokens: As the name suggests, these rounded oblong tokens are  marked with icons identical to the attack dice and are used to manage enemy respawning.
    • Portal Tokens: For when you absolutely, positively need to teleport somewhere!
  • Models: Arcadia Quest comes with quite a few plastic minis. These include 12 hero figures as well as about 2 dozen monster and enemies.
  • Dice: The dice used are not the usual six-siders, instead they are split into 2 types. Black attack dice and white defence dice.
    Attack dice: The black dice contain a mixture of 3 symbols, melee hits, ranged hits and critical hits.
    Defence dice: ​Meanwhile the white dice contain a mix of blank spaces and shield icons.
  • Campaign sheet: This is used only for campaigns and tracks each player's guild performance over the course of the campaign.

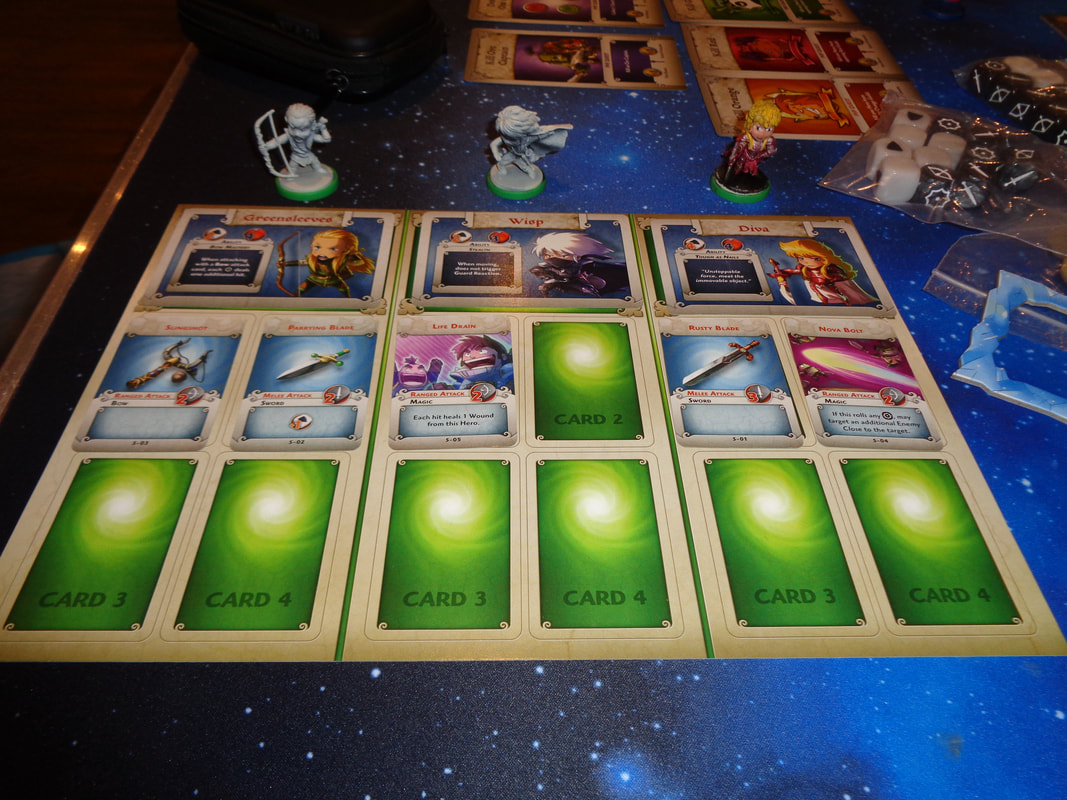
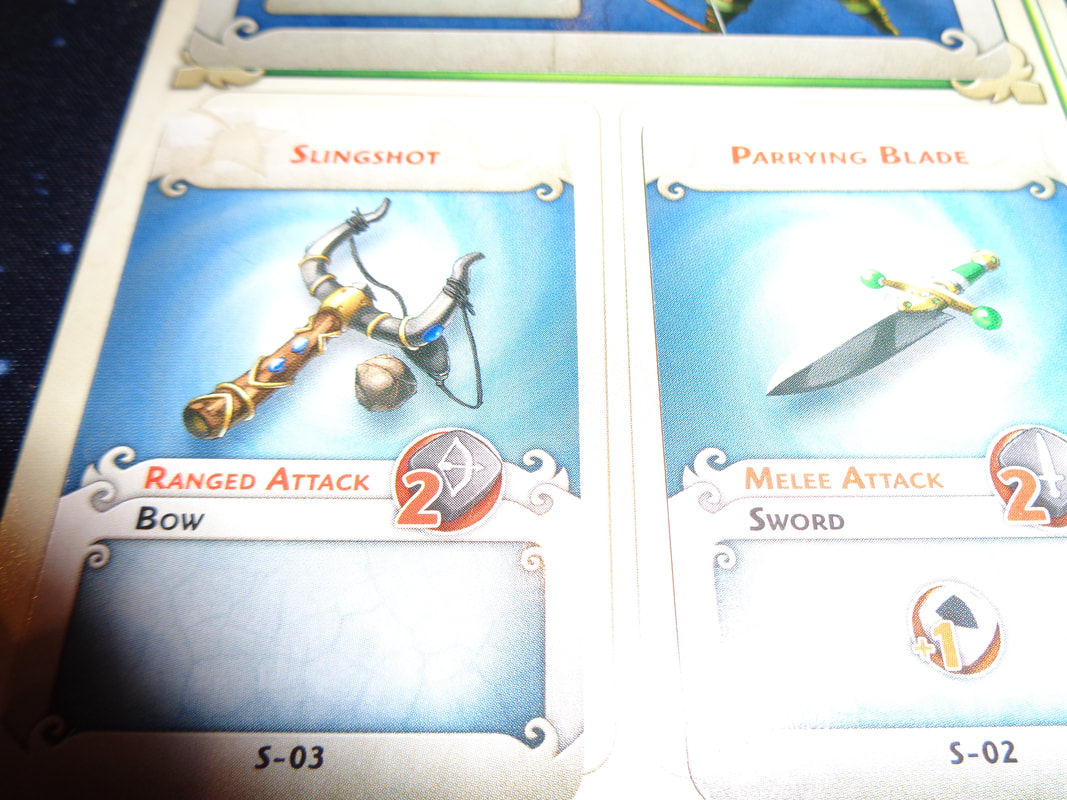
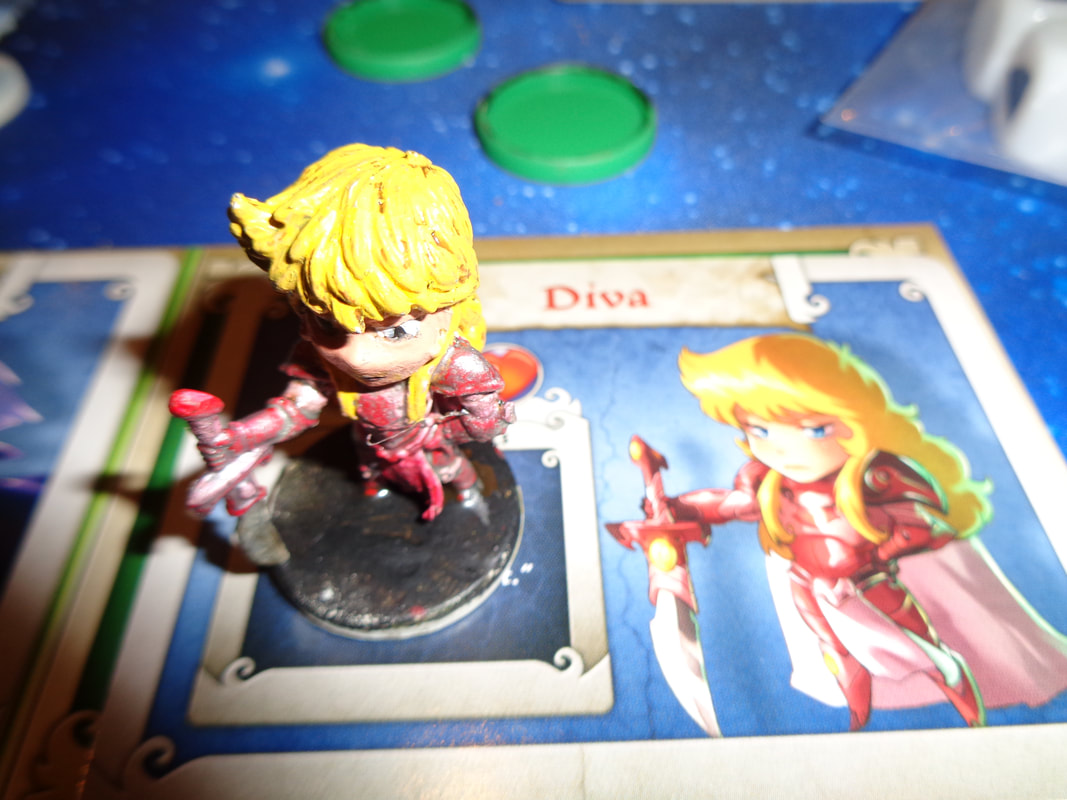
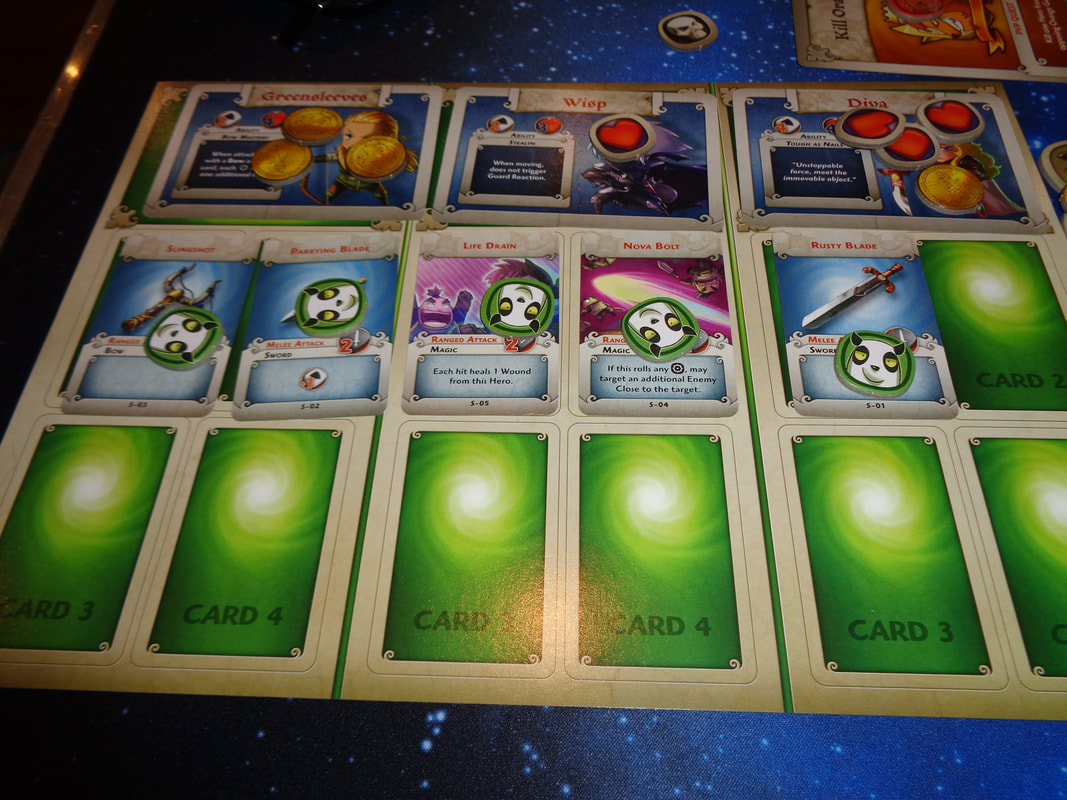
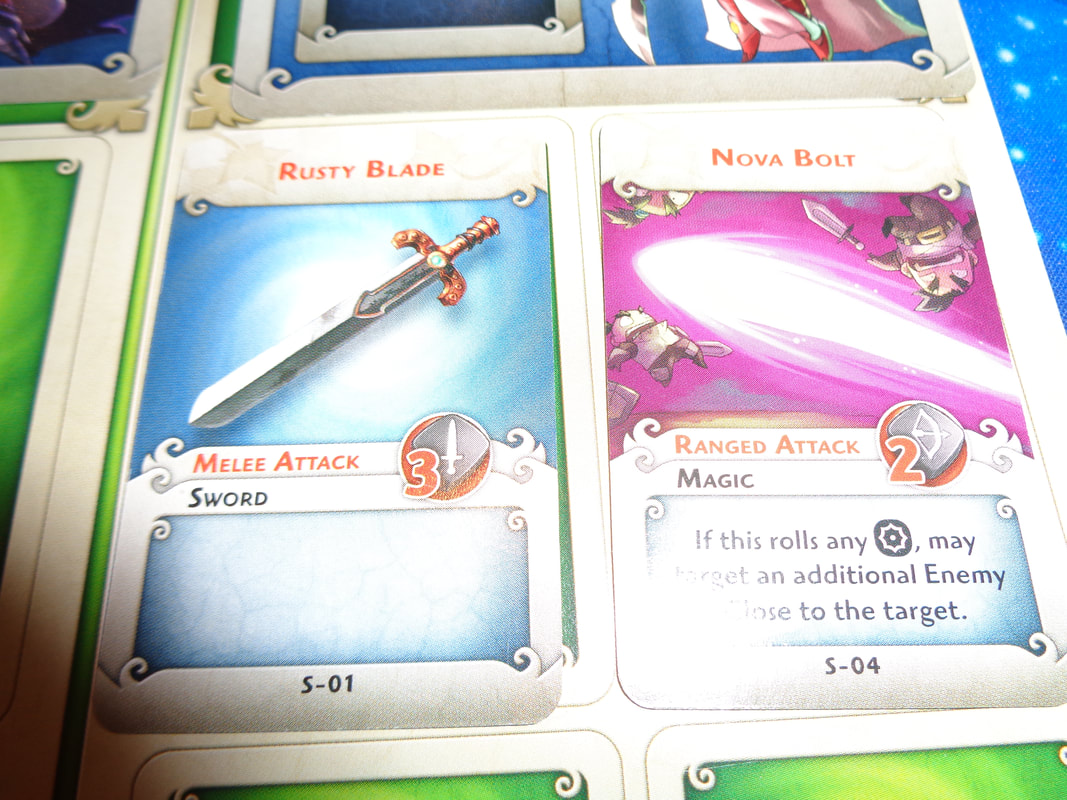
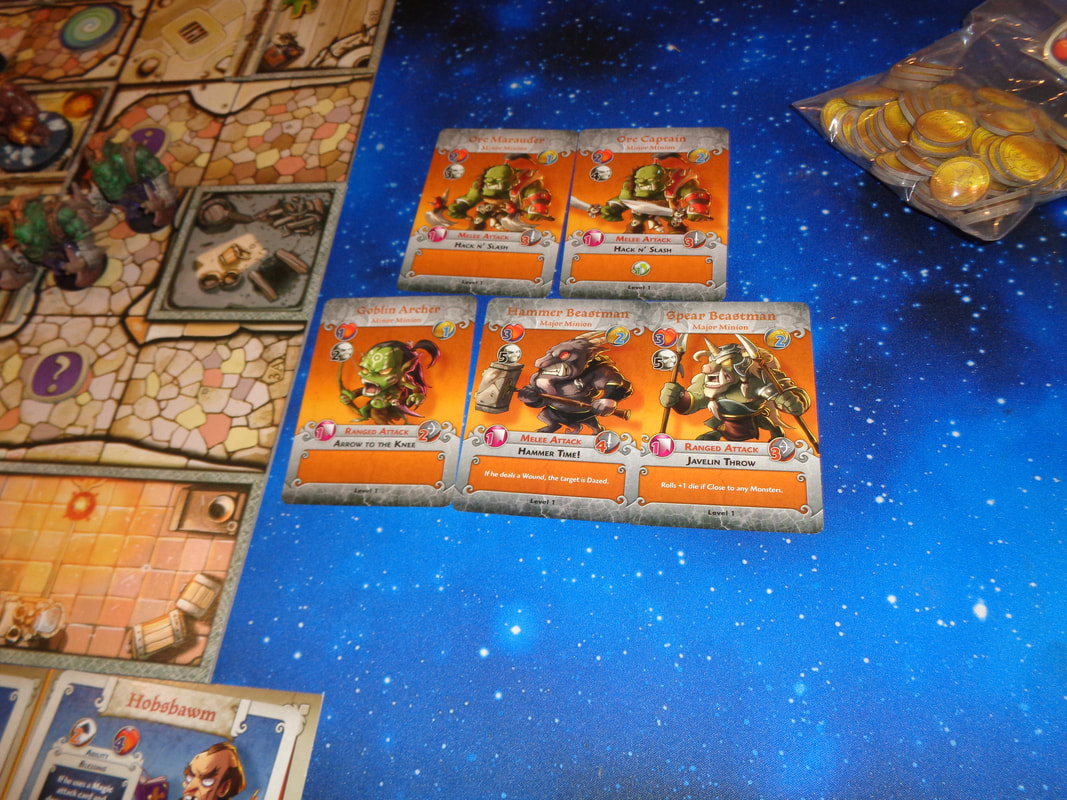
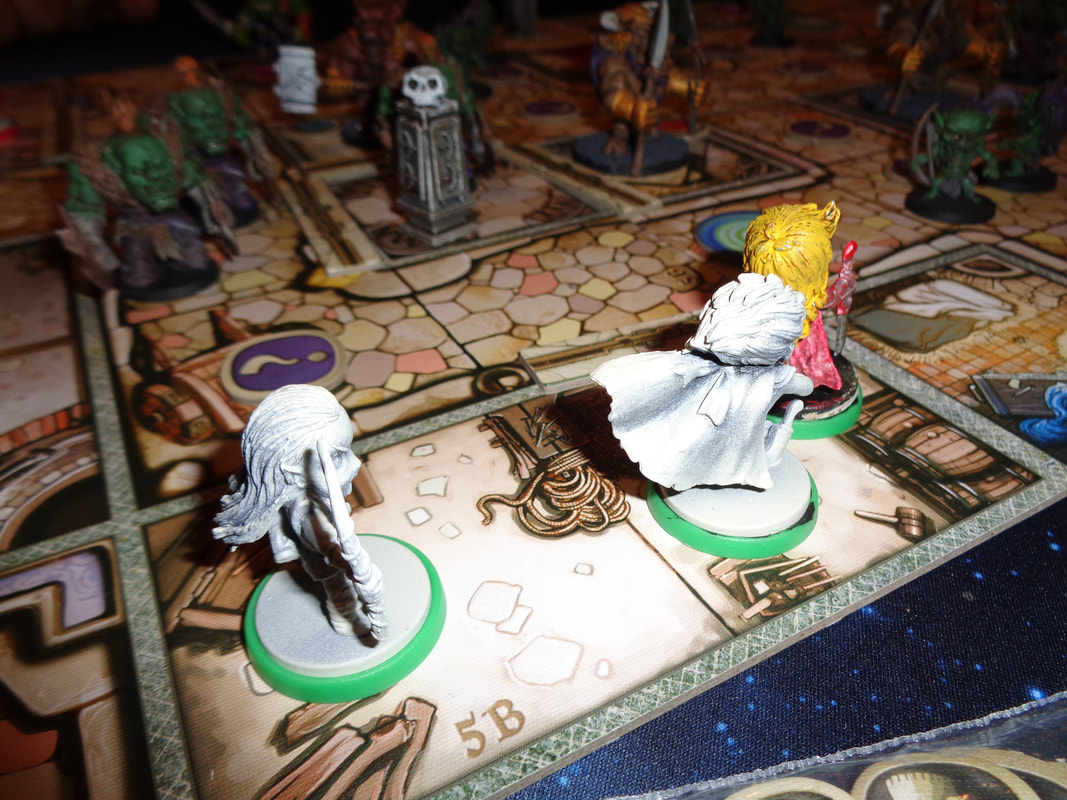
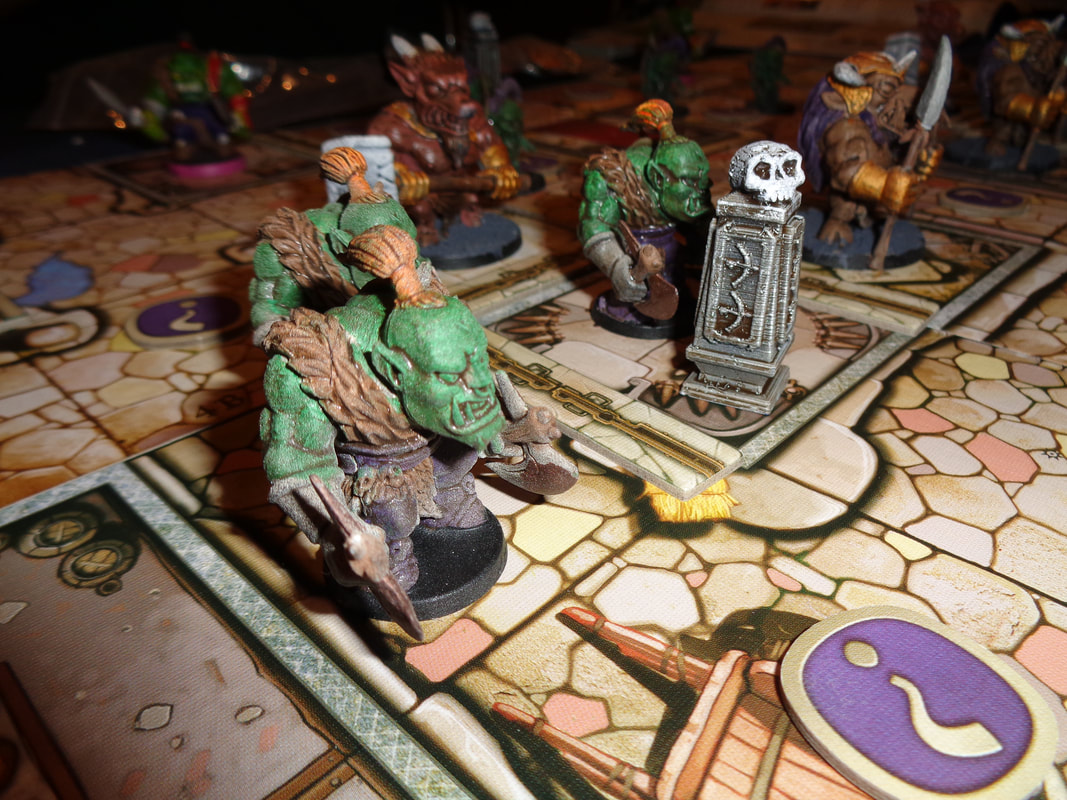
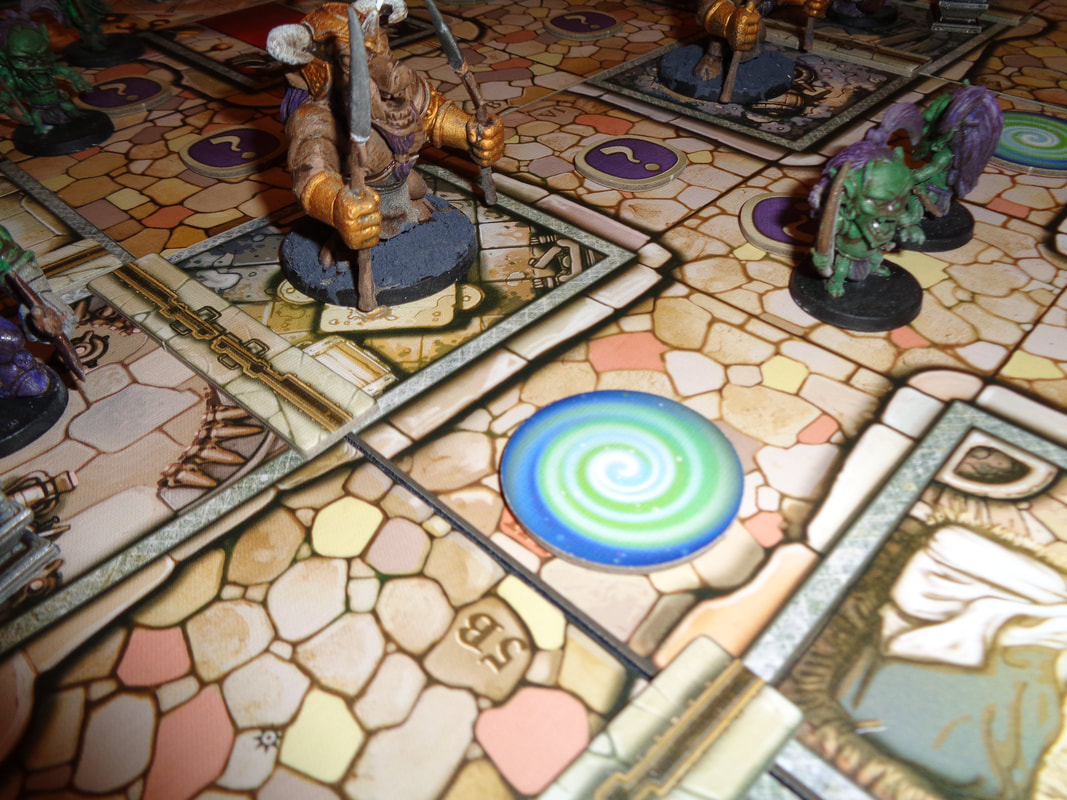
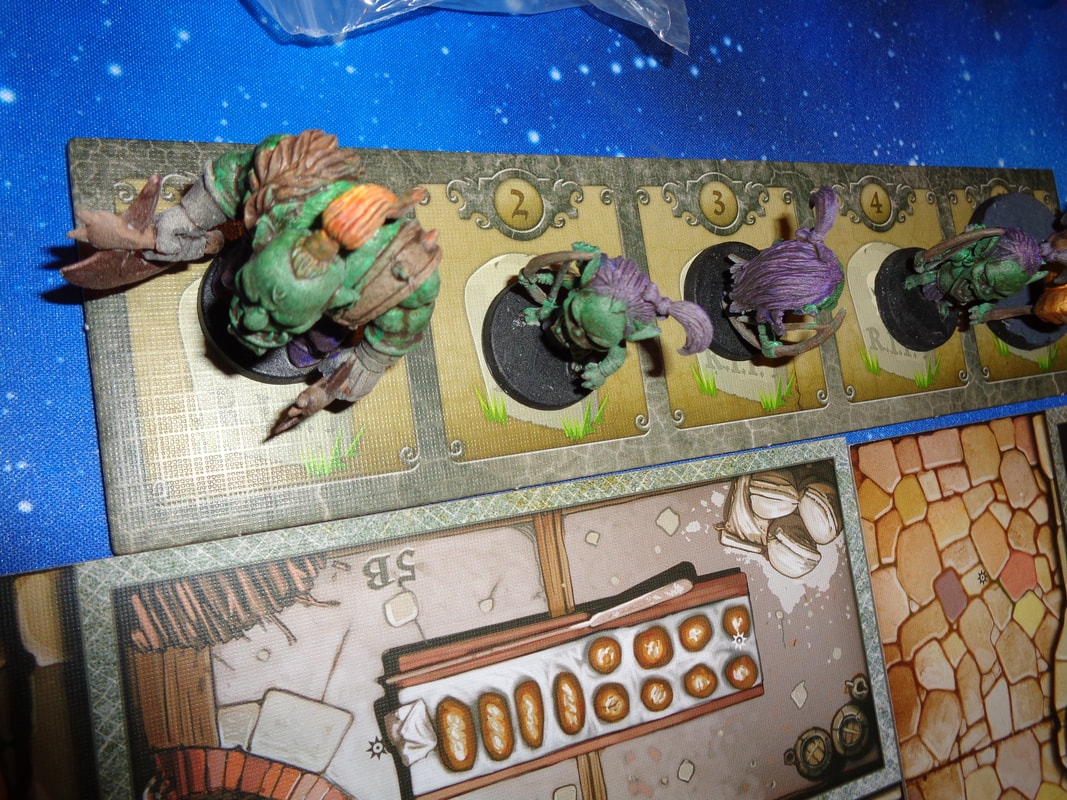
It's hard to fault the component quality in Arcadia Quest and nothing feels cheap. It comes with a generous amount of minis
 
The game utilises a chibi art style throughout, this extends to the hero and monster cards as well as the miniatures. The illustrations on the cards and boards is colourful and has a lot of character.
Arcadia is a fairly miniatures heavy game and they're the components that I would say are the the most eye-catching. They're all good quality sculpts and while it's all part of the game's art direction and charm; I have to say I'm a bit ambivalent towards the chibi styling personally.
As an aside; figures are supplied unpainted but haven a paint job.

The game also contains a a fair amount of iconography but it never felt unintuitive.


How's it play?
Setup
​Arcadia Quest can be played as a traditional board game but is clearly meant to be played as a series of linked scenarios, thus the Campaign book will determine the specific setup required, although it will generally involve the following:
  • Game area: Set out the the game tiles as determined in the campaign book, this will include adding door, exploration, quest and spawn tokens.
    Each scenario will also employ certain enemies, the miniatures and cards for these will need to be put out as well.
    Quests: A game called Arcadia Quest wouldn't be much without quests.
    Again, the campaign book will determine which quest cards are set out.
  • Heroes: Each player should be given 3 hero cards and their 5 starting gear cards. All of which should be placed on their player board.
    Finally, give each player the guild tokens in their colour.
    The heroes should be put out their starting spaces.
On to play
Arcadia Quest follows the typical turn structure with the active player taking their turn, then the player to the their left acting next.
During their turn, the active player has 2 basic options they can choose from.
  • ​Rest: The active player may rest all their heroes, this has several potential benefits.
    • Unexhaust cards: During the usual course of their actions, players will exhaust the cards on their personal board, this means they can no longer be used. This action removes exhaustion from cards.
      More on exhaustion below.
    • Rearrange gear cards: When resting, the active player may choose to re-arrange any and all the gear cards in their personal board between their heroes.
    • Resurrection: If any of the active player's heroes were 'killed' they will reappear on their guild's starting spaces.
  • Activate hero: Instead of resting all their heroes, the active player may choose to activate exactly one of their heroes. This will result in the active hero performing the following 2 actions in any order they see fit.
    • Move: The active hero may be moved up to 3 spaces orthogonally along the game tiles. Heroes can also 'spend' movement to open doors or use teleporters.
    • Attack: The active hero may attack a monster or even other players' heroes. Heroes have no default attack in Arcadia Quest per se; instead, all attacks come from using the gear/cards they have equipped for that hero and when a card is used in this way it becomes 'exhausted', a token is then placed on the card to indicate this. Thus each of a hero's cards can be used once only until they are rested.
      As well as attacks, gear cards may also provide other or bonus actions.
That's it for basic player choices, there is of course quite a lot more to Arcadia Quest, below are some more details.
  • Attacks: Attacks may be melee or ranged and are performed using a number of black dice as specified by the card being utilised to undertake the attack.
    Melee: This requires the target to be adjacent to the active hero. The player rolls the required number of black dice and every die that comes up with a sword is a point of damage to the target.
    The CRIT result also inflicts damage but additionally, allows the attacker to roll an extra black die, it's possible to string together a number of critical hits.
    Ranged: An attack at range requires line-of-sight and functionally is identical to a melee attack except bow results are required instead of swords. Critical results work the same as with melee.
    Defence: It's not all attack in Arcadia Quest and heroes will need to defend from monster attacks and the aggression of other players.
    Heroes may have a default defence value, they may also have defence values on their gear cards, these are all added to together to give them a total defence score. Even if a gear card is exhausted, it's defence value still always contributes to the hero's defence.
    The defending player rolls white dice equal to the total defence value, each shield result, prevents a point of damage.
  • Death: When a hero or monster goes to 0 hit points, it's not good news.
    Monster: Reducing a monster's hit points to 0 defeats it and earns the victorious player money.
    Hero: When a hero reaches 0 hit points, they are also dead! Furthermore, all other players earn coins! There's also some good news/bad news!
    The good news is the next time a player rests their guild, the dead hero will respawn at their guild's starting spot. The bad news though, is that respawned heroes get a 'death token', more on these later.
  • Monsters: Monsters are essentially reactive in Arcadia Quest and do nothing when left alone. However, when a hero attacks a monster, it will immediately retaliate after that attack if it can. Additionally, if a hero wanders too close to a monster, it will provoke an attack from that monster. Mechanically, attacking and defending for monsters is identical to heroes.
    Hit points work a little differently though. Monsters have a hit point total and a overkill value. Even when a monster loses all its hit points and is killed; it can still counter attack. However, if an attack deals more damage to a monster than it's overkill value, it is insta-killed and does not counterattack. Thus, getting overkills on monsters is a good tactic.
  • Spawns: When a monster is dispatched, its miniature is placed on to the spawn tile. When this tile is filled with monsters, they are all potentially respawned on to the spawn tokens on the game tiles. Rolling a pair of attack dice is used to determine where each monster will respawn, although there's a possibility they won't be respawned at all.
  • Villains: Basically, villains are tougher versions of monsters.
There's more that goes on in a game than I've explained above but some of it will be specific to certain scenarios and I'm not going to write about it here. But suffice to say, that's the gist of it.

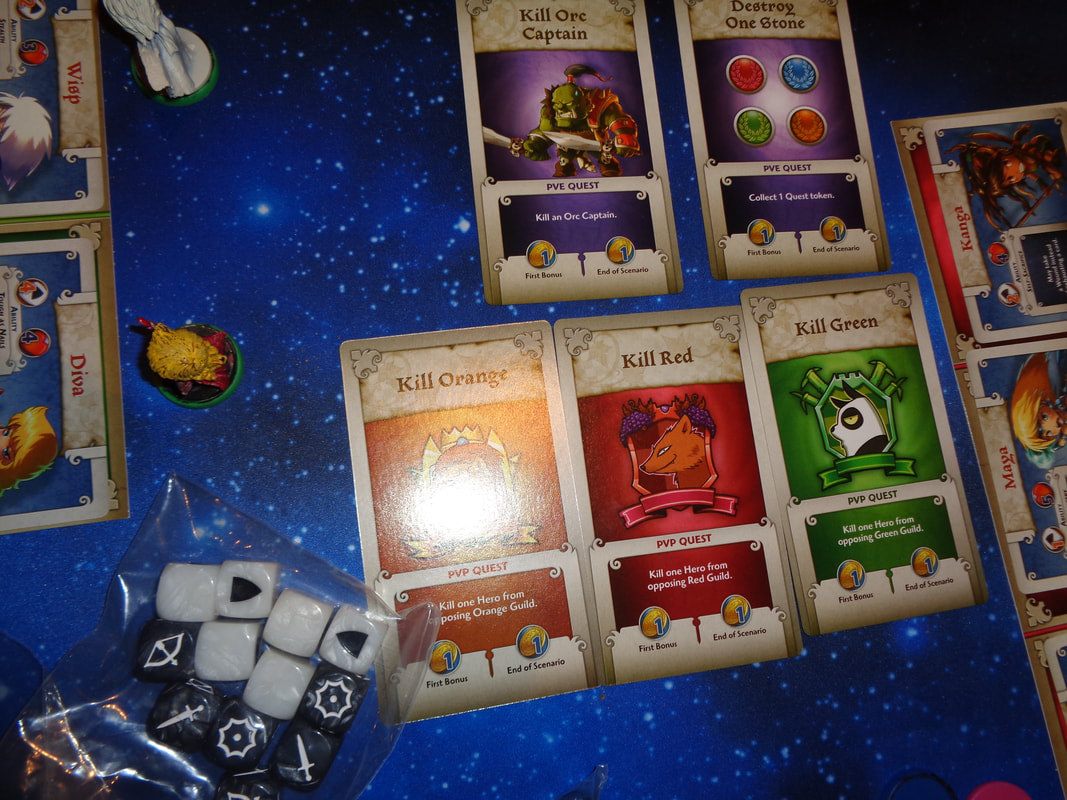
Endgame
Depending on player count, the first player to complete 2/3 quests wins the game, provided at least 1 of those completed quests is a PvE quest. It's not possible to win by just fighting other players.

Campaign
Hang on, there's some more rules-talk after the endgame! When a scenario is completed, players earn rewards as per the scenario, quest cards and other successes in the scenario. These can be used to purchase more cards for the heroes, providing them a route to upgrade or 'level-up'.
If a hero accumulated 1 or more death tokens during the scenario, then that hero will randomly acquire a death curse card, which inflicts some sort of penalty on the hero in the next scenario. Once that next scenario is completed, the death curse card is discarded. If the hero was unfortunate to die again, they would acquire a new randomly drawn death curse card.

Campaign endgame
If players are going through the campaign, then at the end of each scenario, each player's results are recorded on the campaign sheet and they will earn points for events that occurred in the scenario.
The player who has the best overall results at the end of the campaign, wins the campaign!


Overall
It's tricky to describe Arcadia Quest. Mechanically it's a pretty straightforward, player's use the fairly obvious actions on their cards, looking for ways to sync or combo effectively until they need to be refreshed.
Different scenarios will present players with different options, opportunities and objectives. Objectives are always a mixture of PvE and PvP goals and players will need to be aware of retaliation from monsters as well as attacks from other players.

This brings me to something I consider a bit of a bugbear. I'm not a fan of games that mix PvE and PvP elements together, particularly in a game that aspires to be 'RPG-adjacent'.
As someone who's played a lot of traditional RPGs, I find it grates a little because it's not something I want from a RPG. Having said that, the other players who don't have any RPG experience found it all enjoyable, so maybe I'm the outlier,

Otherwise, I found Arcadia Quest sort of average, it plays well enough but I found nothing really engaging about it. It never felt like there was a clever strategy I could employ and there was a kind of inevitability to the gameplay.

You spend your action to fight a monster or fight a player and doing one often meant the other could happen to you. I mean if one of you're heroes has been wounded by battling a monster, what better time for another play to target?
I think this is why completing a PvE quest is mandatory to winning, otherwise the game would descend into total PvP combat. When thinking about it, Arcadia Quest ultimately seems like a mini-heavy, light-strategy skirmish wargame on a board with the veneer of RPG-adjacent gameplay. And truth be told; if I'm after a skirmish game, I feel there's plenty of better alternatives out there.

There's nothing really wrong with Arcadia Quest and if you want a light strategy game (Which let me emphasise is no bad thing.) with accessible rules then it's worth a look. But it's not for me.
0 Comments

    Author

    I play, I paint.
    ​This is where I talk about what I play.

    Archives

    March 2024
    February 2023
    January 2023
    December 2022
    November 2022
    October 2022
    September 2022
    August 2022
    July 2022
    June 2022
    May 2022
    April 2022
    March 2022
    February 2022
    January 2022
    December 2021
    November 2021
    October 2021
    September 2021
    August 2021
    July 2021
    June 2021
    May 2021
    April 2021
    March 2021
    February 2021
    January 2021
    December 2020
    November 2020
    October 2020
    September 2020
    August 2020
    July 2020
    June 2020
    May 2020
    April 2020
    March 2020
    February 2020
    January 2020
    December 2019
    November 2019
    October 2019
    September 2019
    August 2019
    July 2019
    June 2019
    May 2019
    April 2019
    March 2019
    February 2019
    January 2019

    Categories

    All
    2 Player Only
    50 Fathoms
    Abstract
    Annual Quiz
    Area Control
    Asymmetrical Play
    Auctioning
    Black Hack
    Bluffing
    Board Game
    Campaign Play
    Card Game
    Clockwork & Chivalry
    Cooperative
    Cthulhu Hack
    Deck/Bag Builder
    Deduction
    Dice Game
    Drafting
    Engine Builder
    Hand Management
    Hidden Movement
    Hidden Role
    In Darkest Warrens
    Legacy
    Merry Outlaws
    One Vs Many
    Oubliette
    Party Game
    Programming
    Push Your Luck
    Real Time
    Renaissance
    Resource Management
    Roll And Move
    Roll And Write
    Route Builder
    RPG
    Sand Box
    Savage Worlds
    Set Collecting
    Storytelling
    Tableau Builder
    Team Based
    The Month In Gaming
    The Year In Gaming
    Tile Placement
    Trading
    Traitor
    Trick Taking
    Voting
    Wargame
    Wasted Hack
    WFRP
    Wogglecon
    Word Game
    Worker Placement

    RSS Feed

Powered by Create your own unique website with customizable templates.
  • Home
  • Special Effect
    • Special Effect
    • The Final Return of The Indiana Jones Charity Globe Trot
    • The Warlock of Firetop Mountain Challenge
    • Return of The Indiana Jones Charity Globe Trot
    • Bard's Tale Challenge
    • Fighting Fantasy Challenge
    • The Indiana Jones Charity Globe Trot
    • Mirkwood Charity Walk
    • Middle-earth Charity Walk
    • Dungeon Daze
  • RPGs
    • The One Ring
    • The Evils of Illmire
    • Beach Patrol
    • The Surrendered Lands
  • Game Blogs
    • RPG Blog
    • Gaming Blog
  • Painting Blog
  • Contact