3 Spellcasters and a Dwarf
  • Home
  • Special Effect
    • Special Effect
    • The Final Return of The Indiana Jones Charity Globe Trot
    • The Warlock of Firetop Mountain Challenge
    • Return of The Indiana Jones Charity Globe Trot
    • Bard's Tale Challenge
    • Fighting Fantasy Challenge
    • The Indiana Jones Charity Globe Trot
    • Mirkwood Charity Walk
    • Middle-earth Charity Walk
    • Dungeon Daze
  • RPGs
    • The One Ring
    • The Evils of Illmire
    • Beach Patrol
    • The Surrendered Lands
  • Game Blogs
    • RPG Blog
    • Gaming Blog
  • Painting Blog
  • Contact

Gaming Blog

Heat: Pedal to the Metal - First Play!

4/1/2023

0 Comments

 
3rd January 2023

It's the first Tuesday of the year and we're with the Woking Gaming Club at The Sovereigns for an evening of gaming goodness

“You might not think that’s cricket, and it’s not, it’s motor racing.” - Murray Walker.

Heat: Pedal to the Metal is a card hand management, push-your-luck game about F1 racing. Intriguingly it's themed after 1960's F1.

What's in a game?
  • Game board: Heat Pedal to the Metal actually comes with 2 double-sided boards providing 4 tracks - France, Italy, Great Britain & USA for players to race around.
    Each board provides bird's eye view of the track as well as the surround environs.
    Each track is generally around 60 spaces long and each space has '2 lanes', there will be a number of corners marked by lines that each have a proscribed speed as well as a racing line indicator and 'Legend Lines' (Used to manage AI cars.). Straights also have countdowns to corners.
    There's also track information for the exact number of spaces, corners and lap count. It also lists the number of 'Heat' and 'Stress' cards required on the track (More on these below.) and has a space to place a weather tile if playing with the optional weather rules.
    Finally, each track has its own finishing podium to place your car when you finish the race!
Picture
French track.
  • Player board: There's a player board in each player colour.
    Along the top are a series of icons themed as dashboard dials that display a breakdown of how a turn occurs
    There are spaces for 3 stacks of cards (Racing deck, engine - or heat deck and discard pile.).
    Along the right side is a vertical track to manage the car's 4 gears. Each gear 'space' also has icons next to it, indicating additional actions the player may take when in that gear.
Picture
Green player has a shamrock illustration, does it mean it's Irish racing green?
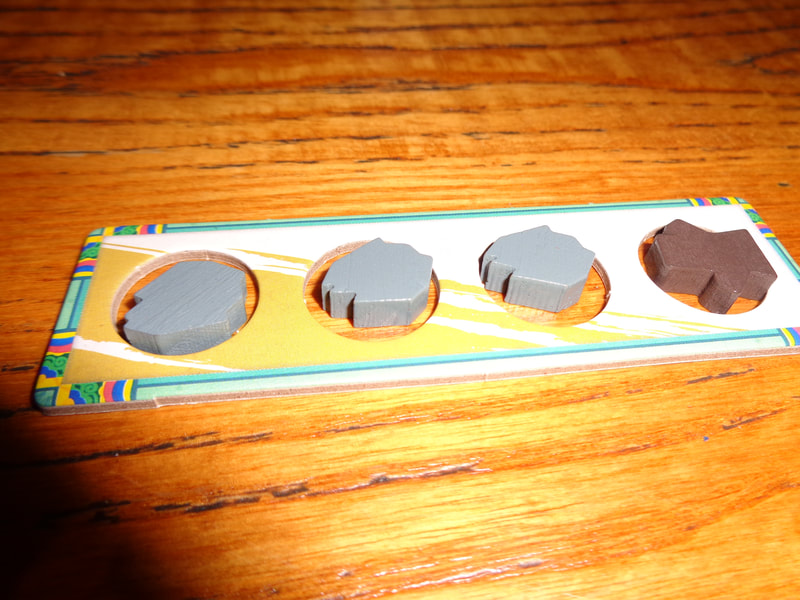
  • Player tokens​: There is a 'gearstick' pawn and F1 car in each player colour.
Picture
Yellow and blue tokens.
  • Cards: Heat: Pedal to the Metal uses several types of cards. Each card depicts some element related to racing, speed cards generally show a err.. speeding car while others might show some part of the engine.
    Base cards: There are 12 base cards in each player colour, 3 cards each of cards numbered from 1-4.
    Starter upgrade cards: There are 3 starting upgrade cards, a 0-speed card, 5-speed card and a heat card.
    Heat cards: These very red looking cards displays a 'no-trash' symbol in the top corners - basically it means they can't be discarded, move on this below.
    Stress cards: As well as no-trash symbols, stress cards also display the 'boost' symbol which is a '+', again more on this below.

Picture
Base cards for green player.
Advanced components: Heat Pedal to the Metal has introductory and advanced rules. The advanced game adds more components.
These are broken down into 'modules' which players can pick and choose to add to their game as they see fit.
  • Championship module: This allows for a season of races during the 60's in which players score points in each race, culminating in a final score to see who wins.
    Event cards: Each race in a season has its own event card that can affect the race in some manner.
    Press corner standee: There are 2 standees which can be placed at certain corners.
    Sponsorship cards: These work somewhat like upgrade cards and are added to a player's deck but when they are used, they are discarded out of the player's deck instead of going to the discard pile.
  • Garage module: This module allows players further options when upgrading their cars through a big stack of differing upgrade cards.
    ​​Upgrade cards: These are further upgrade cards that are used in the advanced rules, these cards tend to have unique or unusual moves compared to the base cards.
    Advanced upgrade cards: Yep, if the upgrade cards aren't enough for then there's the advanced upgrade cards!
  • Legends module: This module introduces 'bot' or AI drivers. Heat: Pedal to the Metal plays with up to 6 including bots.
    If you're playing with a higher player count you can safely ignore this module but with 2 or 3 players, it might be a good idea to add some extra bots.
Picture
Legends mat and examples of legends cards that manage bot movement.
  • Weather module: This module will not only add weather variations to track but also track conditions, all of which may make it harder for players or even provide them with a benefit.
    Weather tiles: The thick tiles are sized a bit like playing cards. Using one of these 6 tiles will alter the race in some way for all players.
    Condition tokens: These smaller tokens are used on the corners, they affect the rules for going through the corners.
Picture
Weather tiles and condition tokens.
First; a bit of a criticism. The game has no tokens to track the usage of adrenaline (More on adrenaline below.). It's only a minor oversight and in no way a gamebreaker but it's still something that would have been nice to include.

The player and module mats feel a little flimsy compared to the other components but to be honest, unless the mats are mistreated, it shouldn't matter. Otherwise the components are all good.
The tiles and tokens all feel satisfyingly thick and sturdy while the cards and standees are of the usual acceptable quality.
The gearstick pawn is plastic as are the little cars, which are the standout components, they have enough detail to look cool on the track.

Heat: Pedal to the Metal features excellent art through out, in the particular the speed cards with their illustrations of F1 cars hurtling along are evocative and because it harks back to the F1 cars of yesteryear it lends the art a timeless quality.
There's also a lot of variation in the art for the upgrade cards and while the illustrations are good, pictures of brake discs or suspension coils are not as exciting as speeding sportscars.
The race tracks are also well depicted on the gameboards with some excellent illustrations.

Iconography found in the introductory game is not particularly complicated or overwhelming and players won't have any problems quickly understanding them.

The same cannot be said for the advanced game.
There are a large number of icons in the advanced game, icons for weather, icons for track conditions and so on but the main culprit is the upgrade cards since there's a lot of them, they contain a lot of varied icons that will require looking-up in the rule book.
Normally, I'd be a bit critical of this but as they're part of the advanced rules, it's fairly likely players will start with the introductory game and work up to the advanced modules. So I don't see it as a serious obstacle.


How's it play?
The following describes the basic, introductory game.
Setup
  • Race track: Choose a track, this will determine how many laps will be raced and what heat and stress cards each player will receive.
  • Players: Give each player the player board, gearstick, car and cards in their player colour.
    Deck setup: For the basic game, players should use the base cards and starter upgrade cards. Player should also be given heat and stress cards as dictated by the chosen racetrack.
    The heat cards should be placed on the player board space for heat cards while all the remaining cards should be shuffled into a face-down deck and placed on the deck space.
    Finally, players should put their gear stick on the 1st gear space on their player board.
    Players should then draw a starting hand of 7 cards.
  • First player: Starting positions should be randomly determined and players should place their cars in the pertinent position on the starting grid.

On to play
Before explaining the rules, it would be a good idea to explain some of facets of the rules beforehand.
  • Boost: There are several ways a player may gain a boost and several may occur at the same time (Due to stress cards.) but they are resolved the same way.
    For each boost being resolved, the player flips a card from their racing deck: If it's a base speed card (Speed 1-4.) it is added to the player's total speed and that boost symbol is resolved. If it's any other type of card, that card is placed in the discard pile and other cards are drawn until the boost symbol is resolved.
    This is repeated for as many boost symbols need to be resolved.
  • Heat: For a game called Heat: Pedal to the Metal, you'd think that heat cards would be important and you'd be right!
    Pay heat: The game has several ways to make players pay heat (Or gain heat cards really.) and they are all resolved in the same way.
    For every point of heat a player has to pay for, they must take a heat card from the engine deck and add it to their discard pile (Not their hand as I've done accidentally.). If player does not have enough heat cards available, then, depending on the situation, they cannot perform the action that requires they pay heat for it or they spin out!
    Cooldown: When cooldown occurs, it allows the player to return 1 or more heat cards from their hand (Not their racing deck or discard pile.) to the engine deck and every point of cooldown allows the player to return a heat card.
  • Speed: It's important to remember that a car's speed is the total numerical value of all the cards played face-up by that car's player at the end of their movement.
    This includes from using adrenaline - which is why a token for it would have been useful.
    This does not include slipstreaming.
Right with that out of the way let's get on with it.
It's fairly obvious but the first player to complete the required number of laps and cross the finish line is the winner!
Each turn in Heat: Pedal to the Metal consists of 9 phases which may sound like a lot but not all of them are required or mandatory and in practice is generally easily managed.

Heat: Pedal to the Metal does not use a traditional turn order. Instead the order of play is determined by position on the track. I.e., the player in 1st position on the track goes first, the player in 2nd goes second and so forth. This means the turn order is very likely to change from round to round.
The first 2 phases are resolved simultaneously whilst others full resolved by the player during their turn.   
  • Change gear (Mandatory): This action is performed simultaneously by players and in this phase players may choose to stay in the same gear or change gear.
    A player may increase or decrease their gear 1 step without issue, or they may increase or decrease their gear by 2 steps by immediately paying 1 heat.
  • Play cards (Mandatory): This is done simultaneously by all players.
    In this phase players play cards face-down and the number of cards played must be equal the gear their car is in. E.g., if a car is in 3rd gear, 3 cards must be played.
    A player may play any of the cards in their hand except heat cards.
  • Reveal & move (Mandatory): This phase is resolved one-by-one during the active player's turn.
    The active player reveal the cards they played and must move their car a number of spaces equal to the total value of the cards played. Thus if a player was in 2nd gear and played a 2 & 3, they must move their car 5 spaces.
    Some cards such as stress cards use the boost action and must be resolved.
    When a car moves, it is not blocked by other cars, however a car cannot end it's movement on the same space as another car.
    If a car moves to a empty space, it should be placed alongside the racing line, if there's already a car there, then it should be placed on the other lane in the same space.
  • Adrenaline (Optional): As well as being an optional action, this action only applies to the 1 or 2 back markers in the race (Depending on player count.). A back marker has 2 actions available to them.
    Speed increase: The active player may increase their speed by 1.
    1 cooldown: The active may gain 1 point of cooldown.
  • React (Optional): If the player has activated any icons due to what gear they're in gear or cards they've played, they may choose to resolve them at this time, in the order of their choosing.
    For the base game, this only applies to the gear. Upgrade cards may contain other icons.
    The player can use a boost action in any gear.
    In 1st gear they gain 3 cooldown and in 2nd, 1 cooldown.
  • Slipstream (Optional): If the active player has moved their car directly behind or alongside another car, they may choose to make use of slipstreaming.
    Slipstreaming allows the active player to move their car an additional 2 spaces, this is also without increasing their speed - which can prove very useful sometimes.
  • Corner check (Mandatory): If a player's cars has crossed any corner lines in this turn then they must do a corner check.
    The player compares the speed of their car with the speed listed for the corner, if the car's speed is equal or lower than the corner's speed, the it's all good. If the speed is higher, then the active player gets a point of heat for each point over the corner's speed limit.
    Spinning out: If for any reason the active player cannot pay the cost for heat because their engine deck is empty, then they spin out.
    If this occurs, the player moves their car to before the corner that caused the spin out, pays all the heat they can and adds 1 or 2 stress cards to their hand from the supply (Depending on what gear their card was in when it spun out.) and puts their car into first gear.
  • Discard (Optional): The active player may discard any cards in their hand into their discard pile except for heat and stress cards.
    Only cooldown allows a player to discard heat cards and stress cards must be played to get rid of them.
  • Draw (Mandatory): The active player refills their hand until they are back up to a hand of 7 cards. Whenever a player's racing deck is emptied, they simply shuffle their discard pile into a new racing deck.
  • Next player: Play proceeds to the next player in the turn order.
  • End round: Once the last player has taken their turn, the current round is over.
    A new turn order is set according to the current positions of all cars with whoever is now in 1st place going first and so on
 
  • Advanced rules: What is written above pretty much explains the entirety of the game and I'm only going to briefly touch on the advanced rules, some of which actually just change the parameters of the game.
    • Championship: This adds a sort of career mode to the game and adds events that alter the basic rules.
      Press corners: Each track will have press corners and by performing specific actions at them, the active can acquire sponsorship cards. talking of which...
      Sponsorship cards: These work a bit like upgrade cards except they once they are played, they are discarded out of the game and not into the player's discard pile.
    • Garage: This module provides a wide variety of upgrades that player's can use. Generally they can be very useful.
      E.g., a upgrade card might be 1/3 upgraded brakes and when play means the player can choose the card to have a speed of 1 or 3 which can be very useful.
    • Legends: Not really additional rules but a way of providing bot players to increase the number of cars on the track.
    • Weather: There are 2 ways this module can affect the game.
      Weather tiles: The weather tiles generally alter the starting number of heat and stress cards.
      Track conditions: These tokens change some element of the game for a stretch of the track or on a particular corner. It might be possible to use the boost action a straight for free, or a corner's speed might be lowered and so on.

Endgame
Who ever crosses the finishing first after completing the required number of laps is the winner. Remaining players may of course continue playing to determine the final finishing order.

Championship
If playing a championship, all cars should finish and their championship points for that race should be recorded.
Additionally, if the garage module is also being used. Players should keep their upgrade cards from race-to-race.
Once the championship is over, whichever player has acquired the most points wins the championship!


Overall
Heat: Pedal to the Metal gives players several obstacles to wrestle with and sometimes several ways to approach that obstacle.
Players need to navigate corners, manage their hand and by extension also manage their heat cards. The game also has a push-you-luck element to contend with but not necessarily in the way you'd think.

The game also requires players to think a turn ahead, especially in regard to corners. Managing the current round is not so hard, players will know how far away the next corner is and how far their cards will get them (With the exception of stress cards.) but will need to think about where they end their move. A player be may end its turn right in front of a 4-speed corner in 4th gear, will they have the heat to go down 2 gears, do they have low enough speed cards to get through the corner unscathed or will have to hope to draw the cards they need, which is one way they can push their luck.

Discarding cards is also something to think about, players will sometimes have to resist the urge to discard low speed cards on occasion as they can prove useful in  upcoming corner and of course, some cards cannot be discarded.
When players have heat cards in their hands, they need to dip into the lower gears to discard them.
Stress cards though, have to played.

Stress cards is the other way of pushing your luck in Heat: Pedal to the Metal. If a player is on a straight, it's not too much of a risk but if they're going into a corner and need a specific number, there's always the chance that they card they least want!

Having said that, sometimes players will want to be a bit too fast! Going through corners effectively is a bit of an art in itself. Sometimes it pays to deliberately go through a corner just a little bit too fast and take the heat, especially if the corner goes into a long straight as it leaves the player free to blast down the track.

Slipstreaming is also a interesting mechanic as it creates a 'jostle' between players and I'm sure that's how it's intent.
It also creates a higher level to player where players will try to anticipate where their rivals ahead of them will move to and exploit it with slipstreaming.
Conversely, if a player is ahead of their rival, they may want to position themselves in such a way that their rival cannot slipstream them. However, there will be times that it's unavoidable that an opponent will slipstream you and it can feel a little punishing. Conversely, if a player is ahead of their rival, they may want to position themselves in such a way that their rival cannot slipstream them. However, there will be times that it's unavoidable that an opponent will slipstream you and it can feel a little punishing.

​Finally, lets talk about heat cards. They are a very important resource and can provide significant bonuses when utilised correctly.
Heat cards can be used to push a car harder than usual, go up gears faster or go through corners quicker. There's a risk though, unless a player can discard (Usually by dropping gears in corners) them they'll just clutter the player's hand up.
Players should try and the best of this; crossing the finish line first with a empty engine deck and a handful of heat is still first.
Finishing second with a full set of heat cards in the engine deck still equates to finishing second.

All of this is good stuff because it provides players with meaningful decisions to make, sometimes what might seemingly be a simple decision can have significant outcomes and a lot of these may be contextual.

E.g., while going through a 4-speed corner a player may want to be in 2nd gear and play a 3 & 1 speed cards, keeping a 4 for later.
Or, they may want to drop to 1st and play the single 4, which will allow them to discard 3 heat cards instead of 1. However this would mean they start the next round in 1st gear, which may be a bad thing depending on what is up ahead.

This kind of contextual gameplay keeps Heat: Pedal to the Metal fresh, it also helps that it has 4 tracks and various modules.

Heat: Pedal to the Metal is a fun game that plays well at a higher player count without having a too long a playtime and worth trying.
0 Comments

December '22 - The month in gaming

31/12/2022

0 Comments

 
A big drop in the monthly totals from November '22, I attribute this in part to how Christmas fell and when people were away for their holidays.
Only 1 new play for the month!


First plays: 1
Different games: 15
​Total games: 24

Saturday New Year's Eve! on Board Game Arena
Jump Drive - 15

Sunday Christmas Day! on Board Game Arena
Lucky Numbers - 54
Can't Stop - 33
Love Letter - 67
Roll'n Bump - 7
Railroad Ink - 42
Just One - 8

Tuesday 13th at The Sovereigns with the Woking Gaming Club
Codex Naturalis - 25
Tiny Epic Galaxies - 8
Jump Drive - 14

Sunday 11th on Board Game Arena
Lucky Numbers - 53
Can't Stop - 32
Love Letter - 66
Dragonwood - 13
Just One - 7
Cosmos: Empires -  First Play!

Thursday 8th Aldershot
Scout - 2
HeroQuest - 8

Sunday 4th on Board Game Arena
Lucky Numbers - 52
Railroad Ink - 41
Love Letter - 65
Loco Momo - 15
Just One - 6

Friday 2nd Woking
Deep Sea Adventure - 10
0 Comments

Cosmos: Empires - First Play!

11/12/2022

0 Comments

 
11th December 2022

It's a Sunday evening and where logged into video chat and Board Game Arena for some gaming fun.

More space, more empires and more final frontiers. 
Cosmos: Empires is a galactically-themed tableau building where plays rush to build their cosmic empire - or least increase their empire's production - all very capitalist!

Caveat: We've only ever played this game digitally.

What's in a game?
  • Cards: Cosmos: Empires uses a single deck of card.
    Each card is illustrated with some sort of space-themed vehicle or construct.
    In the top left corner of each card is the 'purchasing' cost
    Along the bottom it lists the card's 'type', 'activation number' and 'production value'.
    Some cards will also have one of various types of ability, this may well also include some text to better explain how the card works.
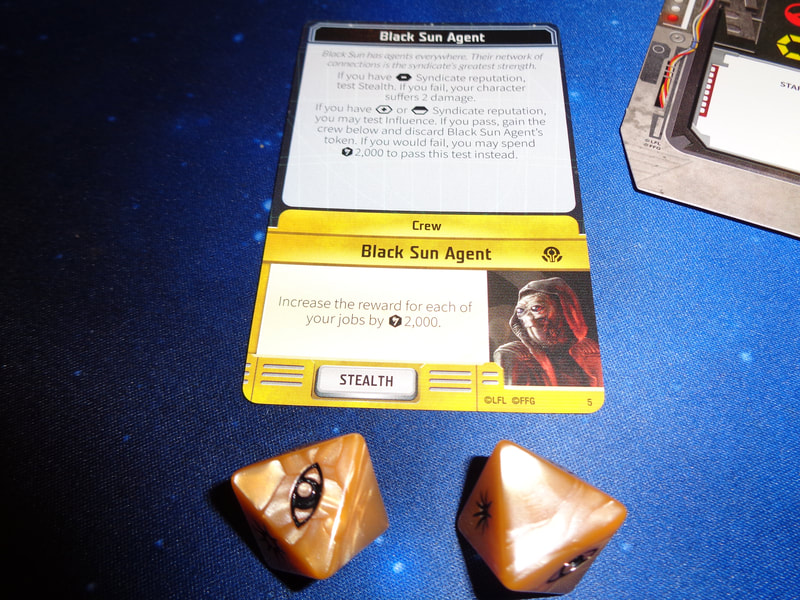
  • Dice: The game uses 2 4-sided (d4), pyramid looking dice numbered from 1-4.
    There are also a few 8-sided (d8) dice which have no direct gameplay use but are instead used to track certain cards.
  • Currency: The game uses 'credits' as its currency.

I have to say I found the illustrations to be pretty good sci-fi themed artwork and could easily see them on classic 70's sci-fi book covers. Having said that, I did also find some of the artwork was a little too busy for a card game, there were bright spots that drew the eye from important information for example and perhaps the text could have been a bit clearer.

While there are a few icons, it's not overwhelming, some information on card abilities are displayed on the cards themselves, sometimes player's will want to refer to the rules for clarification. I would not consider it a problem as Cosmos: Empires is pretty straightforward.

Picture
Example of cards in drafting area.

How's it play?
Setup
  • Cards: Shuffle the cards into a face-down deck, then deal 10 face-up into a central drafting area.
  • Players: Give 8 credits to each player.
  • First player: Determine a starting player.

On to play
In Cosmos: Empires, players will be generating credits which will be used to buy cards from the drafting area.
These cards will have various actions that can be used to the player's benefit with the ultimate aim of increasing currency production.
When a player reaches a certain threshold of currency production, it will trigger the game end.
Cosmos: Empires mostly follows the typical turn structure with the active player performing their actions before play progresses to the player on their left. However, it is likely that 'inactive' players will have their cards activated outside of their turn.
The following occurs during the active player's turn.
  • Roll dice: First the active player rolls the 2 4-sided dice and add their values together generating a number from 2-8.
    Note: It should be noted that it's possible for the active player to change the result of the dice roll during their turn. More on this below.
    • Activations: Now all players who have cards with matching activation numbers can activate those cards and produce the listed amount of credits for each activated card's production value.
  • Actions: During their turn, the active play can perform any 2 actions from the following. A player may also pick an action to perform twice.
    • Shift result: The active player may use an action increase or decrease the result of the dice roll by 1. This will have the result of changing which cards are activated.
    • Build card: This is another way of saying the active player may buy a card  from the drafting area and add it to their tableau.
    • Cycle a card: The active player may spend an action to discard a card from the drafting area to the bottom of the deck and gain 2 credits.
  • Card abilities: If a card has an ability, it can be activated by the active player during their turn without using an action, it's essentially 'free' to use a card ability.
    Furthermore, if the active player 'builds' a card, its ability can be immediately used.
  • Next player: Once the active player has completed their 2 actions, play progress to the player on their left.

Endgame
Play continues until any one player has combined production value (Not credits.) on all the cards in their tableau of 30 or more.
At this point the endgame is triggered, the round continues until all players have had even turns.
All player then calculate their finishing combined production value.

Points are tallied, highest score wins.


Overall
Cosmos: Empires is a tableau building game that seems to me to have been designed to be a more streamlined, quicker playing, simpler, more accessible game that's a little different to other games of this type.

The strategy in Cosmos: Empires is relatively straightforward; acquire as many cards as quickly as you can, while some cards do combo off each other and getting those cards is good. It's also a goof idea to just get many cards as you can and hope dice rolls go your way.

You see; typically in tableau building games there's ​an early game element about building up the tableau then a late game element about using that tableau to work towards whatever the winning criteria.
Cosmos: Empires eschews this paradigm because it's winning criteria is about accumulating production value and all cards provide production value. It means that acquiring any cards works towards winning.
​The impact of this is that can create a sort of situation where a player will get some cards that quickly earn them a lot of production/credits which can be used to get even more cards (Especially the case when a player can build 2 cards per turn.) to get more even more production/credits in a self perpetuating cycle.
Now this might sound like a good thing and the kind of you'd want in a tableau builder?

The issue is that it can put one player into a unassailable lead where they not only constantly outproduce other players' production but consequently, they also constantly outpace the production increases of other players. A uncatchable double whammy!
This can be exacerbated by the fact that all cards activate in all players' turns. Quite often activations will end up benefitting whoever is in the lead simply by virtue of them having more cards.
Sure, players can shift the activation numbers but I found in order to not to give the leader benefits, I also had to deny them to myself. It felt very negative.

I genuinely admire any game's attempt to pare back rules, provide more elegant gameplay and quicker playtime and this is the case for Cosmos: Empires but it results in a game that feels somewhat unbalanced.
Additionally, I found Cosmos: Empires a little bland, it didn't feel like there's much variety in the mix of cards and it didn't feel particularly engaging. I'm not sure it would stand up to repeated playing

Although, having said all of that, I might not be the best target audience.
Cosmos: Empires might serve as a good entry the tableau building game type and if you want a straightforward, uncluttered, quick playing iteration of it, Cosmos: Empires might tick those boxes.
0 Comments

November '22 - The Month in Gaming

1/12/2022

0 Comments

 
November '22 had slightly less plays than October but with a slightly higher total games played and different games played.

First plays: 4
Different games: 25
​Total games: 39

Sunday 27th on Board Game Arena
Lucky Numbers - 51​
Can't Stop - 31
Roll'n Bump - 6
Cat Cafe - First Play!
Via Magica - 12
Just One - 5

Sunday 27th 
at The Sovereigns​
Cascadia - 5

Tuesday 22nd at The Sovereigns with the Woking Gaming Club
Cosmic Encounter - First Play!

Sunday 20th on Board Game Arena
Lucky Numbers - 50
Martian Dice - 22
Roll'n Bump - 5
Parks - 15
Railroad Ink - 40
Just One -  4

Saturday 19th Wogglecon
Wogglecon 5: It's Alive 
Cascadia - 4
Altiplano - First Play!

​Thursday 17th Aldershot
Wayfinders - 3
Valeria: card Kingdoms - 2

Tuesday 15th at The Sovereigns with the Woking Gaming Club
Point Salad - 3
Ginkopolis - 2

Sunday 13th on Board Game Arena
Lucky Numbers - 49
Can't Stop - 30
Codex Naturalis - 24
Just One - 3

Friday 11th Woking
The Princes of Florence - First Play!

Thursday 10th Simon's 
Akropolis - 2
Cascadia - 3
It's a Wonderful World - 5

Tuesday 8th at The Sovereigns with the Woking Gaming Club
Love Letter - 64
Cascadia - 2

Sunday 6th on Board Game Arena
Lucky Numbers - 48
Can't Stop - 29
Roll'n Bump - 4
Railroad Ink - 39
Space Base - 15
Loco Momo - 14

Friday 4th Aldershot
It's a Wonderful World - 4
The Crew: Mission Deep Sea - 34
HeroQuest - 7
0 Comments

Cat Café - First play!

27/11/2022

0 Comments

 
27th November 2022

It's a Sunday and we're logged into Board Game Arena for some gaming fun.

Have you ever gone to a cat café or wanted to go to one?
According to Cat Café the game, if you're at one of these establishments you're meant to try and attract as many cats as possible! How is this done? By getting mouse toys, balls of yarn and so on to lure them over.

Of course the actual best way to attract cats is to set up a board game with lots of components, then you'll attract every one for miles around!

Caveat: We've only played this game digitally.

What's in a game?
  • Dice: Cat Cafe comes with 5 normal six-siders.
  • Player sheet: These sheets depict a number of important items.
    • Cat towers: There are 5 cat towers and they take up most of the space on the sheet. Each tower has 4-6 spaces numbered from 1-4/5/6 depending on the tower. Each tower also has a pair of scoring numbers at the top. Some towers also have 'scratching spots' which are unusable spots.
      Finally, there's a hex grid overlaid on the towers which makes it easier to see how different spaces are connected to each other.
    • Paw prints: Along the right side of the sheet is a vertical line of cat footprints.
    • Columns: Below the cat towers are 6 columns and each is essentially numbered 1-6.
      As well as a cat illustration, each column contains one of the game's 6 actions and associated icon. There's also a box for tracking some of the scoring for each of the symbols.
    • Scoring row: Lastly, there's a row at the bottom of the sheet to track all the game's scoring​ during the game end..
Picture
What art does appear in the game can be found on the sheets and there's a definite charm to those hand-drawn styled cartoonish cat illustrations and icons.

​Speaking of icons, nearly all the game's iconography is briefly explained on the sheet itself, there isn't too much of it and I can't imagine it proving a problem to learn.

How's it play?
Setup
  • Dice: Put a number of dice into the central playing area equal to the player count plus 1.
  • Sheets: Give each player a sheet.
  • First player: Determine a starting player.

On to play
During the game players will be drafting dice and then using the results to draw 1 of 6 symbols on the cat towers.
Cat Café is played in 2 phases and uses a typical turn structure for the first phase while the second can be played out by all players simultaneously.
  • Drafting: The first player rolls all the dice in a central playing area. Then in turn order, each player takes 1 die.
    After all players have drafted a die, there will be still a die remaining in the central area - this is important for the next phase.
  • Assigning values: This phase can be perform simultaneously by all players if they choose to do so.
    Even though each player has only drafted 1 die, they also have to make use of the die remaining in the central area. Thus they will have two dice to assign which will determine which symbol is used and the row it goes on to.
    Placing symbols: One die must assigned to one of the 6 symbol types; cat house, ball of yarn, butterfly toy, food bowl, cushion and mouse toy.
    ​The other die is assign to 'height'.
    So if a player has a '1' & '4' to use, they can put a cat house on the 4th row of a tower OR a food bowl in the 1st row of any tower.
    Once a player has decided on which combination to use, they draw the pertinent symbol (Or letter for that symbol.) on the relevant row.
    Scoring: The cat house and butterfly toy are immediately resolved when drawn, if a cat tower is completed it is scored upon completion.
    • Butterfly: When a player draws a butterfly on one of their cat towers, they can also circle 2 paws on the paw track, each butterfly toy symbol is also worth VPs at the game end. More on what paws do below.
      Cat house: When placing a cat house, the player chooses any one of the 6 symbols types and marks 2 Victory Points (VPs) for each time they've drawn on their player sheet in that symbol's box. Each symbol can only be scored once in this way.
      Cat tower: When a cat tower is completed, that is when all the spaces on a tile are filled, it is immediately scored according to the following criteria.
      • First to complete with tower: If a player is first to complete a tower and with a cat house in the tower, then they score the higher of the 2 scores at the top of the tower - all other players cross that number off, they can only score the lower number.
      • Completed any other way: If a player completes a tower first without a cat house, then they score the lower amount. If they are not first to complete a tower, they score the lower amount.
  • Additional rules: There are some other rules that will come into play.
    • Passing: A player may choose or may have to pass their action. In either case, instead of adding a symbol to their sheet, they circle 3 paws on the track.
    • Paw prints: A player may cross-off any number of circled paws to alter a die's value. Each crossed off paw allows the player to increase a die's value by +1 or -1. This can be done in anyway the player sees fit, although a die cannot go from 6 to 1 or vice versa.
  • Next round: Once all players have drawn a symbol or passed, the round is over. The player to the left of the current first player now becomes first and takes the dice to roll again.

Endgame
As soon as any player has completed their 3rd tower, the game ends on that round and goes to scoring.
Cat Café has several ways to score.
  • Cat house: The cat houses will have actually be scored during the game, they simply need tallying up.
  • Ball of yarn: All players count up the number of balls of yarn they have in each individual cat tower.
    For each cat tower, the player who has the most balls of yarn scores 8 VPs for that cat tower, any player who has 1 or more but a lesser number of balls of yarn, scores 3 VPs.
  • Butterfly toy: Each butterfly toy scores 3 VPs.
  • Food bowl: Each food bowl scores 1 VP per adjacent different symbol type.
  • Cushion: Each cushion scores VPs equal to it's height in a cat tower. 
  • Mouse toy: These score VPs for being connected in a contiguous group. It is possible for multiple groups to score.
  • Cat tower: These scores will have been calculated when the cat tower was completed during play so just need tallying up.

Points are tallied, highest score wins.

Picture

Overall
For me, Cat Café is a bit of a mixed bag.

I'm always a fan of games that have streamlined, elegant mechanics and there's definitely some of that to Cat Café but here it seems like sometime it comes at the price of choice.
Sometimes the choices feel meaningful, sometimes they don't.

Players will get to choose a die (And sometimes not even that!) then draft it, after that they'll get a 2 options on how to use those dice, or pass.

For example: A player may get a '1' and a '5', this means they could put a cushion on level 1 but that's a waste of a cushion (Ideally, you'd want it higher.). Alternatively they could put a cat house on level 5 which introduces a new conundrum; is this a good time to play a cat house? In the early game they won't score many VPS and are much more valuable to play in the late game - provided the number comes up again.

All of this gives players several things to think about and sounds good - which it is to an extent but it's also hard to try and plan moves ahead when luck can play such a haphazard role, sure, the appropriate use of paws can mitigate bad luck to a degree but even so, it can be frustrating not getting the numbers needed.
It means players will need to adapt and react to their results as they get them to gain optimal scoring and not rely on getting results they want later unless they have of course acquired a sizable amount of paws.

Next is scoring: Cat Café employs a fairly broad criteria for scoring with different avenues to approach in acquiring VPs.
E.g., the mouse toy scores points for gathering the same type of symbol together while the food bowl scores by gathering different symbols.
This mechanic has been utilised in other games and is understandable here, where players at times will find themselves at the mercy of the dice and have to change what they were going to do.
However, with some scoring occurring mid game and the rest after the end, it does make scoring a little bit too intricate and involved, especially for a game this light.

Having said all of that, I'm probably overthinking everything.
Cat Café is a lightweight, family friendly game with a cute cat theme.
It's not too hard to pick up and while decisions can be fairly limited they do tend to be meaningful. There's also a dollop of luck to add some unpredictability.
It would be a good choice for younger players but perhaps would need someone older to manage the scoring.

For me, I found it a little too simplistic and unengaging as well as slightly frustrating.
0 Comments

Cosmic Encounter - First Play!

23/11/2022

0 Comments

 
22nd November 2022

Tuesday is here again and that means we're with the Woking Gaming Club at The Sovereigns for a evening of gaming.

Space... is it the final frontier? I mean it's pretty large with enough room for separate civilisations to expand without impinging on each other's territory. Except in Cosmic Encounter, it's not! Players take on the roles of one of numerous alien civilisations with the purpose of invading other player's planets in this game of bidding and bluffing.

What's in a game?
  • The warp: The warp is where defeated ships go! This is a large circular tile that depicts what I suppose is a spatial whirlpool. It also has a track to manage player scores.
Picture
  • Planet tiles: These are smaller circular tiles and there are 5 in each player colour of which there are also 5, thus 25 planet tiles in all.
Picture
  • Hyperspace tile: This tile is sort of triangular in shape and depicts hyperspace travel through some of space gate.
Picture
  • Alien Sheets: Each alien sheet depicts a different space-faring civilisation.
    Each sheet contains an illustration of the alien race in question and below the illustration will be listed the race's 'power'. This power is that race's unique special ability which frequently allows the players to break some of the game's rules in some manner or other.
    There are 50 alien sheets, which is quire a lot! It also means there's a lot of special powers and combinations thereof that can possibly be in play.

Picture
  • Spaceships: These are meeples shaped like classic flying saucers, which is quite cool. Would that then make them 'feeples' or 'seeples' or perhaps 'UFOeeples'? There are 20 in each player colour.
    Interestingly and also conveniently, they stack on top of each other.
  • Player tokens: All of the game's tokens are made of card and there are quite a few types of tokens, most of them specific to certain aliens sheets 
    Colony token: There is 1 each of these in every player colour. They are used in conjunction with the warp tile to track a player's progress through the game.
Picture
  • Cards: Cosmic Encounter uses a variety of cards.
    Destiny cards: This deck is used to determine who the active player will attack.
    ​Encounter cards: By far the most numerous type of card and form the cosmic deck. As the name suggests, these are used during encounters between players. They contain cards numbered 1-to-40 as well as 'negotiate' and 'morph' cards.
    Artefact and tech cards: These are cards that can also be used during encounters and add extra effects or actions to an encounter.
    Flare cards: Flare cards are specific to each race and pertinent flare cards for the aliens in play are added to the cosmic deck. Unlike most cards, once a player has a flare card for their alien race, it is not discarded when played.
    Reinforcement cards: These can be played after the encounter cards have been revealed to alter the outcome.

The component quality is all good, the tiles and tokens are made of suitably sturdy board while cards are average.
The spaceships are plastic with a nice bit of detail and being able to stack them keeps the game area relatively clutter free.

In terms of art direction, the tiles are colourful and mostly ​space-themed with the planet tiles looking like well, planets. The hyperspace and warp tiles are appropriately cosmic looking.
Artwork is used sparingly on cards with space (SIC) given over to text instead.
For the most part, illustrations are reserved for the alien sheets and used to represent the various different alien races. This artwork is fairly good with a lot of diverse and interesting sci-fi artwork.

Cosmic Encounter has little in the way of iconography, numbers are used on encounter cards but otherwise text is used to convey information.
​Nothing here is tricky to understand


How's it play?
Setup
  • ​Players:
    Alien sheet: Shuffle the flare cards into a face-down deck and deal 2 to each player.
    Each player should then take the alien sheets corresponding to the flare cards and choose one sheet for this game, players should take any tokens relevant to the sheet they have chosen.
    Home system: Give each player the planet tiles and space ships in their player colour.
    Each player should put out their planet tiles in a row, they should then stack 4 spaceships on each tile.
  • Central playing area:
    ​Warp tile: Place the warp tile in the middle of the central playing area.
    Players should place their colony tokens at the '0' starting spot.
    Destiny deck: Remove cards that would refer to any unused player colours for the game and shuffle the remaining into a face-down deck.
    Cosmic deck: Add the flare cards for the chosen alien sheets to the encounter cards then shuffle them into a face-down cosmic deck.
    Starting hand: Deal 8 cards face-down to each player.
  • First player: Determine the starting player.

On to play
In Cosmic Encounter players will be trying to create colonies on other players' home systems in the form of land their spaceships on those planets while also preventing their own system from being colonised.
The game employs a traditional turn order with the active player resolving their turn before the game progresses to the player on their left.
Each turn consists of 6 phases.
  • Regroup: The active player may retrieve one of their spaceships from the warp (If possible.) and add it to a planet in their home system.
  • Destiny: A card is drawn from the destiny deck and immediately resolved.
    Colour: If a colour card is drawn from the destiny deck, the player with that player colour will be the active player's target for their 'encounter' (Or attack really!).
    In some circumstances, the active player may target one of their own planets if it has been totally overrun by other players.
    Wild: If a wild card is drawn, then the active player must choose which player to target.
    Special: These are unique cards that have specific outcomes. If a special card is drawn, it will contain text to explain how it is resolved.
  • Attack!: The active player takes the hyperspace tile and points the er... pointy end at one of the planets in the targeted system. Then they add 1-4 spaceships sourced in any combination from any of their planets to the other end, signifying how many ships they commit to the encounter.
  • Alliances: Now the active player who is considered the attacker may invite any number of other players to join with them in the attack.
    ​The targeted player who is now considered the defender may also invite any number of other players to join with their defence.
    Once invites have gone out, the invited players may choose to accept or decline the invitation. If a player is invited to both sides, they must choose one side only or decline.
    Any player that accepts the invitation to form an alliance must commit 1-4 of their ships to their alliance's side by placing them on the hyperspace tile or alongside targeted planet respectively.
  • Planning: During this phase both the attacker and defender choose a card and play it face-down.
  • Reveal: Now both player simultaneously flip their cards face-up and calculate their values which is the card's value plus the number of spaceships committed to the encounter.
    Usually, whoever has the highest total value wins the encounter, ties go in the favour of the defender. However, there are several ways this can change. 
    Reinforcements: After cards are revealed, reinforcement cards may be played to alter scores, this can be done the attacker, defender or any of their respective allies.
    Negotiate: If either the attacker or defender has played a 'negotiate' card, they immediately lose the encounter but as compensation, they get to take cards from their opponent.
    Double negotiate: If both attacker and defender played negotiate cards, then they get 1 minute of real-time to actually negotiate an actual settlement between them!
    If they fail to reach a deal, then both players lose 3 spaceships to the warp tile.
    Morph cards: When a morph card is played, it 'adapts' to have the same value as the card played by the opposing player, essentially negating it.
    Resolution: Once all cards and special abilities have been taken into account and a winner has been determined, the results must be resolved.
    • Attacker wins: If this is the case, all the defender's ships (And those of their allies.) are placed on to the warp tile.
      All of the spaceships committed to the attack by the attacker as well as allied attacker's spaceships are placed on to the targeted planet. Each respective attacking player gets to advance their colony token 1 space on the score tracker.
      Finally, if the successful offensive was the player's first action, they get a second.
    • Defender wins: If this occurs, all of the spaceships committed to the attack by the attacker and their allies are sent to the warp tile.
      The defender's spaceships are unaffected and those committed by allies are safely returned to their planets.
      The score tracker remains unchanged but allies of the successful defender also get to recover ships from the warp tile and/or draw cards as a reward.
  • Next player: Once the active player taken their available action(s), play moves on to the player on their left.
There are some other situational rules and variants but this pretty much sums up the essence of what goes on in Cosmic Encounters.

Endgame
The first player to reach 5 on the score tracker wins!
Because of alliances and such, it is possible for more than one player to reach the 5 score at once. if this is the case, all those players share the victory.


Overall
​Mechanically, Cosmic Encounter is straightforward, at its core it's essentially a single blind bid auctioning game albeit one where players bid within the constraints of their limited hand of encounter cards in order to win encounters
On a basic level, a player only has to win 5 bids to win the game.

There is of course more to it than that.

It's vital that players will have to exploit the stronger cards in their hand and mitigate the risk from weaker cards. High value cards are obviously useful because they can win encounters but weak cards can also have a use.
A low value card can be used as a bluff or ruse to flush out an opponent's higher value card, potentially altering what a later outcome might be. Or, if a player think's they're going to lose, why not throw the lowest value card into the mix? 
Negotiate cards can also prove useful when a player knows they are going to lose and can be used to not only fill their hand but deplete the cards of an opponent.
Managing the luck of the draw is vital for victory.

The alien sheets can throw some real curveballs into the game and how players behave. Some of the sheets provide some really radical changes to strategies.

For example; in one game I played as the 'Spiff' who have the ability can crash land a spaceship on a planet if they are a part of an attack that loses badly.
It suddenly introduced a whole new dynamic into attacks which involved the Spiff (And I involved the Spiff with as many attacks as I could!) because defending players were now faced with the conundrum of having to worry about winning too big which might mean playing a lower value card instead and the risk of doing that meant that they might just flat out lose if I played a high value card! Choices, choices!

With 50 different alien sheets available in the base game (With more in expansions.) it means there will be a lot of variation in games and a lot of unique interactions from game-to-game. 

The rules for the destiny deck can also throw a curveball into the game.
I feel one of the primary purposes of the destiny deck is prevent a 'pick on a player' tactic and in this regard it does it well.
It also means that game has constant shifting alliances, 2 players have been allies in a previous turn but the destiny deck could quickly have one targeting the other in the next run.

This brings me to the next thing that's really strong in Cosmic Encounter; which is player interactivity.
Players will be bidding and bluffing against each other, forming temporary alliances, looking to exploit their abilities and take advantage of their unique ability and circumstances as they might arise.
I also think that the quality of the experience the game provides will in part rely on the people playing it. If players buy into the somewhat boisterous, confrontational and luck-based gameplay, then it'll be a positive, enjoyable experience. 

I will add that this game has a lot direct confrontation between players and a hefty dose of 'take that' that goes on as well.
If you find this sort of thing unappealing, it's probably a safe bet to say that you won't like this game and to be fair, sometimes I'm not in the mood for this kind of game.

Otherwise, it's hard to find fault with Cosmic Encounter, the rules are quick to learn and presents players which meaningful decisions to make whenever they attack or have to defend - which is reasonably often, they'll also be faced with whether to join alliances or not and deal with the outcome of those decisions.

Cosmic Encounters is a lot of fun to play and worth trying.
0 Comments

Wogglecon 5: It's Alive

20/11/2022

0 Comments

 
19th November 2022

Saturday 19th of November was the day of Wogglecon 5, a micro-con in Bisley with members of the Woking Gaming Club where we can get together for a whole day of gaming - and also raise a little money for the Bisley scouts.

During Wogglecon 5, we played the following games.
Cascadia
Altiplano
0 Comments

Altiplano - First Play!

19/11/2022

0 Comments

 
19th November 2022

It's a Saturday morning and we're at Bisley for Wogglecon 5 'It's a alive!' - a day of gaming goodness and a bit of charity.

Have you ever fancied travelling South American highlands with nothing but a cart of goods to keep you company, going from place to place, hunting for fish, chopping down trees, trading and so forth. If the answer is yes, then maybe Altiplano is the game for you.

What's in a game?
Altiplano has a whole shedload of components, so here we go!
  • Player boards: Not content with 1 player board, Altiplano gives each player 2 of them.
    • Action board: This busy looking board lists all the actions the player can perform. Actions will have 1 or more action spaces to place required goods to activate.
      Each board has 7 locations which correspond to the game's 7 locations and each location lists the actions related to it. For example; 2 food can be spent at the forest to gain 1 wood. 
      The board also has a movement track with spaces for carts or wheel barrows I guess as well as food.
      Finally, the board has 8 numbered 'planning' spaces to place tokens when they are drawn from the player's bag.
    • Warehouse: Each player also has a warehouse board. These look like grids but actually they are rows and can be used to store tokens which in turn score Victory Points (VPs) at the game end.
Picture
Action board and warehouse board.
  • ​Containers: Each player also has a container, which in reality is a carboard box that folds together.
Picture
Red container.
  • Bags: Each player is given a bag to randomly pull their tokens out of during the game.
  • Meeple: There's a meeple in each player colour as well as a little wooden cube.
  • Cards: There are primarily 3 types of cards in Altiplano.
    • Boat cards: These are worth VPs and more importantly, they allow players to acquire a good of the displayed type and add it to their container. 
    • House cards: These also score VPs, they also increase the VP value of all tokens for the good listed on the card. 
    • Order cards: Players can acquire these cards and when the order is fulfilled (With various types of goods.) they provide the controlling player with VPs.
    • Mission cards (Optional.): Mission cards provide players with hidden scoring opportunities.
  • Tokens: Altiplano also makes use of a lot of types of token to represent resources, in fact at least 12 types of tokens. These include:
    • Goods: alpaca, cacao, corn, food, cloth, fish, glass, ore, silver, stone, wood and wool. These are all identically sized circular tokens, except for the corn tokens which are square.
    • Money: Sort of squarish card tokens of various sizes are used to represent different denominations of money.
    • Carts: Slightly larger than the other cubes, brown cubes are used to represent carts.
  • Tiles: A large variety of tiles are used in the game. Pretty much all of the tokens and cards except money are associated with location tiles
    • Location tiles: These 7 large tiles are places that the players will visit to perform actions and essentially constitute the game's board. 
      The locations are:
      Farm: Alpaca, cloth and wool tokens go here.
      Forest: Cacao and wood tokens go here.
      Harbor: Fish tokens and boat cards go here.
      Market: Glass tiles and order tiles go here.
      Mine: Ore, silver and stone tokens go here.
      Road: Corn tiles go here (As do cubes in player colours.).
      ​Village: The cart cubes and house cards go here.
      Extension strip: This is not a location but used in conjunction with extension tiles. It has 5 spaces for 5 extension tiles, listed next to each space is a additional cost going from 0 at the bottom space all the way up to 4 at the top space. When tiles are acquired, remaining tiles are slid down to fill the gas and new tiles are introduced at the top. It's a pretty standard conveyor belt mechanic.
      Speaking of extension tiles...
    • Extension tiles: These tiles provide extra actions that can be performed when acquired. They are divided into 4 groups; A through to D.
    • Role tiles: There are 7 of these and they each provide the controlling player with an additional action and also determine their starting resources.
  • First player standee: I usually don't bother mentioning the first player tokens because... well it's not too important but Altiplano uses a massive alpaca shaped standee as a pretty cool first player marker.
    Yes, it's a gimmick and I'm easily impressed.
Picture
First player marker next to a meeple for comparison.
Right, I think that's it for components.

Altiplano's components are for the most part solidly made, the tokens, boards and tiles are constructed of thick card and feel sturdy.
The containers made of equally sturdy material but are supplied as flat components that need to need folded into their shape. They sort of clip together but some of them had a tendency to break open. It's not a problem really and nothing that a dab of PVA glue wouldn't solve but even so, it feels a little like a cheap oversight. 
Cards are pretty average but also smaller than typical cards which allows them to fit on the tiles.
Finally, the meeples and cubes all feel like nice wooden components.

Altiplano is a game with a South American theme and consequently has a South American folk art themed art style to it.
There's a lot of bright solid colours with stylised line art that mixes with slightly cartoony illustrations to be found on the tokens, cards, board and tiles. It's all solid artwork, brash and colourful which is how I like it.
The only criticism I have is for the colour schemes for the cloth and wool tokens, which in less than good light can look similar.

Between all the location actions, tokens, extension tile actions and so on, there's quite a lot of iconography to Altiplano. Luckily, much of it is intuitive and easily comprehended but some of it will - particularly the extension tiles - will require referring to the rulebook, fortunately it contains fairly extensive explanations.
​It's not a gamebreaker but there's definitely a bit of a learning curve here.


How's it play?
Setup
  • Game area: Set the central playing area up.
    • Location boards: Randomly arrange the 7 location tiles in a ring shape.
      • Tokens: Sort all the tokens as per player count and add them to their pertinent location tiles. Only food and money do not go on to a location tile.
      • Cards: Add the boat, house and order cards face-up to their pertinent location tiles.
    • Extension strip: Put the extension strip in the centre of the ring.
      • Extension tiles: First sort the extension tiles as per player count, then sort them by type (A, B, C and D.) and shuffle each type into face-down stacks. Finally arrange them into a single face-down stack, with the A stack at the top, going down to the D stack at the bottom.
      • Place extension tiles: Draw and place 5 tiles from the stack along the 5 spaces on the edge of the extension strip.
  • Players: Give each player an action board, warehouse board and bag.
    • Meeples: Give each player the meeple, cube and container in their colour. Each player's cube should go on the '0' space on the road location.
    • Role tile: Randomly assign a role tile to each player. The tile should be placed adjacent its location on the player's action board.
      Each player should then take their starting resources as indicated on the tile, goods and food should be placed them into their bag. Money should be put to the side in a personal supply.
      Finally each player should take a brown cart cube from the village location and place it in the topmost space in the movement track on their action board.
  • First player: Determine a starting player then each player places their meeple on any one of the 7 location tiles. Now we're ready to play.

On to play
In Altiplano players will be making plans to travel around the location tiles and use their goods to carry out the actions specific to those locations.
This is done over 4 phases:
  • Drawing phase: This phase is carried simultaneously with all players drawing tokens from their bag and placing them on their planning spaces.
    At the start of the game, players can only use 4 planning spaces, thus only draw 4 tokens from their bag. However, by moving their cube up the road location, players will unlock more planning spaces which mean they can draw and use more goods tokens.
    Empty bag: If at any time a player needs to draw 1 or more tokens from their bag and it's empty, then they tip the contents of their container into the bag, give it a good shake and continue drawing.
    Taking tokens back: Obviously, this does not apply during the first round but before drawing tokens, a player can choose to take tokens they have previously placed on action spaces but not resolved off of those action spaces. However, these tokens must be placed on planning spaces which consequently lessen the number of tokens they can draw. Money retrieved in this manner is returned to the player's personal play.
  • Planning phase: This phase is also performed simultaneously. In this phase players take goods from their planning spaces (Or money from their personal supply.) and place them on action spaces on the board. This includes the movement track and also extension tiles a player may have acquired.
    All actions require specific goods to activate them.
    Most locations have 1 or 2 spaces, except the village which has 3. Some actions require 1 good (And thus may be performed more than once.) while many actions require 2 goods.
    A player may choose not to place all the goods on their action spaces but this would mean they draw less tokens in the following round.
    When placing goods and money, players do not need to complete the action to place them. If an action requires 2 tokens, they can place just one of them even if it won't complete the action. It's a useful way to keep planning spaces free.
  • Action phase: This phase represents the bulk of the game's activities and thus has many elements.
    • Turns: Unlike the previous 2 phases, starting with the current first player, actions are carried out in turn order one action at a time. The active player resolves one action, then play progresses to the next player.
      Passing: If a player cannot complete an action, they must pass. Additionally, a player may choose to pass even if they could complete an action. In either case, when a player passes, they are no longer involved in the action phase for the current round.
    • Movement: Movement does not count as an action but can be performed as part of an action.
      Timing: Movement may be performed before or after an action.
      Moving: Each player starts the game with 1 cart cube. A player can slide it to the 'used' side on their movement track to move their meeple up to 3 location either way around the circle of locations.
      Additional movement If a player has put food on to other movement track spaces, they may 'spend' it to move during another action. However they can only move 1 location unless they have acquired additional carts, in which case they can move 3 locations.
    • Actions: There are lot of actions a player can perform and several rules associated with them.
      Location: A player's meeple must be at the action's location in order to perform that action, this includes extension and role tiles.
      Paying tokens: Actions require players to pay the required tokens to resolve them. Other than money, anytime a token is 'spent' the token(s) are not actually spent instead they are put into the player's container and will ultimately end up going back into the player's bag. Only money is actually spent and returned to the central supply.
      Acquiring goods: When acquired, most goods tokens immediately go into a player's container. The exceptions are money which goes into the player's personal supply and corn, which is explained below.
    • Resolving actions: Each location has one or more actions which can be resolved by players.
      • Farm: cloth, food and wool can be acquired here.
      • Forest: cloth, food, glass and wood can be acquired here
      • Harbor: Fish and food can be acquired.
        Boat cards can also be acquired here which allow players to add tokens to their container. A player may choose any available boat card.
      • Market: The market has several actions.
        Sell goods: Some goods can be sold for 1-3 coins each, as with all actions, goods that are sold are actually put into the player's container.
        Buy extension: A player can purchase 1 extension tile per round. The total cost is the cost on the tile plus the cost from it's position on the extension strip. If a extension is bought, it is not replaced until the last phase.
        Order cards: These can be bought here too, which allows the player to choose any available order card.. A player may only have 1 unfulfilled order card at a time.
        Deliver goods: This action allows the player to move goods placed here on to an order card. When a order is completed, it will earn the controlling player VPs during the endgame, generally it will also give the player a corn token, more on these later. 
      • Mine: Silver and stone can be acquired here.
      • Road: Completing the road action may have 1 of 2 effects. Either it unlocks a planning space for a player or it provides them with a corn token, again, more on corn below.
      • Village: The village also has several types of action.
        Buy cart: Players can buy a cart and place it on an available space on their movement track.
        Buy house card: A player can buy any available house card. House cards increase the VP value of the displayed good during the endgame.
        Store goods: This action allows the player to move goods off of the action spaces and into their warehouse. There are however, several restrictions here.
        • No food: Food tokens cannot be placed into the warehouse.
          Same goods: A row can only have 1 type of good in it. Thus if the 1st good in a row is a fish token, all the subsequent tokens in that row must be fish tokens. Additionally, there can only be 1 incomplete per type of good. A row of fish must be completed before a second row can be started.
          Bottom-to-top: When a good is placed in the warehouse, it must be in the lowest available space, either in a new row or an existing one.
          Left-to-right: A good must also be placed into the leftmost open space in the row it is placed into. A row is considered complete when the rightmost space has been filled.
        • Corn: There are several rules regarding corn.
          Store immediately: Regardless of how a player gains a corn token, when they gain it, it must immediately be stored in the warehouse.
          Wildcard: Corn can be used as any type of good for a row that has already been started. E.g., if a player has started a row of fish, it can be added to that row and even complete it.
          If there is no incomplete row to add the corn token to, then it starts it's own row!
          Corn rows takes priority: When storing corn, if there is a row that was started with corn, then corn tokens must go into that row before any other until it's completed!
  • End of round phase: Once all players have passed, the game goes to end of round and several events occur.
    New first player: The first player marker is passed on to the player on the left who will be the new first player.
    Reset carts: All carts are put back to their initial positions.
    Manage extension strip: If any extension tiles we bought during the action phase, remaining tiles are slid downwards to fill the gaps and new tiles are added to the gaps now at the top.
    If no extension tiles were brought during the action phase, the bottommost extension tile is discarded, the other tiles are slid down and a new tile is added to the top.
    Now a new round begins with the first phase.

​Endgame
Play continues until one of the following 2 criteria are met.
Any one location becomes fully emptied of all tokens, cards, etc.
Or, a space along the extension strip cannot be filled, i.e., the extension tiles supply has emptied.
In either instance, the current round is completed and 1 further round is played, then the game goes to scoring.

VPs will come from a variety of sources.
  • Goods tokens: Tokens can score 0-4 VPs each depending on the type. Tokens on a player's action board, warehouse, in their bag and container all count.
    Tokens on order cards are not counted.
  • Warehouse: Each completed row in a player's warehouse will score it's associated VPs.
  • Cards: Boat and house cards earn their respective VPs. Completed order cards also earn their VPs.
  • Bonus VPs: If a player has house cards, they will earn bonus VPs for the corresponding goods.

Points are tallied, highest score wins.


Overall
As you can see from the write up so far, there's quite a lot going on in Altiplano and a lot for players to think about.

There's a recognisable quandary going on with the bag building mechanic.
Players will naturally be looking to acquire tokens to carry out actions but invariably there will be times they end up getting pulled from the bag when they're not needed and unneeded tokens can 'water down' a player's strategies.
Unwanted tokens can of course be left on planning spaces but most players will find that irritatingly suboptimal. Alternatively, they can placed on spaces for action that a player does not immediately want to perform but they will eventually end up coming back  to again though. Another option albeit fairly situational, is to put them on to order cards, although removes the goods from the remainder of the game.
Finally, they can be put into the warehouse, this means those tokens have greater scoring opportunities but again, permanently removes them from a player's container/bag which may or may not be a good thing. layers will have judge the merits of storing tokens contextually - except when dealing with glass tokens. The thing with glass tokens is that they don't produce any other type of token, all they do is produce the most VPs per token, storing them in the warehouse where they contribute to more VPs and declutter a player's bag is a no-brainer and usually I consider no-brainers a bad thing for a board game but I feel this is a deliberate decision on the part of the game - more on that below.

If you've been paying attention (And I'm sure you have!) you will also have noticed that several goods such as a cacao, alpacas and even something that seems that it should be common such as fish cannot be produced from the action board.
So how are these acquired?
There's a couple of opportunities to get them, namely boat cards, extension tiles and possibly role tiles.
However, this brings me to a bit of a bugbear I have with this scarcity mechanic. It means there can be a race by experienced players to get those hard-to-produce goods, particularly cacao which produces glass which can be worth so many VPs. In fact I feel the whole of the forest location is especially strong location since cacao alone is used there for 3 separate actions in the same location. A player who can produce cacao and concentrates on doing so can soon be producing lots of goods at the forest.
Having said that, the game is a bit of a point salad with various avenues to scoring VPs, it's just that I feel going for glass is the strongest way and experienced players will end competing in that tactic.


While the bulk of the game's activity takes place during the action phase, the planning phase is where players will do most of their well... planning. They'll look to optimise there actions to get the most out of their available tokens.
Because players will generally need to move around to perform multiple actions, efficient use of the movement track is important, especially so in the early game when food tokens will be scarcer. A player can move their meeple before or after an action may make it seem unimportant but sometimes players will need to think ahead about where they need to be at the start of the next round.
As well as having to think about movement and balancing their goods with their bags, players will also have to think about gaining extensions, house and order cards, as well as boat cards if they are needed. 
Add to this increasing their planning spaces and acquiring corn to fill out their warehouse and players have lot of ways to approach the game
​

In this regard Altiplano does that thing which presents players with lots of options but frequently not enough opportunity to do everything they want, forcing them to make tricky decisions, which I consider a good thing in games.

Altiplano is a mid-to-heavy game with a longish playtime, it's probably not for beginners and perhaps could be criticised for being a bit over-elaborate although personally I didn't find it that much of a problem
In conclusion; the mechanics blend together to give players choices and essentially problems to solve in optimising their actions. If bag-building style games and resource management are your thing, Altiplano is worth a try.
0 Comments

The Princes of Florence - First Play!

12/11/2022

0 Comments

 
11th November 2022

It's a Friday and I'm at the office in Woking for some end-of-week gaming fun.

You know you can't go wrong when you're playing a board game set in Renaissance Italy.
In this case it's Florence and about princes which is about as Renaissance as it gets! All you need are some Medici and Borgia to round it all off!

In The Princes of Florence players take on the role of wealthy nobles trying to out do each other by enticing artist and scholars to their estates to create 'works' which in turn gives players bragging rights - which is what is important obviously.

What's in a game?
  • Game board: This central game board features a scoring track that runs around the board for 'Prestige Points' (PPs).
    There is also a 'round tracker' and works value tracker' in the centre of the board which displays the minimum value a 'work' must have in each of the game's 7 rounds.
Picture
Central game board.
  • Player boards: There's 1 each of these boards in every player colour.
    They are quite busy looking but in practice pretty straightforward.
    A 7x7 grid dominates most of the board - although a 'palazzo' takes up 6 spaces on each grid, meaning players have 43 spaces to use.
    There are spaces to place 'builders' and 'freedoms' as well.
    The remainder of each player board is given over to player information; a list actions players choose from and a list of professions and those professions' requirements.
Picture
The 'brown palace'...
  • Cards: There are several types of cards in The Princes of Florence.
    Bonus cards: These cards can increase the value of works when they are created. 
    Prestige cards:  Endgame bonus PPs can possibly be earned by prestige cards.
    Profession cards: There are 21 professions in the game that players will be looking to recruit.
    Recruiting cards: Used to err.. recruit professions! Specifically, profession cards played by other players.
  • Tiles: There are landscape and building tiles and they're sort of tetramino shaped. Building tiles: There are 10 types and they come in small, medium and large. Each one depicts a building of some sort, ranging from a chapel to a university.
    Landscape tiles: There are parks, lakes and forests.
  • Tokens: There are a number of card tokens.
    Freedoms: There are rectangular tokens for each of the 3 'freedoms', freedom of travel, opinion and religion.
    Builders: Square tokens represent builders, which aid when acquiring building tiles.
    Jesters: These are circular tokens. Jesters provide bonuses when scoring the value of a work.
    Money: Finally, there's circular tokens of various sizes to represent differing denominations of florins; the game's currency.
  • Pawns: There's a pawn in each player colour used to track PPs as well as a black 'first player' pawn.
  • Discs: There are also chunky scoring discs in each player colour to track work values, there is also a black disc is used to track the round count.

All the components in The Princes of Florence are well made. The tokens and cards are what you'd expect. The tetramino tiles feel nice and sturdy, as do the game and player boards.
Amusingly, the pawns are all wearing wide-brimmed hats, got to have some protection from that scorching Mediterranean sun!

Broadly speaking there there are 2 art styles utilised in The Princes of Florence.
Tiles, tokens and some of the player boards are decorated with full colour illustrations. They are quite stylised and almost simplistic illustrations but they are effective and feel appropriate for the setting.
All the game's cards (Particularly the profession cards.) are illustrated with a sepia coloured line art style. It contrasts with the art style but also compliments it and again, is appropriate for the setting.
The standout art-wise is the game board where nearly each space on the scoring track has its own unique illustration. It shows that little extra effort put into the presentation that shows care for the game which I appreciate.

There's little in the way of iconography, mostly its appears on the player boards in the form of silhouetted tetramino shapes for buildings but even so, they are also labelled.
Most information is relayed through text. Speaking of which...
The game uses a distinct and flowery font for text. It looks suitable for a renaissance themed game but can be a little harder to read than it could be and also tends to make the player board and cards a little more complex then they actually are.
It's a minor quibble and in no way a gamebreaker though.


How's it play?
Setup
  • ​Game board: Put out the game board and arrange the following.
    Tiles: Sort all the tiles by type.
    Tokens: Also sort all the tokens, including Florins by type.
    ​Cards: Sort all the cards by type. Since the recruitment cards are all identical, these should be placed face-up. The 3 remaining types of cards should be shuffled into 3 face-down decks.
    ​Round tracker: Place the black disc on the '1' space on the round tracker.
  • Players: Each player should take the game board and pawns in their respective player colour.
    Profession cards: Deal 4 profession cards to each player. Everyone should keep 3 and discard 1 of them. Shuffle the discarded cards back into the deck to form a new deck.
    ​Florins: Give each player 3500 florins.
  • First player: Determine a starting player and give them the first player pawn.
Picture
'Il gatto Rex' as a distant namesake might have said...
On to play
The Princes of Florence is played over 7 rounds.
Each round is divided into an auctioning phase and an action phase.
Auctions allow players to bid for items which will aid them during action phases.
The action phase uses the usual turn structure with the active player taking their turn before play progresses to the player on their left.
  • Auction phase: During this phase, players may bid on 1 of 7 different objects, there are some rules for auctions.
    • Auctions: In a round, there will be a number of auctions equal to the number players, additionally, there are some rules when resolving auctions.
    • Opening bid: Whoever starts a bid chooses 1 of the 7 objects to bid on. The objects are: Forest/Lake/Park landscape tile, builder token, jester token, prestige card or recruitment card.
      Once they've placed their opening bid, other players in clockwise order may place a higher bid or pass.
    • Passing: If a player passes on a bid for any reason, then they are out for the rest of that particular auction.
      Winning: When all players bar one pass, that player wins the auction, the winner take the object they won pays for it and cannot participate in any further auctions in that round. Thus, a player can only 1 object per round through auctions.
    • 1 auction per object type: Once a object has been won in an auction, no further objects of that type can be bid on.
    • Objects: When a player wins a bid, they take 1 of the 7 following objects as explained below:
      Landscape tiles: Forest lakes and parks. When one of these is taken, it must immediately be placed on their board's grid.
      Builders: These tokens are added to their allotted spaces on the player board going from left-to-right. They will provide bonuses when building.
      Jesters: These tokens should placed on the palazzo space, they increase the value of works... with the strength of their humour I guess!
      Prestige cards: Draw 5 and keep 1, placed the remainder at the bottom of the deck.
      Recruitment cards: Take a recruitment card, it can be used immediately or saved and used during the controlling player's turn later.
      Playing recruitment card allows a player to take a profession card that has been played by another player.
    • End of auction: Once all players have won an auction, play progresses to the action phase.
  • Action phase: During their turn, the active player may perform 2 actions from the following list of 5.
    • Build: This action can be performed twice in a round.
      The active player may buy and place a building tile on their grid. The tile can be placed in any orientation on the grid but cannot be directly adjacent to another building unless the player has acquired at least 2 builder tokens. Builder tokens can also give discounts to the cost of buying buildings.
      Finally, when a building has been placed on the grid, the player immediately earns 3PPs.
    • Acquire a bonus card: This action can be performed twice in a round.
      The active player pays for a bonus card and draws 5 cards from the deck and keeps 1, returning the 4 other cards to the bottom of the deck.
    • Buy a 'Freedom': This action can only be performed once per round.
      The active player may buy one of the freedoms and immediately places it on the appropriate space on their player board.
    • Buy a profession card: This action can only be performed once per round.
      The active pays for a profession card then draws 5 and keeps 1, returning the other 4 to the bottom of the deck.
    • Complete a work: This action can be performed twice in a round.
      With this action, the active player may complete a 'work', this has several steps and involves calculating the work's 'value'.
      Play profession card: The active must play a profession card from their hand. Each profession has 3 things they 'want'; a building, landscape and freedom. Each one of these that that the active player owns will add to the work's value.
      Jesters and profession cards in hand or played also add to the value.
      Finally, if the active player has a bonus card, it can be played now to add to the value of the work.
      From this, the value of the work will be calculated.
      Minimum work value: If a work's value does not meet the minimum value of works for the round, it cannot be completed. Minimum values start at 7 in round 1 and go up to 17 in round 7.
      Rewards: Once a work has been completed and it's value has been calculated, the active play will gain rewards.
      ​Firstly; the active player moves their disc to along the scoring track to the number that matches the work's value.

      Then the active player gains 100 Florins per point. The player can choose to keep the money or immediately trade it in for PPs at a cost of 200 Florins per PP. This must be done immediately, it cannot be done later.
  • Earn money: This is not one of the actions a player can take per se but any point in the game, any player may spend PPs to gain Florins at a rate of 100 Florins per PP.
  • ​Next Player: Once the active player has completed their 2 actions, play progresses to the player on their left.
  • Next round: Once all player have completed their turns, the round is over and the following 2 steps occur.
    Best Work: Whoever has created the single highest value work for the round gains 3PPs. All players should remove their discs in preparation of scoring works in the following round.

    First player: The first player marker should be moved to the player on the left who will start the bidding in the next round.

Endgame
Once the 7th round has been completed, the game goes to scoring.
Players now reveal any prestige cards they've acquired and score them, adding whatever they're worth to their score on the game board.

Points are tallied, highest score wins.


Overall
In terms of gameplay, there's some nice mechanics going on. There's some interesting balancing that occurs with buildings. By virtue of their sizes, the larger buildings will be harder to fit in the grid and take up more room but they are wanted by more professions.

Auctioning in particular is also well balanced.
Because a player can only win 1 auction per round, it means someone who has a lot of cash cannot dominate all the proceedings. It means that every player can only ever get 1 object per round and it means that if a player has lost every auction and is the last player left in it, they can get any remaining object, unopposed and for just the cost of the opening bid.

During the action phase, synchronicity is important. Getting landscapes, buildings, freedoms and professions that 'riff' off each is very useful. E.g., both the goldsmith and bell maker want a 'workshop, or both the theologian and painter want freedom of travel.

Players will be looking to optimise their decisions especially when it comes to creating works which is a major source of income and potentially PPs.
Why is this so important? The Princes of Florence only has 7 rounds, which is only 7 auctions and 14 actions! Even the most efficient of players will probably find themselves unable to do everything they want they want to do in the rounds given. This forces them to make difficult decisions which is generally a good thing.

The Princes of Florence also has distinct early and late game states. Early on players will be looking to build up their estate, buildings, freedoms etc. In the late game they will likely be looking to create as many works as possible and convert them to PPs. If a player creates 2 works in a round, only the highest value one counts for end of round best work bonus but both will pay out Florins and consequently PPs.

I suppose that The Princes of Florence is a sort of 'mid-weight' game and by that I mean a game that isn't too complex but probably has a bit too much going on to be a good introductory or crossover game.
With having to win auctions to gain certain objects and cards, buildings to place, works to create and more, as well as having to consider how everything relates to everything else, there's a lot to think about.

But for more seasoned players, The Princes of Florence is a solid experience with well structured gameplay elements that all have a clear purpose which in turn presents players with meaningful decisions to make.
It also blends the individual aspect of a player building up their own palazzo and estate with the interaction of auctioning and drafting.
The Princes of Florence is definitely one to try.
0 Comments

October '22 - The Month in Gaming

1/11/2022

0 Comments

 
The gaming totals for October '22 are in.
Interestingly, First Plays for October were identical to September.
Otherwise, the numbers are down, different game and total game are noticeably lower. Partially this may be due to players being on holiday during October.


​First plays: 5
Different games: 24
​Total games: 35

Sunday 30th on Board Game Arena
Lucky Numbers - 47
Can't Stop - 28
Carcassonne - 11
Azul - 9
Stella: Dixit Universe - 12
Splendor - 16
Roll'n Bump - 3

Tuesday 25th at The Sovereigns with the Woking Gaming Club
Dice Hospital - 8

Sunday 23rd on Board Game Arena
Ticket to Ride - 3
Railroad Ink - 38

Sunday 23rd at The Sovereigns 
Point Salad - 2
Parks - 14

Tuesday 18th at The Sovereigns with the Woking Gaming Club
Port Royal - 24
Furnace - First Play!

Sunday 16th on Board Game Arena
Lucky Numbers - 46
Can't Stop - 27
Ticket to Ride - 2
Parks - 13
Roll'n Bump - 2

Saturday 15 on Board Game Arena
Jump Drive - 13

Thursday 13th Aldershot
Point Salad - First Play!
HeroQuest - 6

Sunday 9th on Board Game Arena
Lucky Numbers - 45
Can't Stop - 26
Roll'n Bump - First Play!
Railroad Ink - 37
Ticket to Ride - First Play!

Sunday 9th at The Sovereigns 
Machi Koro 2 - 5
Kingdomino - 5

Wednesday 5th Simon's
It's a Wonderful World - 3
Roll for the Galaxy - 6
Love Letter Premium - 63
Cloud 9 - 4

Tuesday 4th at The Sovereigns with the Woking Gaming Club
Paper Tales - 5
Akropolis - First Play!
0 Comments
<<Previous
Forward>>

    Author

    I play, I paint.
    ​This is where I talk about what I play.

    Archives

    March 2025
    March 2024
    April 2023
    March 2023
    February 2023
    January 2023
    December 2022
    November 2022
    October 2022
    September 2022
    August 2022
    July 2022
    June 2022
    May 2022
    April 2022
    March 2022
    February 2022
    January 2022
    December 2021
    November 2021
    October 2021
    September 2021
    August 2021
    July 2021
    June 2021
    May 2021
    April 2021
    March 2021
    February 2021
    January 2021
    December 2020
    November 2020
    October 2020
    September 2020
    August 2020
    July 2020
    June 2020
    May 2020
    April 2020
    March 2020
    February 2020
    January 2020
    December 2019
    November 2019
    October 2019
    September 2019
    August 2019
    July 2019
    June 2019
    May 2019
    April 2019
    March 2019
    February 2019
    January 2019

    Categories

    All
    2 Player Only
    50 Fathoms
    Abstract
    Annual Quiz
    Area Control
    Asymmetrical Play
    Auctioning
    Black Hack
    Bluffing
    Board Game
    Campaign Play
    Card Game
    Clockwork & Chivalry
    Cooperative
    Cthulhu Hack
    Deck/Bag Builder
    Deduction
    Dice Game
    Drafting
    Engine Builder
    Hand Management
    Hidden Movement
    Hidden Role
    In Darkest Warrens
    Legacy
    Merry Outlaws
    One Vs Many
    Oubliette
    Party Game
    Programming
    Push Your Luck
    Real Time
    Renaissance
    Resource Management
    Roll And Move
    Roll And Write
    Route Builder
    RPG
    Sand Box
    Savage Worlds
    Set Collecting
    Storytelling
    Tableau Builder
    Team Based
    The Month In Gaming
    The Year In Gaming
    Tile Placement
    Trading
    Traitor
    Trick Taking
    Voting
    Wargame
    Wasted Hack
    WFRP
    Wogglecon
    Word Game
    Worker Placement

    RSS Feed

Powered by Create your own unique website with customizable templates.
  • Home
  • Special Effect
    • Special Effect
    • The Final Return of The Indiana Jones Charity Globe Trot
    • The Warlock of Firetop Mountain Challenge
    • Return of The Indiana Jones Charity Globe Trot
    • Bard's Tale Challenge
    • Fighting Fantasy Challenge
    • The Indiana Jones Charity Globe Trot
    • Mirkwood Charity Walk
    • Middle-earth Charity Walk
    • Dungeon Daze
  • RPGs
    • The One Ring
    • The Evils of Illmire
    • Beach Patrol
    • The Surrendered Lands
  • Game Blogs
    • RPG Blog
    • Gaming Blog
  • Painting Blog
  • Contact